Arduino gas sensor MQ2, Smoke Detector, Programming & Circuit
Table of Contents
Description:
Gas Sensor MQ2- In this Tutorial, you will learn how to use the Smoke/Gas sensor Mq2 with Arduino. MQ2 Sensor is one of the most commonly used Sensors throughout the world. This Sensor is most commonly used for the Smoke and Gas detection.
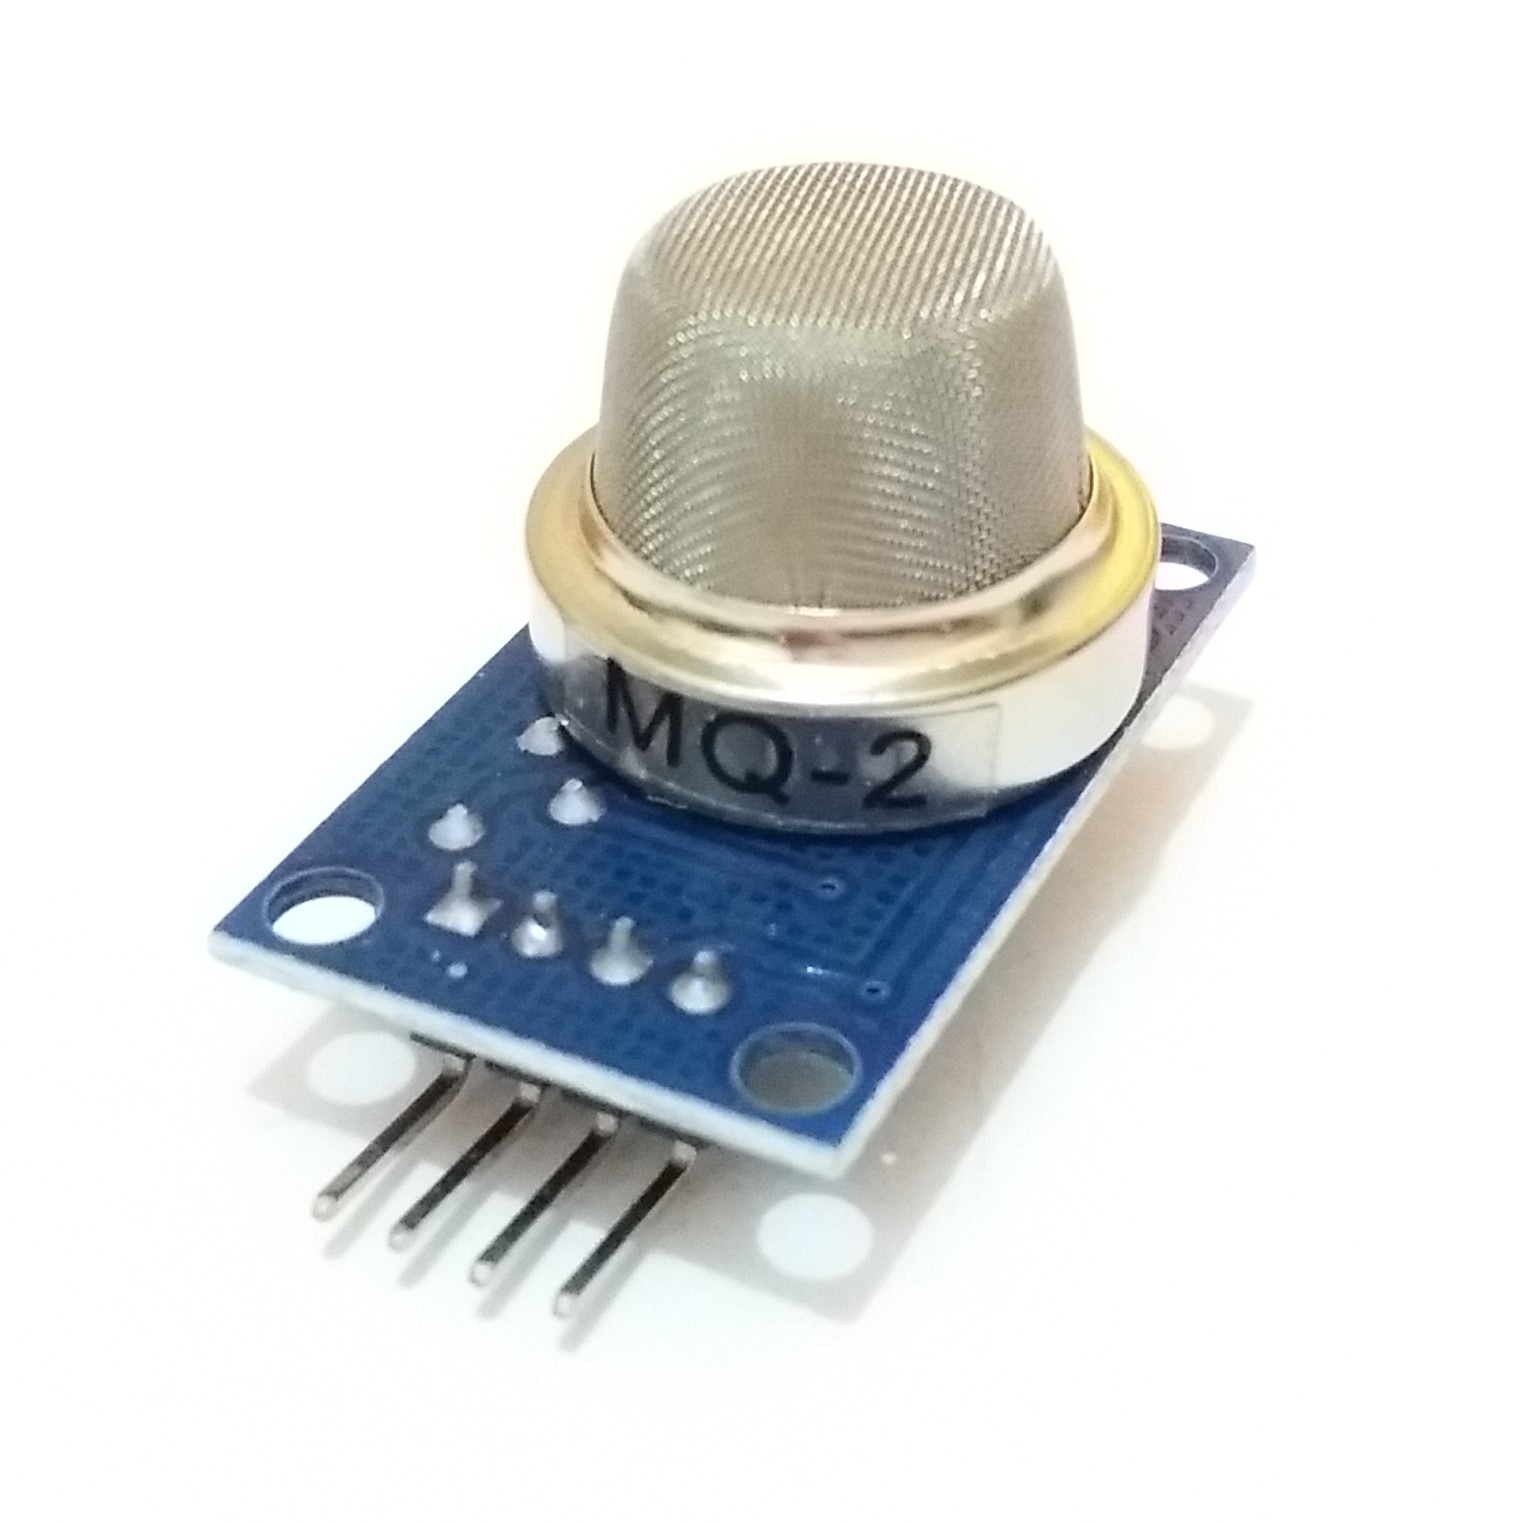
This Gas Sensor mq2 Module features an MQ-2 sensor. The MQ-2 sensor is a versatile gas sensor capable of detecting a wide range of gases including alcohol, carbon monoxide, hydrogen, isobutene, liquefied petroleum gas, methane, propane, and smoke. This module is provided with male header interface and can be easily interfaced with Arduino/Mega using male to female type jumper wires.
In this tutorial, we will cover.
- MQ2 Sensor Pinout
- MQ2 sensor interfacing with Arduino
- Mq2 sensor Programming and finally
- Testing
Amazon Links:
Arduino Nano USB-C Type (Recommended)
Other Tools and Components:
ESP32 WiFi + Bluetooth Module (Recommended)
Super Starter kit for Beginners
PCB small portable drill machines
DISCLAIMER:
Please Note: these are affiliate links. I may make a commission if you buy the components through these links. I would appreciate your support in this way!
Gas Sensor MQ2 Pinout:
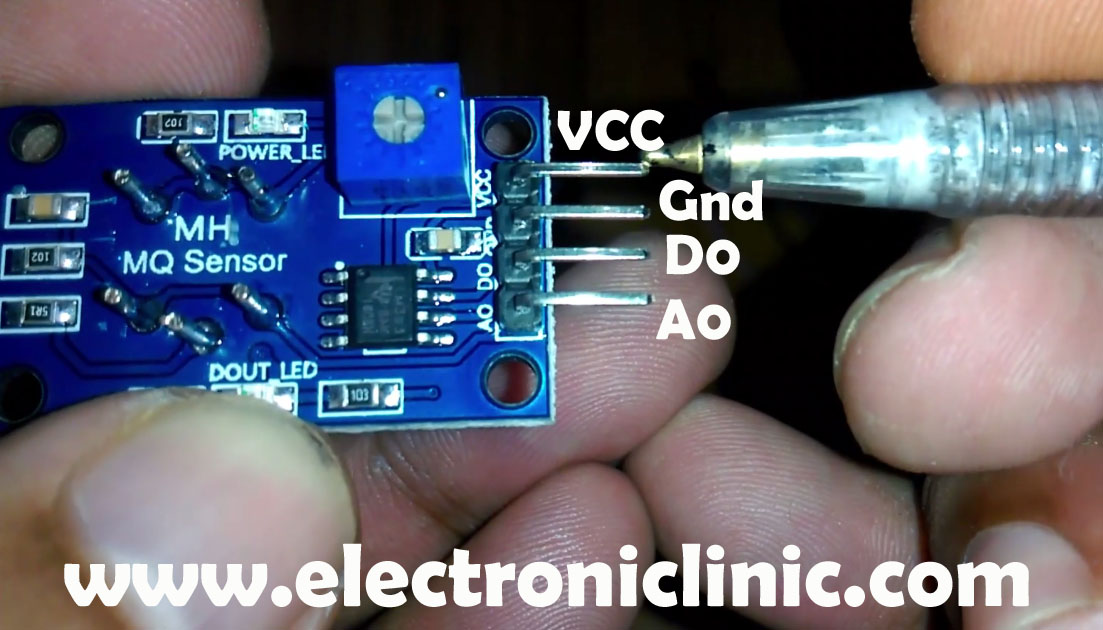
The 4 male headers are labeled with
- A0
- D0
- GND, and
- VCC
A0 is the Analog output of the sensor and should be connected with the analog pin of the Arduino Uno or Mega.
D0 is the digital output in the form of 5v or Gnd. The level can be adjusted using the variable resistor.
GND pin of this module will be connected with GND of the Arduino or mega.
VCC should be connected with 5 volts of Arduino or mega.
Gas Sensor MQ2 Applications:
They are used in gas leakage detecting equipment in family and industry, are suitable for detecting of LPG, i-butane, propane, methane, alcohol, Hydrogen and smoke. MQ2 Gas/Smoke sensor is a very user-friendly Sensor and it can be easily interfaced with the Arduino Uno or Mega using Male to Female type Jumper wires.
Gas Sensor MQ2 Interfacing with Arduino Uno:
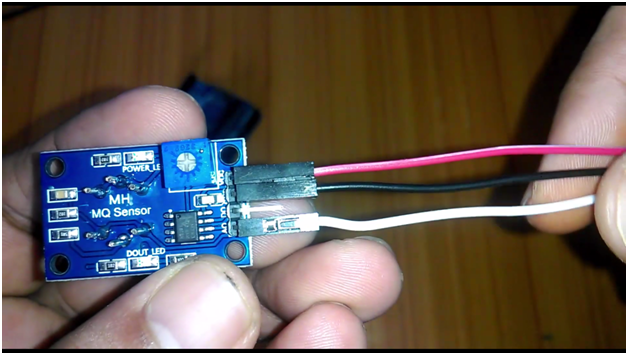
As you can see I have already connected 3 jumper wires, red is connected with VCC of the sensor module, black is connected with the Ground of the sensor module and white is connected with the analog output(A0) of the sensor Module. I selected A0 for the Smoke or Gas detection as this way I get more control over the MQ2 Gas/Smoke sensor. Because this way I can make accurate decisions depending on the threshold value.

So connect the red wire with the Arduino’s 5V.
Connect the Black wire with the Arduino’s Ground.
Finally, connect the white wire with analog pin A1 of the Arduino Uno.
So that’s all about the Interfacing of the MQ-2 sensor with the Arduino. The same connections can also be used with the Mega board. One more thing that I want to share with you guys is that any program which is written for the Arduino can also run on Mega except some special cases which I will discuss in my future tutorials.
Gas Sensor MQ2 Arduino Programming:
This is a very basic program written for the SMOKE/GAS SENSOR MODULE MQ-2. The purpose of this program is to show you how you can read this sensor. I have also used the same sensor in some advance level projects which are given below.
Gas leakage detector and Automatic Solenoid Valve shut down using Arduino and MQ-2 Sensor
Arduino Gas leakage detection and SMS alert
First of all, lets start by defining a pin for the A0 pin of the MQ2 Sensor. I Selected A1 pin of the Arduino Uno.
|
1 |
int smokeS = A1; // smoke sensor connected with analog pin A1 of the arduino / mega. |
A1 is the pin number and smokeS is the name of the A1. You can also give it any other name, even you can name it as l, m, n or x, y, z. but it’s a good programming practice to use such a name which has a meaning. The name smokeS clearly shows that, with pin A1 of the Arduino or mega smoke sensor is connected.
Variable names follow some rules, for example
No numbers are allowed in the beginning of the variable name
No spaces are allowed in the variable names.
And we cannot use same variable names for different pins. A variable name should be unique, in simple words as your name is unique among your brothers and sisters.
|
1 |
int data = 0; |
data is a variable of the type integer and this will be used for storing the value coming from the MQ2 sensor.
|
1 |
int led = 13; |
As you know in Arduino and Mega we have an led on pin number 13 So we will be using this led as a signal that smoke is detected.
|
1 |
int flag = 0; // to stop the unnecessary repetition of code |
Every Arduino Uno or Mega program has at least two functions, which are the Void setup and void loop functions. Void means that these functions are not returning any values while the empty parenthesis means that these functions are not taking any arguments as the input.
|
1 2 3 |
void setup() { Serial.begin(9600); |
Serial.begin() function is used to activate the serial communication, 9600 is the baud rate. So this is a function which is not returning any value but takes one argument as the input which is the baud rate or communication speed.
|
1 |
pinMode(smokeS, INPUT); |
pinMode is also a function and it takes two arguments as the input, the Pin number or Pin name and the status which can be input or ouput. as in our case we are reading the sensor values so that’s why we are using it as an input.
|
1 |
pinMode(led, OUTPUT); |
As led is an output device so that’s why set to output.
|
1 |
digitalWrite(led, LOW); |
In order to turn on or turn off a specific pin of the Arduino or Mega, we use the digitalWrite function. This function takes two arguments as the input, the pin which is led, and a high or low signal. So the above instruction turns off the led.
|
1 2 3 4 5 |
} void loop() { data = analogRead(smokeS); |
To read the Analog Pins of the Arduino Uno or Mega we use the analogRead function. So the above instruction simply reads the Smoke/Gas sensor and stores the value in variable data.
|
1 2 |
Serial.print("Smoke: "); Serial.println(data); |
The purpose of these two instructions is to find the exact range of values, like for example
What values we get when there is no smoke, and what set of values we get when there is smoke.
This helps us in defining the threshold value which in my case is 230.
I tested it in my room, and I find out, that when there is no smoke the values remain below 200 and when there is smoke the values increases above 200. You can practically see this by watching video given at the end of this Article.
The following two if conditions are used to check if the Smoke or Gas is detected and Turns off and Turns on the Led accordingly.
|
1 2 3 4 5 6 7 8 9 10 11 12 13 14 |
if ((data < 230) && ( flag == 0)) { digitalWrite(led, LOW); flag = 1; } if ((data >= 230) && ( flag == 1)) { digitalWrite(led, HIGH); flag = 0; } delay(1000); } |