Arduino PIR Sensor Code, Sensitivity, Datasheet, and Range “Passive Infrared Sensor”
Table of Contents
Description:
Arduino PIR Sensor– This is a beginner’s level tutorial which explains everything you want to know about the PIR motion sensor. No doubt the PIR Sensor is used in thousands of projects throughout the world for security purposes and loads automation. I myself have used this Sensor in so many projects which you can find in the related projects section. If you want to master the PIR sensor then you should read this article. In this tutorial, I am also going to interface the PIR sensor with the Arduino for human detection. Without any further delay, let’s get started!!!
Amazon Purchase links:
Arduino Nano USB-C Type (Recommended)
Other Tools and Components:
ESP32 WiFi + Bluetooth Module (Recommended)
Super Starter kit for Beginners
PCB small portable drill machines
DISCLAIMER:
Please Note: these are affiliate links. I may make a commission if you buy the components through these links. I would appreciate your support in this way!
PIR Sensor “Passive Infrared Sensor”:

PIR Sensor is called with so many different names like PIR sensor, PIR motion sensor, motion detector, passive infrared sensor, Arduino motion Sensor, human detection sensor, etc.
PIR stands for the Passive Infrared Sensor. PIR motion sensor is specially designed for humans and animal detection. PIR sensor is commonly used in automatic lighting systems, security projects, etc. The PIR sensor, like the one you can see in the image, can be easily used with Arduino and other microcontrollers as well.
Passive Infrared sensors come in different sizes and shapes, but the basic working principle is exactly the same. To avoid the false triggering all the PIR sensors are used indoors. They can be used outside at night time only when there is no sun light.
PIR Sensor Datasheet specifications:
(1) Detection angle of 120 degrees.
(2) The detection range of 7m.
(3) Size: 32x24mm
(4) TTL switch signal output high signal output (3.3V), low signal output (0.4V).
(5) Trigger time is adjustable 0.3 seconds to 10 minutes.
(6) Commonly used in anti-theft devices and other equipment.
(7) Modules have been forced to set to work reusable trigger
(8) 4.5 to 20V working voltage
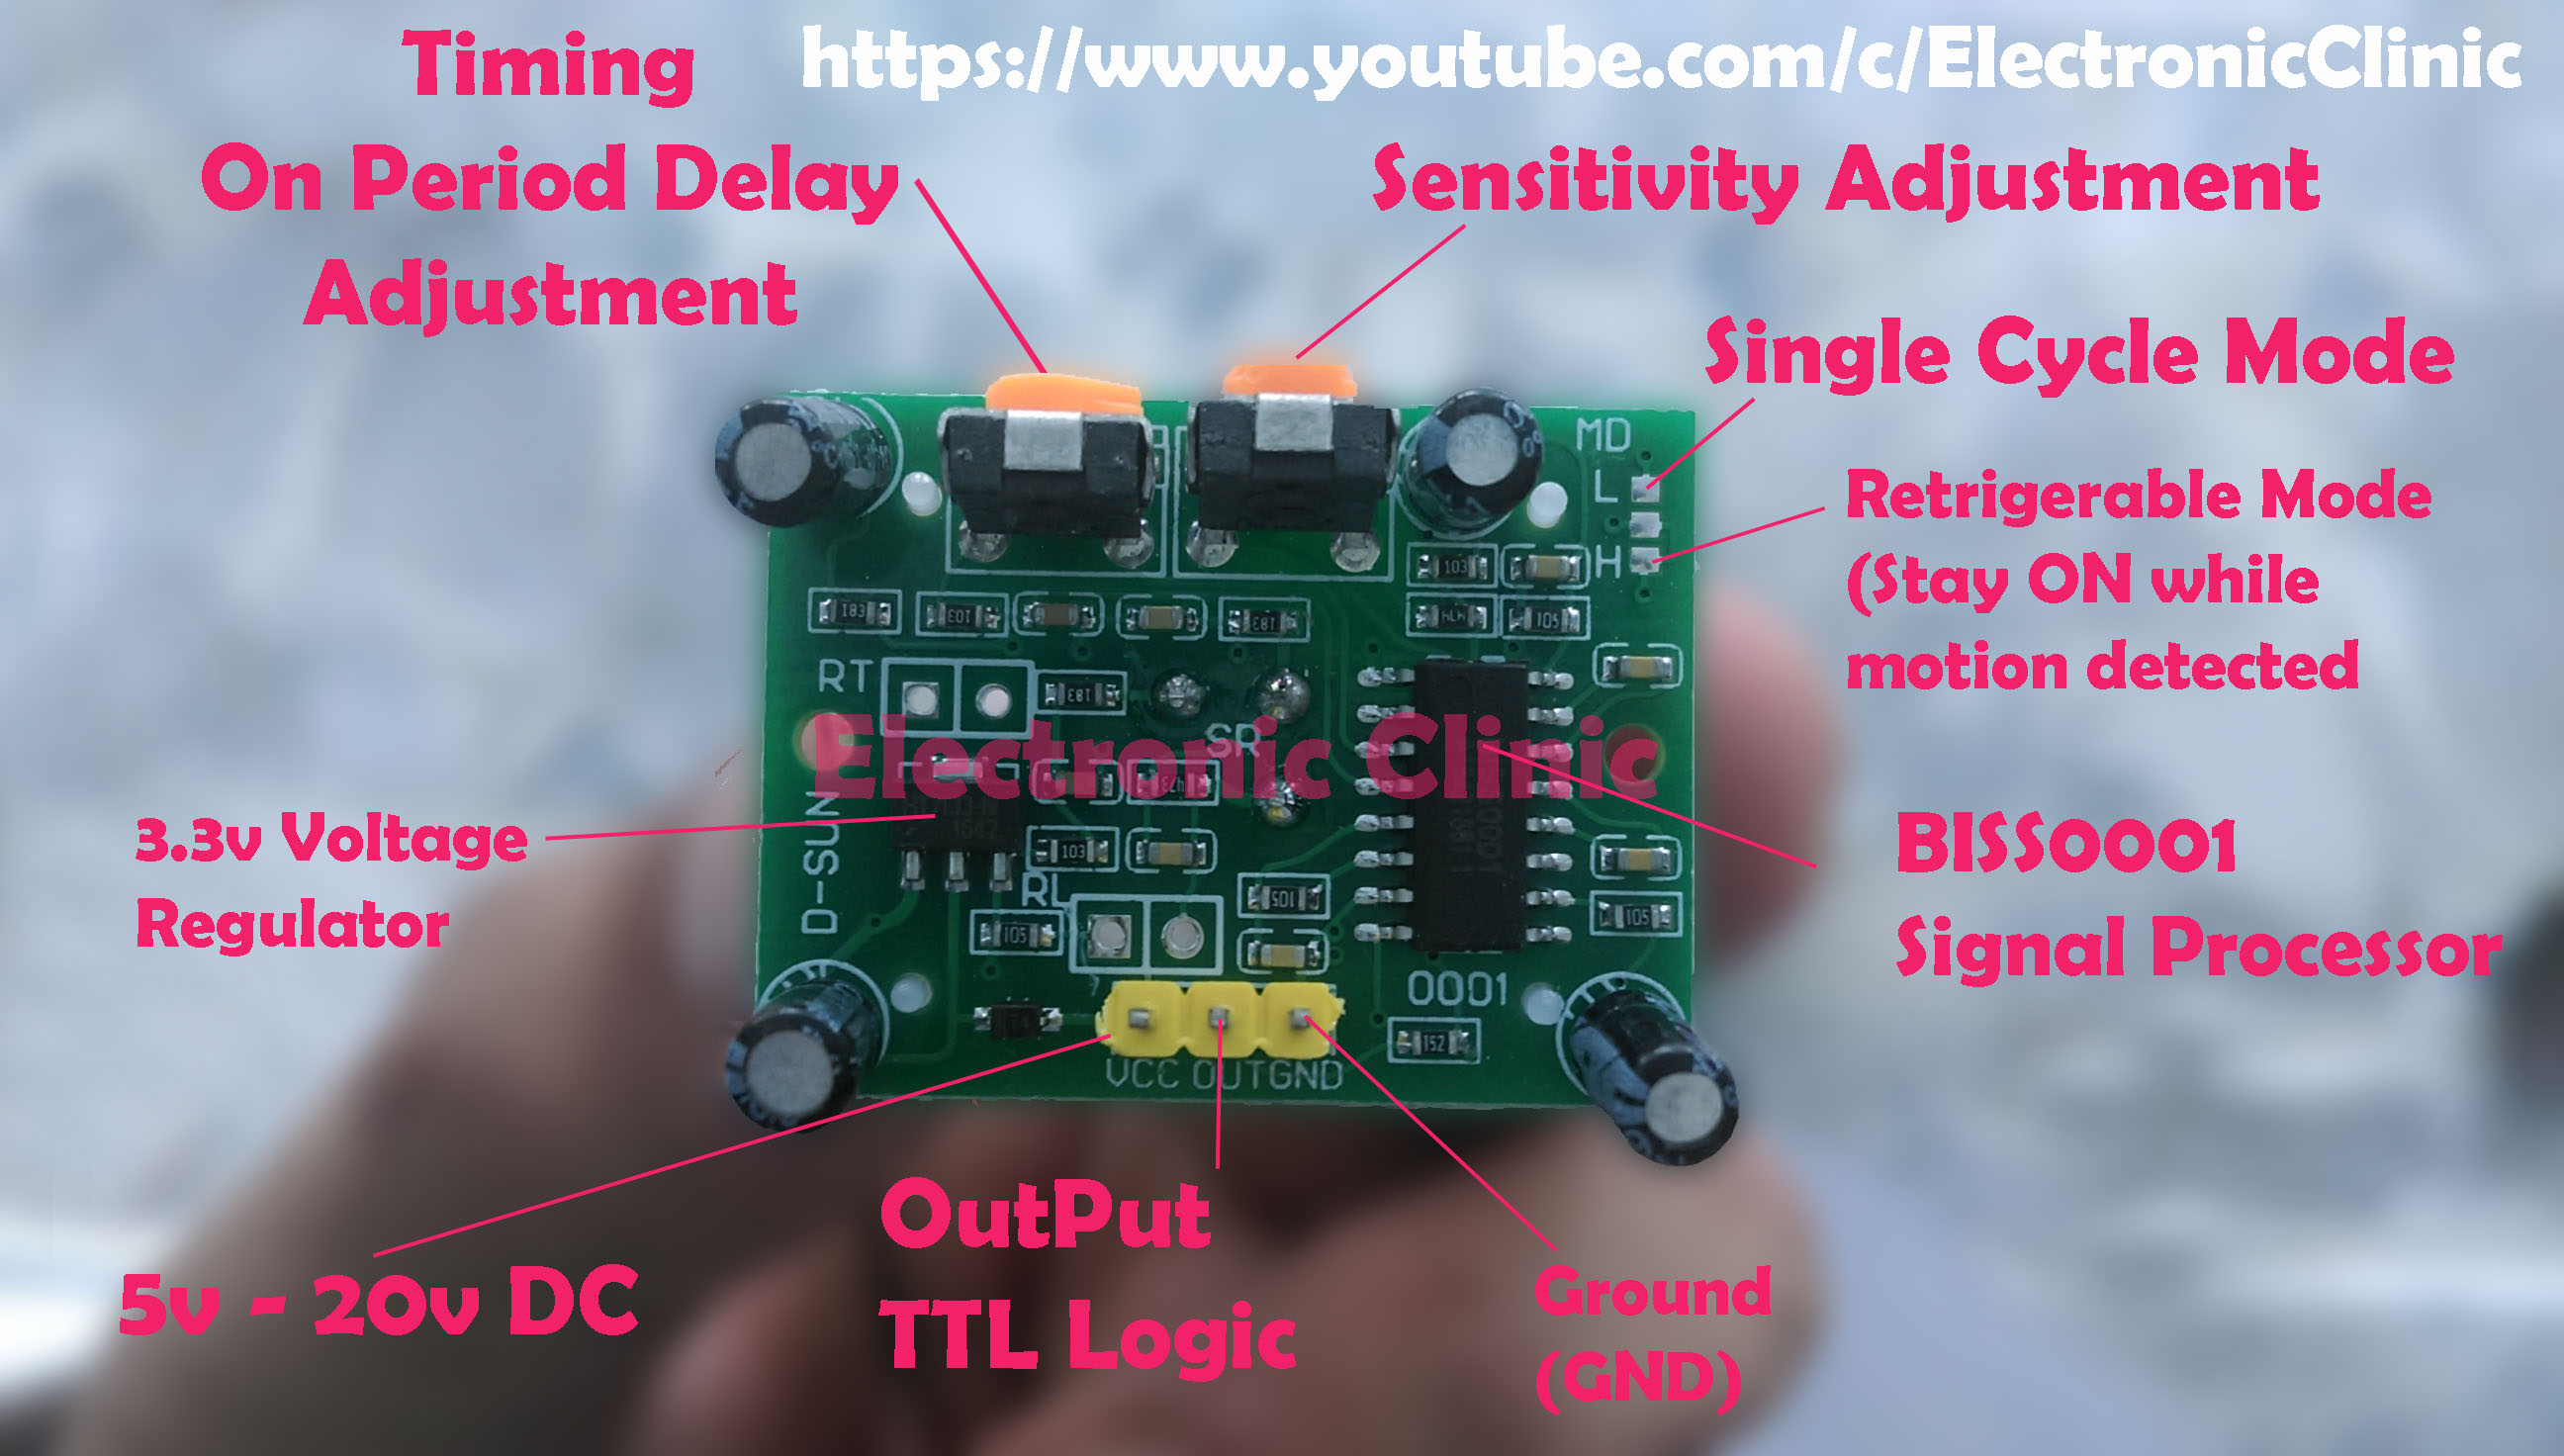
For the best understanding I have labeled the components that you should know about. I will discuss all the labeled components.
PIR Sensor Sensitivity Adjustment Variable Resistor:
As it’s quite clear from its name sensitivity adjustment, this variable resistor is used to control the sensitivity of the PIR sensor. If not properly adjusted it can create a problem due to which you will always get a high signal.
Very often I hear this from my followers and subscribers that we get a high signal even if there is no human or animal. This happens when the sensitivity is not properly adjusted. So if you have any detection problem you can play around with this variable resistor.
PIR Sensor Timing ON period delay adjustment:
This variable resistor is used to adjust the ON time when a human or animal is detected. This gives you the control to adjust the ON time after motion is detected by the PIR sensor. This function can help you in situations when you don’t want to use a microcontroller. This way you can turn on a relay for a few minutes which can be used to control a bulb or buzzer etc. By rotation this variable resistor, you can select different delay times.
On the right top corner, the Passive infrared sensor has the two pads labeled with single-cycle mode and Retrigerable mode (stay ON while motion is detected).
On the right side, this PIR sensor has an IC BIS0001 which is a signal processor. We can say this signal processor IC is the heart of the PIR “Passive Infrared Sensor”.
PIR Sensor “Passive Infrared Sensor) Pinout:
As you can see in the picture above this Motion Sensor has three male headers which are clearly labeled with VCC, OUT, and GND. As you can see this motion sensor also has the 3.3v voltage regulator, so it really doesn’t matter if you connect the VCC pin with 3.3v or 20v DC. As I am going to use the Arduino so I can connect this PIR sensor module VCC pin with the Arduino’s 5v. The output pin of the PIR Sensor can be connected with any digital Pin. While the GND of the PIR sensor should be connected with the Arduino’s ground.
Passive Infrared Sensor Arduino Circuit Diagram:

The circuit diagram explains how the PIR Sensor is connected with the Arduino. As you can see in the circuit diagram above, the PIR Sensor OUT pin is connected with the digital Pin 2 of the Arduino, while the VCC and GND pins are connected with the Arduino’s 5v and Ground.

PIR Passive Infrared Sensor Arduino Programming:
|
1 2 3 4 5 6 7 8 9 10 11 12 13 14 15 16 17 18 19 20 21 |
int pirsensor = 2; // PIR sensor is connected with pin2 of the Arduino int led = 13; void setup() { Serial.begin(9600); pinMode(pirsensor, INPUT); pinMode(led, OUTPUT); digitalWrite(led, LOW); } void loop() { if( digitalRead(pirsensor) == HIGH) { Serial.println("Human detected"); digitalWrite(led, HIGH); delay(1000); } } |
This program is very simple as you can see, still, if you find this program difficult then you can watch a video tutorial given below.
After you upload this program into the Arduino then open the Serial Monitor and select 9600 as the baud rate.4
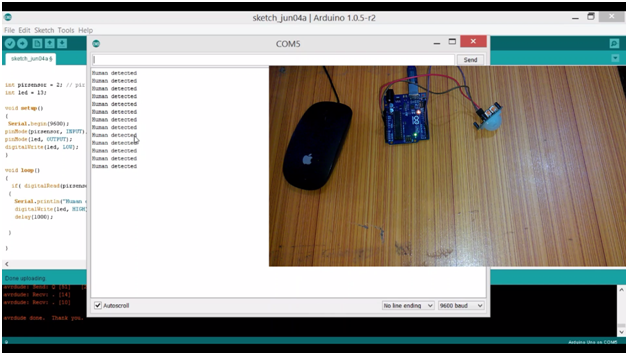
So when it detects any motion it prints Human detected on the screen and also turns on the led connected with pin number 13 of the Arduino. This is the Arduino’s Onboard LED. For advanced projects based on the PIR sensor check the related projects section given below.
Watch Video Tutorial:
PIR Sensor Related Projects:
How to make Motion Sensor light Homemade | PIR light sensor | Automatic light switch
Automatic Street Lights using PIR Sensor code and circuit diagram