Hello world First Android Application Project using Eclipse
Table of Contents
Create your first Android project:
Hello world- The first program written in any programming language will undoubtedly be Hello World, which has been since the 20th century. The tradition that has been handed down in the 1970s has become an eternal classic in the programming world, so of course, we will not make exceptions.
Amazon Purchase Links:
*Please Note: These are affiliate links. I may make a commission if you buy the components through these links. I would appreciate your support in this way!
Create HelloWorld project:
Click File→New→Android Application Project in the navigation bar of Eclipse, and create a pop-up the dialog of the Android project. Where Application Name represents the name of the application, this application will be
The name is displayed on the phone, here we fill in Hello World. Project Name represents the name of the project after the project is created After completion, the name will be displayed in Eclipse, where we fill in HelloWorld (the project name usually does not add spaces). Then the Package Name represents the package name of the project. The Android system distinguishes different applications through the package name, so the package name must be unique, here we fill in com.test.helloworld.
Next are a few drop-down selection boxes, Minimum Required SDK refers to the lowest compatible version of the program, here we choose Android 4.0. Target SDK means that you have done sufficient testing on the target version, and the system will not help you do forward-compatible operations on this version, here we choose the highest version Android 4.4. Compile With It refers to which version of SDK the program will be compiled with. Here we also choose Android 4.0. The last theme Refers to the theme used in the UI of the program. Personally, I prefer to choose None. All selected interfaces are shown in Figure 1.

Now we can click Next, the next interface is to create some configuration of the project, all keep the default configuration Good, as shown in Figure 2.

Click Next directly to enter the configuration interface of the startup icon, the icon configured here will be your application The icon displayed after it is installed on the phone is shown in Figure 3.

If the logo of your program has not been designed, don’t worry, you can also configure the startup icon in the project, here Let’s not configure it, just click Next. Then jump to the create event interface, in this interface, you can select an event type you want to create, here We choose Blank Activity, as shown in Figure 4.

After continuing to click Next, we need to give the Blank Activity we just selected a name, and then give this activity The layout also has a name. Fill in the Activity Name with HelloWorldActivity, and fill in the Layout Name hello_world_layout, as shown in Figure 5.

Then click Finish, the project is finally created!
Run HelloWorld:
At this time, your Eclipse should display the HelloWorld project you just created, because ADT has automatically A lot of things have been generated for us, you don’t need to write any code now, and the HelloWorld project is ready to run. Do not Before running, let’s check if the simulator just now is still online.
Click Window→Open Perspective→DDMS in the Eclipse navigation bar, then you will enter DDMS
In the view. DDMS provides many tools that we need to use when developing Android programs, but currently you only Just pay attention to whether there are online devices in the Devices window. If you have a device in the Devices window If the display is Online, it means that everything is normal and your emulator is online. If there is no Device, it may be that you have turned off the emulator, it doesn’t matter, just reopen it according to the previous steps. in case Although there are devices in your Devices window, it displays Offline, indicating that your emulator is offline. The probability of this situation
Not high, but if it appears, you only need to click Reset adb, as shown in Figure 6.

Ok, after confirming that the simulator is online, click the Java option on the right side of the Eclipse toolbar to return to the previous view. Then let’s run the project. Right-click the HelloWorld project→Run As→Android Application. Wait big In a few seconds, your project will be up and running. Now go and take a look at your simulator, the result should match the picture The display in 7 is the same.

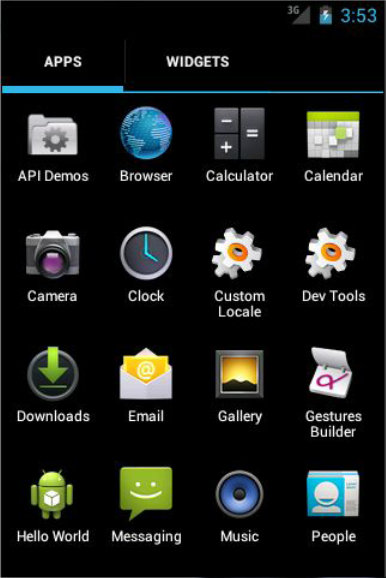
The HelloWorld project runs successfully! And you will find that Hello World is already installed on your simulator Applied. Open the launcher list, as shown in Figure 8.
Analyze your first Android application:
Back to Eclipse, first, expand the HelloWorld project, and you will see the directory structure shown in Figure 9.

You must feel a little dizzy at first seeing so many strange things. Don’t worry, I’m right now Explain the contents one by one, you will not feel so strenuous when you look at this picture soon.
- src
There is no doubt that the src directory is where all our Java code is placed, and its meaning here is the same as ordinary Java The src directory under the project is exactly the same, after expanding you will see the HelloWorldActivity we just created The file is inside.
- gen
The content in this directory is automatically generated, there is mainly an R.java file, which you add to the project Any resource will generate a corresponding resource id in it. Never modify this file manually.
- assets
This directory is not used much, it can mainly store some files packaged with the program, which can be used when your program is running. The contents of these files are dynamically read. In addition, if your program uses WebView to load local web pages The function of all web pages is also stored in this directory.
- bin
You don’t need to pay too much attention to this directory, it mainly contains some files that are automatically generated during compilation. among them, there will be a compiled installation package for your current project, expand the bin directory and you will see HelloWorld.apk, put this Copy the files to the phone, and install it directly.
- libs
If you use third-party Jar packages in your project, you need to put these Jar packages in the libs directory and put Jar packages in this directory will be automatically added to the build path. You can expand Android 4.0, Android Private Libraries and Android Dependencies libraries, the Jar packages shown in them have been added to the build path.
- res
The content in this directory is a bit too much. To put it simply, it is all the pictures and fabrics you use in the project. Resources such as bureaus and strings must be stored in this directory. The contents of the aforementioned R.java are also based on this The recorded files are automatically generated. Of course, there are many subdirectories in this directory, and pictures are placed in the drawable directory. The layout is placed in the layout directory, and the string is placed in the values directory, so you don’t have to worry about putting the entire res directory It’s messed up.
- AndroidManifest.xml
This is the configuration file of your entire Android project. All four components you define in the program need to be here Registered in each file. In addition, you can add a permission statement to the application in this file, or you can reassign The minimum compatible version and target version of the program specified when creating the project. Since this file will be used frequently in the future, we
Detailed explanations will be given when needed.
- project.properties
This file is very simple. It specifies the SDK version used when compiling the program through a line of code. Our HelloWorld project uses API 14, you can also change to other versions here to try.
In this way, the directory structure of the entire project has been introduced. It is normal if you still can’t fully understand it. There are too many things you haven’t touched yet. Don’t worry, this will not affect your subsequent studies. Instead, wait for you to learn When you come back to this directory structure diagram after completing the book, you will find it particularly clear and simple.
Next, let’s analyze how the HelloWorld project works. First open In the AndroidManifest.xml file, you can find the following code:
|
1 2 3 4 5 6 7 8 |
<activity android:name="com.test.helloworld.HelloWorldActivity" android:label="@string/app_name" > <intent-filter> <action android:name="android.intent.action.MAIN" /> <category android:name="android.intent.category.LAUNCHER" /> </intent-filter> </activity> |
This code represents the registration of HelloWorldActivity, which is not in AndroidManifest.xml
Registered events cannot be used. The two lines of code in the intent-filter are very important, <action android:name=
“android.intent.action.MAIN” /> and <category android:name=”android.intent.category.LAUNCHER” />
This indicates that HelloWorldActivity is the main activity of this project. Click the application icon on the phone, and this is the first one to start Events.
What exactly does HelloWorldActivity do? I said when I introduced the four major components of Android, Activities are the facade of Android applications. Everything you can see in the application is placed in activities. therefore
The interface you see in Figure 7 is actually the activity HelloWorldActivity. Then let’s go take a look at it
Code, open HelloWorldActivity, the code is as follows:
|
1 2 3 4 5 6 7 8 9 10 11 12 13 |
public class HelloWorldActivity extends Activity { @Override protected void onCreate(Bundle savedInstanceState) { super.onCreate(savedInstanceState); setContentView(R.layout.hello_world_layout); } @Override public boolean onCreateOptionsMenu(Menu menu) { // Inflate the menu; this adds items to the action bar if it is present. getMenuInflater().inflate(R.menu.hello_world, menu); return true; } } |
First of all, we can see that HelloWorldActivity is inherited from Activity. Activity is provided by the Android system An activity base class provided, all activities in our project must inherit from it to have activity characteristics. Then you can See that there are two methods in HelloWorldActivity, the onCreateOptionsMenu() method is used to create menus, We can ignore it first and mainly look at the onCreate() method. The onCreate() method must be executed when an activity is created There are only two lines of code, and there is no Hello world! Then the Hello world is shown in Figure 7!
Where is it defined?
In fact, the design of Android programs pays attention to the separation of logic and views, so it is not recommended to write interfaces directly in activities. A more general approach is to write the interface in the layout file, and then introduce it in the activity. You can see that The second line of the onCreate() method calls the setContentView() method, which is why this method introduces a hello_world_layout layout, then Hello world! must be defined here! Let’s open this file Take a look.
Layout files are defined in the res/layout directory, when you expand the layout directory, you will see
hello_world_layout.xml this file. The code after opening is as follows:
|
1 2 3 4 5 6 7 8 9 10 11 12 13 |
<RelativeLayout xmlns:android="http://schemas.android.com/apk/res/android" xmlns:tools="http://schemas.android.com/tools" android:layout_width="match_parent" android:layout_height="match_parent" android:paddingLeft="@dimen/activity_horizontal_margin" android:paddingRight="@dimen/activity_horizontal_margin" android:paddingTop="@dimen/activity_vertical_margin" tools:context=".HelloWorldActivity" > <TextView android:layout_width="wrap_content" android:layout_height="wrap_content" android:text="@string/hello_world" /> </RelativeLayout> |