How to Create Android App for Arduino Sensor Monitoring over Bluetooth
Table of Contents
Description:
How to Create Android App for Arduino Sensor Monitoring over Bluetooth- I have been using Android applications for monitoring Arduino sensors over Bluetooth. I will share the links of all the projects in which I have used the android applications. Due to a lot of requests from my subscribers and followers on my YouTube channel “Electronic Clinic” to explain how to create your own android application. Finally, I decided to share with you the knowledge, how to develop your own Android app to monitor any sensor which is connected with the Arduino.
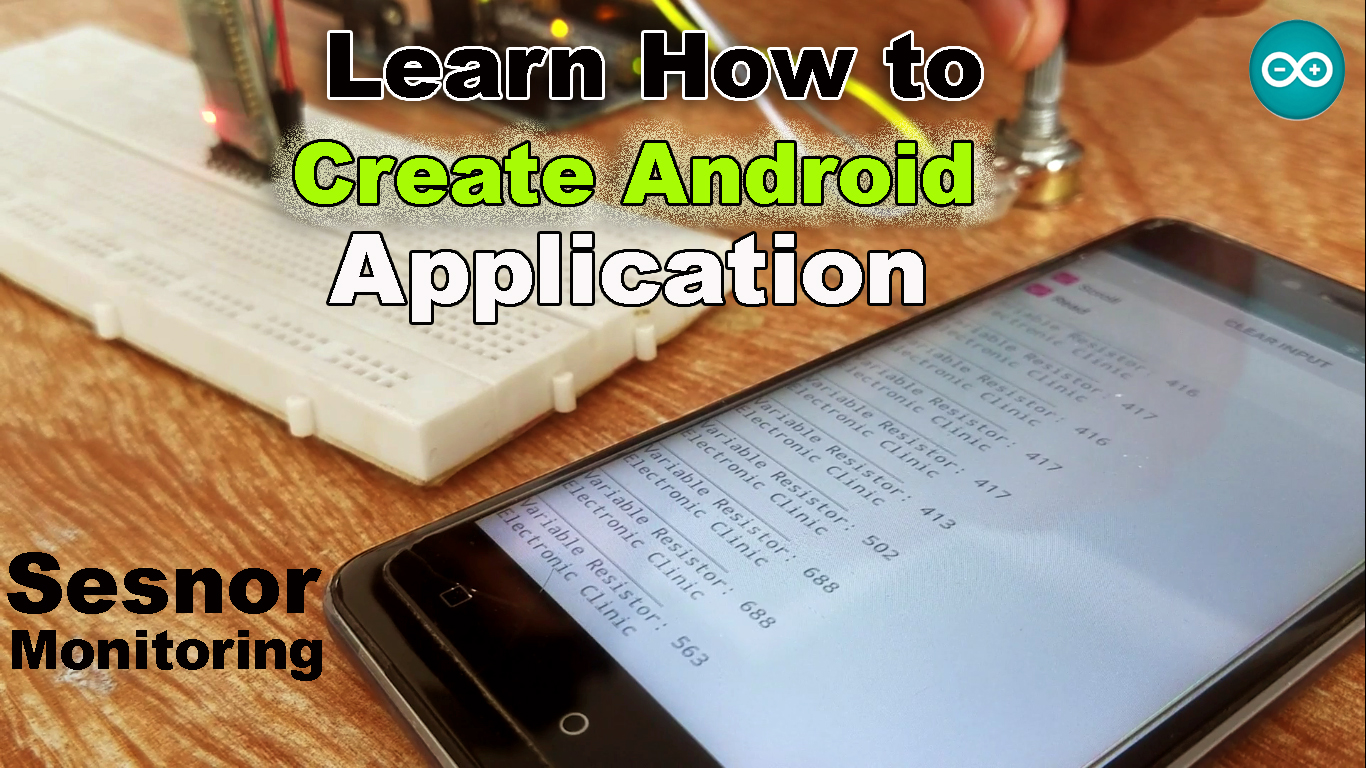
In this tutorial, you will learn how to create your own android cell phone application for monitoring any Sensor using Arduino, HC-05 Bluetooth module and an Android cell Phone. For the best understanding, I am using a variable resistor as the sensor. Later this variable resistor can be replaced with any sensor you want. This sensor monitoring application is designed using Android Studio. This is version 2 of the Android cell phone application designing.
While in version 1 of the android cell phone application designing, I created an application to control an LED using only two buttons.
In this tutorial, we will cover
- Complete circuit diagram explanation
- Interfacing
- Arduino programming
- Step by Step android cell phone App designing using Android Studio and finally
- Testing
without any further delay, let’s get started!!!
Amazon Links:
Other Tools and Components:
Super Starter kit for Beginners
PCB small portable drill machines
DISCLAIMER:
Please Note: these are affiliate links. I may make a commission if you buy the components through these links. I would appreciate your support in this way!
The software’s used:
- The Software used for the Android app development
- Android Studio
- Arduino IDE
About the Android Studio:
Android studio is one of the most commonly used software used for android app development which includes designing and programming. Before you follow this tutorial you should have some basic knowledge of how to use the Android studio. Otherwise It can be really confusing for you. My recommendation is first you should follow some basic tutorials and then you can resume from here.
Before we start the android app development, first of all, I would like to explain the circuit diagram and Arduino programming. Because we can only design a good android application if we know exactly for what purpose we are making this application.
HC-05 Bluetooth Module with Arduino Circuit Diagram:

This is a very basic circuit diagram designed in CadeSoft Eagle 9.1.0 version. If you want to learn how to make a schematic and PCB then watch my tutorial.
For the demonstration purposes, I am using a variable resistor. This variable resistor can be easily replaced with any sensor you want. As you can see the middle leg of the variable resistor is connected with the Arduino’s Analog pin A0. While the other two legs of the variable resistor are connected with the Arduino’s 3.3v and GND.
On the left side, you can see a Bluetooth module, you can use HC-05 or HC-06 Bluetooth Module. If you are using a Bluetooth for the first time then you can watch my getting started tutorial on the Bluetooth module, which completely explains how to change the name of the Bluetooth module and how to change the pairing code.
The Bluetooth module Tx and Rx pins are connected with the Arduino’s pin number 2 and pin number 3. Pin number 2 and pin number 3 will be used as the Serial Port, which will be defined in the programming. While the VCC and GND pins are connected with the Arduino’s 5v and GND.
Arduino Bluetooth Module Programming:
|
1 2 3 4 5 6 7 8 9 10 11 12 13 14 15 16 17 18 19 20 21 22 23 24 25 |
#include <SoftwareSerial.h> SoftwareSerial blue(2,3); // bluetooth module connected here int Vresistor = A0; int Vdata = 0; void setup(){ pinMode(Vresistor, INPUT); Serial.begin(9600); blue.begin(9600); } void loop(){ // read the value at analog input Vdata = analogRead(Vresistor); blue.print("Variable Resistor: "); blue.println(Vdata); blue.println("Electronic Clinic"); blue.println("________________"); delay(1000); } |
Arduino Bluetooth Program explanation:
As you know my friends in Arduino we have only one Serial port which is available on pin number 0 and pin number 1. As I always say never use these pins for communication with other devices. The Arduino’s default Serial Port should only be used for debugging purposes. You can always define other Serial Ports using the SoftwareSerial library. So that’s the reason I added the SoftwareSerial.h header file.
I defined a Serial Port with the name Blue on pin number 2 and pin number 3 of the Arduino. Pin number 2 is the Rx while Pin number 3 is the Tx.
On the third line, I defined a pin for the Variable Resistor which is connected with the Analog pin A0 of the Arduino.
Then I defined a variable Vdata of the type integer, this variable will be used to store the value of the variable resistor.
As you know my friends every Arduino and Mega program has at least two functions which are the void setup and void loop functions. This is inside the void setup function that we tell the controller what are the input pins and what are the output pins. As in this tutorial, I am using a variable resistor as the sensor so that’s why I set it as the input using the pinMode function.
Then I activated the Serial communication and I selected 9600 as the baud rate. One more thing about the void setup function. It executes only one time when the Arduino or Mega board is powered up.
Then starts the void loop function.
Using the analogRead function we read the analog pin A0 to which a variable resistor is connected and store the value in variable vdata.
And lastly we send the data to the Android cell phone application. After every 1 second data is sent to the Android cell phone sensor monitoring application. So that’s all about the Arduino programming.
Android app development:
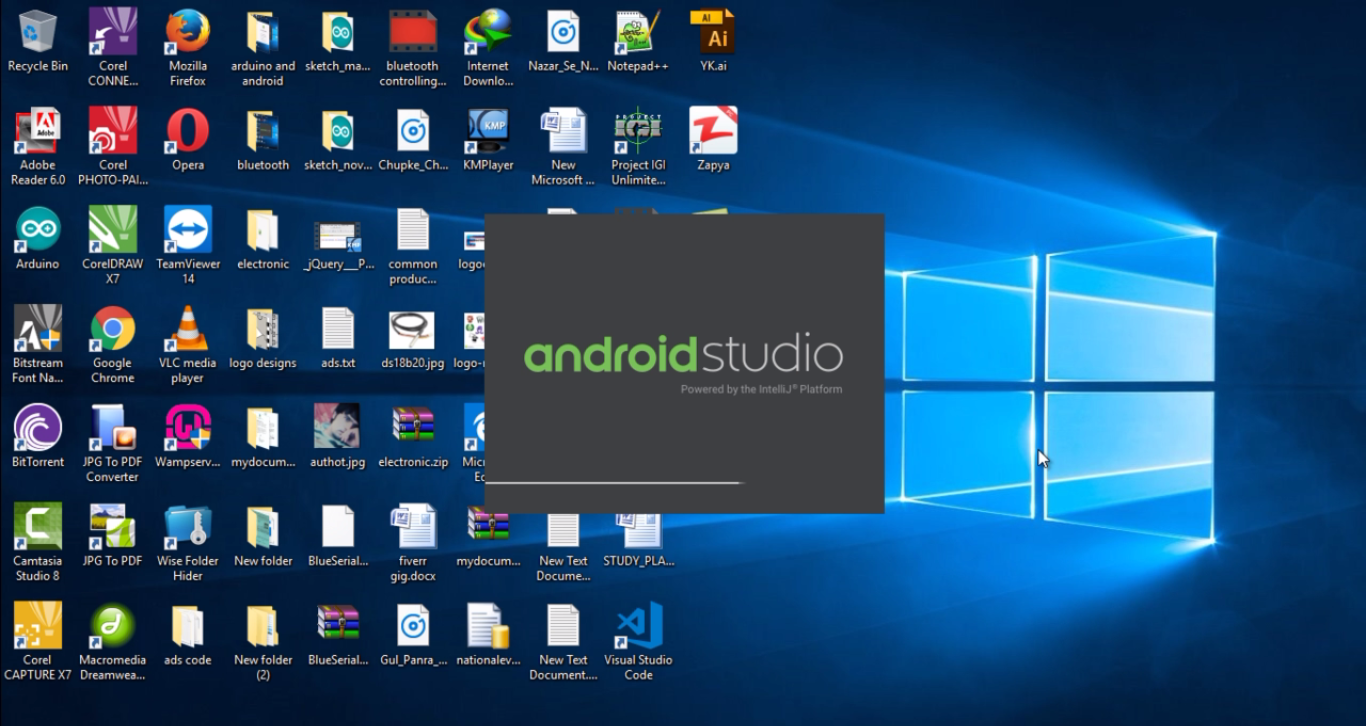
First of all, open the Android Studio.
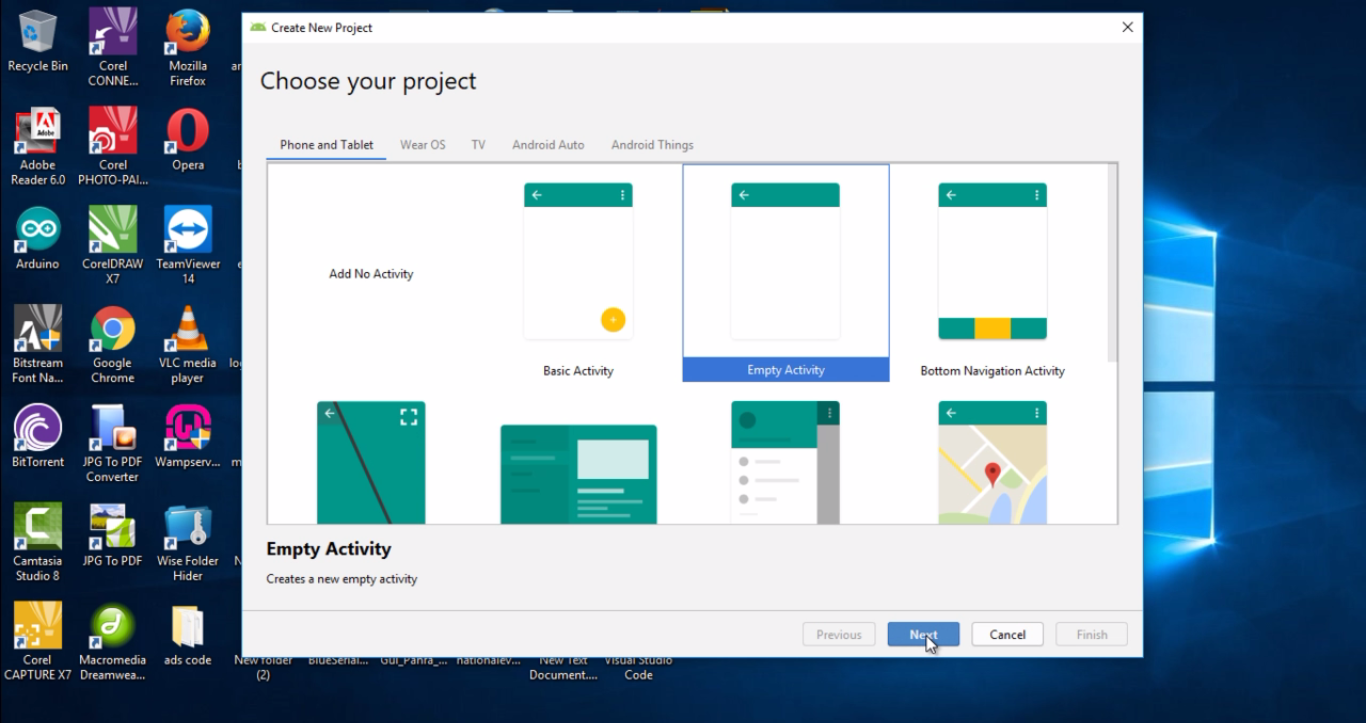
Click on Start a new Android Studio project

While the Choose your project form is open.
Select empty activity and click on the next button
After you click on the next button, the configure your project form is opened, over here you set the project name, package name and you can select a directory where you want to store the application. Make sure the language is set to Java. So after you are done then you can click on the Finish button.

Wait for app synchronization
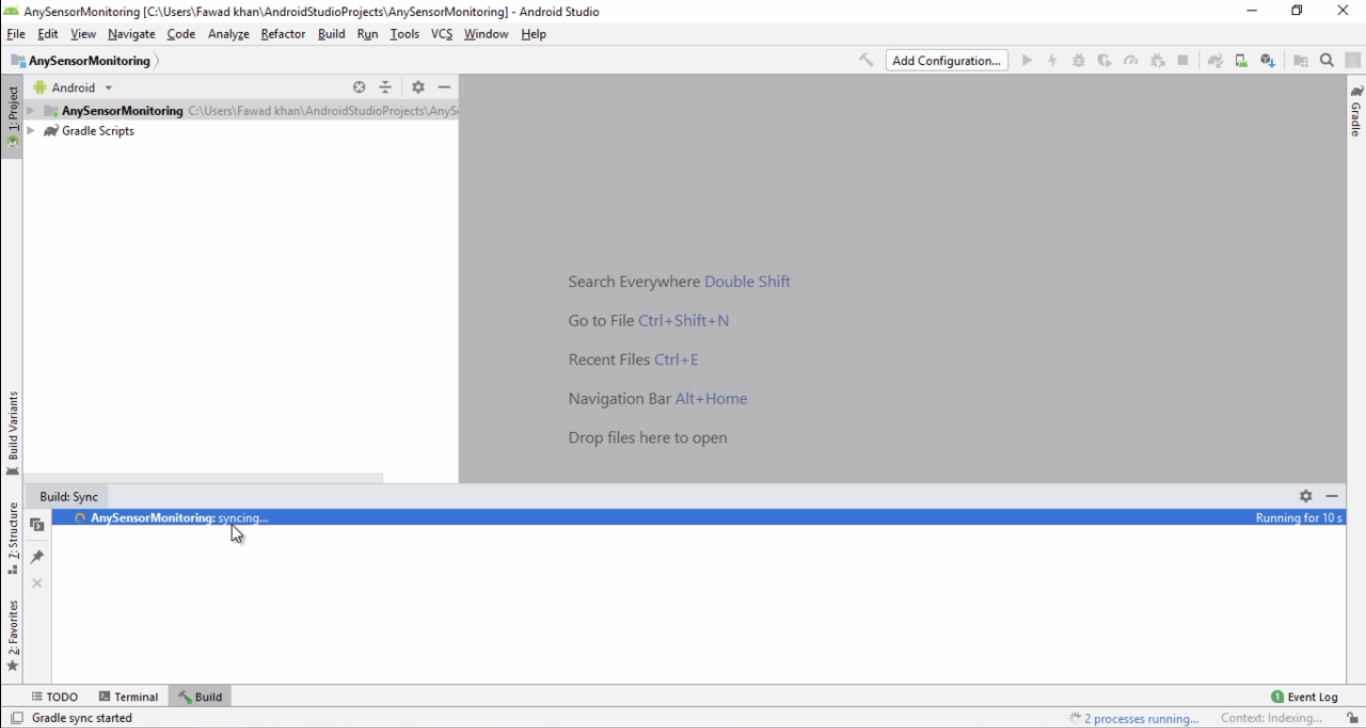
When your project is fully synchronized, as you can see the green dots in the following picture which is an indication that the synchronization is completed and we are ready for the next step.

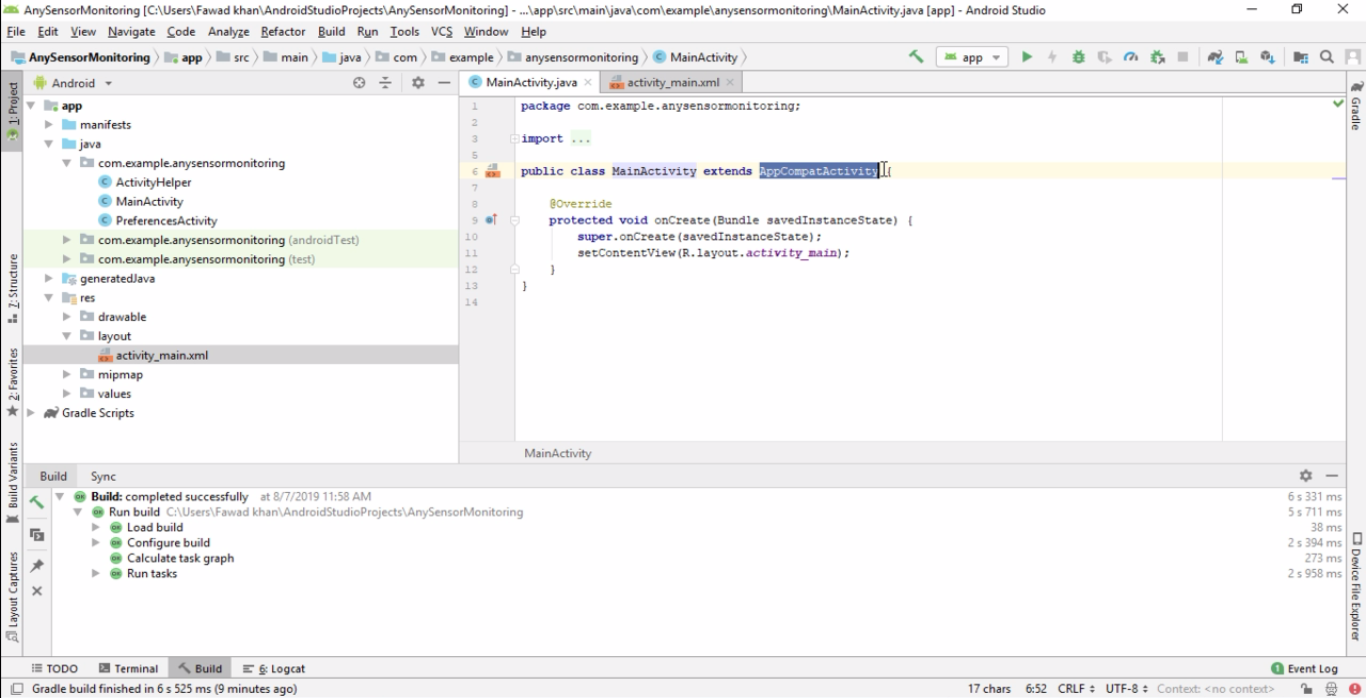
After synchronization is completed the MainActivity.java and activity_main.xml open automatically

Before i start the main programming I want to tell you that there are two main classes which we first need to add
one is ActivityHelper.java
and the second is PreferencesActivity.java
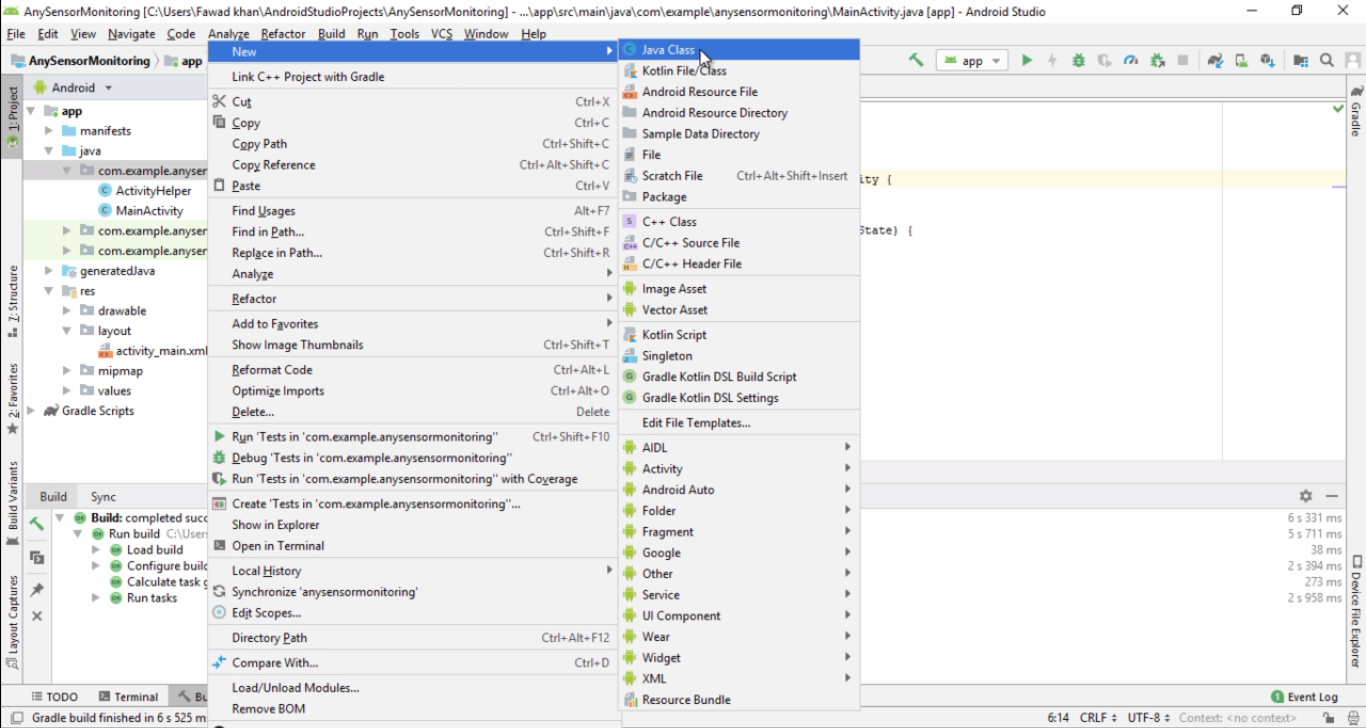
now create ActivityHelper.java
right click on the package folder, then in new select java class.

Enter name as the ActivityHelper and click ok

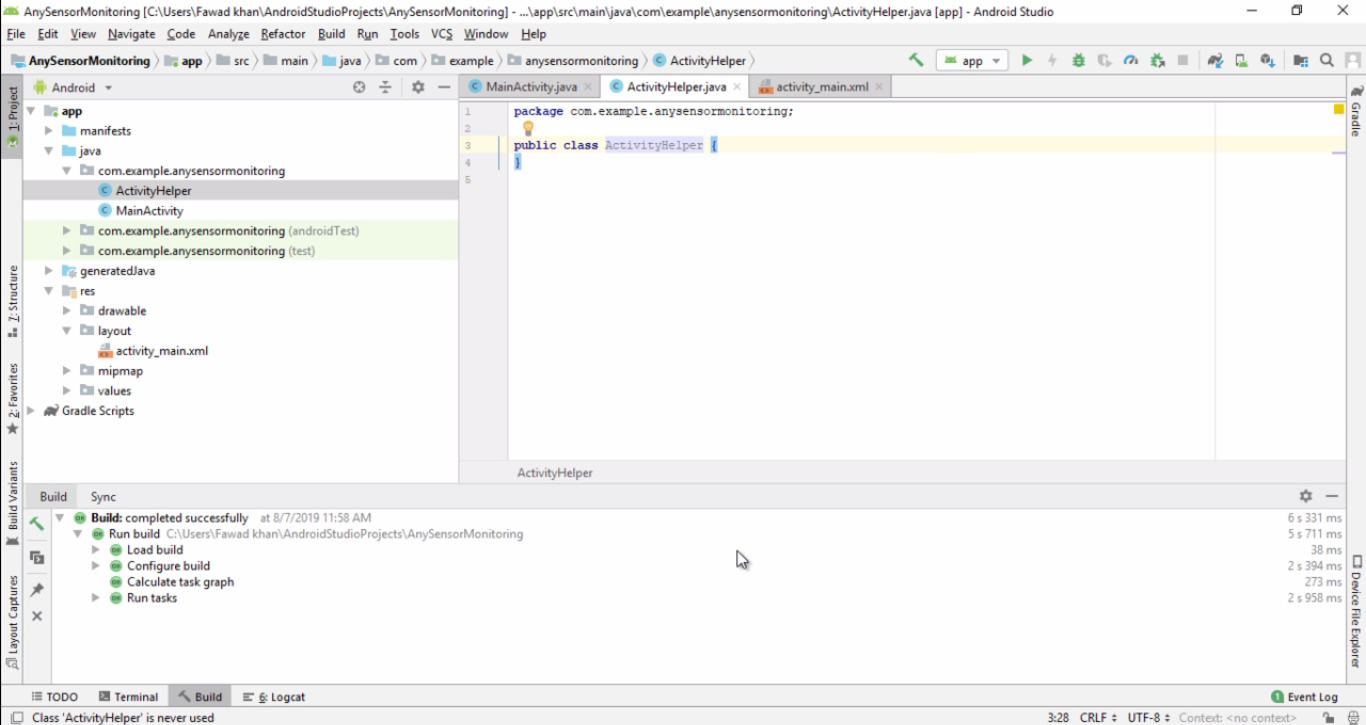
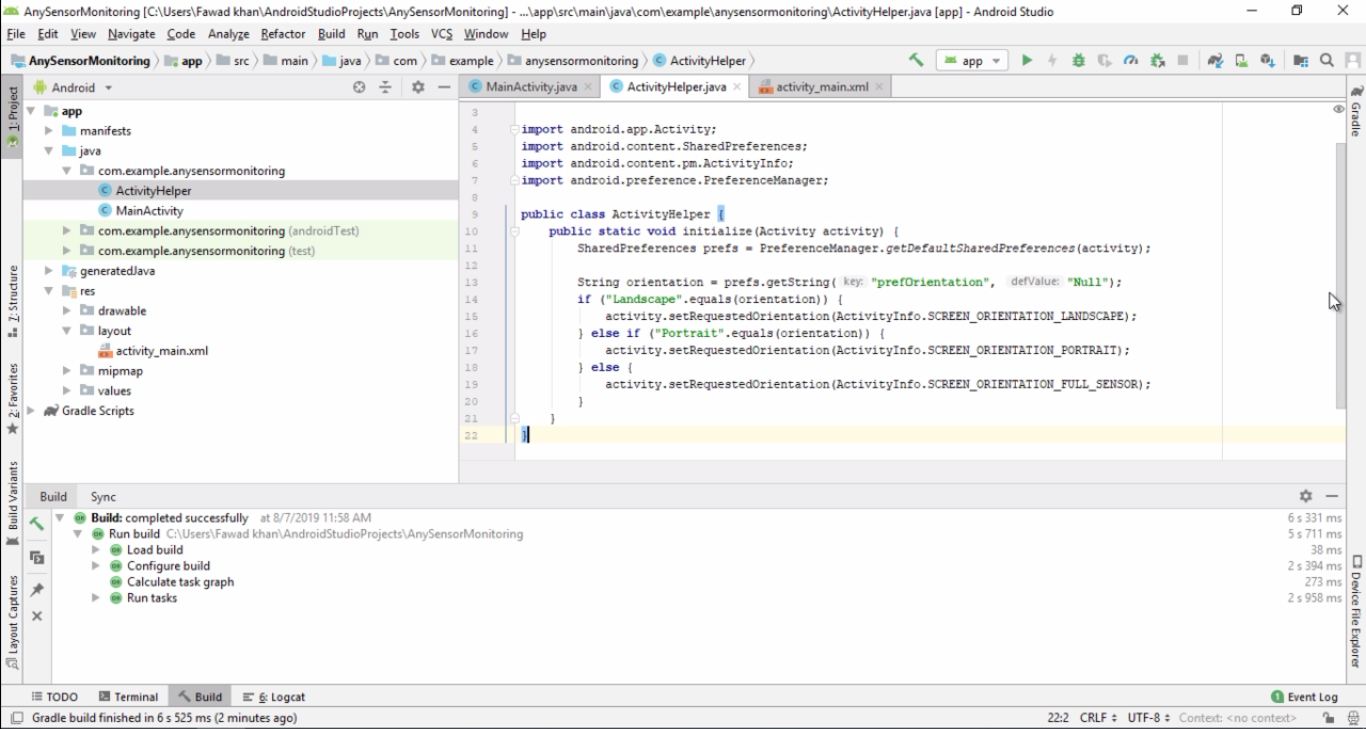
ActivityHelper.java code:
|
1 2 3 4 5 6 7 8 9 10 11 12 13 14 15 16 17 18 19 20 |
package com.example.anysensormonitoring; import android.app.Activity; import android.content.SharedPreferences; import android.content.pm.ActivityInfo; import android.preference.PreferenceManager; public class ActivityHelper { public static void initialize(Activity activity) { SharedPreferences prefs = PreferenceManager.getDefaultSharedPreferences(activity); String orientation = prefs.getString("prefOrientation", "Null"); if ("Landscape".equals(orientation)) { activity.setRequestedOrientation(ActivityInfo.SCREEN_ORIENTATION_LANDSCAPE); } else if ("Portrait".equals(orientation)) { activity.setRequestedOrientation(ActivityInfo.SCREEN_ORIENTATION_PORTRAIT); } else { activity.setRequestedOrientation(ActivityInfo.SCREEN_ORIENTATION_FULL_SENSOR); } } } |
Now create the second java class and follow the same steps as explained above.
Enter class name as the preferrencesActivity and click ok


preferrencesActivity.java code:
|
1 2 3 4 5 6 7 8 9 10 11 12 13 14 15 16 17 18 19 20 21 22 23 24 25 26 27 28 29 30 31 32 33 34 35 36 37 38 39 40 41 42 43 44 45 46 47 48 49 50 51 52 53 54 55 56 57 58 59 60 |
package com.example.anysensormonitoring; import java.util.Map; import android.content.SharedPreferences; import android.content.SharedPreferences.OnSharedPreferenceChangeListener; import android.os.Bundle; import android.preference.EditTextPreference; import android.preference.ListPreference; import android.preference.Preference; import android.preference.PreferenceActivity; import android.preference.PreferenceManager; public class PreferencesActivity extends PreferenceActivity implements OnSharedPreferenceChangeListener { @Override public void onCreate(Bundle savedInstanceState) { super.onCreate(savedInstanceState); ActivityHelper.initialize(this); // Using this for compatibility with Android 2.2 devices } public void onSharedPreferenceChanged(SharedPreferences sharedPreferences, String key) { Preference pref = findPreference(key); if (pref instanceof ListPreference) { ListPreference listPref = (ListPreference) pref; pref.setSummary(listPref.getEntry()); ActivityHelper.initialize(this); } if (pref instanceof EditTextPreference) { EditTextPreference editPref = (EditTextPreference) pref; pref.setSummary(editPref.getText()); } } @Override protected void onPause() { PreferenceManager.getDefaultSharedPreferences(this).unregisterOnSharedPreferenceChangeListener(this); super.onPause(); } @Override protected void onResume() { PreferenceManager.getDefaultSharedPreferences(this).registerOnSharedPreferenceChangeListener(this); Map<String, ?> keys = PreferenceManager.getDefaultSharedPreferences(this).getAll(); for (Map.Entry<String, ?> entry : keys.entrySet()) { // Log.d("map values", entry.getKey() + ": " + entry.getValue().toString()); Preference pref = findPreference(entry.getKey()); if (pref != null) { pref.setSummary(entry.getValue().toString()); } } super.onResume(); } } |

now you can see that we made two main classes one is ActivityHelper and the other is preferrencesActivity

Now we can start our main application programming
Now we design our first launcher screen in which there will be two buttons search and connect and listview
Open the activity_main.xml

Now change the layout form constraint layout to linearlayout

As you can see in the picture below.

Now we make another linear layout within the main linearlayout
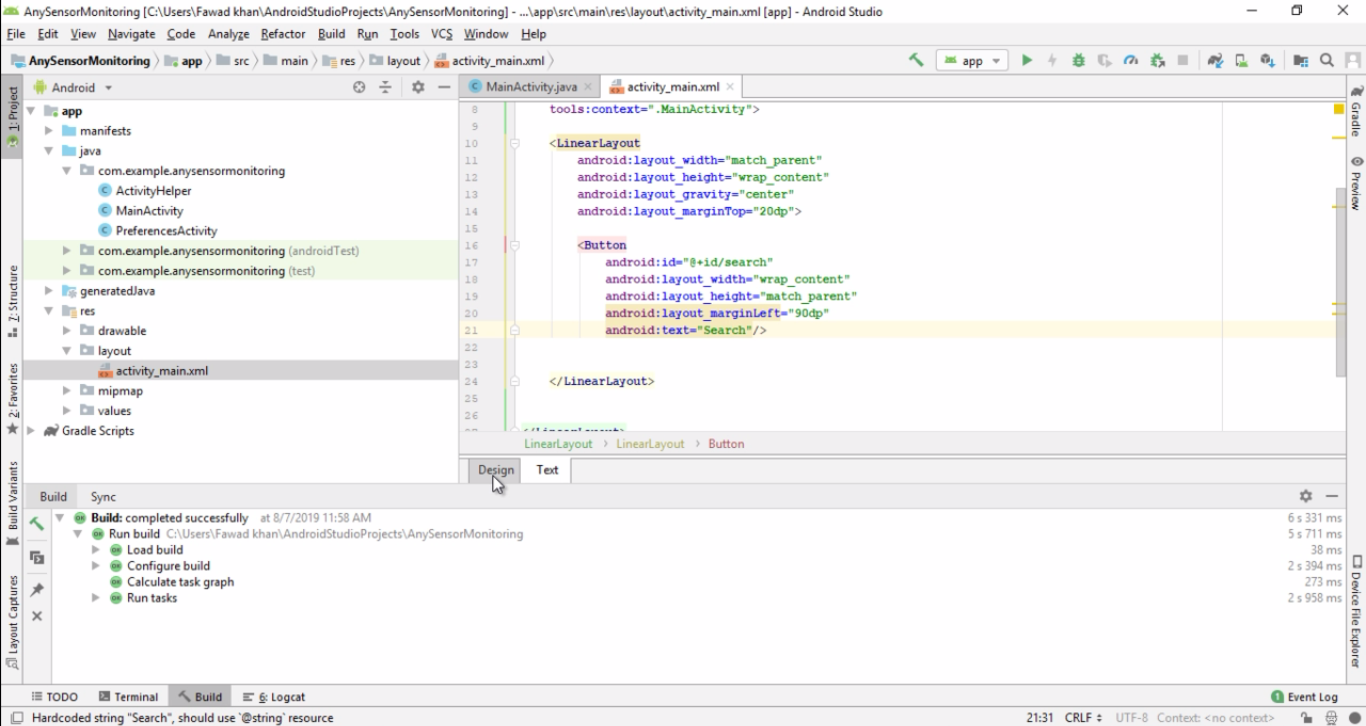
To create a button in xml we use the button attribute having some property which you can adjust as per your requirements.


To check how the design look like just click on design button as you can see in below picture

Now again click on the text button to open the coding. As in this App I am going to use only two buttons. So I can simply copy and paste the code and will change the caption of the button from search to connect.


To check the design layout for this change from text mode to the design. As you can see at the end of the coding there are two button with captions Design and Text. You can click on the Design button.

It’s a good programming practice to keep checking your desing layout as you continue to program. So now we are done with two buttons with captions search and connect. Now we will add the code for the pair device, for this we use the listview attribute.


activity_main.xml code:
|
1 2 3 4 5 6 7 8 9 10 11 12 13 14 15 16 17 18 19 20 21 22 23 24 25 26 27 28 29 30 31 32 33 34 35 36 37 38 39 40 |
<?xml version="1.0" encoding="utf-8"?> <LinearLayout xmlns:android="http://schemas.android.com/apk/res/android" xmlns:app="http://schemas.android.com/apk/res-auto" xmlns:tools="http://schemas.android.com/tools" android:layout_width="match_parent" android:layout_height="match_parent" android:orientation="vertical" tools:context=".MainActivity"> <LinearLayout android:layout_width="match_parent" android:layout_height="wrap_content" android:layout_gravity="center" android:layout_marginTop="20dp"> <Button android:id="@+id/search" android:layout_width="wrap_content" android:layout_height="match_parent" android:layout_marginLeft="90dp" android:text="Search"/> <Button android:id="@+id/connect" android:layout_width="wrap_content" android:layout_height="match_parent" android:layout_marginLeft="50dp" android:text="Connect" /> </LinearLayout> <ListView android:id="@+id/listview" android:layout_width="match_parent" android:layout_height="match_parent"> </ListView> </LinearLayout> |
Now click on MainActivity.java tab as you can see

Change the appcompatActivity to Activity

MainActivity.java code:
|
1 2 3 4 5 6 7 8 9 10 11 12 13 14 15 16 17 18 19 20 21 22 23 24 25 26 27 28 29 30 31 32 33 34 35 36 37 38 39 40 41 42 43 44 45 46 47 48 49 50 51 52 53 54 55 56 57 58 59 60 61 62 63 64 65 66 67 68 69 70 71 72 73 74 75 76 77 78 79 80 81 82 83 84 85 86 87 88 89 90 91 92 93 94 95 96 97 98 99 100 101 102 103 104 105 106 107 108 109 110 111 112 113 114 115 116 117 118 119 120 121 122 123 124 125 126 127 128 129 130 131 132 133 134 135 136 137 138 139 140 141 142 143 144 145 146 147 148 149 150 151 152 153 154 155 156 157 158 159 160 161 162 163 164 165 166 167 168 169 170 171 172 173 174 175 176 177 178 179 180 181 182 183 184 185 186 187 188 189 190 191 192 193 194 195 196 197 198 199 200 201 202 203 204 205 206 207 208 209 210 211 212 213 214 215 216 217 218 219 220 221 222 223 224 225 226 227 228 229 230 231 232 233 234 235 236 237 238 239 240 241 242 243 244 245 246 247 248 249 250 251 252 253 254 255 256 257 258 259 260 261 262 263 264 265 266 267 268 269 270 271 272 273 274 275 276 277 278 279 280 281 282 283 284 285 286 287 288 289 290 291 292 293 294 295 296 297 298 299 300 301 302 303 304 305 306 307 308 309 310 311 312 313 314 315 316 317 318 319 320 321 322 323 |
package com.example.anysensormonitoring; import android.app.Activity; import android.support.v7.app.AppCompatActivity; import android.os.Bundle; import android.bluetooth.BluetoothAdapter; import android.bluetooth.BluetoothDevice; import android.content.Context; import android.content.Intent; import android.content.SharedPreferences; import android.content.pm.ActivityInfo; import android.graphics.Color; import android.os.AsyncTask; import android.preference.PreferenceManager; import android.support.v7.app.AppCompatActivity; import android.os.Bundle; import android.util.Log; import android.view.LayoutInflater; import android.view.Menu; import android.view.MenuItem; import android.view.View; import android.view.ViewGroup; import android.widget.AdapterView; import android.widget.ArrayAdapter; import android.widget.Button; import android.widget.ListView; import android.widget.TextView; import android.widget.Toast; import java.util.ArrayList; import java.util.List; import java.util.Set; import java.util.UUID; public class MainActivity extends AppCompatActivity { private Button search; private Button connect; private ListView listView; private BluetoothAdapter mBTAdapter; private static final int BT_ENABLE_REQUEST = 10; // This is the code we use for BT Enable private static final int SETTINGS = 20; private UUID mDeviceUUID = UUID.fromString("00001101-0000-1000-8000-00805F9B34FB"); private int mBufferSize = 50000; //Default public static final String DEVICE_EXTRA = "com.example.anysensormonitoring.SOCKET"; public static final String DEVICE_UUID = "com.example.anysensormonitoring.uuid"; private static final String DEVICE_LIST = "com.example.anysensormonitoring.devicelist"; private static final String DEVICE_LIST_SELECTED = "com.example.anysensormonitoring.devicelistselected"; public static final String BUFFER_SIZE = "com.example.anysensormonitoring.buffersize"; private static final String TAG = "BlueTest5-MainActivity"; @Override protected void onCreate(Bundle savedInstanceState) { super.onCreate(savedInstanceState); setContentView(R.layout.activity_main); search = (Button) findViewById(R.id.search); connect = (Button) findViewById(R.id.connect); listView = (ListView) findViewById(R.id.listview); if (savedInstanceState != null) { ArrayList<BluetoothDevice> list = savedInstanceState.getParcelableArrayList(DEVICE_LIST); if (list != null) { initList(list); MyAdapter adapter = (MyAdapter) listView.getAdapter(); int selectedIndex = savedInstanceState.getInt(DEVICE_LIST_SELECTED); if (selectedIndex != -1) { adapter.setSelectedIndex(selectedIndex); connect.setEnabled(true); } } else { initList(new ArrayList<BluetoothDevice>()); } } else { initList(new ArrayList<BluetoothDevice>()); } search.setOnClickListener(new View.OnClickListener() { @Override public void onClick(View arg0) { mBTAdapter = BluetoothAdapter.getDefaultAdapter(); if (mBTAdapter == null) { Toast.makeText(getApplicationContext(), "Bluetooth not found", Toast.LENGTH_SHORT).show(); } else if (!mBTAdapter.isEnabled()) { Intent enableBT = new Intent(BluetoothAdapter.ACTION_REQUEST_ENABLE); startActivityForResult(enableBT, BT_ENABLE_REQUEST); } else { new SearchDevices().execute(); } } }); connect.setOnClickListener(new View.OnClickListener() { @Override public void onClick(View arg0) { BluetoothDevice device = ((MyAdapter) (listView.getAdapter())).getSelectedItem(); Intent intent = new Intent(getApplicationContext(), MonitoringScreen.class); intent.putExtra(DEVICE_EXTRA, device); intent.putExtra(DEVICE_UUID, mDeviceUUID.toString()); intent.putExtra(BUFFER_SIZE, mBufferSize); startActivity(intent); } }); } protected void onPause() { // TODO Auto-generated method stub super.onPause(); } @Override protected void onStop() { // TODO Auto-generated method stub super.onStop(); } @Override protected void onActivityResult(int requestCode, int resultCode, Intent data) { switch (requestCode) { case BT_ENABLE_REQUEST: if (resultCode == RESULT_OK) { msg("Bluetooth Enabled successfully"); new SearchDevices().execute(); } else { msg("Bluetooth couldn't be enabled"); } break; case SETTINGS: //If the settings have been updated SharedPreferences prefs = PreferenceManager.getDefaultSharedPreferences(this); String uuid = prefs.getString("prefUuid", "Null"); mDeviceUUID = UUID.fromString(uuid); Log.d(TAG, "UUID: " + uuid); String bufSize = prefs.getString("prefTextBuffer", "Null"); mBufferSize = Integer.parseInt(bufSize); String orientation = prefs.getString("prefOrientation", "Null"); Log.d(TAG, "Orientation: " + orientation); if (orientation.equals("Landscape")) { setRequestedOrientation(ActivityInfo.SCREEN_ORIENTATION_LANDSCAPE); } else if (orientation.equals("Portrait")) { setRequestedOrientation(ActivityInfo.SCREEN_ORIENTATION_PORTRAIT); } else if (orientation.equals("Auto")) { setRequestedOrientation(ActivityInfo.SCREEN_ORIENTATION_FULL_SENSOR); } break; default: break; } super.onActivityResult(requestCode, resultCode, data); } /** * Quick way to call the Toast * @param str */ private void msg(String str) { Toast.makeText(getApplicationContext(), str, Toast.LENGTH_SHORT).show(); } /** * Initialize the List adapter * @param objects */ private void initList(List<BluetoothDevice> objects) { final MyAdapter adapter = new MyAdapter(getApplicationContext(), R.layout.list_item, R.id.lstContent, objects); listView.setAdapter(adapter); listView.setOnItemClickListener(new AdapterView.OnItemClickListener() { @Override public void onItemClick(AdapterView<?> parent, View view, int position, long id) { adapter.setSelectedIndex(position); connect.setEnabled(true); } }); } /** * Searches for paired devices. Doesn't do a scan! Only devices which are paired through Settings->Bluetooth * will show up with this. I didn't see any need to re-build the wheel over here * @author ryder * */ private class SearchDevices extends AsyncTask<Void, Void, List<BluetoothDevice>> { @Override protected List<BluetoothDevice> doInBackground(Void... params) { Set<BluetoothDevice> pairedDevices = mBTAdapter.getBondedDevices(); List<BluetoothDevice> listDevices = new ArrayList<BluetoothDevice>(); for (BluetoothDevice device : pairedDevices) { listDevices.add(device); } return listDevices; } @Override protected void onPostExecute(List<BluetoothDevice> listDevices) { super.onPostExecute(listDevices); if (listDevices.size() > 0) { MyAdapter adapter = (MyAdapter) listView.getAdapter(); adapter.replaceItems(listDevices); } else { msg("No paired devices found, please pair your serial BT device and try again"); } } } /** * Custom adapter to show the current devices in the list. This is a bit of an overkill for this * project, but I figured it would be good learning * Most of the code is lifted from somewhere but I can't find the link anymore * @author ryder * */ private class MyAdapter extends ArrayAdapter<BluetoothDevice> { private int selectedIndex; private Context context; private int selectedColor = Color.parseColor("#abcdef"); private List<BluetoothDevice> myList; public MyAdapter(Context ctx, int resource, int textViewResourceId, List<BluetoothDevice> objects) { super(ctx, resource, textViewResourceId, objects); context = ctx; myList = objects; selectedIndex = -1; } public void setSelectedIndex(int position) { selectedIndex = position; notifyDataSetChanged(); } public BluetoothDevice getSelectedItem() { return myList.get(selectedIndex); } @Override public int getCount() { return myList.size(); } @Override public BluetoothDevice getItem(int position) { return myList.get(position); } @Override public long getItemId(int position) { return position; } private class ViewHolder { TextView tv; } public void replaceItems(List<BluetoothDevice> list) { myList = list; notifyDataSetChanged(); } public List<BluetoothDevice> getEntireList() { return myList; } @Override public View getView(int position, View convertView, ViewGroup parent) { View vi = convertView; ViewHolder holder; if (convertView == null) { vi = LayoutInflater.from(context).inflate(R.layout.list_item, null); holder = new ViewHolder(); holder.tv = (TextView) vi.findViewById(R.id.lstContent); vi.setTag(holder); } else { holder = (ViewHolder) vi.getTag(); } if (selectedIndex != -1 && position == selectedIndex) { holder.tv.setBackgroundColor(selectedColor); } else { holder.tv.setBackgroundColor(Color.WHITE); } BluetoothDevice device = myList.get(position); holder.tv.setText(device.getName() + "\n " + device.getAddress()); return vi; } } @Override public boolean onCreateOptionsMenu(Menu menu) { // Inflate the menu; this adds items to the action bar if it is present. //getMenuInflater().inflate(R.menu.homescreen, menu); return true; } @Override public boolean onOptionsItemSelected(MenuItem item) { switch (item.getItemId()) { case R.id.action_settings: Intent intent = new Intent(MainActivity.this, PreferencesActivity.class); startActivityForResult(intent, SETTINGS); break; } return super.onOptionsItemSelected(item); } } |
To remove these error just click on red bulb and click on create layout resource file “list_item”

And press ok

As you can see list_item.xml file is create open it and paste the code

list_item.xml code:
|
1 2 3 4 5 6 7 8 9 10 11 12 13 14 15 16 17 18 |
<LinearLayout xmlns:android="http://schemas.android.com/apk/res/android" android:layout_width="fill_parent" android:layout_height="fill_parent" android:gravity="center_vertical" > <!-- Defining where should text be placed. You set you text color here --> <TextView android:id="@+id/lstContent" android:layout_width="fill_parent" android:layout_height="wrap_content" android:layout_margin="4dip" android:textSize="20sp" android:gravity="left" android:padding="5dp" android:textColor="#000000" /> </LinearLayout> |
So the list_item error is removed

To remove this errer just click on red bulb and then click on id value resource “action_sitting”

And press ok


Now we create the main controlling screen, for this right click on package folder
Then New
Then Activity
And click on the Empty Activity

Enter the activity name which you want and click finish

Now open activity_monitoring_screen.xml and change the layout form constraint layout to
LinearLayout

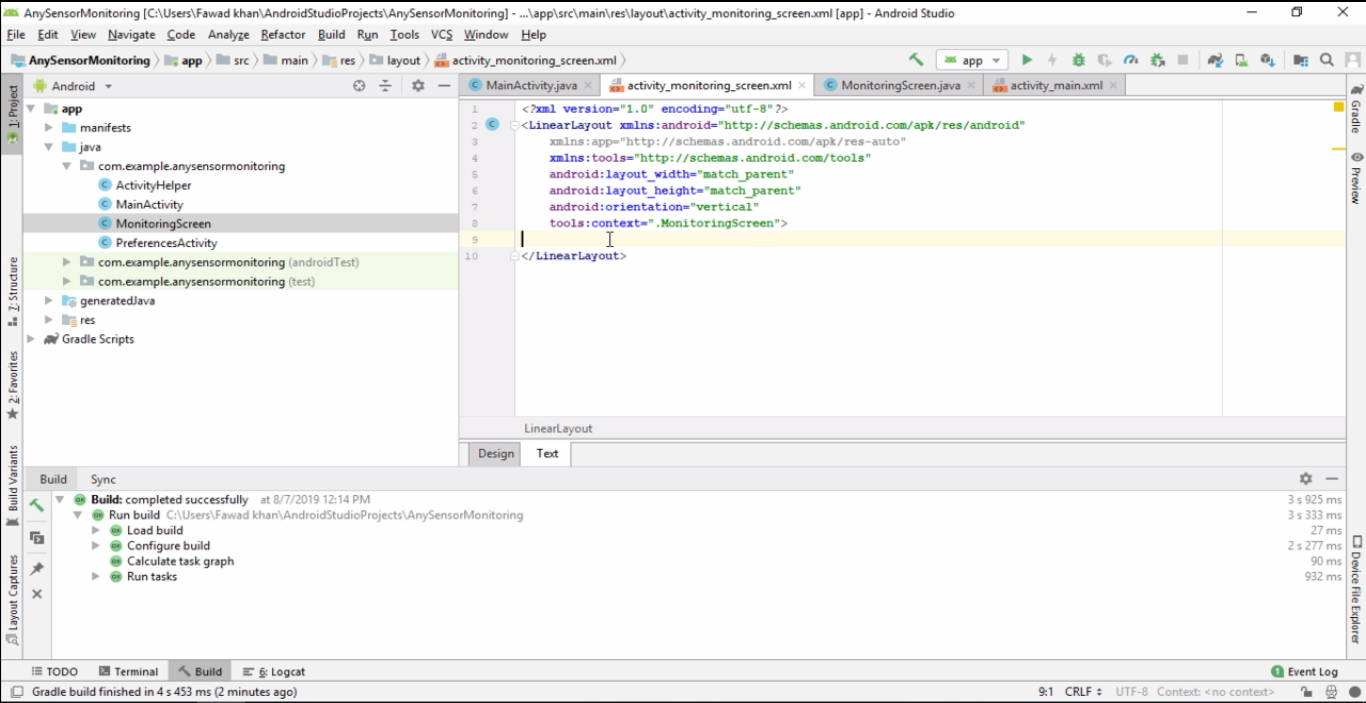
activity_monitoring_screen.xml code:
|
1 2 3 4 5 6 7 8 9 10 11 12 13 14 15 16 17 18 19 20 21 22 23 24 25 26 27 28 29 30 31 32 33 34 35 36 37 38 39 40 41 42 43 44 45 46 47 48 49 50 51 52 53 54 55 56 57 58 59 60 61 62 63 64 65 66 67 68 69 70 71 |
<?xml version="1.0" encoding="utf-8"?> <LinearLayout xmlns:android="http://schemas.android.com/apk/res/android" xmlns:app="http://schemas.android.com/apk/res-auto" xmlns:tools="http://schemas.android.com/tools" android:layout_width="match_parent" android:layout_height="match_parent" android:orientation="vertical" tools:context=".MonitoringScreen"> <LinearLayout android:layout_width="fill_parent" android:layout_height="wrap_content" android:orientation="horizontal" > <Button android:id="@+id/btnClearInput" android:layout_width="0dp" android:layout_height="fill_parent" android:layout_weight="5" android:text="Clear Input" /> </LinearLayout> <LinearLayout android:layout_width="match_parent" android:layout_height="match_parent" android:orientation="vertical"> <CheckBox android:id="@+id/chkScroll" android:layout_width="fill_parent" android:layout_height="wrap_content" android:layout_margin="0dp" android:checked="true" android:text="Scroll" /> <CheckBox android:id="@+id/chkReceiveText" android:layout_width="fill_parent" android:layout_height="wrap_content" android:checked="true" android:text="Read" /> <ScrollView android:id="@+id/viewScroll" android:layout_width="fill_parent" android:layout_height="0dp" android:layout_weight="1" > <TextView android:id="@+id/txtReceive" android:layout_width="fill_parent" android:layout_height="wrap_content" android:layout_gravity="top" android:background="#eeeeee" android:typeface="monospace" android:hint="Message shows up here ..." android:scrollbars="vertical" android:layout_marginTop="20dp"/> </ScrollView> </LinearLayout> </LinearLayout> |

To check the design layout for this change from text mode to the design. As you can see at the end of the coding there are two button with captions Design and Text. You can click on the Design button.

Now open MonitoringScreen.java

MonitoringScreen.java code:
|
1 2 3 4 5 6 7 8 9 10 11 12 13 14 15 16 17 18 19 20 21 22 23 24 25 26 27 28 29 30 31 32 33 34 35 36 37 38 39 40 41 42 43 44 45 46 47 48 49 50 51 52 53 54 55 56 57 58 59 60 61 62 63 64 65 66 67 68 69 70 71 72 73 74 75 76 77 78 79 80 81 82 83 84 85 86 87 88 89 90 91 92 93 94 95 96 97 98 99 100 101 102 103 104 105 106 107 108 109 110 111 112 113 114 115 116 117 118 119 120 121 122 123 124 125 126 127 128 129 130 131 132 133 134 135 136 137 138 139 140 141 142 143 144 145 146 147 148 149 150 151 152 153 154 155 156 157 158 159 160 161 162 163 164 165 166 167 168 169 170 171 172 173 174 175 176 177 178 179 180 181 182 183 184 185 186 187 188 189 190 191 192 193 194 195 196 197 198 199 200 201 202 203 204 205 206 207 208 209 210 211 212 213 214 215 216 217 218 219 220 221 222 223 224 225 226 227 228 229 230 231 232 233 234 235 236 237 238 239 240 241 242 243 244 245 246 247 248 249 250 251 252 253 254 255 256 257 258 259 260 261 262 263 264 265 266 267 268 269 270 271 272 273 274 275 276 277 278 279 280 |
package com.example.anysensormonitoring; import java.io.IOException; import java.io.InputStream; import java.util.UUID; import android.app.Activity; import android.app.ProgressDialog; import android.bluetooth.BluetoothAdapter; import android.bluetooth.BluetoothDevice; import android.bluetooth.BluetoothSocket; import android.content.Intent; import android.os.AsyncTask; import android.os.Bundle; import android.text.method.ScrollingMovementMethod; import android.util.Log; import android.view.View; import android.view.View.OnClickListener; import android.widget.Button; import android.widget.CheckBox; import android.widget.EditText; import android.widget.ScrollView; import android.widget.TextView; import android.widget.Toast; public class MonitoringScreen extends Activity { private static final String TAG = "BlueTest5-MainActivity"; private int mMaxChars = 50000;//Default private UUID mDeviceUUID; private BluetoothSocket mBTSocket; private ReadInput mReadThread = null; private boolean mIsUserInitiatedDisconnect = false; // All controls here private TextView mTxtReceive; private Button mBtnClearInput; private ScrollView scrollView; private CheckBox chkScroll; private CheckBox chkReceiveText; private boolean mIsBluetoothConnected = false; private BluetoothDevice mDevice; private ProgressDialog progressDialog; @Override protected void onCreate(Bundle savedInstanceState) { super.onCreate(savedInstanceState); setContentView(R.layout.activity_monitoring_screen); ActivityHelper.initialize(this); Intent intent = getIntent(); Bundle b = intent.getExtras(); mDevice = b.getParcelable(MainActivity.DEVICE_EXTRA); mDeviceUUID = UUID.fromString(b.getString(MainActivity.DEVICE_UUID)); mMaxChars = b.getInt(MainActivity.BUFFER_SIZE); Log.d(TAG, "Ready"); mTxtReceive = (TextView) findViewById(R.id.txtReceive); chkScroll = (CheckBox) findViewById(R.id.chkScroll); chkReceiveText = (CheckBox) findViewById(R.id.chkReceiveText); scrollView = (ScrollView) findViewById(R.id.viewScroll); mBtnClearInput = (Button) findViewById(R.id.btnClearInput); mTxtReceive.setMovementMethod(new ScrollingMovementMethod()); mBtnClearInput.setOnClickListener(new OnClickListener() { @Override public void onClick(View arg0) { mTxtReceive.setText(""); } }); } private class ReadInput implements Runnable { private boolean bStop = false; private Thread t; public ReadInput() { t = new Thread(this, "Input Thread"); t.start(); } public boolean isRunning() { return t.isAlive(); } @Override public void run() { InputStream inputStream; try { inputStream = mBTSocket.getInputStream(); while (!bStop) { byte[] buffer = new byte[256]; if (inputStream.available() > 0) { inputStream.read(buffer); int i = 0; /* * This is needed because new String(buffer) is taking the entire buffer i.e. 256 chars on Android 2.3.4 http://stackoverflow.com/a/8843462/1287554 */ for (i = 0; i < buffer.length && buffer[i] != 0; i++) { } final String strInput = new String(buffer, 0, i); /* * If checked then receive text, better design would probably be to stop thread if unchecked and free resources, but this is a quick fix */ if (chkReceiveText.isChecked()) { mTxtReceive.post(new Runnable() { @Override public void run() { mTxtReceive.append(strInput); int txtLength = mTxtReceive.getEditableText().length(); if(txtLength > mMaxChars){ mTxtReceive.getEditableText().delete(0, txtLength - mMaxChars); } if (chkScroll.isChecked()) { // Scroll only if this is checked scrollView.post(new Runnable() { // Snippet from http://stackoverflow.com/a/4612082/1287554 @Override public void run() { scrollView.fullScroll(View.FOCUS_DOWN); } }); } } }); } } Thread.sleep(500); } } catch (IOException e) { // TODO Auto-generated catch block e.printStackTrace(); } catch (InterruptedException e) { // TODO Auto-generated catch block e.printStackTrace(); } } public void stop() { bStop = true; } } private class DisConnectBT extends AsyncTask<Void, Void, Void> { @Override protected void onPreExecute() { } @Override protected Void doInBackground(Void... params) { if (mReadThread != null) { mReadThread.stop(); while (mReadThread.isRunning()) ; // Wait until it stops mReadThread = null; } try { mBTSocket.close(); } catch (IOException e) { // TODO Auto-generated catch block e.printStackTrace(); } return null; } @Override protected void onPostExecute(Void result) { super.onPostExecute(result); mIsBluetoothConnected = false; if (mIsUserInitiatedDisconnect) { finish(); } } } private void msg(String s) { Toast.makeText(getApplicationContext(), s, Toast.LENGTH_SHORT).show(); } @Override protected void onPause() { if (mBTSocket != null && mIsBluetoothConnected) { new DisConnectBT().execute(); } Log.d(TAG, "Paused"); super.onPause(); } @Override protected void onResume() { if (mBTSocket == null || !mIsBluetoothConnected) { new ConnectBT().execute(); } Log.d(TAG, "Resumed"); super.onResume(); } @Override protected void onStop() { Log.d(TAG, "Stopped"); super.onStop(); } @Override protected void onSaveInstanceState(Bundle outState) { // TODO Auto-generated method stub super.onSaveInstanceState(outState); } private class ConnectBT extends AsyncTask<Void, Void, Void> { private boolean mConnectSuccessful = true; @Override protected void onPreExecute() { progressDialog = ProgressDialog.show(MonitoringScreen.this, "Hold on", "Connecting");// http://stackoverflow.com/a/11130220/1287554 } @Override protected Void doInBackground(Void... devices) { try { if (mBTSocket == null || !mIsBluetoothConnected) { mBTSocket = mDevice.createInsecureRfcommSocketToServiceRecord(mDeviceUUID); BluetoothAdapter.getDefaultAdapter().cancelDiscovery(); mBTSocket.connect(); } } catch (IOException e) { // Unable to connect to device e.printStackTrace(); mConnectSuccessful = false; } return null; } @Override protected void onPostExecute(Void result) { super.onPostExecute(result); if (!mConnectSuccessful) { Toast.makeText(getApplicationContext(), "Could not connect to device. Is it a Serial device? Also check if the UUID is correct in the settings", Toast.LENGTH_LONG).show(); finish(); } else { msg("Connected to device"); mIsBluetoothConnected = true; mReadThread = new ReadInput(); // Kick off input reader } progressDialog.dismiss(); } } } |
And finally open the AndroidManifest.xml and add Bluetooth permission

AndroidManifest.xml code:
|
1 2 3 4 5 6 7 8 9 10 11 12 13 14 15 16 17 18 19 20 21 22 23 24 25 26 27 |
<?xml version="1.0" encoding="utf-8"?> <manifest xmlns:android="http://schemas.android.com/apk/res/android" package="com.example.anysensormonitoring"> <uses-permission android:name="android.permission.BLUETOOTH" /> <uses-permission android:name="android.permission.BLUETOOTH_ADMIN" /> <application android:allowBackup="true" android:icon="@mipmap/ic_launcher" android:label="@string/app_name" android:roundIcon="@mipmap/ic_launcher_round" android:supportsRtl="true" android:theme="@style/AppTheme"> <activity android:name=".MonitoringScreen"></activity> <activity android:name=".MainActivity"> <intent-filter> <action android:name="android.intent.action.MAIN" /> <category android:name="android.intent.category.LAUNCHER" /> </intent-filter> </activity> </application> </manifest> |
For testing the app create apk file.so for apk file click on build menu and then then click on build bundle(s)/apk and then build apk

Wait for generating apk file after generating the file a popup dialog will show as dialog shown just click on locate as you can see in the below picture

After clicking on locate a folder will open where the apk is stored then just copy the app-debug.apk file and paste in the phone and install

Download:
Download apk file: sensor app apk file
For the Android app testing and explanation watch video tutorial is given below
Watch Video Tutorial:
Arduino Android App Related Projects:
https://www.electroniclinic.com/android-app-development-to-control-arduino-over-bluetooth-using-android-studio/
https://www.electroniclinic.com/12v-battery-efficiency-monitoring-using-arduino-and-cell-app-with-database/
https://www.electroniclinic.com/unlock-my-car-with-my-phone-start-engine-start-a-c-anti-theft-using-arduino/
https://www.electroniclinic.com/android-hmi-development-control-hmi-touch-screen-using-bluetooth-tft-touch-screen/
https://www.electroniclinic.com/arduino-bluetooth-controlled-robot-using-l298n-motor-driver-android-app/
https://www.electroniclinic.com/pulse-sensor-heartbeat-rate-heart-rate-measurement-using-arduino-bluetooth/
https://www.electroniclinic.com/arduino-bluetooth-smart-lock-using-android-cell-phone-application/
https://www.electroniclinic.com/how-to-use-gsm-and-bluetooth-together-to-monitor-any-sensors-wirelessly-using-arduino/
https://www.electroniclinic.com/wireless-battery-voltage-monitor-using-arduino-and-bluetooth/
https://www.electroniclinic.com/bluetooth-arduino-pin-code-and-name-changing-using-at-commands/
https://www.electroniclinic.com/wireless-temperature-monitoring-system-using-bluetooth/
https://www.electroniclinic.com/8×8-led-matrix-max7219-control-using-bluetooth/
Your guides are great! The step by step walkthough for Android Studio is very good and helped me go from zero to having a functioning app. Thanks so much!!
Thanks so much for the tutorial, it worked perfectly for the project I’m working on.
Just wondering if you know how to solve a small problem, I would like the bluetooth connection to remain active even with the background application. I’m new to Android and I don’t know how to solve it.
Where did the value of potentiometer saved in the Android app that is display on screen. Bcoz I want to store this value in database so from where I get this value?
thank you so much sir but i have one question i want to store this value database but i cant figure out where did the value of potentiometer is stored so that i can transfer this value into database kindly tell me in which file and array/variable the value is stored
This value is not stored, I am just receiving the values and displaying them on the screen.
contact my brother stu_softwareengineering@yahoo.com. This application is actually developed by my brother. you can also visit his website.
https://programmingdigest.com/
i am getting an problem in prefernce file plz tell me what i do
Thanks a lot. It is very good project. I run it but when click on search button it gives message Bluetooth not found. Kindly guide what to do? There is no error in the code.
Your error is fixed. you can reply to this message, and explain how you fixed it. This will help others to solve basic errors.
I am facing problem when click on search button it gives message no bluetooth found. kindly guide
Thanks to Engineer Fawad, my problem is fixed. Actually, i try to run it on Emulator that does not directly support Bluetooth. First of all, i run app on Android cell and before it make sure to enable the usb debugger mode of cell due to that app directly install on my cell and working.
I have a question. I’m struggling to understand why PreferencesActivity class is needed in this project. Can you explain to me what exactly this class is doing?
I want to show what i receive from strInput on a TextView, how can i do that? (with SetText)
Hi there. I’ve been trying to implement a system-based app over your bluetooth connection. I was wondering to have your brother’s answer by email, but it is highly needed for us to have an explanation. We are about to deliver a project and we are running out of time. It would be nice to have your help. I followed your YT channel and also commented I loved your video 🙂
Regards.
Hi, I am facing an issue right now regarding receiving the data from the Arduino I followed all the steps you showed here and tried to implement it on, and also tried to do it with your Apk.file but non of the apps delivered the data into my screen. What do you think the problem is? is it from the Arduino? or the Bluetooth device?