Installing Flutter in Android Studio with simple Flutter Application example
Table of Contents
Description:
Installing Flutter in Android Studio:- in this article, I am going to set the flutter development environment for Android. The process is really simple and straightforward
Installing Flutter in android studio:
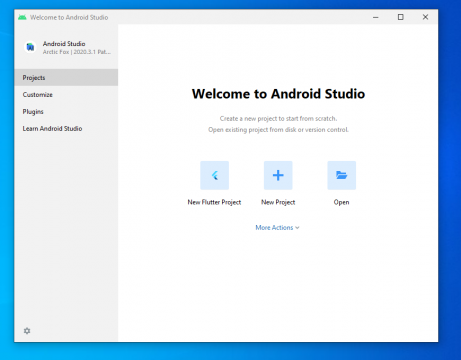
First, open your Android studio

Then click on plugins and search flutter in the search bar
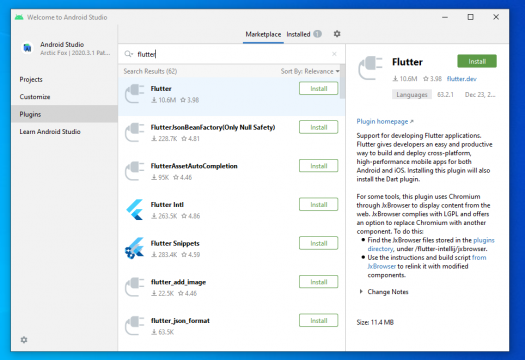
Click on install and it says the plug-in you want to install requires other plugin dart which have to be downloaded.
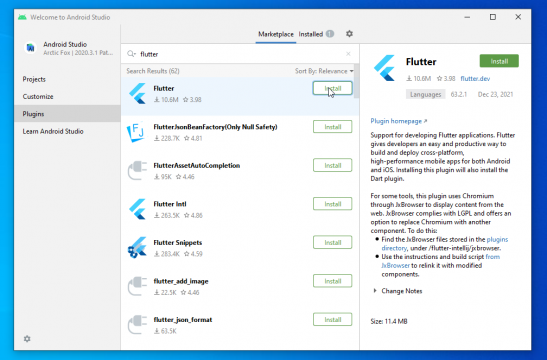

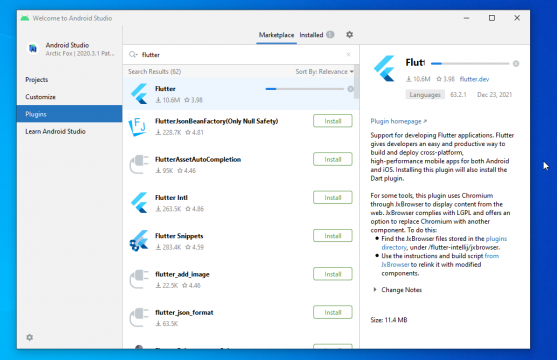
Wait for downloading process
When the flutter downloads, It will say restart ide, so, click on the restart button.
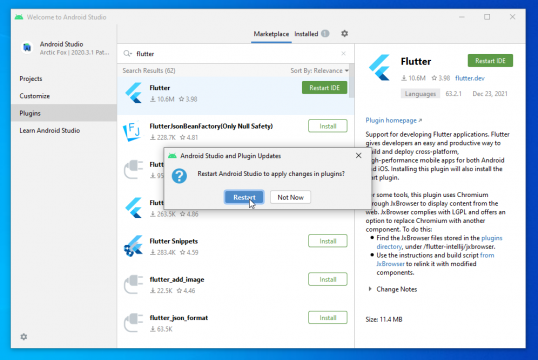
So our flutter plugin is downloaded and installed successfully, as you can see new flutter project.
Set up flutter environment for Android studio:
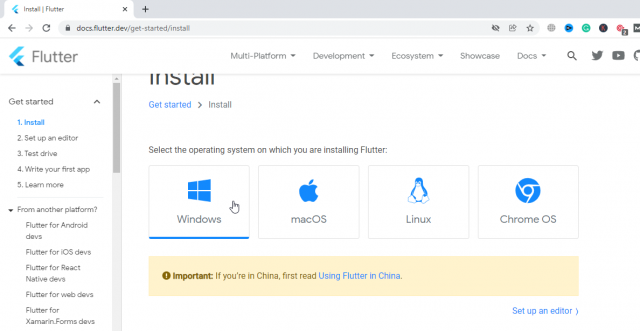
Now we are going to set up a flutter environment which is very simple go to flutter website https://flutter.dev/
And click on get started

And select your operating system according to your needs, so I’m going to click on install on Windows
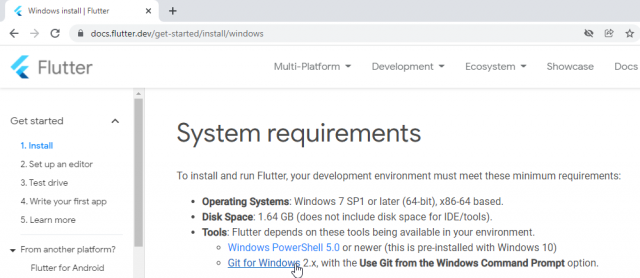
System requirements for flutter :
Operating Systems:
- Windows 7 SP1 or later (64-bit), x86-64 based.
Disk Space:
1.64 GB (does not include disk space for IDE/tools).
Tools:
Flutter depends on these tools being available in your environment.
- Windows PowerShell 5.0 or newer (this is pre-installed with Windows 10)
- Git for Windows 2.x
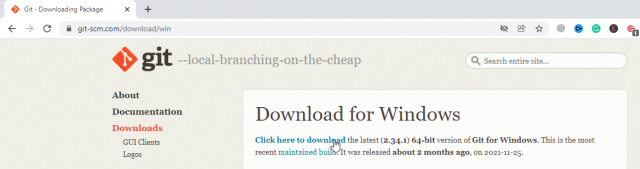
Git for Windows well this is very important if you don’t have Git, it’s going to create problems so click on Git for Windows button. if you don’t have Git installed, you know this is a hyperlink and it will take you to the git website and from there download git and install it.
Now download flutter SDK

Click and download this .zip file or you can also download It via the command line. To open .zip file you will need decompression software like WinRAR, WinZip, 7zip, etc. after extracting it inside It include a SDK folder flutter

Then move it where you want it to be, perhaps in the program file. I will move the flutter SDK folder to the program file
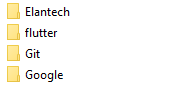
As you can see I moved the flutter folder to the program file.
Android flutter path setting:
Now we need to update the path, this will help you manipulate the commands in flutter for that simply
Right-click on pc and select properties
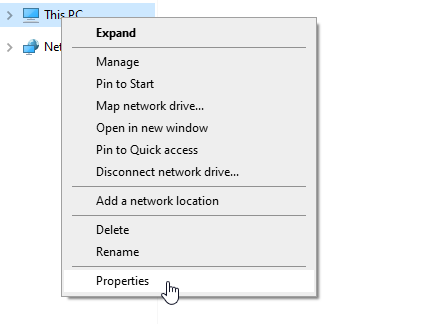
Then click on the advanced system setting
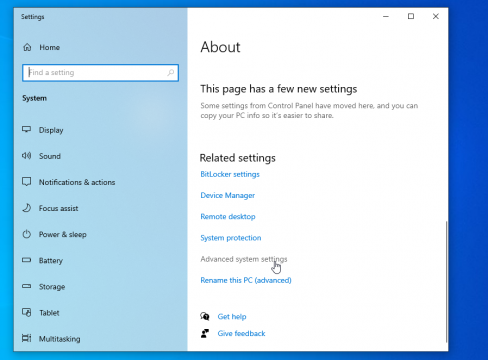
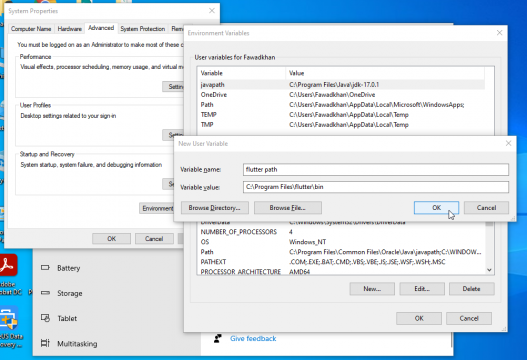
In an advanced system, setting click on an environment variable

In environment variables click on new and past the flutter SDK bin directory path and press ok
So our flutter environment setup is completed for android application development. Now we can make a simple application to test android flutter in android studio.
Start simple Flutter Application in android studio:
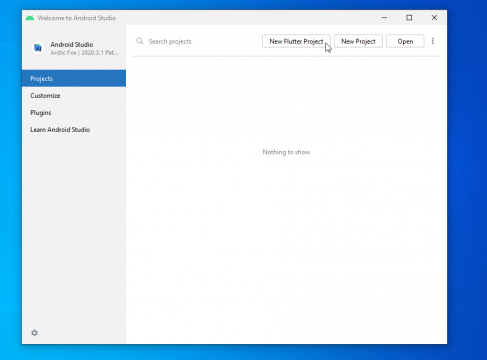
First, open android studio and click on the new flutter project
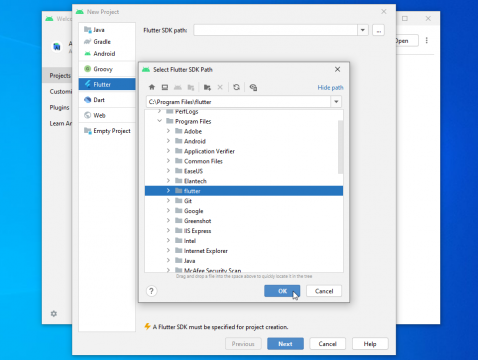
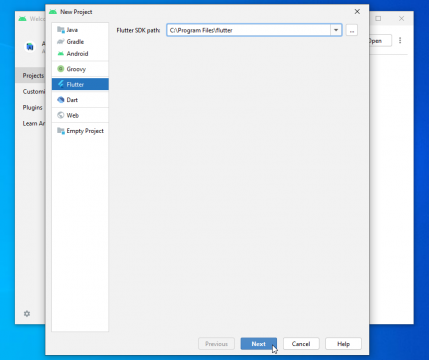
When you click on flutter new project a window will be shown in this window you will see the flutter SDK path so simply click on three dots and set the path where you extracted the flutter SDK in my case I extracted it in program files and then press the ok button
Then press the next button
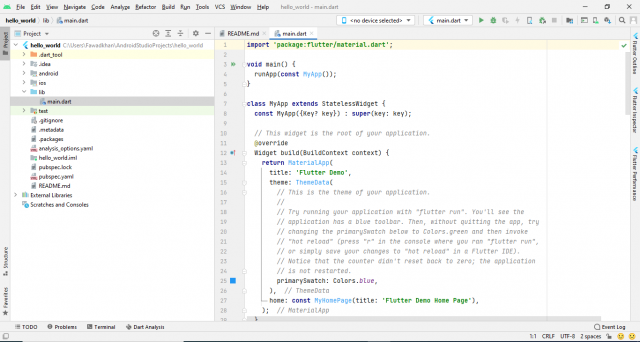
So our application successfully opened
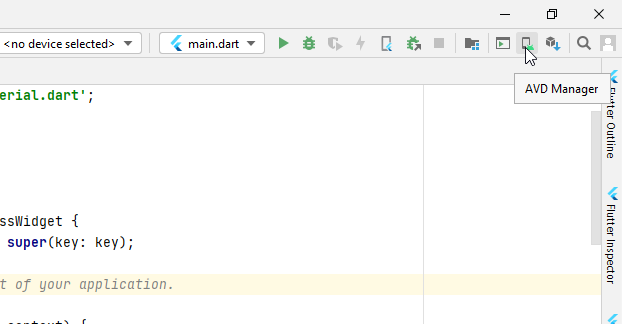
Virtual device setting for flutter in android studio:
First, open AVD(android virtual device) manager
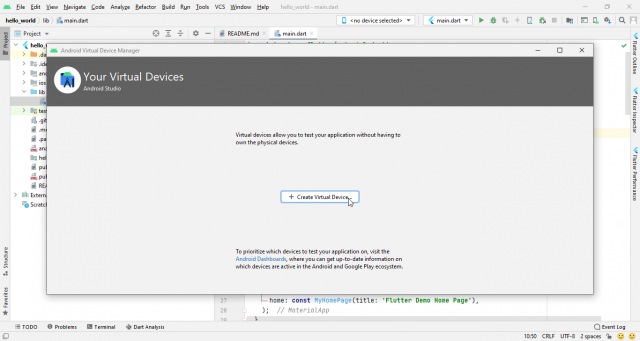
Then click on create virtual device
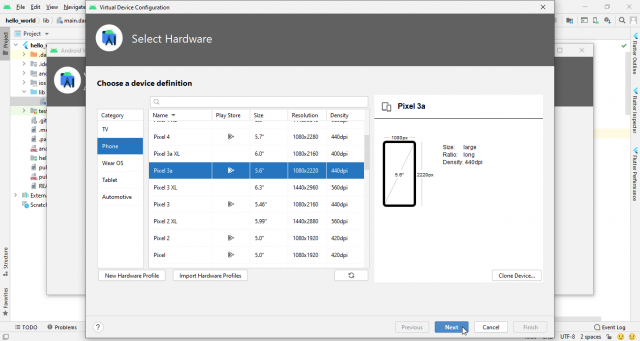
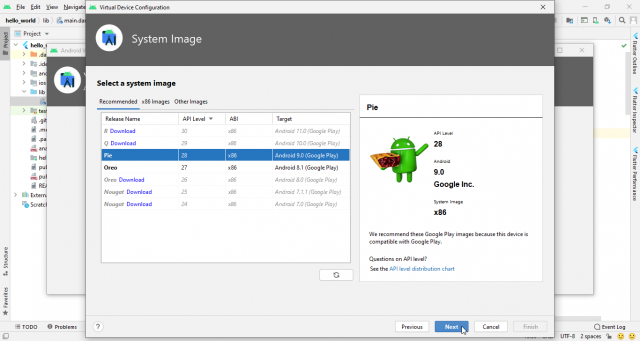
Then click on the phone tab and in the phone tab select the device for application debugging in my case I selected the pixel 3a and press the next button.
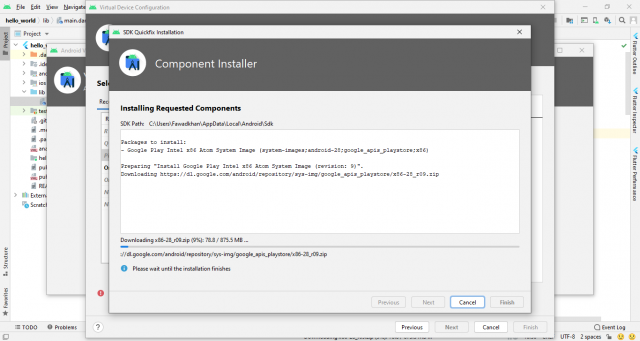
If android version 9 is not installed in your android SDK, then first install the pie android version, for that, simply click on download and wait for the downloading process to complete.
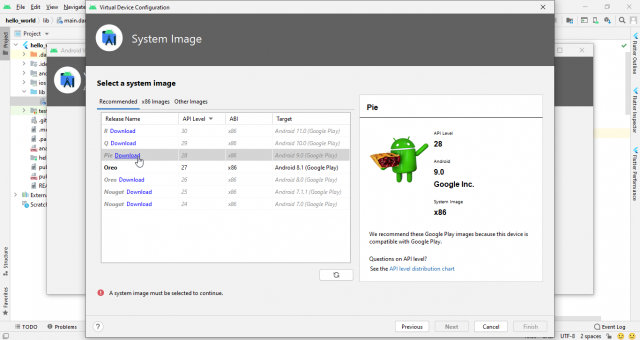
After downloading the pie android version simply click the next button.
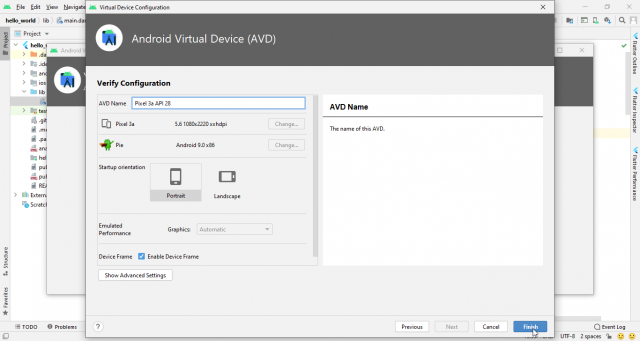
Then select name for the android virtual device (AVD), but it’s not important you can leave it as a default and click on the finish button.
As you can see our android virtual device is created. Now, click on the play button for launching the emulator.
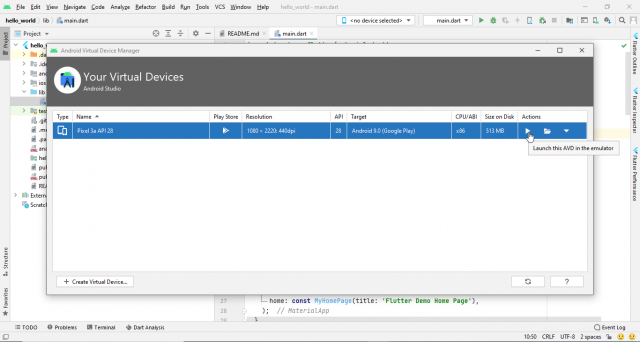
And you can see our emulator is launched.

I just edited the application title from default to programming digest and then pressed on the run button in android studio.
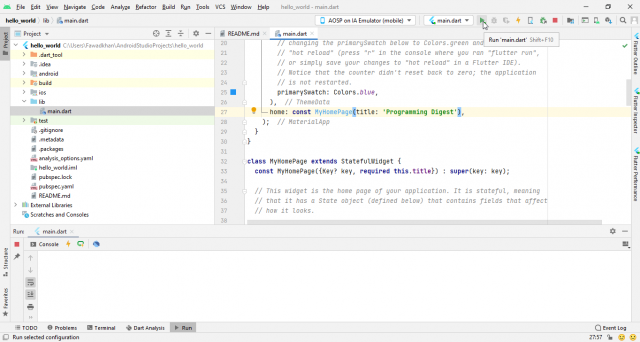

So our application is successfully launched and you can see the programming digest on the title bar which I changed from the default Flutter Demo Home Page.
Program of Flutter in android studio:
|
1 2 3 4 5 6 7 8 9 10 11 12 13 14 15 16 17 18 19 20 21 22 23 24 25 26 27 28 29 30 31 32 33 34 35 36 37 38 39 40 41 42 43 44 45 46 47 48 49 50 51 52 53 54 55 56 57 58 59 60 61 62 63 64 65 66 67 68 69 70 71 72 73 74 75 76 77 78 79 80 81 82 83 84 85 86 87 88 89 90 91 92 93 94 95 96 97 98 99 100 101 102 103 104 105 106 107 108 109 110 111 112 113 114 115 |
import 'package:flutter/material.dart'; void main() { runApp(const MyApp()); } class MyApp extends StatelessWidget { const MyApp({Key? key}) : super(key: key); // This widget is the root of your application. @override Widget build(BuildContext context) { return MaterialApp( title: 'Flutter Demo', theme: ThemeData( // This is the theme of your application. // // Try running your application with "flutter run". You'll see the // application has a blue toolbar. Then, without quitting the app, try // changing the primarySwatch below to Colors.green and then invoke // "hot reload" (press "r" in the console where you ran "flutter run", // or simply save your changes to "hot reload" in a Flutter IDE). // Notice that the counter didn't reset back to zero; the application // is not restarted. primarySwatch: Colors.blue, ), home: const MyHomePage(title: 'Programming Digest'), ); } } class MyHomePage extends StatefulWidget { const MyHomePage({Key? key, required this.title}) : super(key: key); // This widget is the home page of your application. It is stateful, meaning // that it has a State object (defined below) that contains fields that affect // how it looks. // This class is the configuration for the state. It holds the values (in this // case the title) provided by the parent (in this case the App widget) and // used by the build method of the State. Fields in a Widget subclass are // always marked "final". final String title; @override State<MyHomePage> createState() => _MyHomePageState(); } class _MyHomePageState extends State<MyHomePage> { int _counter = 0; void _incrementCounter() { setState(() { // This call to setState tells the Flutter framework that something has // changed in this State, which causes it to rerun the build method below // so that the display can reflect the updated values. If we changed // _counter without calling setState(), then the build method would not be // called again, and so nothing would appear to happen. _counter++; }); } @override Widget build(BuildContext context) { // This method is rerun every time setState is called, for instance as done // by the _incrementCounter method above. // // The Flutter framework has been optimized to make rerunning build methods // fast, so that you can just rebuild anything that needs updating rather // than having to individually change instances of widgets. return Scaffold( appBar: AppBar( // Here we take the value from the MyHomePage object that was created by // the App.build method, and use it to set our appbar title. title: Text(widget.title), ), body: Center( // Center is a layout widget. It takes a single child and positions it // in the middle of the parent. child: Column( // Column is also a layout widget. It takes a list of children and // arranges them vertically. By default, it sizes itself to fit its // children horizontally, and tries to be as tall as its parent. // // Invoke "debug painting" (press "p" in the console, choose the // "Toggle Debug Paint" action from the Flutter Inspector in Android // Studio, or the "Toggle Debug Paint" command in Visual Studio Code) // to see the wireframe for each widget. // // Column has various properties to control how it sizes itself and // how it positions its children. Here we use mainAxisAlignment to // center the children vertically; the main axis here is the vertical // axis because Columns are vertical (the cross axis would be // horizontal). mainAxisAlignment: MainAxisAlignment.center, children: <Widget>[ const Text( 'You have pushed the button this many times:', ), Text( '$_counter', style: Theme.of(context).textTheme.headline4, ), ], ), ), floatingActionButton: FloatingActionButton( onPressed: _incrementCounter, tooltip: 'Increment', child: const Icon(Icons.add), ), // This trailing comma makes auto-formatting nicer for build methods. ); } } |
So, that’s all for now. I hope, you have learned something new from this article. For more programming-related projects, you can visit my other website programmingdigest.com.
“Amazing tutorial! I followed the steps exactly as described, and within no time, I had Flutter up and running in Android Studio. The included example was the perfect starting point for my app development journey. Thanks a bunch!”
“An exceptional guide! I successfully installed Flutter in Android Studio by following this tutorial, and the provided Flutter application example was incredibly helpful for a beginner like me.