Arduino IoT Cloud ESP32, Control an LED
Last Updated on August 24, 2024 by Engr. Shahzada Fahad
Table of Contents
Arduino IOT Cloud ESP32:
Arduino IoT Cloud ESP32, Control an LED- In this tutorial, we will discuss how to get started with the Arduino IoT cloud using ESP32 WiFi + Bluetooth Module. After reading this article, you will be able to make your very first project using the Arduino IoT cloud and start controlling things and you can also monitor different types of sensors. As this article is for the absolute beginners so I will try my best to keep things simpler, for this reason I have decided to start only with the LED. We will be using the ESP32 onboard LED which is connected with the GPIO5. If you learn how to control an LED using the Arduino IoT Cloud then you can control almost anything which you can think of, you can replace an LED with a relay and then you can start controlling higher loads.
Amazon Links:
ESP32 WiFi + Bluetooth Module(Recommended)
*Disclosure: These are affiliate links. As an Amazon Associate I earn from qualifying purchases.
Creating an account on the Arduino IOT cloud:
So to get started with the Arduino IoT Cloud you will need to first create an account on the Arduino official website.
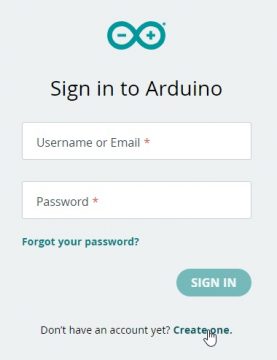
Now when the page is opened, click on the SIGN IN button
![]()
If you are a returning user and you have an account on the Arduino then you can simply log into your account using user username or email and a password. If you are a new user then you can click on the Create one as you can see in the image below.
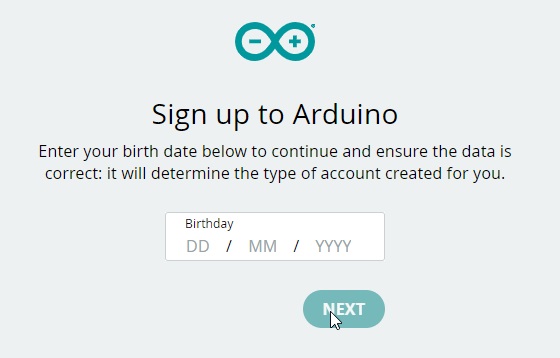
Next, you will need to enter your date of birth and then you can click on the next button to continue.
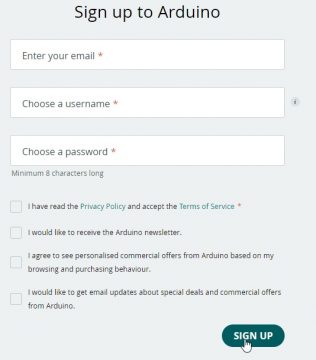
Then enter your email address, user name, and password and finally, click on the SIGN UP, make sure you have checked the boxes.
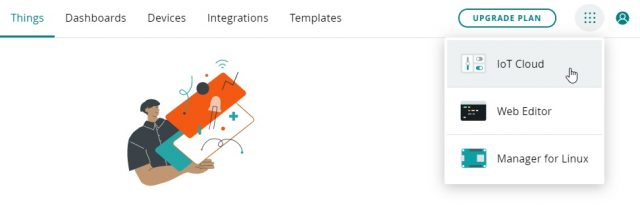
This was the hard part, after registering an account then you are all set. One more thing that I would like to mention is that I am using a free PLAN as I am using the Arduino IoT Cloud for the first time and I am sure you guys may also be using the FREE PLAN. It doesn’t matter if you are using a Free Plan or a Paid Plan the programming and making is exactly the same, the only difference is that with paid plans you can use more things and get more privileges. Anyways, after creating the account, click on the IoT cloud.
Now we will click on the create thing
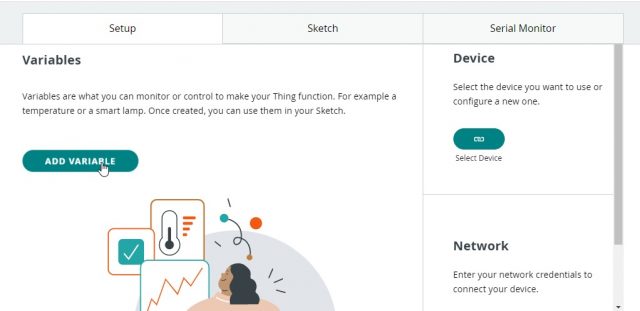
Now, here, first of all, we need to create a variable, so just click on add variable.
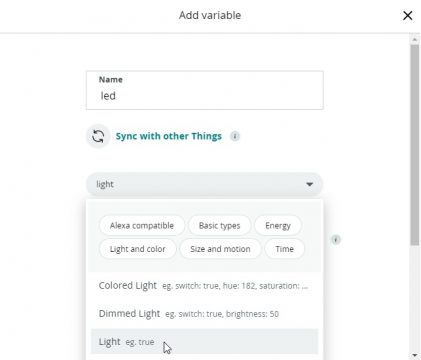
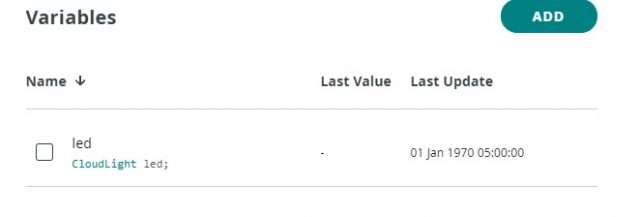
After that, you just need to name the variable, so as we want to make a project for controlling an LED. So we will require only one variable. So let’s just add it. I will name the first variable as led and select the light.
Now, in the variable permission select the read and write and in variable update policy select the on change and then click on the add variable.
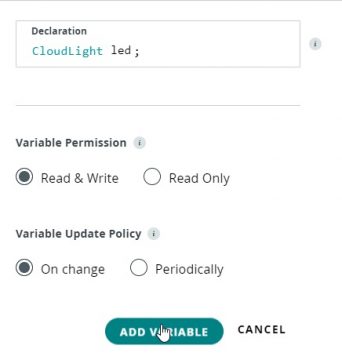
When we click on the add variable, it will be added to the Variables list along with that you can also see the Last Value and the Last Update. So, our variable name is led and its type is CloudLight.
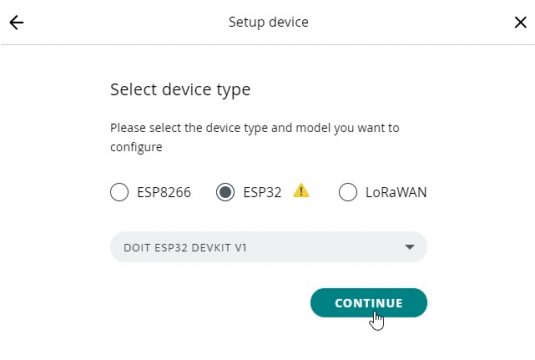
After this, we will now need to select a device, now it can be an Arduino board or a third party device like ESP8266, ESP32, etc. But as in the tutorial, I am using the ESP32 Module so I will select the ESP32 Dev Module.
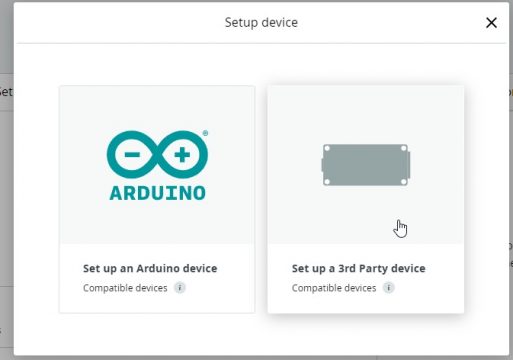
So Arduino recently started accepting the third-party devices like the ESP8266 and ESP32 as well. So ESP32 is a third-party device, I will select a third-party device here select esp32 and i will select the model as do it ESP32 Dev Module.
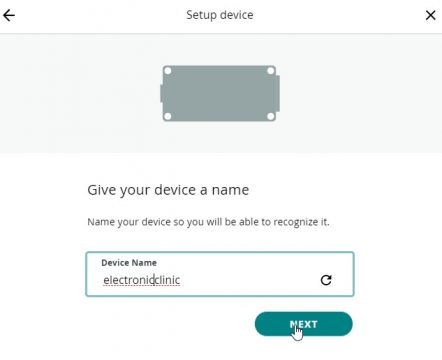
After that click on continue we need to name the device, let’s just name it as electronicclinic special character is not allowed and click on the Next button.
So after adding your device, it will be creating two credentials we can save, one is the device id and the next is the secret key.
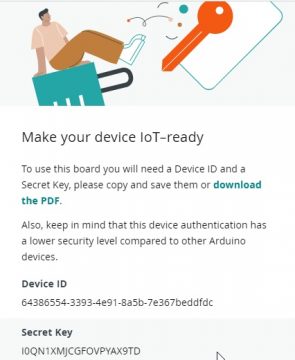
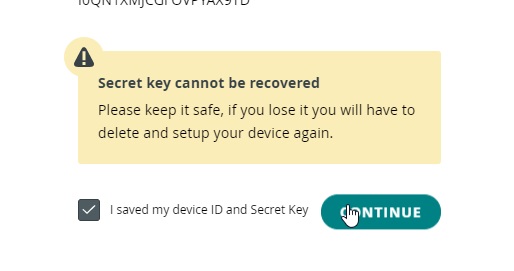
Now we need to save both parameters, we can say inside our computer because we will be requiring these parameters at the time of coding, so for that, you just need to click on download the pdf and it will automatically download the credentials pdf on your computer. The pdf containing all the data, after that, click on I saved my device id and secret key and click on continue.
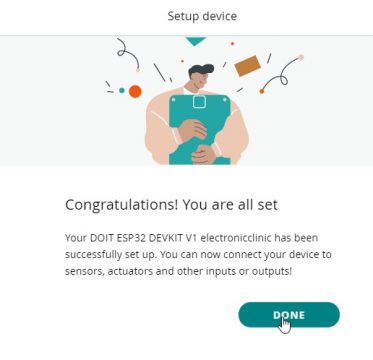
Now with this, we have successfully added a device as well and click on the done.
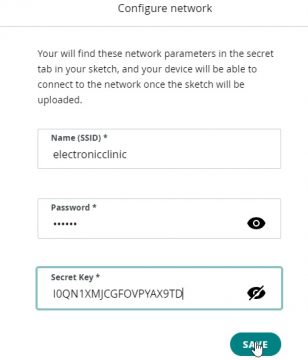
Now we need to provide the wi-fi credentials because this is an IoT project and this esp32 board does require internet connectivity. So just click on this configure button
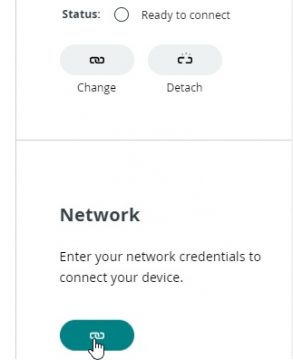
Now provide your SSID name, I will provide the SSID name of my wifi router after that I will provide the password of my router and after that here we have to provide the secret key. Now you can get the secret key from this particular pdf file which we just downloaded. I will simply copy it and paste that in the secret key option and click on the Save button.
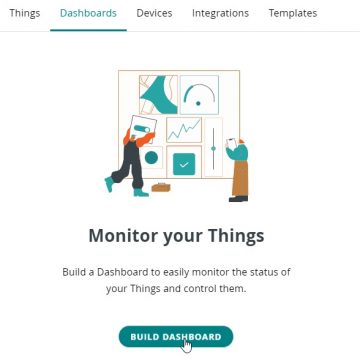
So with this, we have configured our device. Now we will configure the dashboard

Now, it’s time to create our dashboard.
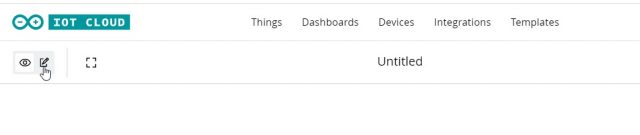
Now the dashboard is created with the name untitled now here I will click on the edit icon on the dashboard.
Now I will click on add, to add different widgets, so here are all the available widgets for our projects. They are kind of limited widgets if we compare them with the Blynk IoT platform but they are all the important widgets. We can say and it will be enough for the majority of our projects.
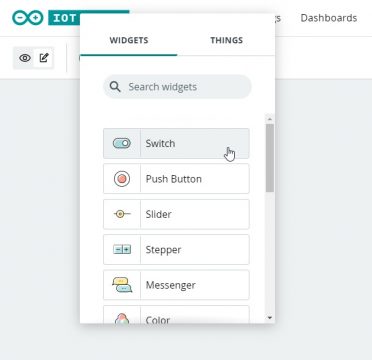
So first of all, I will add a switch to control the led. I will name it as led and I will link a variable to this switch.
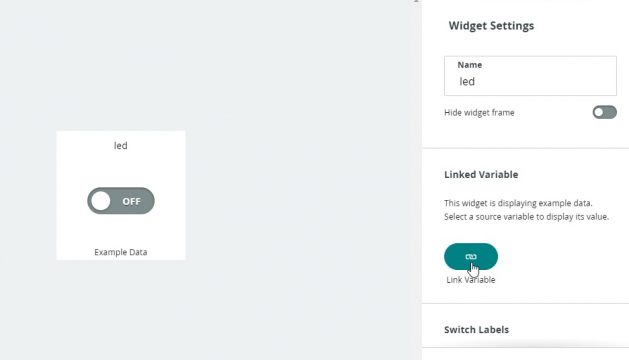
So we need to define on which variable to send the data of the switch widget so I will select the led here I will click on link variable so the led variable is linked with this button
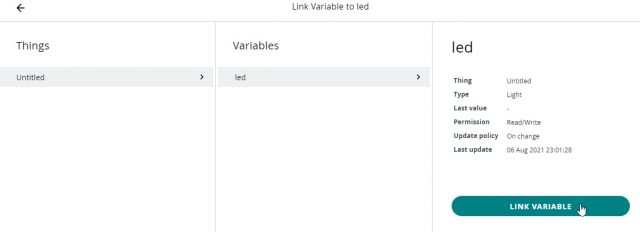
After that I will simply click on done so with this we have successfully configured the first widget.
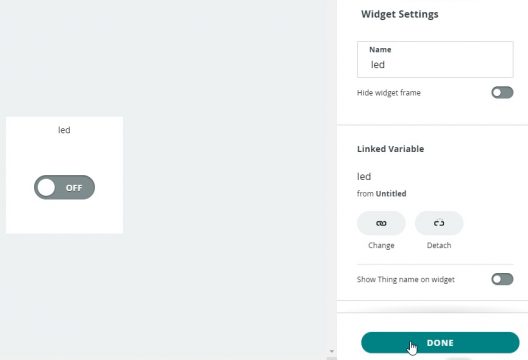
Now the widget is created.
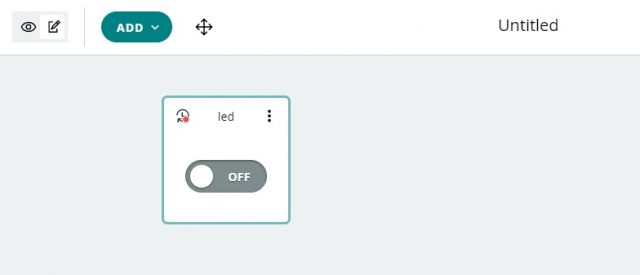
Now one interesting feature of the Arduino IoT cloud platform is that you don’t need to create a separate dashboard for mobile application and the web application whatever you create inside the web application it will be reflected directly to your mobile application without doing any changes. So both the dashboard is common dashboards we can say unlike the Blynk IoT platform Blynk offers a web dashboard and mobile dashboard separately so, that’s it we have successfully edited the dashboard.
Arduino IoT Cloud Led Control, Code:
Now, we will write the code to control the led and for this we will click the thing and now click on the sketch option.

Now, one very great thing about this Arduino IoT cloud platform is you don’t even need to have any software any library to be installed onto your computer. You just need to have a basic computer with internet connectivity and all the things will be done inside this IoT. Arduino IoT cloud platform provides the online Arduino IDE or we can say code editor software with all the libraries already included on it, so this is kind of a plus point for Arduino because we don’t require anything other than a computer with internet connectivity. You will need to download and install the ArduinoCreatAgent.
The variable is already declared which is led by this cloud platform. After that, all the necessary lines are already added
|
1 2 3 4 5 6 7 8 9 10 11 12 13 14 15 16 17 18 19 20 21 22 23 24 25 26 27 28 29 30 31 32 33 34 35 36 37 38 39 40 41 42 43 44 45 46 47 48 |
<span style="font-family: 'times new roman', times, serif; font-size: 14pt;">/* Sketch generated by the ArduinoIoT Cloud Thing "Untitled" https://create.arduino.cc/cloud/things/33307ca4-9fb6-45e9-95c4-b31bbb07aa41 ArduinoIoT Cloud Variables description The following variables are automatically generated and updated when changes are made to the Thing CloudLight led; Variables which are marked as READ/WRITE in the Cloud Thing will also have functions which are called when their values are changed from the Dashboard. These functions are generated with the Thing and added at the end of this sketch. */ #include "thingProperties.h" void setup() { pinMode(2,OUTPUT); // Initialize serial and wait for port to open: Serial.begin(9600); // This delay gives the chance to wait for a Serial Monitor without blocking if none is found delay(1500); // Defined in thingProperties.h initProperties(); // Connect to ArduinoIoT Cloud ArduinoCloud.begin(ArduinoIoTPreferredConnection); /* The following function allows you to obtain more information related to the state of network and IoT Cloud connection and errors the higher number the more granular information you’ll get. The default is 0 (only errors). Maximum is 4 */ setDebugMessageLevel(2); ArduinoCloud.printDebugInfo(); } void loop() { ArduinoCloud.update(); // Your code here } </span> |
Now we just need to embed the logic for our project. So the onLEDChange function is already created so as soon as the status of the button changes this function will be called. Now here we have to define what we have to do as soon as the button is changed. So I want to turn on and off the led based on the button status. So for that, i will write the command
|
1 2 3 4 5 6 7 8 9 10 11 |
<span style="font-family: 'times new roman', times, serif; font-size: 14pt;">void onLedChange() { if (led==1) { digitalWrite(2,HIGH); // update this pin if your led is connected with another gpio } if (led==0) { digitalWrite(2,LOW); } } </span> |
Complete code:
|
1 2 3 4 5 6 7 8 9 10 11 12 13 14 15 16 17 18 19 20 21 22 23 24 25 26 27 28 29 30 31 32 33 34 35 36 37 38 39 40 41 42 43 44 45 46 47 48 49 50 51 52 53 54 55 56 57 58 59 |
<span style="font-family: 'times new roman', times, serif; font-size: 14pt;">/* Sketch generated by the Arduino IoT Cloud Thing "Untitled" https://create.arduino.cc/cloud/things/33307ca4-9fb6-45e9-95c4-b31bbb07aa41 Arduino IoT Cloud Variables description The following variables are automatically generated and updated when changes are made to the Thing CloudLight led; Variables which are marked as READ/WRITE in the Cloud Thing will also have functions which are called when their values are changed from the Dashboard. These functions are generated with the Thing and added at the end of this sketch. */ #include "thingProperties.h" void setup() { pinMode(2, OUTPUT); // Initialize serial and wait for port to open: Serial.begin(9600); // This delay gives the chance to wait for a Serial Monitor without blocking if none is found delay(1500); // Defined in thingProperties.h initProperties(); // Connect to ArduinoIoT Cloud ArduinoCloud.begin(ArduinoIoTPreferredConnection); /* The following function allows you to obtain more information related to the state of network and IoT Cloud connection and errors the higher number the more granular information you’ll get. The default is 0 (only errors). Maximum is 4 */ setDebugMessageLevel(2); ArduinoCloud.printDebugInfo(); } void loop() { ArduinoCloud.update(); // Your code here } void onLedChange() { if (led == 1) { digitalWrite(2, HIGH); } else { digitalWrite(2,LOW); } } </span> |
If the data of the led variable is coming as one means the button is turned on and it will turn on the led.
Now the code is completed and we will click on the compile button
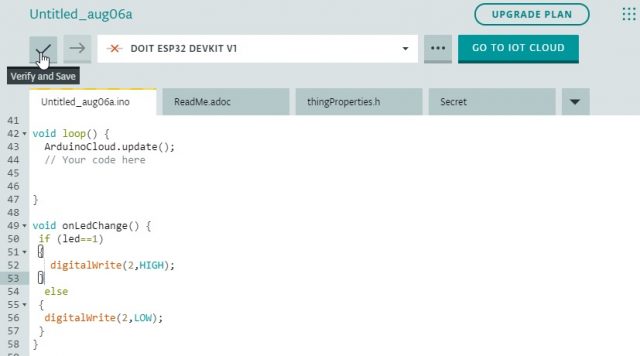
After successfully compiling the code we will click on the go-to IoT cloud. Now in order to upload the code, we will first install the Arduino agent by click on the learn more

Now click on the agent download
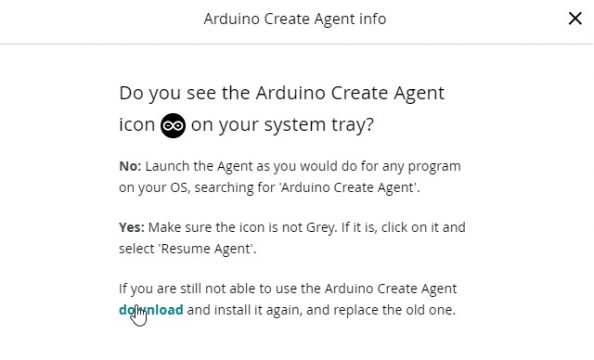
After downloading the agent install it on the computer. We will be able to upload the code to the esp32.
Now, if you open the Dashboard, you will be able to control your LED using your computer or you can use a mobile app. Now for the mobile app, you will need to download the IoS or Android supported app designed by Arduino. Open the Playstore on your cell phone and search for the Arduino IoT cloud Remote, install the App, enter your login details, and then you are all set. So, anything that you have created on the dashboard, the same widgets will be added to your mobile dashboard as well, you don’t need to do anything at all. So, that’s all for now and I hope you find this article informative.
Discover more from Electronic Clinic
Subscribe to get the latest posts sent to your email.


