Matlab Interfacing with Arduino, Matlab Support Package
Last Updated on September 8, 2021 by Engr. Shahzada Fahad
Table of Contents
Matlab interfacing with Arduino:
Matlab Interfacing with Arduino, Matlab Support Package- In my previous article I explained how to make simple GUI application in Matlab the purpose of this article is to help you get started with the GUI designing in Matlab. This is my first getting started tutorial on the Arduino and Matlab together to control something. We usually need an Arduino code to control or monitor something connected with the i/o pins of the Arduino boards. But in this tutorial we won’t need Arduino code “isn’t it amazing?”. In this article we will discuss about the MATLAB support package for Arduino Hardware. Matlab support package is basically a MATLAB add-on that will allow you to write MATLAB code which is then compiled, loaded, and executed on Arduino. This Matlab support package enables you to perform tasks like reading and writing to i/o pins on an Arduino board, using that Arduino board to connect with peripheral devices via i2c or SPI as well as a whole host of other functionalities and way you can control an Arduino board from MATLAB just note though that it actually does not support all the hardware functionality across all the boards. So if you need to be accessing all the different functionalities on board an Arduino board you will need to use the native Arduino integrated development environment. MATLAB Support Package for Arduino Hardware allow us to take that MATLAB code that we will write in the Matlab and the Arduino board that is connected through USB compile that MATLAB send it over to the Arduino. Before you start with the MATLAB support package, first make sure you the latest version of the Matlab installed on your computer. Read my article on how to install the Matlab and how to start using it.
Installing MATLAB support package for the Arduino:
Now to get the MATLAB Support Package for Arduino Hardware click on the Home tab come over to the add-on buttons click this drop down and come all the way down to get hardware support packages as you can see in the image given below.

Now wait for a few seconds and after few seconds the add-on Explorer pop-up the MATLAB Support Package for Arduino Hardware appears to be the number one click on it.

Now we will go ahead and click on it and we should see a page loading which will allow us to install click on the install button.

Now after clicking on the install a dialog box will appear and if you have no account in the MathWorks first of all, we will need to create an account by clicking on create one!

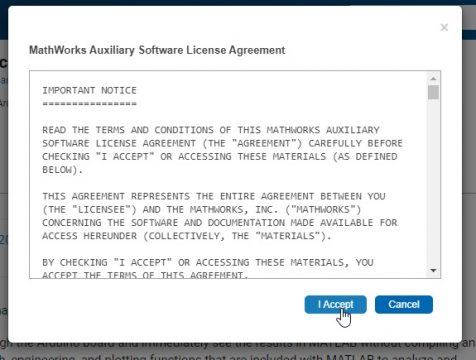
Now after creating account the installation will start and click on I accept button.
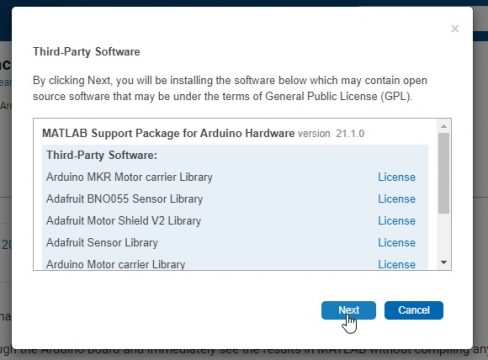
Now the support package for Arduino Hardware actually requires some third-party software and namely the ones that are listed so it is going to install those at the same time obviously these apparently have their own licenses to look at you feel free to do that if you like I am fairly comfortable with them. So I acknowledge that I want to install these third-party pieces of software and accept their license by just going ahead and clicking next button.
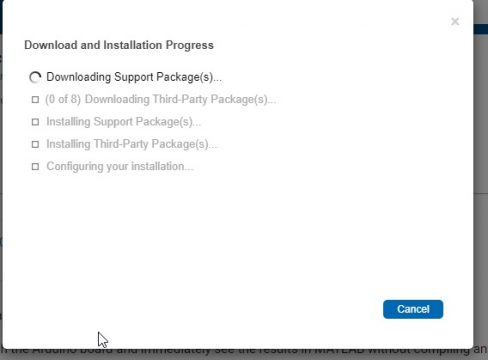
We are finally downloading and installing the third party software so will wait for few minutes.
After the installation is complete click on the Setup Now button.

Arduino USB driver setup will start up and click on the next button.

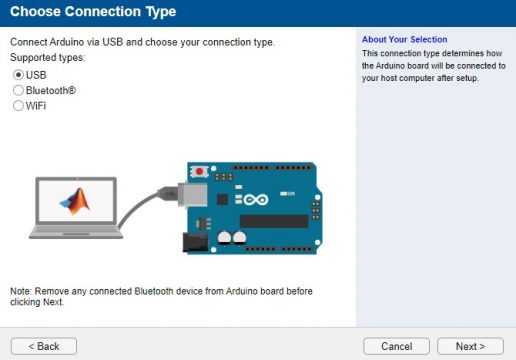
Then we will select the connection type through which we will connect the Arduino and click on the next.
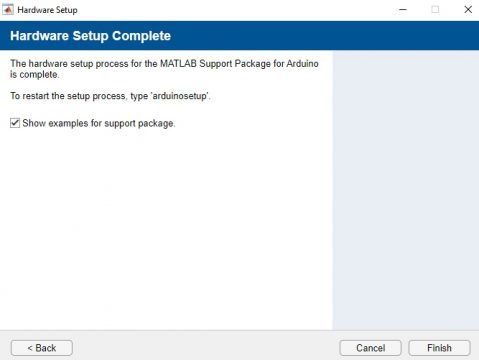
Now the hardware setup is completed and we will click on the finish and restart the MATLAB.
Flashing or blinking LED with MATLAB:
We are going to do a very simple example script to demonstrate functionality and make sure that we have this entire process is set up, so let’s go ahead before we actually write any code we will plug Arduino just to make sure that the drivers were installed correctly so before we do the actual physical plugging in let’s go ahead and start up the device manager in which we will see at which port is our Arduino installed. In our case the Arduino is installed at the com port 5.

We are going to need that in a little bit, now we will close the device manager and we will come back to MATLAB and start a new script. So in this script what we want to do here is we want to write a MATLAB script that will be compiled loaded on to and executed on the Arduino. So this will be accomplished with the MATLAB support package or Arduino hardware so what we are trying to do here is basically so first of all I am going to go ahead and save the script file I will just put this on the desktop.
So let’s go and get started we will write three commands
|
1 2 3 |
clc clear all close all |
Now go ahead and get some user settings we actually just want to flash the built-in LED on the Arduino board so will define the pin number of the led that we are going to flash. I will make a variable called ledpin and the on board LED in the Arduino is built into the digital 13.
|
1 |
ledpin = 'D13'; |
Now let’s make this thing blink at some rate so maybe you will define:
|
1 |
tblink= 0.5; |
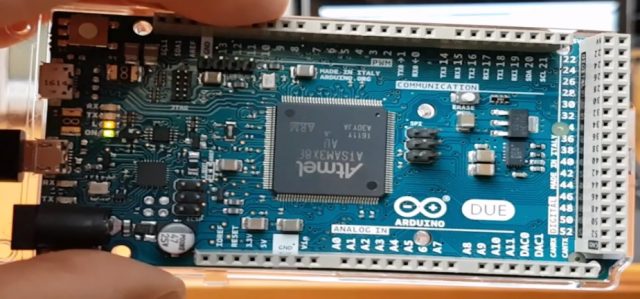
So it should flash every half a second somay be a quarter second on and quarter second off. So what I need to do now is let’s go ahead and use the MATLAB Support Package for Arduino hardware to instantiate an Arduino object that will be used to communicate with the Arduino. First of all, we will define the port number, this is why the device manager trip was useful and in our case the comm port is five and then the board that we are actually using is an Arduino due we better define
|
1 2 |
port = 'COM5'; board = 'Due'; |
Now call the constructor we are going to make an Arduino object with the specific port and board. We will assign that to a variable “a”
|
1 |
a= arduino(port,board); |
Now we will write a small for loop that flashes the LED on and off several times for which I will write the for loop and turn the Arduino LED on so I will just go ahead and use one of the functions:
|
1 2 3 4 5 6 7 8 9 10 |
for k= 1:10 %this command will turn off the led a.writeDigitalPin(ledpin,0); % this command is used for the delay pause(tblink/2); %this command is used to turn on the led a.writeDigitalPin(ledpin,1); pause(tblink/2); end |
So it is actually a very simple program but you can see we are using the Arduino support package to instantiate the Arduino object which we can then use to control the Arduino we will save this and click on the run.
Now after running the program we will see that the led will flashes 10 times and then it will be off.
Complete code:
|
1 2 3 4 5 6 7 8 9 10 11 12 13 14 15 16 17 18 |
clc clear all close all ledpin = 'D13'; tblink= 0.5; port = 'COM5'; board = 'Due'; a= arduino(port,board); for k= 1:10 %this command will turn off the led a.writeDigitalPin(ledpin,0); % this command is used for the delay pause(tblink/2); %this command is used to turn on the led a.writeDigitalPin(ledpin,1); pause(tblink/2); end |
Discover more from Electronic Clinic
Subscribe to get the latest posts sent to your email.