Raspberry Pi Pico Development Board Guide with RP2040 Features and Examples
Last Updated on May 11, 2026 by Engr. Shahzada Fahad
Table of Contents
Raspberry Pi Pico Development Board:
Today I am going to talk about the elecfreaks Raspberry Pi Pico Development board, and honestly, it’s one of the best things I have used with the Raspberry Pi Pico.
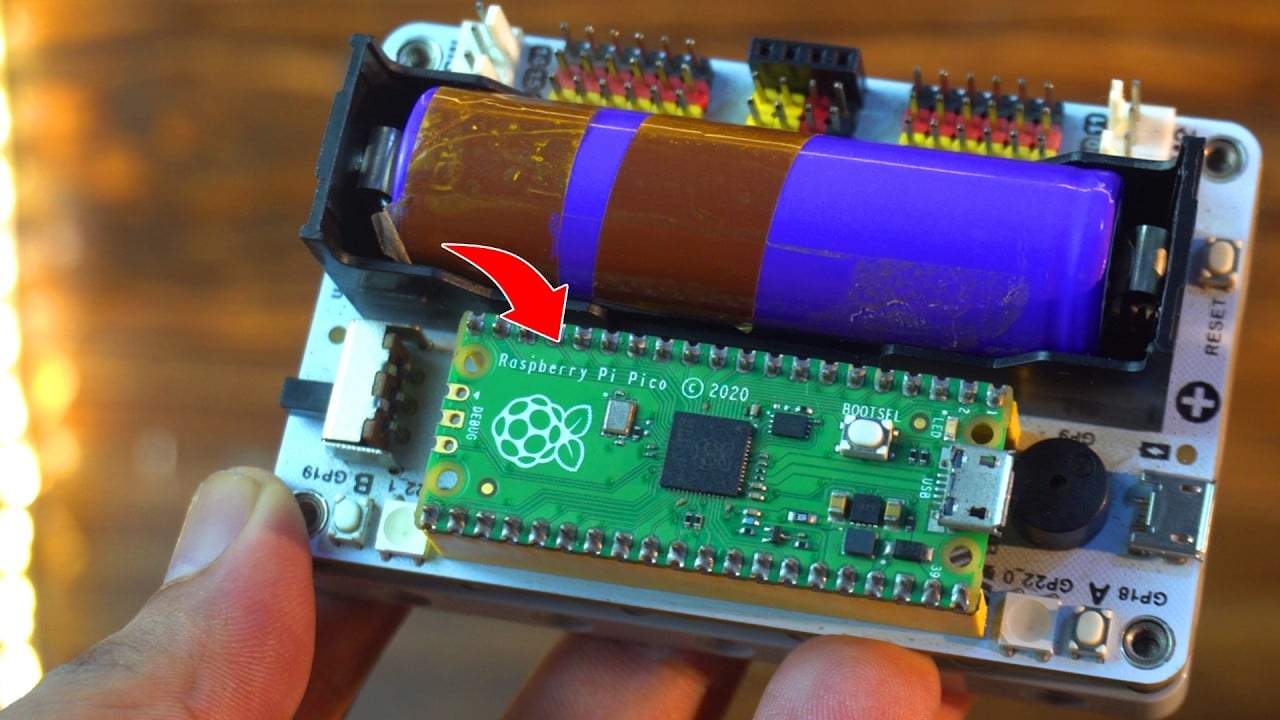
The first thing I love is the battery slot. You can put a Lithium Ion 18650 battery in it, and it powers the whole board; no need for wires or a power bank.

I tested it, and it worked for more than 2 hours on battery alone. That’s great for projects like robots or anything you want to run without USB.
Next, it has some cool features built in. You get a buzzer, two buttons (A and B), and even two rainbow LEDs. These are already connected to the GPIO pins, so no need for extra wiring. Just write your code and run it; simple!
It also has motor ports; M1, M2, M3, and M4; so you can easily control motors without needing a motor driver board. That’s really useful if you are building a car or a robot.
There is also a charging indicator, a power switch, and a power indicator LED.

And what I really like is that all the GPIO pins are clearly labeled. There’s no guessing; you can see which pin does what. It also supports I2C, SPI, UART, and ADC, so you can connect sensors, displays, or anything else.
And one more thing I would like to highlight is the base of this board; take a look at this! It’s LEGO compatible.
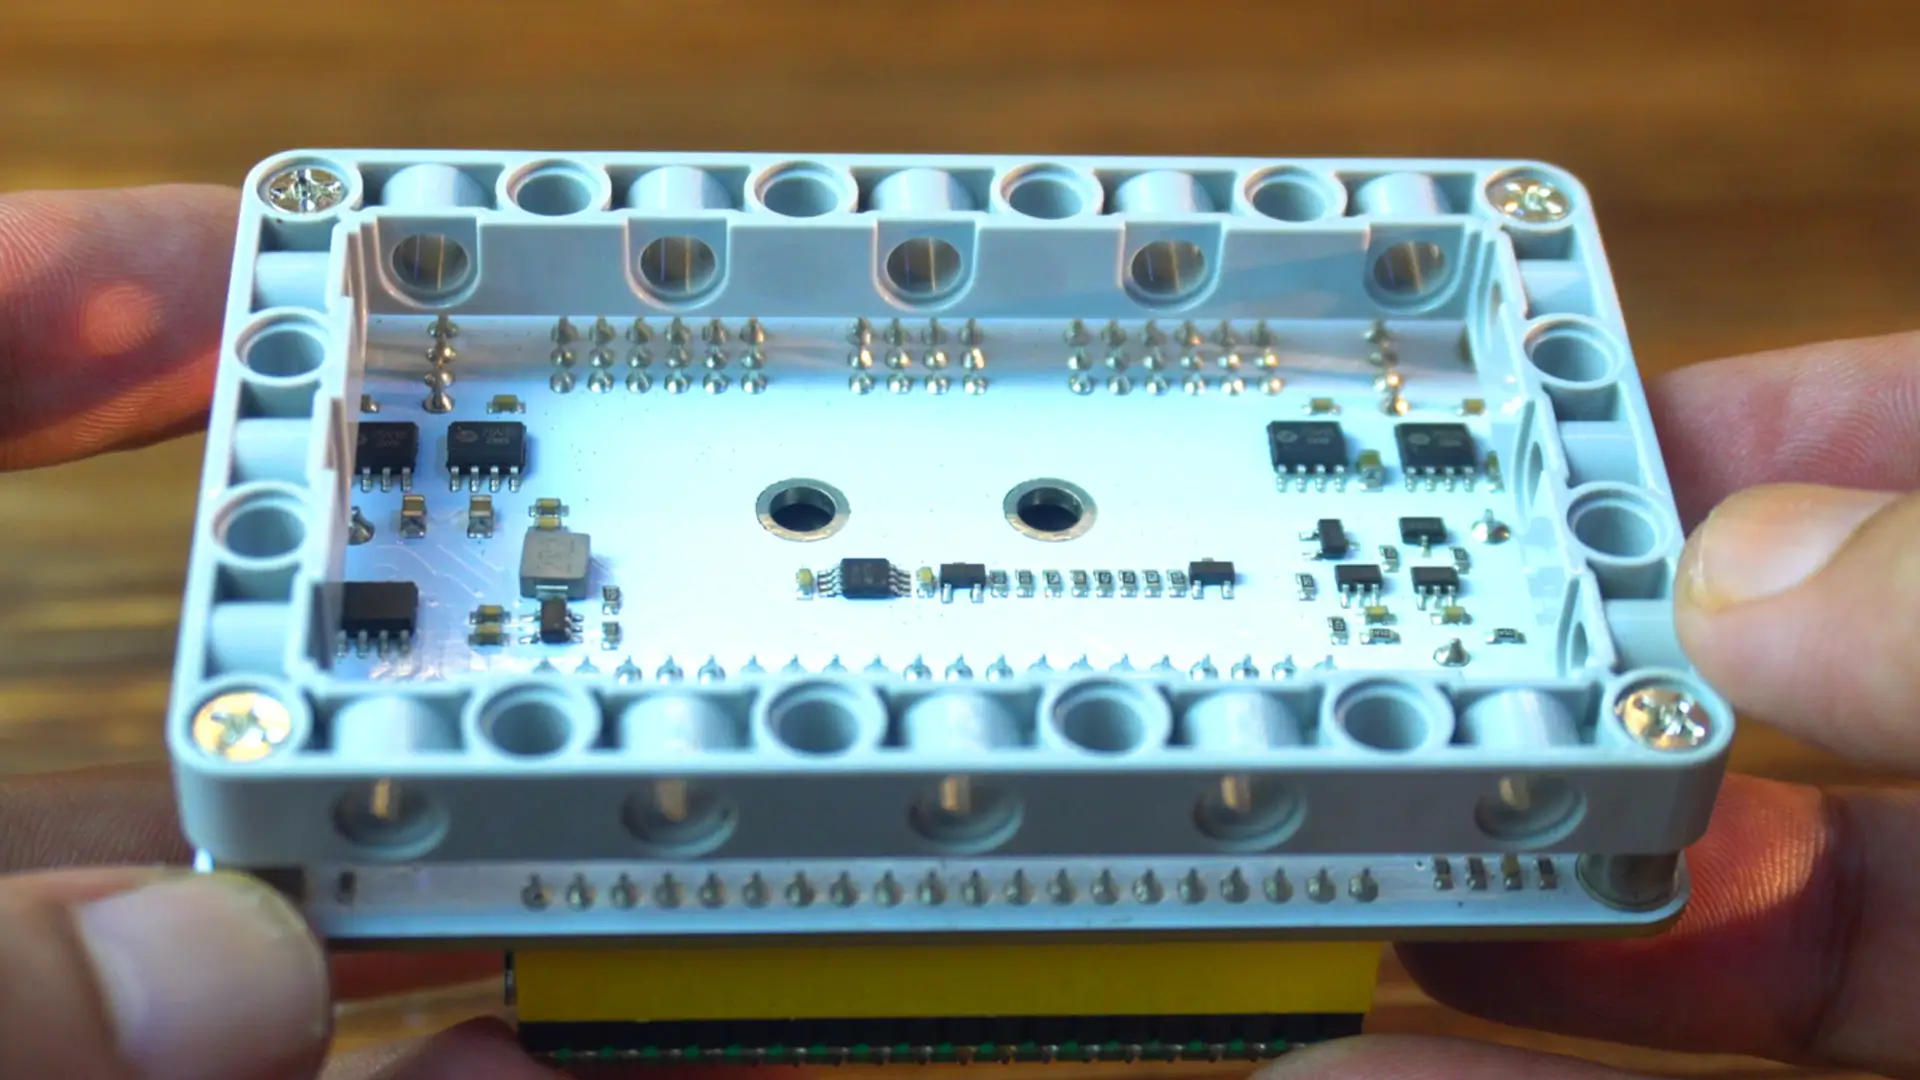
That means you can easily mount it on your custom LEGO creations
Everything is clean, organized, and ready to use. If you are a beginner or even if you have done some projects before; this board will save you time and help you build faster.
Amazon Links:
Raspberry Pi Pico WuKong Development board
Other Tools and Components:
ESP32 WiFi + Bluetooth Module (Recommended)
Arduino Nano USB C type (Recommended)
*Please Note: These are affiliate links. I may make a commission if you buy the components through these links. I would appreciate your support in this way!
I have already uploaded a detailed article on my Raspberry Pi Pico course. In that article, I showed how to install Thonny IDE and do all the basic settings. So today, I won’t repeat those steps again. But this time, I will show you another way to quickly set up your Raspberry Pi Pico for Thonny IDE.
In the Raspberry Pi course, I used the UF2 file method, which can take some time and might be a bit confusing; especially for beginners; because you have to download and flash the file manually. But the method I will show you now is much easier and more beginner-friendly.
Anyway, once you have installed Thonny IDE.

Push and hold the Boot Selection button and plug your Raspberry Pi Pico into the USB port of your Laptop or computer.
It will mount as a Mass Storage Device called RPI-RP2.

Release the BOOT Selection button after your Pico is connected.
While Thonny IDE is open, look at the bottom right corner. You might see something like “Local Python 3 Thonny’s Python”. It doesn’t matter what’s written there; just click on it.
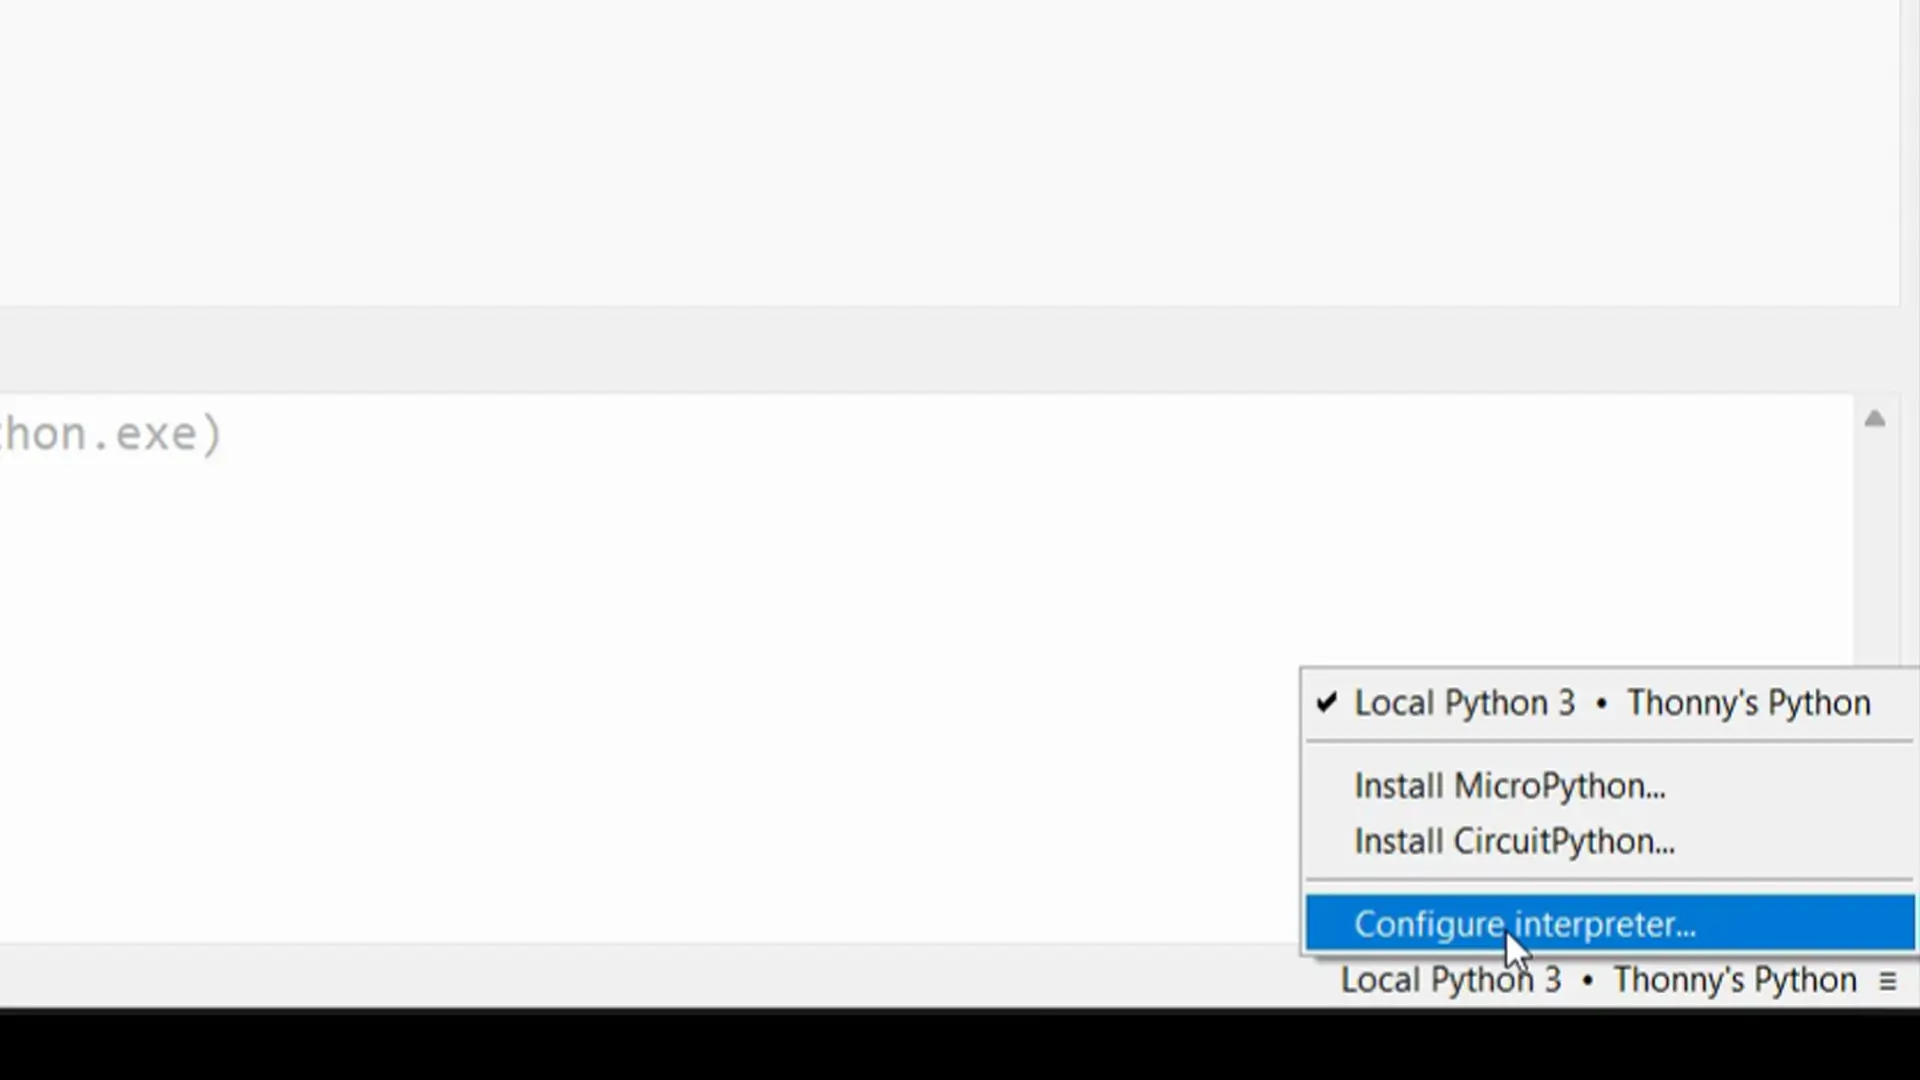
Now click on “Configure Interpreter”.
Make sure the “Interpreter” tab is selected.
It will ask: “Which kind of interpreter should Thonny use for running your code?”

From the list, select “MicroPython (Raspberry Pi Pico)”.

The install or update MicroPython link will appear instantly. Just click on it.

Thonny will automatically select the Target volume for you. If it doesn’t, no problem; you can select it yourself.
Next, you have to select the variant; the one I am using is the simple Raspberry Pi Pico.
Finally, click on the install button.
That’s it; this was the only hard part!
You will see Done! when the installation is completed.
Now go ahead and select the MicroPython (Raspberry Pi Pico).

To test this Raspberry Pi Pico Development board, I have already prepared some example codes; so let’s go ahead and try them out one by one.
Raspberry Pi Pico and Rainbow LEDs:
The two Rainbow LEDs are connected to GP22.
Rainbow LEDs Code:
|
1 2 3 4 5 6 7 8 9 10 11 12 13 14 15 16 17 18 19 20 21 22 23 24 25 26 27 28 29 30 31 32 33 34 35 36 37 |
import machine import neopixel import time # Number of LEDs in your strip num_leds = 2 # Change this to match your LED strip length # Pin where the data input of the RGB LED strip is connected pin = machine.Pin(22, machine.Pin.OUT) # Initialize the NeoPixel object np = neopixel.NeoPixel(pin, num_leds) # Function to display a rainbow on the RGB LEDs def rainbow_cycle(wait): for j in range(255): for i in range(num_leds): # Generate the rainbow effect based on a hue value color = wheel((i + j) & 255) np[i] = color np.write() # Update the LEDs time.sleep(wait) # Function to generate a color based on a hue value (from 0 to 255) def wheel(pos): if pos < 85: return (pos * 3, 255 - pos * 3, 0) elif pos < 170: pos -= 85 return (255 - pos * 3, 0, pos * 3) else: pos -= 170 return (0, pos * 3, 255 - pos * 3) # Main loop to run the rainbow effect while True: rainbow_cycle(0.01) # Change speed of the rainbow cycle by adjusting the wait time |
This code brings your RGB LEDs to life with a smooth rainbow effect.
if you want the complete folder with all the resources, head over to my Patreon page; you can download the full project files. It will save you a lot of time. Just download the folder and start running the examples!
To run this code, just click on the Play button.
Practical Demonstration:
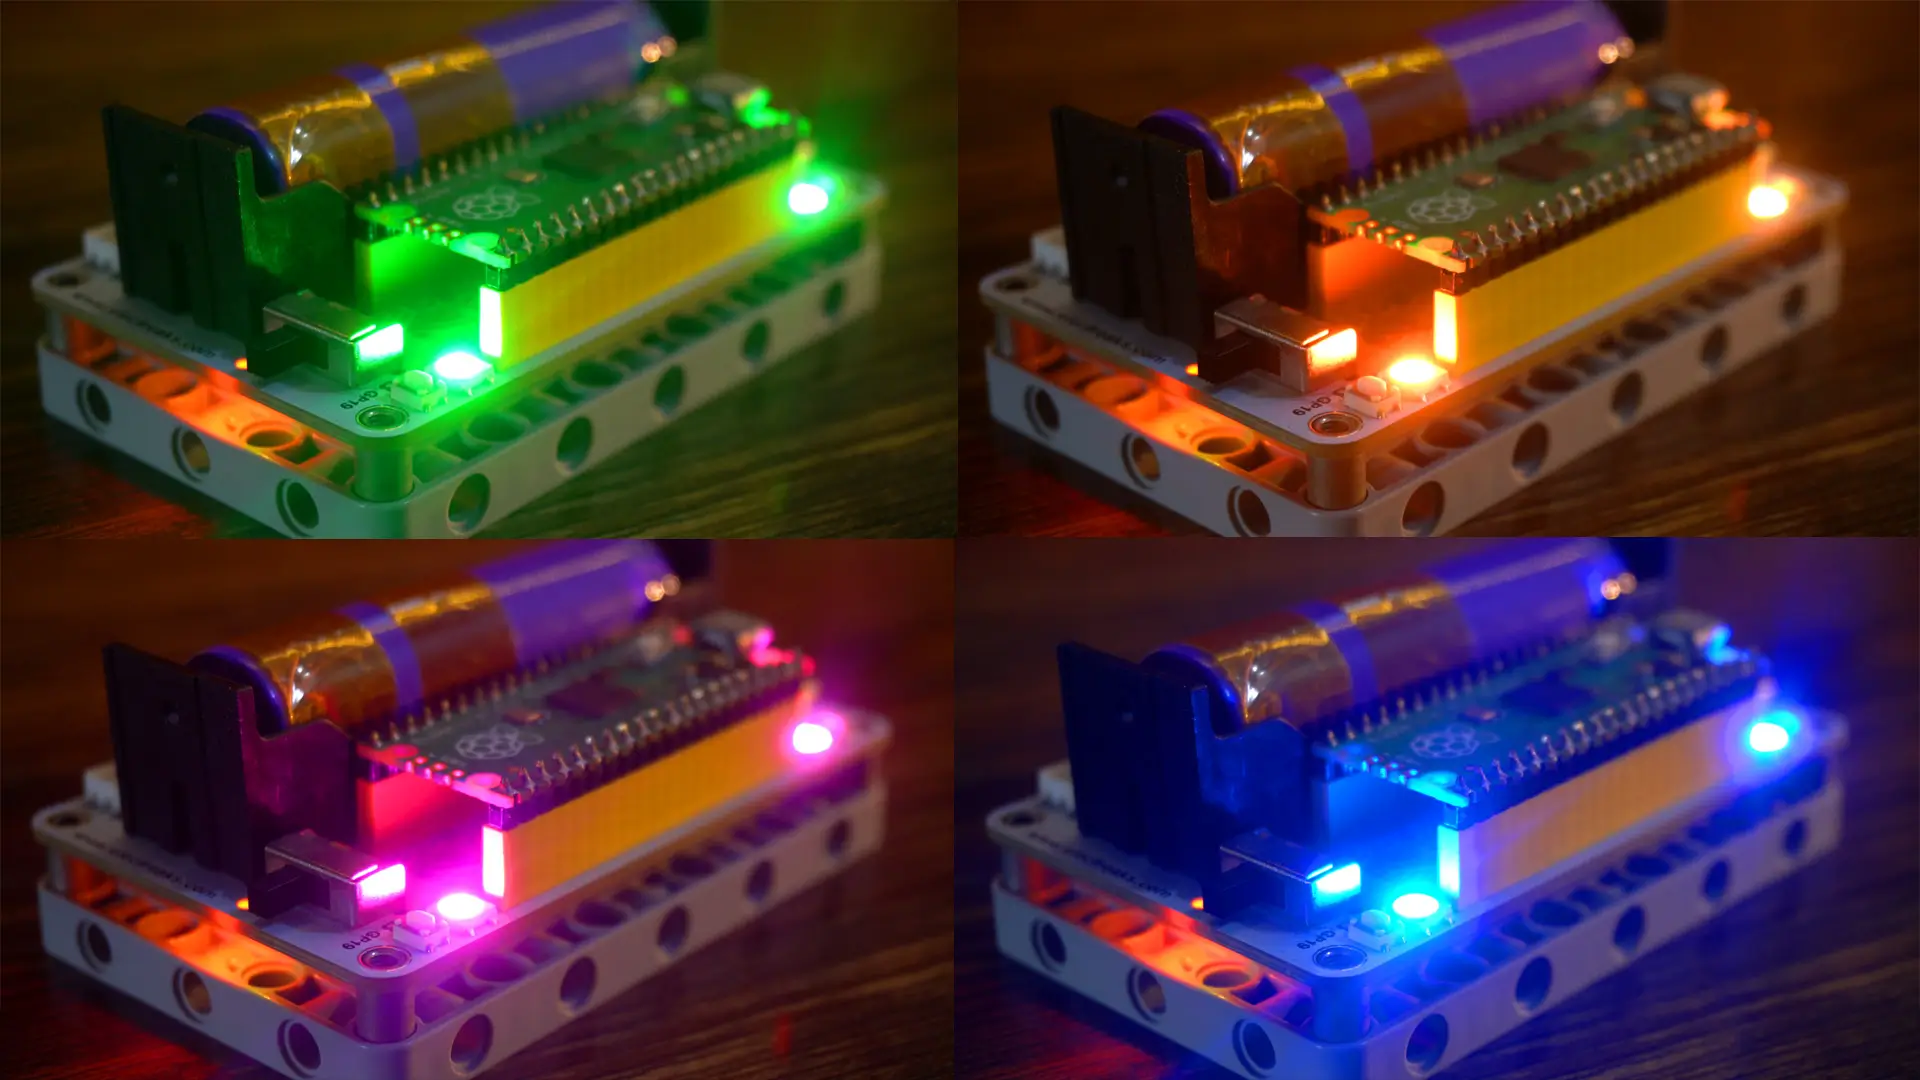
Boom! The rainbow LEDs are working perfectly; just look at those colors smoothly changing. It’s such a satisfying effect, and it instantly makes your project look cool and professional. And the best part? It only took a few lines of MicroPython!
Now let’s take it one step further; we are going to control the two rainbow LEDs individually.
One will go red, the other green, and we will even make them switch colors back and forth. Let’s run the code!
|
1 2 3 4 5 6 7 8 9 10 11 12 13 14 15 16 17 18 19 20 21 22 23 24 25 |
import machine import neopixel import time # ==== USER SETTINGS ==== NUM_LEDS = 2 # Number of NeoPixel LEDs LED_PIN = 22 # GPIO pin connected to the LEDs DELAY_TIME = 0.5 # Delay time in seconds (change this to adjust speed) # ======================== # Setup NeoPixel np = neopixel.NeoPixel(machine.Pin(LED_PIN), NUM_LEDS) while True: # LED 0 = RED, LED 1 = GREEN np[0] = (255, 0, 0) np[1] = (0, 255, 0) np.write() time.sleep(DELAY_TIME) # LED 0 = GREEN, LED 1 = RED np[0] = (0, 255, 0) np[1] = (255, 0, 0) np.write() time.sleep(DELAY_TIME) |
Practical Demonstration:

As you can see, the two rainbow LEDs are now blinking in alternating colors. One goes red while the other goes green, and then they swap.
This proves that we can control each LED individually even though both are connected to the same GPIO pin.
It’s a great way to test your wiring and confirm everything is working before moving on to more advanced effects.”
And if you want the LEDs to switch faster or slower, just change the delay time in the code; it’s super simple!
Raspberry Pi Pico and PushButtons:
Alright, now let’s test those pushbuttons; one will change the LEDs color, and the other will control the brightness.
The two buttons are connected to GP18 and GP19. Let’s go ahead and run this code.
Push Buttons Example:
|
1 2 3 4 5 6 7 8 9 10 11 12 13 14 15 16 17 18 19 20 21 22 23 24 25 26 27 28 29 30 31 32 33 34 35 36 37 38 39 40 41 42 43 44 45 46 47 48 49 50 51 52 53 54 55 56 57 58 59 60 61 62 63 64 65 66 |
import machine import time import neopixel # Pin configurations LED_PIN = 22 NUM_LEDS = 10 BUTTON_COLOR_PIN = 18 BUTTON_SPEED_PIN = 19 # Setup neopixel np = neopixel.NeoPixel(machine.Pin(LED_PIN), NUM_LEDS) # Setup buttons button_color = machine.Pin(BUTTON_COLOR_PIN, machine.Pin.IN, machine.Pin.PULL_UP) button_speed = machine.Pin(BUTTON_SPEED_PIN, machine.Pin.IN, machine.Pin.PULL_UP) # Color settings colors = [(255, 0, 0), (0, 255, 0), (0, 0, 255), (255, 255, 0), (0, 255, 255), (255, 0, 255)] color_index = 0 # Start with the first color brightness = 5 # Default brightness (0 to 5) speed = 0.1 # Default speed (higher means slower) # Function to set color with brightness def set_color(brightness_factor): r, g, b = colors[color_index] # Scale the color by the brightness factor r = int(r * brightness_factor / 5) g = int(g * brightness_factor / 5) b = int(b * brightness_factor / 5) # Set the color on all LEDs for i in range(NUM_LEDS): np[i] = (r, g, b) np.write() # Function to handle button presses for color change def handle_color_button(): global color_index if not button_color.value(): # Button pressed (low active) time.sleep(0.2) # Debounce time color_index = (color_index + 1) % len(colors) # Cycle through colors print(f"Color changed to {colors[color_index]}") set_color(brightness) # Apply brightness to the new color # Function to handle button presses for speed and brightness control def handle_speed_button(): global brightness, speed if not button_speed.value(): # Button pressed (low active) time.sleep(0.2) # Debounce time # Increase brightness (0-5 scale) brightness = (brightness + 1) % 6 print(f"Brightness level: {brightness}") set_color(brightness) speed = 0.1 + brightness * 0.05 # Adjust speed based on brightness print(f"Speed set to {speed:.2f} seconds per frame") # Main loop while True: handle_color_button() handle_speed_button() # Animate rainbow effect with current settings for i in range(NUM_LEDS): set_color(brightness) time.sleep(speed) |
Practical Demonstration:
For the practical demonstration; watch video tutorial given at the end of this article. Anyway;
When I press the first button, the LED color changes. Every press cycles through a new color from the predefined list.
And when I press the second button, the brightness increases.
Raspberry Pi Pico and Buzzer:
Now let’s move on to the next example; controlling a buzzer connected to pin GP9.
I have written three different codes to test the buzzer, just go ahead and try them out one by one.
Buzzer PWM:
|
1 2 3 4 5 6 7 8 9 10 11 12 13 14 15 |
import machine import time # Initialize PWM on GP9 buzzer = machine.PWM(machine.Pin(9)) # Set frequency and duty cycle buzzer.freq(2000) # 2 kHz tone (you can try other values like 1000-4000) buzzer.duty_u16(30000) # 50% duty cycle (max is 65535) # Let it beep for 2 seconds time.sleep(2) # Turn off the buzzer buzzer.duty_u16(0) |
Repeated Beeps:
|
1 2 3 4 5 6 7 8 9 10 11 |
import machine import time buzzer = machine.PWM(machine.Pin(9)) buzzer.freq(2000) while True: buzzer.duty_u16(30000) # Buzzer ON time.sleep(0.5) buzzer.duty_u16(0) # Buzzer OFF time.sleep(0.5) |
Happy Birthday Tone:
|
1 2 3 4 5 6 7 8 9 10 11 12 13 14 15 16 17 18 19 20 21 22 23 24 25 26 27 28 29 30 31 32 33 34 35 36 37 38 39 |
import machine import time # Initialize PWM on GP9 (buzzer pin) buzzer = machine.PWM(machine.Pin(9)) # Set initial duty cycle buzzer.duty_u16(30000) # Define note frequencies (in Hz) for the Happy Birthday song notes = { "C4": 261, "D4": 294, "E4": 329, "F4": 349, "G4": 392, "A4": 440, "B4": 493, "C5": 523 } # Define the melody for Happy Birthday (using note names and durations in seconds) melody = [ ("C4", 0.3), ("C4", 0.3), ("D4", 0.7), ("C4", 0.7), ("F4", 0.7), ("E4", 1.4), ("C4", 0.3), ("C4", 0.3), ("D4", 0.7), ("C4", 0.7), ("G4", 0.7), ("F4", 1.4), ("C4", 0.3), ("C4", 0.3), ("C5", 0.7), ("A4", 0.7), ("F4", 0.7), ("E4", 0.7), ("D4", 1.4), ("B4", 0.3), ("B4", 0.3), ("A4", 0.7), ("F4", 0.7), ("G4", 0.7), ("F4", 1.4) ] # Function to play a note for a specific duration def play_note(note, duration): frequency = notes.get(note) if frequency: buzzer.freq(frequency) buzzer.duty_u16(30000) # Play note time.sleep(duration) buzzer.duty_u16(0) # Stop the note time.sleep(0.05) # Short pause between notes # Play the melody for note, duration in melody: play_note(note, duration) # Turn off the buzzer buzzer.duty_u16(0) |
Raspberry Pi Pico and Servo:
Now let’s move on to the next example; this one is all about controlling a servo motor connected to the GP0.
I have written a simple script that smoothly sweeps the servo back and forth between 0 and 90 degrees.
You can change the sweep angle, the speed, and even the step size using the user-friendly settings at the top of the code. So, whether you want fast movement or smooth, slow motion; it’s all right there!
|
1 2 3 4 5 6 7 8 9 10 11 12 13 14 15 16 17 18 19 20 21 22 23 24 25 26 27 28 29 30 31 32 33 34 |
from machine import Pin, PWM import time # ==== USER SETTINGS ==== SERVO_PIN = 0 # Change GPIO pin here MIN_ANGLE = 0 # Minimum angle (in degrees) MAX_ANGLE = 90 # Maximum angle (in degrees) STEP = 1 # Angle step size (smaller = smoother) DELAY = 0.01 # Delay between steps in seconds # ======================== # Set up PWM on chosen GPIO pin servo = PWM(Pin(SERVO_PIN)) servo.freq(50) # 50Hz for standard servo def set_angle(angle): # Clamp the angle within range angle = max(MIN_ANGLE, min(MAX_ANGLE, angle)) min_duty = 1000 # For 0 degrees (0.5ms pulse) max_duty = 9000 # For 180 degrees (2.5ms pulse) duty = int(min_duty + (angle / 180) * (max_duty - min_duty)) servo.duty_u16(duty) def smooth_sweep(): while True: for angle in range(MIN_ANGLE, MAX_ANGLE + 1, STEP): set_angle(angle) time.sleep(DELAY) for angle in range(MAX_ANGLE, MIN_ANGLE - 1, -STEP): set_angle(angle) time.sleep(DELAY) # Start sweeping smooth_sweep() |
Let’s run the code and watch the servo in action!

So, that’s all for now.
Frequently Asked Questions (FAQ)
-
What is the Elecfreaks Wukong 2040 board?
The Elecfreaks Wukong 2040 is an all-in-one Raspberry Pi Pico development board designed for beginners and robotics projects. It includes a battery slot, built-in motor drivers, buttons, LEDs, a buzzer, and a LEGO-compatible base. -
Can you power a Raspberry Pi Pico with a battery?
Yes, development boards like the Wukong 2040 have a built-in slot for a rechargeable 18650 battery, allowing you to power your Raspberry Pi Pico projects without a USB cable. -
What is the best Raspberry Pi Pico board for beginners?
The Wukong 2040 is an excellent choice for beginners because it integrates common components like motor drivers, buttons, and LEDs directly onto the board, eliminating the need for complex wiring and extra components. -
How do you connect motors to a Raspberry Pi Pico?
While a standard Pico requires a separate motor driver board, the Wukong 2040 development board has built-in motor ports (M1-M4), allowing you to connect and control motors directly. -
What is the easiest way to install MicroPython on a Raspberry Pi Pico?
The easiest way is to use the Thonny IDE. After connecting the Pico in BOOTSEL mode, you can use Thonny’s “Configure Interpreter” tool to automatically find and install the latest MicroPython firmware directly onto the board. -
How do I set up Thonny for Raspberry Pi Pico?
In Thonny, go to “Run” > “Configure interpreter,” select “MicroPython (Raspberry Pi Pico)” from the dropdown menu, and choose the correct port for your device. If MicroPython isn’t installed, Thonny will prompt you to install it. -
What IDE is best for Raspberry Pi Pico?
Thonny is the most recommended IDE for Raspberry Pi Pico, especially for beginners. It has built-in support for MicroPython and includes tools to easily manage files and install firmware on the device. -
How do you control RGB LEDs with Raspberry Pi Pico?
You can control RGB LEDs using the neopixel library in MicroPython. By connecting the LED data pin to a GPIO pin on the Pico, you can write code to set the color and brightness of each LED individually or create effects like a rainbow cycle. -
How do I control a servo motor with Raspberry Pi Pico?
You can control a servo by using Pulse Width Modulation (PWM) on a GPIO pin. In MicroPython, you import the PWM class from the machine library, set the frequency to 50Hz, and then adjust the duty cycle to move the servo to a specific angle. -
How do you make a Raspberry Pi Pico make sound?
You can make a Raspberry Pi Pico produce sound by connecting a buzzer to a GPIO pin and using PWM. By changing the PWM frequency, you can create different tones, and by turning it on and off in a sequence, you can play simple melodies.
Watch Video Tutorial:
Discover more from Electronic Clinic
Subscribe to get the latest posts sent to your email.