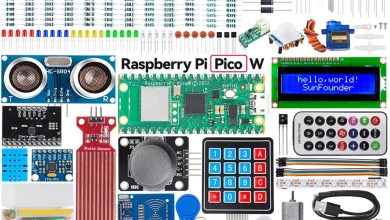
Raspberry Pi Pico W with Thingspeak and MAX6675 K type thermocouple
Last Updated on September 21, 2024 by Engr. Shahzada Fahad
Table of Contents
Raspberry Pi Pico W with Thingspeak:
Raspberry Pi Pico W with Thingspeak and MAX6675 K type thermocouple-Things have got a lot easier after the addition of WiFi connectivity in Raspberry Pi Pico; and now it is called Raspberry Pi Pico W. Today, for the first time you will see how easily Raspberry Pi Pico W can be connected with Thingspeak IoT Platform for monitoring any type of sensor. For demonstration purposes, I am going to use the MAX6675 module and the K-type thermocouple.
The way we have been programming the Nodemcu ESP8266 WiFi module and the ESP32 WiFi + Bluetooth module using the Arduino IDE. Now the same exact way we can also program the Raspberry Pi Pico W using the Arduino IDE. I have already explained this in my previous articlein which I used Raspberry Pi Pico W with Adafruit Io and I used Arduino IDE for programming the Raspberry Pi Pico W. So, I highly recommend you guys should read my previous article because I have explained things in quite a detail.
Anyway, before I am going to explain how to setup Thingspeak Dashboard and how to interface Max6675 with Raspberry Pi Pico W; first let’s watch the Raspberry Pi Pico W and Thingspeak IoT Platform based Temperature monitoring system in action.
I have connected the Max6675 module and the K-type thermocouple as per the circuit diagram which I will explain in a minute.

I have powered up the Raspberry Pi Pico W. Right now the Laptop and the Raspberry Pi Pico W both are connected with the same WiFi. But if you want you can use different WiFi networks. Anyway, its working is very simple. Raspberry Pi Pico W reads the temperature and sends the values to the Thingspeak IoT Platform where the temperature values are displayed in the Box and on the Chart. There is a 20 seconds delay, so it takes time to update the value.
Anyway, I applied some heat and the temperature increased to 67.5C.

I am sure by now, you might have got an idea of how does this system work. So, without any further delay let’s get started!!!
Amazon Links:
Max6675 and K type thermocouple
Raspberry Pi Pico W kit from Sunfounder
Other Tools and Components:
Super Starter kit for Beginners
PCB small portable drill machines
*Please Note: These are affiliate links. I may make a commission if you buy the components through these links. I would appreciate your support in this way!
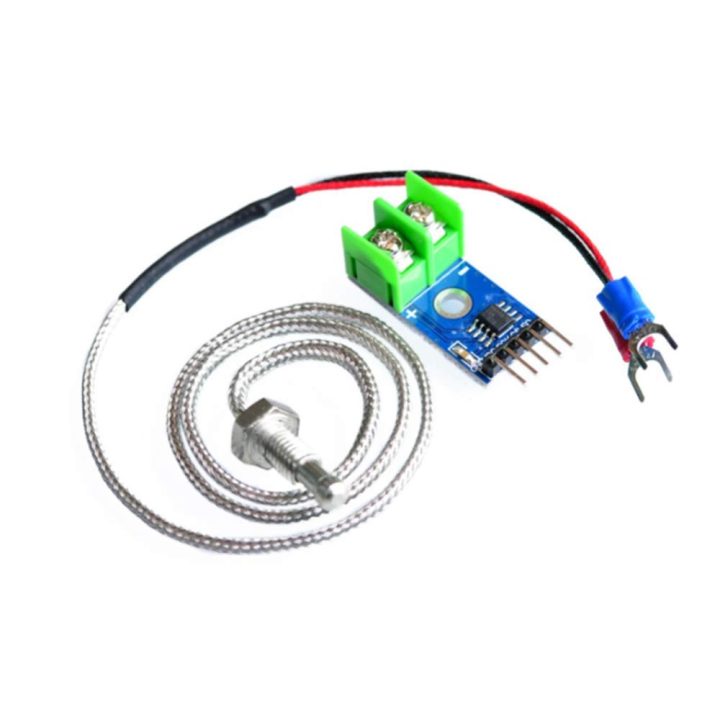
MAX6675 K-Type Thermocouple:
This is the MAX6675 thermocouple temperature sensor amplifier breakout module. The temperature resolution capability of the MAX6675 Amplifier module is 0.25 degrees. The working voltage is DC 3.0 to 5V, the operating current is 50mA, the temperature range is 0 to 1024 Celsius with a temperature resolution of 0.25 Celsius, temperature measurement accuracy is +/-1.5 Celsius, and the output mode is SPI digital signal.
Specification of MAX6675 K-Type Thermocouple Temperature Sensor:
- Working Voltage: DC 3.0 to 5V.
- Operating Current: 50mA.
- Temperature Range: 0°C – 1024°C, the converter temperature resolution is 0.25°C.
- Temperature Measurement Accuracy: +/-1.5C.
- Temperature Resolution: 0.25C.
- Output mode: SPI digital signal.
The two wires of the thermocouple come with the Red and Blue sleeves. Red is connected with the + terminal of the MAX6675 module while the Blue wire is connected with the – terminal of the MAX6675 amplifier module. Now, let’s go ahead and take a look at the circuit diagram.
Max6675 with Raspberry Pi Pico W:

Connect the VCC and GND pins of the Max6675 module with the Raspberry Pi Pico W 3.3V and GND pins. And connect the SCK, CS, and SO pins of the Max6675 module with the Raspberry Pi Pico W GPIO pins 13, 14, and 15 respectively. Now, let’s go ahead and start with Thingspeak.
Note: If you want to make Arduino Nano based projects then you can download the PCB Gerber files from PCBWay. Or you can place an order, they offer cheap prices without compromising the Quality.
Thingspeak with Raspberry Pi Pico W:
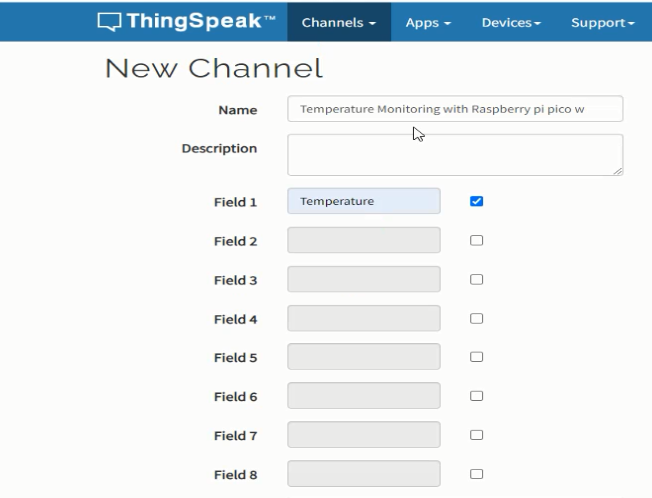
Log into your Thingspeak account.First of all we will create a New Channel in the ThingSpeak. For this click on the New Channel Button.
Note: if you find it hard to follow these steps, then you can watch the video tutorial given at the end of this article

Write the Channel name “Temperature Monitoring with Raspberry Pi pico w”. Next check the fields as per your requirement. In my case, as I am going to monitoring only temperature so I am going to use Field 1 “Temperature”.
After writing the channel name and selecting the field; click the save button.

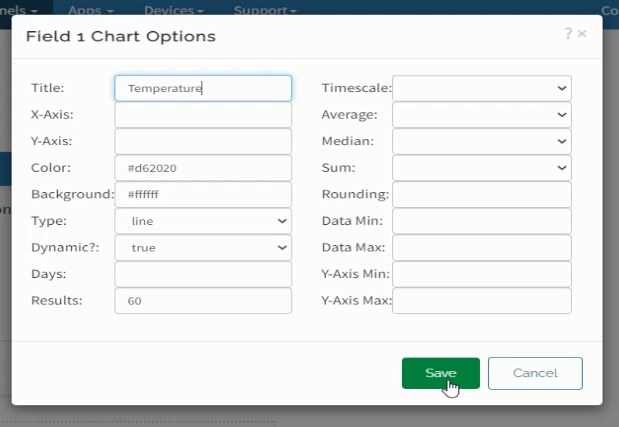
Then click on the Edit button to change the title of the Chart
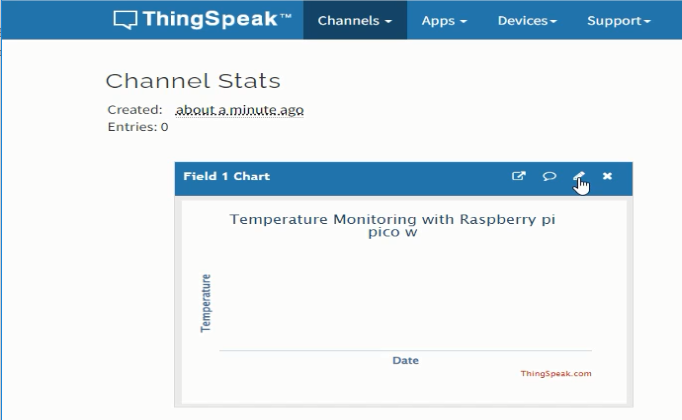
Then give a name to the chart.
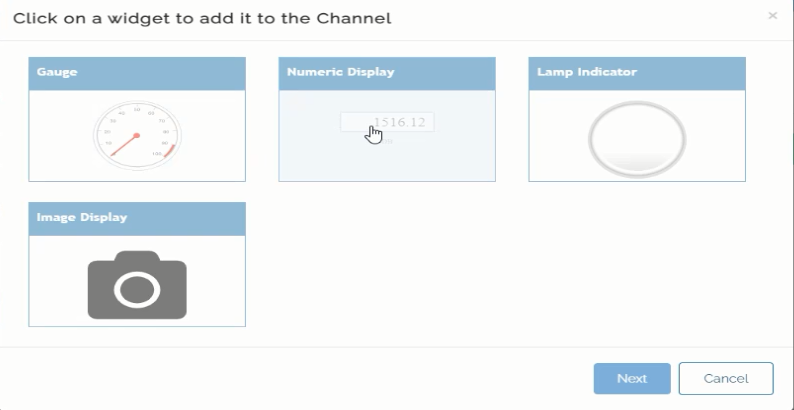
Then click on the widgets to display the numerical value of the temperature.

Then click on the Numeric Display widget and click on the next button.
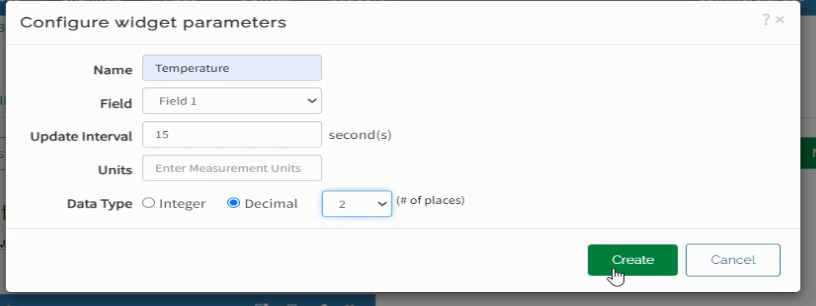
Then configure widget parameters and click on the create button.
We are done with the Thingspeak Dashboard.

After this we will link theThingSpeak with Raspberry Pi Pico W.
So first we will copy the channel id and paste it in the code.

Then click on the API key and copy the key

Now we will paste the channel ID and API Key in the code.Copy the Channel ID and paste it next to the SECRET_CH_ID. Now, go to the API Keys, Copy the Write API Key, And paste it next to the SECRET_WRITE-APIKEY as you can see in the image given below.

Required Libraries:
Install the ThingSpeaklibrary.
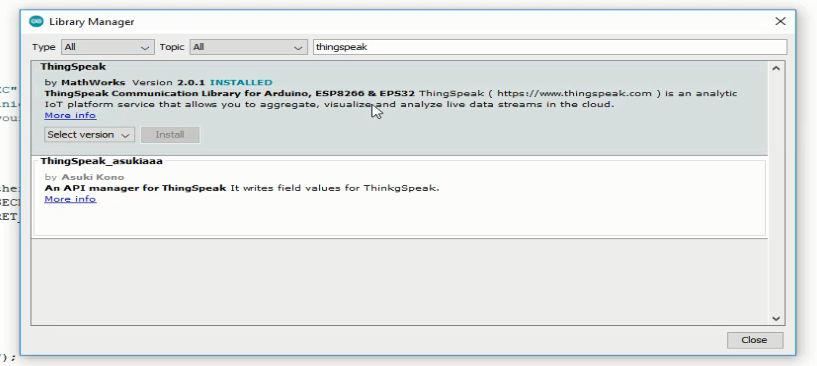
Now, install library for the Max6675 temperature sensor.

Project Code:
|
1 2 3 4 5 6 7 8 9 10 11 12 13 14 15 16 17 18 19 20 21 22 23 24 25 26 27 28 29 30 31 32 33 34 35 36 37 38 39 40 41 42 43 44 45 46 47 48 49 50 51 52 53 54 55 56 57 58 59 60 61 62 63 64 65 66 67 68 69 70 71 72 73 74 75 |
#include <WiFi.h> #include "ThingSpeak.h" #include "secrets.h" #include<stdlib.h> #include "max6675.h" const char *ssid = "AndroidAP3DEC"; // replace with your wifi ssid and wpa2 key const char *pass = "electroniclinic"; int keyIndex = 0; // your network key Index number (needed only for WEP) WiFiClient client; int thermoDO = 15; int thermoCS = 14; int thermoCLK = 13; MAX6675 thermocouple(thermoCLK, thermoCS, thermoDO); unsigned long myChannelNumber = SECRET_CH_ID; const char * myWriteAPIKey = SECRET_WRITE_APIKEY; String myStatus = ""; void setup() { Serial.begin(115200); Serial.println("Connecting to "); Serial.println(ssid); WiFi.begin(ssid, pass); while (WiFi.status() != WL_CONNECTED) { delay(500); Serial.print("."); } Serial.println(""); Serial.println("WiFi connected"); ThingSpeak.begin(client); // Initialize ThingSpeak } void loop() { float temperature=thermocouple.readCelsius(); // set the fields with the values ThingSpeak.setField(1, temperature); Serial.println(temperature); // set the status ThingSpeak.setStatus(myStatus); // write to the ThingSpeak channel int x = ThingSpeak.writeFields(myChannelNumber, myWriteAPIKey); if(x == 200){ Serial.println("Channel update successful."); } else{ Serial.println("Problem updating channel. HTTP error code " + String(x)); } delay(20000); // Wait 20 seconds to update the channel again } |
Secrets.h file:
|
1 2 3 4 |
// Use this file to store all of the private credentials #define SECRET_CH_ID 1880551 // replace 0000000 with your channel number #define SECRET_WRITE_APIKEY "86NAGJ7AN9YX00QU" // replace XYZ with your channel write API |
The main project code .ino file and the Secrets.h files are need to be inside the same folder.
Finally, you can upload the program.

Raspberry Pi Pico W is connected to the WiFi and you can see the Temperature value 27.50C.
Watch Video Tutorial:

Discover more from Electronic Clinic
Subscribe to get the latest posts sent to your email.