Raspberry Pi Pico W with Ubidots and MAX6675 K type thermocouple
Table of Contents
Raspberry Pi Pico W with Ubidots:
Raspberry Pi Pico W with Ubidots and MAX6675 K type thermocouple- Things have got a lot easier after the addition of WiFi connectivity in Raspberry Pi Pico; and now it is called Raspberry Pi Pico W. Today, for the first time you will see how easily Raspberry Pi Pico W can be connected with Ubidots IoT Platform for monitoring any type of sensor. For demonstration purposes, I am going to use the MAX6675 module and the K-type thermocouple.
The way we have been programming the Nodemcu ESP8266 WiFi module and the ESP32 WiFi + Bluetooth module using the Arduino IDE. Now the same exact way we can also program the Raspberry Pi Pico W using the Arduino IDE. I have already explained this in my previous articles in which I used Raspberry Pi Pico W with Adafruit Io and with ThingSpeak IoT Platform; I used Arduino IDE for programming the Raspberry Pi Pico W. So, I highly recommend you guys should read my previous articles because I have explained things in quite a detail.
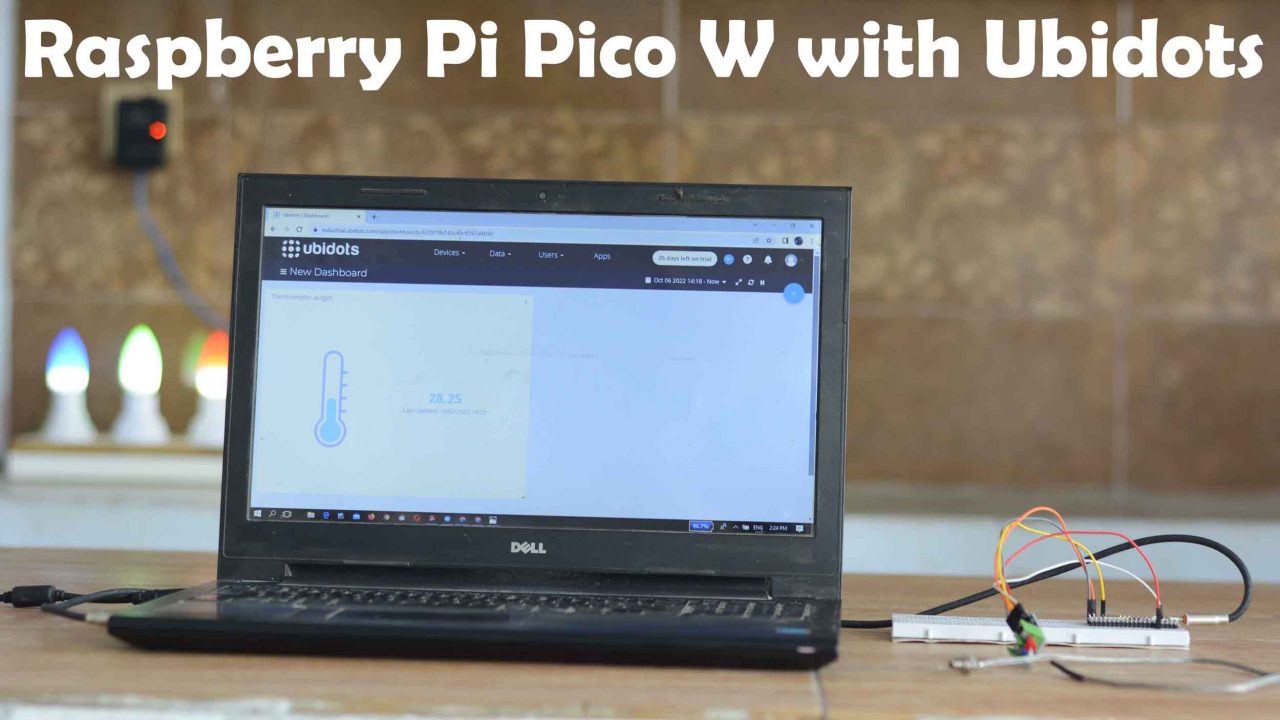
Anyway, before I am going to explain how to setup Ubidots Dashboard and how to interface Max6675 with Raspberry Pi Pico W; first let’s watch the Raspberry Pi Pico W and Ubidots IoT Platform based Temperature monitoring system in action.
Altium Designer + Altium 365 + Octopart:
Altium 365 lets you hold the fastest design reviews ever. Share your designs from anywhere and with anyone with a single click. it’s easy, leave a comment tagging your teammate and they’ll instantly receive an email with a link to the design. Anyone you invite can open the design using a web browser. Using the browser interface, you’re able to comment, markup, cross probe, inspect, and more. Comments are attached directly to the project, making them viewable within Altium designer as well as through the browser interface. Design, share, and manufacture, all in the same space with nothing extra to install or configure. Connect to the platform directly from Altium Designer without changing how you already design electronics. Altium 365 requires no additional licenses and comes included with your subscription plan.
Get real-time component insights as you design with Octopart built into Altium 365. Octopart is the fastest search engine for electronic parts and gives you the most up-to-date part data like specs, datasheets, cad models, and how much the part costs at different amounts etc. Right in the design environment so you can focus on your designs. Start with Altium Designer and Activate Altium 365. Search for electronic parts on Octopart.
I have connected the Max6675 module and the K-type thermocouple as per the circuit diagram which I will explain in a minute.
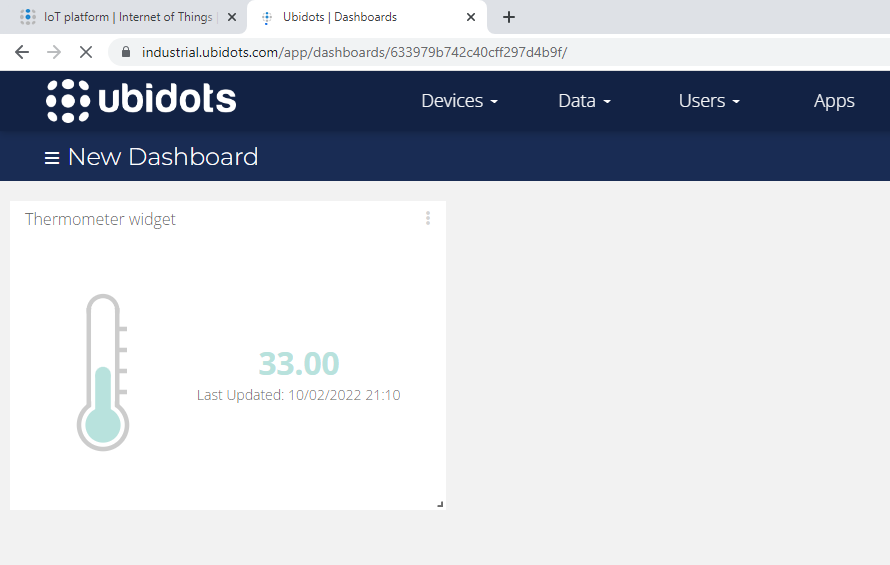
I have powered up the Raspberry Pi Pico W. Right now the Laptop and the Raspberry Pi Pico W both are connected with the same WiFi. But if you want you can use different WiFi networks. Anyway, its working is very simple. Raspberry Pi Pico W reads the temperature and sends the temperature reading to the Ubidots IoT Platform where the temperature value is displayed on the Thermometer Widget.
I am sure by now, you might have got an idea of how does this system work. So, without any further delay let’s get started!!!
Amazon Links:
Max6675 and K type thermocouple
Raspberry Pi Pico W Ultimate Kit from Sunfounder
Other Tools and Components:
Super Starter kit for Beginners
PCB small portable drill machines
*Please Note: These are affiliate links. I may make a commission if you buy the components through these links. I would appreciate your support in this way!
MAX6675 K-Type Thermocouple:
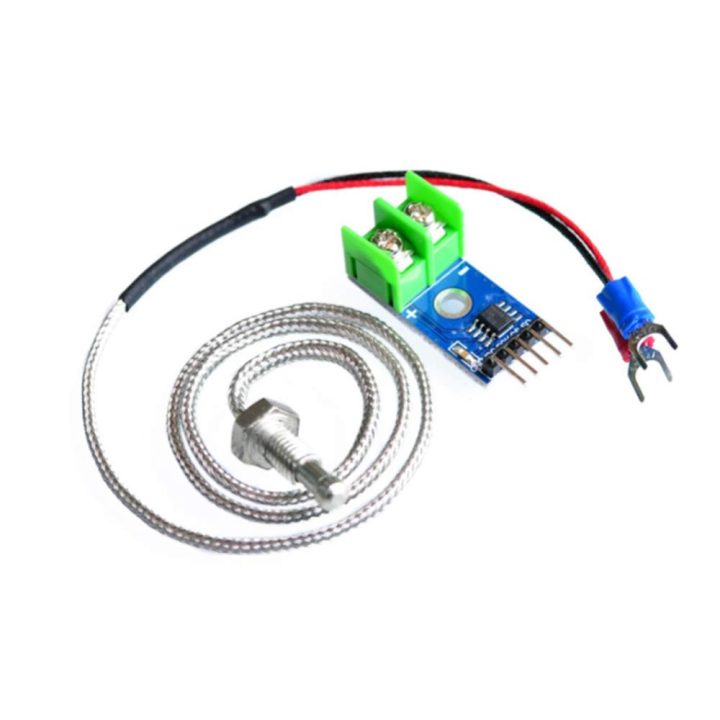
This is the MAX6675 thermocouple temperature sensor amplifier breakout module. The temperature resolution capability of the MAX6675 Amplifier module is 0.25 degrees. The working voltage is DC 3.0 to 5V, the operating current is 50mA, the temperature range is 0 to 1024 Celsius with a temperature resolution of 0.25 Celsius, temperature measurement accuracy is +/-1.5 Celsius, and the output mode is SPI digital signal.
Specification of MAX6675 K-Type Thermocouple Temperature Sensor:
- Working Voltage: DC 3.0 to 5V.
- Operating Current: 50mA.
- Temperature Range: 0°C – 1024°C, the converter temperature resolution is 0.25°C.
- Temperature Measurement Accuracy: +/-1.5C.
- Temperature Resolution: 0.25C.
- Output mode: SPI digital signal.
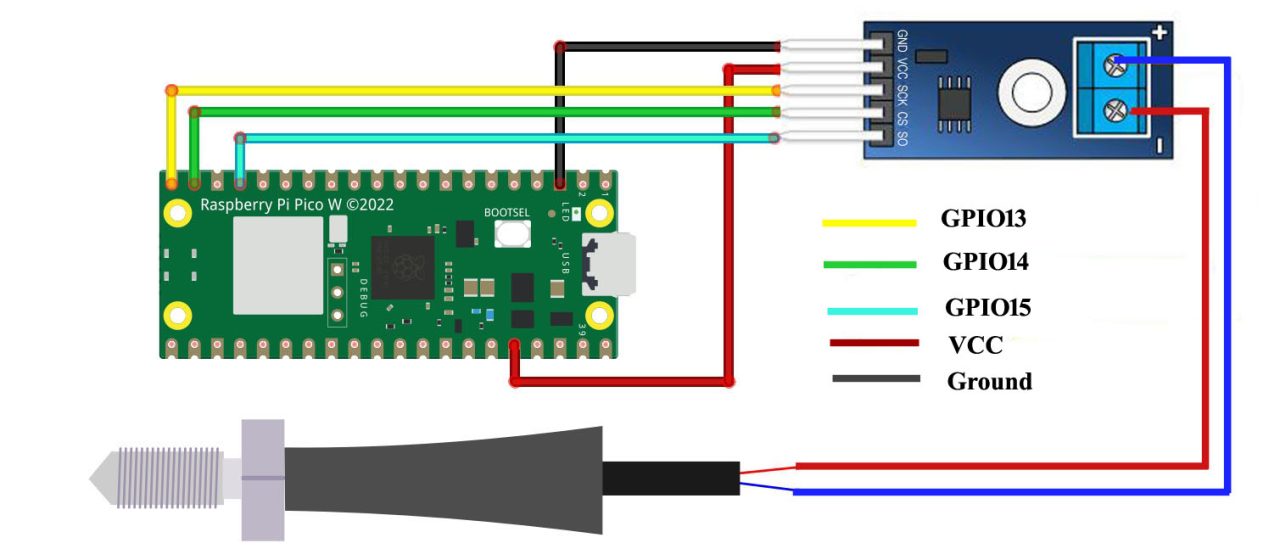
The two wires of the thermocouple come with the Red and Blue sleeves. Red is connected with the + terminal of the MAX6675 module while the Blue wire is connected with the – terminal of the MAX6675 amplifier module. Now, let’s go ahead and take a look at the circuit diagram.
Max6675 with Raspberry Pi Pico W:
Connect the VCC and GND pins of the Max6675 module with the Raspberry Pi Pico W 3.3V and GND pins. And connect the SCK, CS, and SO pins of the Max6675 module with the Raspberry Pi Pico W GPIO pins 13, 14, and 15 respectively. Now, let’s go ahead and start with Ubidots.
Ubidots with Raspberry Pi Pico W:
Login into your Ubidots account and open the Raspberry Pi Pico W code in Arduino ID, Code is given below.Anyway, while you are logged into Ubidots, open API Credentials.
Copy the Token.
And paste this link next to the TOKEN in double quotes.
We need to do this first, as we want the Raspberry Pi Pico W and the Temperature variable to appear in Ubidots. For this, we will need to upload the program, make sure your WiFi router or Hotspot is ON, because once the program is uploaded; Raspberry Pi Pico W will automatically connect with the WiFi.
Project Code:
|
1 2 3 4 5 6 7 8 9 10 11 12 13 14 15 16 17 18 19 20 21 22 23 24 25 26 27 28 29 30 31 32 33 34 35 36 37 38 39 40 41 42 43 44 45 46 47 48 49 50 51 52 53 54 55 56 57 58 59 60 61 62 63 64 65 66 67 68 69 70 71 72 73 74 75 76 77 78 79 80 81 82 83 84 85 86 87 88 89 90 91 92 93 94 95 96 97 98 99 100 101 102 103 104 105 106 107 108 109 110 111 112 113 114 115 116 117 118 119 120 121 122 123 124 125 126 127 128 129 130 |
#include <Wire.h> #include <WiFi.h> #include <PubSubClient.h> #include "max6675.h" #define WIFISSID "AndroidAP3DEC" // Put your WifiSSID here #define PASSWORD "electroniclinic" // Put your wifi password here #define TOKEN "BBFF-yrh0STxs2bWHPqOFmDPj7UfKKVyLwJ" // Put your Ubidots' TOKEN #define MQTT_CLIENT_NAME "Raspberrypi_max6675_Monitoring" // MQTT client Name, please enter your own 8-12 alphanumeric character ASCII string; /**************************************** Define Constants ****************************************/ #define VARIABLE_LABEL1 "Temperature" // Assing the variable label #define DEVICE_LABEL "RaspberryPiPicoW" int thermoDO = 15; int thermoCS = 14; int thermoCLK = 13; MAX6675 thermocouple(thermoCLK, thermoCS, thermoDO); char mqttBroker[] = "industrial.api.ubidots.com"; char payload[1000]; char topic1[150]; // Space to store values to send char str_Temperature[10]; /**************************************** Auxiliar Functions ****************************************/ WiFiClient ubidots; PubSubClient client(ubidots); void callback(char* topic, byte* payload, unsigned int length) { char p[length + 1]; memcpy(p, payload, length); p[length] = NULL; String message(p); Serial.write(payload, length); Serial.println(topic); } void reconnect() { // Loop until we're reconnected while (!client.connected()) { Serial.println("Attempting MQTT connection..."); // Attemp to connect if (client.connect(MQTT_CLIENT_NAME, TOKEN, "")) { Serial.println("Connected"); } else { Serial.print("Failed, rc="); Serial.print(client.state()); Serial.println(" try again in 2 seconds"); // Wait 2 seconds before retrying delay(2000); } } } /**************************************** Main Functions ****************************************/ void setup() { Serial.begin(115200); WiFi.begin(WIFISSID, PASSWORD); Serial.println(); Serial.print("Waiting for WiFi Connection .............."); while (WiFi.status() != WL_CONNECTED) { Serial.print("."); delay(500); } Serial.println(""); Serial.println("WiFi Connected"); Serial.println("IP address: "); Serial.println(WiFi.localIP()); client.setServer(mqttBroker, 1883); client.setCallback(callback); } void loop() { if (!client.connected()) { reconnect(); } float temperature = thermocouple.readCelsius(); Serial.print("Temperature = "); Serial.print(temperature); Serial.println(" *C"); dtostrf(temperature, 4, 2, str_Temperature); sprintf(topic1, "%s%s", "/v1.6/devices/", DEVICE_LABEL); sprintf(payload, "%s", ""); sprintf(payload, "{\"%s\":", VARIABLE_LABEL1); sprintf(payload, "%s {\"value\": %s}}", payload, str_Temperature); Serial.println("Publishing temperature to Ubidots Cloud"); client.publish(topic1, payload); Serial.println(); client.loop(); delay(5000); } |
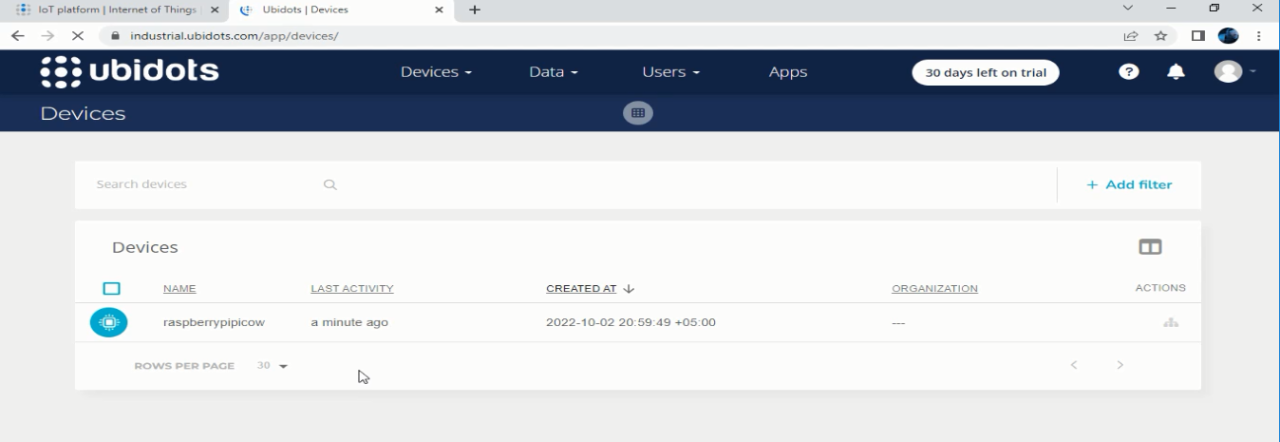
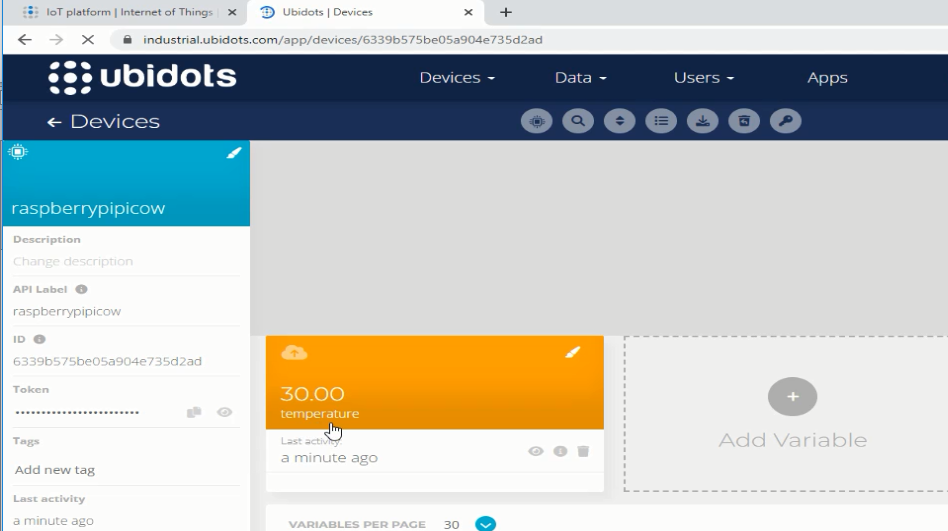
I uploaded the program and now let’s go back to Ubidots. You can see Raspberry Pi Pico W has been added as a device in Ubidots.
Now, If you click on this device you will see the temperature variable name and the temperature reading which is 30C. Now, you are free to use this temperature variable throughout Ubidots.
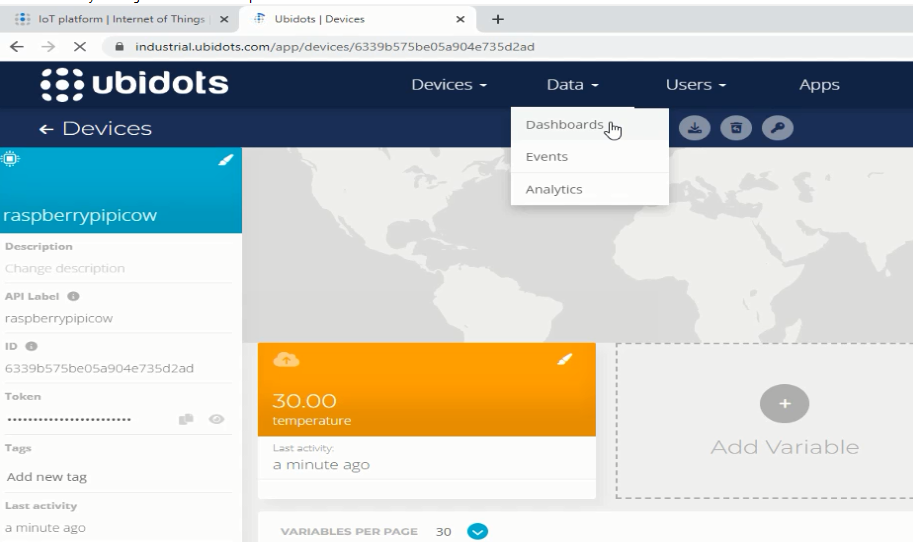
Anyway, go to the Data menu and click on the Dashboards.
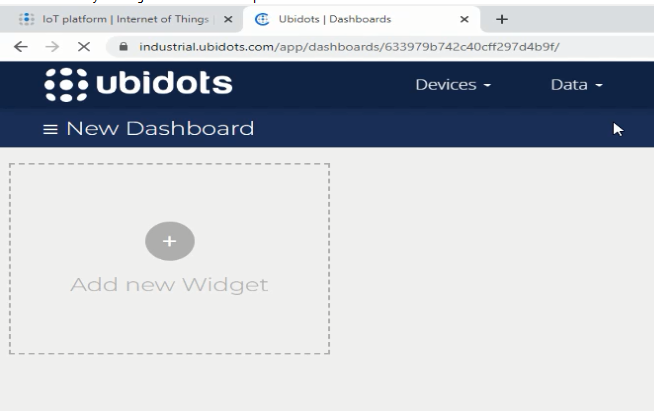
Click on Add new Widget.
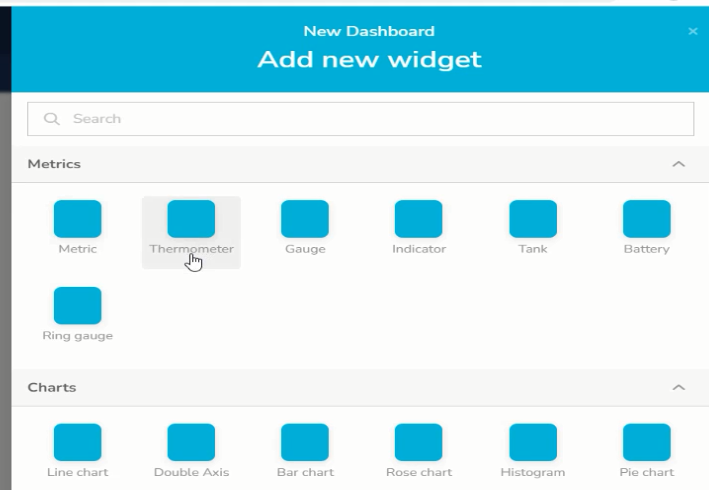
Select Thermometer or any other widget as per your needs.
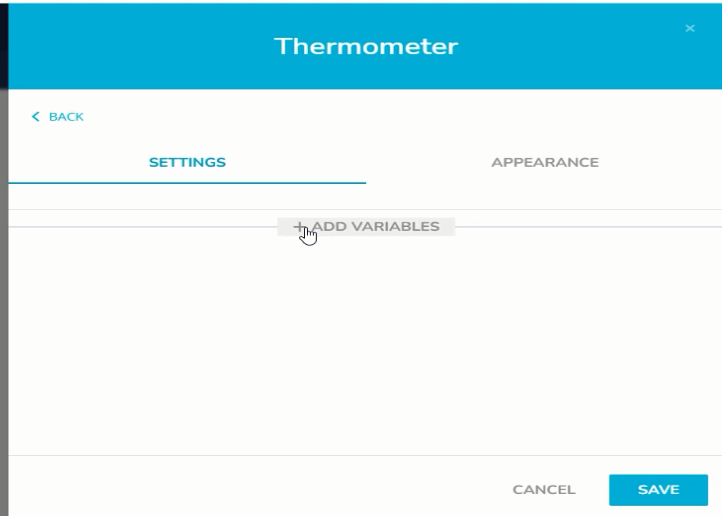
Click on ADD VARIABLES.
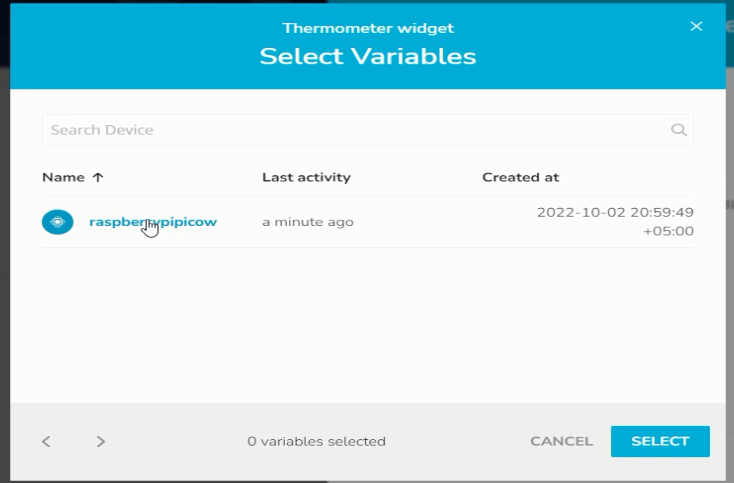
Click on raspberry pi pico w which has been added as a device.
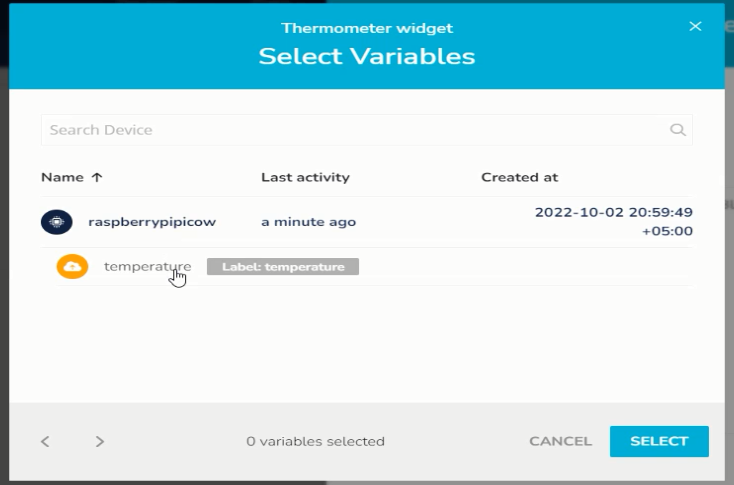
And select the temperature variable and click on the SELECT button.
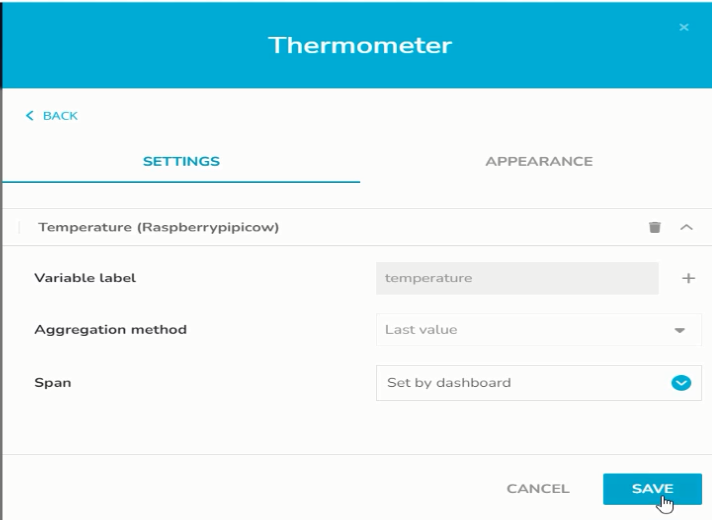
Then click on the save button.
A thermometer has been added.
you can see a change in the temperature reading as right now I am applying heat. Now, let’s go ahead and take look at the programming.
About the Code:
|
1 2 3 4 5 6 7 |
#include <Wire.h> #include <WiFi.h> #include <PubSubClient.h> #include "max6675.h" |
As usual, before you start the programming, first of all, make sure you download all the necessary libraries. You can read my getting started article on the Nodemcu ESP8266 WiFi module, because this WiFi library is from there.
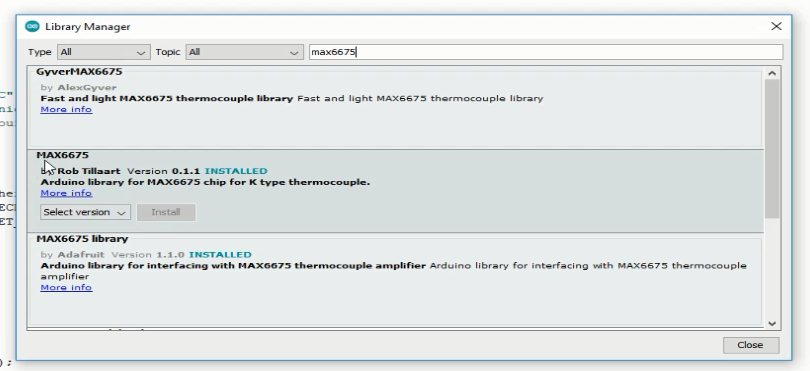
To install the max6675 library, simply go to the Sketch Menu then to Include Library, and click on Manage Libraries… Search for the max6675.
As you can see I have already installed this library…
These are the WiFi credentials.
|
1 2 3 |
#define WIFISSID "AndroidAP3DEC" // Put your WifiSSID here #define PASSWORD "electroniclinic" // Put your wifi password here |
This is the Token.
|
1 |
#define TOKEN "BBFF-yrh0STxs2bWHPqOFmDPj7UfKKVyLwJ" // Put your Ubidots' TOKEN |
This is going to be the variable name
|
1 |
#define VARIABLE_LABEL1 "Temperature" // Assing the variable label |
And this is going to be the device name.
|
1 |
#define DEVICE_LABEL "RaspberryPiPicoW" |
Rest of the code is exactly the same. You can watch my getting started videos on the Ubidots. I have used it with Nodemcu ESP8266 and ESP32. So, that’s all about the programming.
Watch Video Tutorial

