Mastering the XIAO ESP32-C5: Dual-Band Wi-Fi 6 Power in a Tiny IoT Board
Last Updated on March 31, 2026 by Engr. Shahzada Fahad
Table of Contents
Description:
But when Seeed Studio released another XIAO; the ESP32-C5; a lot of people got confused. Because logically, you would expect C3… and then C5. But instead, we got Xiao ESP32-C6 first, and now Xiao ESP32-C5.
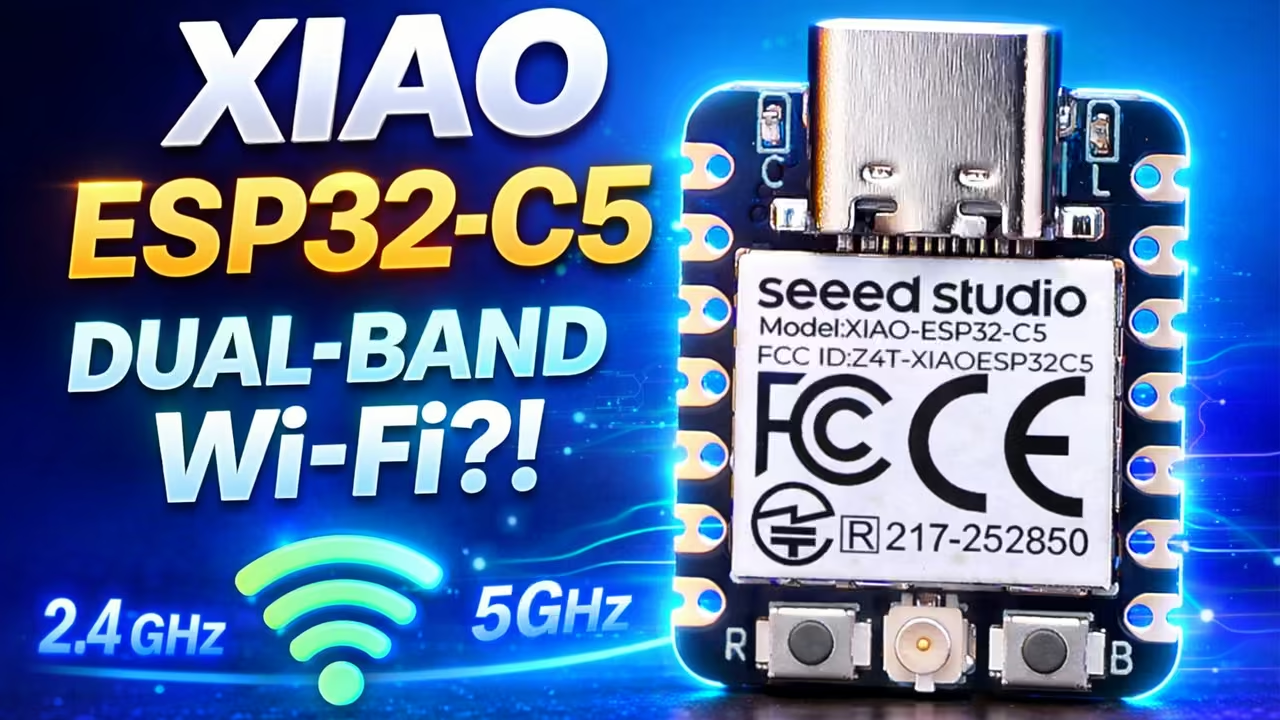
This is the XIAO ESP32-C5, and it changes how we look at IoT boards. This tiny board is the First Seeed Studio XIAO with Dual-Band 2.4 and 5GHz Wi‑Fi, supporting Wi-Fi 6, Bluetooth 5, Zigbee, Thread, and Matter… and yes; it’s an ESP32.
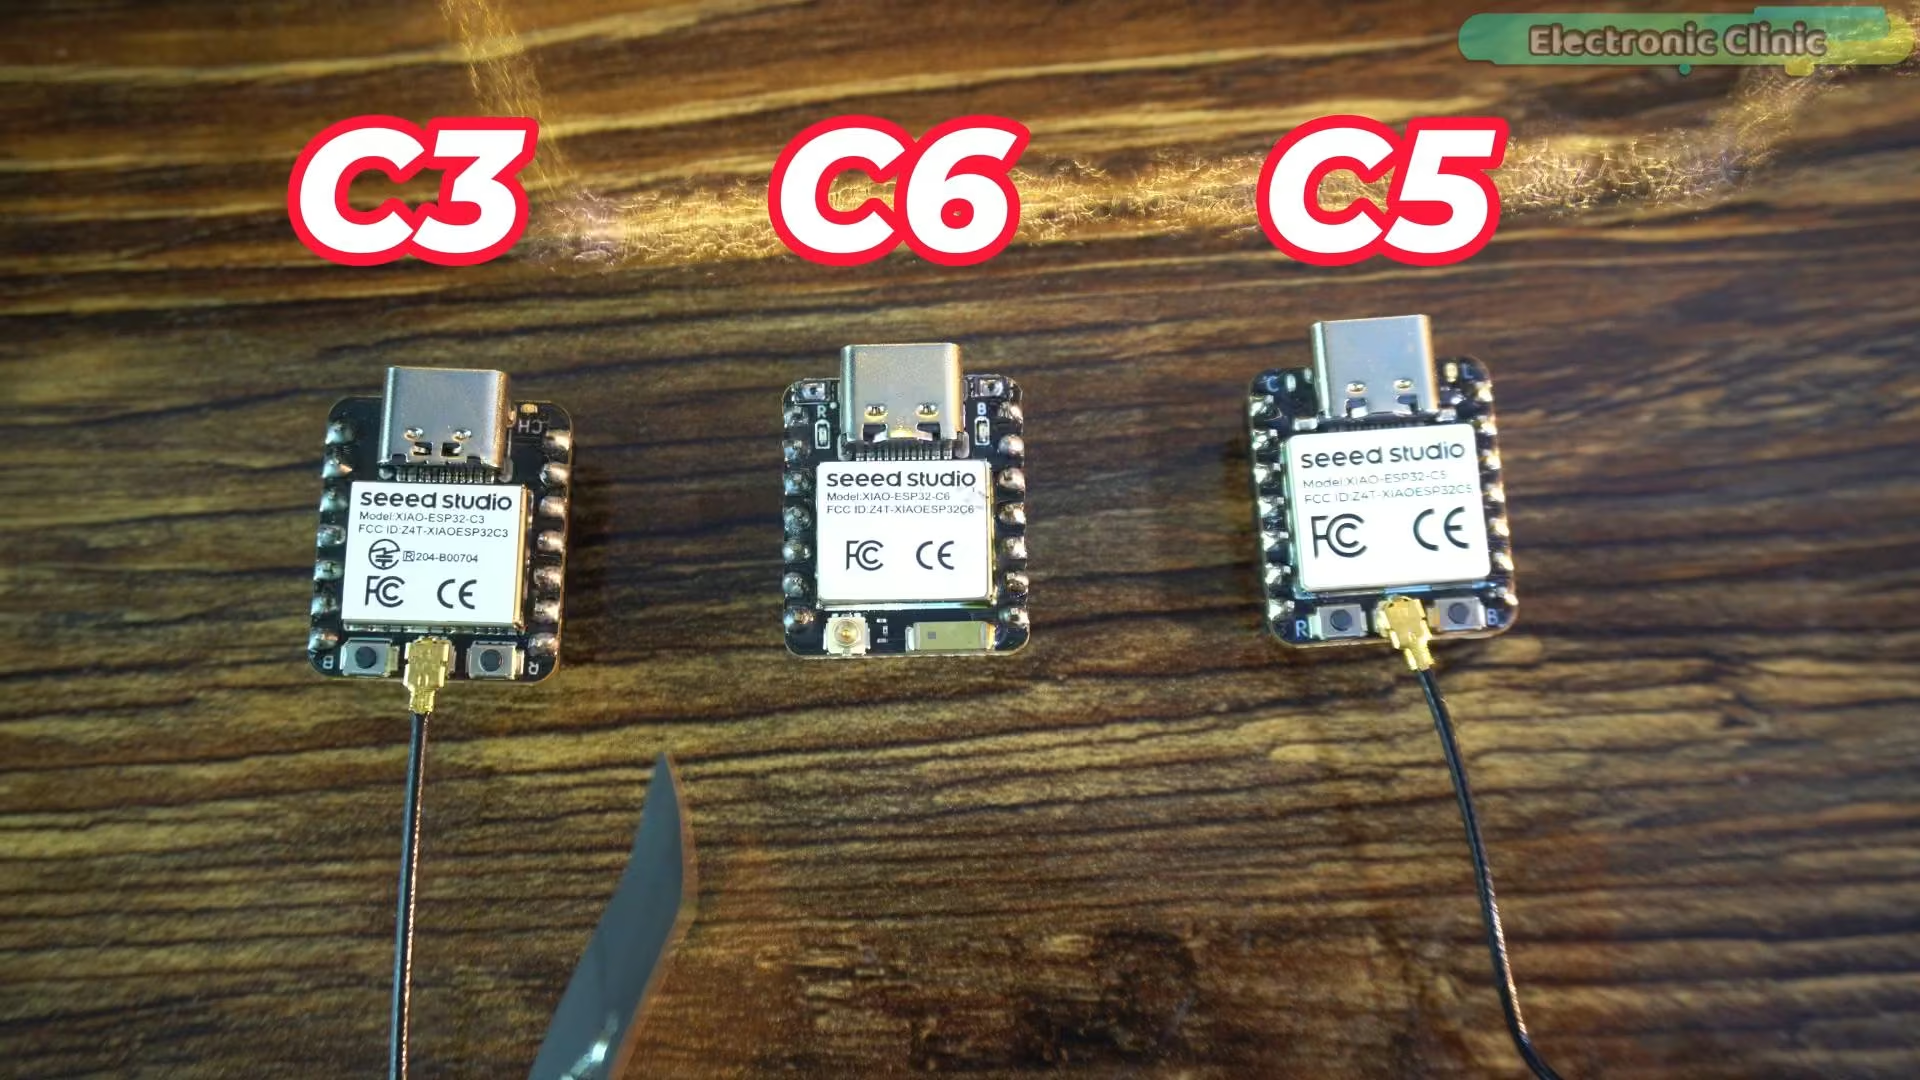
If you have been following my website, you already know I have used the XIAO ESP32-C3 and the XIAO ESP32-C6 in real projects. They are small, reliable, and perfect for IoT. So in this article, we will focus on the XIAO ESP32-C5; what it offers, and why this board exists, without overcomplicating things.
Along the way, we will also go through some practical steps. We will get the Arduino IDE ready for the XIAO ESP32-C5, and finally, we will run a few basic examples so you can see how it behaves in real use.
Anyway; before going any further, I want to give a quick thanks to Seeed Studio for sending these boards.
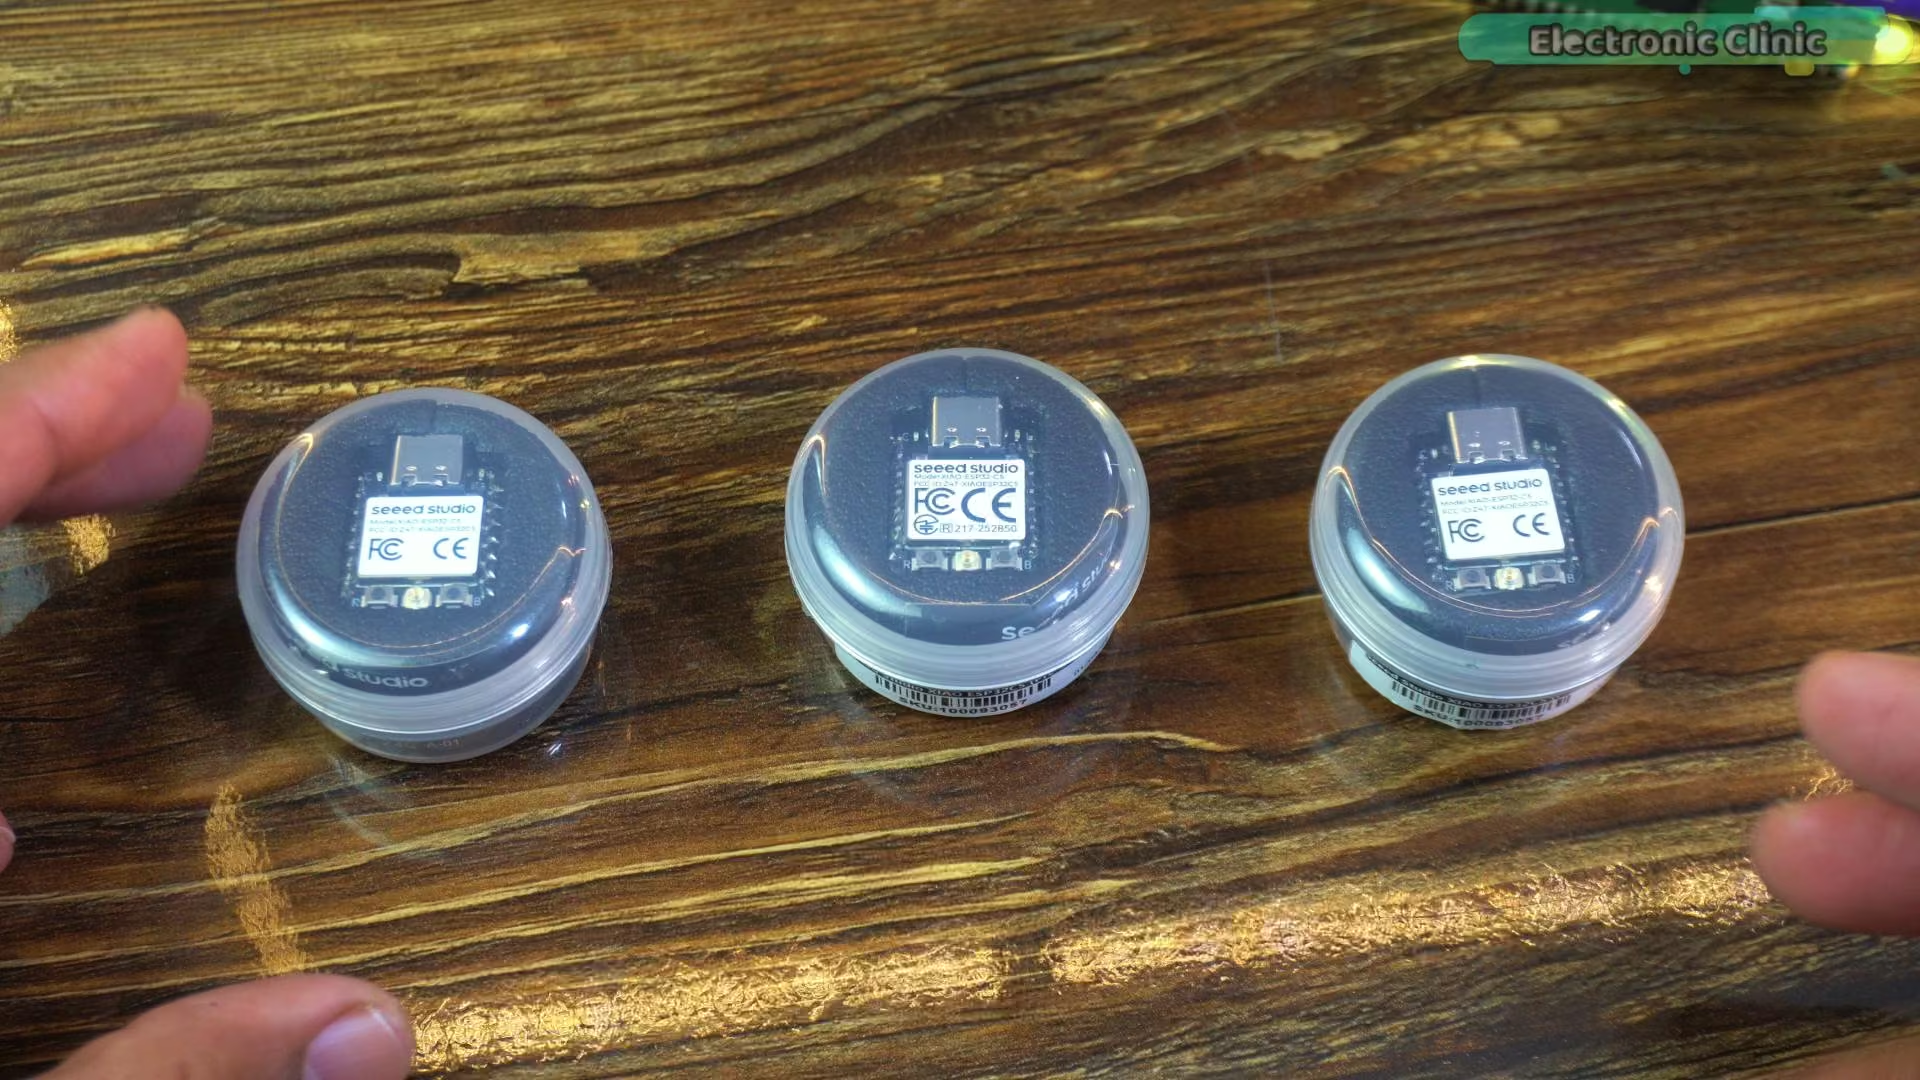
They came in these small, round protective cases, and I actually like this packaging because it keeps the board safe during shipping and handling.
Let’s open one of these.

Inside, you will find the XIAO ESP32-C5 neatly placed in the center, and wrapped around this plastic holder is the flexible PCB antenna.
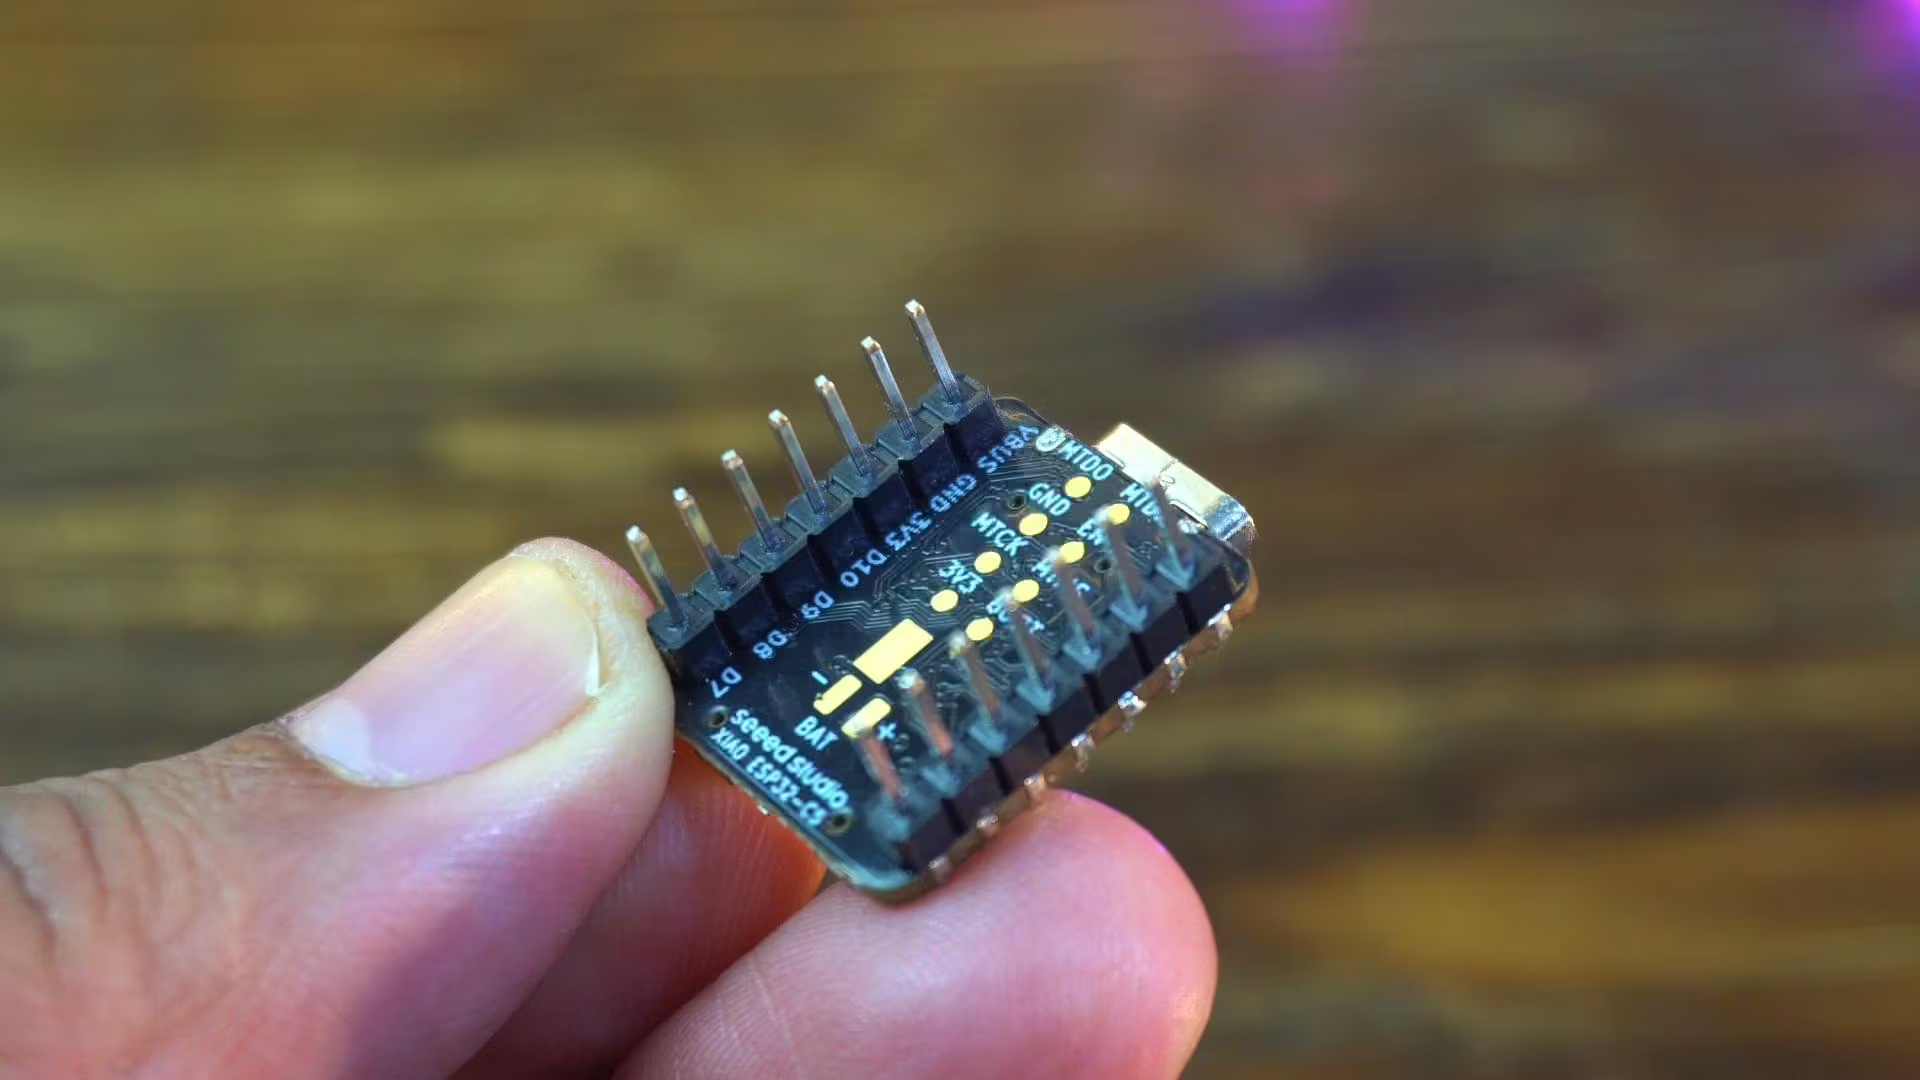
It’s nice to see that the male header pins come pre-soldered, which saves a bit of time. Now let’s connect the flexible PCB antenna.
Now let’s take a closer look at the technical specifications and see what actually sets the XIAO ESP32-C5 apart from the rest.
Xiao ESP32-C5 Specs: Unpacking its Capabilities
ESP32-C5 Architecture and Performance
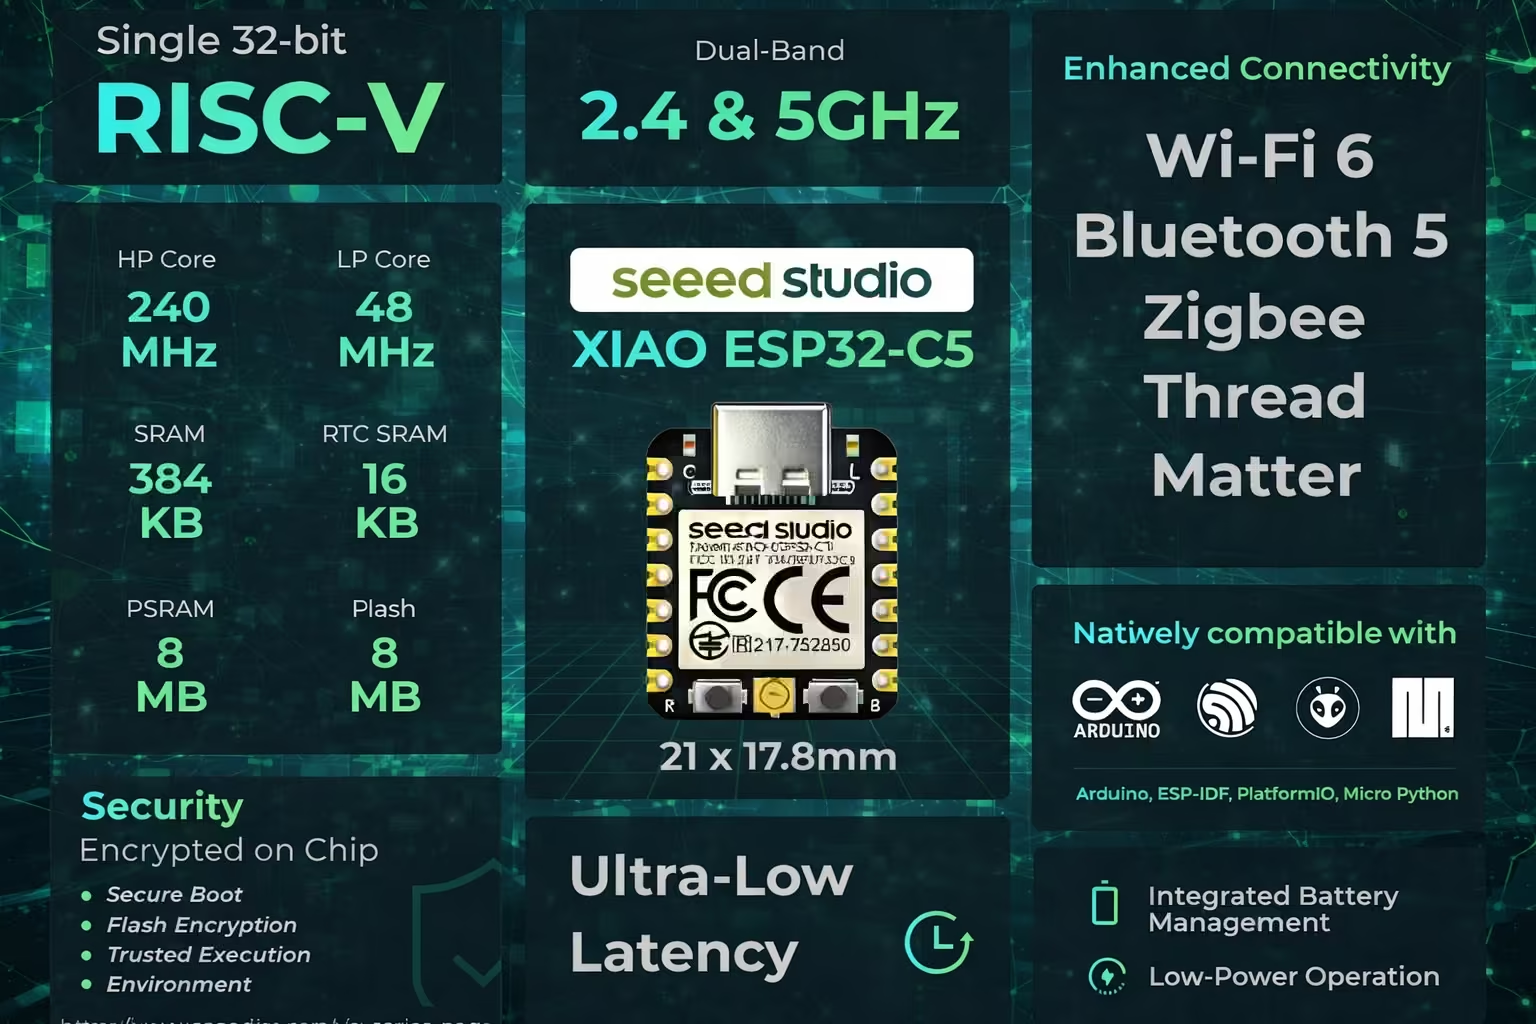
The XIAO ESP32-C5 is built on a single 32-bit RISC-V architecture. It uses a high-performance core running up to 240 megahertz, along with a low-power core that can go up to 48 megahertz. This dual-core setup allows the board to balance performance and power efficiency, depending on what your application needs.
XIAO ESP32-C5 Memory Configuration
In terms of memory, the board comes with 384 kilobytes of SRAM and 16 kilobytes of RTC SRAM, which helps with low-power operations. On top of that, you also get 8 megabytes of PSRAM and 8 megabytes of flash storage. This combination is especially useful for larger firmware, networking tasks, and applications that rely heavily on wireless communication.
Dual-Band Wi-Fi 6 and IoT Connectivity (XIAO ESP32-C5 Features)
One of the biggest highlights of the XIAO ESP32-C5 is its dual-band wireless support. It supports both 2.4 gigahertz and 5 gigahertz Wi-Fi, using the Wi-Fi 6 standard. Along with that, you get Bluetooth 5, Zigbee, Thread, and Matter support, which makes this board suitable for modern IoT and smart home ecosystems.
ESP32-C5 Security Features
Security is also handled directly on the chip. The XIAO ESP32-C5 supports secure boot, flash encryption, and a trusted execution environment. This is important for connected devices where data protection and firmware security matter.
Programming Platforms for XIAO ESP32-C5
The board is natively compatible with popular development platforms like Arduino, ESP-IDF, PlatformIO, and MicroPython. So whether you are a beginner or an advanced developer, you can work with the tools you are already familiar with.
Ultra-Low Latency Wi-Fi 6 Benefits
Another important point shown here is ultra-low latency. Thanks to Wi-Fi 6 and the improved architecture, the board is designed for fast and responsive wireless communication, especially in crowded network environments.
XIAO ESP32-C5 Power Management for Portable Projects
For power management, the XIAO ESP32-C5 includes integrated battery management and supports low-power operation. You can run it directly from USB-C or a 3.7-volt battery, making it ideal for portable and battery-powered projects.
Miniature ESP32 Development Board Dimensions and Form Factor
And finally, all of this is packed into the classic XIAO form factor, measuring just 21 by 17.8 millimeters. Despite its tiny size, it delivers features that were previously only available on much larger development boards.
XIAO ESP32-C5 Comparisons: Familiarity for C3/C6 Users
If you have used XIAO ESP32-C3 or XIAO ESP32-C6, this board feels instantly familiar.
Software Setup: Getting Started with XIAO ESP32-C5
Arduino IDE for ESP32-C5: Initial Check
Right now, I am using Arduino IDE version 2.3.6.
Now go to Tools menu > then Board > and ESP32. You will see a long list of ESP32 boards here, but at this point, you won’t find the XIAO ESP32-C5 in the list.
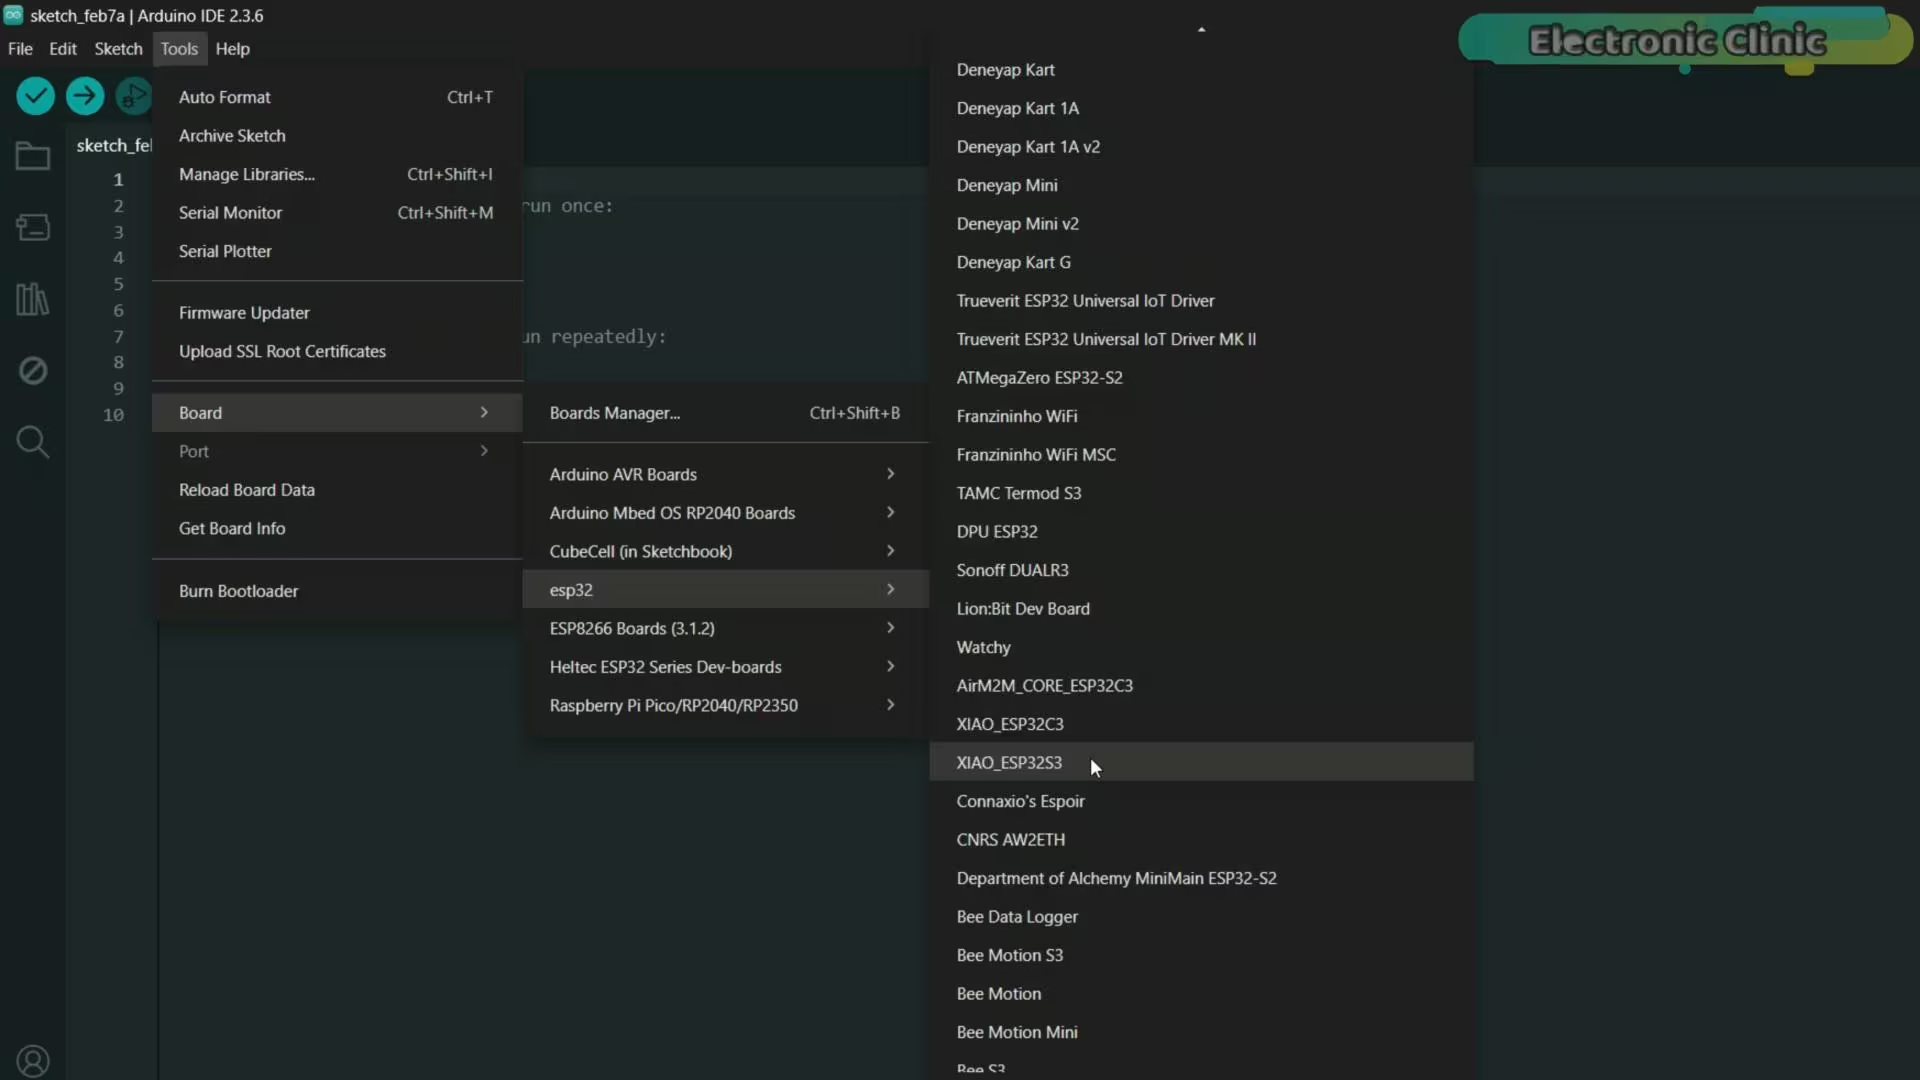
That’s because I am using an older version of the ESP32 board package.
Update ESP32 Board Package for XIAO ESP32-C5 Support
So let’s update it.
To do that, open the Boards Manager and search for ESP32.
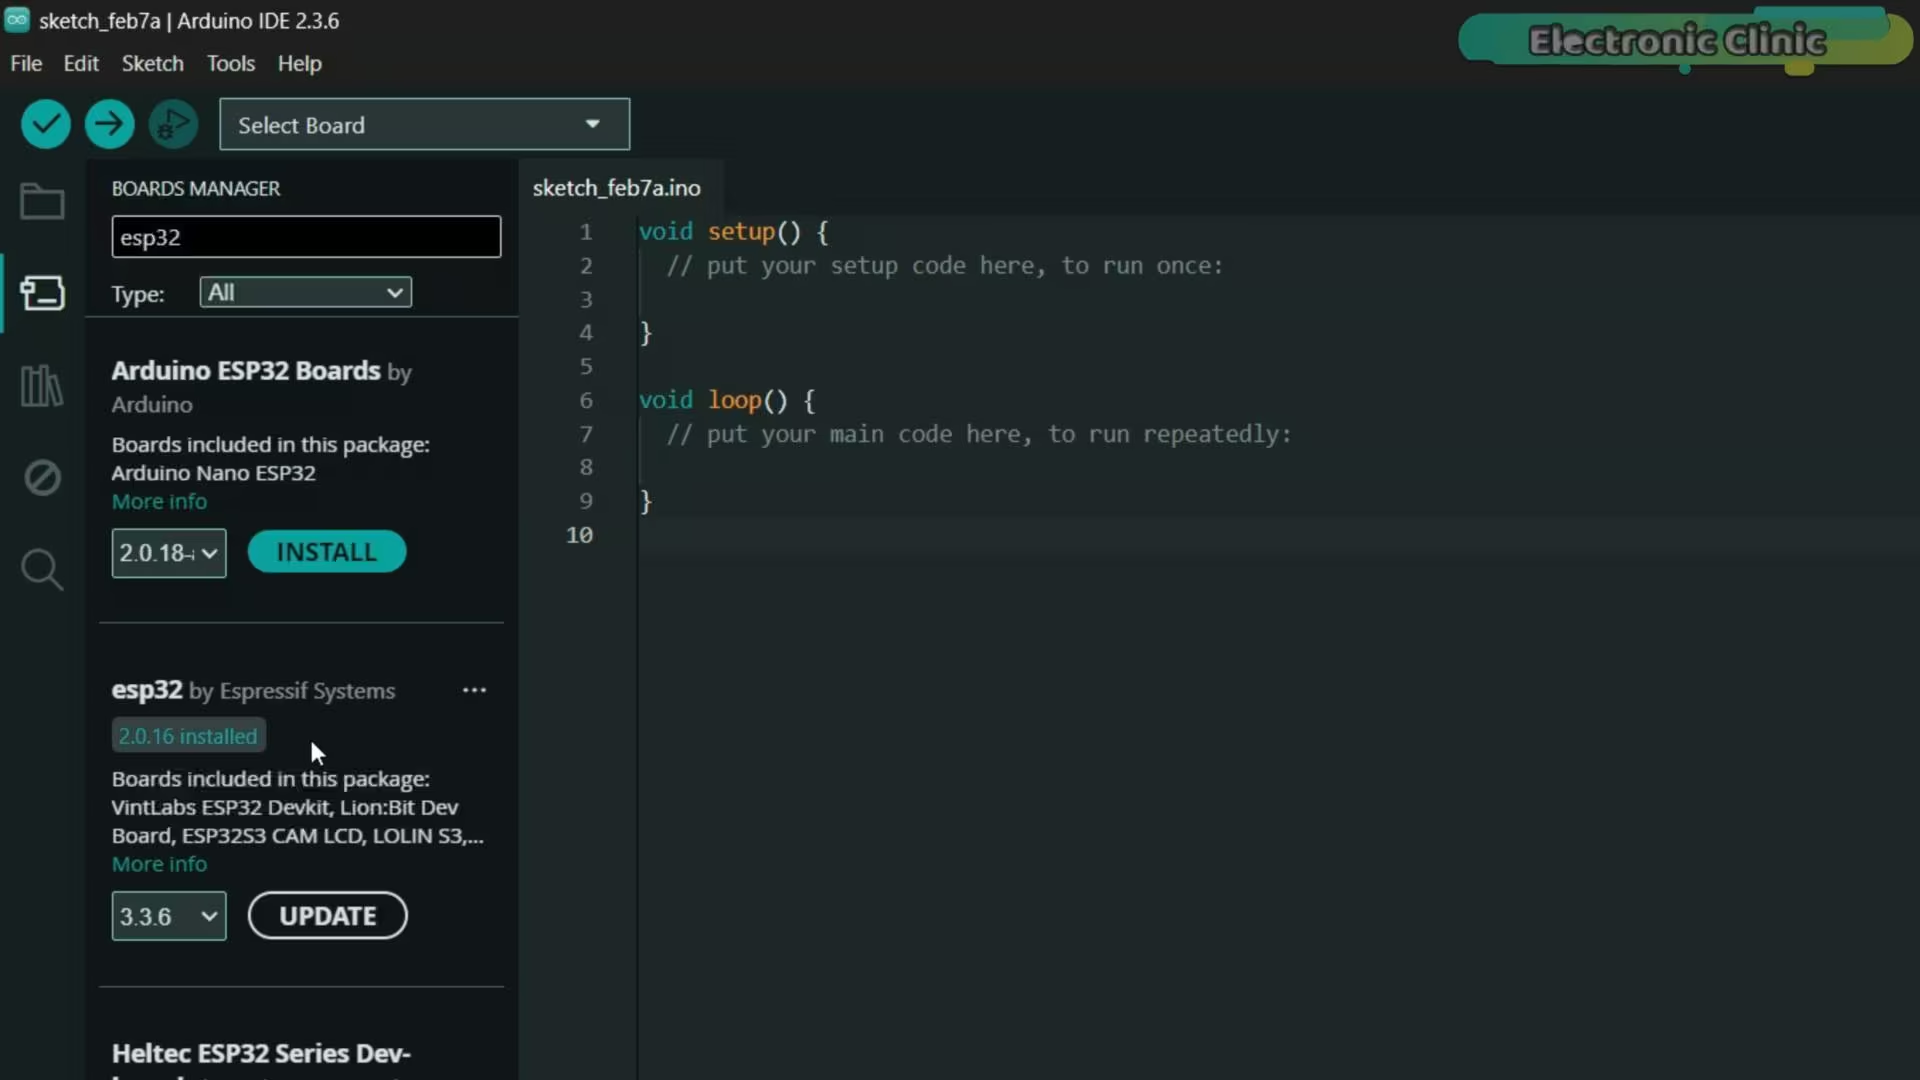
As you can see, version 2.0.16 is currently installed.
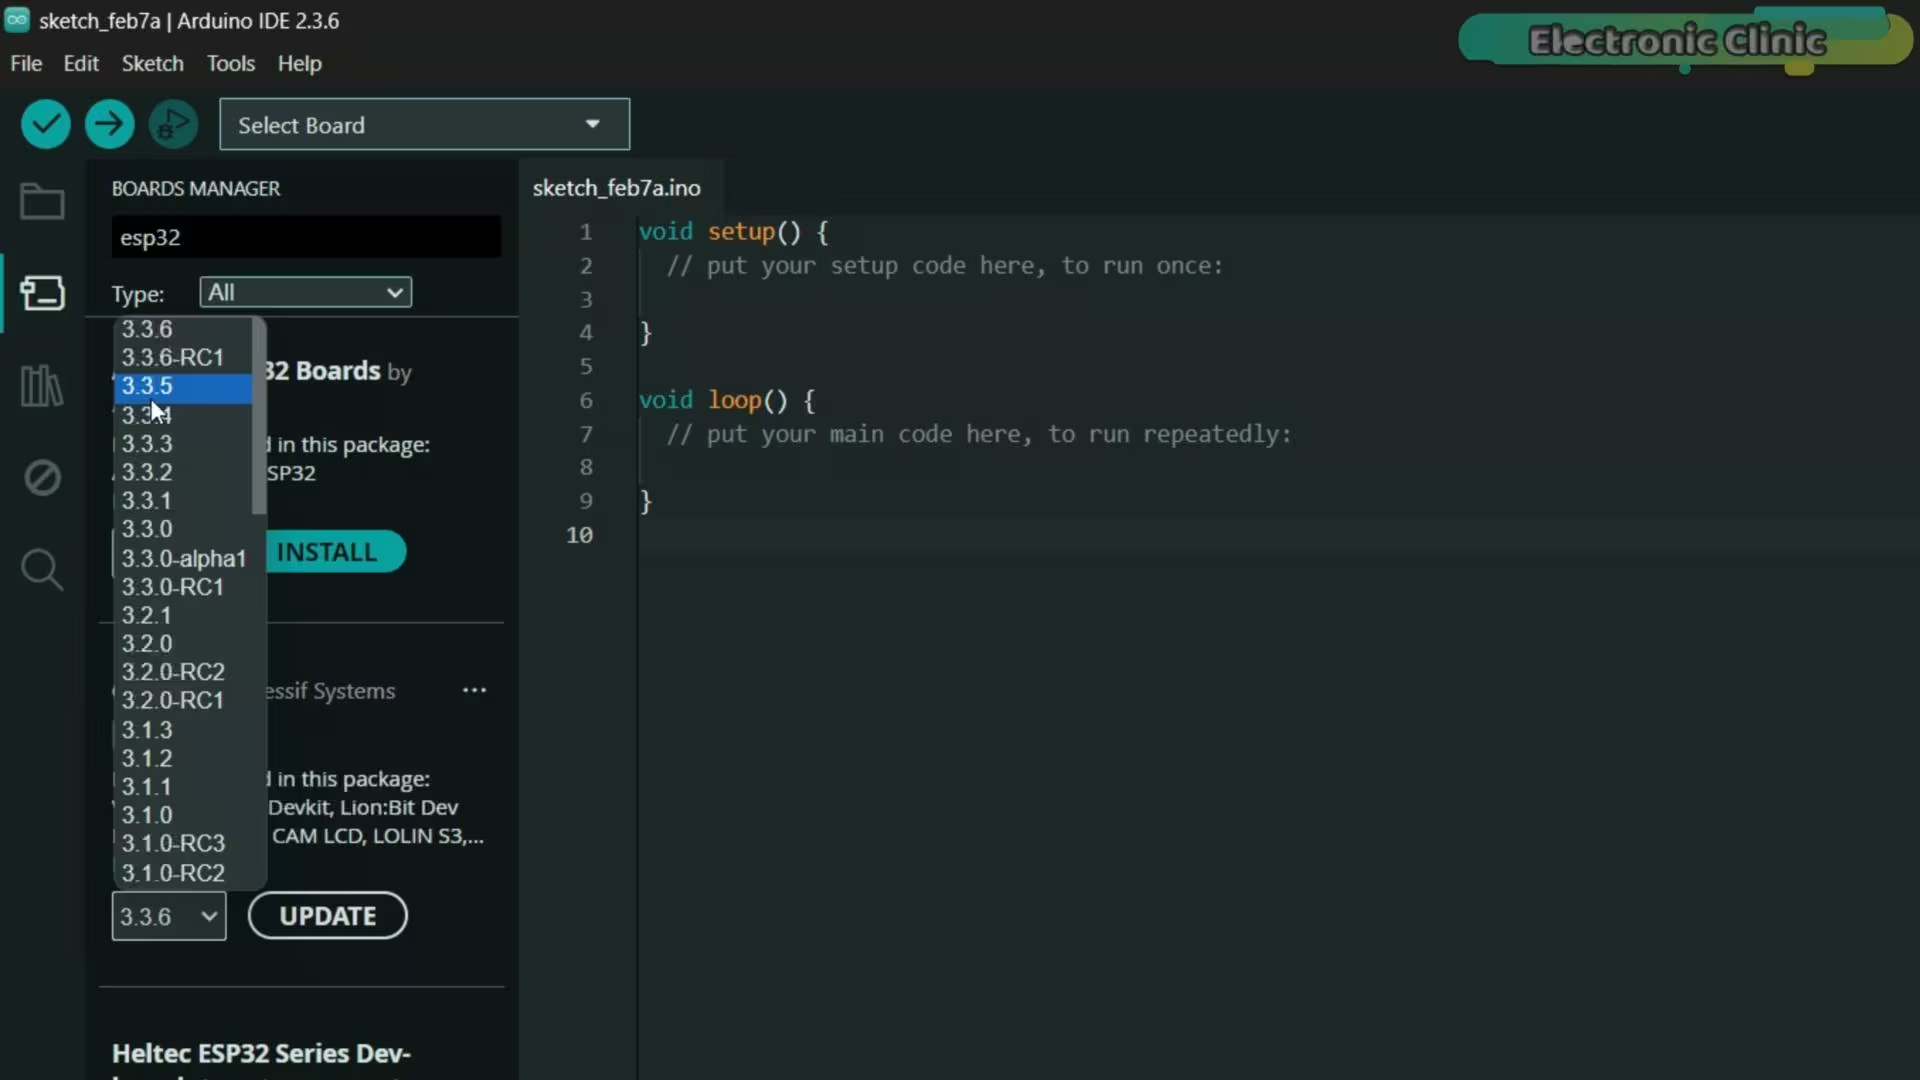
We need to update this to version 3.3.5, because support for the XIAO ESP32-C5 is included in the newer versions.
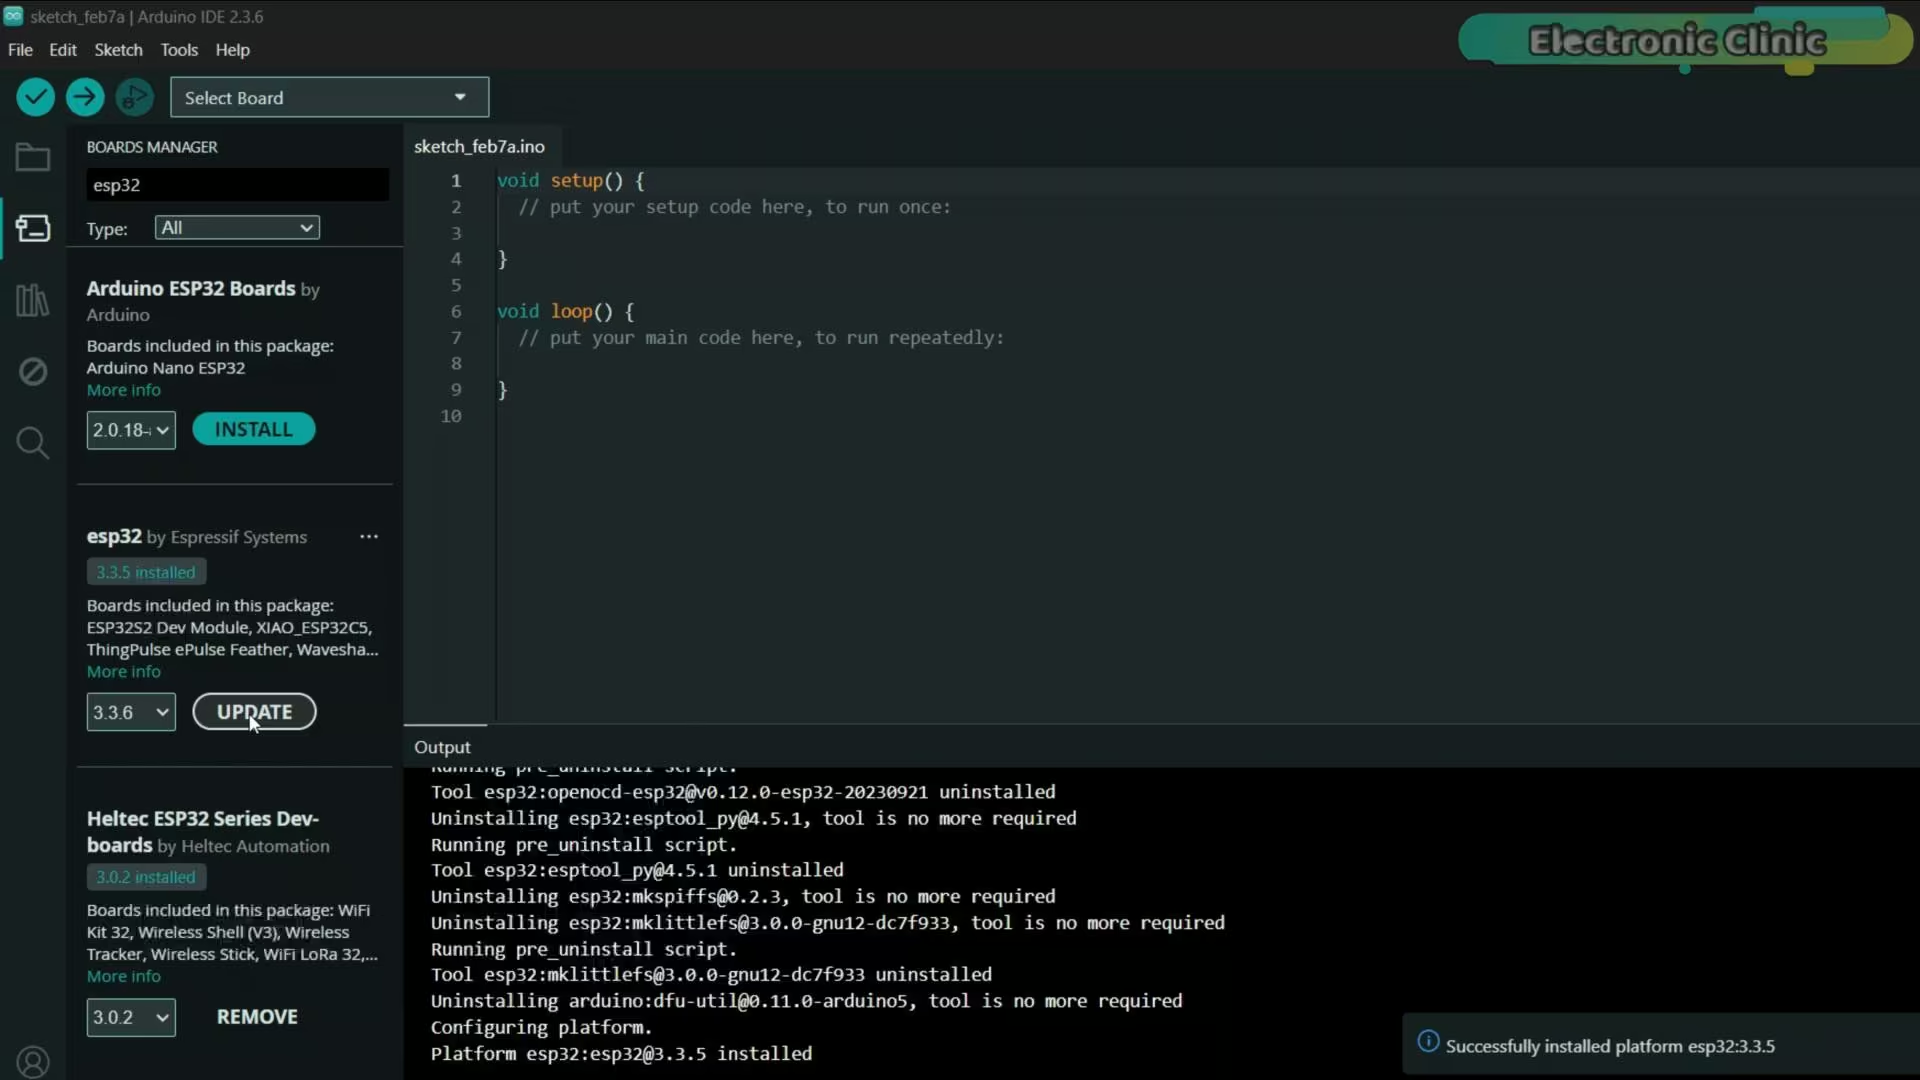
The new ESP32 board package is now successfully installed, so let’s check if the XIAO ESP32-C5 is available in the boards list.
Confirming XIAO ESP32-C5 Board Installation
After the update, a lot of new boards have been added, and the list is much longer now. It just keeps scrolling.
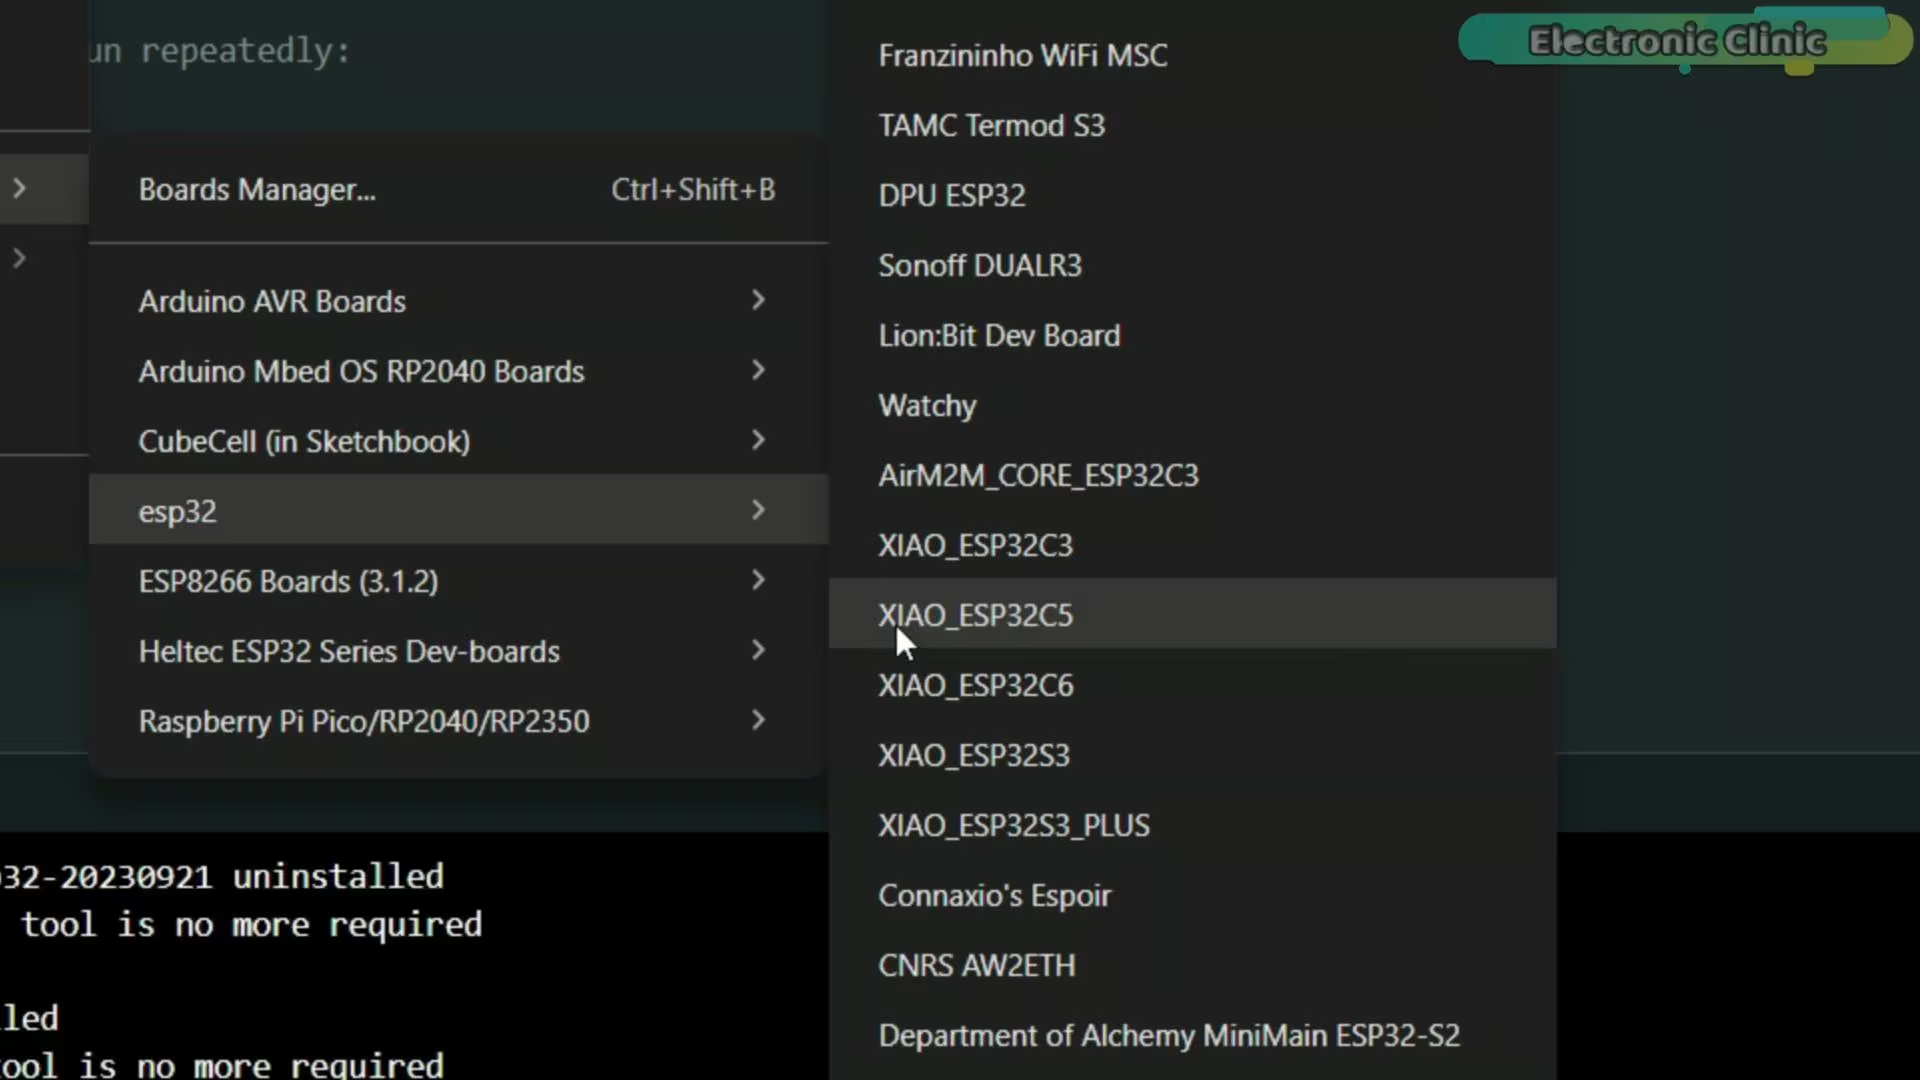
And here it is; the XIAO ESP32-C5 is now available in the list.
Amazon Links:
Other Tools and Components:
ESP32 WiFi + Bluetooth Module (Recommended)
Arduino Nano USB C type (Recommended)
*Please Note: These are affiliate links. I may make a commission if you buy the components through these links. I would appreciate your support in this way!
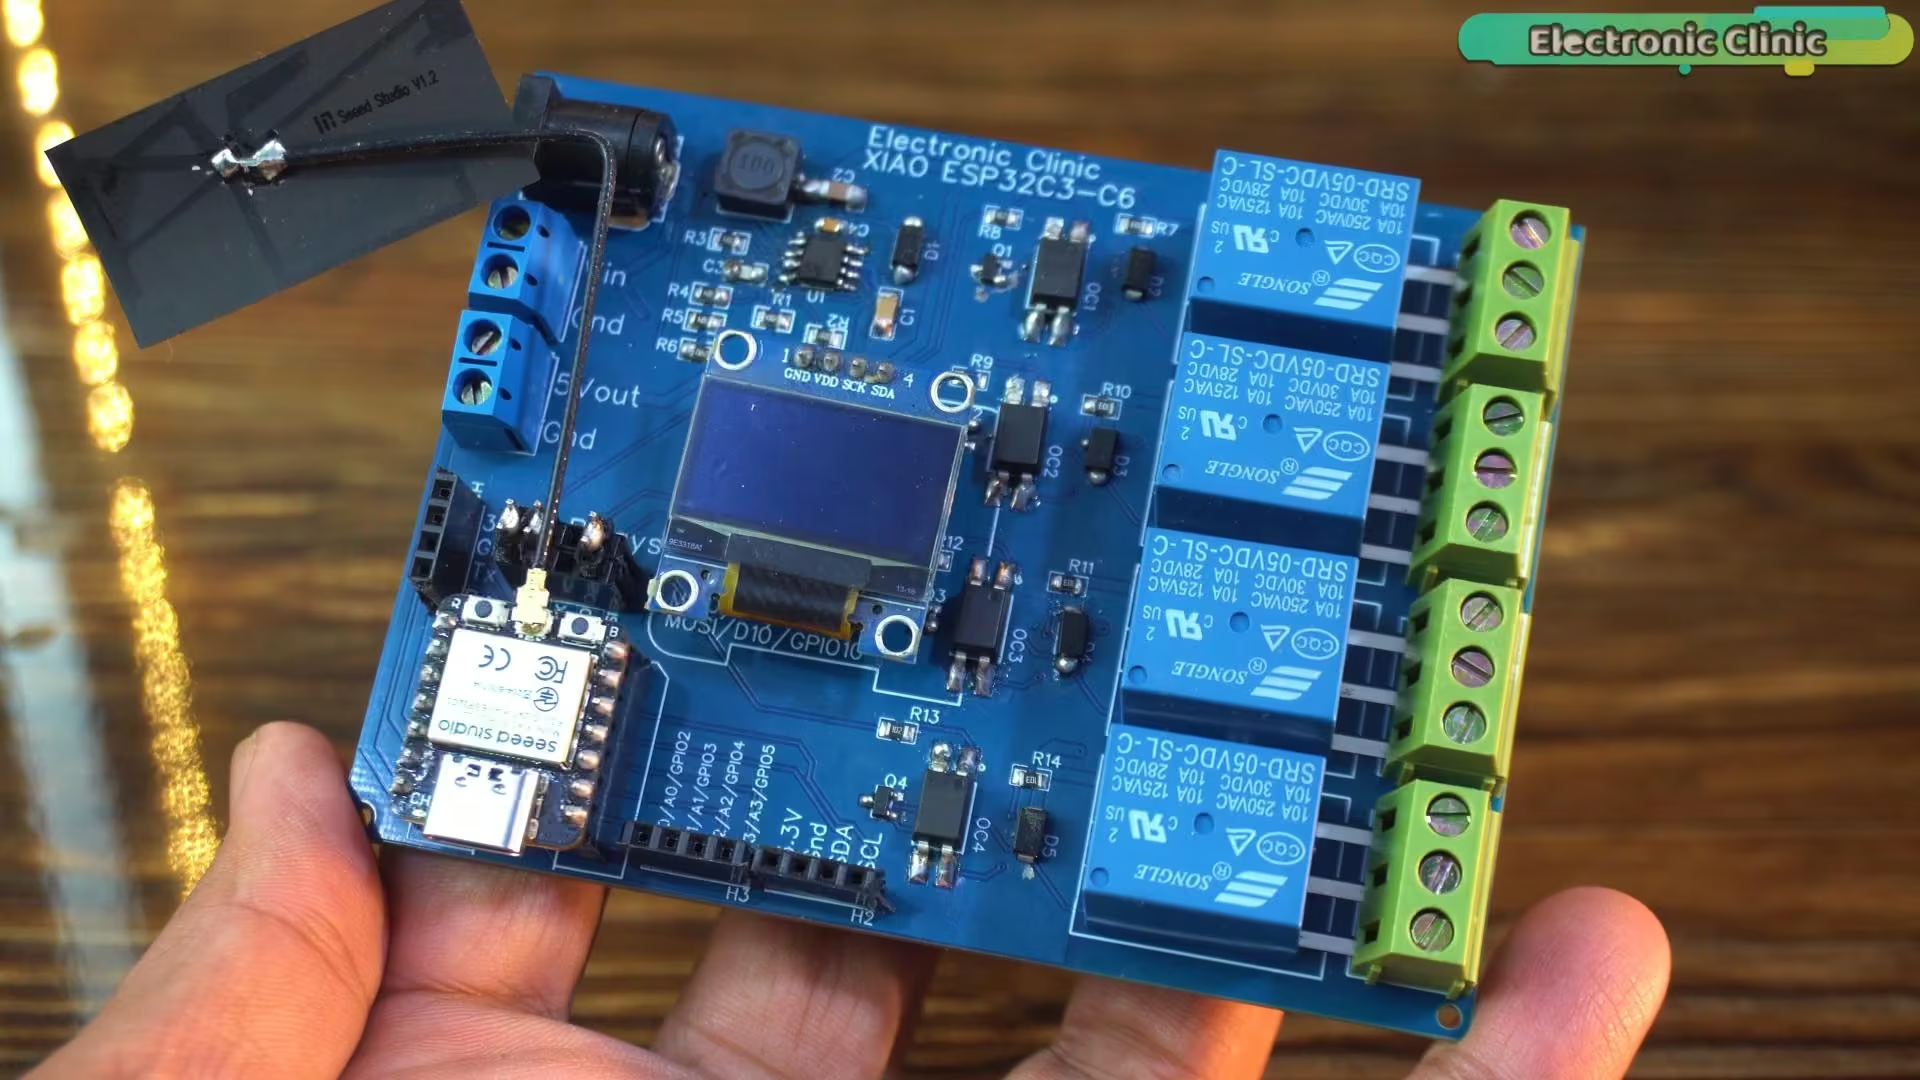
This development board was originally designed for the XIAO ESP32-C3 and XIAO ESP32-C6.
But since the XIAO ESP32-C5 has the exact same size and pin layout, I can also use the XIAO ESP32-C5 with this same development board without any changes.

If you want to build a similar development board for yourself, you can watch my previous video where I explain the complete design.
I have already explained the connections for the SSD1306 OLED display and the relays in that previous video, so I won’t repeat the wiring details again here. Instead, let’s jump straight into printing text on the OLED display and controlling the relays using the XIAO ESP32-C5.
XIAO ESP32-C5 and SSD1306 Oled display Code:
|
1 2 3 4 5 6 7 8 9 10 11 12 13 14 15 16 17 18 19 20 21 22 23 24 25 26 27 28 29 30 31 32 33 34 |
#include <Wire.h> #include <Adafruit_GFX.h> #include <Adafruit_SSD1306.h> // ================= OLED SETTINGS ================= #define SCREEN_WIDTH 128 #define SCREEN_HEIGHT 64 Adafruit_SSD1306 display(SCREEN_WIDTH, SCREEN_HEIGHT, &Wire, -1); void setup() { Serial.begin(115200); // Initialize OLED Wire.begin(); // SDA=D4, SCL=D5 on Xiao ESP32-C3 if(!display.begin(SSD1306_SWITCHCAPVCC, 0x3C)) { Serial.println("OLED not found"); for(;;); // Stop here if display failed } display.clearDisplay(); display.setTextColor(WHITE); display.setTextSize(2); display.setCursor(0, 20); display.println("Electronic"); display.setCursor(0, 40); display.println("Clinic"); display.display(); } void loop() { // Nothing here; display stays static } |
This code is only meant for basic testing, just to make sure everything is working as expected. I’m simply initializing the SSD1306 OLED display and printing some text on the screen. If the text appears correctly, it confirms that the I²C communication, wiring, and the XIAO ESP32-C5 itself are all working fine. This kind of quick test is always a good starting point before moving on to more complex logic or real applications.
Now let’s upload the program.
First, select XIAO ESP32-C5 as the board.
Then choose the correct communication port.
Once that’s done, hit the Upload button.
And there we go;
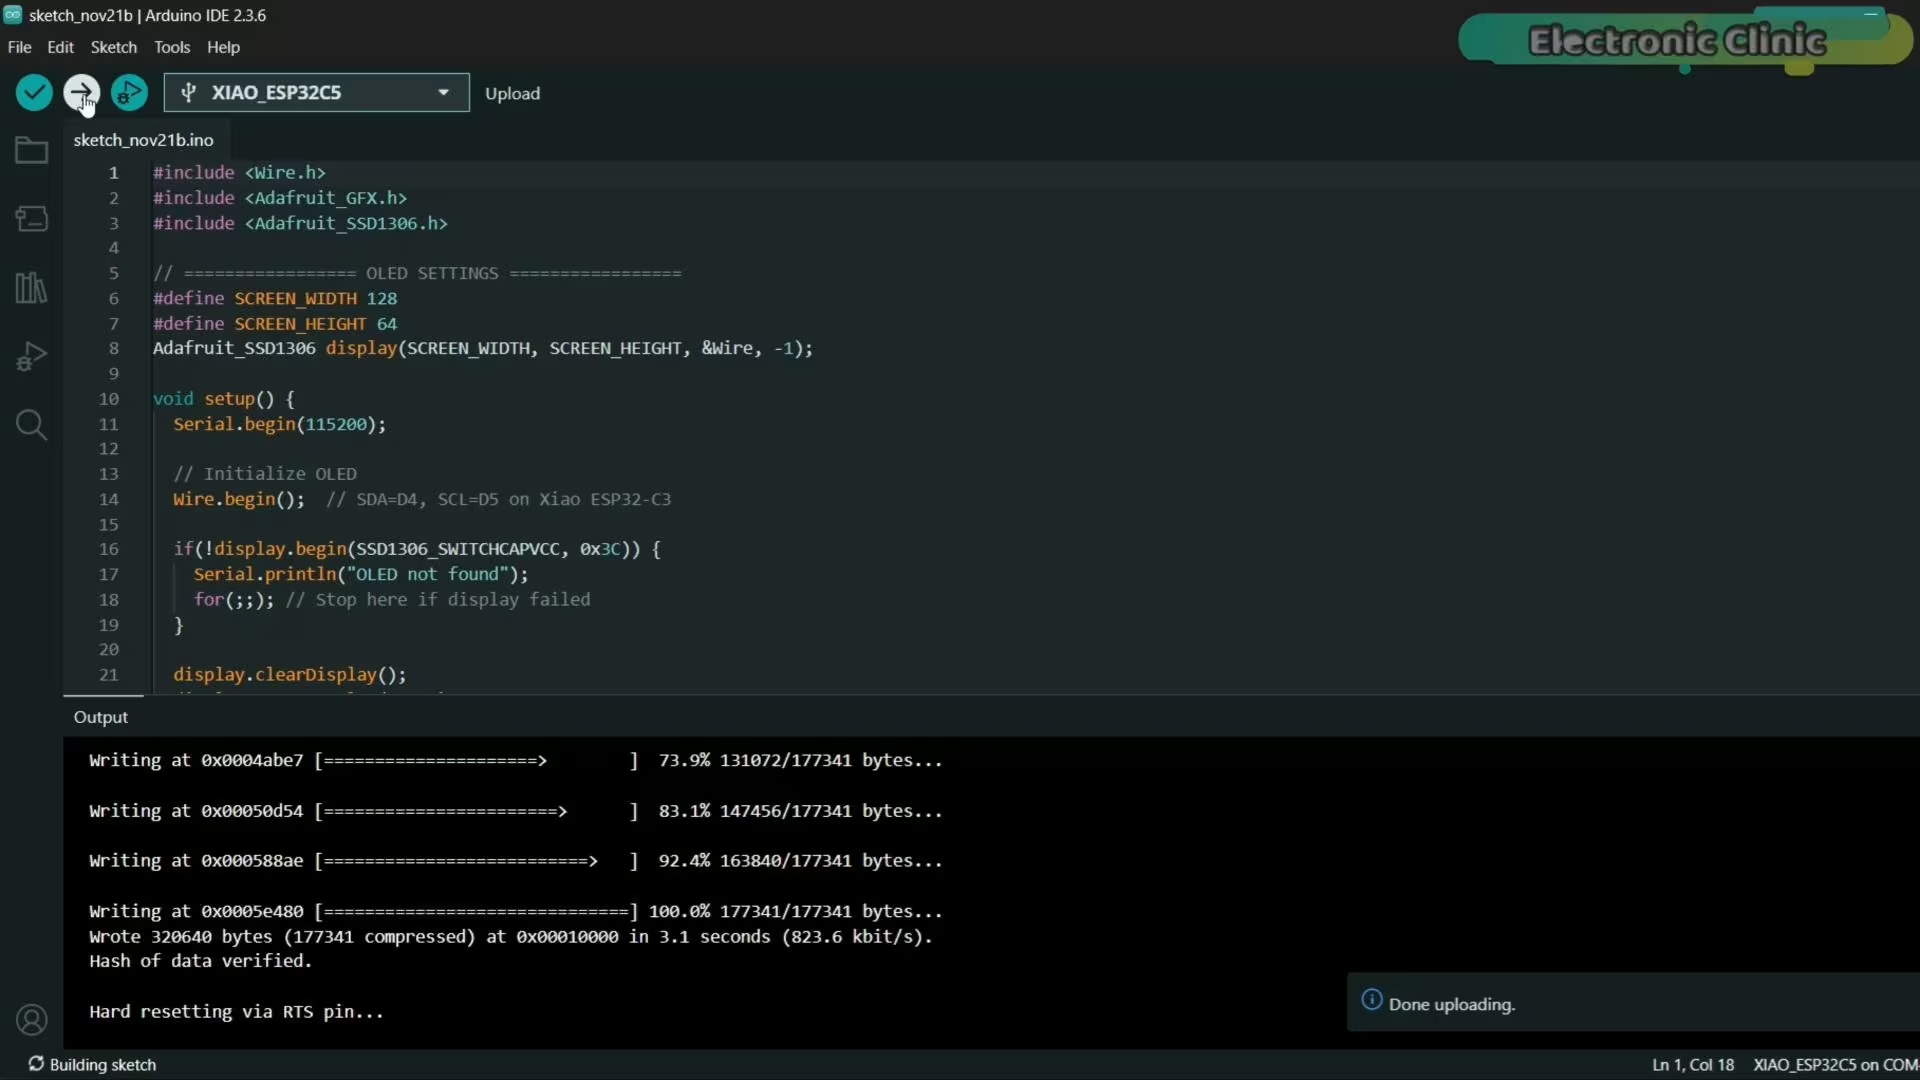
The code is uploaded successfully, and the board is ready to go.
Practical Demo:
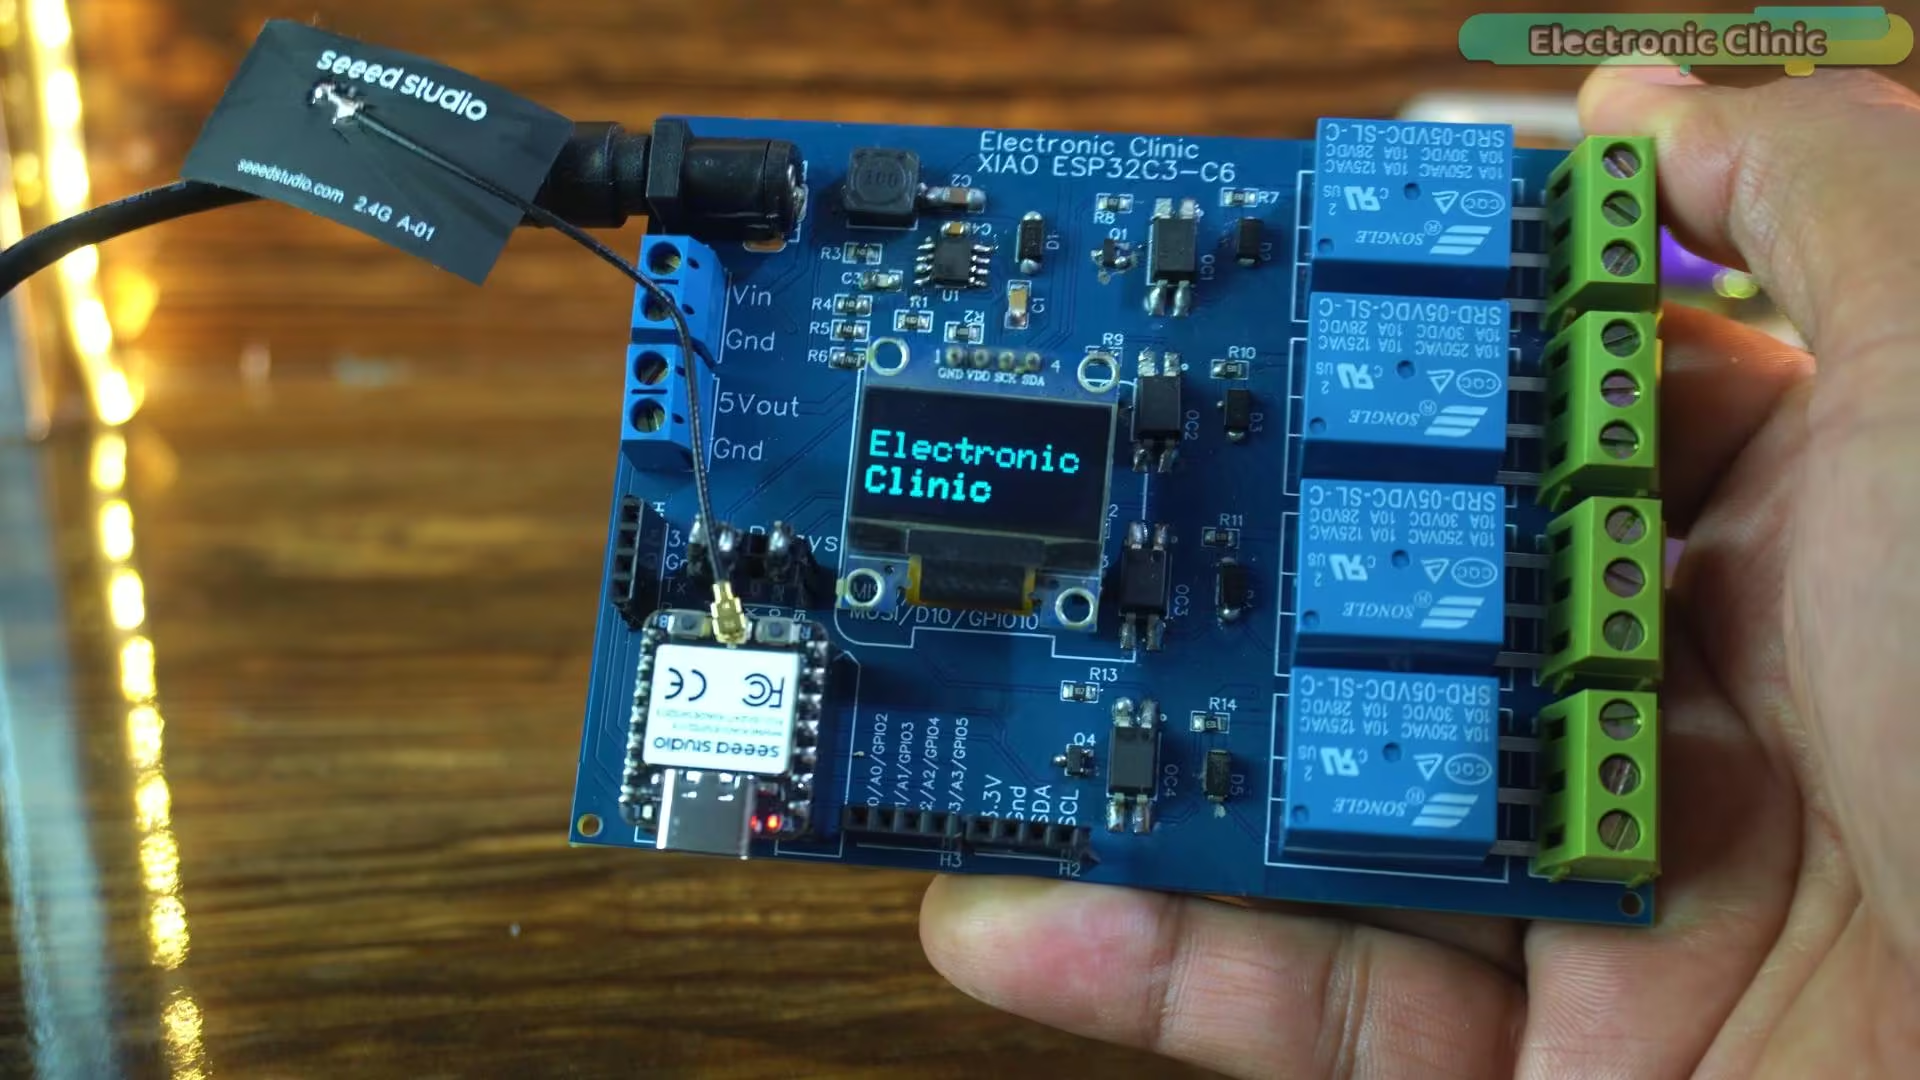
As soon as you see “Electronic Clinic” appear on the OLED, that’s the moment you know everything is working — the I²C communication is fine, the wiring is correct, and the XIAO ESP32-C5 is running perfectly. This quick test gives me confidence before moving on to more complex logic or real-world applications, and it’s always a good first step in any project.
XIAO ESP32-C5 and 5V SPDT Relays:
|
1 2 3 4 5 |
// define led according to pin diagram int relay1 = D0; int relay2 = D8; int relay3 = D9; /* |
I won’t be using D9 to control a relay in the future.
When a relay is connected to D9 and I power up the controller, the relay doesn’t work.
But if I disconnect the relay from D9, power up the controller first,
and then reconnect the relay, it works normally.
This happens because D9 is involved in the ESP32-C3’s boot process and is not a stable,
general-purpose output during power-up. Any external load—like a relay driver or transistor—interferes
with the pin’s boot behavior, preventing it from working correctly until the system has fully initialized.
To avoid this issue, it’s better to use a different GPIO that is safe during boot.
|
1 2 3 4 5 6 7 8 9 10 11 12 13 14 15 16 17 18 19 20 21 22 23 24 25 26 27 28 29 30 31 32 33 34 35 36 37 38 39 40 |
*/ int relay4 = D10; void setup() { // initialize digital pin led as an output Serial.begin(115200); pinMode(relay1, OUTPUT); pinMode(relay2, OUTPUT); pinMode(relay4, OUTPUT); } void loop() { digitalWrite(relay1, HIGH); // turn the LED on Serial.println("Relay1 ON"); delay(1000); // wait for a second digitalWrite(relay2, HIGH); // turn the LED on Serial.println("Relay2 ON"); delay(1000); digitalWrite(relay4, HIGH); // turn the LED on Serial.println("Relay4 ON"); delay(1000); digitalWrite(relay1, LOW); // turn the LED off Serial.println("Relay1 OFF"); delay(1000); // wait for a second digitalWrite(relay2, LOW); // turn the LED off Serial.println("Relay2 OFF"); delay(1000); // wait for a second digitalWrite(relay4, LOW); // turn the LED off Serial.println("Relay4 OFF"); delay(1000); // wait for a second } |
This second code is also just for testing purposes, but this time I’m using it to control relay modules. I’m simply turning the relays on and off one by one with a fixed delay, so I can visually and physically confirm that each output pin is working correctly. I have already uploaded this program; so, let’s watch this in action.
Practical Demo:

I am simply turning the relays on and off one by one with a short delay. Every relay click you hear is the XIAO ESP32-C5 controlling real hardware in real time. This isn’t about building a final project yet; it’s just a quick, practical check to confirm that the GPIO pins are working properly and the board is behaving exactly as expected.
So, that’s all for now.
Watch Video Tutorial:

XIAO ESP32-C5 FAQs
What is the XIAO ESP32-C5?
The XIAO ESP32-C5 is a compact IoT development board from Seeed Studio that supports Wi-Fi 6, Bluetooth 5, Zigbee, Thread, and Matter.
What makes the XIAO ESP32-C5 different from other XIAO boards?
The main difference is dual-band Wi-Fi (2.4GHz and 5GHz) with Wi-Fi 6 support, which is not available in earlier XIAO boards.
Why was the XIAO ESP32-C5 released after the ESP32-C6?
Seeed Studio released the ESP32-C6 first, which confused many users, but the C5 is focused more on dual-band Wi-Fi performance.
What processor does the XIAO ESP32-C5 use?
It is based on a 32-bit RISC-V architecture with a high-performance core up to 240 MHz and a low-power core up to 48 MHz.
How much memory does the XIAO ESP32-C5 have?
It includes 384KB SRAM, 16KB RTC SRAM, 8MB PSRAM, and 8MB flash storage.
Which wireless technologies are supported by the XIAO ESP32-C5?
It supports Wi-Fi 6 (2.4GHz and 5GHz), Bluetooth 5, Zigbee, Thread, and Matter.
Which software platforms can be used with XIAO ESP32-C5?
You can use Arduino IDE, ESP-IDF, PlatformIO, and MicroPython for development.
Why is the XIAO ESP32-C5 not showing in Arduino IDE?
It does not appear if you are using an older ESP32 board package. You need to update it to version 3.3.5 or newer.
Can I use the same development board as XIAO ESP32-C3 and C6?
Yes, the XIAO ESP32-C5 has the same size and pin layout, so it works with the same development boards.
Why should I avoid using pin D9 for relays?
D9 is involved in the boot process, so connecting a relay can cause issues during startup. It’s better to use other GPIO pins.
Discover more from Electronic Clinic
Subscribe to get the latest posts sent to your email.