Arduino Analog Sensor Input Code Example
Last Updated on August 16, 2024 by Engr. Shahzada Fahad
Table of Contents
Arduino Analog Sensor Input, Example:
In this example, I am going to explain how to read an Arduino analog sensor and send its value to the Serial monitor. So, in this example, we are going to cover two things, how to read an analog sensor and how to use Serial Communication. For the demonstration purposes I am going to use the Potentiometer as the analog sensor, if you want you can also use an LDR or any other analog sensor.
Amazon Links:
Arduino Nano USB-C Type (Recommended)
*Disclosure: These are affiliate links. As an Amazon Associate I earn from qualifying purchases.
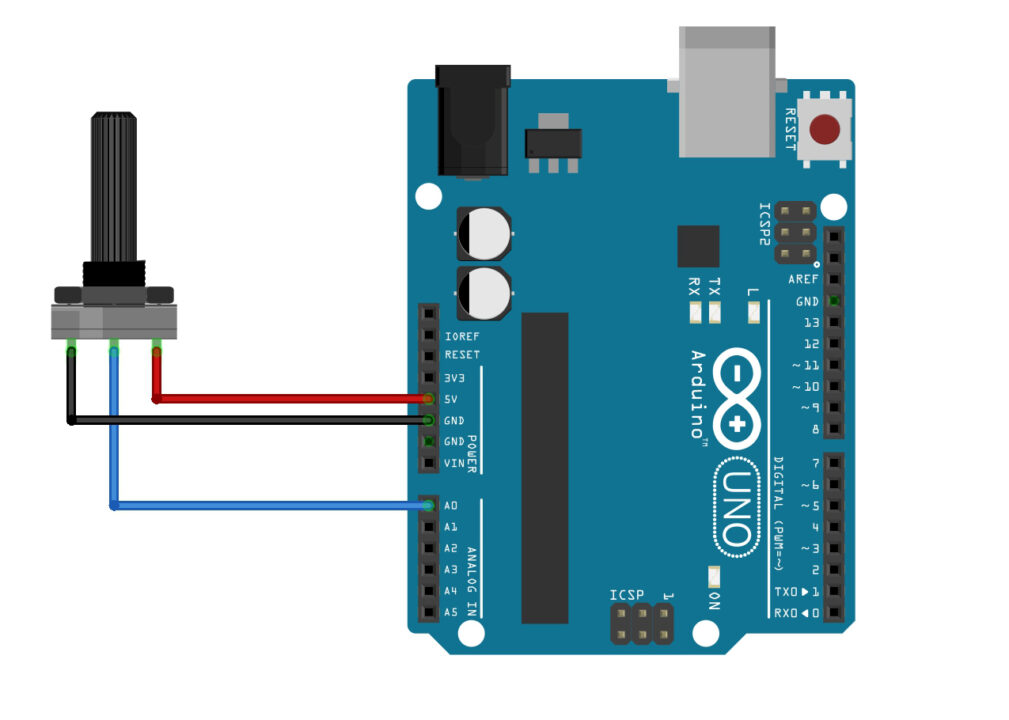
The Leftmost and rightmost legs of the potentiometer are connected to the Arduino 5V and GND. Whereas the middle leg of the potentiometer is connected to the Analog pin A0. Now, let’s go ahead and take a look at the programming.
Arduino Analog Input programming:
|
1 2 3 4 5 6 7 8 9 10 11 12 13 14 |
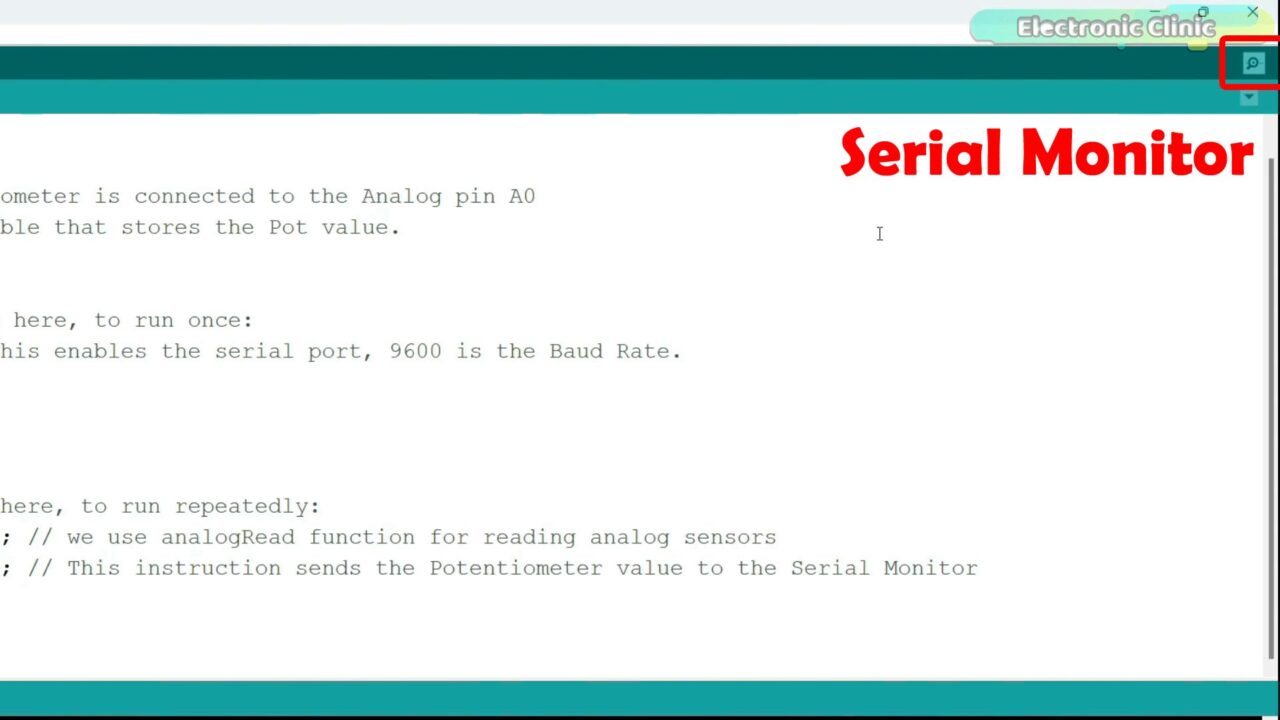
int pot = A0; // Potentiometer is connected to the Analog pin A0 int potvalue; // a variable that stores the Pot value. void setup() { // put your setup code here, to run once: Serial.begin(9600); // This enables the serial port, 9600 is the Baud Rate. pinMode(pot,INPUT); } void loop() { // put your main code here, to run repeatedly: potvalue=analogRead(pot); // we use analogRead function for reading analog sensors Serial.println(potvalue); // This instruction sends the Potentiometer value to the Serial Monitor } |
I simply started off by defining the pin and a variable. To activate Serial communication between Arduino and a computer or any other serial communication supported devices; we use the Serial.begin() function and inside the parenthesis we add the Baud rate. For this example, I have selected the standard baud rate of 9600. The baud rate specifies the speed at which data is transmitted in bits per seconds(bps). Common baud rates include 9600, 115200, 57600, 38400, etc.
analogRead() is a function used to read analog voltage values from an analog input pin on the Arduino board. Arduino boards have several analog input pins labeled with “A0,” “A1,” and so on. These pins can be used to read analog signals, such as those generated by sensors, potentiometers, or other analog devices.
The analogRead() function takes one argument, which is the number of the analog input pin you want to read from. The argument should be a number representing the pin’s analog input number. For example, to read from analog pin A0, you would use analogRead(A0). But, in my case, I have defined it with the name pot.
So, it reads the potentiometer and stores the value in a variable potvalue and then using the Serial.println() function we send the value to the Serial Monitor.
Upload the program and then click on the Serial monitor button.
Then you should be able to see the Potentiometer value; you will see different values as you rotate the knob of the Potentiometer. For the step by step explanation and practical demonstration watch the video tutorial given at the end of this article.

video tutorial
Discover more from Electronic Clinic
Subscribe to get the latest posts sent to your email.


