Underwater Ultrasonic Sensor Arduino Interfacing and Distance Measurement
Last Updated on May 11, 2026 by Engr. Shahzada Fahad
Table of Contents
Underwater Ultrasonic Sensor:
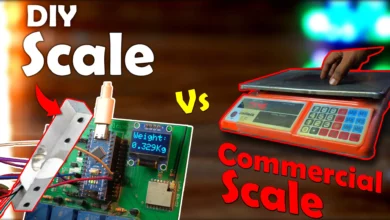
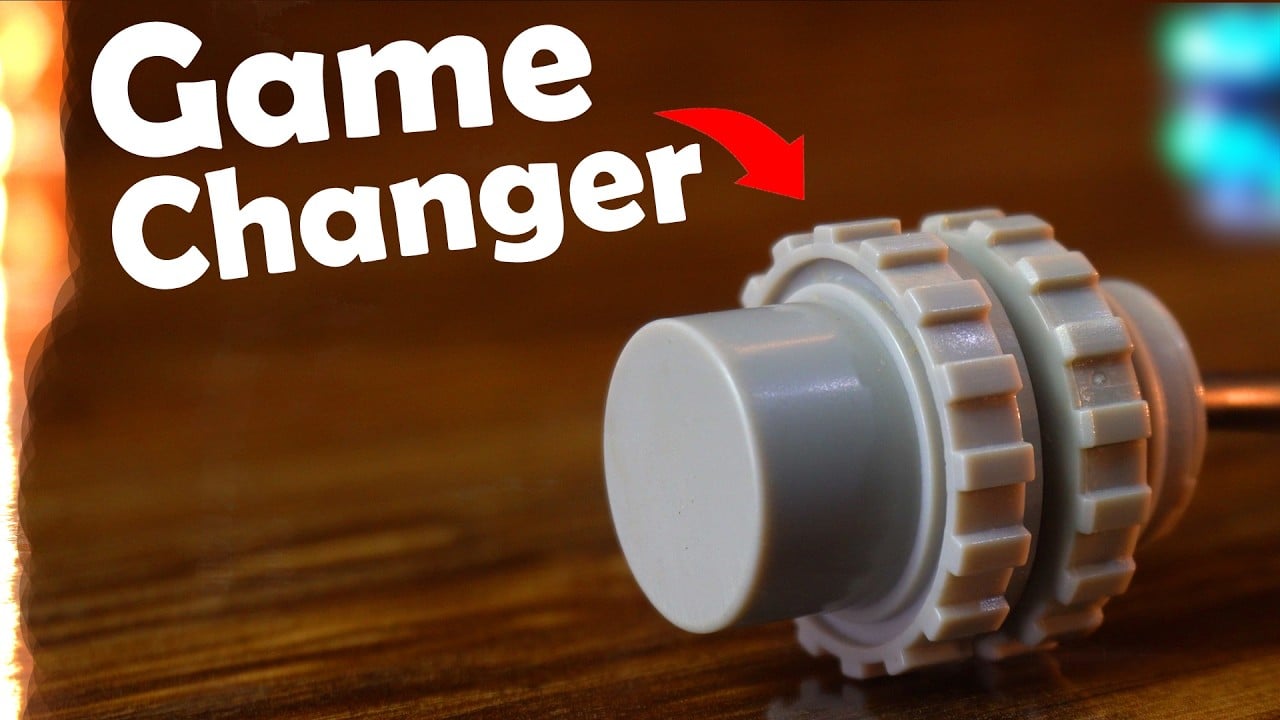
Underwater Ultrasonic Sensor with Arduino- This Underwater Ultrasonic Sensor from the DFRobot is a Game Changer. And when used with Arduino, you can do things you can’t even imagine. To show you how powerful this underwater ultrasonic sensor is, I will share four tests with you that are going to blow your mind.
So far, you may have seen a lot of waterproof ultrasonic sensors, including the most popular ones, A02YYUW and SR04T/AJ-SR04M. There is no doubt that these ultrasonic sensors are completely waterproof, but you can only use them outside the water. When submerged, these ultrasonic sensors fail to work.
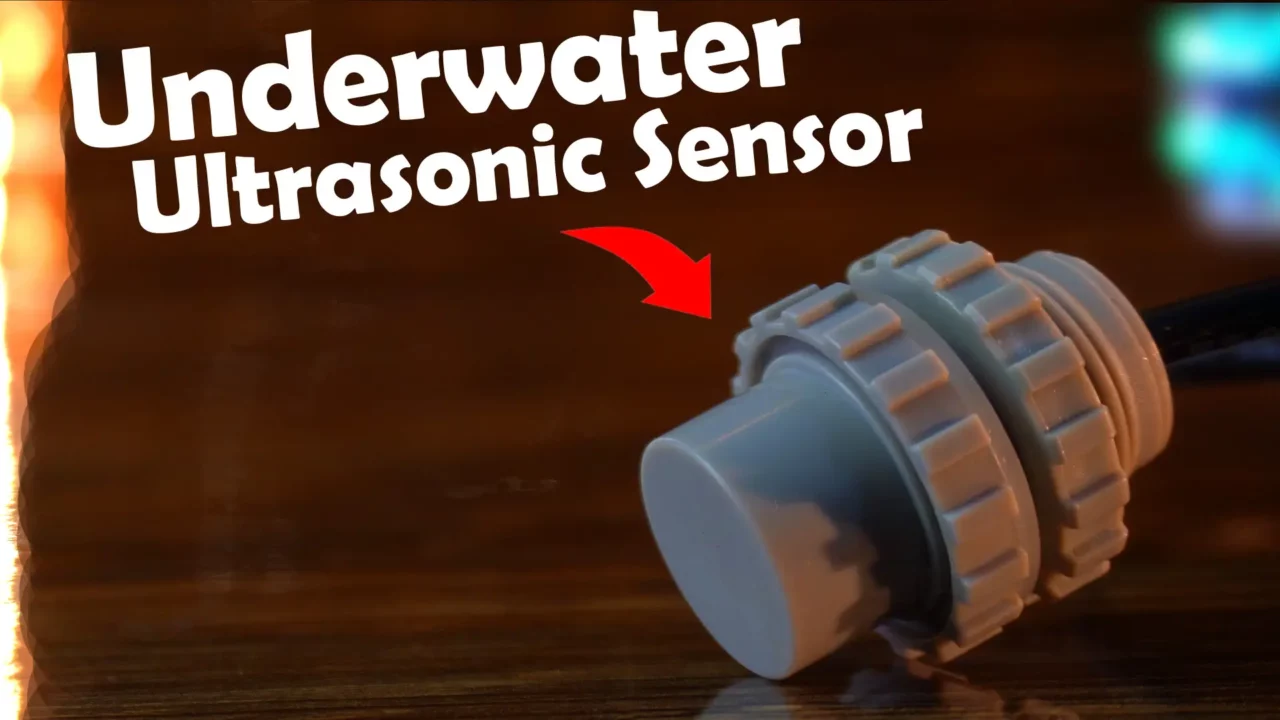
However, thanks to DFRobot’s Underwater Ultrasonic Ranging Sensor, which can be used underwater to avoid obstacles and monitor water depth.
Since it’s specifically designed for underwater applications, so, the sensor can only be used underwater as it requires the presence of water to provide accurate data.
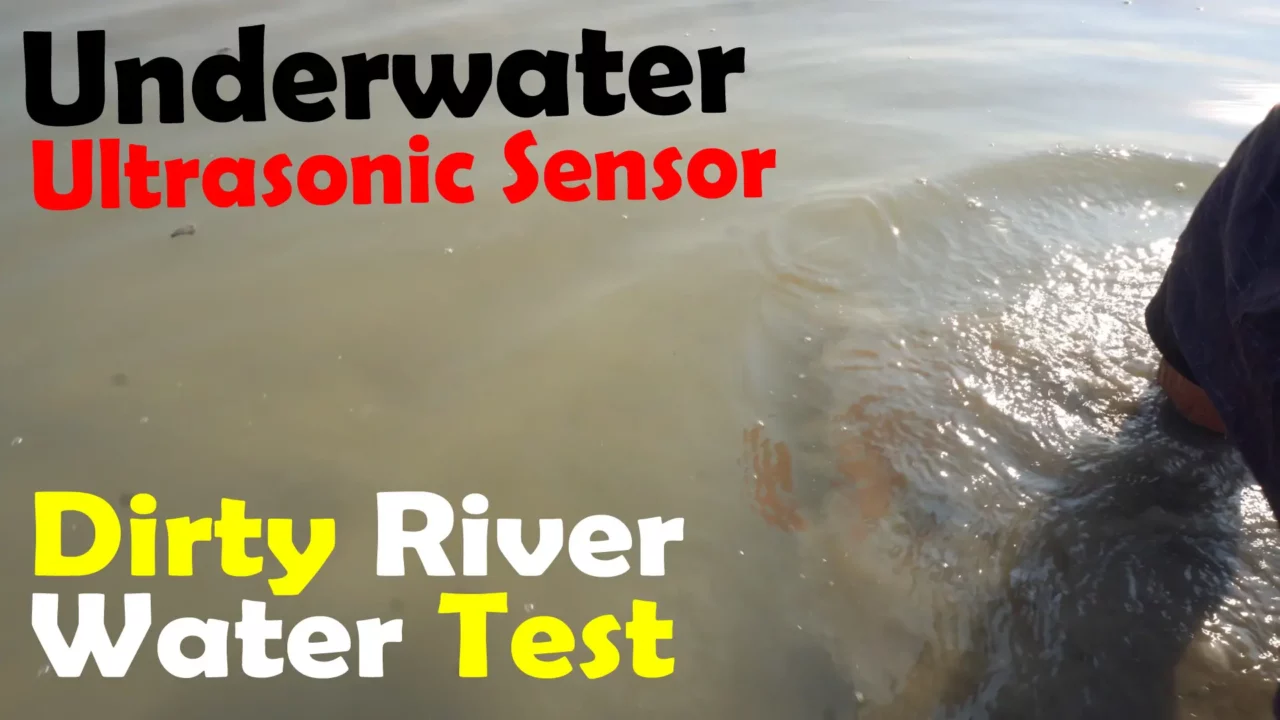
With an IP68 protection rating, this sensor can replace a camera for obstacle avoidance and meet the requirements of standard underwater navigation speeds. I am saying this because a camera won’t work in dirty water like this.
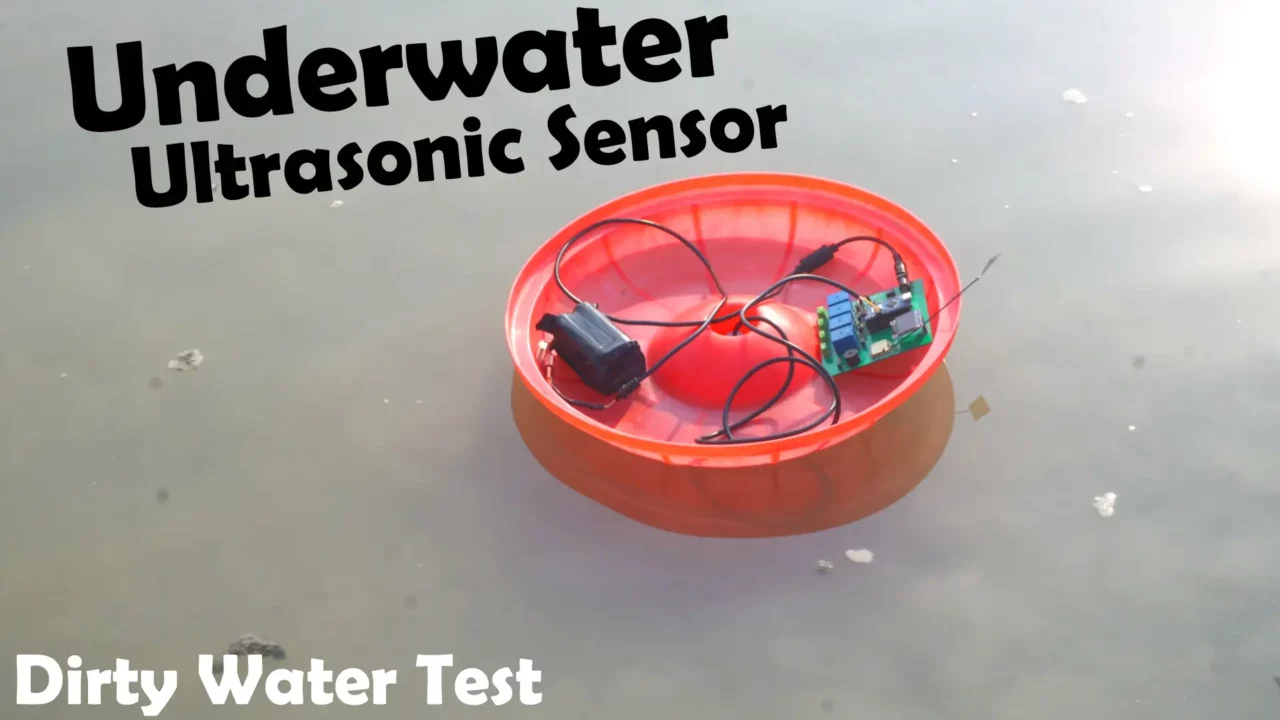
Where you can’t even see an inch below the surface. So, in such water, a camera cannot be used.
So, we will also use the Underwater Ultrasonic Sensor in such dirty water to check whether we can still obtain an accurate distance value.
Finding the depth of such dirty water is important because traditional methods, such as cameras and optical sensors, fail in low-visibility conditions. Unlike cameras, which require clear water to capture images, ultrasonic sensors use sound waves, making them effective even in muddy or polluted water.
By testing this sensor in extremely dirty water, we can evaluate its accuracy and potential for use in real-world applications. If it performs well, it can be a game changer for underwater exploration, environmental monitoring, and industrial inspections.
Before I use this Underwater Ultrasonic Sensor with Arduino to measure the distance in mm and feet, let’s first go through its technical specifications.
Amazon Links:
Arduino Nano USB C type (Recommended)
Other Tools and Components:
ESP32 WiFi + Bluetooth Module (Recommended)
*Please Note: These are affiliate links. I may make a commission if you buy the components through these links. I would appreciate your support in this way!
Underwater Ultrasonic Sensor Specifications:
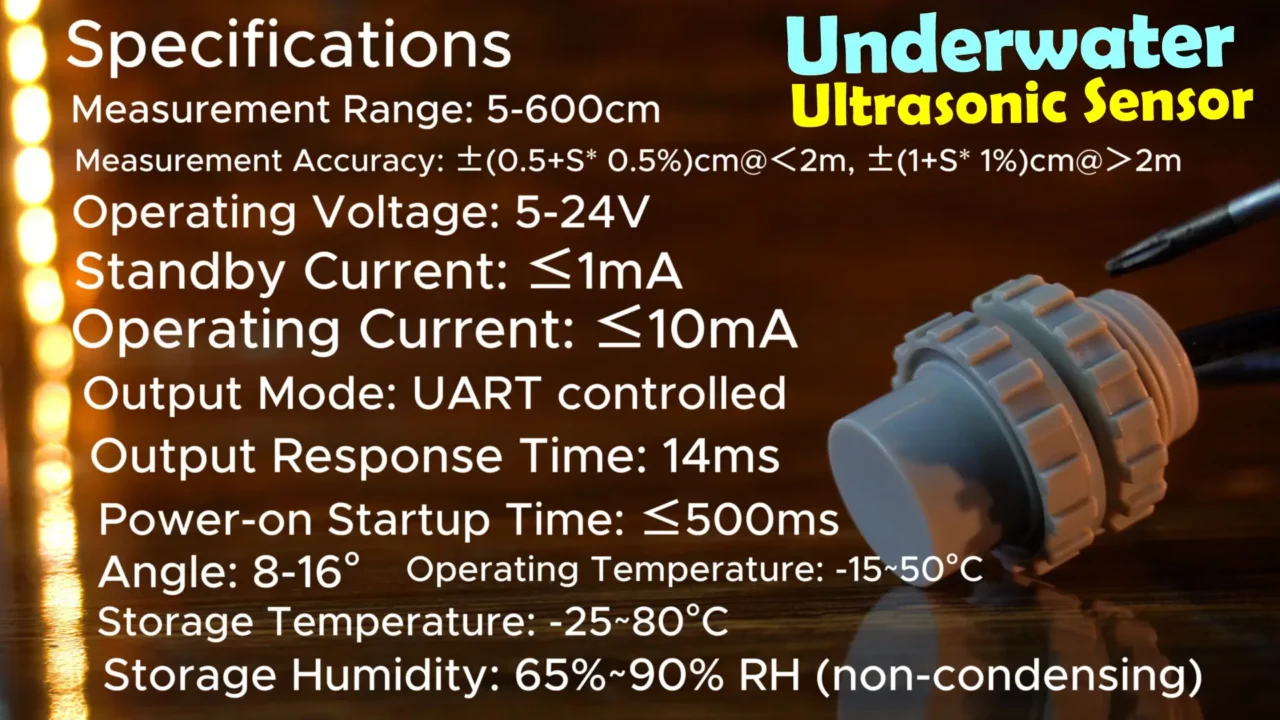
Measurement Range: 5-600cm
Measurement Accuracy: ±(0.5+S* 0.5%)cm@<2m, ±(1+S* 1%)cm@>2m
Operating Voltage: 5-24V
Standby Current: ≤1mA
Operating Current: ≤10mA
Output Mode: UART controlled
Power-on Startup Time: ≤500ms
Output Response Time: 14ms
Angle: 8-16°
Operating Temperature: -15~50°C
Storage Temperature: -25~80°C
Storage Humidity: 65%~90% RH (non-condensing)
The Underwater Ultrasonic Sensor comes with impressive specifications
It has a measurement range of 5 to 600 cm with an accuracy of ±(0.5 + S*0.5%) cm for distances under 2m and ±(1 + S*1%) cm for distances over 2m, ensuring precise readings.
In the formula ±(0.5 + S * 0.5%) cm @ <2m and ±(1 + S * 1%) cm @ >2m, the “S” represents the measured distance (in cm).
Let me explain how it works.
The error increases as the distance (S) increases.
If the measured distance S = 100 cm (<2m):
Accuracy = ±(0.5 + 100 * 0.5%) cm
= ±(0.5 + 0.5) cm
= ±1 cm
The accuracy is ±1 cm
If the measured distance S = 300 cm (>2m):
Accuracy = ±(1 + 300 * 1%) cm
= ±(1 + 3) cm
= ±4 cm
The accuracy is ±4 cm
This means the sensor’s error margin increases slightly with distance, but it remains within a predictable range.
The sensor operates on a voltage range of 5-24V, making it versatile for different power setups.
With a standby current of ≤1mA and an operating current of ≤10mA, it is energy-efficient.
The UART-controlled output mode ensures smooth communication with microcontrollers or other systems.
Additionally, the sensor has a quick response time of just 14ms and a power-on startup time of ≤500ms, allowing real-time data collection.
Its narrow detection angle of 8-16° helps in focused and accurate measurements.
Designed for tough conditions, it works within an operating temperature of -15 to 50°C and can be stored in temperatures ranging from -25 to 80°C, with a humidity tolerance of 65% to 90% RH (non-condensing).
These features make it an excellent choice for underwater applications where traditional sensors fail to work.
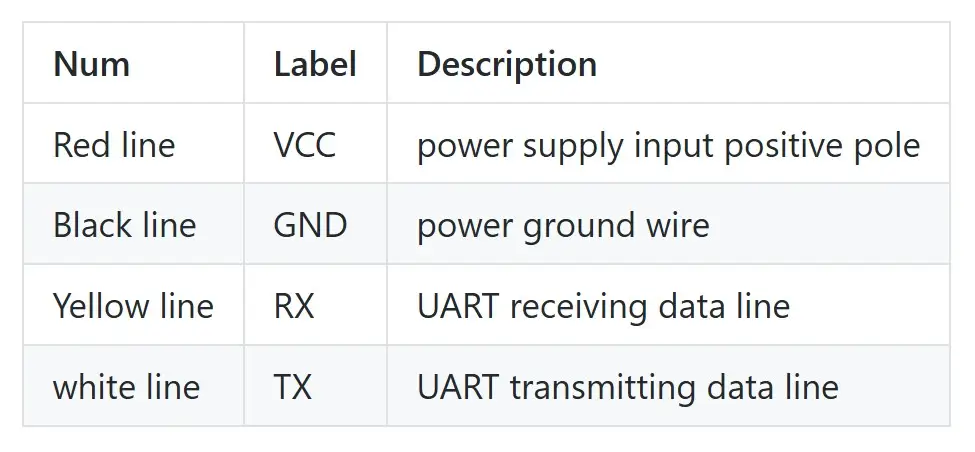
About the Wires:
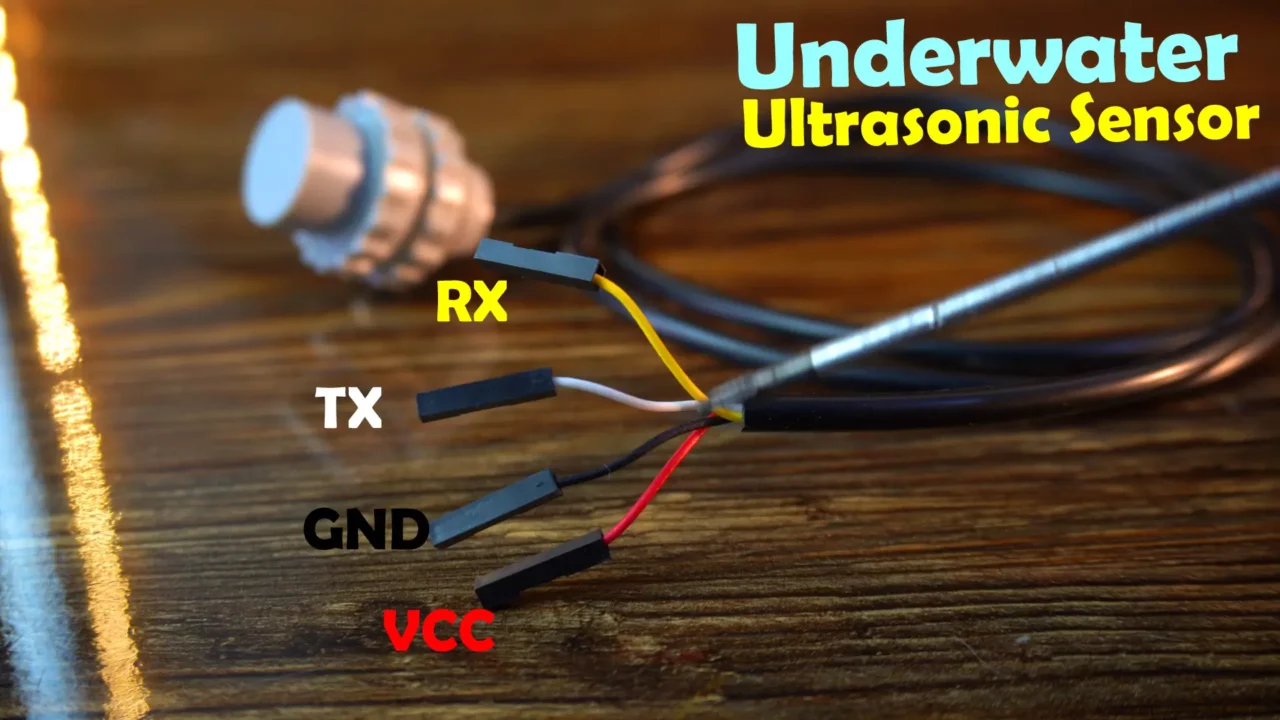
This sensor has a total of 4 wires. The Red wire is the VCC, Black wire is the ground, Yellow wire is RX and the White wire is TX.
Underwater Ultrasonic Sensor Interfacing with Arduino:
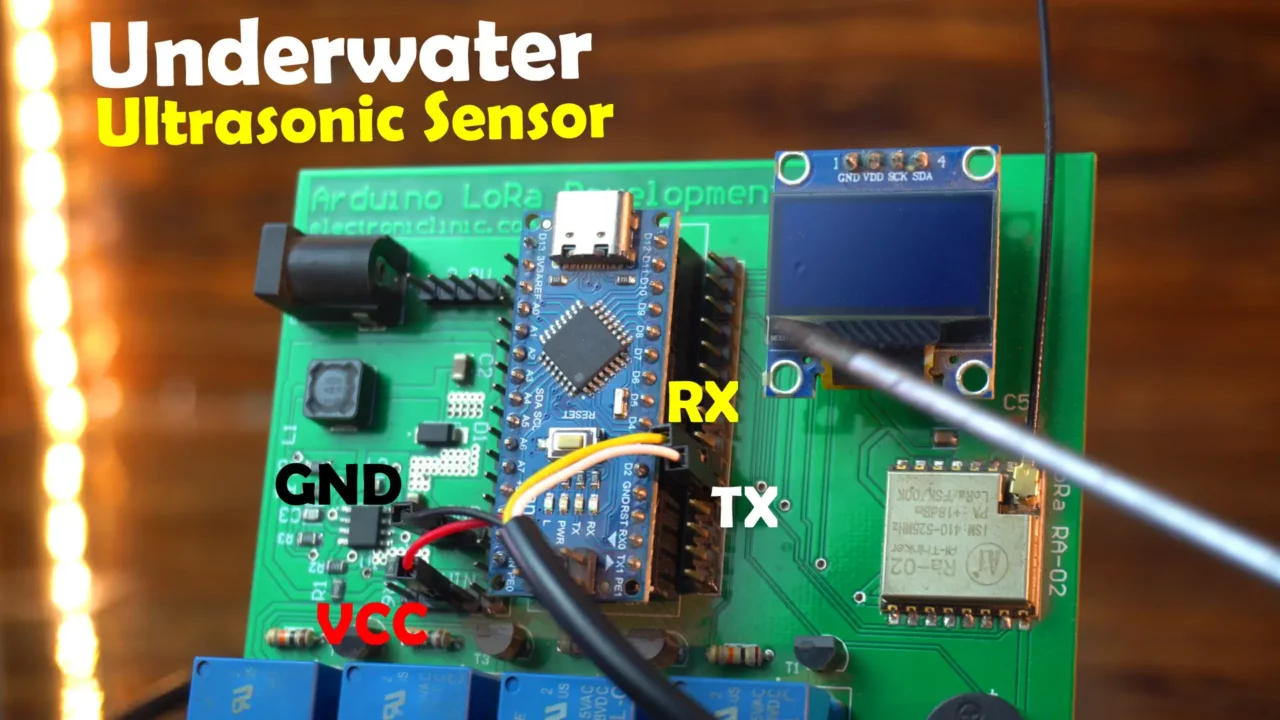
Simply connect the Red and Black wires to the 5V and GND pins on the Arduino. Connect the White and Yellow wires to the Arduino digital pins 2 and 3 respectively.
Connect the VDD and GND pins of the SSD1306 Oled display module to the Arduino 3.3V and GND. And connect the SDA and SCL pins to the Arduino A4 and A5 which are the I2C pins.
Underwater Ultrasonic Sensor Data Format:
Before starting the programming, you need to thoroughly understand the UART output format of the underwater ultrasonic sensor, as only then will you be able to successfully read the distance value. You can spend some time over here to study how these calculations are performed.
UART output format
| Frame data | Output data | Description | Bytes |
| Frame header | 0XFF | Frame header, fixed as 0XFF | 1 byte |
| H_DATA | 0X07 | Higher 8 bits of distance data | 1 byte |
| L_DATA | 0XA1 | Lower 8 bits of distance data | 1 byte |
| SUM | 0XA7 | data checksum | 1 byte |
SUM= (header+Data_H+ Data_L)&0x00FF
=(0XFF + 0X07 + 0XA1)&0x00FF
=0XA7;
Distance value = DATA_ H * 256+DATA_L = 0x07A1;
Decimal conversion is equal to 1953;
Let’s first start with the most basic program. It’s purpose is to measure the distance and send the value to the Serial Monitor.
Underwater Ultrasonic Sensor Programming:
|
1 2 3 4 5 6 7 8 9 10 11 12 13 14 15 16 17 18 19 20 21 22 23 24 25 26 27 28 29 30 |
#include <SoftwareSerial.h> unsigned char buffer_RTT[4] = {0}; uint8_t CS; #define COM 0x55 int Distance = 0; SoftwareSerial mySerial(2, 3); void setup() { Serial.begin(115200); mySerial.begin(115200); } void loop() { mySerial.write(COM); delay(100); if(mySerial.available() > 0){ delay(4); if(mySerial.read() == 0xff){ buffer_RTT[0] = 0xff; for (int i=1; i<4; i++){ buffer_RTT[i] = mySerial.read(); } CS = buffer_RTT[0] + buffer_RTT[1]+ buffer_RTT[2]; if(buffer_RTT[3] == CS) { Distance = (buffer_RTT[1] << 8) + buffer_RTT[2]; Serial.print("Distance:"); Serial.print(Distance); Serial.println("mm"); } } } } |
Modified Code:
|
1 2 3 4 5 6 7 8 9 10 11 12 13 14 15 16 17 18 19 20 21 22 23 24 25 26 27 28 29 30 31 32 33 34 35 36 37 38 39 40 41 42 43 44 45 46 47 48 49 50 51 52 53 54 55 56 57 58 59 60 61 62 63 64 65 66 67 68 69 70 71 72 73 74 75 76 77 78 79 80 81 82 83 84 85 86 87 88 |
#include <SoftwareSerial.h> #include <Adafruit_GFX.h> #include <Adafruit_SSD1306.h> unsigned char buffer_RTT[4] = {0}; uint8_t CS; #define COM 0x55 int Distance = -1, lastStableDistance = -1; unsigned long stableStartTime = 0; SoftwareSerial mySerial(2, 3); // For the SSD1306 OLED display Module #define SCREEN_WIDTH 128 #define SCREEN_HEIGHT 64 #define OLED_RESET -1 Adafruit_SSD1306 display(SCREEN_WIDTH, SCREEN_HEIGHT, &Wire, OLED_RESET); void setup() { Serial.begin(115200); mySerial.begin(115200); if (!display.begin(SSD1306_SWITCHCAPVCC, 0x3C)) { Serial.println("SSD1306 allocation failed"); for (;;); } delay(2000); display.clearDisplay(); display.setTextColor(WHITE); display.setTextSize(2); } void loop() { mySerial.write(COM); // COM = 0X55 delay(100); if (mySerial.available() > 0) { delay(4); if (mySerial.read() == 0xff) { buffer_RTT[0] = 0xff; for (int i = 1; i < 4; i++) { buffer_RTT[i] = mySerial.read(); } CS = buffer_RTT[0] + buffer_RTT[1] + buffer_RTT[2]; if (buffer_RTT[3] == CS) { int newDistance = (buffer_RTT[1] << 8) + buffer_RTT[2]; if (Distance == -1) { // First valid reading, set immediately Distance = newDistance; lastStableDistance = newDistance; stableStartTime = millis(); updateDisplay(lastStableDistance); } else if (newDistance == Distance) { // Check if stable for 500ms if (millis() - stableStartTime >= 500 && newDistance != lastStableDistance) { lastStableDistance = newDistance; updateDisplay(lastStableDistance); } } else { // Reset stability timer on change Distance = newDistance; stableStartTime = millis(); } Serial.print("Current Distance: "); Serial.print(Distance); Serial.println("mm"); } } } } void updateDisplay(int value) { display.clearDisplay(); display.setCursor(10, 10); display.println("Distance: "); display.setCursor(10, 30); display.print(value); display.print("mm"); display.setCursor(10, 50); display.print(value*0.00328084); // feet display.print("feet"); display.display(); } |
Underwater Ultrasonic Sensor Code Explanation:
|
1 2 3 4 5 |
#include <SoftwareSerial.h> #include <Adafruit_GFX.h> #include <Adafruit_SSD1306.h> |
SoftwareSerial.h enables serial communication on digital pins for sensors that need software-based serial communication.
Adafruit_GFX.h and Adafruit_SSD1306.h are used to control the SSD1306 OLED display.
|
1 2 3 4 5 6 7 8 9 |
unsigned char buffer_RTT[4] = {0}; uint8_t CS; #define COM 0x55 int Distance = -1, lastStableDistance = -1; unsigned long stableStartTime = 0; |
buffer_RTT[4] stores received data from the sensor.
CS is used for the checksum validation.
COM = 0x55 is a Command sent to the sensor to request distance data.
The variable Distance stores the most recent distance reading.
lastStableDistance stores the last stable distance reading. and
the stableStartTime variable is used to track how long a value remains unchanged.
|
1 |
SoftwareSerial mySerial(2, 3); // RX on pin 2, TX on pin 3 |
mySerial creates a software serial connection on pins 2 (RX) and 3 (TX) for communication with the sensor.
|
1 2 3 4 5 |
#define SCREEN_WIDTH 128 #define SCREEN_HEIGHT 64 #define OLED_RESET -1 |
Adafruit_SSD1306 display(SCREEN_WIDTH, SCREEN_HEIGHT, &Wire, OLED_RESET);
This set of code defines the OLED display.
Inside the setup() function.
|
1 2 3 4 5 |
void setup() { Serial.begin(115200); mySerial.begin(115200); |
Initializes both the hardware serial (for debugging) and software serial (for sensor communication).
|
1 2 3 4 5 6 7 |
if (!display.begin(SSD1306_SWITCHCAPVCC, 0x3C)) { Serial.println("SSD1306 allocation failed"); for (;;); } |
Initializes the OLED display at I2C address 0x3C. If initialization fails, it enters an infinite loop.
|
1 2 3 4 5 6 7 8 9 |
delay(2000); display.clearDisplay(); display.setTextColor(WHITE); display.setTextSize(2); } |
Waits 2 seconds, clears the display, and sets text color and size.
Inside the loop() function.
|
1 2 3 |
mySerial.write(COM); delay(100); |
First, we send 0x55 “stored in COM” to request distance data from the sensor.
And then wait 100ms for the response.
|
1 2 3 |
if (mySerial.available() > 0) { delay(4); |
Checks if data is available to read.
Waits 4ms to ensure all bytes are received.
|
1 2 3 4 5 6 7 8 9 |
if (mySerial.read() == 0xff) { buffer_RTT[0] = 0xff; for (int i = 1; i < 4; i++) { buffer_RTT[i] = mySerial.read(); } |
Reads the first byte; if it’s 0xFF, it means valid data is coming.
Reads the next three bytes into buffer_RTT[].
|
1 |
CS = buffer_RTT[0] + buffer_RTT[1] + buffer_RTT[2]; |
Calculates the checksum to verify data integrity.
|
1 2 3 |
if (buffer_RTT[3] == CS) { int newDistance = (buffer_RTT[1] << 8) + buffer_RTT[2]; |
If checksum matches, it extracts the distance value from the received data.
|
1 2 3 4 5 6 7 8 9 10 11 |
if (Distance == -1) { Distance = newDistance; lastStableDistance = newDistance; stableStartTime = millis(); updateDisplay(lastStableDistance); } |
If it’s the first valid reading, update immediately and set it as stable.
|
1 2 3 4 5 6 7 8 9 10 11 |
else if (newDistance == Distance) { if (millis() - stableStartTime >= 500 && newDistance != lastStableDistance) { lastStableDistance = newDistance; updateDisplay(lastStableDistance); } } |
If the value remains the same for 500ms, update the OLED display.
This prevents rapid fluctuations from being displayed.
|
1 2 3 4 5 6 7 |
else { Distance = newDistance; stableStartTime = millis(); } |
If the value changes, reset the stability timer and wait for another 500ms before updating.
|
1 2 3 4 5 6 7 8 9 10 11 |
Serial.print("Current Distance: "); Serial.print(Distance); Serial.println("mm"); } } } |
Prints the current distance reading to the Serial Monitor for debugging.
|
1 2 3 4 5 6 7 8 9 10 11 12 13 14 15 16 17 |
void updateDisplay(int value) { display.clearDisplay(); display.setCursor(10, 10); display.println("Distance: "); display.setCursor(10, 40); display.print(value); display.print("mm"); display.display(); } |
The updateDisplay() is a user-defined function and takes one argument as the input.
Clears the OLED display, set the cursor position, prints the stable distance value and then calls
display.display() to show the updated value.
I have already uploaded this program and now let’s watch the Underwater Ultrasonic Sensor in action.
Note: Watch the video tutorial given at the end of this article.
Practical Demonstration of Underwater Ultrasonic Sensor:
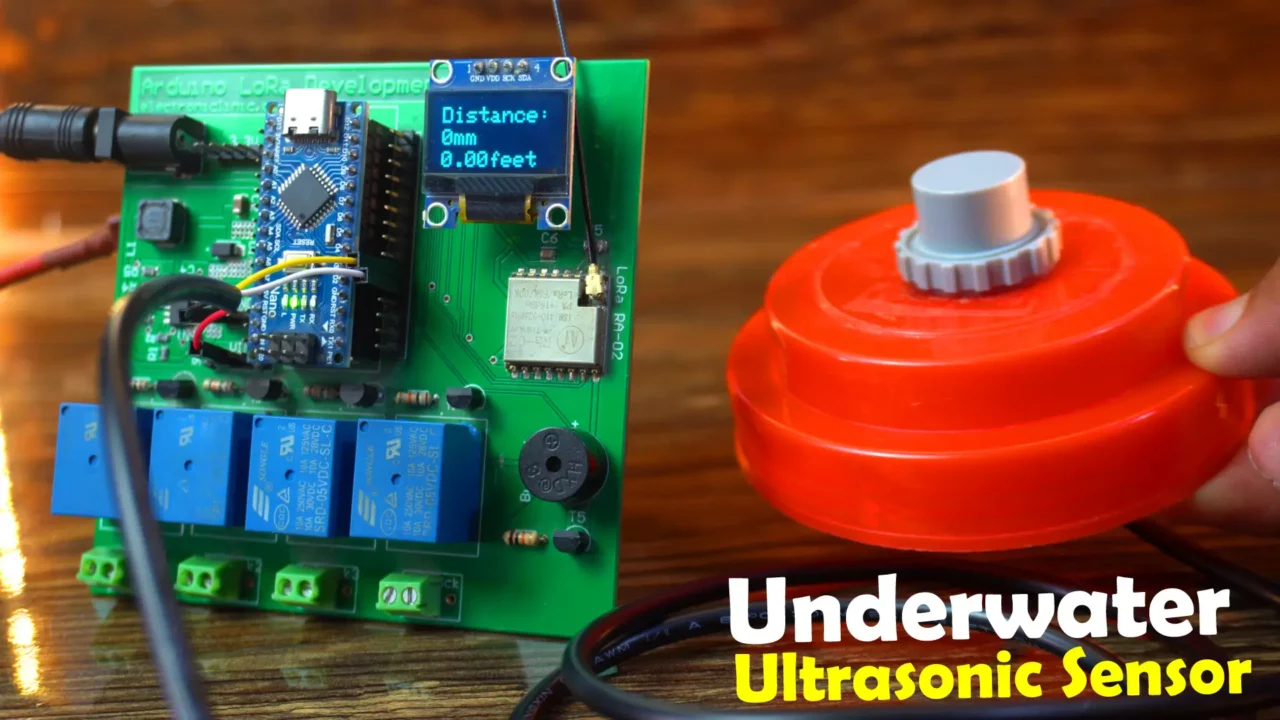
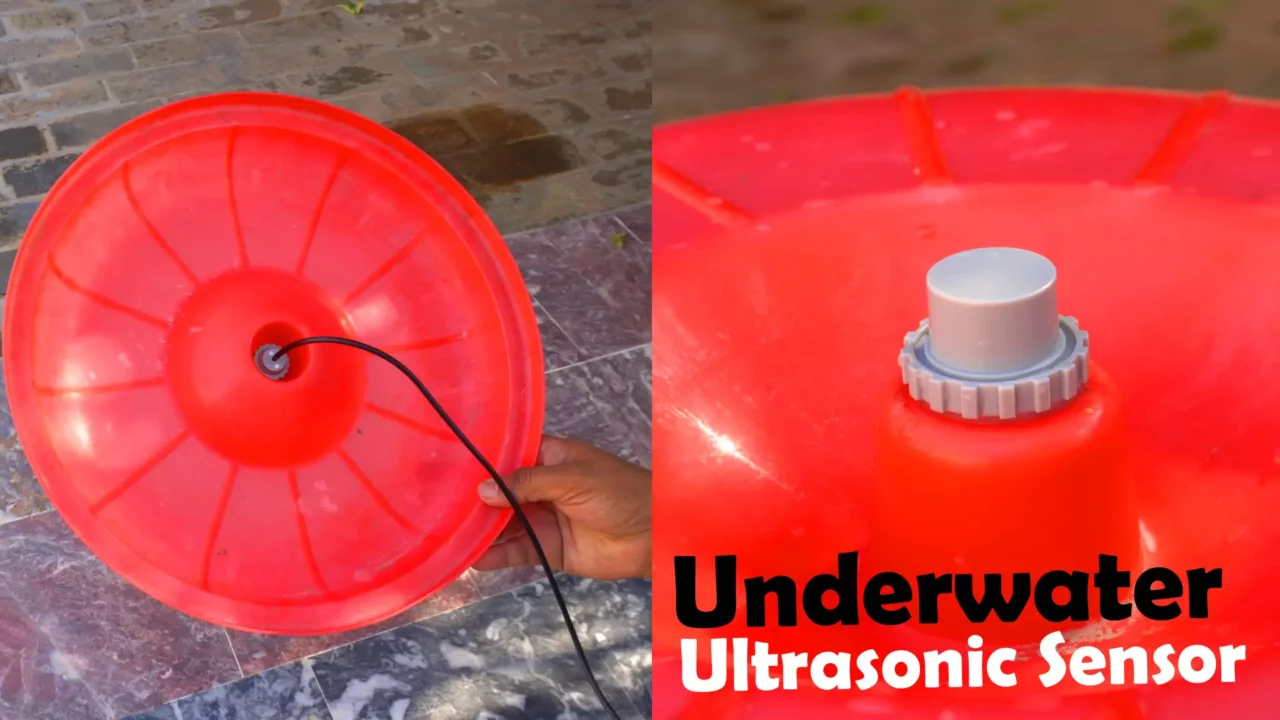
I have fixed the sensor onto a plastic cap so that I can easily use it on the water’s surface. With this setup, the sensor will float on the surface, dipping slightly into the water.
As you can see, I have powered up the Arduino, and the sensor is correctly connected, yet the display is still showing 0. This is because the sensor is currently outside the water. The moment we submerge it, it will start working.
Underwater Ultrasonic Sensor, Test1:
First, let’s start with this jug of water and see how accurately it measures the depth.
You might think the sensor is slow, but that’s not the case. To eliminate fluctuations, I have added a 500 milliseconds delay using a timer. This ensures the display updates only when there is a genuine change in distance. If you prefer an instant response and don’t mind small fluctuations, you can simply remove that part of the code.
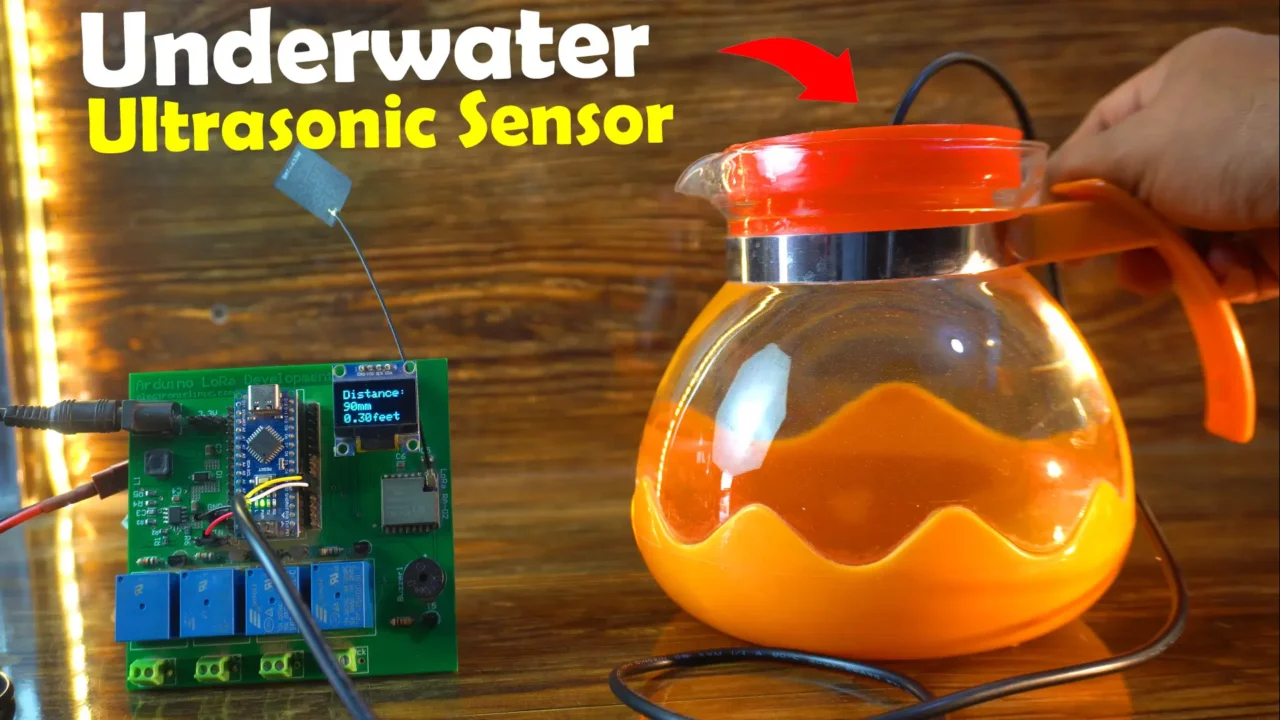
Anyway, you can see that it measured the depth as 90mm. I am doing my best to keep the sensor as flat as possible. The value is quite stable since I am not moving my hand.
Some minor fluctuations are due to the sensor being slightly tilted, meaning it’s not completely flat. A difference of 2mm or 3mm isn’t a big deal. Sometimes the sensor stays perfectly flat and other times it tilts slightly, which is why the values keep fluctuating between 89 and 92mm.
Let’s check it with a vernier caliper and see how accurate the measurement is.
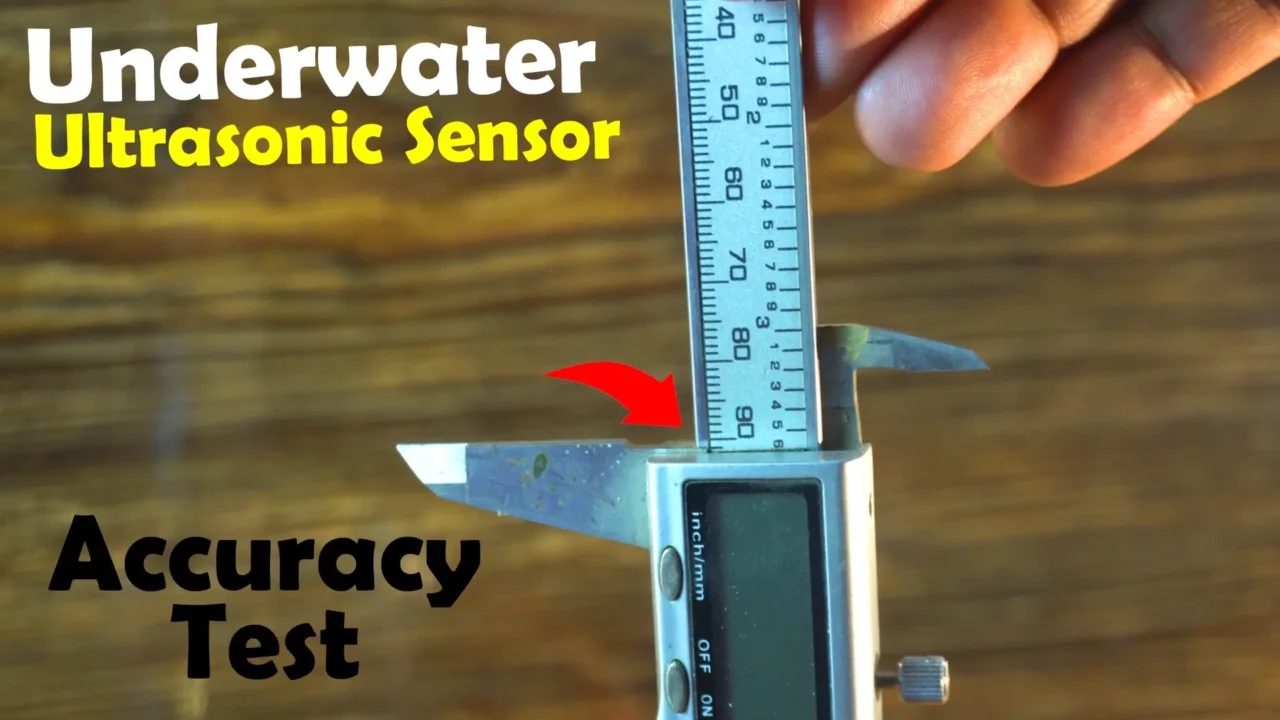
I am totally shocked! Just look at the accuracy! The value is around 91mm. Honestly; I didn’t expect this level of precision. I am really impressed! The sensor has passed the first test.
Underwater Ultrasonic Sensor, Test 2:
Let’s imagine that we have fixed this underwater ultrasonic sensor onto a mini-submarine for underwater exploration and are using it as an underwater radar for obstacle detection and seafloor mapping. In this experiment, the water is also completely clear.
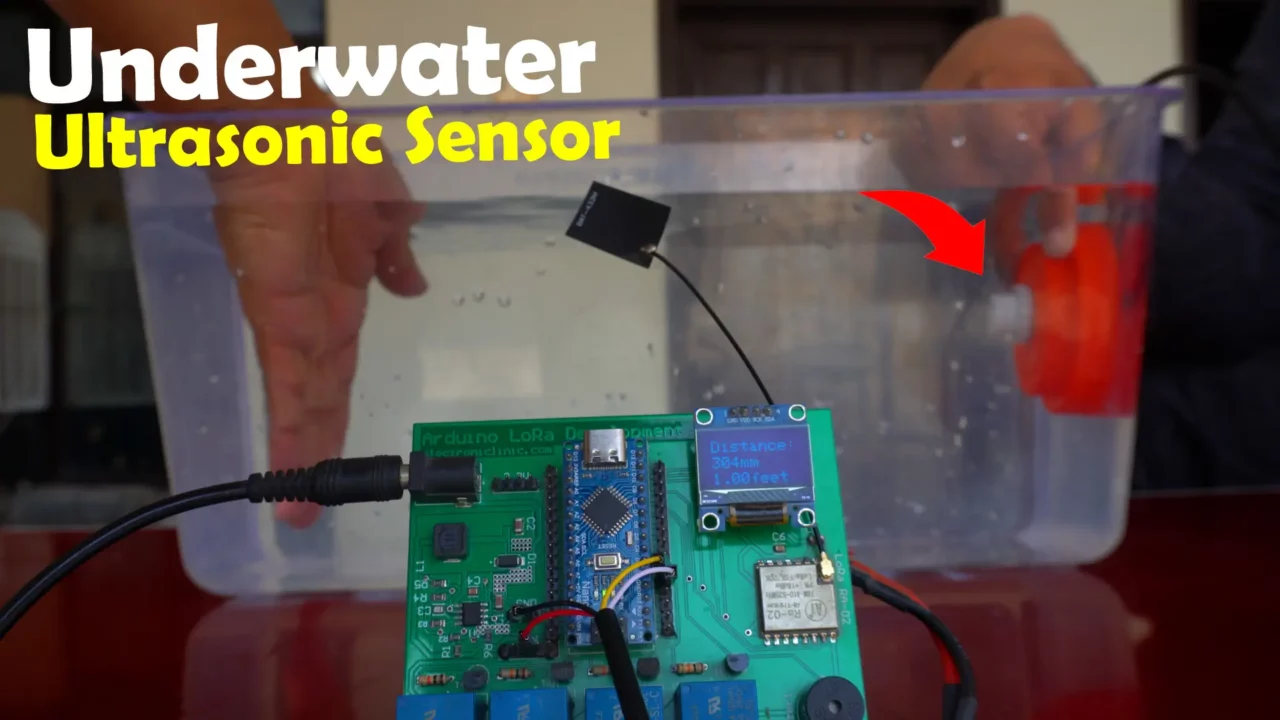
You can see how accurately it measures the distance of my hand underwater.
Underwater Ultrasonic Sensor, Test 3:
Now, let’s test it by measuring the depth of this large water drum.
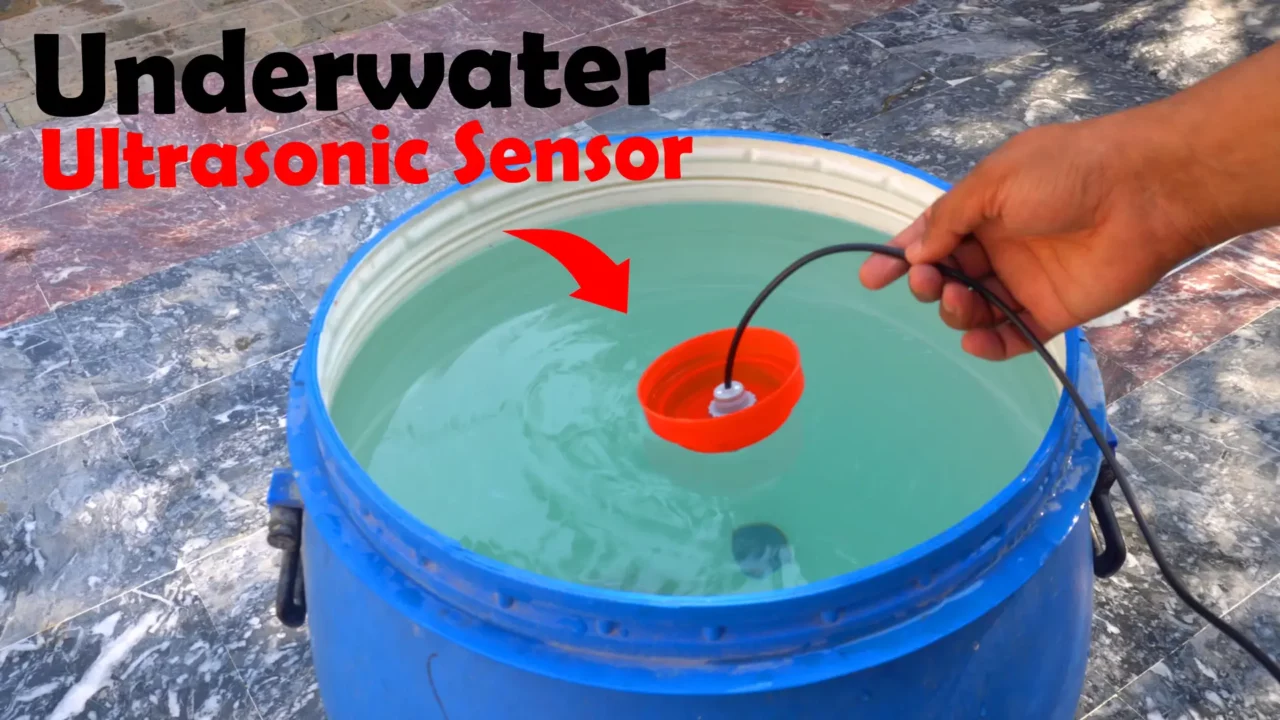
Its surface area is quite small, which is why it doesn’t float flat on the water and keeps tilting. I have to keep adjusting it with my hand to make it flat, causing the values to fluctuate a lot, making it difficult for me as well. Since we are going to a river for the next test, this setup won’t work there, so I will have to find a better solution.
Luckily, I found this bucket lid, and its design is absolutely perfect. The sensor fits onto it really well. For now, this setup is just perfect, and I am sure the sensor won’t tilt anymore. So, let’s measure the depth!
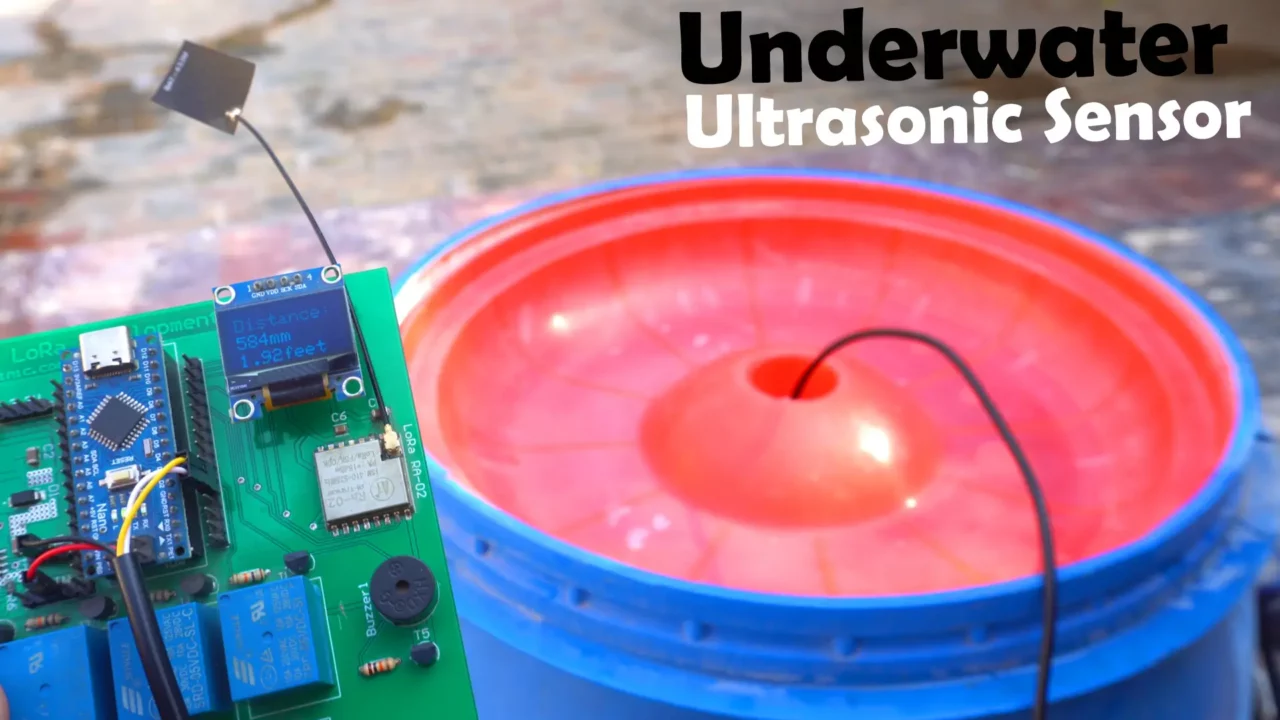
You can see it measured the depth as 1.92 feet. This new setup worked as expected, and the value is pretty stable. Now, let’s go ahead and check if this value is correct.

It’s simply mind blowing! Look at the accuracy; if we subtract the sensor length from this measurement, we get around 1.95 feet, which is pretty close to the measured distance.
So far, this underwater ultrasonic sensor has performed exceptionally well. The readings have been consistent, and the accuracy is impressive. Even with minor fluctuations, the overall depth measurement remains highly reliable. This level of precision makes it a great choice for various underwater applications, whether it’s for robotics, marine research, or simple depth monitoring.
I am excited to see how it holds up in more challenging environments, like in dirty river water. So, let’s head to the riverside.
Test 4:
I have traveled quite far from home in search of dirty river water. The water is extremely muddy and cold. A like for my brother is well deserved!
Right now, we are at the riverbank, and the depth is 0.39 feet.

Honestly, this is quite scary because I have no idea about this river. The ground is extremely muddy and slippery, almost like quicksand, and my feet keep sinking in.
With great difficulty, we managed to measure the depth up to 3 feet. Going any further would have been too dangerous for us. Despite the filthy water, this sensor performed exceptionally well.
So, that’s all for now.
Watch Video Tutorial:
Discover more from Electronic Clinic
Subscribe to get the latest posts sent to your email.