Arduino I2C-supported 16×2 LCD, Example with Circuit diagram and Programming
Last Updated on August 16, 2024 by Engr. Shahzada Fahad
Table of Contents
Arduino 16×2 LCD, Example:
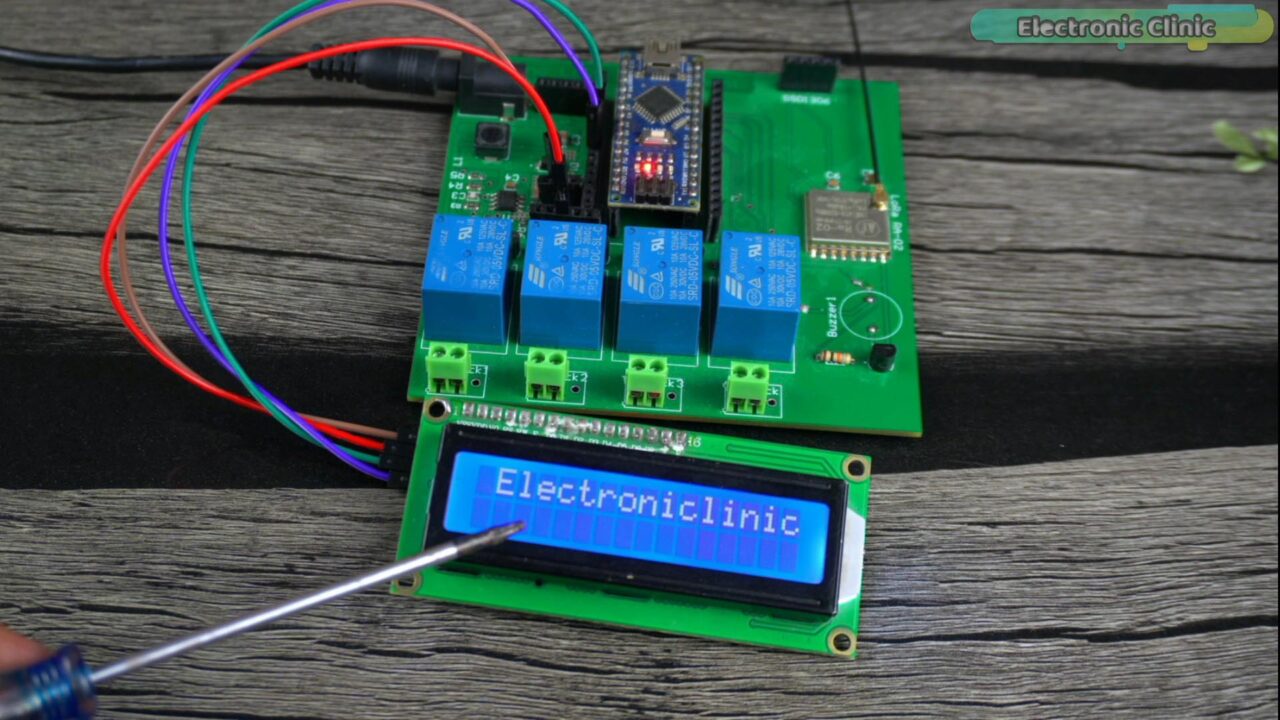
In this example, I am going to explain how to print a text message on an Arduino I2C-supported 16×2 LCD. This is the most commonly used LCD and you are going to need this LCD in your upcoming projects for printing text messages and sensors values, and for creating menus etc.
Amazon Links:
Arduino Nano USB-C Type (Recommended)
*Disclosure: These are affiliate links. As an Amazon Associate I earn from qualifying purchases.
Arduino I2C-supported 16×2 LCD Circuit Diagram
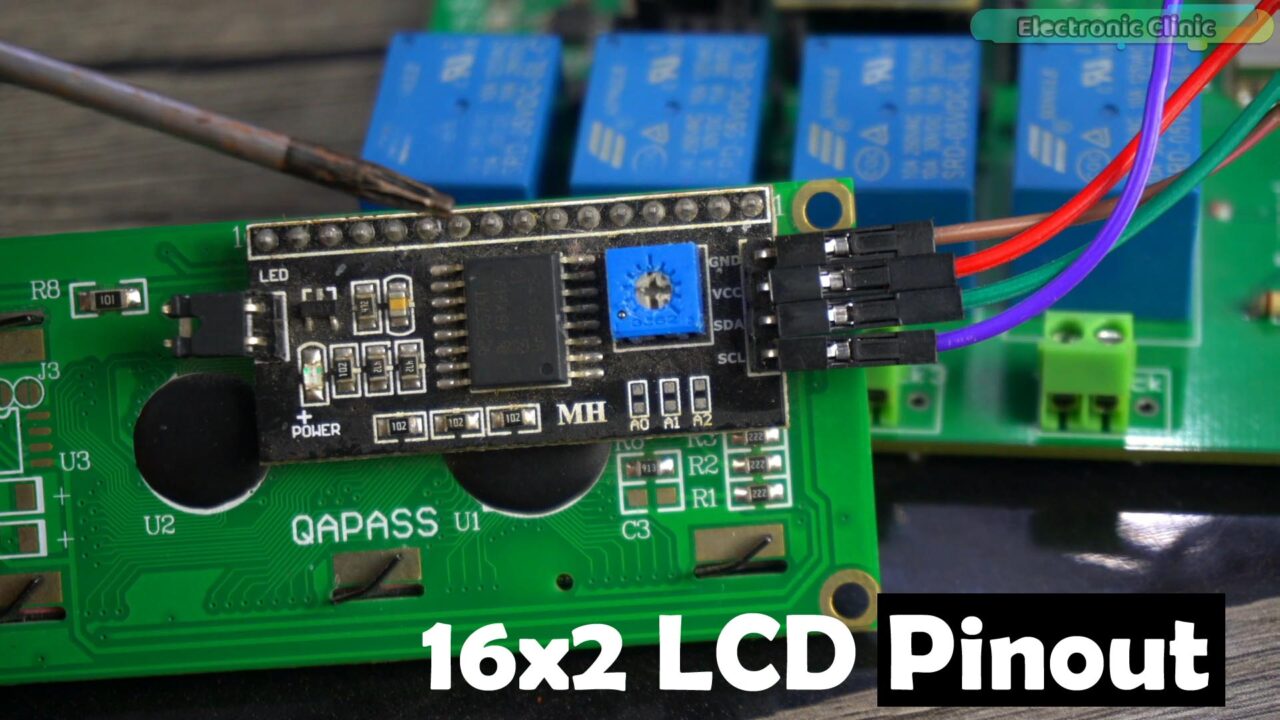
Anyway, this is the i2c version of the 16×2 LCD because it has this driver on its backside so you don’t need to connect a lot of wires. You only need to use 4 wires. All the 4 pins are properly labeled with GND, VCC, SDA, and SCL.
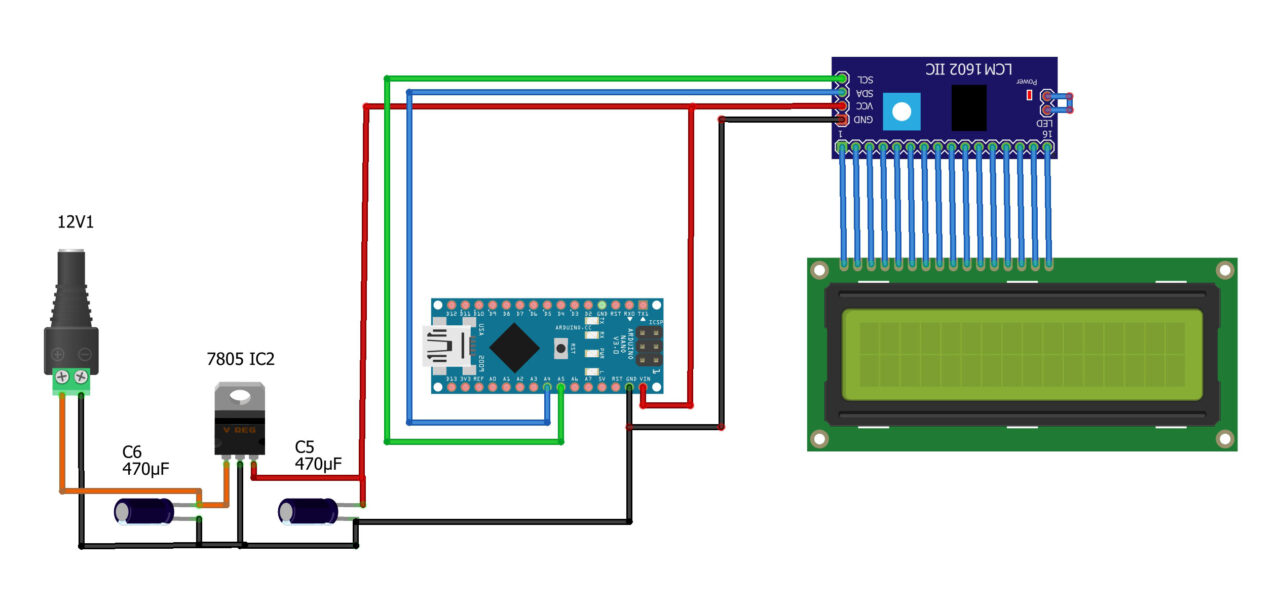
Simply connect the VCC and GND pins to the Arduino 5V and GND pins; and connect the SDA and SCL pins to the Arduino A4 and A5 pins. A4 is the SDA and A5 is the SCL. I have already explained this. It also has a blue color potentiometer to control the LCD contrast or brightness. Now let’s go ahead and take a look at the programming.
Arduino 16×2 LCD Programming:
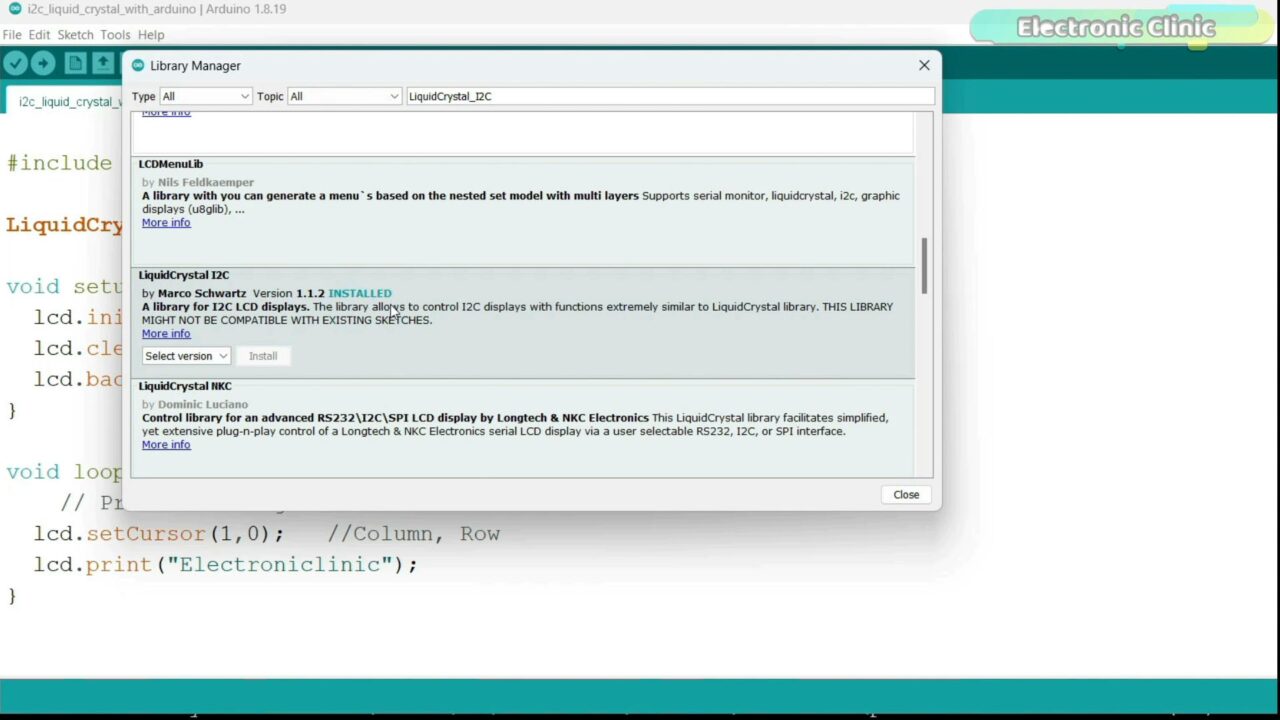
Before, you start the programming, first of all, make sure you have installed the LiquidCrystal library. For this simply copy this name” LiquidCrystal_I2C”. Then go to the Sketch menu > then Include Library and click on the manage libraries. Paste the library name in the search box. You can see I have already installed this library and you also need to install the same library.
Programming:
|
1 2 3 4 5 6 7 8 9 10 11 12 13 14 15 |
#include <LiquidCrystal_I2C.h> LiquidCrystal_I2C lcd(0x27,16,2); void setup() { lcd.init(); lcd.clear(); lcd.backlight(); // Make sure backlight is on } void loop() { // Print a message on both lines of the LCD. lcd.setCursor(1,0); //Column, Row lcd.print("Electroniclinic"); } |
So, I started off by adding the LiquidCrystal_I2C.h header file.
This line initializes an instance of the LiquidCrystal_I2C class named lcd. The constructor takes three arguments:
0x27 is the I2C address of the LCD module. The specific address may vary depending on the configuration of your LCD module. You can find the I2C address by running an I2C scanner sketch which you can download from the article.
16 is the number of columns in the LCD and 2 is the number of rows in the LCD.
In the void setup() function,
The lcd.init() function initializes the LCD by sending the necessary commands over the I2C bus.
The lcd.clear() function clears the LCD screen, making sure it’s empty or blank.
The lcd.backlight() function turns ON the backlight; if the LCD module has it. If your LCD doesn’t have backlight support then this command will not affect the display.
The lcd.setCursor() function is used to select one of the two rows and 16 columns. The first number is used to select the column, in my case I have selected column 1, the index starts from 0 all the way to 15.
The 2nd number is used to select the row, 0 means first row and 1 means 2nd row. In my case I have selected the first row. Now, after selecting the column and row next we use the lcd.print command to write text on the LCD. Make sure you use double quotes for printing strings. If you want to display numbers and variable data on the LCD then there is no need to use the double quotes, just write the variable name or number and that’s it.
video tutorial

Discover more from Electronic Clinic
Subscribe to get the latest posts sent to your email.


