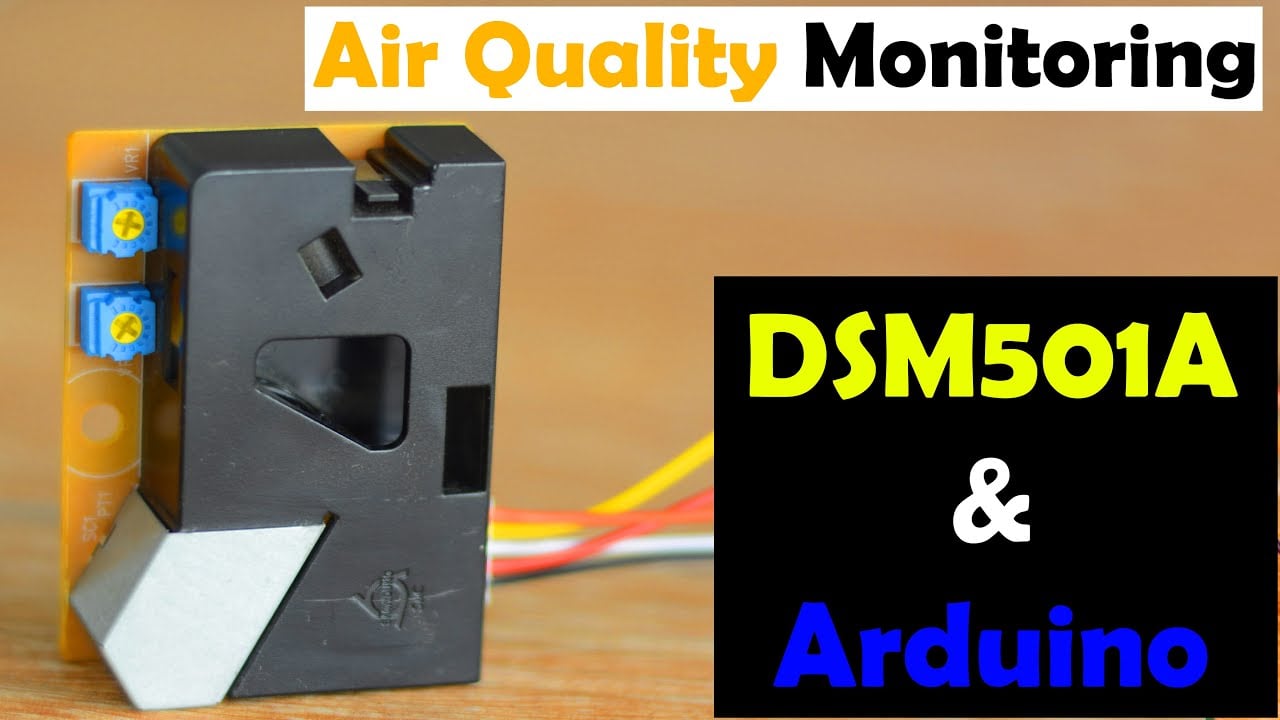
Dust Sensor DSM501A with Arduino, PM10 & PM2.5 Air Quality Monitoring
Last Updated on September 21, 2024 by Engr. Shahzada Fahad
Table of Contents
Dust Sensor DSM501A:
Dust Sensor DSM501A with Arduino, PM10 & PM2.5 Air Quality Monitoring- When it comes to Air quality monitoring; particles are defined by their diameter PM2.5 and PM10 particles. Now, you might be thinking what are PM2.5 and PM10 particles?

Well, PM stands for Particulate Matter, and it’s also called particle pollution. Particles that are 10 microns or less in diameter are called (PM10) and particles that are 2.5 microns or less in diameter are called as PM2.5. Both PM2.5 and PM10 particles can be inhaled. But the fine particles PM2.5 pose the greatest health risk. These fine particles can get deep into lungs and some may even get into the bloodstream. Exposure to these particles can affect a person’s lungs and heart. So, I will be focusing more on the PM2.5 particles.

The DSM501A Dust sensor is one of the cheapest dust sensors on the market and it is capable of detecting PM2.5 as well as PM10 particles.
So, in today’s article, you will learn how to make a low-cost Air Quality monitoring system using DSM501A Dust Sensor, Arduino Nano, and SSD1306 Oled display module. Anyway, before I am going to explain the DSM501A Dust Sensor technical specifications, its interfacing with Arduino, and its programming, first let’s watch the DSM501A dust sensor and Arduino-based Air Quality monitoring system in action.

I have connected the DSM501A Dust sensor and Oled display module as per the circuit diagram which I will explain in a minute. Right now on the display, you can see the particle concentration and the message clean. So, when the concentration of particles is less than 1000 the message Clean will be printed. Likewise, when the concentration of particles is between 1000 and 10000 then the message Good will be printed. If the concentration of particles is between 10000 and 20000 then the message Acceptable will be printed. If the concentration of particles is between 20000 and 50000 then the message Heavy will be printed. And if the concentration of particles is greater than 50000 then the message Hazard will be printed. For the practical demonstration, I am going to use Smoke.

You can see the particle concentration value on the Oled display module. It successfully detected the smoke. For the practical demonstration watch video given at the end of this article. I am sure by now, you might have got an idea of how does this system work. So, without any further delay let’s get started!!!
Amazon Links:
Arduino Nano USB-C Type (Recommended)
*Disclosure: These are affiliate links. As an Amazon Associate I earn from qualifying purchases.
DSM501A Dust Sensor:

DSM501A Dust Sensor module is a low-cost particles density monitoring sensor and it is capable of detecting PM2.5 as well as PM10 particles. I have already talked much about PM2.5 and PM10 particles right in the beginning.
Specifications:
The supply voltage is 5 volts
Power consumption is 90mA
The operating temperature range is from -10 to +65 Degrees Celsius.
The operating Humidity Range is 95%
Detectable particle size is approximately 1micron
Output Signals are PWM
Time for Stabilization is 1 minute after power is turned ON
The DSM501A consists of
- Light Emitting Diode (LED) Lamp
- Detector * Signal amplifier circuit
- Output drive circuit 1
- Output drive circuit 2
- Heater-induced air flow

Pinout and description:
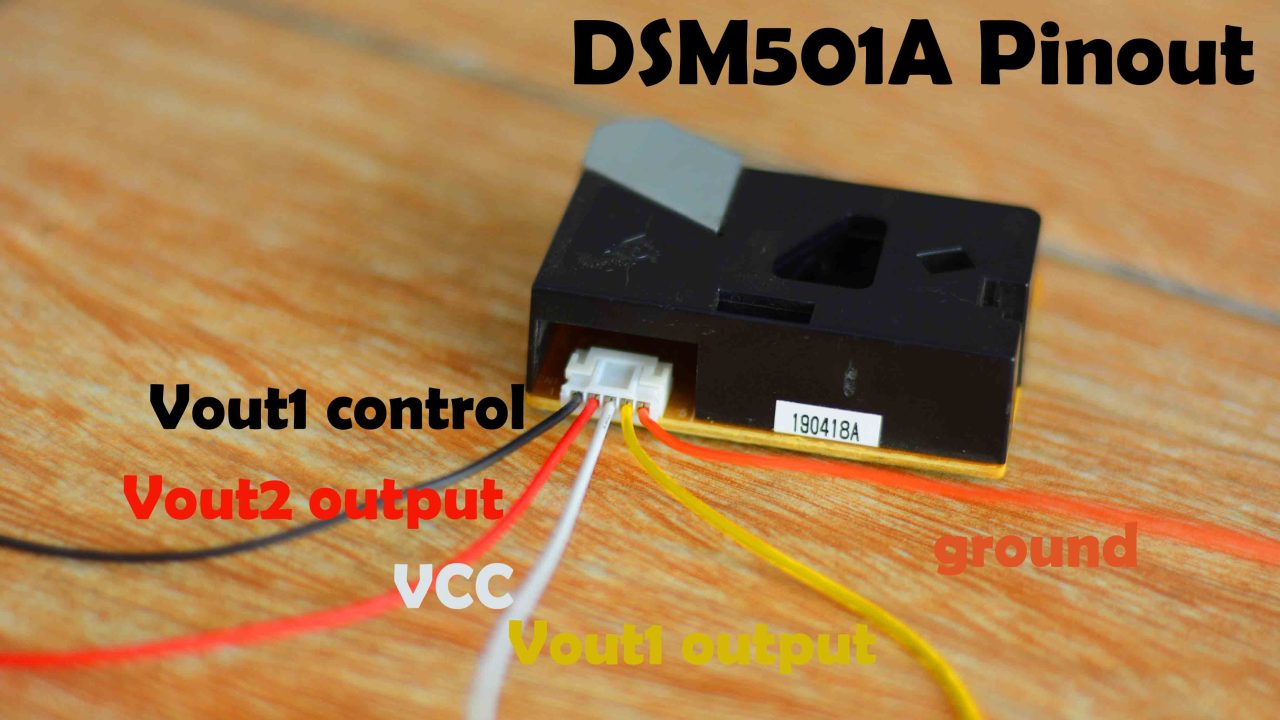
It has a total of 5 wires. And don’t get confused with the colors. Just follow the pin numbers. As per the datasheet,
- Pin number 1 is the Vout1 control.
- Pin number 2 is the Vout2 output(PWM).
- Pin number 3 is the VCC.
- Pin number4 is the Vout1 output (PWM). And
- Pin number 5 is the ground.

Your dust sensor might have different color wires. So, just follow the pin numbers and forget about the colors.
Sensor Characteristics vs Low ratio

Installation:
The dust sensor module DSM501 should be installed vertically and kept away from any artificial current of air by fans. In case it is used for air purifier of which fan located in front or rear part, it should be installed at either side of the housing, but not too much deep inside of the housing. There also need to have slits near the module so that air can come inside. In addition, please pay attention to structure and placing location of the application to avoid any adhesive particles (such as oil, etc) getting into the module, which may cause malfunction by sticking to the optical part. Moisture presence inside of the module may cause malfunction of the sensor. Please avoid the location where condensation may frequently occur.
DSM501A with Arduino:

Connect Pin 3 of the DSM501A dust sensor with the Arduino 5 volts. Connect Pin 4 of the dust sensor with the Arduino pin 8. Pin 4 of the dust sensor is the Vout1 output. Finally, connect pin 5 of the dust sensor with the Arduino ground.
The VCC and Gnd pins of the SSD1306 Oled display module are connected with the Arduino 3.3V and ground pins. While the SDA and SCL pins of the Oled display module are connected with the A4 and A5 pins.
On the left side, you can see a 5V regulated power supply based on the LM7805 voltage regulator. If you are powering up your Arduino using your laptop or computer then there is no need for this external 5v regulated power supply.
Required Libraries:
As usual, before you start the programming, first of all, make sure you download the Adafruit_GFX.h and Adafruit_SSD1306.h libraries.
DSM501A Arduino Programming:
|
1 2 3 4 5 6 7 8 9 10 11 12 13 14 15 16 17 18 19 20 21 22 23 24 25 26 27 28 29 30 31 32 33 34 35 36 37 38 39 40 41 42 43 44 45 46 47 48 49 50 51 52 53 54 55 56 57 58 59 60 61 62 63 64 65 66 67 68 69 70 71 72 73 74 75 76 77 78 79 80 81 82 83 84 85 86 |
#include <Adafruit_GFX.h> #include <Adafruit_SSD1306.h> int pin = 8; unsigned long duration; unsigned long starttime; unsigned long sampletime_ms = 1000; unsigned long lowpulseoccupancy = 0; float ratio = 0; float concentration = 0; #define SCREEN_WIDTH 128 // OLED display width, in pixels #define SCREEN_HEIGHT 64 // OLED display height, in pixels // Declaration for an SSD1306 display connected to I2C (SDA, SCL pins) #define OLED_RESET -1 // Reset pin # (or -1 if sharing Arduino reset pin) Adafruit_SSD1306 display(SCREEN_WIDTH, SCREEN_HEIGHT, &Wire, OLED_RESET); void setup() { Serial.begin(9600); pinMode(8,INPUT); display.begin(SSD1306_SWITCHCAPVCC, 0x3C); delay(2000); display.clearDisplay(); display.setTextColor(WHITE); delay(10); starttime = millis();//get the current time; } void loop() { duration = pulseIn(pin, LOW); lowpulseoccupancy = lowpulseoccupancy+duration; if ((millis()-starttime) > sampletime_ms) { ratio = lowpulseoccupancy/(sampletime_ms*10.0); // Integer percentage 0=>100 concentration = 1.1*pow(ratio,3)-3.8*pow(ratio,2)+520*ratio+0.62; // using spec sheet curve lowpulseoccupancy = 0; display.clearDisplay(); display.setTextSize(2); display.setCursor(0, 10); display.print("C:"+String(concentration)); if (concentration < 1000) { display.setTextSize(2); display.setCursor(0, 40); display.print("Clean"); } if (concentration > 1000 && concentration < 10000) { display.setTextSize(2); display.setCursor(0, 40); display.print("Good"); } if (concentration > 10000 && concentration < 20000) { display.setTextSize(2); display.setCursor(0, 40); display.print("Acceptable"); } if (concentration > 20000 && concentration < 50000) { display.setTextSize(2); display.setCursor(0, 40); display.print("Heavy"); } if (concentration > 50000 ) { display.setTextSize(2); display.setCursor(0, 40); display.print("Hazard"); } display.display(); starttime = millis(); } } |
The Vout1 Output pin of the dust sensor is connected with the Arduino pin 8. Right now, I am using only the Vout1, if you want you can also define a pin for the Vout2. Anyway, the purpose of this code is to find the particles concentration and display it on the Oled display module. And at the same time, we use some if conditions to check if the particles concentration is increased, and then accordingly different messages are printed on the Oled display. So, that’s all about the programming.
Watch Video Tutorial
Discover more from Electronic Clinic
Subscribe to get the latest posts sent to your email.


Thanks, Hallo im so confused about pin no 1 and 2? Where to go wire pin no 1 and 2?