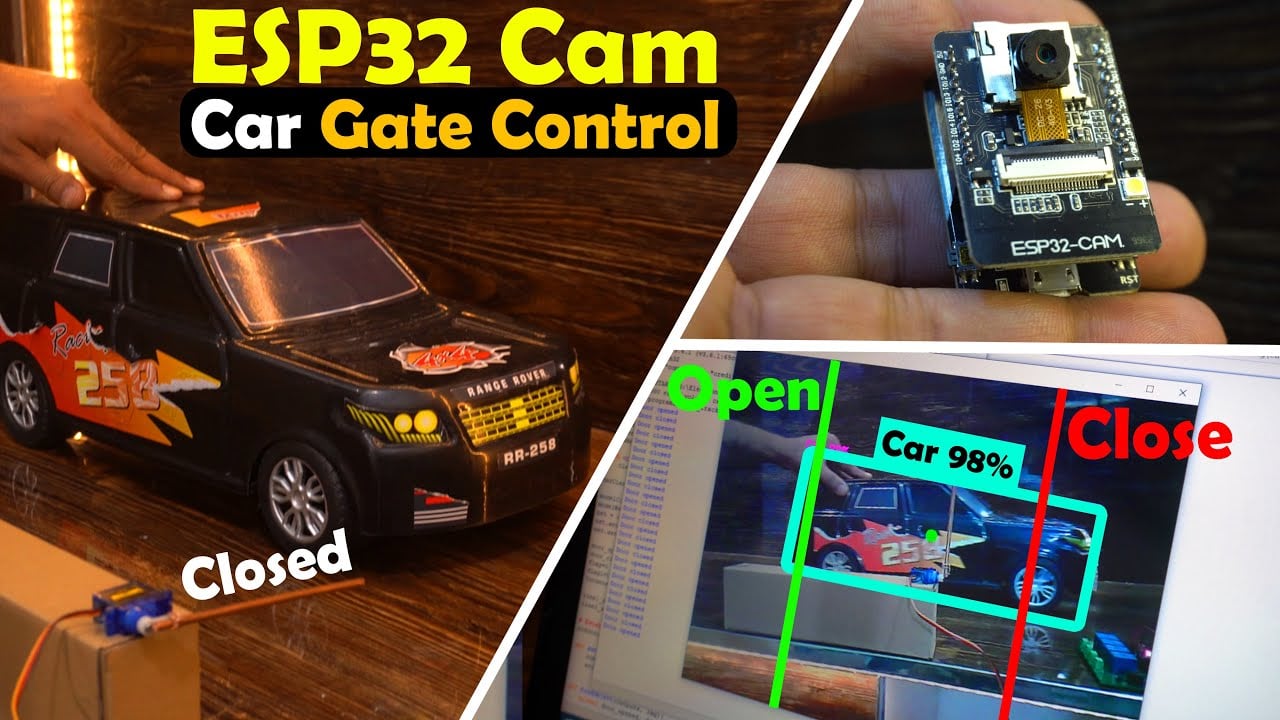
How to Build an ESP32 Cam Car Parking Barrier Using OpenCV, YOLOv3, and Arduino
Last Updated on May 11, 2026 by Engr. Shahzada Fahad
Table of Contents
ESP32 Cam Car Parking Barrier Control:
ESP32 Cam, Python OpenCV, Yolov3, & Arduino based Car Parking Barrier/Gate Control- Last year, I created a video on a car barrier control system, in which I used an ultrasonic sensor to control the car barrier/gate. That project is suitable for beginners. However, in reality, that project is not practical at all. This is because an ultrasonic sensor can only sense the presence of objects and measure their distance, but it cannot identify those objects. Therefore, if any object comes in front of the ultrasonic sensor, it would open the car barrier/gate, which is not ideal.
So, I thought, why not take that project to a slightly advanced level? So, this time, I will be using the Arduino along with ESP32 Cam for wireless live video streaming, and for the image processing, I am going to use Python OpenCV YoloV3. Now, the barrier/gate will only open for cars. It will not open for any other objects.
This project is entirely based on my previous project, where I explained the most basic things, such as:
How to perform wireless video streaming using the ESP32 Cam module?
How to install Python, OpenCV, and YoloV3? and
How to detect and identify different objects?

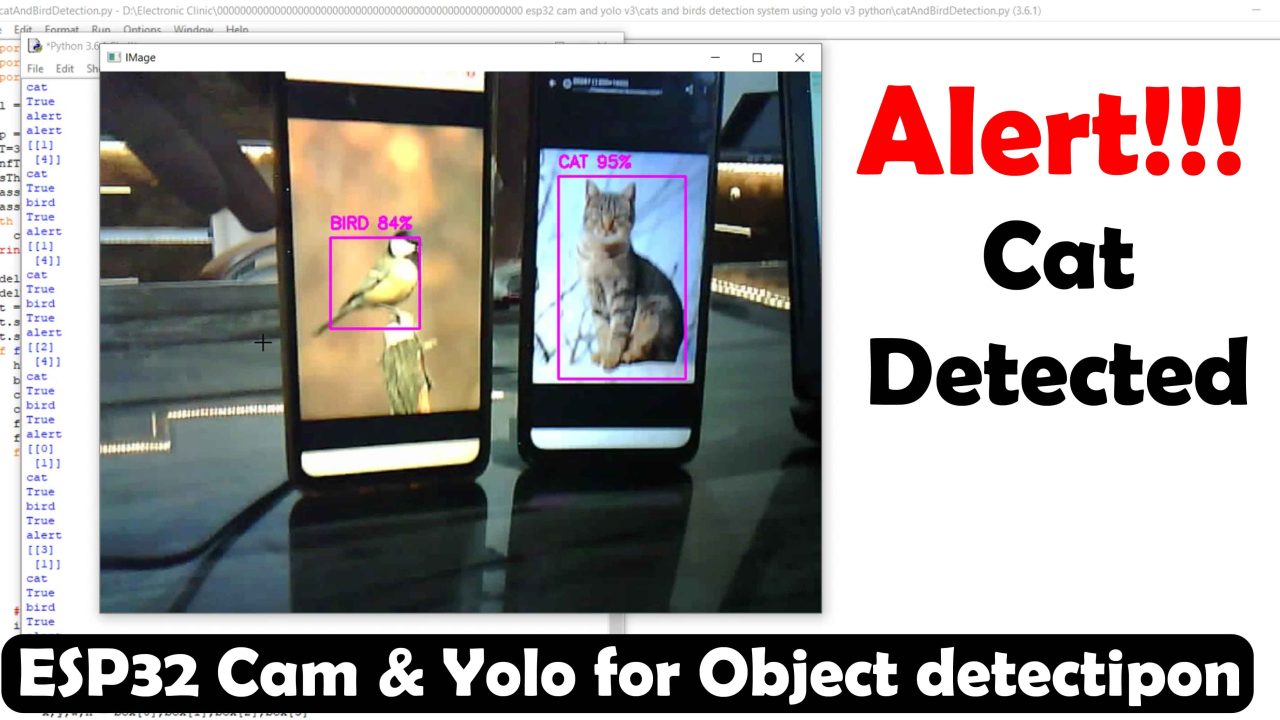
In my studio, I detected and identified various objects, and not only did I identify and track birds and cats, but I also displayed alert messages on the screen.
So, I have already explained all of these things, and I won’t repeat them today. Today, I will only explain new things. Including,
Servo motor interfacing with Arduino and its programming.
How to detect and identify a car? And
How to send car barrier/gate opening and closing commands to Arduino from Python OpenCV YoloV3. So, without any further delay, let’s get started!
Check out our latest article on the new AI development board that’s changing the future of smart projects!
Amazon Links:
Arduino Nano USB C type (Recommended)
MSI Intel Core i7 Laptop check this out.
Disclosure: These are affiliate links. As an Amazon Associate I earn from qualifying purchases.
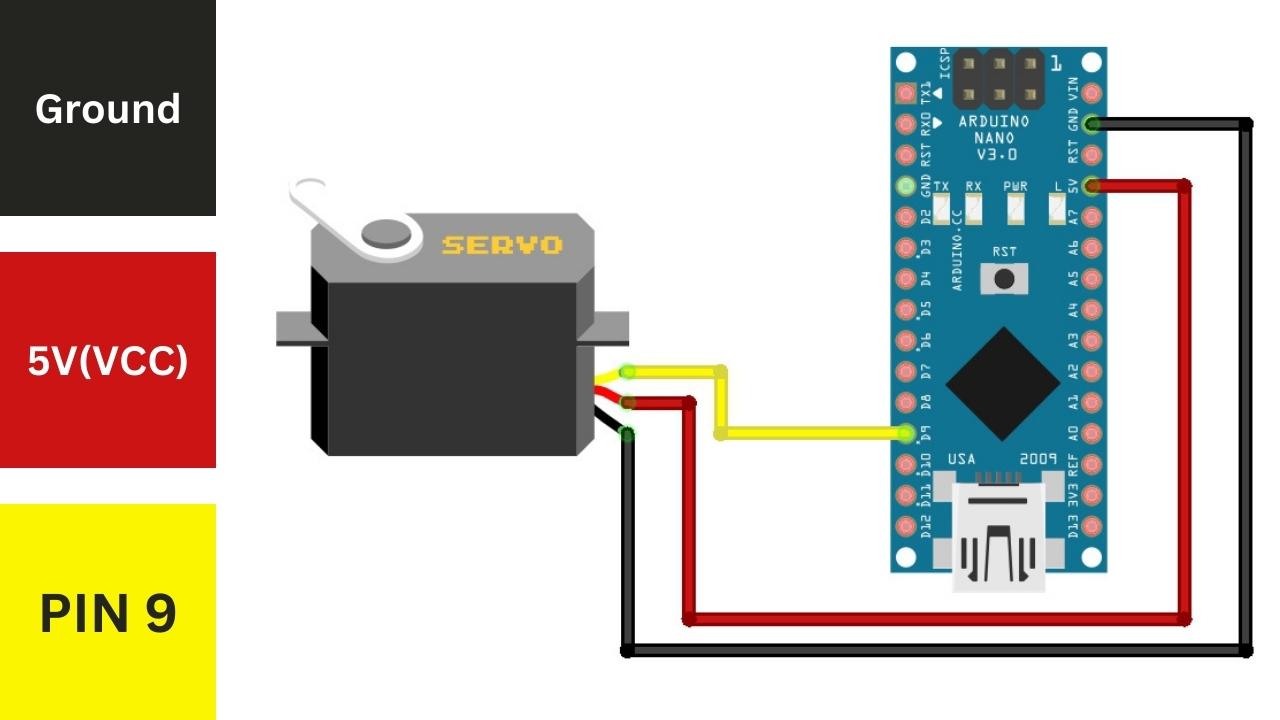
I am using my Arduino Nano and LoRa based development board. But you can do the same exact connections on a breadboard. Anyway, connect the signal wire to the Arduino pin9, and connect the VCC and GND wires of the Servo to the Arduino 5V and GND pins. You can follow this circuit diagram.
Servo with Arduino, Circuit Diagram:
And let me also tell you. If you are planning on using large servo motors like the ones you can see on the screen.
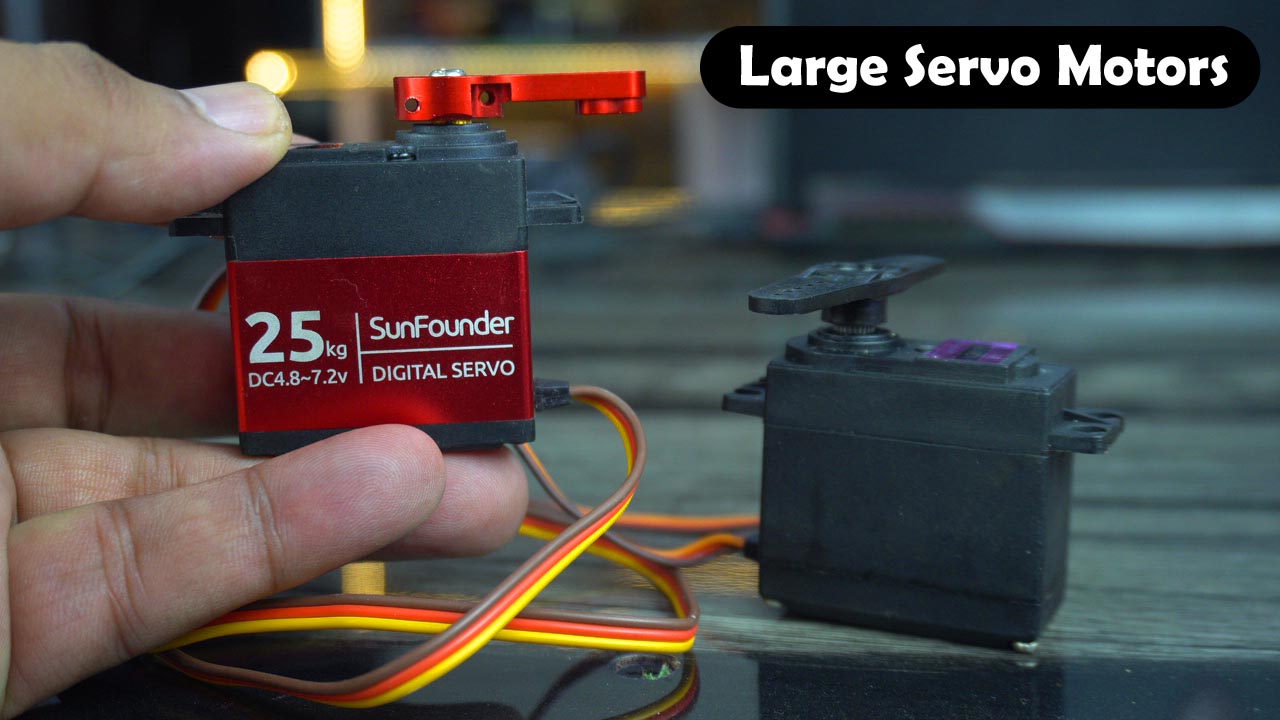
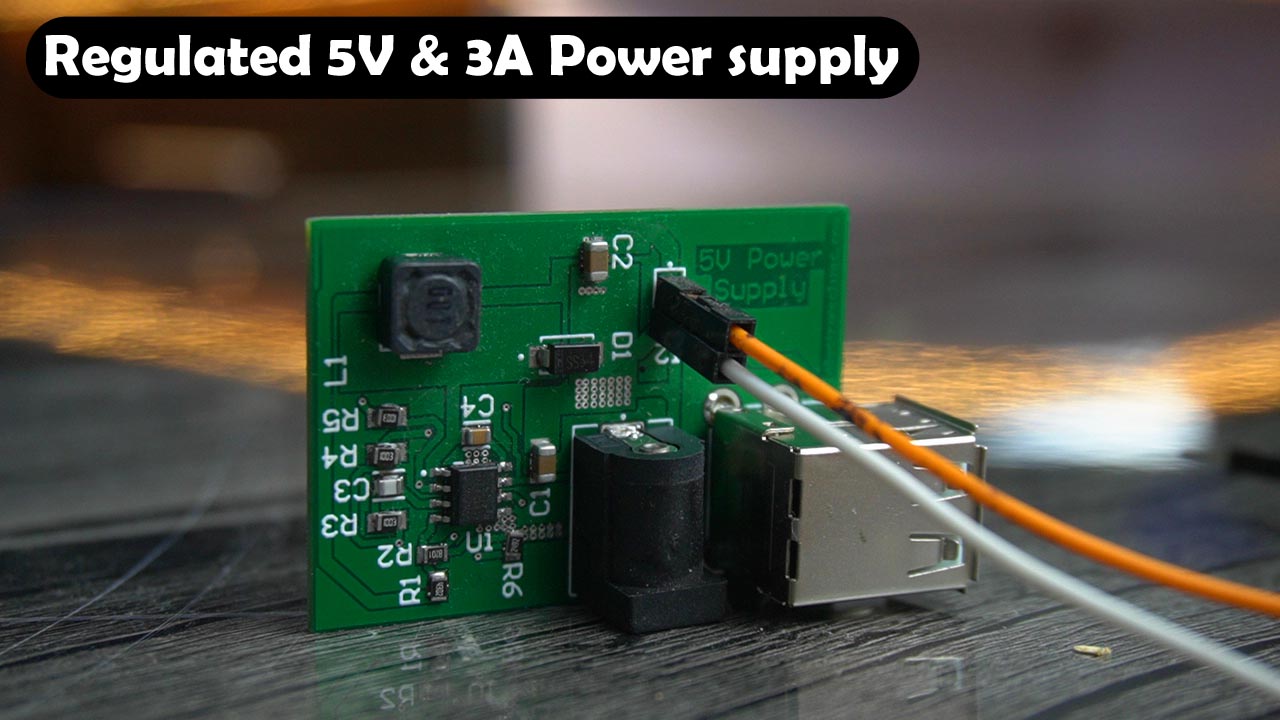
Then don’t use 5V from the Arduino because it might damage your Arduino board. So, use an external 5V power supply.
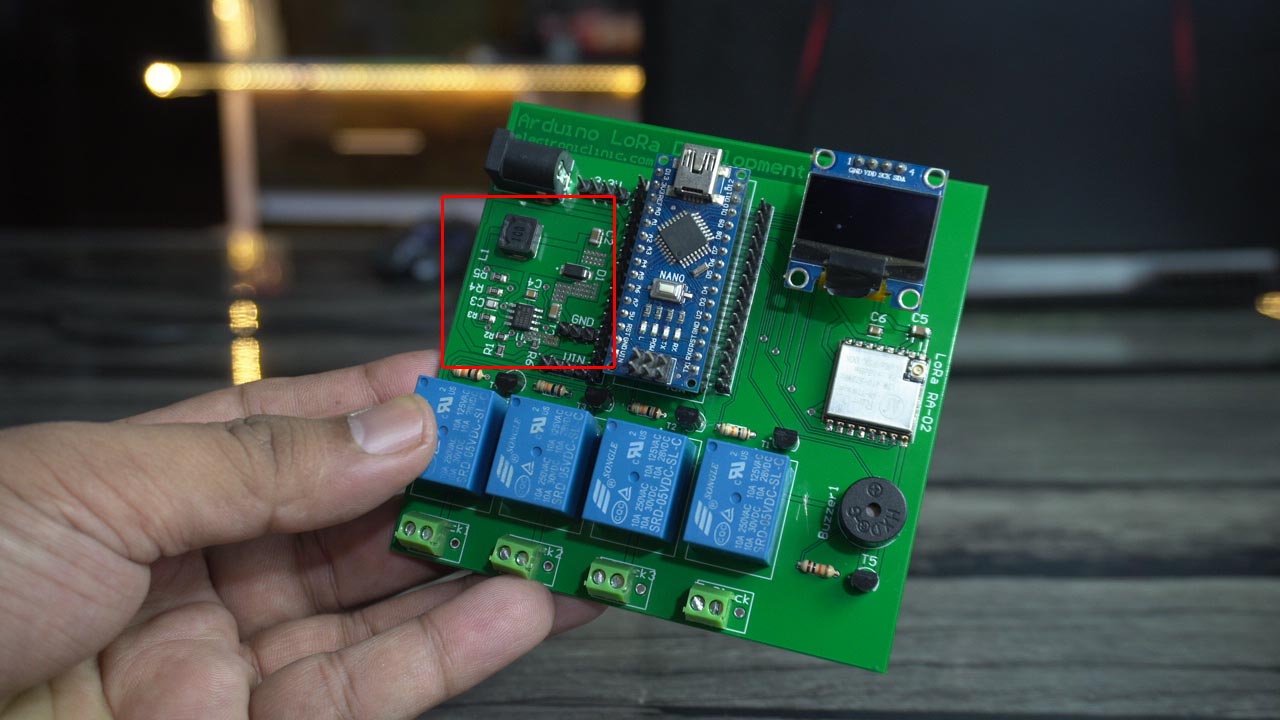
On my development board, I have this 5V and 3A power supply and its more than enough for powering these all types of servos. So, you can make yourself this development board, or you can make yourself this 5V and 3A power supply and then you can use it with different microcontroller boards, servos, breakout boards, and even you can use this 5V and 3A power supply to charge your cell phone.
Now, let’s go ahead and take a look at the Arduino programming.
Car Barrier/Gate Control Arduino Programming:
|
1 2 3 4 5 6 7 8 9 10 11 12 13 14 15 16 17 18 19 20 21 22 23 24 25 26 27 28 29 30 31 32 33 34 35 36 37 38 39 40 |
/* ESP32 Cam, Python OpenCV Yolo V3, & Arduino based Car Parking Barrier/Gate control system Programming https://www.electroniclinic.com/ */ #include <Servo.h> Servo servoMotor; int servoPin = 9; // Modify this with the appropriate pin number int Sflag = 0; void setup() { servoMotor.attach(servoPin); Serial.begin(9600); servoMotor.write(0); // Move servo to 0 degrees initially delay(1000); // Delay for 1 second } void loop() { if (Serial.available() > 0) { int angle = Serial.parseInt(); if((angle==1) && (Sflag == 0)) { servoMotor.write(90);// Move servo to 90 degrees Sflag = 1; delay(2000); } if((angle==2) && (Sflag == 1)) { servoMotor.write(0); Sflag = 0; delay(2000); } } } |
I started off by adding the Servo.h header file. You can see the Servo signal wire is connected to the Arduino pin 9. The Sflag variable I am going to use as the flag, I could also define it as Boolean but, anyway, I am using it to stop the unnecessary repetition of code.
In the void loop() function, we simply check if any data is available on the Serial port, or in simple words if any data is received from the Python. In my case, I send two numbers from python. So, that’s why I have used parseInt().
So, if the received number is 1 and the Sflag == 0 then move the Servo arm to 900 and change the Sflag state to 1. So, these instructions will only execute once.
If the received number is 2 and the Sflag == 1 then move the servo arm to 00.
I have already uploaded this program. And now let’s take a look at the Python OpenCV YoloV3 programming.
Python OpenCV YoloV3 programming:
|
1 2 3 4 5 6 7 8 9 10 11 12 13 14 15 16 17 18 19 20 21 22 23 24 25 26 27 28 29 30 31 32 33 34 35 36 37 38 39 40 41 42 43 44 45 46 47 48 49 50 51 52 53 54 55 56 57 58 59 60 61 62 63 64 65 66 67 68 69 70 71 72 73 74 75 76 77 78 79 80 81 82 83 84 85 86 87 88 89 90 91 92 93 94 95 96 97 98 99 100 101 102 103 104 105 106 107 108 109 110 111 112 113 114 115 116 117 118 119 120 121 122 123 124 125 |
import cv2 import numpy as np import urllib.request import serial url = 'http://192.168.43.219/cam-hi.jpg' arduino_port = 'COM11' # Modify this with the appropriate serial port baud_rate = 9600 # Modify this with the appropriate baud rate cap = cv2.VideoCapture(url) whT = 320 confThreshold = 0.5 nmsThreshold = 0.3 classesfile = 'coco.names' classNames = [] with open(classesfile, 'rt') as f: classNames = f.read().rstrip('\n').split('\n') carClassId = classNames.index('car') # Get the class ID for car modelConfig = 'yolov3.cfg' modelWeights = 'yolov3.weights' net = cv2.dnn.readNetFromDarknet(modelConfig, modelWeights) net.setPreferableBackend(cv2.dnn.DNN_BACKEND_OPENCV) net.setPreferableTarget(cv2.dnn.DNN_TARGET_CPU) door_opened = False door_closed = False flag=0 flag1=0 Ccounter=0 #for counting cars line1_x1, line1_y1, line1_x2, line1_y2 = 200, 0, 200, 600 # Coordinates for line 1 (x1, y1, x2, y2) line2_x1, line2_y1, line2_x2, line2_y2 = 600, 0, 600, 600 # Coordinates for line 2 (x1, y1, x2, y2) # Establish serial connection with Arduino Nano arduino = serial.Serial(arduino_port, baud_rate, timeout=1) def send_servo_command(angle): command = f"{angle}\n" # Append newline character to the command arduino.write(command.encode('utf-8')) def findObject(outputs, img): global door_opened, door_closed,flag, Ccounter# Declare the variables as global hT, wT, cT = img.shape bbox = [] classIds = [] confs = [] for output in outputs: for det in output: scores = det[5:] classId = np.argmax(scores) confidence = scores[classId] if classId == carClassId and confidence > confThreshold: w, h = int(det[2] * wT), int(det[3] * hT) x, y = int((det[0] * wT) - w / 2), int((det[1] * hT) - h / 2) bbox.append([x, y, w, h]) classIds.append(classId) confs.append(float(confidence)) indices = cv2.dnn.NMSBoxes(bbox, confs, confThreshold, nmsThreshold) for i in indices: i = i[0] box = bbox[i] x, y, w, h = box[0], box[1], box[2], box[3] center_x = x + w // 2 center_y = y + h // 2 cv2.rectangle(img, (x, y), (x + w, y + h), (255, 0, 255), 2) cv2.putText(img, f'{classNames[classIds[i]].upper()} {int(confs[i] * 100)}%', (x, y - 10), cv2.FONT_HERSHEY_SIMPLEX, 0.6, (255, 0, 255), 2) cv2.circle(img, (center_x, center_y), 10, (0, 255, 0), -1) # Draw a dot at the center of the bounding box if flag == 0 and center_x > line1_x1 and center_x < line2_x1: door_opened = True flag=1 print("Door opened") send_servo_command(1) # Send 90 degree command to servo if flag==1 and center_x > line2_x1: door_closed = True flag=0 print("Door closed") send_servo_command(2) # Send 0 degree command to servo # Draw line 1 cv2.line(img, (line1_x1, line1_y1), (line1_x2, line1_y2), (0, 255, 0), 2) # Draw line 2 cv2.line(img, (line2_x1, line2_y1), (line2_x2, line2_y2), (0, 0, 255), 2) while True: img_resp = urllib.request.urlopen(url) imgnp = np.array(bytearray(img_resp.read()), dtype=np.uint8) im = cv2.imdecode(imgnp, -1) success, img = cap.read() blob = cv2.dnn.blobFromImage(im, 1 / 255, (whT, whT), [0, 0, 0], 1, crop=False) net.setInput(blob) layerNames = net.getLayerNames() outputNames = [layerNames[i[0] - 1] for i in net.getUnconnectedOutLayers()] outputs = net.forward(outputNames) findObject(outputs, im) cv2.imshow('Image', im) if door_opened and door_closed: door_opened = False door_closed = False if cv2.waitKey(1) == ord('q'): break cv2.destroyAllWindows() |
This is the same exact program from my previous project. You can see I am using the same IP Address.
|
1 |
url = 'http://192.168.43.219/cam-hi.jpg' |
Through this IP address, I receive high-quality images from the ESP32 Camera module. I have already explained, how to setup your ESP32 camera module for the live video streaming.
|
1 |
arduino_port = 'COM11' |
This is the Arduino_port. My Arduino board is connected to the communication port11 and 9600 is the baud_rate.
This time round, I am using coco.names for the detection and identification of a car. If you open the coco.names file, you will see a long list of the objects. So, you can select any of those objects for controlling the Car barrier/Gate. In my case I am going to continue with a car.
|
1 2 3 4 5 6 7 8 9 10 11 12 13 14 15 16 17 18 19 20 21 22 23 24 25 |
line1_x1, line1_y1, line1_x2, line1_y2 = 200, 0, 200, 600 line2_x1, line2_y1, line2_x2, line2_y2 = 600, 0, 600, 600 These are the co-ordinates of two lines used to open and close the Car barrier. if flag == 0 and center_x > line1_x1 and center_x < line2_x1: door_opened = True flag=1 print("Door opened") send_servo_command(1) # Send 90 degree command to servo if flag==1 and center_x > line2_x1: door_closed = True flag=0 print("Door closed") send_servo_command(2) # Send 0 degree command to servo |
These are the instructions used to send the commands 1 and 2. When the car crosses line1, it sends 1 to the Arduino to open the Barrier and when the Car crosses line2 then it sends 2 to the Arduino to close the Barrier.
Now, let’s go ahead and start our practical demonstration.
Car Barrier/Gate control system using ESP32 Cam and Arduino:

In the above image, you can see the Car parking barrier/gate is closed. The parking barrier will only open when the car crosses the line.

In the image above, you can see the Car Parking barrier is opened. It will stay open as long as the car doesn’t cross the line2”red line”.
![]()
And in this image, you can see the Car parking barrier is closed. For the practical demonstration watch the video tutorial given below.

Watch Video Tutorial:
Troubleshooting — Problems You Will Likely Face and How to Solve Them
Problem 1: Python cannot connect to the ESP32-CAM video stream — the window opens but stays black or throws a connection error
This is almost always the first obstacle people hit and it comes down to either the wrong IP address in the Python code or the ESP32-CAM not being on the same WiFi network as your computer.
The ESP32-CAM assigns itself a local IP address when it connects to your router. That IP address is printed to the Serial Monitor when the module starts up — open the Serial Monitor at 115200 baud rate immediately after uploading and powering the ESP32-CAM. You will see something like “Camera Ready! Use http://192.168.1.105 to connect.” Copy that exact address and paste it into your Python code where the IP address is defined. If you skip this step and guess the address, the stream will never open.
The second thing to verify is that your computer and the ESP32-CAM are connected to the same WiFi router. If your laptop is on 5GHz WiFi and your ESP32-CAM only supports 2.4GHz — which it does — they may be on different network segments even though they appear connected to the same router. Connect your computer to the 2.4GHz band temporarily for testing.
If the connection still fails, open a browser on your computer and type the ESP32-CAM IP address directly. If the browser shows the camera stream, the issue is in your Python OpenCV code. If the browser also shows nothing, the ESP32-CAM is not streaming — check your Arduino code and make sure the correct camera model and pin configuration are selected.
Problem 2: YOLOv3 is detecting objects but it is not detecting cars specifically, or it detects everything as the wrong class
YOLOv3 uses a file called coco.names which contains 80 object classes. The class for a car is listed as “car” — all lowercase. In the Python code, the filter that checks for cars must match this exact name. If you accidentally typed “Car” with a capital C or “cars” with an s, the detection filter will never match and the barrier will never trigger.
Open your coco.names file and look at line 3 — that is where “car” is listed in the standard COCO dataset. In your Python code, wherever you are comparing the detected class label to trigger the barrier, make sure the string comparison is exact and case-sensitive.
Another issue is the confidence threshold. YOLOv3 assigns a confidence score from 0 to 1 to each detection. If your threshold in the code is set too high — say 0.8 or above — many valid car detections will be filtered out because they score slightly below that. For real-world video from an ESP32-CAM which is not a high-quality camera, a threshold of 0.4 to 0.5 is more practical. Adjust this value and you will see more consistent detections.
Problem 3: The barrier servo opens when a car is detected but never closes — it stays open permanently
The barrier is controlled by two virtual lines drawn on the video frame in the Python code. When the detected car’s bounding box center crosses line 1, command 1 is sent to Arduino to open the gate. When it crosses line 2, command 2 closes it. If the gate never closes, the car is either not crossing line 2 or line 2 is positioned incorrectly.
Check where you have drawn line 2 in the Python code. If line 2 is too close to the edge of the frame or outside the visible area, a car driving through will never cross it. Adjust the y-coordinate of line 2 so it sits clearly within the path a car would travel after passing through the gate. A good starting point is to place line 1 at about 40% of the frame height and line 2 at about 70% — this gives the car enough space between the two triggers.
Also check that the Arduino is correctly receiving command 2. Open the Serial Monitor on the Arduino while the Python script is running. Every time a command is sent from Python, print it to the Serial Monitor to confirm the Arduino is receiving it. If command 2 never appears, the Python code is not reaching that condition.
Problem 4: The Python script runs but the servo connected to Arduino does not move at all
The Python script detects the car and sends the serial command but the servo on the Arduino side does nothing. This is a serial communication problem between the computer running Python and the Arduino.
First, check the COM port in the Python code. The Arduino_port variable must match the exact port your Arduino is connected to on your computer. On Windows, open Device Manager and look under Ports to see the correct COM number — it might be COM3, COM11, or something else entirely. On Linux and Mac, it will be something like /dev/ttyUSB0 or /dev/cu.usbserial.
Second, check the baud rate. The Python code uses 9600 as the baud_rate and your Arduino Serial.begin() must also be set to 9600. A mismatch here means the Arduino receives garbled data and does nothing.
Third, make sure no other application is using the same COM port. If you have the Arduino Serial Monitor open at the same time as your Python script, they will conflict with each other because two applications cannot use the same serial port simultaneously. Close the Serial Monitor before running the Python script.
Problem 5: Detection works well in good lighting but completely fails outdoors or in a parking lot at night
The OV2640 camera on the ESP32-CAM is not designed for low-light performance. In dim conditions the image quality drops significantly — it becomes grainy, blurry, and colors shift — all of which makes YOLOv3 much less accurate.
For outdoor and nighttime use, add external lighting near the camera to illuminate the detection zone. Even two white LED floodlights pointing at the gate entry area make a dramatic difference. The camera does not need to see the whole car perfectly — it just needs enough contrast to identify the front of the vehicle as a car-shaped object.
In the Python code, add image preprocessing before feeding frames to YOLOv3. Increase brightness and contrast using OpenCV’s convertScaleAbs() function — something like alpha = 1.3 for contrast and beta = 30 for brightness as starting values. Tune these for your specific lighting conditions. This preprocessing step costs almost no processing time and can significantly improve detection accuracy in difficult lighting.
Problem 6: The system works perfectly for a few minutes then Python crashes with a memory error
YOLOv3 is a large model — the yolov3.weights file alone is 248MB. When you run it continuously processing a live video stream, memory usage climbs over time because frames are being allocated faster than they are being released. Eventually Python runs out of memory and crashes.
The fix is to explicitly release each video frame after processing. After each frame is analyzed, call frame = None or use del frame to free that memory immediately. Also add a small sleep between frames — even cv2.waitKey(1) with a 1 millisecond wait gives Python time to garbage collect unused memory. If the problem persists, consider switching to YOLOv3-tiny instead of the full YOLOv3. The tiny version uses a fraction of the memory and runs significantly faster, though with slightly lower accuracy. For a parking barrier that only needs to detect full-size cars in a controlled lane, YOLOv3-tiny is completely sufficient.
Frequently Asked Questions
Can I use a regular USB webcam instead of the ESP32-CAM for this project?
Yes, absolutely. If your computer has a USB webcam, you can replace the ESP32-CAM stream URL in the Python code with cv2.VideoCapture(0) and the rest of the project works exactly the same. The ESP32-CAM is used specifically because it is wireless and can be mounted at the parking gate without any cable running back to the computer. A USB webcam is easier to set up for initial testing since you avoid all the WiFi streaming setup entirely. Once the detection and barrier control logic is working with a USB cam, migrating to the ESP32-CAM is straightforward.
Can YOLOv3 be replaced with a newer model like YOLOv8?
Yes and in fact YOLOv8 would be a significant upgrade. YOLOv8 by Ultralytics is faster, more accurate, and much easier to set up than YOLOv3. With YOLOv8 you do not need to manually download weights and config files separately — the entire model loads with a single pip install and one line of Python code. The detection logic for triggering the barrier remains the same — you still filter for the “car” class and check bounding box positions relative to your two lines. The main reason the original project uses YOLOv3 is that it was the best widely available option when this tutorial was written. For anyone starting fresh today, YOLOv8 nano or YOLOv8 small would be my recommendation.
What minimum PC specifications do I need to run YOLOv3 in real time?
For the full YOLOv3 model at real-time speeds you want at least an Intel Core i5 or AMD Ryzen 5 processor with 8GB of RAM. With only a CPU, expect around 3 to 7 frames per second which is functional for a parking gate since cars move slowly through the gate area. If you have an Nvidia GPU with CUDA support, the same detection runs at 25 to 30 frames per second or faster which is genuinely smooth real-time performance. YOLOv3-tiny runs at real-time speeds even on mid-range CPUs without a GPU and is a good choice if your computer is not very powerful.
Can I extend this system to detect and log number plates as well?
That is a great idea and it is definitely possible, though it requires an additional step. After detecting a car with YOLOv3, you would crop the bounding box region of the detected car, pass that cropped image to an OCR tool or a dedicated license plate recognition library like OpenALPR or EasyOCR, and extract the plate text. The recognized plate number can then be logged to a Google Sheet, a local database, or displayed on screen. This transforms the basic gate controller into a complete vehicle entry management system. It is a worthwhile project extension and the foundation — car detection and barrier control — is already built in this tutorial.
Why is the barrier controlled by two lines instead of just opening when a car is detected?
This is a smart design choice that prevents the barrier from opening and closing rapidly when a car is partially in the detection zone. If the barrier triggered every time a car appeared anywhere in the frame, it would start opening while the car is still approaching, then might close while the car is halfway through. By using two lines — one to open and one to close — the system waits until the car has fully entered the gate lane before opening, and only closes after the car has fully passed through the exit point. This makes the system much more reliable and safe in real use. You can adjust the position of both lines in the code to match the exact physical layout of your gate.
Can this same system be used to control a sliding gate or a rolling shutter instead of a barrier arm?
Yes. The Arduino is just receiving command 1 to open and command 2 to close. Whatever is connected to the Arduino — a servo for a barrier arm, a relay for a motor driver controlling a sliding gate, or a relay for a rolling shutter motor — the Arduino side just needs to be programmed to activate the right output on each command. The Python and ESP32-CAM side of the system stays completely unchanged. If you are controlling a mains-powered sliding gate motor, use a relay module on the Arduino side and make sure to follow proper electrical safety practices when wiring anything connected to mains voltage.
If you are building this project and hit a problem that is not covered here, leave a detailed comment below describing exactly what happens and at which step it fails. I read every comment and will help you work through it.
Discover more from Electronic Clinic
Subscribe to get the latest posts sent to your email.