ESP32 CAM with Python OpenCV Yolo V3 for object detection and Identification
Last Updated on July 8, 2025 by Engr. Shahzada Fahad
Table of Contents
ESP32 CAM OpenCV Yolo V3:
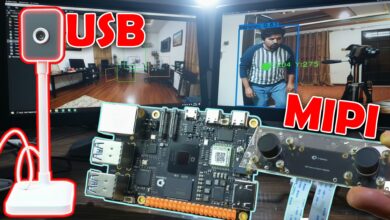
ESP32 CAM with Python OpenCV Yolo V3 for object detection and Identification- In this article, I am going to use the ESP32 Camera module with Python OpenCV Yolo V3 for object detection and Identification. I am only using the ESP32 Camera module for the live video streaming whereas for the image processing, I am using Python OpenCV Yolo V3.
I will test it on three different machines and you will be amazed with the end results. First I will test it using the Raspberry Pi 4 and it has 8GB RAM. Then I will test it on Core i3 Laptop. And finally, I will test it on my MSI Intel Core i7 with Nvidia Geforce 16GB GPU and 16GB RAM. I specially purchased this laptop for video editing and image processing.
Anyway, after performing initial tests then I will share with you the final code, which can be used for the detection and identification of specific objects. Let’s say you want to send an alert message when a specific object is detected.
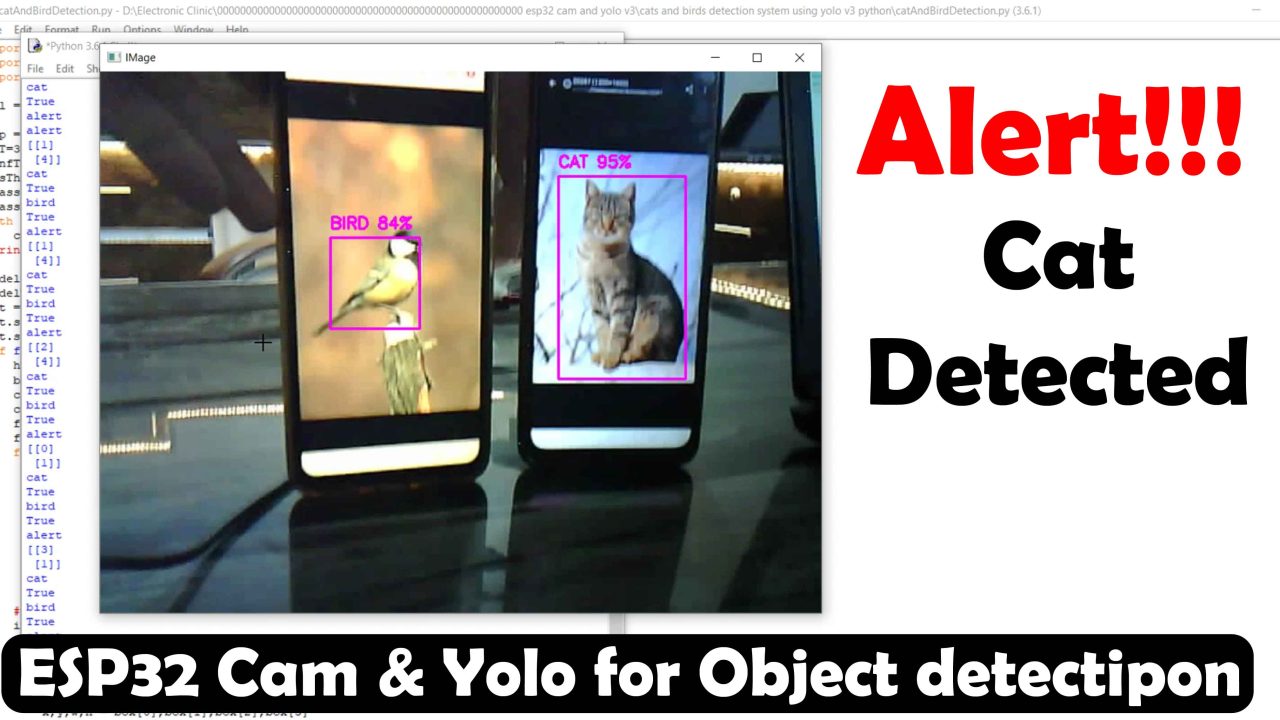
In my case, I send an alert message when a bird and a cat are detected at the same time. While all the other objects are totally ignored.
We have a long list of objects that we can detect. So, after reading this article or watching my video you will be able to detect all the objects at the same time or you can select one or multiple objects of your choice, and this way you can build amazing image processing-based projects.
So, without any further delay let’s get started!!!
Check out our latest article on the new AI development board that’s changing the future of smart projects!
Note: Read my article on ESP32 Cam and Arduino-based Car Parking Barrier control system.
Amazon Links:
MSI Intel Core i7 Laptop check this out.
Disclosure: These are affiliate links. As an Amazon Associate I earn from qualifying purchases.
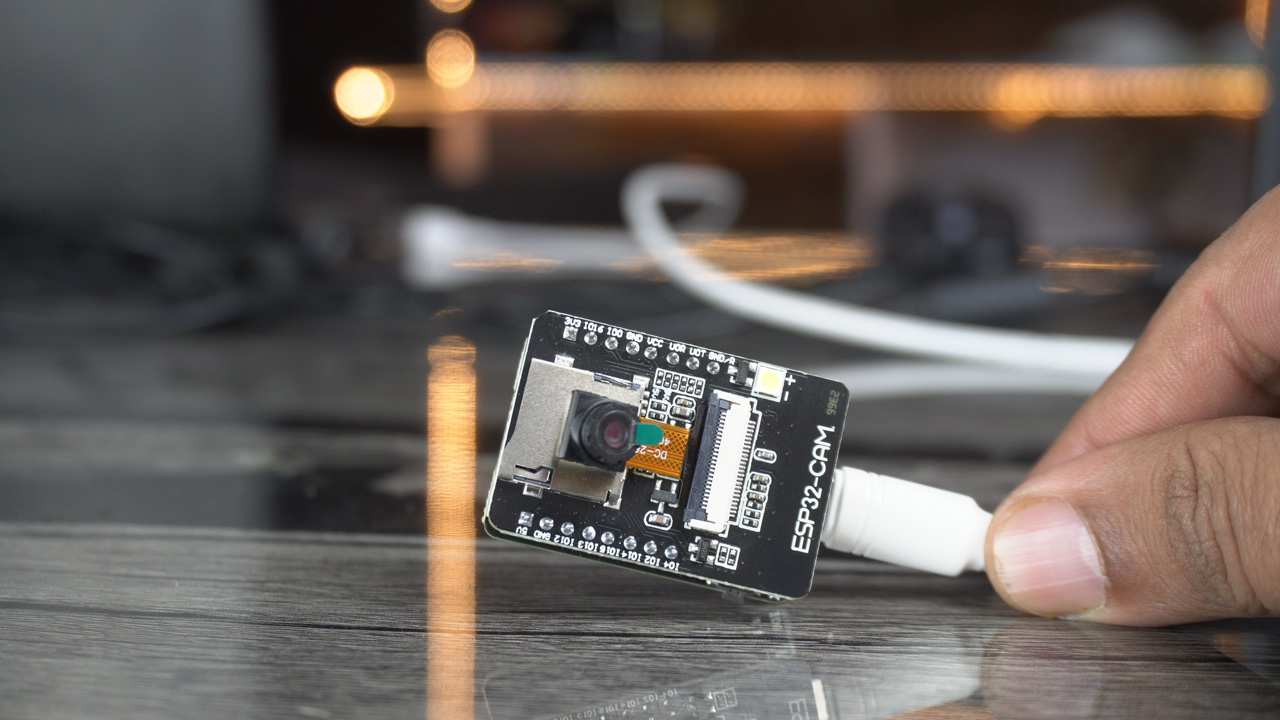
About ESP32Cam Module:
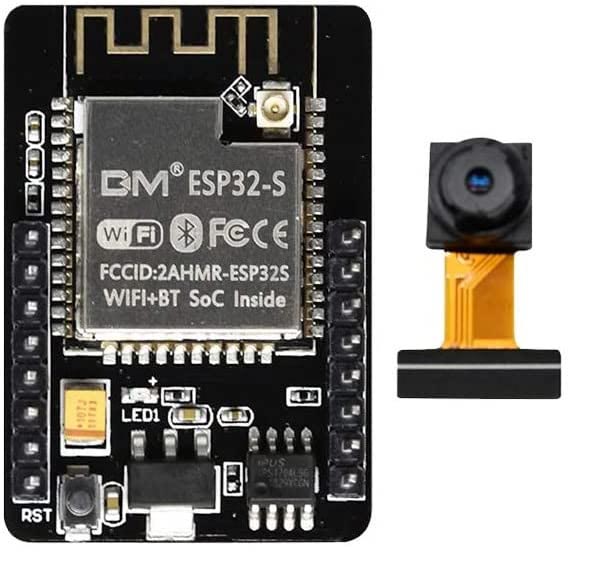
The ESP32-CAM is a small, low-cost development board based on the ESP32 microcontroller and a camera module. It combines Wi-Fi and Bluetooth connectivity with a camera, making it suitable for projects requiring image capture and wireless communication capabilities.
Here are some key features of the ESP32-CAM:
- ESP32 Microcontroller: The board is built around the ESP32, a powerful and versatile microcontroller that supports both Wi-Fi and Bluetooth connectivity. It has a dual-core processor, ample RAM, and various peripherals.
- Camera Module: The ESP32-CAM integrates a small camera module, typically an OV2640 or OV7670, capable of capturing images and video. The camera can be used to capture still images or stream video to a host device.
- GPIO Pins: The ESP32-CAM features a set of general-purpose input/output (GPIO) pins that allow you to connect additional sensors, actuators, or other components to expand the functionality of your project.
- Storage Options: The board offers different storage options for storing images and other data. It includes a microSD card slot for external storage, as well as built-in flash memory for storing firmware and other files.
- Programming: The ESP32-CAM can be programmed using the Arduino IDE, which provides a user-friendly development environment for writing and uploading code. There are also alternative programming options available, such as MicroPython or the Espressif IDF (IoT Development Framework).
- Power Supply: The board can be powered through a USB connection or an external power source. It has a voltage regulator to provide a stable power supply to the ESP32 and camera module.
- The ESP32-CAM is commonly used in applications such as surveillance systems, home automation, robotics, and IoT projects that require image capture and wireless connectivity. Its compact size and affordable price make it a popular choice for hobbyists and developers.
Please note that specific details about the ESP32-CAM’s features and specifications may vary depending on the manufacturer or version of the board.
What is yolo v3?
YOLO (You Only Look Once) v3 is an object detection algorithm that is widely used in computer vision and image recognition tasks. It is an improvement over its predecessors, YOLO and YOLO v2, and offers better accuracy and performance.
The key idea behind YOLO v3 is to divide an input image into a grid and predict bounding boxes and class probabilities directly on the grid cells. Instead of sliding a window or using a region proposal network, YOLO v3 performs detection in a single pass. This makes it extremely fast and efficient compared to other object detection algorithms.
YOLO v3 uses a deep convolutional neural network (CNN) to process the input image and predict the bounding boxes and class probabilities. The network architecture comprises several convolutional layers, which are subsequently followed by fully connected layers. It also incorporates skip connections, which allow information from earlier layers to be used in later layers, enhancing the detection performance.
One of the significant improvements in YOLO v3 is the introduction of multiple detection scales. It applies detection at three different scales to detect objects of varying sizes in the image. This multi-scale approach helps improve detection accuracy, particularly for small objects.
YOLO v3 is capable of detecting and localizing multiple objects within an image in real time. It has been widely used in various applications, including autonomous vehicles, surveillance systems, and video analysis.
Why ESP32 CAM & Yolo V3?
The combination of the ESP32 camera module and Python YOLOv3 (You Only Look Once version 3) can be a powerful solution for various computer vision applications. Here’s why:
ESP32 Camera Module: The ESP32 is a versatile microcontroller with built-in Wi-Fi and Bluetooth capabilities. It also has sufficient processing power to handle basic image-processing tasks. The ESP32 camera module integrates a camera sensor with the microcontroller, allowing you to capture images or videos directly. This makes it convenient for applications that require real-time image processing or analysis.
Python: Python is a popular programming language for machine learning and computer vision. It has a rich ecosystem of libraries and frameworks that simplify the development of complex applications. By using Python, you can leverage the extensive support available for computer vision tasks and easily integrate with other libraries or tools.
YOLOv3: YOLOv3 is a state-of-the-art object detection algorithm that can accurately detect and classify objects in real-time. It operates by dividing the input image into a grid and predicting bounding boxes and class probabilities for each grid cell. YOLOv3 is known for its speed and accuracy, making it suitable for applications that require real-time object detection, such as surveillance, robotics, or smart home systems.
Combining the ESP32 camera module and YOLOv3 in Python allows you to perform real-time object detection on images or video streams captured by the camera. The ESP32 can capture the images, send them to a computer or a server running the YOLOv3 algorithm, and receive the object detection results back to take further actions.
This combination is particularly useful for resource-constrained environments where running complex computer vision algorithms on the microcontroller itself may not be feasible due to memory or processing limitations. Instead, offloading the heavy computation to a more powerful machine running YOLOv3 in Python can provide better performance and accuracy.
Python and OpenCV installation:
To install Python and OpenCV, please follow the steps outlined below:
Python Installation:
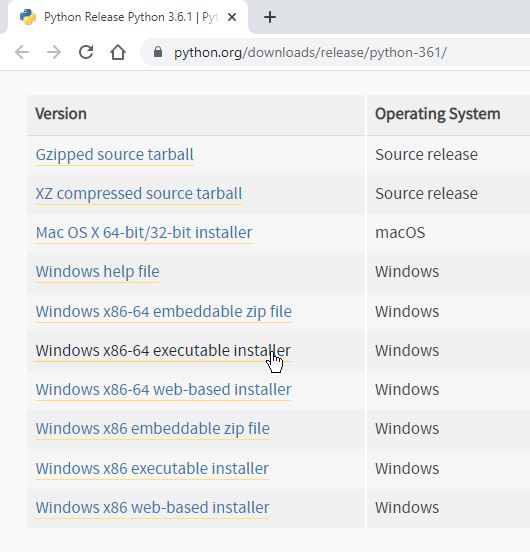
Visit the official Python website’s releases page.

Scroll down to the “Files” section and download the appropriate installer for your operating system (Windows, macOS, or Linux) based on your system architecture (32-bit or 64-bit). In my case, I am going to download and install the Windows x86-64 executable installer.
Run the installer and follow the instructions to install Python 3.6.1. Make sure to select the option to add Python to the system PATH during the installation process.
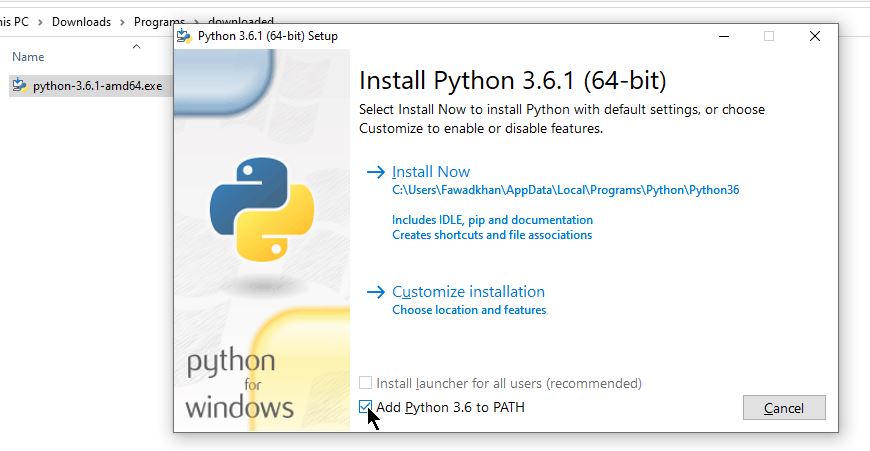
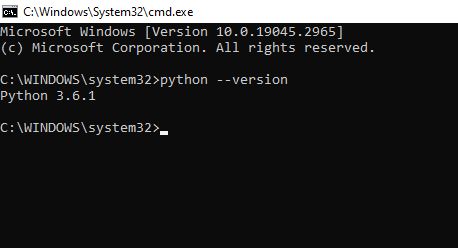
If you want to check whether Python is installed on your system, you can use the following command “python –version” in your command prompt or terminal. As you can see Python version 3.6.1 is successfully installed.
Install OpenCV:
Open a command prompt or terminal. And paste the below code in the terminal:
|
1 |
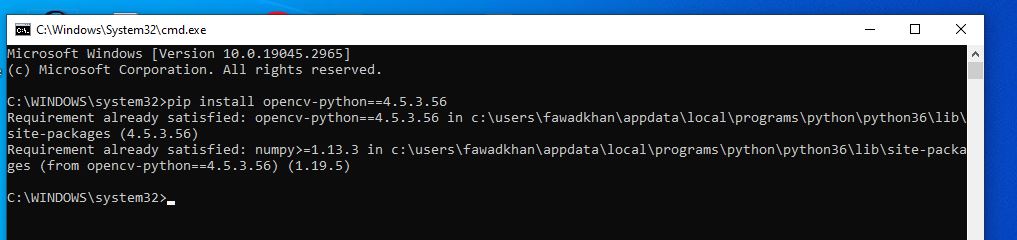
pip install opencv-python==4.5.3.56 |
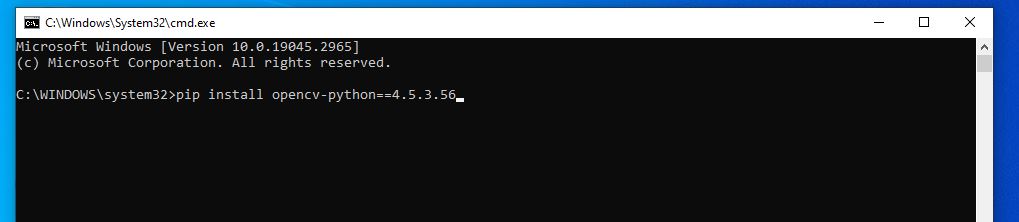
And press the enter button. But in my case it shows the following message because I already installed it.
If you want to check whether Opencv is installed on your system, you can use the following command in your Python IDLE shell:
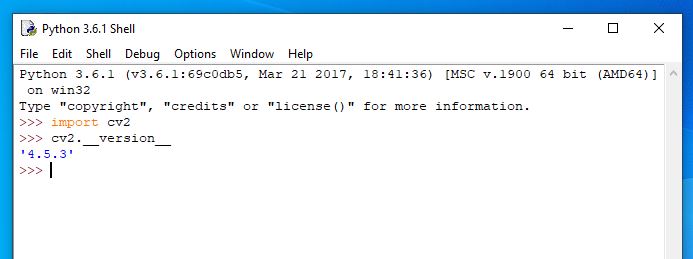
As you can see the Opencv is installed successfully.
Download yolov3 weight and cfg files:
Step 1: Visit the Darknet Website Head over to the official Darknet website. Darknet is the open-source framework developed by Joseph Redmon, the creator of YOLO.
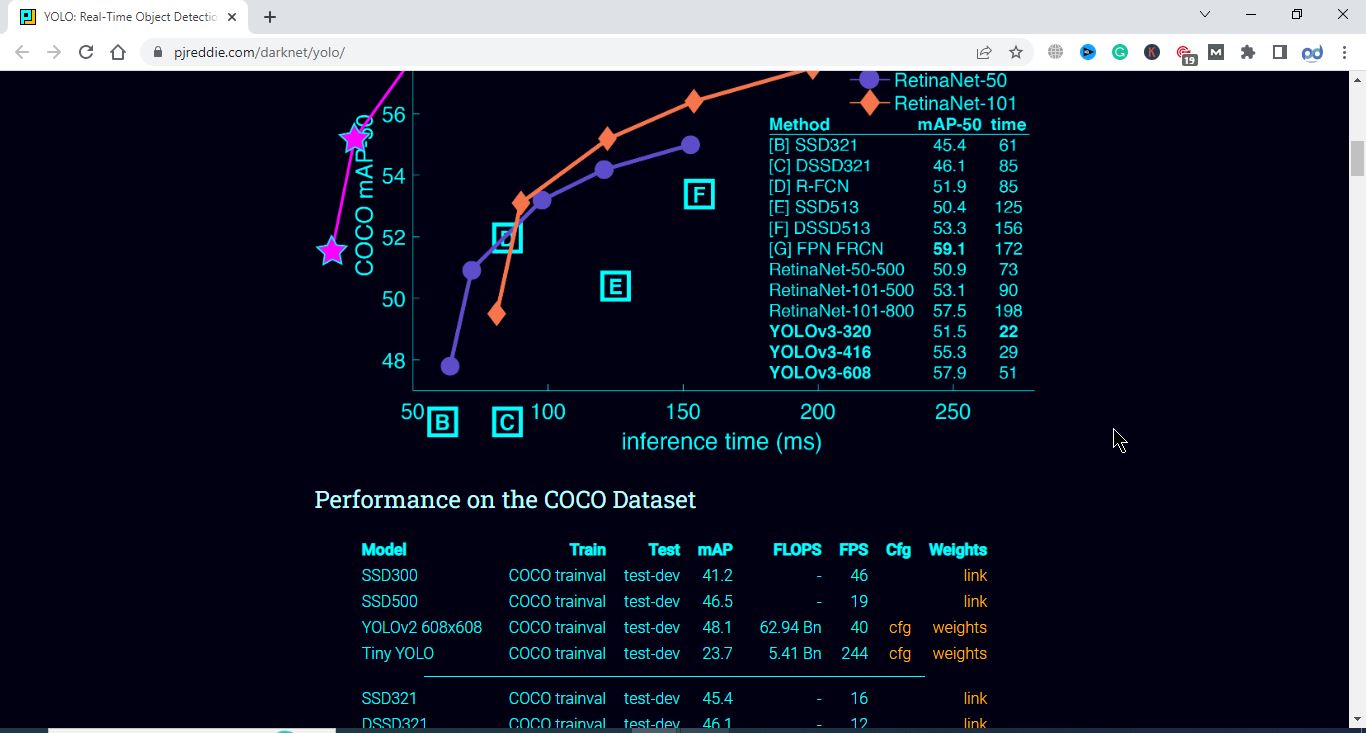
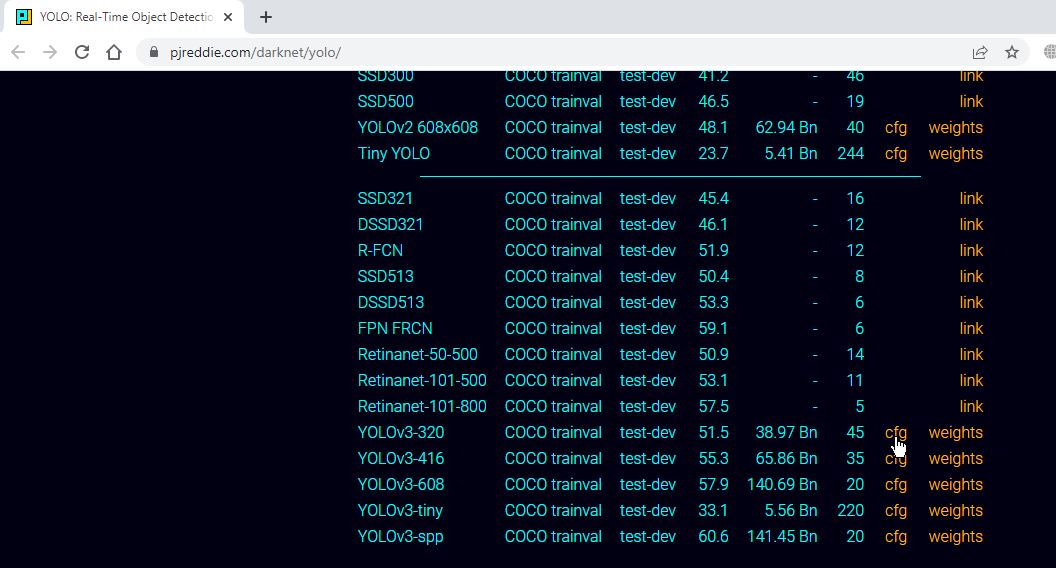
Step 2: Download YOLO Weights On the Darknet website, scroll down to the “YOLO” section. You’ll find a link to download the YOLO weights file. Click on the link to start the download. The weights file is typically named “yolov3.weights”.
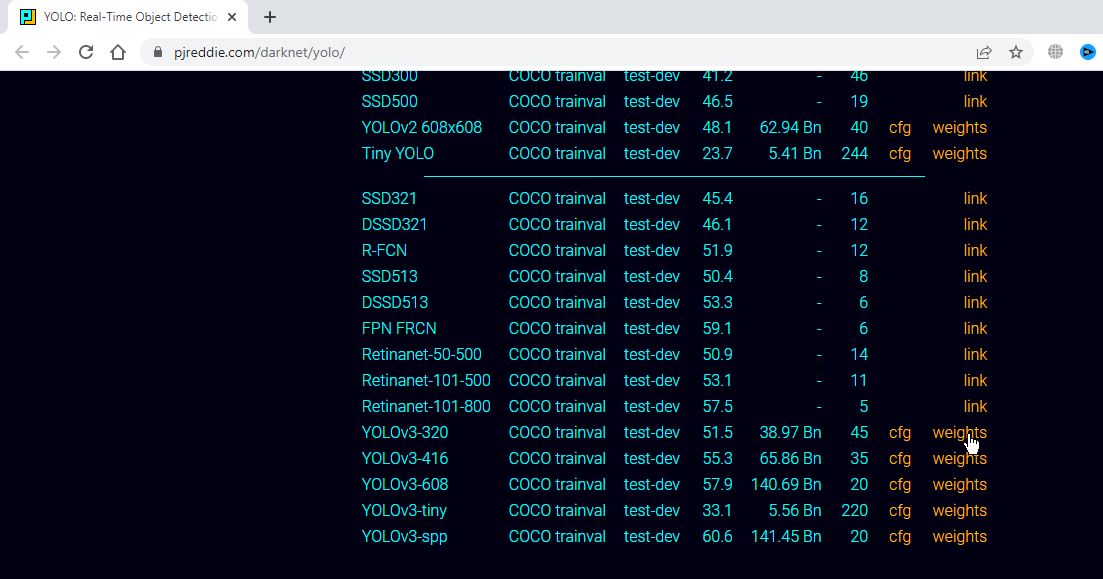
Make sure you download the cfg and weights files of the YOLOv3-320 as you can see in the image above.
Step 3: Download YOLO Configuration Files (CFG) While still on the Darknet website, navigate to the “Configuration” section. You’ll find a link to download the YOLO configuration files (CFG) there. The configuration files contain the architecture and settings for the YOLO model. Click on the link to begin the download. The configuration file for YOLOv3 is usually named “yolov3.cfg”.
Step 4: Get the Class Names (Optional) To download the coco.names from the Darknet GitHub repository, open the darknet GitHub repository and copy all the classes names and save in your project directory as well with the file extension coco.names.
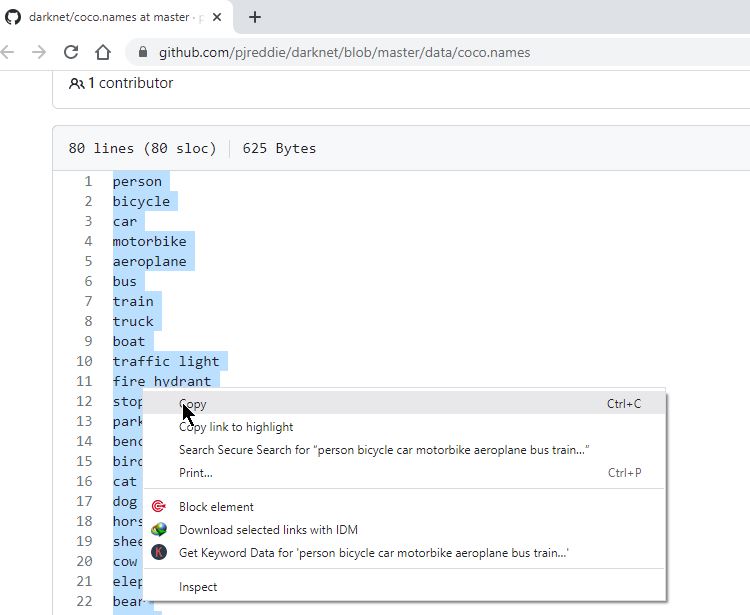

Now you have successfully downloaded the coco.names classes list from the Darknet GitHub repository. This file contains the names of the object classes used in the COCO dataset, which can be useful for object detection and recognition tasks. Make sure the file should be saved with the extension .names. If there is a .txt extension remove it. “Wrong: coco.names.txt” “correct is: coco.names”
Step 5: keep the coco.names, yolov3.cfg, and yolov3.weights files in the same folder with the main programming file. The catAndBirdDetection.py is the main programming file.

Next, we are going to start with the ESP32 Camera module.
ESP32 Cam Live Video Streaming in Python OpenCV:
You will need to upload the following program into the ESP32 Camera module for the Live Video streaming.
|
1 2 3 4 5 6 7 8 9 10 11 12 13 14 15 16 17 18 19 20 21 22 23 24 25 26 27 28 29 30 31 32 33 34 35 36 37 38 39 40 41 42 43 44 45 46 47 48 49 50 51 52 53 54 55 56 57 58 59 60 61 62 63 64 65 66 67 68 69 70 71 72 73 74 75 76 77 78 79 80 81 82 83 84 85 86 87 88 89 90 91 92 |
#include <WebServer.h> #include <WiFi.h> #include <esp32cam.h> const char* WIFI_SSID = "Fawad"; const char* WIFI_PASS = "computer007"; WebServer server(80); static auto loRes = esp32cam::Resolution::find(320, 240); static auto midRes = esp32cam::Resolution::find(350, 530); static auto hiRes = esp32cam::Resolution::find(800, 600); void serveJpg() { auto frame = esp32cam::capture(); if (frame == nullptr) { Serial.println("CAPTURE FAIL"); server.send(503, "", ""); return; } Serial.printf("CAPTURE OK %dx%d %db\n", frame->getWidth(), frame->getHeight(), static_cast<int>(frame->size())); server.setContentLength(frame->size()); server.send(200, "image/jpeg"); WiFiClient client = server.client(); frame->writeTo(client); } void handleJpgLo() { if (!esp32cam::Camera.changeResolution(loRes)) { Serial.println("SET-LO-RES FAIL"); } serveJpg(); } void handleJpgHi() { if (!esp32cam::Camera.changeResolution(hiRes)) { Serial.println("SET-HI-RES FAIL"); } serveJpg(); } void handleJpgMid() { if (!esp32cam::Camera.changeResolution(midRes)) { Serial.println("SET-MID-RES FAIL"); } serveJpg(); } void setup(){ Serial.begin(115200); Serial.println(); { using namespace esp32cam; Config cfg; cfg.setPins(pins::AiThinker); cfg.setResolution(hiRes); cfg.setBufferCount(2); cfg.setJpeg(80); bool ok = Camera.begin(cfg); Serial.println(ok ? "CAMERA OK" : "CAMERA FAIL"); } WiFi.persistent(false); WiFi.mode(WIFI_STA); WiFi.begin(WIFI_SSID, WIFI_PASS); while (WiFi.status() != WL_CONNECTED) { delay(500); } Serial.print("http://"); Serial.println(WiFi.localIP()); Serial.println(" /cam-lo.jpg"); Serial.println(" /cam-hi.jpg"); Serial.println(" /cam-mid.jpg"); server.on("/cam-lo.jpg", handleJpgLo); server.on("/cam-hi.jpg", handleJpgHi); server.on("/cam-mid.jpg", handleJpgMid); server.begin(); } void loop() { server.handleClient(); } |
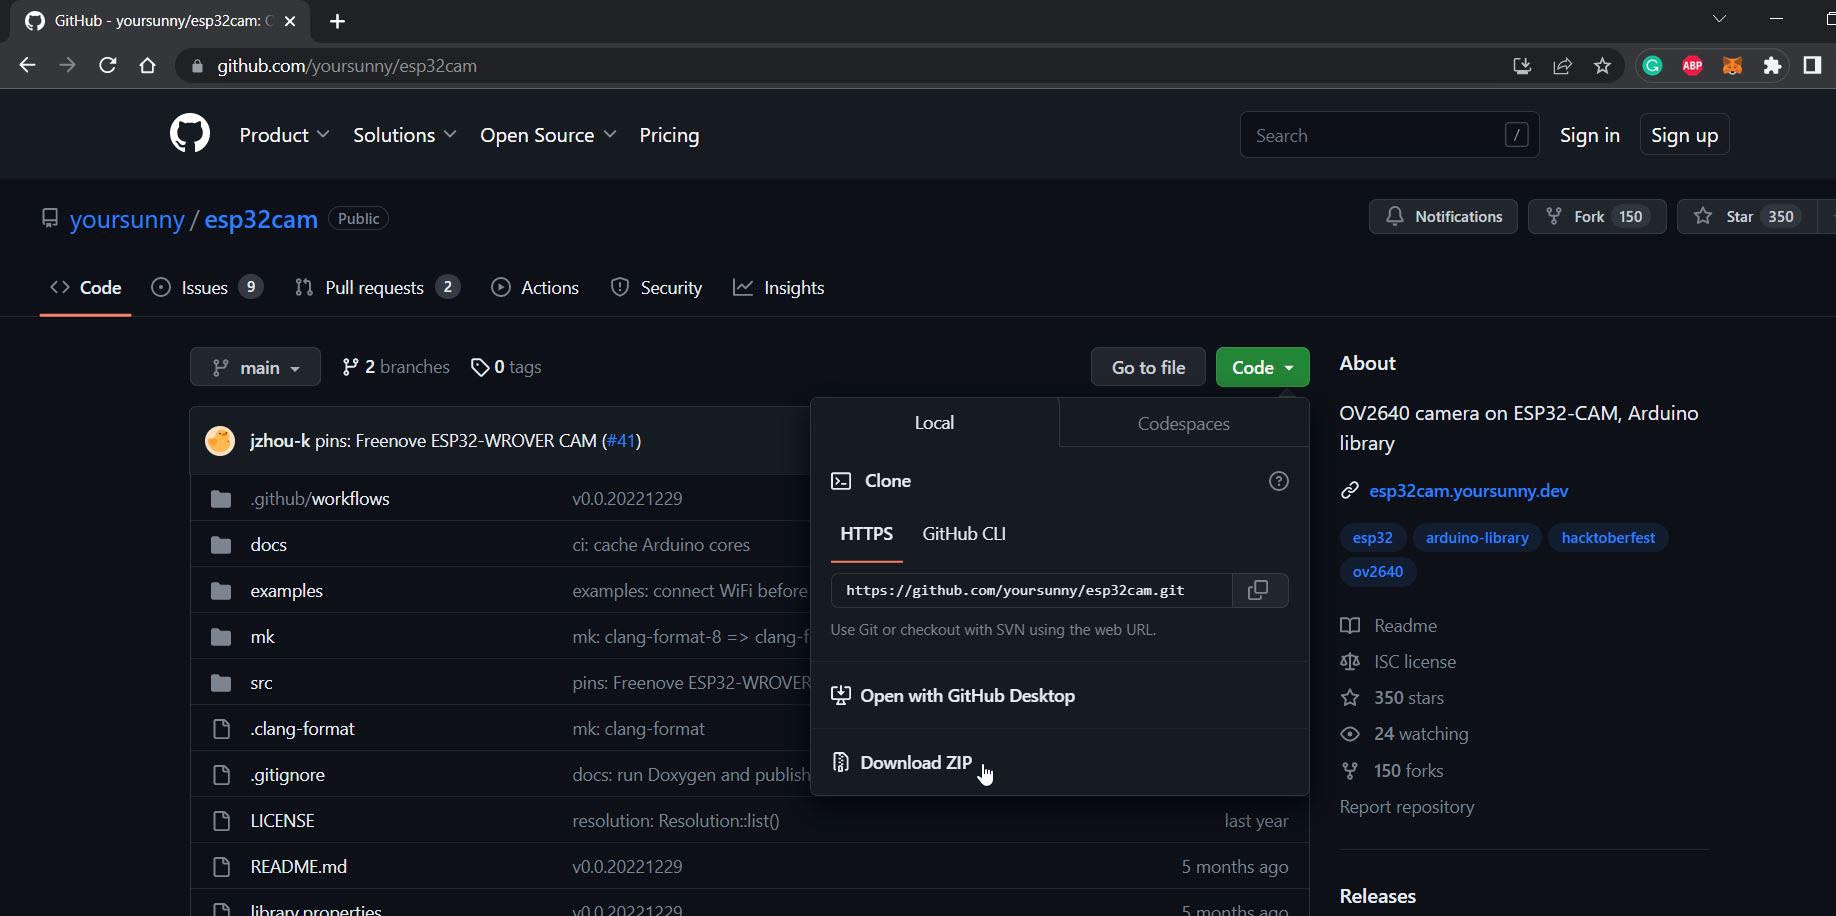
But first, you will need to download the esp32cam.h library. For this go to Github and download the esp32cam Zip.
Then go back to Arduino IDE, click on the Sketch Menu > Include Library >, and click on Add .Zip Library.
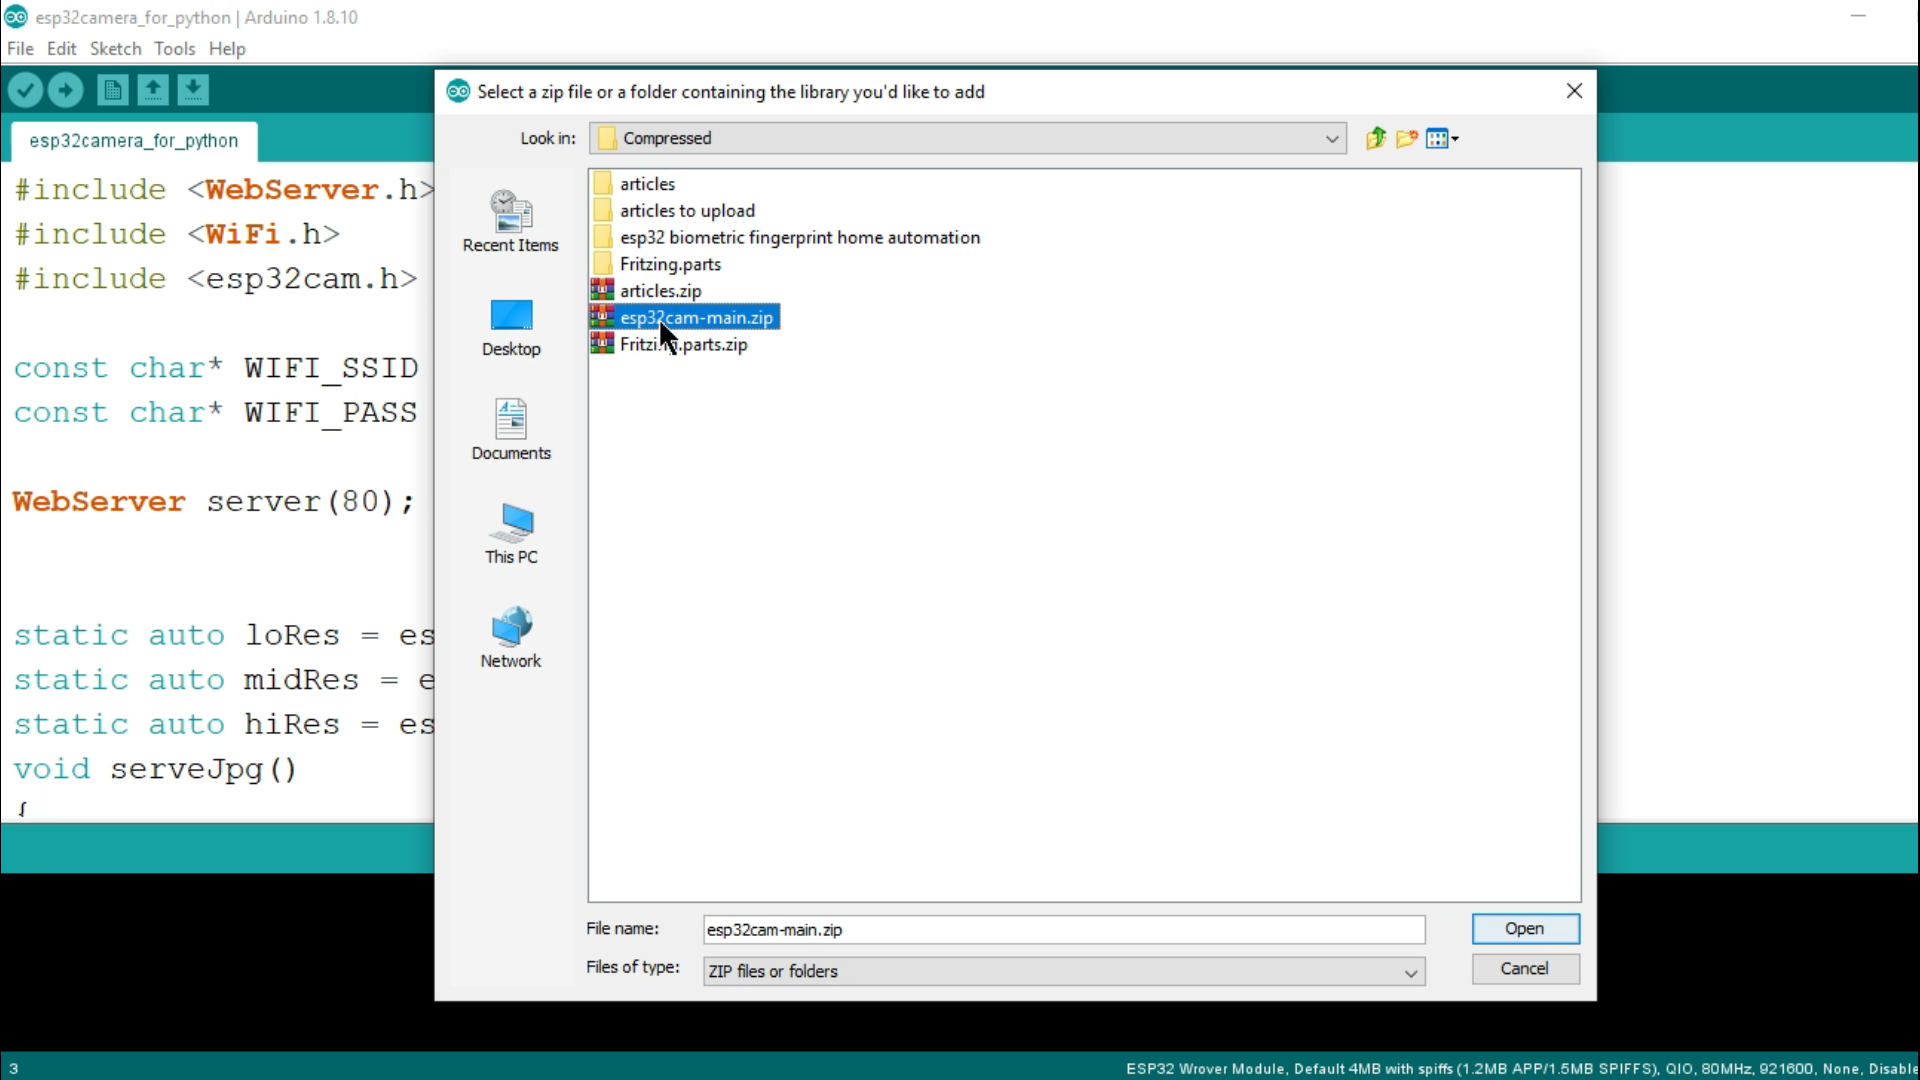
Browse to the location and select the esp32cam-main.zip folder. If you face any difficulty then you can watch my video tutorial given at the end of this article.
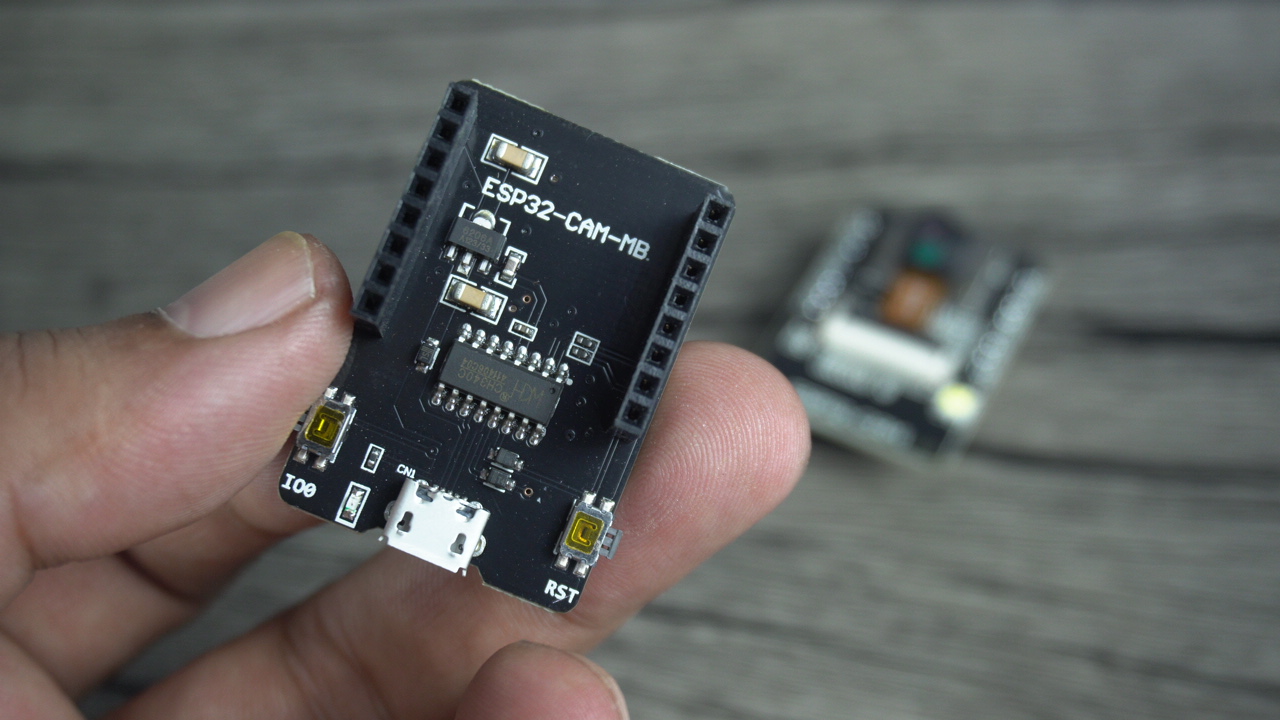
For uploading the program I am using the ESP32 Camera development board. This way I don’t need to use Arduino. But if you don’t have this development board then you can use the Arduino Uno for uploading the program. For this, you can read my getting started article on the ESP32 Camera module.
Simply insert the ESP32 Camera module into the Development board and connect it to your laptop or computer. Now, select the esp32 cam board from the boards list in the Arduino IDE.
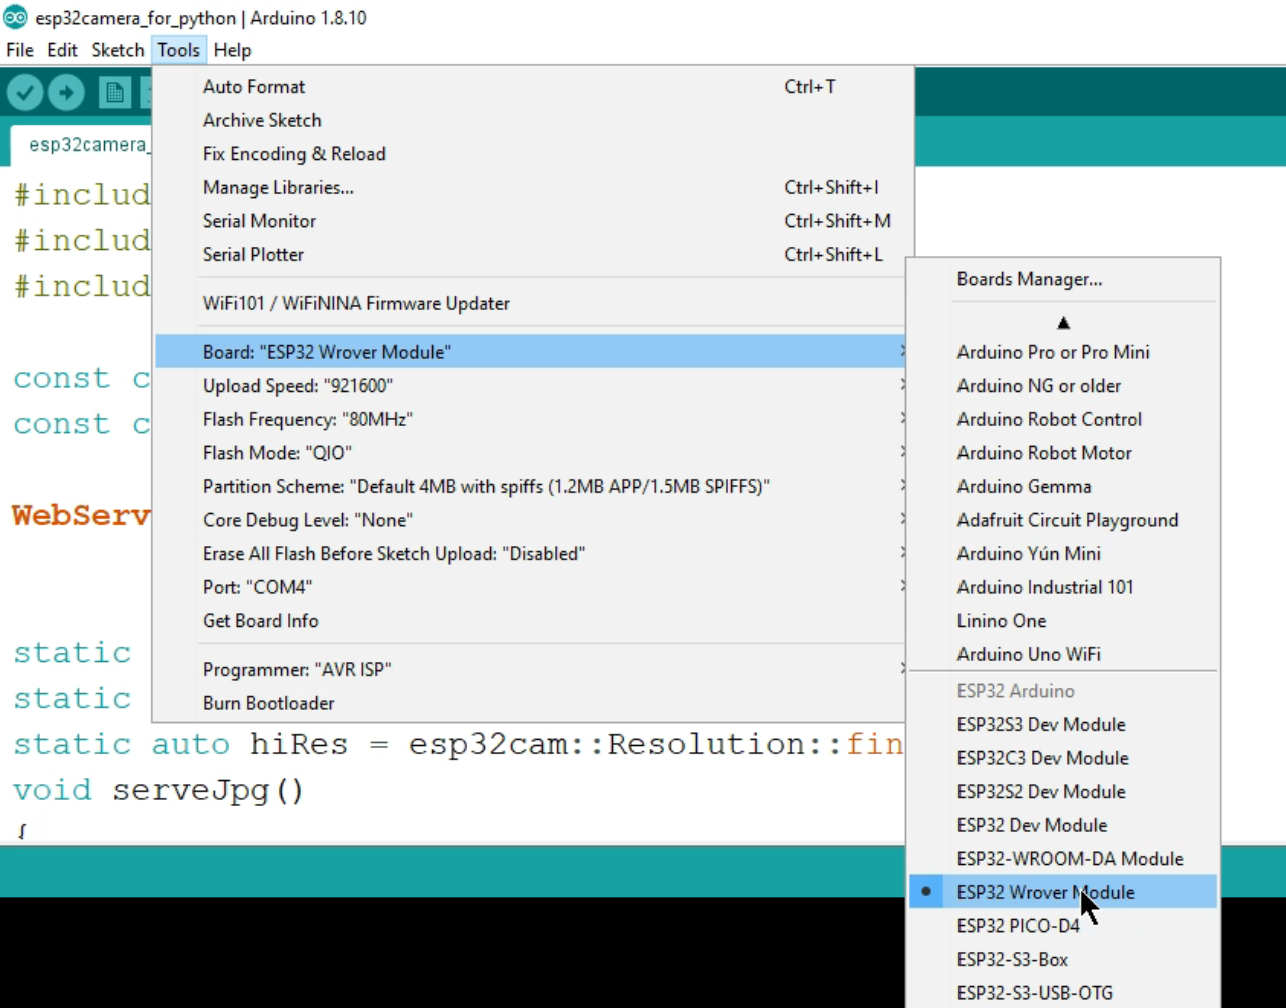
Then check the communication port and click on the upload button.
ESP32 Camera Video Streaming Test in Python OpenCV:
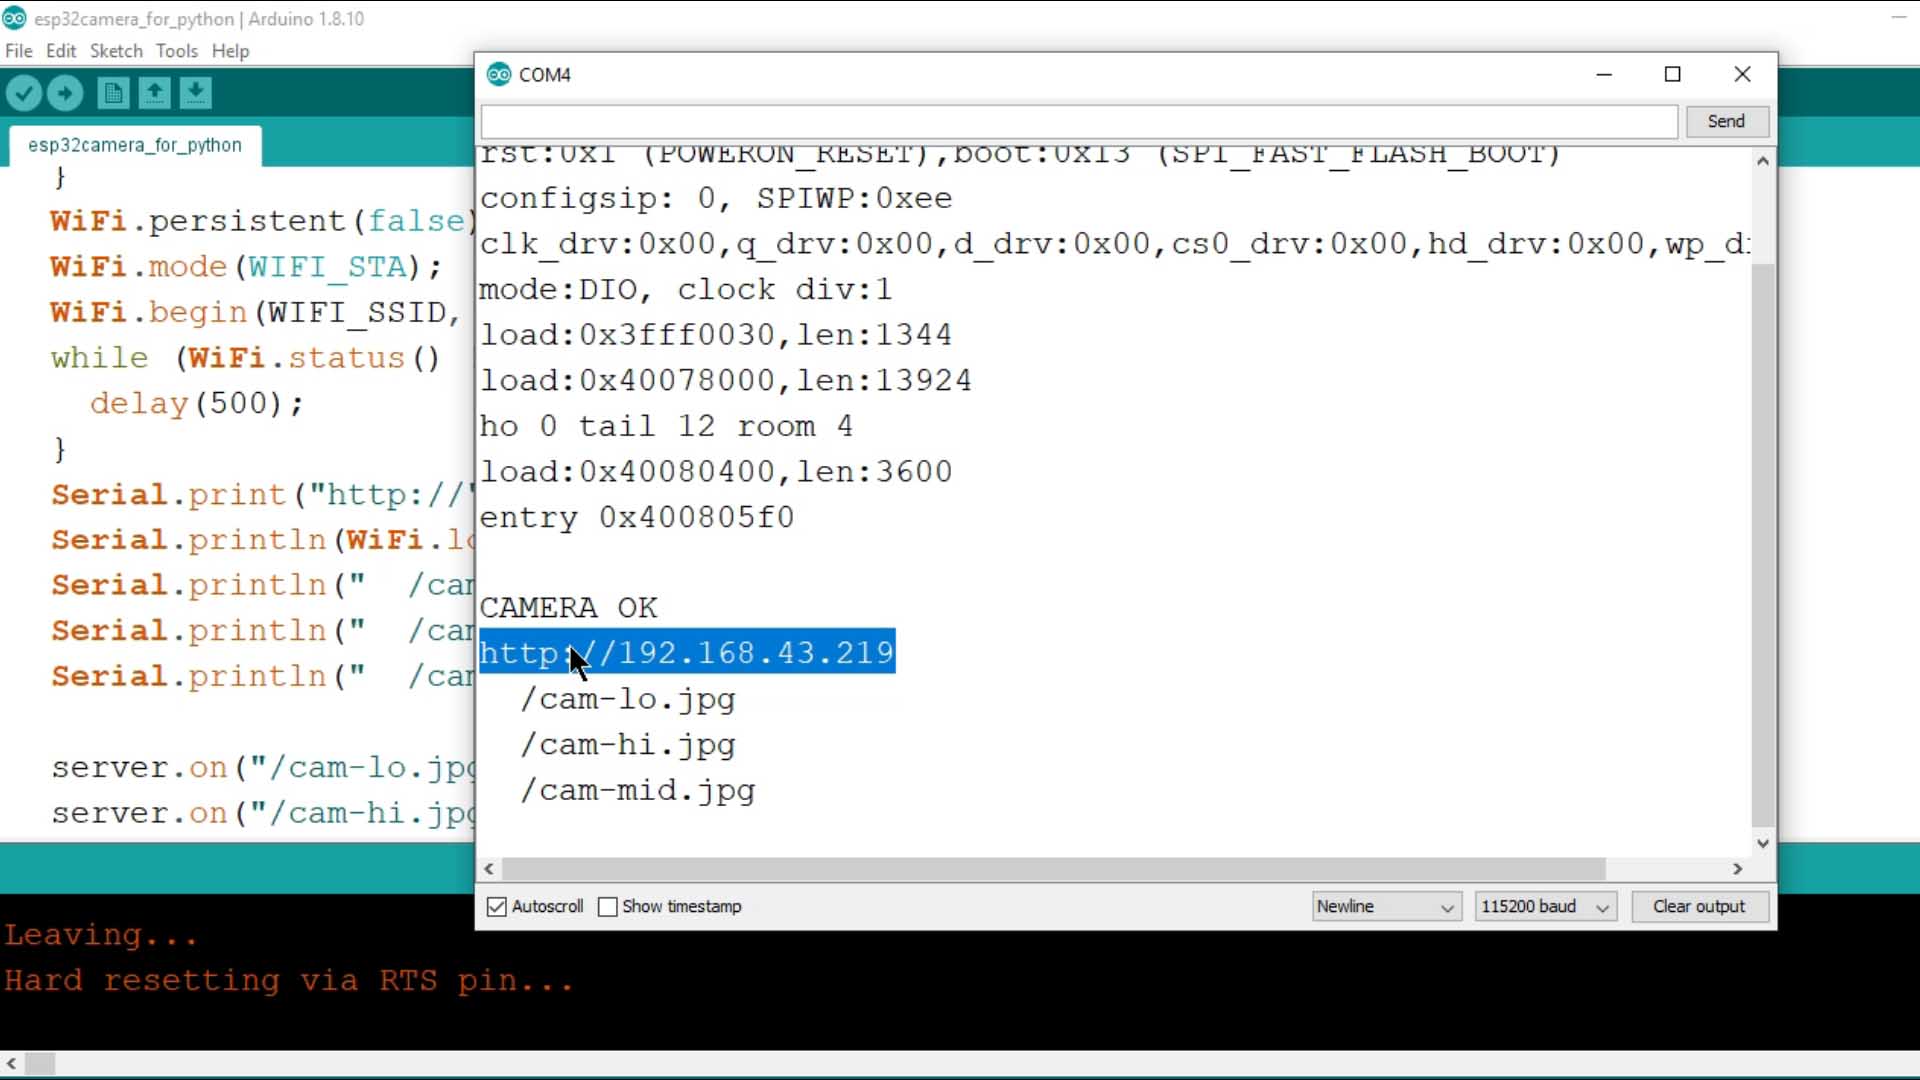
After uploading the program, restart your ESP32 Camera Module, then open the Serial monitor, and wait for the ESP32 Camera module to connect. Copy the IP Address.
For testing the Live Video streaming in Python. You will need the following Python OpenCV code.
Python Code for Video Streaming using ESP32 CAM:
|
1 2 3 4 5 6 7 8 9 10 11 12 13 14 15 16 17 18 19 20 21 22 23 24 25 26 27 28 29 30 31 32 33 |
import cv2 import urllib.request import numpy as np # Replace the URL with the IP camera's stream URL url = 'http://192.168.43.219/cam-hi.jpg' cv2.namedWindow("live Cam Testing", cv2.WINDOW_AUTOSIZE) # Create a VideoCapture object cap = cv2.VideoCapture(url) # Check if the IP camera stream is opened successfully if not cap.isOpened(): print("Failed to open the IP camera stream") exit() # Read and display video frames while True: # Read a frame from the video stream img_resp=urllib.request.urlopen(url) imgnp=np.array(bytearray(img_resp.read()),dtype=np.uint8) #ret, frame = cap.read() im = cv2.imdecode(imgnp,-1) cv2.imshow('live Cam Testing',im) key=cv2.waitKey(5) if key==ord('q'): break cap.release() cv2.destroyAllWindows() |
in the code, you can see this line
|
1 |
url = 'http://192.168.43.219/cam-hi.jpg' |
I just pasted that URL.
On the Serial monitor, under the IP address, you would also see three different image resolutions lo, hi, and mid. Use the one as per your needs. Remove the extra spaces and Run the program.

It is working. I can use my ESP32 Camera module for live video streaming. So the ESP32 Camera module is ready for object detection and identification using Yolo v3.
Let me tell you, we are only using the ESP32 Camera module for the live video streaming, we are not doing image processing on the ESP32 Camera module. The image processing, object detection, and identification will be done on a laptop or raspberry pi. So, let’s go ahead and do it.
Python OpenCV YoLo V3 Testing on different systems:
I am going to test the Final projects codes on Raspberry Pi 4 and which has 8GB RAM, Acer Core i3 laptop, and the Award-winning MSI Intel Core i7 9th Generation and which has the Nvidia Geforce GTX 16GB GPU and 16GB RAM.
Python OpenCV Yolo V3 Code for Laptops/PCs:
|
1 2 3 4 5 6 7 8 9 10 11 12 13 14 15 16 17 18 19 20 21 22 23 24 25 26 27 28 29 30 31 32 33 34 35 36 37 38 39 40 41 42 43 44 45 46 47 48 49 50 51 52 53 54 55 56 57 58 59 60 61 62 63 64 65 66 67 68 69 70 71 72 73 74 |
import cv2 import numpy as np import urllib.request url = 'http://192.168.43.219/cam-hi.jpg' cap = cv2.VideoCapture(url) whT=320 confThreshold = 0.5 nmsThreshold = 0.3 classesfile='coco.names' classNames=[] with open(classesfile,'rt') as f: classNames=f.read().rstrip('\n').split('\n') modelConfig = 'yolov3.cfg' modelWeights= 'yolov3.weights' net = cv2.dnn.readNetFromDarknet(modelConfig,modelWeights) net.setPreferableBackend(cv2.dnn.DNN_BACKEND_OPENCV) net.setPreferableTarget(cv2.dnn.DNN_TARGET_CPU) def findObject(outputs,im): hT,wT,cT = im.shape bbox = [] classIds = [] confs = [] found_cat = False found_bird = False for output in outputs: for det in output: scores = det[5:] classId = np.argmax(scores) confidence = scores[classId] if confidence > confThreshold: w,h = int(det[2]*wT), int(det[3]*hT) x,y = int((det[0]*wT)-w/2), int((det[1]*hT)-h/2) bbox.append([x,y,w,h]) classIds.append(classId) confs.append(float(confidence)) indices = cv2.dnn.NMSBoxes(bbox,confs,confThreshold,nmsThreshold) print(indices) for i in indices: i = i[0] box = bbox[i] x,y,w,h = box[0],box[1],box[2],box[3] if classNames[classIds[i]] == 'bird': found_bird = True elif classNames[classIds[i]] == 'cat': found_cat = True cv2.rectangle(im,(x,y),(x+w,y+h),(255,0,255),2) cv2.putText(im, f'{classNames[classIds[i]].upper()} {int(confs[i]*100)}%', (x,y-10), cv2.FONT_HERSHEY_SIMPLEX, 0.6, (255,0,255), 2) while True: img_resp=urllib.request.urlopen(url) imgnp=np.array(bytearray(img_resp.read()),dtype=np.uint8) im = cv2.imdecode(imgnp,-1) sucess, img= cap.read() blob=cv2.dnn.blobFromImage(im,1/255,(whT,whT),[0,0,0],1,crop=False) net.setInput(blob) layernames=net.getLayerNames() outputNames = [layernames[i[0]-1] for i in net.getUnconnectedOutLayers()] outputs = net.forward(outputNames) findObject(outputs,im) cv2.imshow('IMage',im) cv2.waitKey(1) |
So, first, let’s go ahead and check this test code written for the detection of all the objects. By all objects I mean, only those objects which are available in the coco.names list. And make sure you keep the coco.names, yolov3.cfg, and yolov3.weights file in the same folder with the main programming file, I have already explained this. So, first, let’s start with the Raspberry Pi.
Python OpenCV Yolo V3 Code for Raspberry Pi:
So, guys, this is the smallest Raspberry Pi 4 PC and it has 8GB RAM.
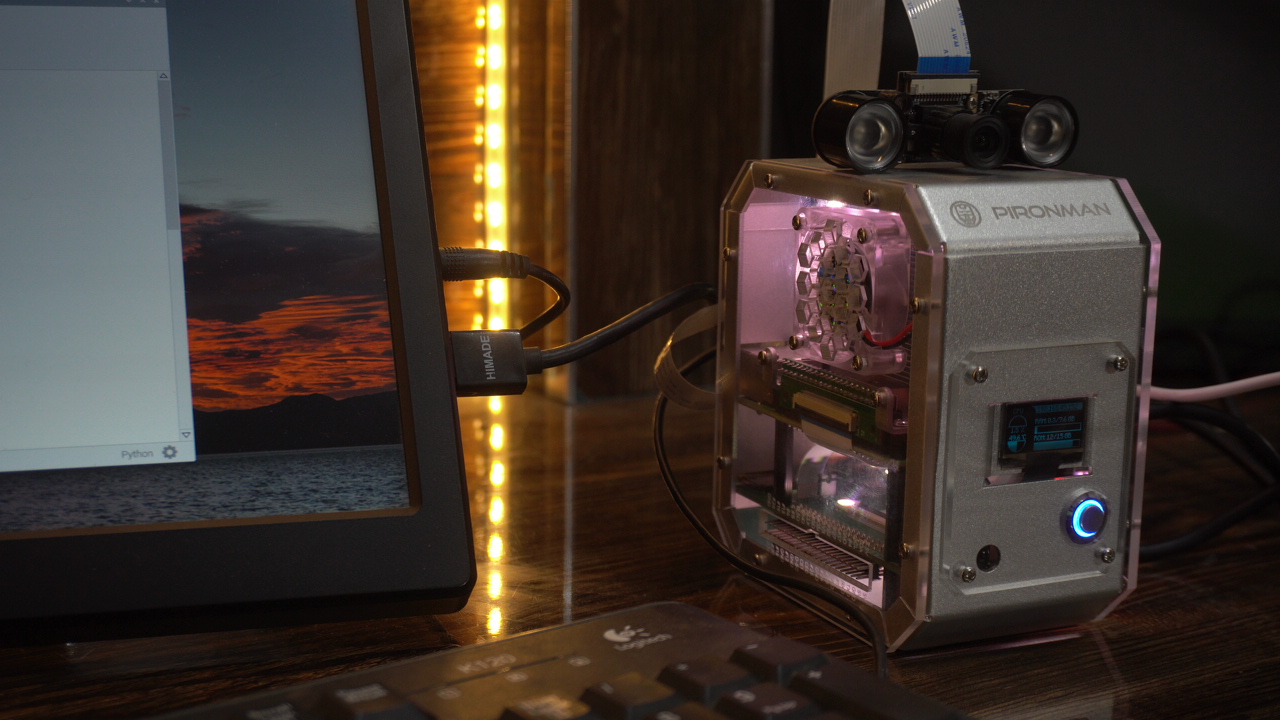
I got it from SunFounder. The reason I am doing this test is just to let you know that is it powerful enough to handle image processing using Python OpenCV YoloV3. I already have a camera connected to my raspberry pi, so I am going to use this camera.
And for this test, I am not using the above, but I am going to use the below code. As I said for this test I am going to use the camera which is connected to the Raspberry Pi. It’s just to check if Raspberry Pi can handle it.
Raspberry Pi Yolo V3 Code:
|
1 2 3 4 5 6 7 8 9 10 11 12 13 14 15 16 17 18 19 20 21 22 23 24 25 26 27 28 29 30 31 32 33 34 35 36 37 38 39 40 41 42 43 44 45 46 47 48 49 50 51 52 53 54 55 56 57 58 59 60 61 62 63 64 65 |
import cv2 import numpy as np cap = cv2.VideoCapture(0) whT=320 confThreshold = 0.5 nmsThreshold = 0.3 classesfile='coco.names' classNames=[] with open(classesfile,'rt') as f: classNames=f.read().rstrip('\n').split('\n') #print(classNames) modelConfig = 'yolov3.cfg' modelWeights= 'yolov3.weights' net = cv2.dnn.readNetFromDarknet(modelConfig,modelWeights) net.setPreferableBackend(cv2.dnn.DNN_BACKEND_OPENCV) net.setPreferableTarget(cv2.dnn.DNN_TARGET_CPU) def findObject(outputs,img): hT,wT,cT = img.shape bbox = [] classIds = [] confs = [] for output in outputs: for det in output: scores = det[5:] classId = np.argmax(scores) confidence = scores[classId] if confidence > confThreshold: w,h = int(det[2]*wT), int(det[3]*hT) x,y = int((det[0]*wT)-w/2), int((det[1]*hT)-h/2) bbox.append([x,y,w,h]) classIds.append(classId) confs.append(float(confidence)) #print(len(bbox)) indices = cv2.dnn.NMSBoxes(bbox,confs,confThreshold,nmsThreshold) print(indices) for i in indices: i = i[0] box = bbox[i] x,y,w,h = box[0],box[1],box[2],box[3] cv2.rectangle(img,(x,y),(x+w,y+h),(255,0,255),2) cv2.putText(img, f'{classNames[classIds[i]].upper()} {int(confs[i]*100)}%', (x,y-10), cv2.FONT_HERSHEY_SIMPLEX, 0.6, (255,0,255), 2) while True: sucess, img= cap.read() blob=cv2.dnn.blobFromImage(img,1/255,(whT,whT),[0,0,0],1,crop=False) net.setInput(blob) layernames=net.getLayerNames() #print(layernames) outputNames = [layernames[i[0]-1] for i in net.getUnconnectedOutLayers()] #print(net.getUnconnectedOutLayers()) outputs = net.forward(outputNames) #print(outputs[0].shape) #print(outputs[1].shape) #print(outputs[2].shape) #print(outputs[0][0]) findObject(outputs,img) cv2.imshow('IMage',img) cv2.waitKey(1) |
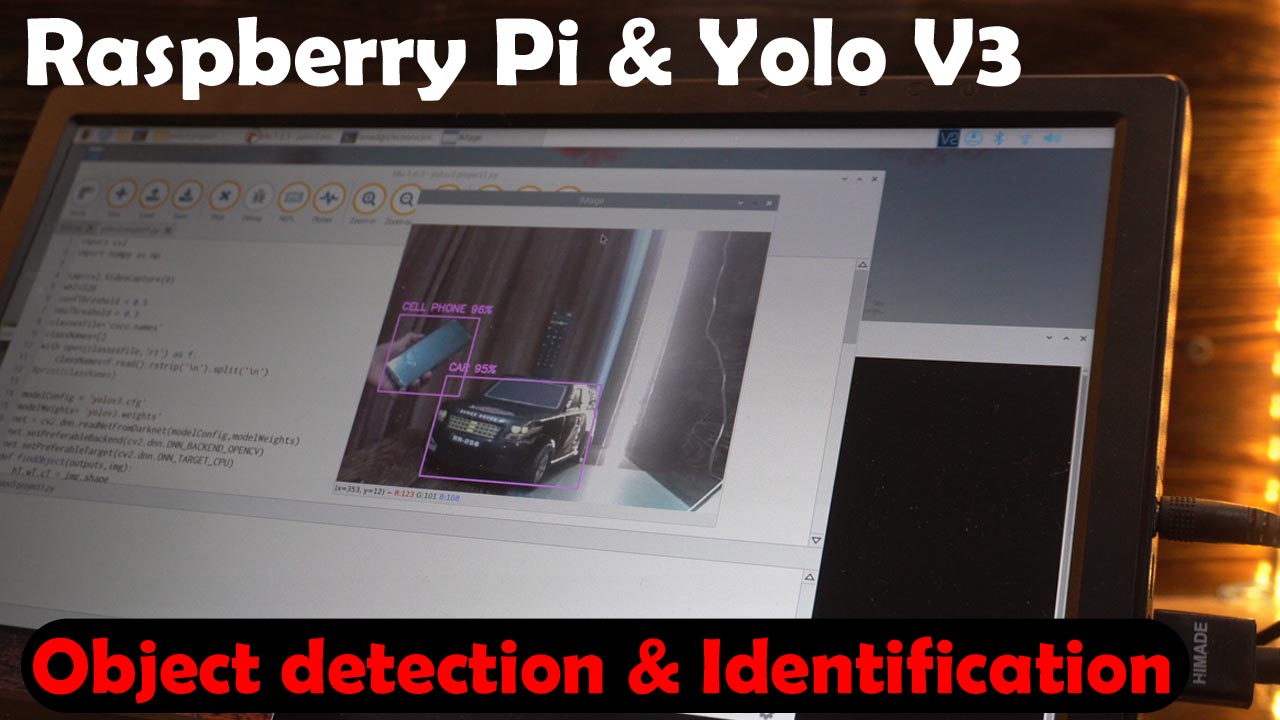
Raspberry Pi 4 is perfectly detecting all objects but it’s really slow, so, Raspberry Pi 4 isn’t good for image processing. For the practical demonstration watch my video tutorial available on my YouTube channel “Electronic Clinic”. Although the 8GB variant of the Raspberry Pi 4 is quite popular, you can even play games with it.

But when it comes to High-end image processing it fails unless you add some kind of external hardware to it.
Yolo V3 on Core i3 Laptop:
Next, I am going to test this using Core i3 Laptop and for this, I am going to use the Python OpenCV Yolo V3 Code for Laptops/PCs given above because from now on we will use the ESP32 Camera module.

I was able to detect all the objects. Image processing on a Core i3 laptop is better than the Raspberry Pi 4 but still it’s slow. But, as a beginner, you can use a similar laptop as Raspberry Pi 4 with 8GB Ram is more expensive than the Core i3 Laptop.
Yolo V3 on Core i7, 9th generation:
Next, I am going to test it on my MSI Intel Core i7 9th Generation Gaming Laptop with award-winning Nvidia Geforce GTX 1660 Ti GPU. This is one of the most expensive laptops. Anyway, let’s see if it will make any difference.
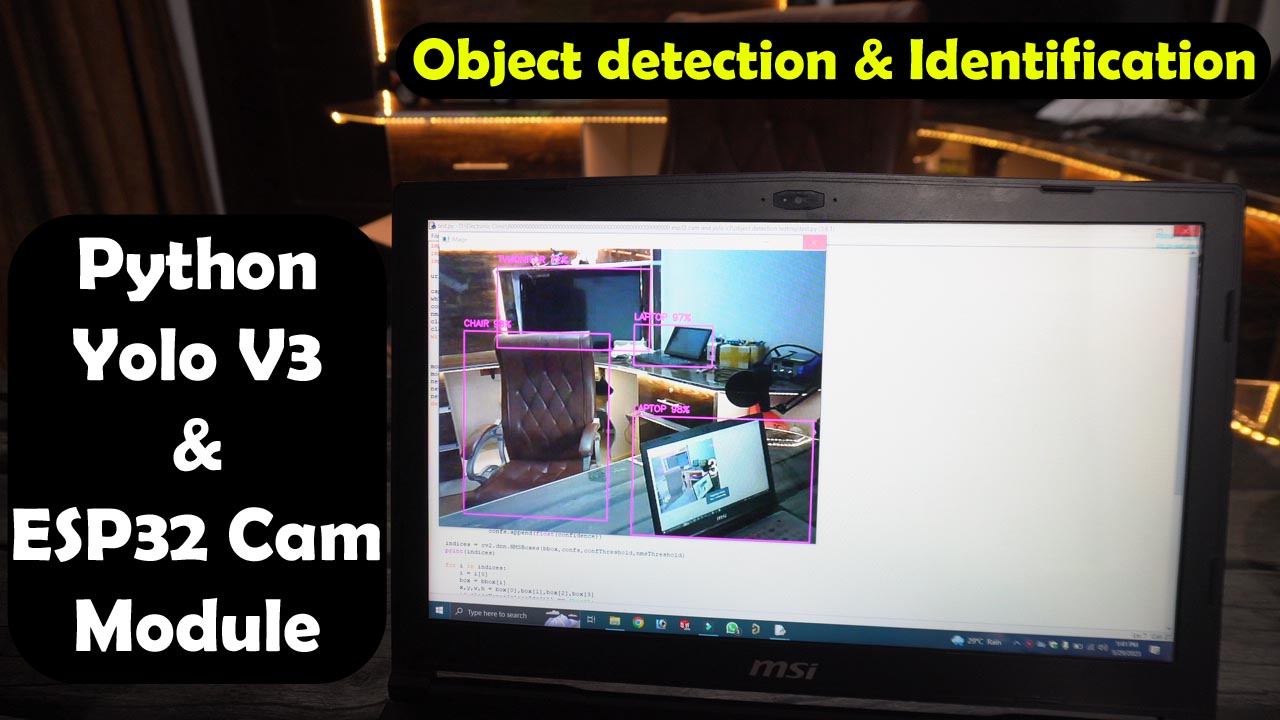
Image processing on this machine is quite impressive. Although it’s not very fast but still acceptable for me, and I can use it in my future image processing-based projects. And by the way, during recording the video, I forgot to turn on the GPU L.
Final ESP32 and YoLo V3 Code:
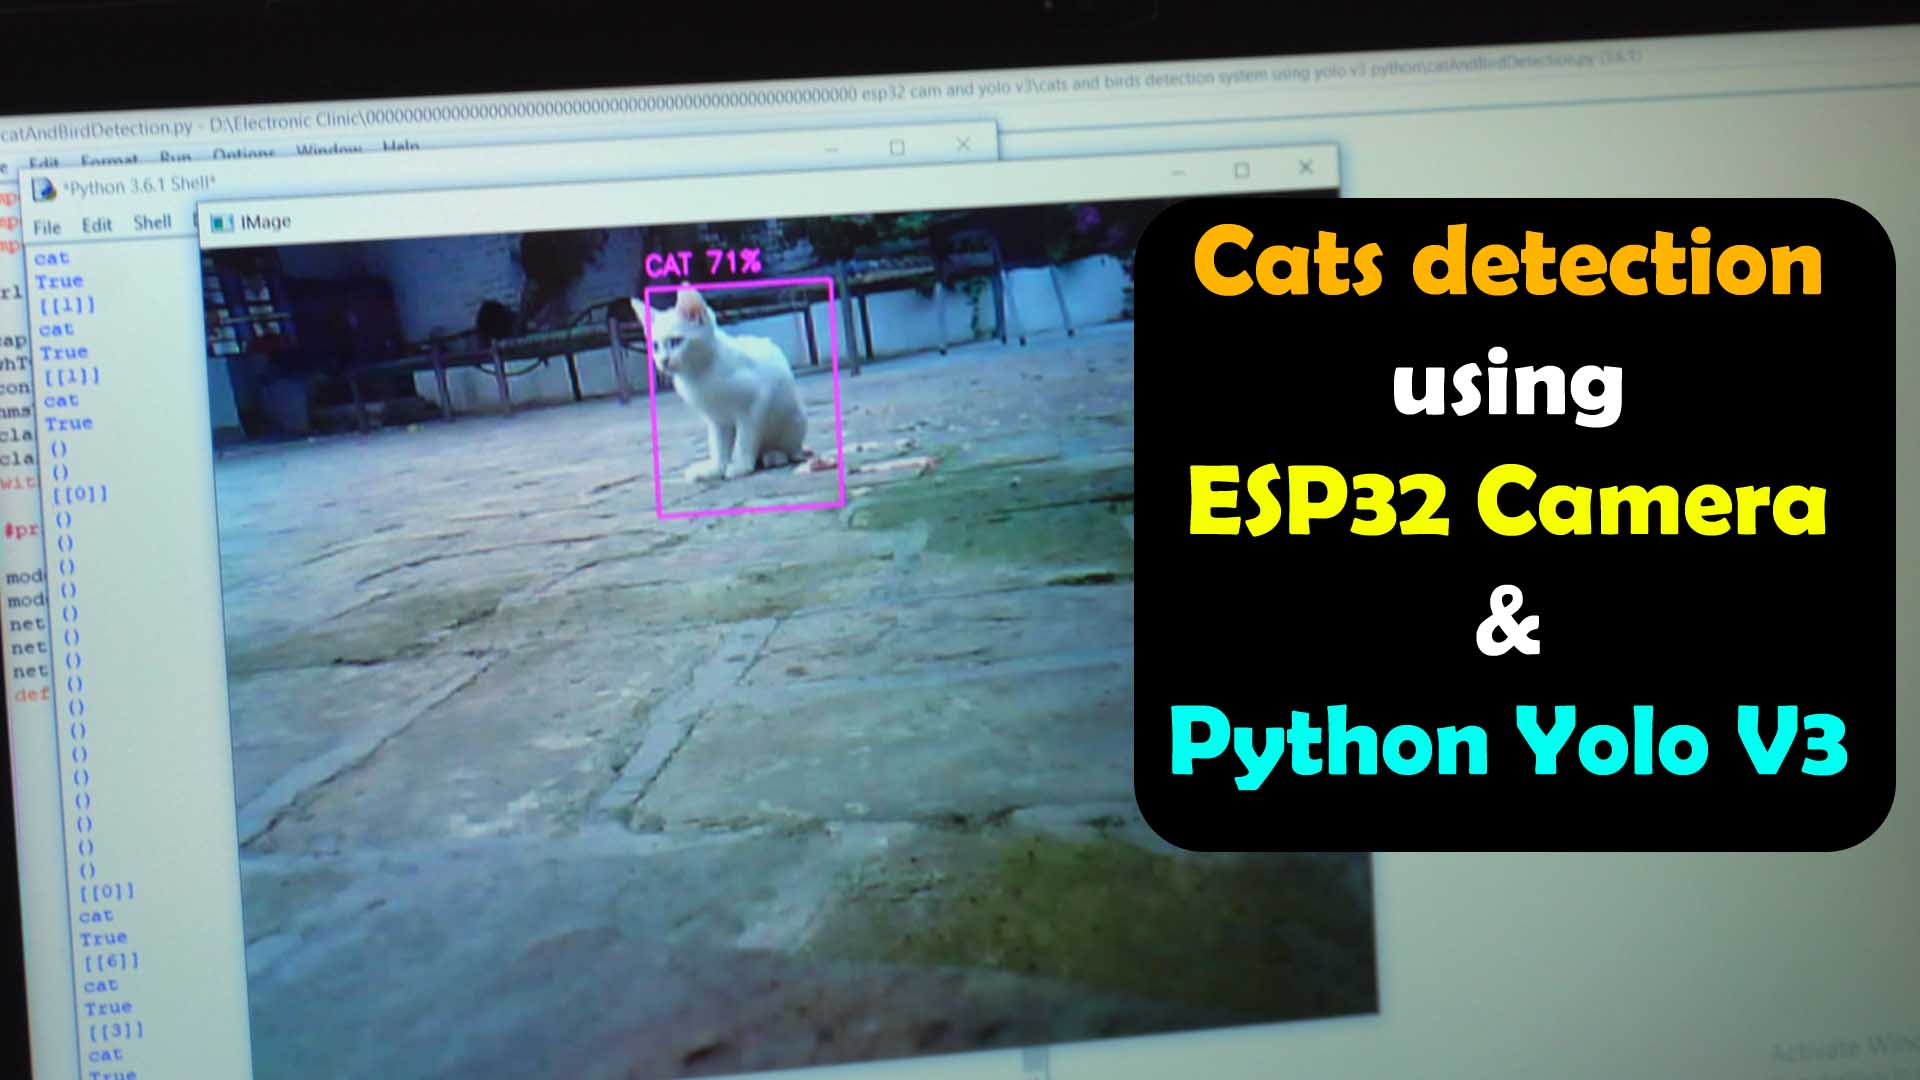
Now, let’s check this final code written only for the detection and identification of birds and cats. It will ignore all the other objects.
|
1 2 3 4 5 6 7 8 9 10 11 12 13 14 15 16 17 18 19 20 21 22 23 24 25 26 27 28 29 30 31 32 33 34 35 36 37 38 39 40 41 42 43 44 45 46 47 48 49 50 51 52 53 54 55 56 57 58 59 60 61 62 63 64 65 66 67 68 69 70 71 72 73 74 75 76 77 78 79 80 81 82 83 84 85 86 87 88 89 90 91 92 93 94 |
import cv2 import numpy as np import urllib.request url = 'http://192.168.43.219/cam-hi.jpg' cap = cv2.VideoCapture(url) whT=320 confThreshold = 0.5 nmsThreshold = 0.3 classesfile='coco.names' classNames=[] with open(classesfile,'rt') as f: classNames=f.read().rstrip('\n').split('\n') #print(classNames) modelConfig = 'yolov3.cfg' modelWeights= 'yolov3.weights' net = cv2.dnn.readNetFromDarknet(modelConfig,modelWeights) net.setPreferableBackend(cv2.dnn.DNN_BACKEND_OPENCV) net.setPreferableTarget(cv2.dnn.DNN_TARGET_CPU) def findObject(outputs,im): hT,wT,cT = im.shape bbox = [] classIds = [] confs = [] found_cat = False found_bird = False for output in outputs: for det in output: scores = det[5:] classId = np.argmax(scores) confidence = scores[classId] if confidence > confThreshold: w,h = int(det[2]*wT), int(det[3]*hT) x,y = int((det[0]*wT)-w/2), int((det[1]*hT)-h/2) bbox.append([x,y,w,h]) classIds.append(classId) confs.append(float(confidence)) #print(len(bbox)) indices = cv2.dnn.NMSBoxes(bbox,confs,confThreshold,nmsThreshold) print(indices) for i in indices: i = i[0] box = bbox[i] x,y,w,h = box[0],box[1],box[2],box[3] if classNames[classIds[i]] == 'bird': found_bird = True elif classNames[classIds[i]] == 'cat': found_cat = True if classNames[classIds[i]]=='bird': cv2.rectangle(im,(x,y),(x+w,y+h),(255,0,255),2) cv2.putText(im, f'{classNames[classIds[i]].upper()} {int(confs[i]*100)}%', (x,y-10), cv2.FONT_HERSHEY_SIMPLEX, 0.6, (255,0,255), 2) print('bird') print(found_bird) if classNames[classIds[i]]=='cat': cv2.rectangle(im,(x,y),(x+w,y+h),(255,0,255),2) cv2.putText(im, f'{classNames[classIds[i]].upper()} {int(confs[i]*100)}%', (x,y-10), cv2.FONT_HERSHEY_SIMPLEX, 0.6, (255,0,255), 2) print('cat') print(found_cat) if found_cat and found_bird: print('alert') while True: img_resp=urllib.request.urlopen(url) imgnp=np.array(bytearray(img_resp.read()),dtype=np.uint8) im = cv2.imdecode(imgnp,-1) sucess, img= cap.read() blob=cv2.dnn.blobFromImage(im,1/255,(whT,whT),[0,0,0],1,crop=False) net.setInput(blob) layernames=net.getLayerNames() #print(layernames) outputNames = [layernames[i[0]-1] for i in net.getUnconnectedOutLayers()] #print(net.getUnconnectedOutLayers()) outputs = net.forward(outputNames) #print(outputs[0].shape) #print(outputs[1].shape) #print(outputs[2].shape) #print(outputs[0][0]) findObject(outputs,im) cv2.imshow('IMage',im) cv2.waitKey(1) |
My designed 5V and 3A power supply and my created 4S lithium Ion battery, make the ESP32 Camera module completely portable. I can freely move around with my ESP32 Camera module or I can place it somewhere and then I can wirelessly monitor a specific region.
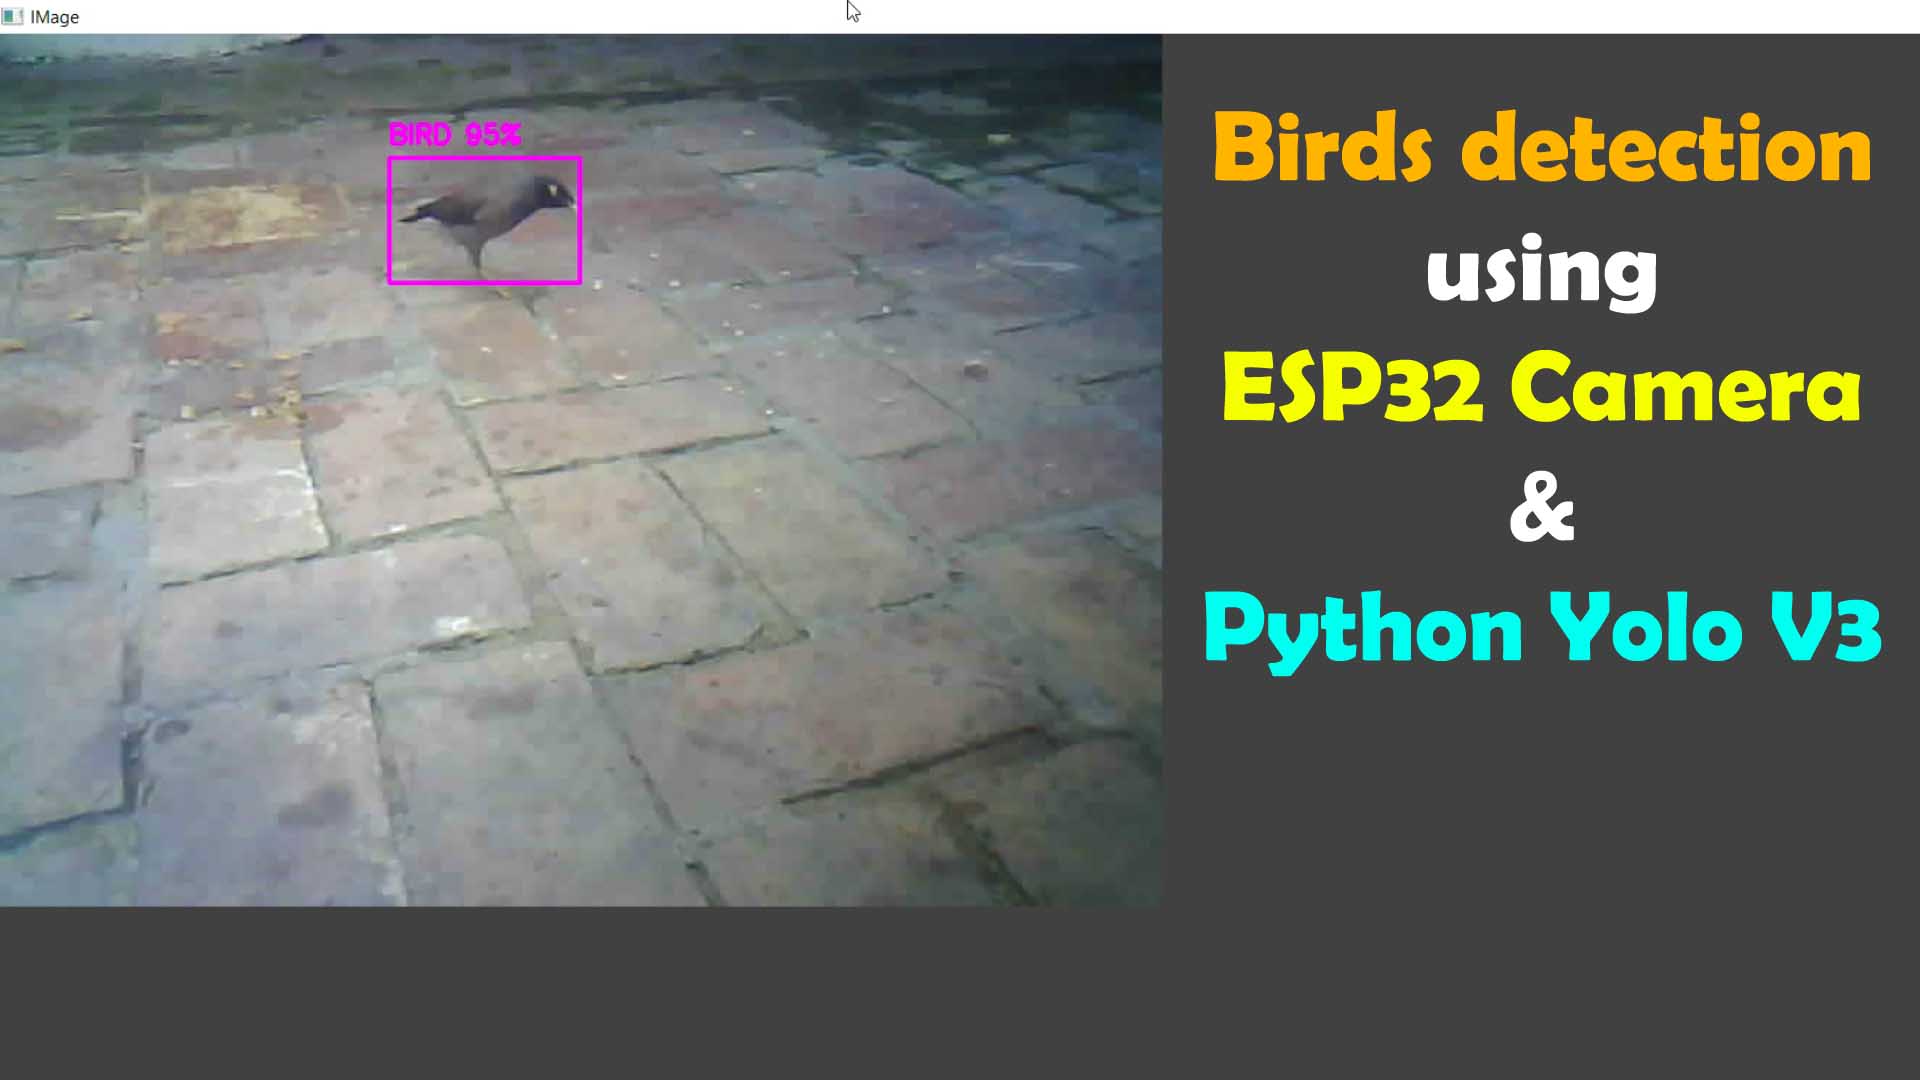
As you can see it can detect birds and cats flawlessly.
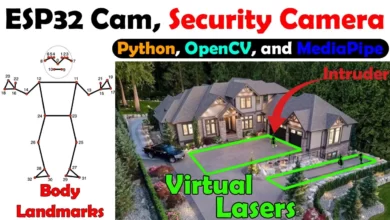
When both a bird and a cat are detected at the same time, it generates an alert. Now, you might be wondering why birds and cats?
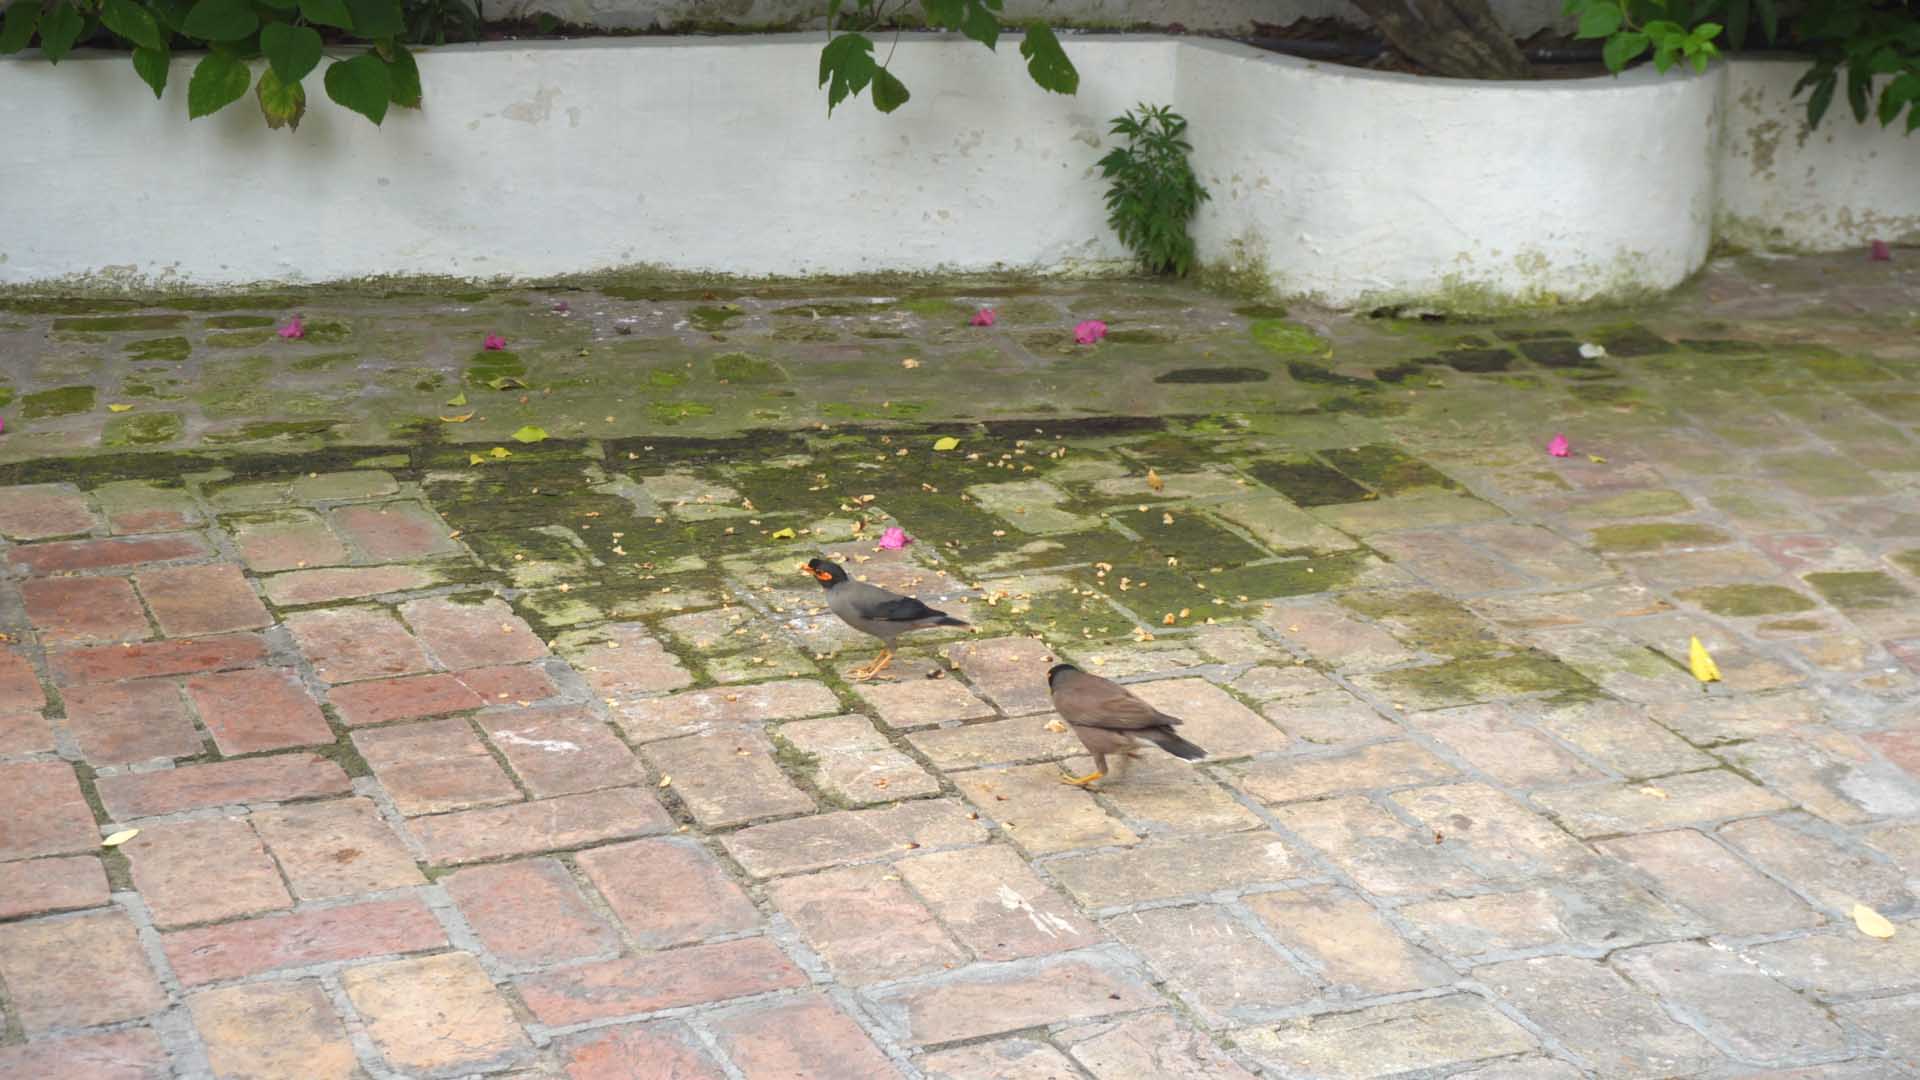
Well, in our house, this particular area is a favorite spot for birds, and there are nests in those trees. So, when a cat comes, the birds start chirping and making noise. My idea is that when birds are eating and, during that time, a cat comes, I should receive an alert.

I can send the alert to myself via email. And I can also use Arduino and GSM to send an SMS to myself. Once the alert is generated, we can take any necessary action.
You can use the same technique for any other object. You can create a high-level security system. You can use it in more than a million ways. In my upcoming video, I will explain how to train your own object that is not available in the coco.names list. So, that’s all for now.
Watch the Video Tutorial:

Discover more from Electronic Clinic
Subscribe to get the latest posts sent to your email.
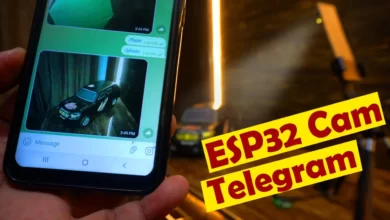
How can you send the alert to yourself via email?
سلام من دانشجوی رشته برق هستم از ایران چندتا سوال راجب برنامه نویسی پایتون برای ماژول esp32 cam داشتم میخواستم اگر میشه منو راهنمایی کنید ممنونم ازتون
و اینکه به تازگی با شما آشنا شدم
can you help modify the codes (both the c++ and python code) to help the image transmission to be done without internet connection access, but with the hotspot credentials of your raspberry pi?
Thank you so much fir the enlightenment, Engr. Fahad. It was really worth it. But I am trying to modify the code to be able to transmit this image data wirelessly (not making use of an internet access, but the network credentials of the raspberry pi) to the raspberry pi. If it can be written in such way that both the C++ and the python code will be written, I will really appreciate it, because I am currently working on a project with this regard. Thanks in advance.
python code is crashed on this line:
outputNames = [layernames[i[0]-1] for i in net.getUnconnectedOutLayers()]