GalaxyRVR Mars Rover with Arduino and ESP32 CAM
Last Updated on August 16, 2024 by Engr. Shahzada Fahad
Table of Contents
GalaxyRVR Mars Rover:
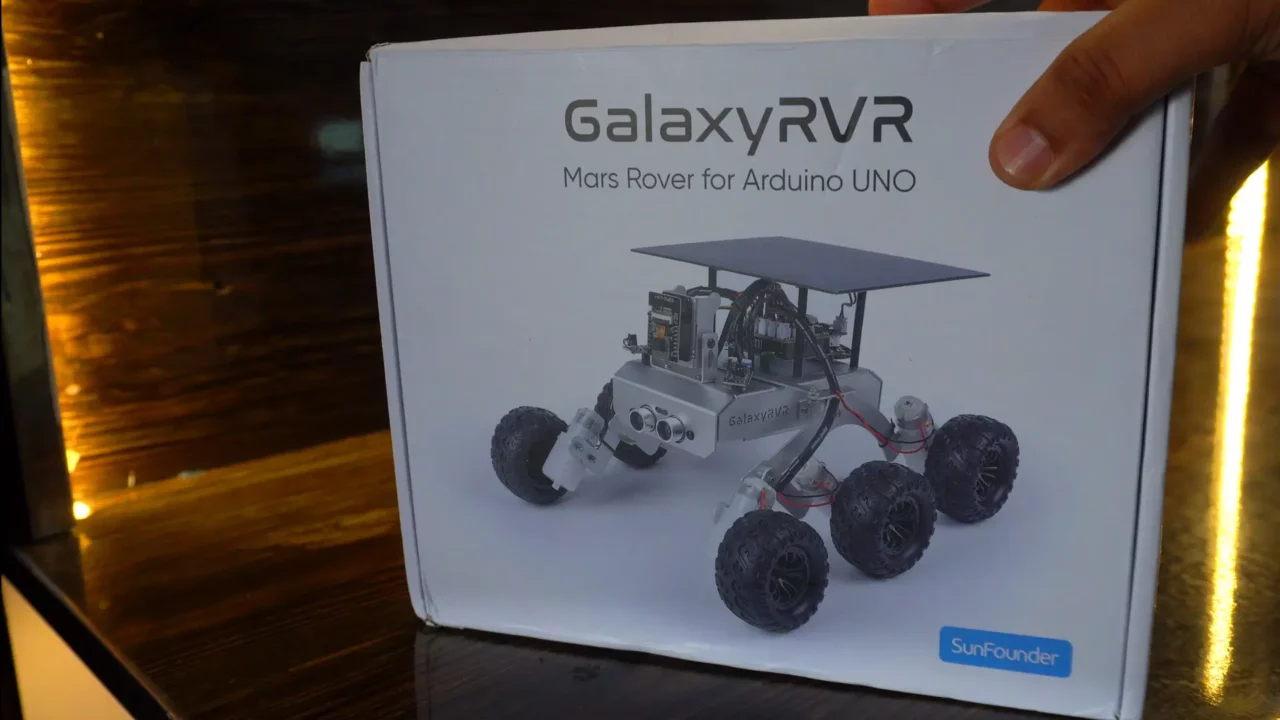
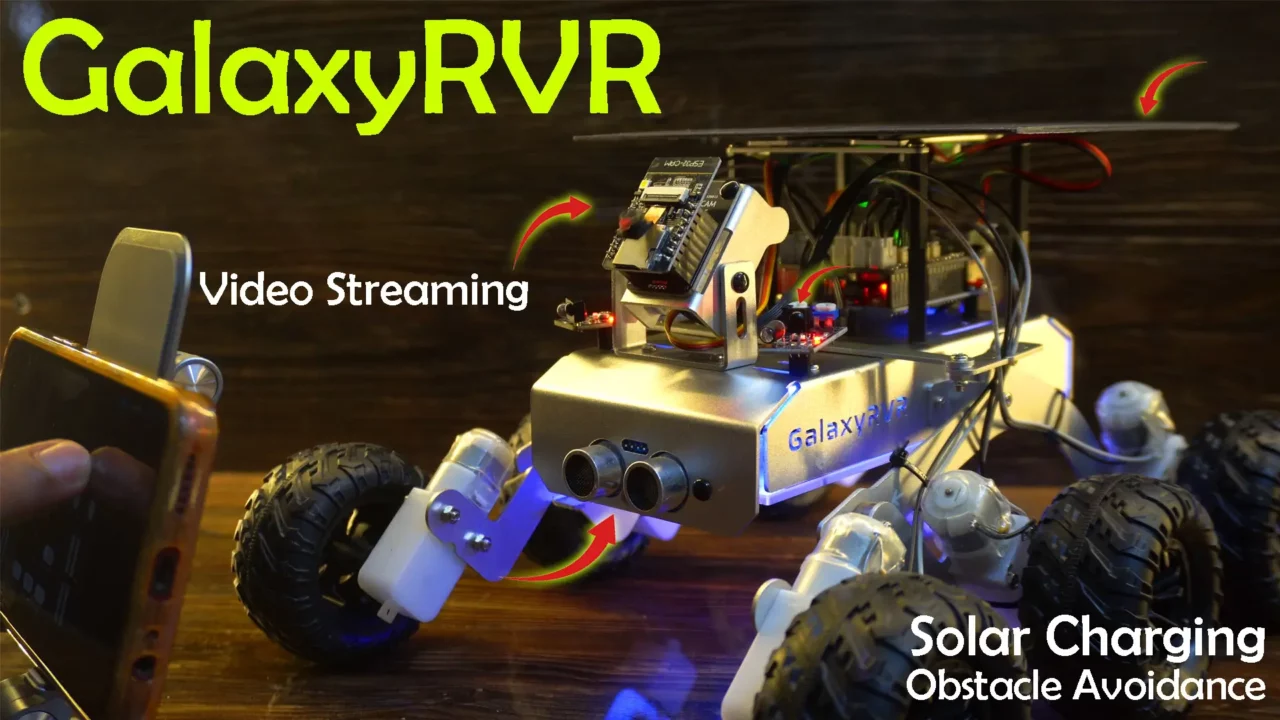
GalaxyRVR Mars Rover with Arduino and ESP32 CAM- This article is about the SunFounder’s GalaxyRVR Mars Rover Kit for the Arduino. Just by looking at the image one can get a complete idea of what this tiny version of the Mars Rover might be capable of. In the image I can already see an ESP32 Camera which means we will be able to do live video streaming. It also has the Ultrasonic Sensor and IR sensors on the Left and Right sides, we can use these for the obstacle avoidance. And to me it seems like all the components are plug and play type.
I am so excited!!! So, let’s not waste any more time and start the unboxing.
Amazon Links:
*Disclosure: These are affiliate links. As an Amazon Associate I earn from qualifying purchases.
As you open up the box, the first thing you will find is the GalaxyRVR Kit User Manual. Then there are three boxes labeled as 1, 2, and 3; and 6 Tires.
Let’s start with Box #1:
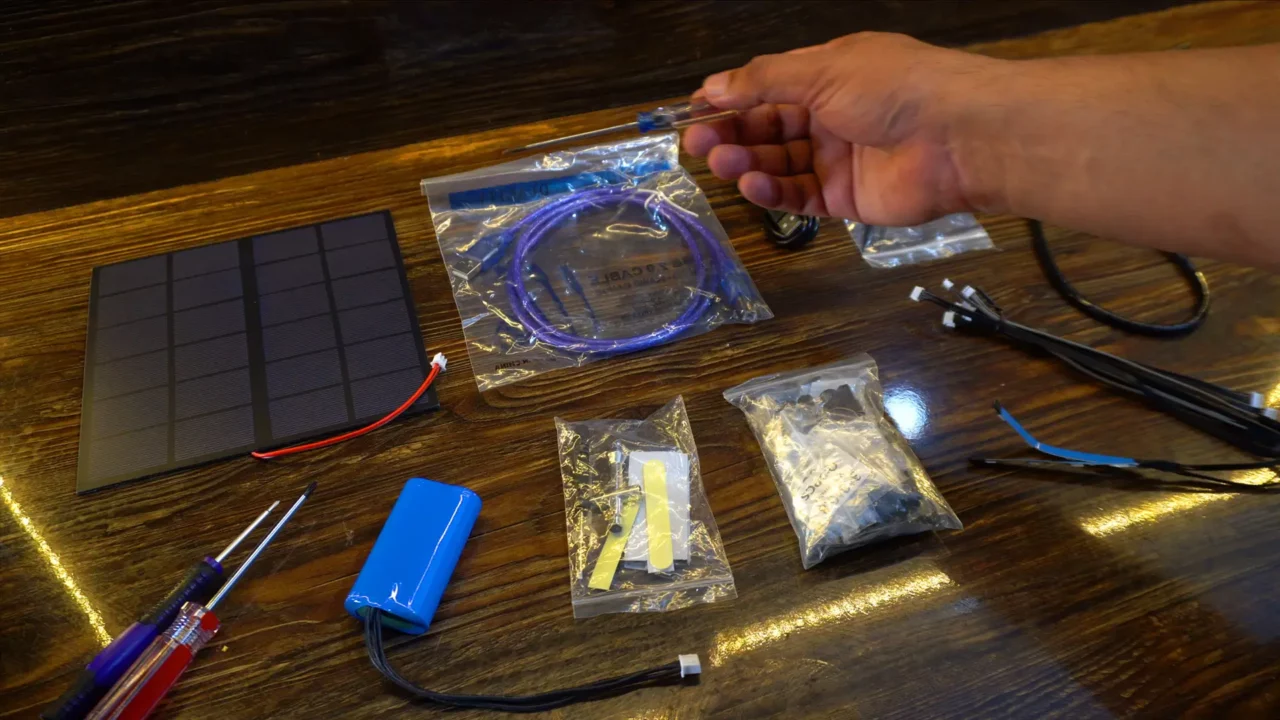
Inside Box #1, you get
- A Solar Panel.
- USB-B and USB-C type Cables.
- Cable ties.
- Screw Drivers.
- A battery.
- Another small screw driver, Wrench, and some Velcro Stickers.
- Standoffs, Revits, Screws, Nuts, and metal washers
- These are 3 Pin, 4 Pin, 5 Pin Wires, and 2 RGB LED strips.
Now, let’s open Box #2.
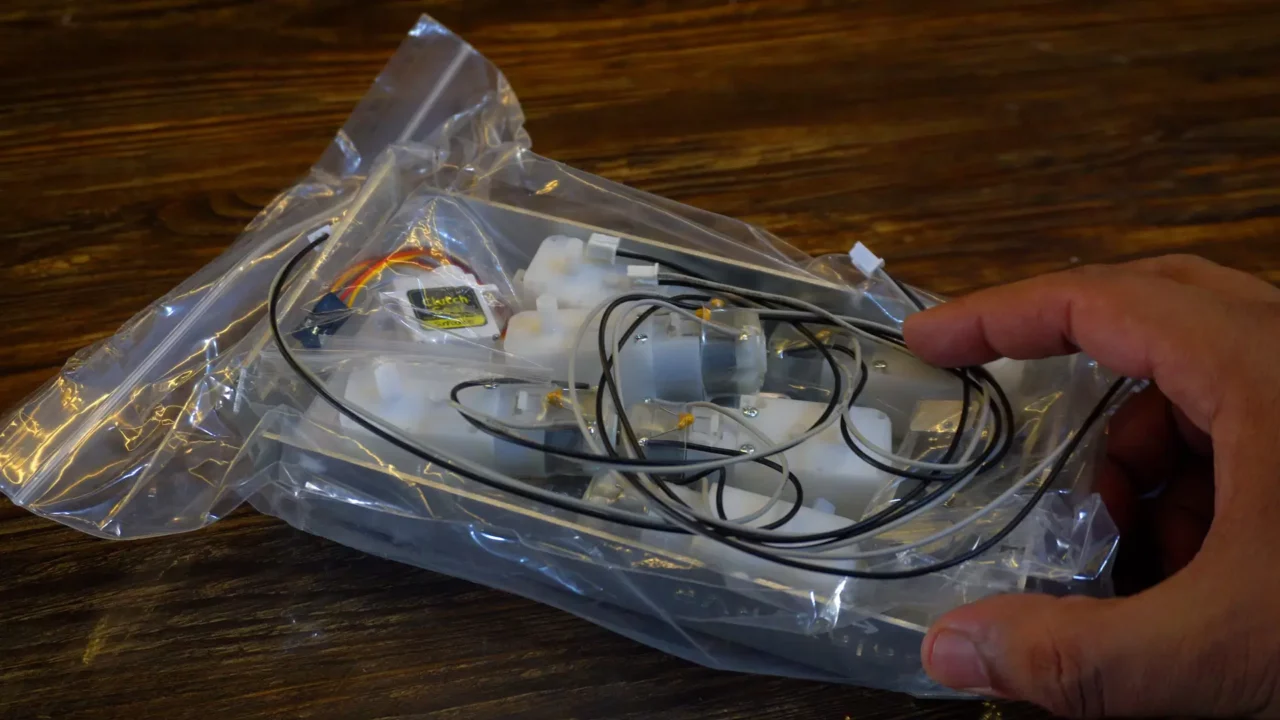
This box has the
- Frame
- 6 Motors and
- A small Servo
Now, let’s check what’s inside Box #3.
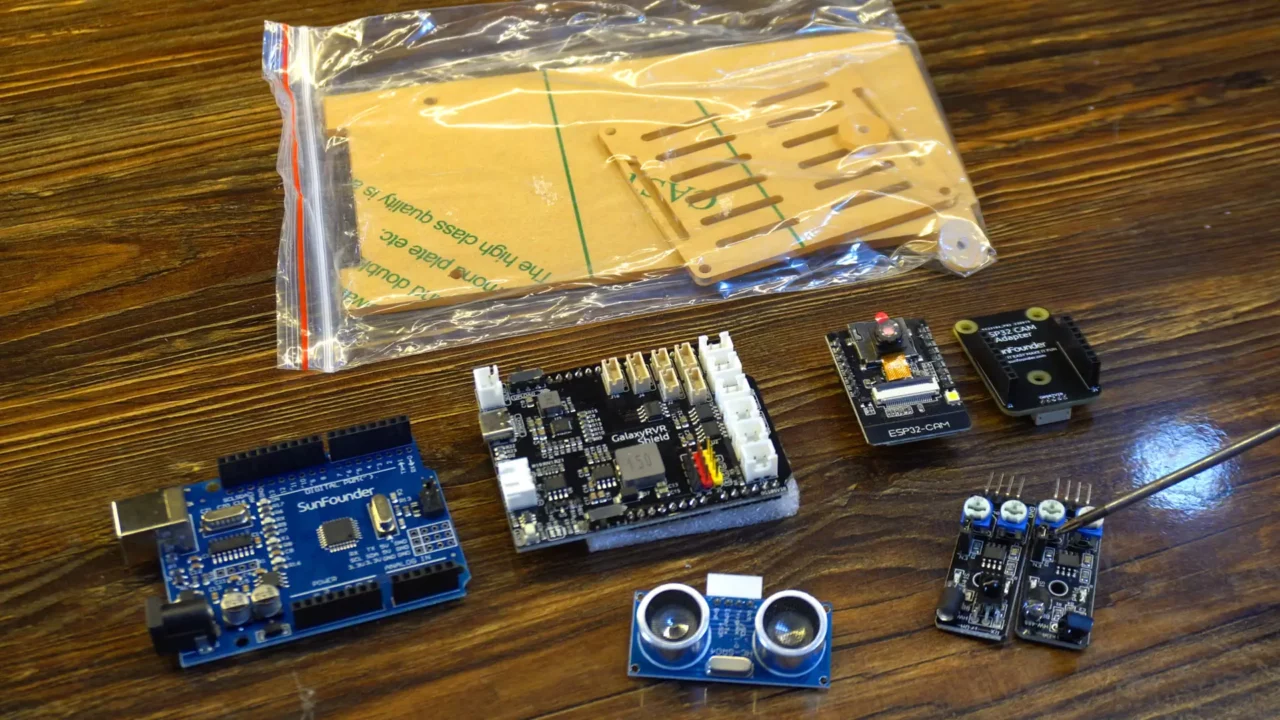
We have the
- Arduino R3 Board
- GalaxyRVR Shield
- ESP32 Camera Module and its Adapter
- Acrylic Plate
- Ultrasonic Sensor, and
- A pair of IR Modules
Assembling:
Now, I am going to assemble all these parts and for this I am going to follow this user manual.
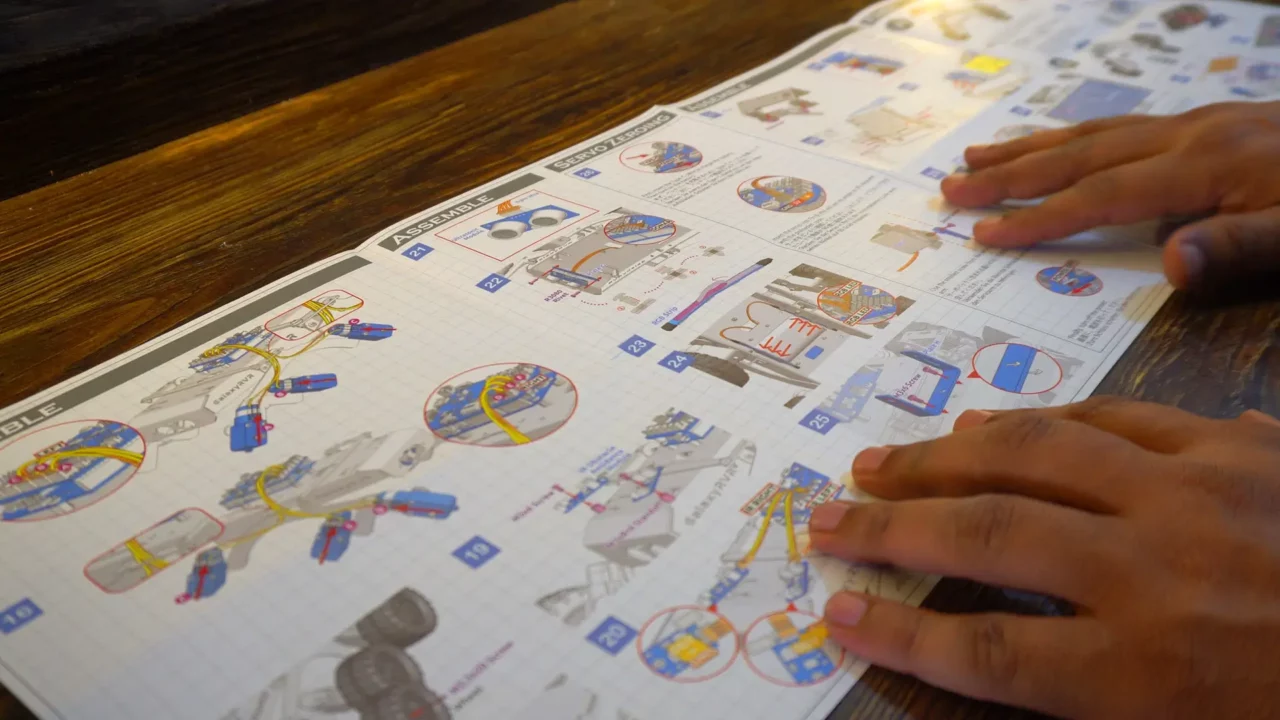
They have provided clear cut instructions for each step, so there is no need for me to explain how to assemble these parts. Therefore, I am not going to explain each and every step. If you encounter any issue while assembling the parts then you can watch my video tutorial given at the end of this article. And don’t forget to subscribe my channel.
The GalaxyRVR Mars Rover assembly has been successfully completed. I didn’t face any issues while assembling all these parts. I didn’t have to think about connecting all these wires because all the onboard connectors are clearly labeled. So, you know exactly where to connect the ESP32 Camera, where to connect the IR Sensors, LED strips, Servos, and DC motors. Just follow the steps in the User Manual.
Make sure to use the cable ties so that the wires don’t make any sort of contact with the tires.
- Finally, you can charge the battery.
- Go to the Play Store and search for the SunFounder Controller and install it.
- Turn ON the switch and press the reset switch to set the Camera to its default position.
- Next, on your cell phone, go to the WiFi Networks, and from the list select GalaxyRVR and enter the password 12345678.
- Finally, open the application, connect it, and start controlling the GalaxyRVR Mars Rover.
I was able to do live video streaming, I was able to control the Flashlight, I could read the IR Sensors, and on the cell phone application, I could read the distance.
Watch Video Tutorial:

Discover more from Electronic Clinic
Subscribe to get the latest posts sent to your email.


