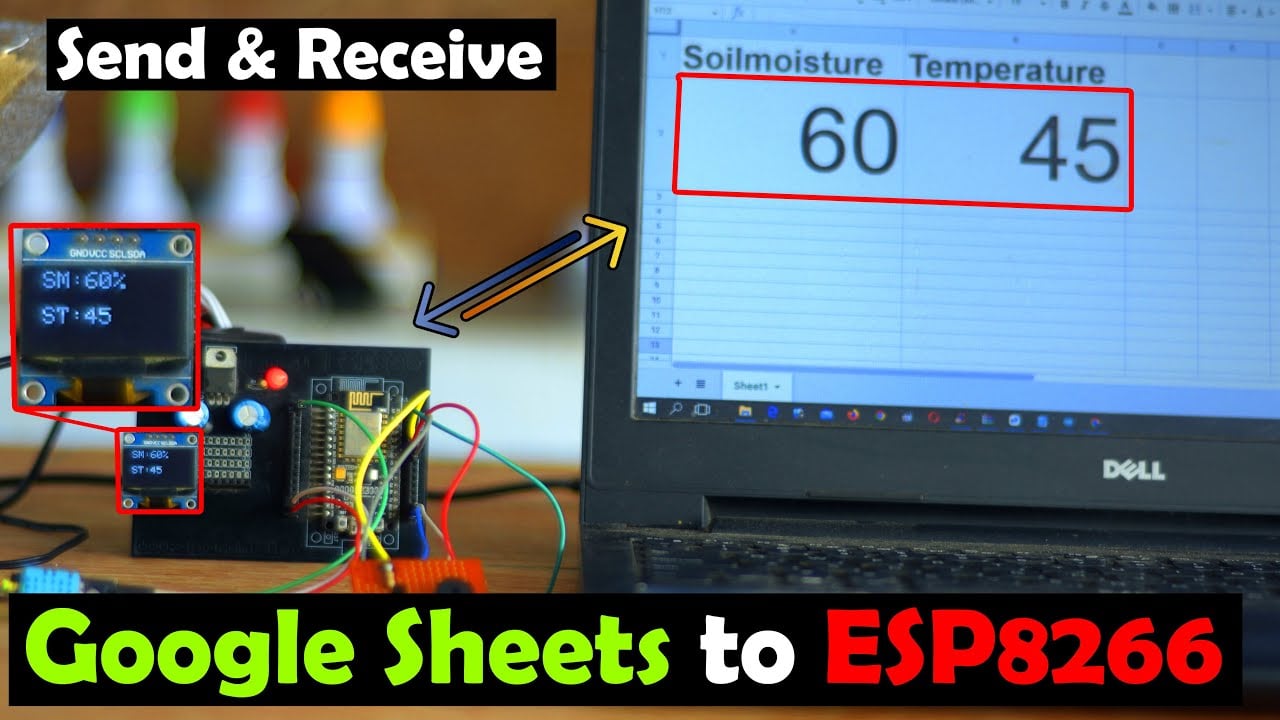
Send data from Google Spreadsheet or Google Sheets to ESP8266 or ESP32
Google Spreadsheet to ESP8266 or ESP32, Soil Moisture monitoring
Last Updated on September 21, 2024 by Engr. Shahzada Fahad
Table of Contents
Google Spreadsheet to ESP8266:
Send data from Google Spreadsheet or Google Sheets to ESP8266 or ESP32– Ever since I made a video on Google Spreadsheet and ESP8266, many boys and girls have been requesting me to make Google Spreadsheet and ESP8266 part-2 video; to explain how do we send data or sensors threshold values from Google Spreadsheet to ESP8266 or ESP32?
Well, let me tell you that in Part-1, I explained how you can send data from ESP8266 to Google Spreadsheet. So, if you want to monitor sensors, or send any other data from ESP8266 or ESP32 to Google Spreadsheet, then I highly recommend that you guys must read my article on the ESP8266 and Google Spreadsheet.
Sending data to Google Spreadsheet from ESP8266 or ESP32 is quite easy and you will get many videos and articles on it. However, sending data from Google Spreadsheet to ESP8266 or SEP32 is a bit tricky. And there is not a single video available on it, so I decided to make a detailed video on it and I also decided to write this article.
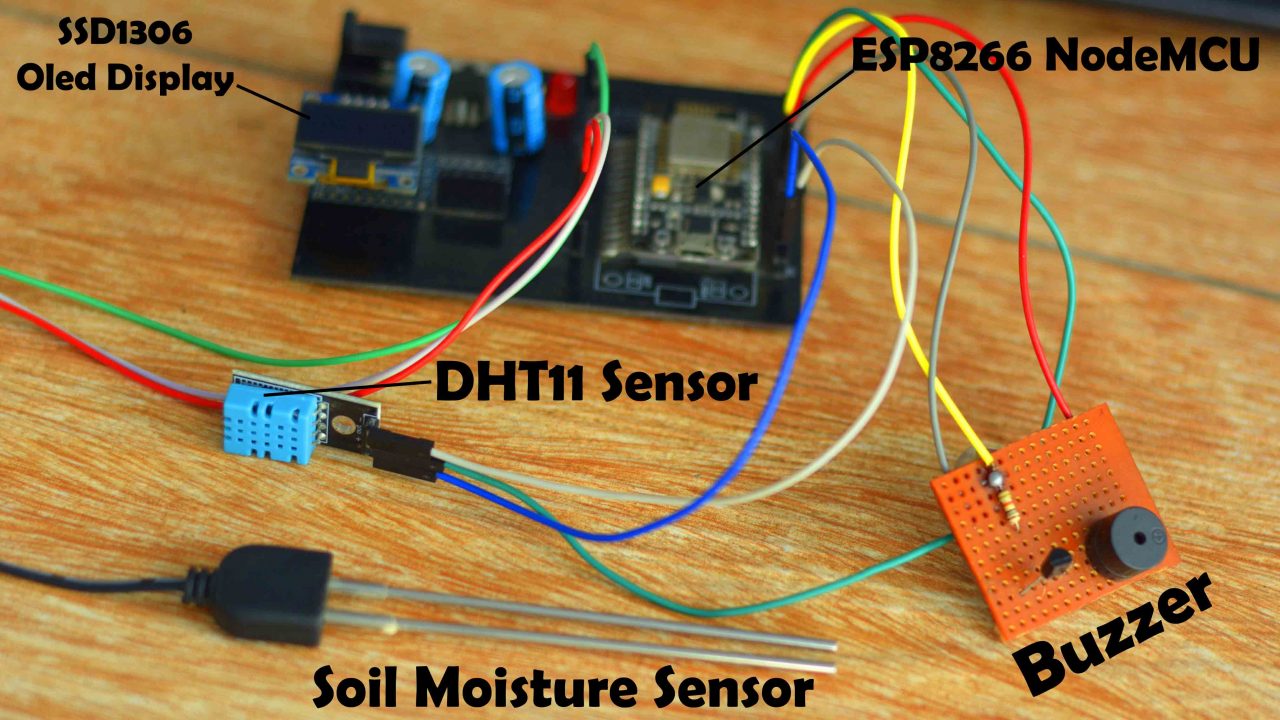
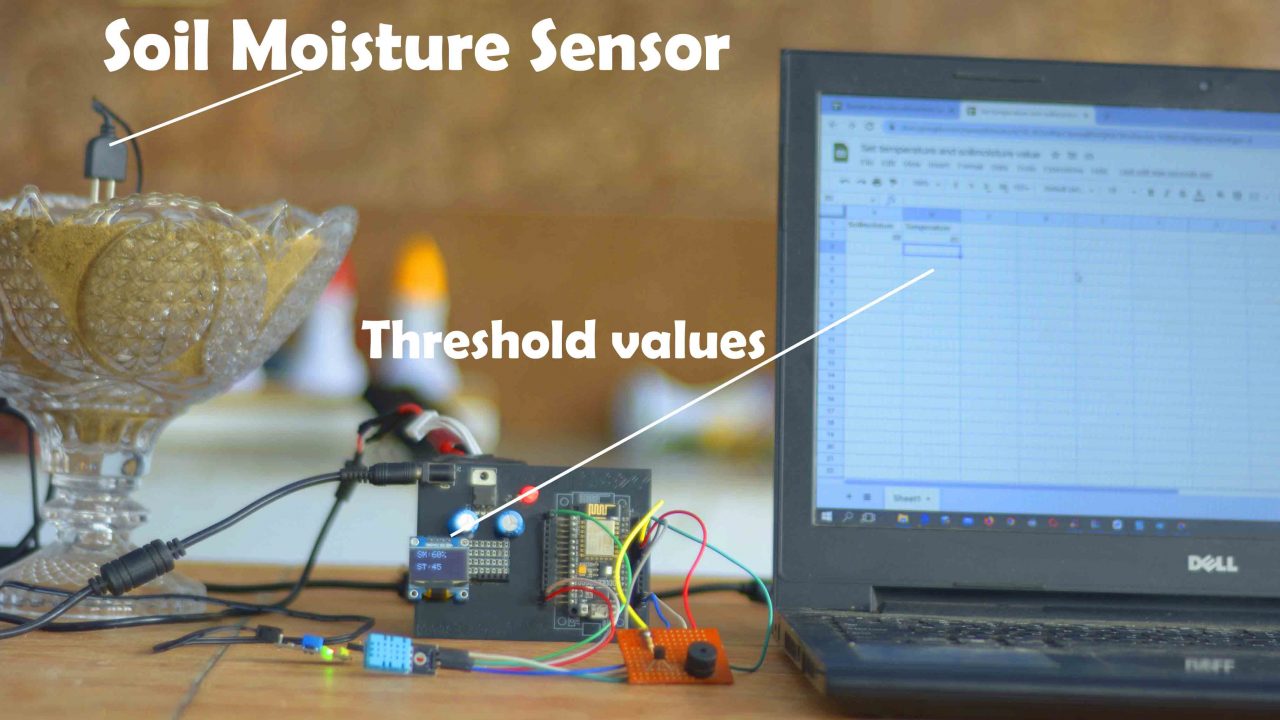
So, in this article, you will learn how to make a Soil Moisture monitoring system using Google Spreadsheet or Google Sheets, ESP8266 WiFi module or ESP32 WiFi + Bluetooth module, a Soil Moisture Sensor, if you don’t have this particular soil moisture sensor it’s ok you can use any other type of the soil moisture sensor, DHT11 Temperature & Humidity Sensor, you will also need a 5V buzzer, and an Oled display module.
I have connected everything as per the circuit diagram which I will explain in a minute. But first I am going to explain how this project actually works and then I will start practical demonstration.
On the monitoring side, I have two Google Spreadsheets.
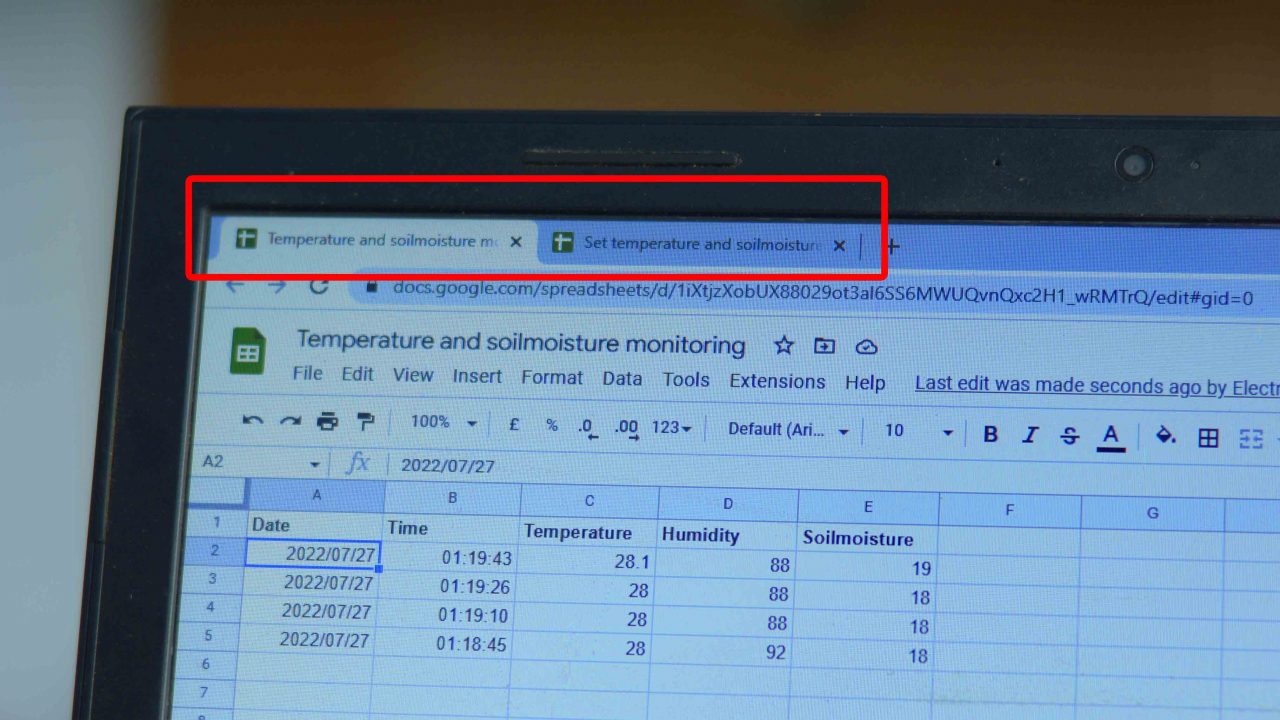
On this Google sheet I am using 5 columns for monitoring Date, Time, Temperature, Humidity, and Soil Moisture. On this Google Spreadsheet, I am receiving data from the ESP8266.
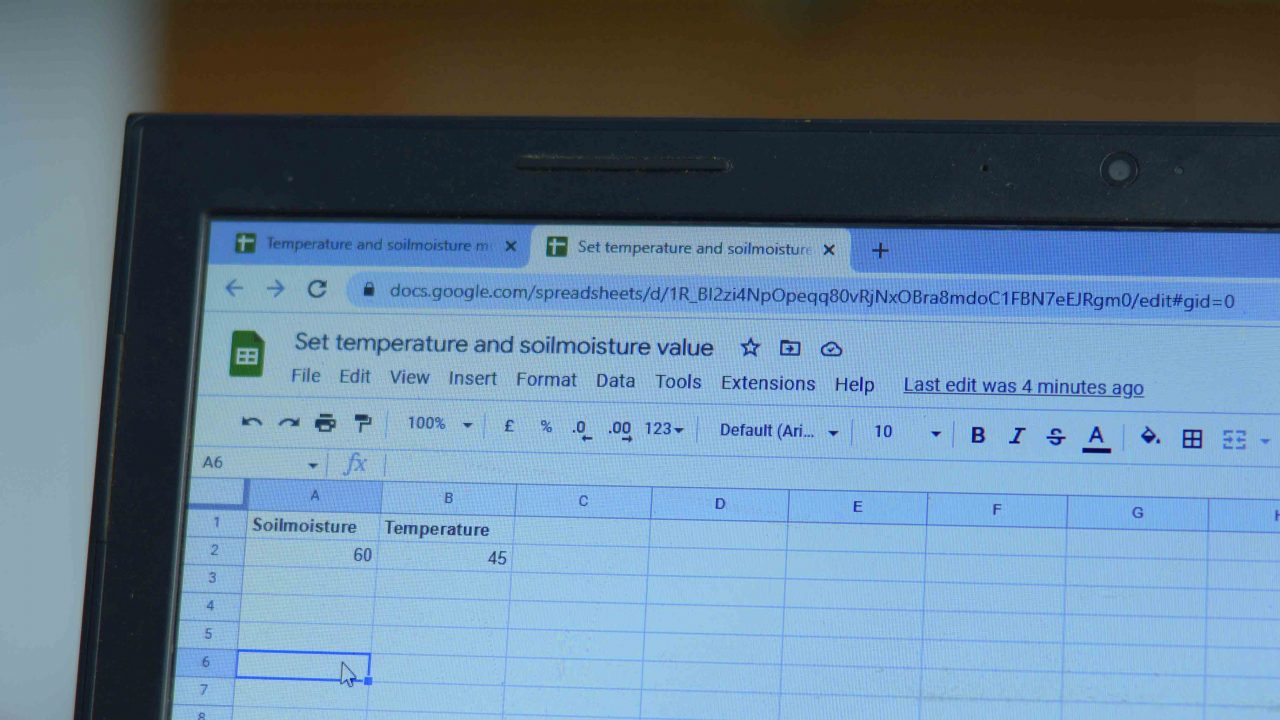
While the other Google Spreadsheet, I am using for setting the threshold values of Soil Moisture and Temperature. Let’s say I want the buzzer to turn ON when the Soil moisture drops below 60%, then I will simply write 60 in A2 Cell, and in the same way; If I want the Led to turn ON when the temperature exceeds above 45 Degrees Celsius then I will simply write 45 in B2 Cell. To further confirm that the Google Spreadsheet actually sends these threshold values to the ESP8266, I will be displaying these values on the Oled display module. So, I will use Buzzer as an indicator when the soil moisture drops below the threshold value, and I will use the ESP8266 onboard Led as an indicator when the temperature increases above the set value or threshold value. Now, let’s go ahead and kick off our practical demonstration.
Practical Demonstration:
I have powered up all the electronics. Right now ESP8266 and Laptop are connected with the WiFi. After every few seconds I am receiving the Temperature, Humidity, and Soil Moisture values from the ESP8266. This time duration can be changed in the programming.

Right now the Buzzer is OFF as the soil moisture value (47) is above the threshold value (35). Let’s say I want to maintain the Soil moisture value above 60%, so what I will do, I will simply increase the threshold value.
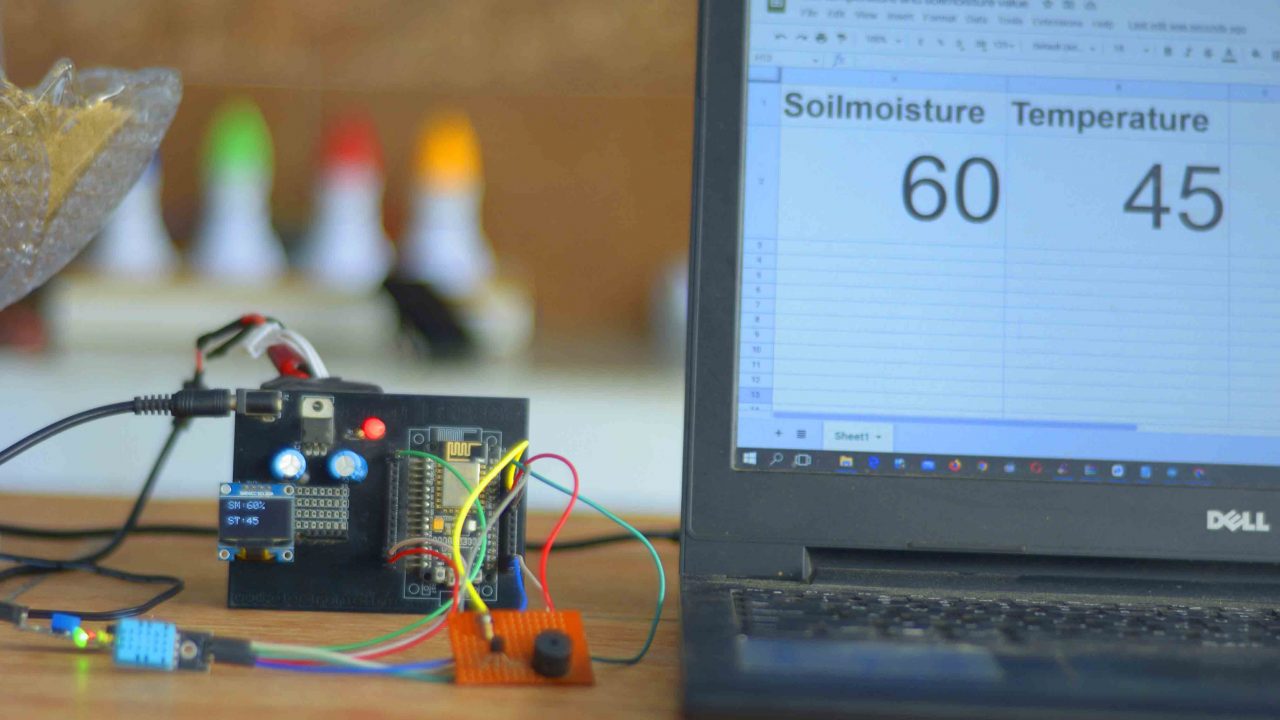
So, any value that you want to send from Google Spreadsheet or Google sheet; simply write these values in the A2 and B2 Cells, as these cells are defined the programming. Once the values are entered, the Google Spreadsheet will automatically send these values to the ESP8266.
It takes a few seconds before the value is updated on the Oled display module.
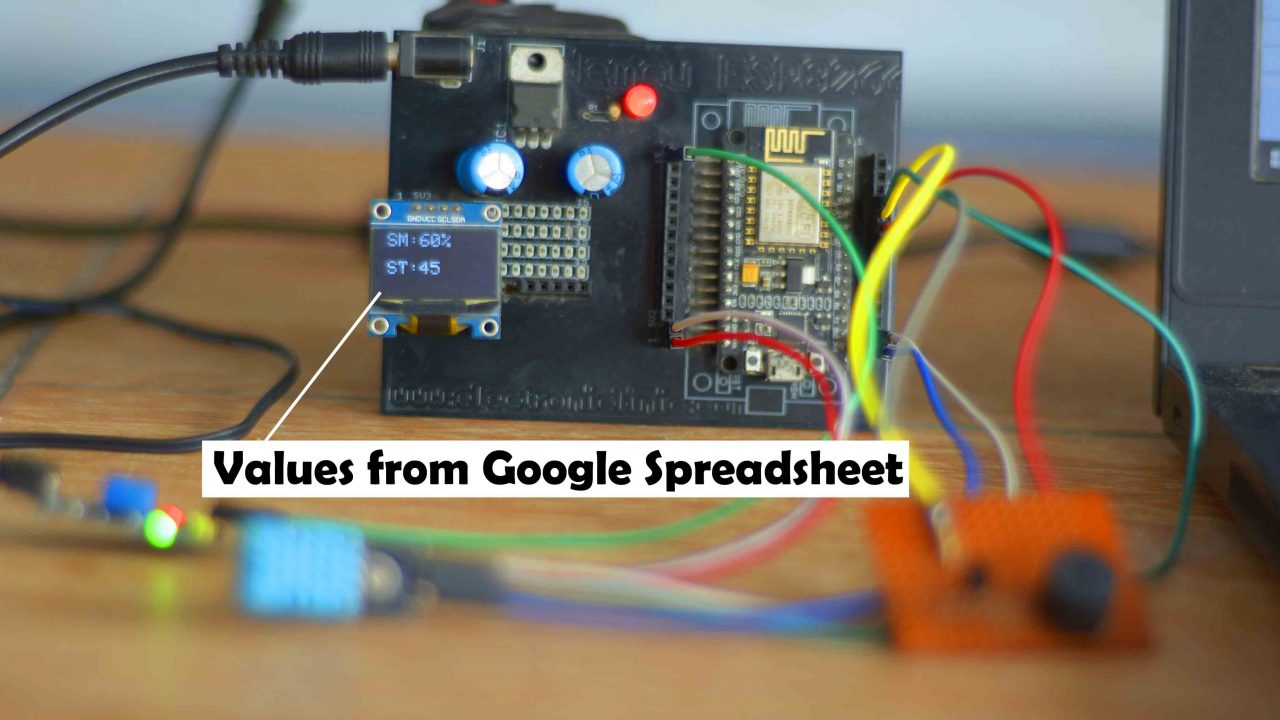
You can see the threshold value on the Oled display module is updated and also the buzzer has turned ON.
You can also see, the onboard Led is off as the temperature is below the threshold value of 45 degrees Celsius.
Now, the threshold values are set. So, now I can go ahead and add some water.
You can see the updated value of the soil moisture and the buzzer has also turned OFF. On the Google Spreadsheet I increased the fonts size, so that you can easily see the values.
Now, I am going to apply some heat.

DHT11 Sensor is quite slow, it takes time to give updated readings. So, I kept applying the heat. The Nodemcu ESP8266 WiFi module onboard Led is off as the measured temperature is less than the threshold value which is 45 degrees Celsius.

You can see the temperature values has increased and also the Onboard Led has turned ON. I am sure by now, you might have got an idea of how does this system work. So, without any further delay let’s get started!!!
Amazon Links:
ESP32 WiFi + Bluetooth Module(Recommended)
DHT11 Temperature and Humidity Module:
*Disclosure: These are affiliate links. As an Amazon Associate I earn from qualifying purchases.
Soil moisture Sensor:
This soil moisture sensor provides data in both digital and analog form. The two probes on the sensor act as variable resistors. Use it in a home automated watering system or just use it to find out when your plant needs water.
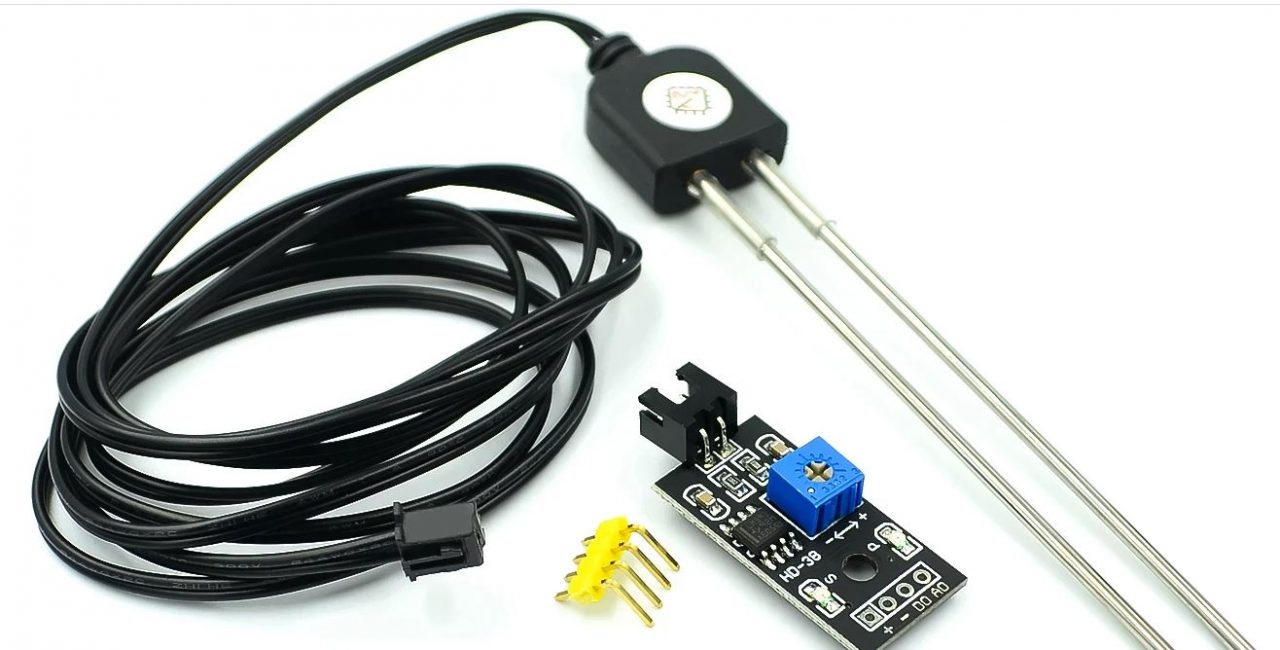
The soil moisture sensor consists of two probes which are used to measure the volumetric content of water. The two probes allow the current to pass through the soil and then it gets the resistance value to measure the moisture value.
When there is more water, the soil will conduct more electricity which means that there will be less resistance. Therefore, the moisture level will be higher. Dry soil conducts electricity poorly, so when there will be less water, then the soil will conduct less electricity which means that there will be more resistance. Therefore, the moisture level will be lower.
Wiring Connection
VCC: 3.3V-5V
GND: GND
DO: Digital output interface (0 and 1)
AO: Analog output interface
Features:
- Dual output mode, analog output more accurate
- A fixed bolt hole for easy installation
- With power indicator (red) and digital switching output indicator (green)
- Having LM393 comparator chip, stable.
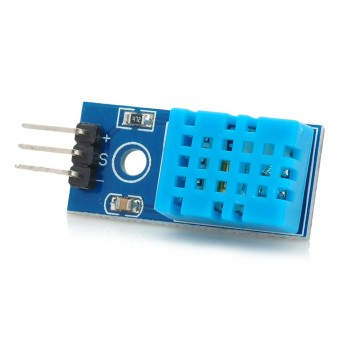
DHT11 Sensor:
The DHT11 is a basic, ultra low-cost digital temperature and humidity sensor. It uses a capacitive humidity sensor and a thermistor to measure the surrounding air, and spits out a digital signal on the data pin. It is simple to use, but requires careful timing to grab data.
Description:
- Low cost
- 3 to 5V power and I/O
- 5mA max current use during conversion (while requesting data)
- Good for 20-80% humidity readings with 5% accuracy
- Good for 0-50°C temperature readings ±2°C accuracy
- No more than 1 Hz sampling rate (once every second)
- Body size 15.5mm x 12mm x 5.5mm
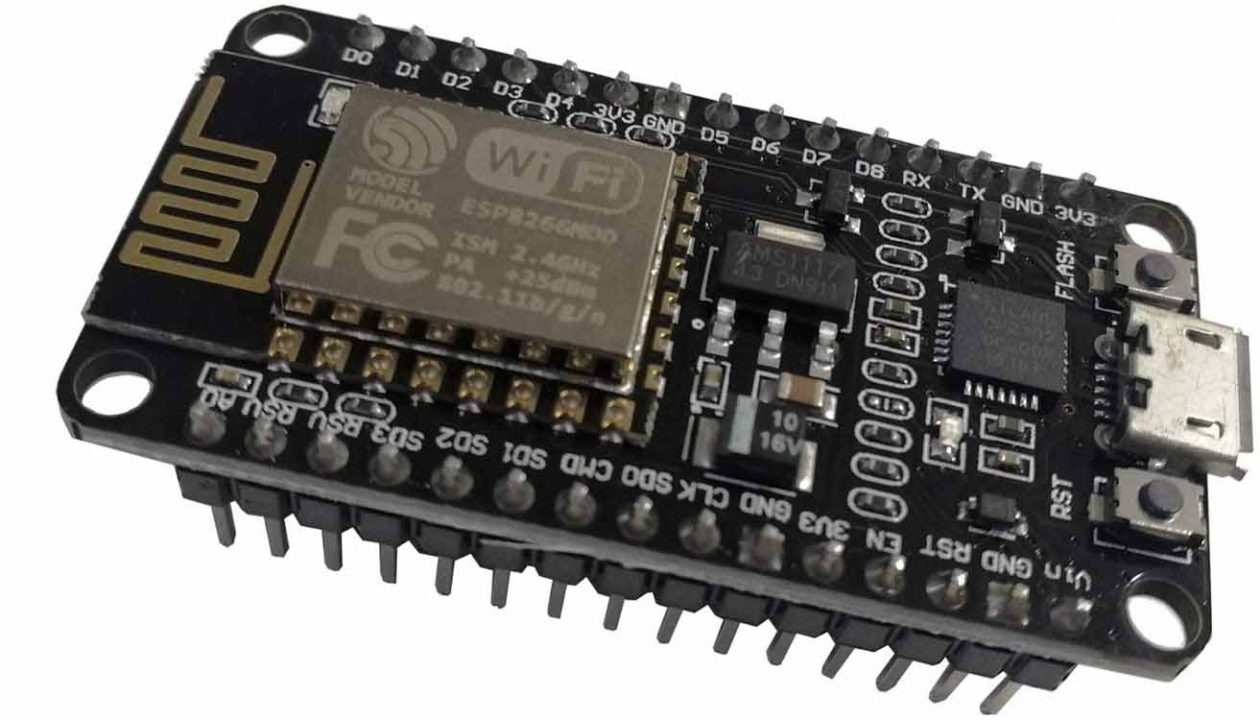
ESP8266 (NodeMCU):
ESP8266 is a highly integrated chip designed for the needs of a new connected world. It offers a complete and self-contained Wi-Fi networking solution, allowing it to either host the application or to offload all Wi-Fi networking functions from another application processor.
ESP8266 has powerful on-board processing and storage capabilities that allow it to be integrated with the sensors and other application specific devices through its GPIOs with minimal development up-front and minimal loading during runtime. Its high degree of on-chip integration allows for minimal external circuitry, and the entire solution, including front-end module, is designed to occupy minimal PCB area.
Specifications:
- Serial/UART baud rate: 115200 bps
- Input power: 3.3V
- I/O voltage tolerance: 3.6V Max
- Flash Memory Size: 1MB (8Mbit)
- WiFi security modes: WPA, WPA2
Read my getting started article on ESP8266 Nodemcu.
Circuit Diagram:
The following circuit diagram shows, how to interface soil moisture sensor, dht11 sensor, 5V buzzer, and SSD1306 Oled display module with the Nodemcu ESP8266 WiFi module.
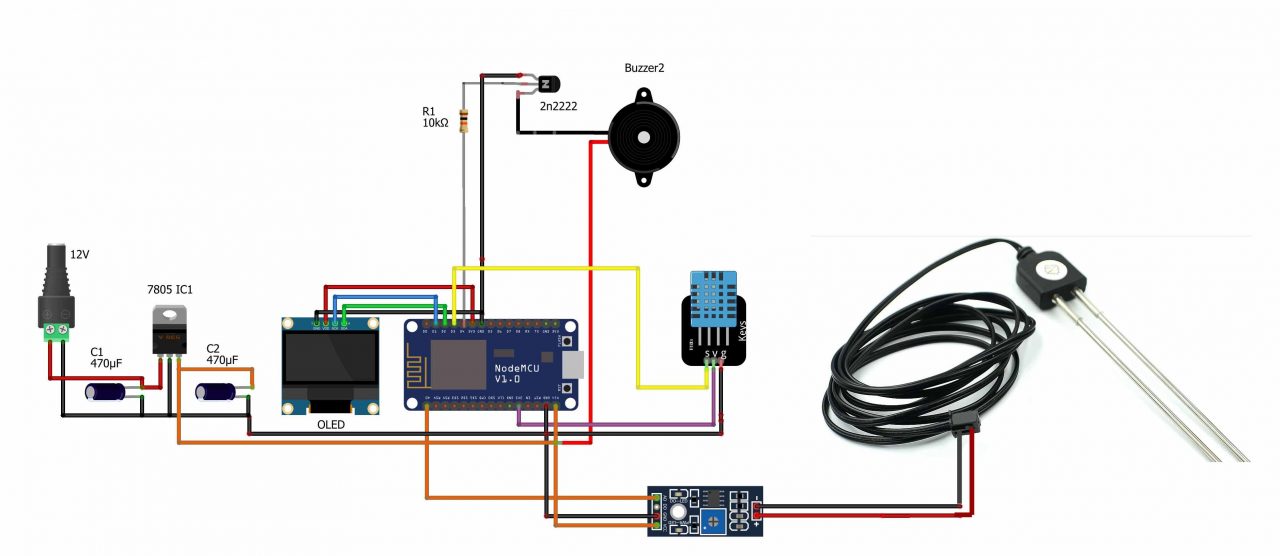
I am using a 5V regulated power supply to power up all the electronics. The SCK or SCL and SDA pins of the SSD1306 Oled display module are connected with the D1 and D2 pins on the Nodemcu ESP8266 WiFi module. While the VDD and GND pins of the Oled display module are connected with the 3.3V and GND pins.
D4 pin on the ESP8266 is used to control the 5V buzzer. I use 2N22222 NPN transistor and a 10K ohm resistor to control this buzzer. The transistor and resistor make the driver circuit.
Data pin of the DHT11 Temperature and Humidity sensor is connected with the D3 pin on the ESP8266 module. While the voltage and GND pins of the DHT11 sensor are connected with the 3.3V and GND pins.
The Analog output pin of the Soil Moisture sensor is connected with the A0 Pin and VCC and GND pins are connected with the 5V and GND. So, that’s all about the circuit diagram and now let’s work on the Google Spreadsheet.
Google Spreadsheet with ESP8266:
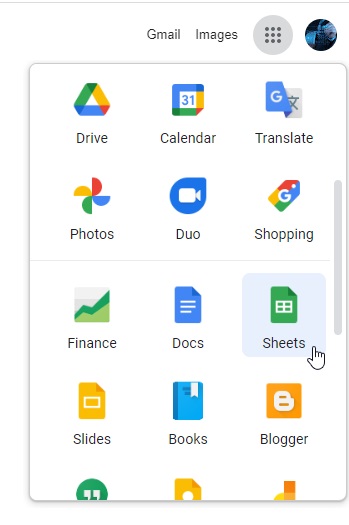
First of all we will create the Google Spreadsheet for which we will click on the Google apps and in which we will click on the Sheets.
After that we will click on the blank in order to create a new spreadsheet.
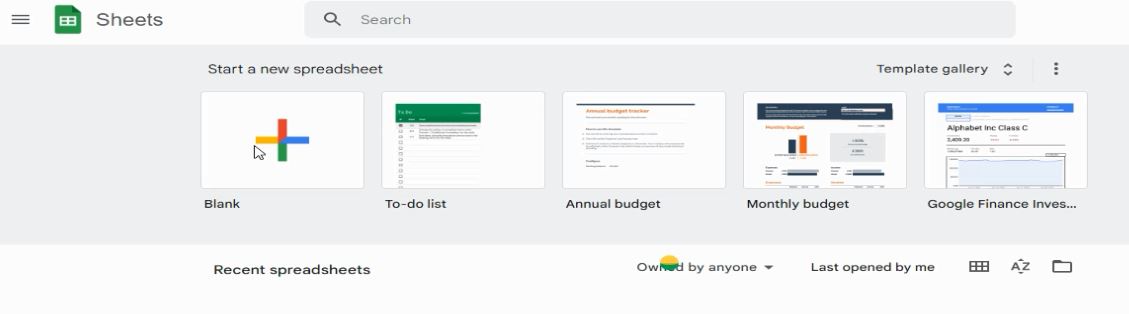
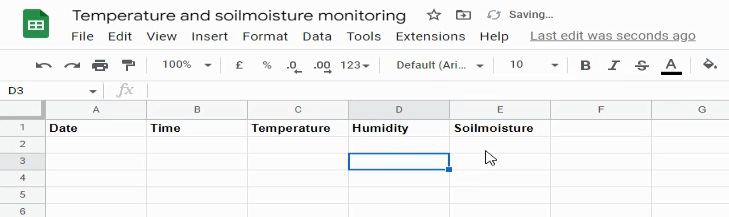
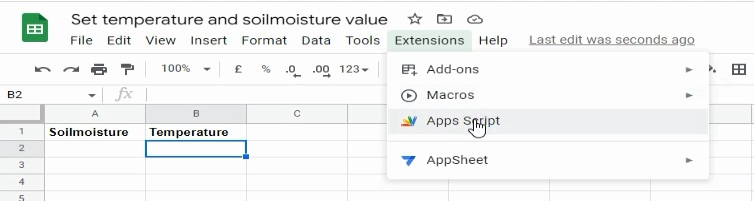
After that give name to Google sheet which is temperature and soil moisture monitoring.
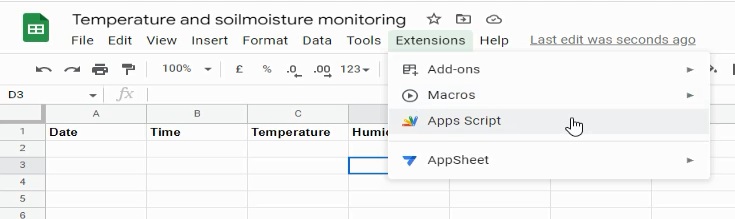
Then we will click on the extensions and click on the Apps Script.
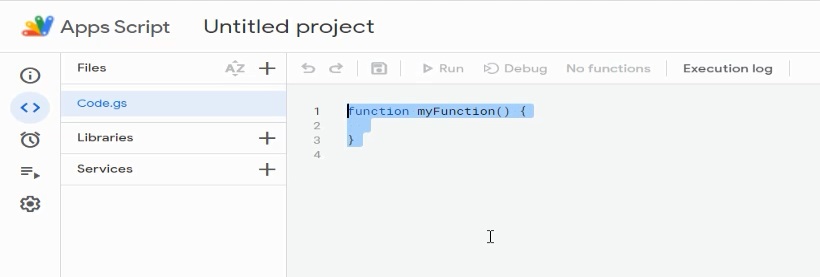
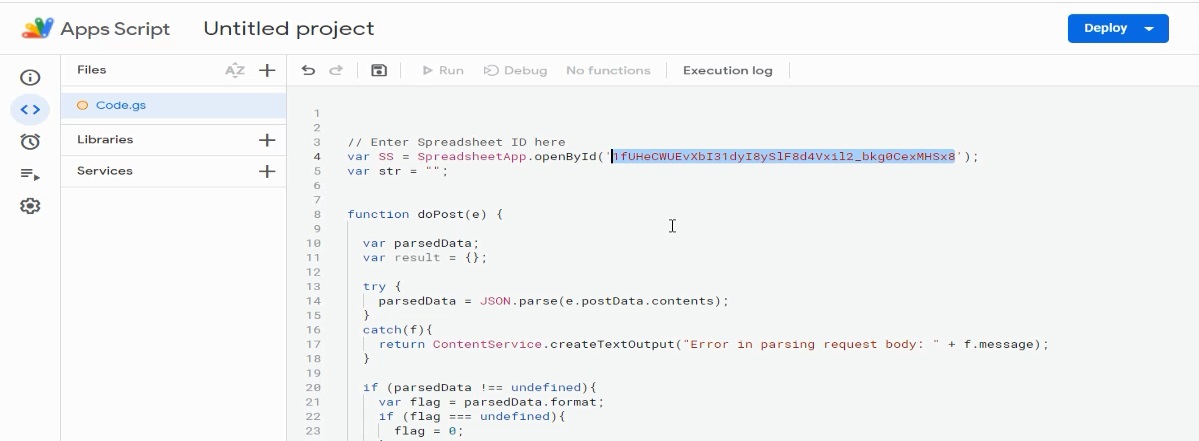
After opening the Apps Script, delete the function and copy the following code.
Code:
|
1 2 3 4 5 6 7 8 9 10 11 12 13 14 15 16 17 18 19 20 21 22 23 24 25 26 27 28 29 30 31 32 33 34 35 36 37 38 39 40 41 42 43 44 45 46 47 48 49 50 51 52 53 54 55 56 57 58 59 60 61 62 63 64 65 66 67 68 69 70 71 72 73 74 75 76 77 |
// Enter Spreadsheet ID here var SS = SpreadsheetApp.openById('1iXtjzXobUX88029ot3al6SS6MWUQvnQxc2H1_wRMTrQ'); var str = ""; function doPost(e) { var parsedData; var result = {}; try { parsedData = JSON.parse(e.postData.contents); } catch(f){ return ContentService.createTextOutput("Error in parsing request body: " + f.message); } if (parsedData !== undefined){ var flag = parsedData.format; if (flag === undefined){ flag = 0; } var sheet = SS.getSheetByName(parsedData.sheet_name); // sheet name to publish data to is specified in Arduino code var dataArr = parsedData.values.split(","); // creates an array of the values to publish var date_now = Utilities.formatDate(new Date(), "CST", "yyyy/MM/dd"); // gets the current date var time_now = Utilities.formatDate(new Date(), "CST", "hh:mm:ss a"); // gets the current time var value0 = dataArr [0]; // value0 from Arduino code var value1 = dataArr [1]; // value1 from Arduino code var value2 = dataArr [2]; // value2 from Arduino code // read and execute command from the "payload_base" string specified in Arduino code switch (parsedData.command) { case "insert_row": sheet.insertRows(2); // insert full row directly below header text //var range = sheet.getRange("A2:D2"); // use this to insert cells just above the existing data instead of inserting an entire row //range.insertCells(SpreadsheetApp.Dimension.ROWS); // use this to insert cells just above the existing data instead of inserting an entire row sheet.getRange('A2').setValue(date_now); // publish current date to cell A2 sheet.getRange('B2').setValue(time_now); // publish current time to cell B2 sheet.getRange('C2').setValue(value0); // publish value0 from Arduino code to cell C2 sheet.getRange('D2').setValue(value1); // publish value1 from Arduino code to cell D2 sheet.getRange('E2').setValue(value2); // publish value2 from Arduino code to cell E2 str = "Success"; // string to return back to Arduino serial console SpreadsheetApp.flush(); break; case "append_row": var publish_array = new Array(); // create a new array publish_array [0] = date_now; // add current date to position 0 in publish_array publish_array [1] = time_now; // add current time to position 1 in publish_array publish_array [2] = value0; // add value0 from Arduino code to position 2 in publish_array publish_array [3] = value1; // add value1 from Arduino code to position 3 in publish_array publish_array [4] = value2; // add value2 from Arduino code to position 4 in publish_array sheet.appendRow(publish_array); // publish data in publish_array after the last row of data in the sheet str = "Success"; // string to return back to Arduino serial console SpreadsheetApp.flush(); break; } return ContentService.createTextOutput(str); } // endif (parsedData !== undefined) else { return ContentService.createTextOutput("Error! Request body empty or in incorrect format."); } } |
After that copy the script id from the Google sheet
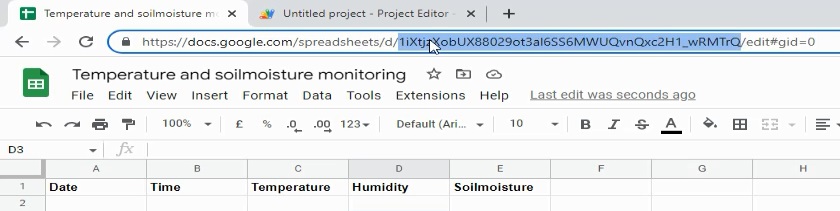
Paste this id in the code and click on the deploy button
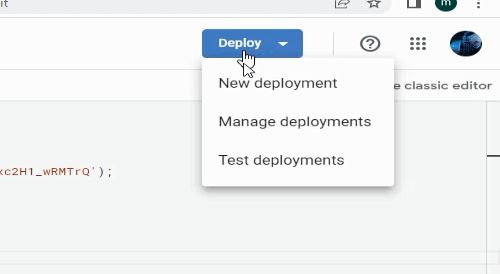
Then click on the Deploy and in the drop down list click on the New deployment.
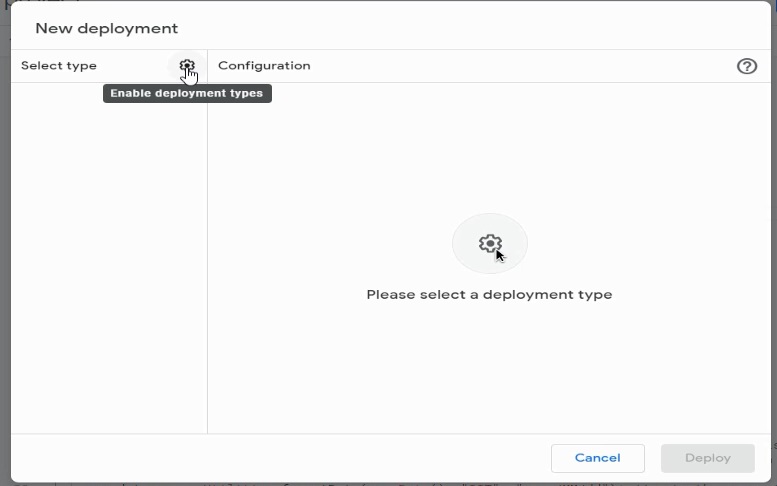
Then click on the enable deployment types.
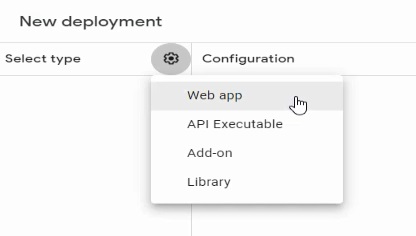
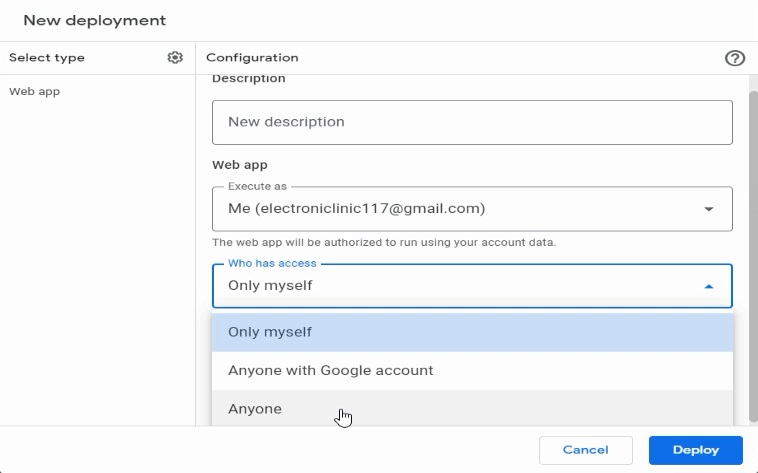
Now select Web app
Now select anyone and click on the Deploy button.
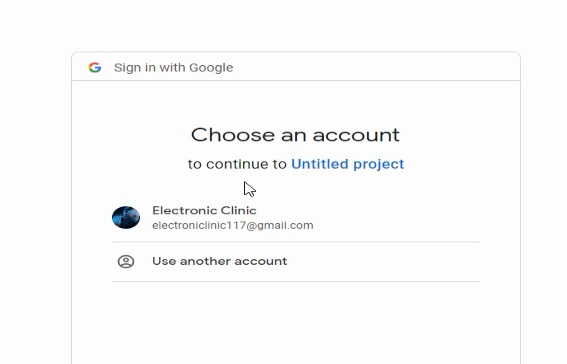
Now select the Gmail account in which you have created the Google sheet.
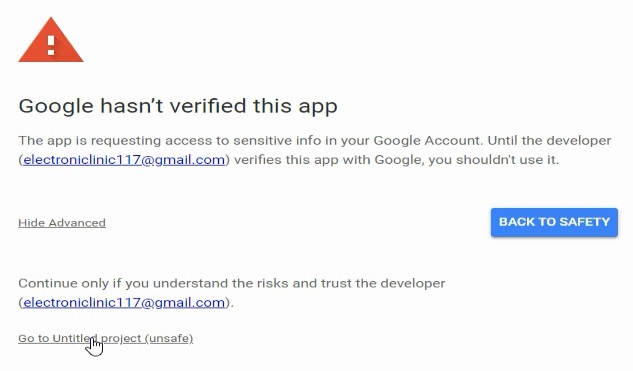
Now click on the Go to Untitled project (unsafe).
Now click on the allow button to give access to the account

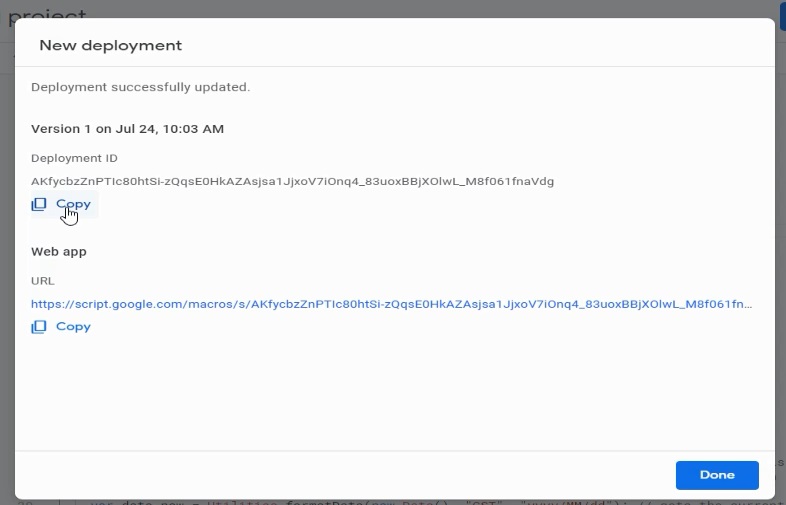
Then copy the deployment id which will be used in the code.
Now the Google sheet code is completed.
Google sheet to ESP8266:
Now, to send data from Google Spreadsheet to ESP8266 add another Google Sheet in the same way as we did previously. Give a name to the Spreadsheet, set the column names as Soilmoisture and Temperature. Values stored in A2 and B2 cells are going to be send to ESP8266. So, in the programming we only access these two cells A2 and B2.
Click on the extensions and select Apps Scripts. All the other steps are exactly the same, the only difference, this time we will use a different script code as given below. If you face any issues, watch the video tutorial given at the end of this article.
|
1 2 3 4 5 6 7 8 9 10 11 12 13 |
var SS = SpreadsheetApp.openById('1R_BI2zi4NpOpeqq80vRjNxOBra8mdoC1FBN7eEJRgm0'); var sheet = SS.getSheetByName('Sheet1'); function doGet(e){ var read = e.parameter.read; if (read !== undefined){ return ContentService.createTextOutput(sheet.getRange(read).getValue()); } return ContentService.createTextOutput("No value passed as argument to script Url."); } |
Now, copy the deployment ID, paste it next to the GScriptedId in the ESP8266 programming. This is used for receiving data from Google Script address. Now the Google sheet is ready for sending the data to the ESP8266.
Note: if you face any issues, watch video tutorial given at the end of this article.
Now the process of the Google spreadsheet is completed and we will open the Arduino IDE. If this is your first time using the Nodemcu ESP8266 WiFi module then you will need to install the Nodemcu board. I have a very detailed article on how to install the Nodemcu board.
Libraries Needed:
Before, you start the programming, first of all, make sure you download all the necessary libraries.
The Adafruit_GFX.h and Adafruit_SSD1306.h libraries I have been using for quite a long time and I have already explained how to download and use these libraries.
You will also need to install the DHT11 library for this click on the Sketch Menu then go to the Include Library and then click on the Manage Libraries. Type dht in the search box and then install the dht sensor library.
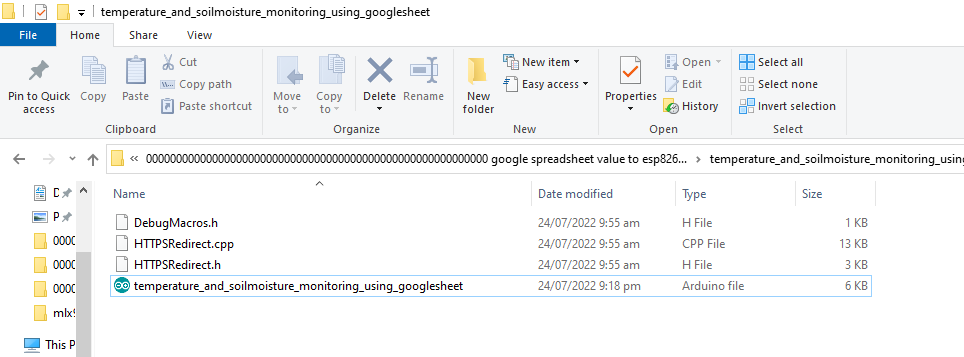
For this project, you will also need these three files DebugMacros.h, HTTPRedirect.cpp, and HTTPRedirect.h. These files are need to be placed with the main programming file in the same folder.
Google Spreadsheet and ESP8266 Programming:
|
1 2 3 4 5 6 7 8 9 10 11 12 13 14 15 16 17 18 19 20 21 22 23 24 25 26 27 28 29 30 31 32 33 34 35 36 37 38 39 40 41 42 43 44 45 46 47 48 49 50 51 52 53 54 55 56 57 58 59 60 61 62 63 64 65 66 67 68 69 70 71 72 73 74 75 76 77 78 79 80 81 82 83 84 85 86 87 88 89 90 91 92 93 94 95 96 97 98 99 100 101 102 103 104 105 106 107 108 109 110 111 112 113 114 115 116 117 118 119 120 121 122 123 124 125 126 127 128 129 130 131 132 133 134 135 136 137 138 139 140 141 142 143 144 145 146 147 148 149 150 151 152 153 154 155 156 157 158 159 160 161 162 163 164 165 166 167 168 169 170 171 172 173 174 175 176 177 178 179 180 181 182 183 184 185 186 187 188 189 190 191 192 193 194 195 196 197 198 199 200 201 202 203 204 205 206 |
#include <ESP8266WiFi.h> #include "HTTPSRedirect.h" #include <WiFiClientSecure.h> #include <Wire.h> #include <Adafruit_GFX.h> #include <Adafruit_SSD1306.h> #include "DHT.h" #define DHTPIN D3 //connect DHT data pin to D3 #define DHTTYPE DHT11 // DHT 11 #define buzzer D4 DHT dht(DHTPIN, DHTTYPE); // Fill ssid and password with your network credentials const char* ssid = "AndroidAP3DEC"; const char* password = "electroniclinic"; #define SCREEN_WIDTH 128 // OLED display width, in pixels #define SCREEN_HEIGHT 64 // OLED display height, in pixels // Declaration for an SSD1306 display connected to I2C (SDA, SCL pins) #define OLED_RESET -1 // Reset pin # (or -1 if sharing Arduino reset pin) Adafruit_SSD1306 display(SCREEN_WIDTH, SCREEN_HEIGHT, &Wire, OLED_RESET); const char* host = "script.google.com"; // Replace with your own script id to make server side changes const char *GScriptId = "AKfycbzRsk-GKAsLl0nhjHhp4AlYKeCnnDMKI_H-1PM1oDhGI9th7GT-O6IdlCfoyPfUzm6POw"; // Receiving data from google script address const char *cellAddress1 = "A2"; //To set moisture value const char *cellAddress2 = "B2"; // to set temperature value String payload_base = "{\"command\": \"insert_row\", \"sheet_name\": \"Sheet1\", \"values\": "; const int httpsPort = 443; String url1 = String("/macros/s/") + GScriptId + "/exec?read=" + cellAddress1; String url2 = String("/macros/s/") + GScriptId + "/exec?read=" + cellAddress2; String payload = ""; String payload1 = ""; String payload2 = ""; HTTPSRedirect* client = nullptr; int msensor = A0; // moisture sensor is connected with the analog pin A1 of the Arduino int msvalue = 0; // moisture sensor value int mspercent; // moisture value in percentage float temp; //to store the temperature value float hum; // to store the humidity value int Led = D0; void setup() { Serial.begin(115200); Serial.flush(); Serial.println(); Serial.print("Connecting to wifi: "); Serial.println(ssid); // flush() is needed to print the above (connecting...) message reliably, // in case the wireless connection doesn't go through Serial.flush(); pinMode(msensor, INPUT); pinMode(Led, OUTPUT); digitalWrite(Led, LOW); pinMode(DHTPIN, OUTPUT); pinMode(buzzer, OUTPUT); display.begin(SSD1306_SWITCHCAPVCC, 0x3C); delay(2000); display.clearDisplay(); display.setTextColor(WHITE); dht.begin(); //Begins to receive Temperature and humidity values. WiFi.begin(ssid, password); while (WiFi.status() != WL_CONNECTED) { delay(500); Serial.print("."); } Serial.println(""); Serial.println("WiFi connected"); Serial.println("IP address: "); Serial.println(WiFi.localIP()); } void loop() { temp = dht.readTemperature(); hum = dht.readHumidity(); Serial.print("temperature = "); Serial.println(temp); Serial.print("humidity = "); Serial.println(hum); msvalue = analogRead(msensor); mspercent = map(msvalue,0,1023,100,0); // To display the soil moisture value in percentage static int error_count = 0; static int connect_count = 0; const unsigned int MAX_CONNECT = 20; static bool flag = false; if (!flag){ client = new HTTPSRedirect(httpsPort); client->setInsecure(); flag = true; client->setPrintResponseBody(false); client->setContentTypeHeader("application/json"); } if (client != nullptr){ if (!client->connected()){ client->connect(host, httpsPort); } } else{ Serial.println("Error creating client object!"); error_count = 5; } if (connect_count > MAX_CONNECT){ //error_count = 5; connect_count = 0; flag = false; delete client; return; } Serial.print("GET Data from cell 1 soil moisture: "); Serial.println(cellAddress1); if (client->GET(url1, host)){ //get the value of the cell payload1 = client->getResponseBody(); payload1.trim(); //soil moisture set value Serial.println(payload1); ++connect_count; } Serial.print("GET Data from cell 2: "); Serial.println(cellAddress2); if (client->GET(url2, host)){ //get the value of the cell payload2 = client->getResponseBody(); payload2.trim(); /// temperature value Serial.println(payload2); ++connect_count; } if (error_count > 3){ Serial.println("Halting processor..."); delete client; client = nullptr; Serial.flush(); ESP.deepSleep(0); } // Add some delay in between checks delay(1000); int moisture = payload1.toInt(); int ctemp= payload2.toInt(); if(mspercent<=moisture) { digitalWrite(buzzer,HIGH); } if(mspercent>moisture) { digitalWrite(buzzer,LOW); } if(temp>=ctemp) { digitalWrite(Led,LOW); } if(temp<ctemp) { digitalWrite(Led,HIGH); } display.clearDisplay(); display.setCursor(10,0); display.setTextSize(2); display.setTextColor(WHITE); display.print("SM:"+String(moisture)+"%"); display.setCursor(10,30); display.setTextSize(2); display.print("ST:"+String(ctemp)); display.display(); sendData(temp, hum, mspercent); //--> Calls the sendData Subroutine } // Subroutine for sending data to Google Sheets void sendData(float value0, int value1, int value2) { String GAS_ID = "AKfycbzZnPTIc80htSi-zQqsE0HkAZAsjsa1JjxoV7iOnq4_83uoxBBjXOlwL_M8f061fnaVdg"; //sending data to google script address String url = String("/macros/s/") + GAS_ID+ "/exec"; payload = payload_base + "\"" + value0 + "," + value1 + "," + value2 + "\"}"; // Publish data to Google Sheets Serial.println("Publishing data..."); Serial.println(payload); if(client->POST(url, host, payload)){ // do stuff here if publish was successful } else{ // do stuff here if publish was not successful Serial.println("Error while connecting"); } // a delay of several seconds is required before publishing again delay(5000); //----------------------------------------Processing data and sending data } |
Watch Video Tutorial:
Discover more from Electronic Clinic
Subscribe to get the latest posts sent to your email.


Hi Shahzada
Amazing work and very well laid out project. Much respect for you.
I have a question regarding this project from a non programmer but as someone trying to learn programming/electronics as a hobby.
I just like to know, why did you use two different Google workbooks and not one.
So for example , sheet1 and sheet2. Can you combine the two scripts together on one sheet for simplicity sake? Or is it more dificult or not possable.
I am trying a do this project and wondering if that can be done.
Warmest Regards
L
same question….
Hello sir,
I am trying to get a lot of data, for attendance project, I want to get approx. 500 data of 1 byte (1-255) , thank you