UNIHIKER M10 Review – A Python-Powered Touchscreen SBC
Last Updated on September 12, 2026 by Engr. Shahzada Fahad
Table of Contents
Description:
What if you could get a full Linux single-board computer with a touchscreen, built-in sensors and WiFi/BT; all ready for Python, IoT and robotics?
Meet the DFRobot’s UNIHIKER M10. In this article; I will show you how it works, what it can do, and whether it’s worth buying.
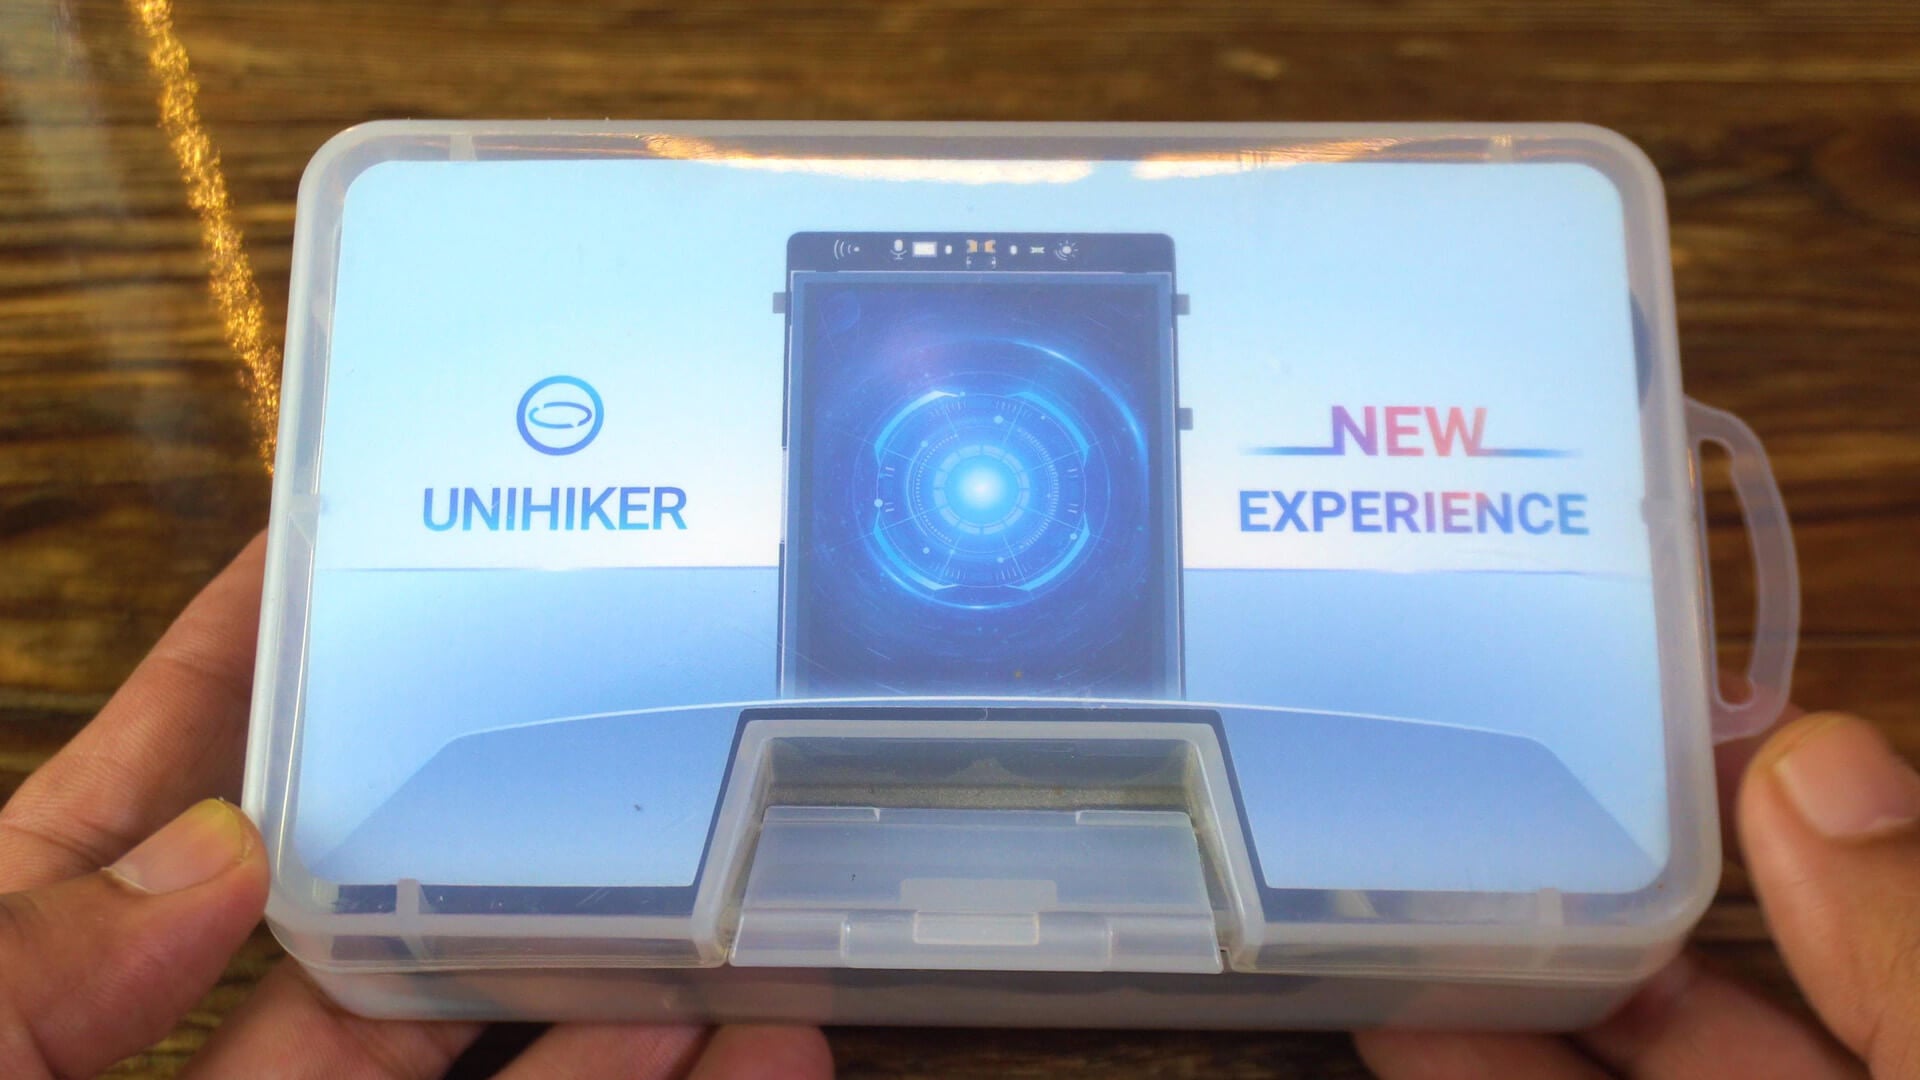
Anyways, I really like how it comes in this clean, transparent case; simple, compact, and travel-friendly. Let’s open it up and see what’s inside!
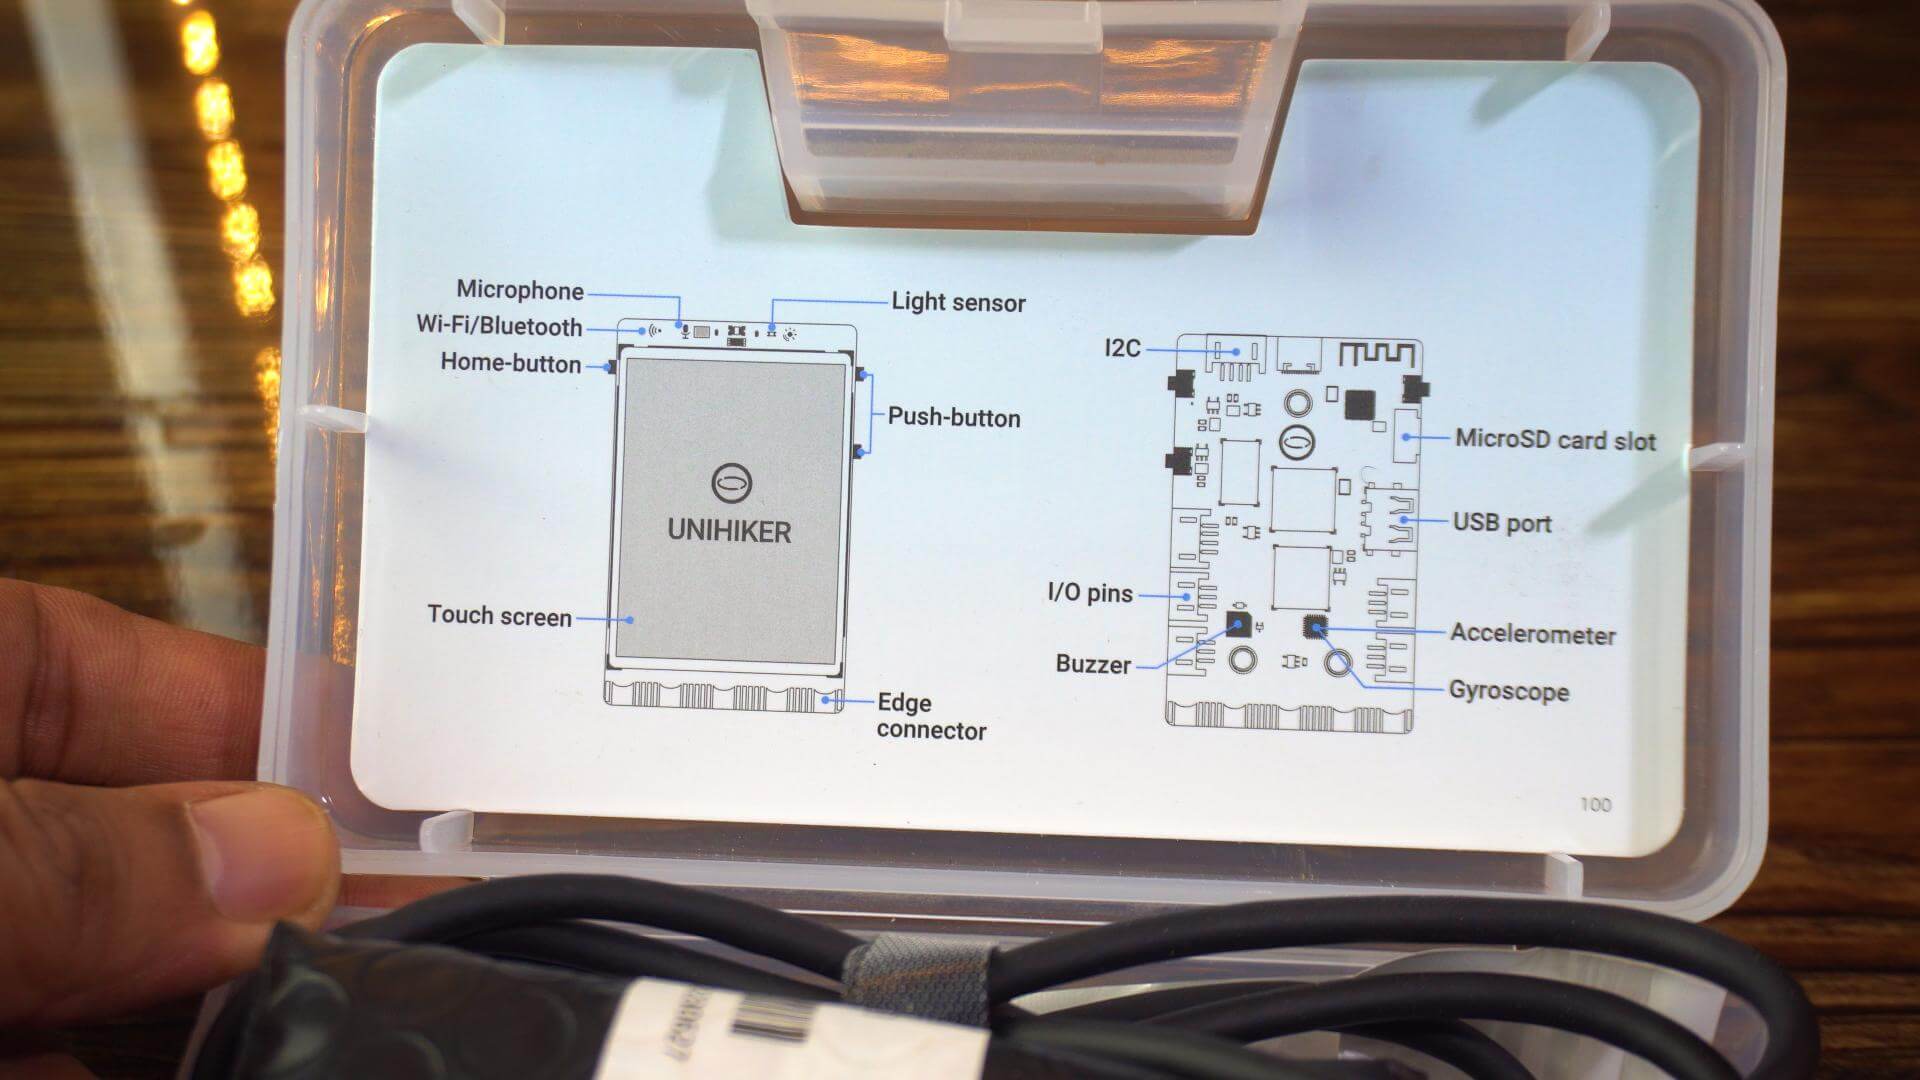
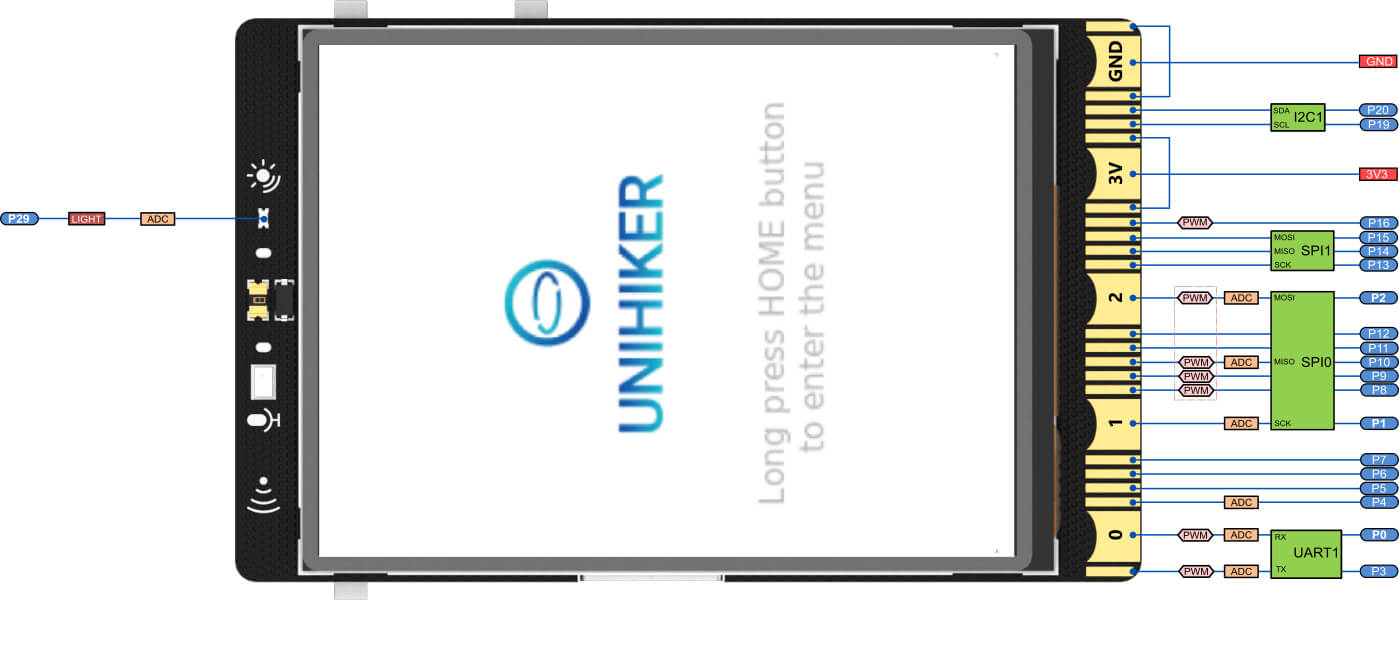
Look at that, there is a full diagram of the UniHiker board. It clearly labels the microphone, sensors, I/O pins, and other components; that’s a really nice touch for beginners. Underneath, there’s this black bubble wrap pouch, which I am guessing has the main board inside. Let’s take it out and see what the UniHiker actually looks like!
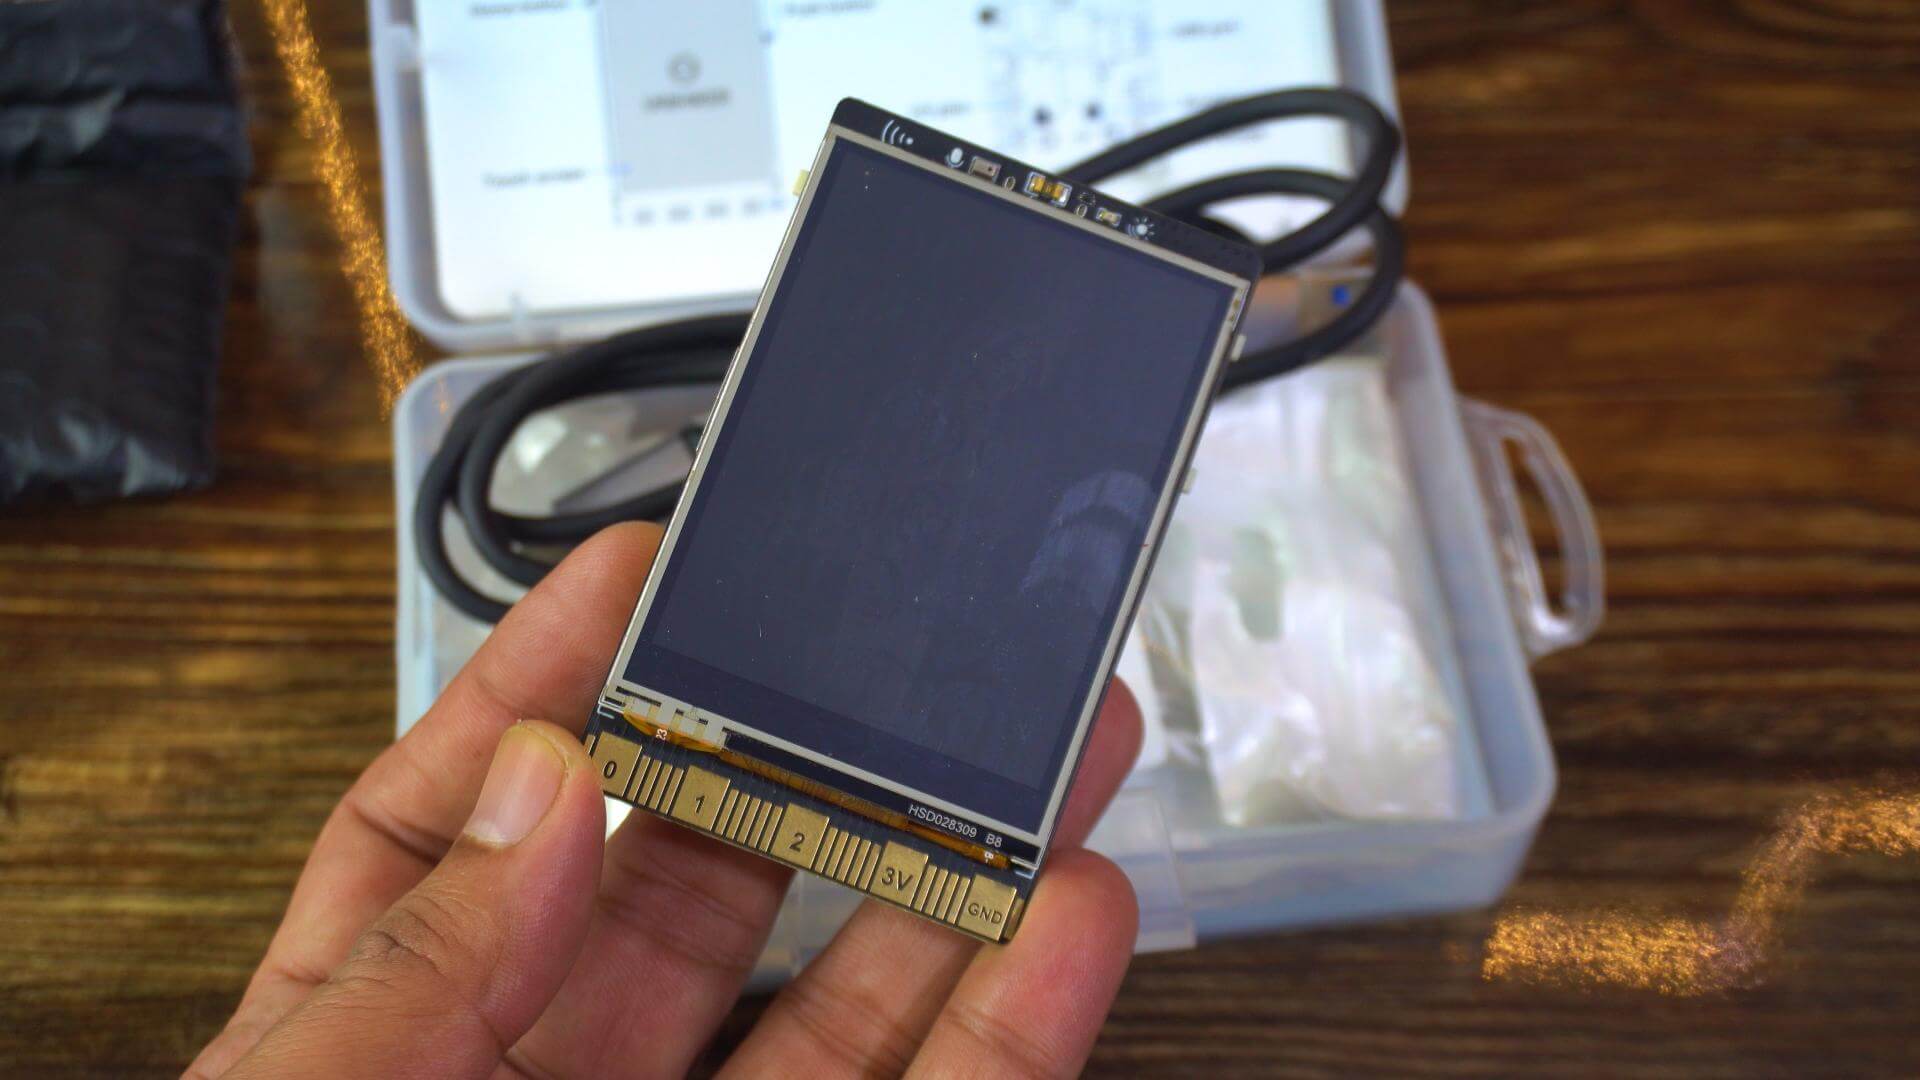
And here it is; the UniHiker board itself! Just look at this; it’s so compact and feels really solid in the hand.
The 2.8-inch touchscreen takes up most of the front, and you can already tell; it’s designed for both learning and real projects.
I really like that gold edge connector at the bottom; it gives it a professional look and makes prototyping much easier.
Overall, it looks clean, modern, and ready to go right out of the box.
The box also contains
- One Type-C USB cable
- Some Double Sided PH2.0-3P and 4P white 20cm silicone wires
- Finally; a User Manual that explains
- How to Get Started?
- How to run the demo programs?
- How to connect to Wi-Fi? and
- How to use wirelessly?
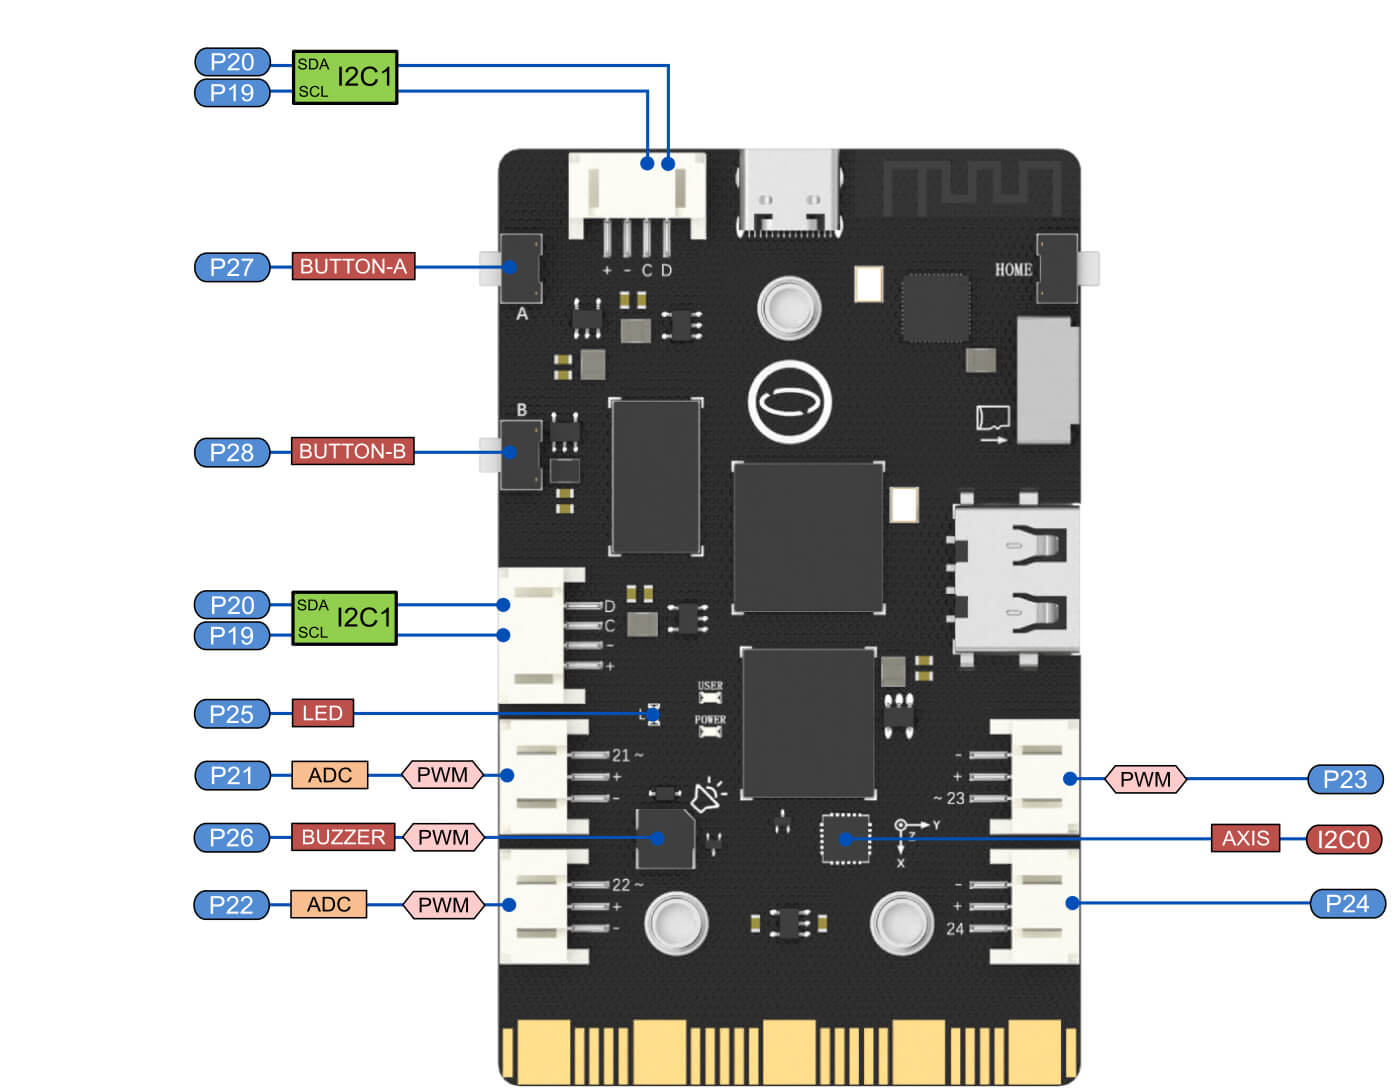
Since the inside of the box already shows a clear diagram labeling all the components; like the sensors, ports, and buttons; I don’t think we need to spend extra time going over each one right now. Everything is already marked nicely. So, let’s move ahead because we have got a lot of exciting stuff to cover in this video!
Amazon Links:
MLX90614 Non-contact infrared temperature Sensor
UniHiker M10 Product Official Page
Other Tools and Components:
ESP32 WiFi + Bluetooth Module (Recommended)
Arduino Nano USB C type (Recommended)
*Please Note: These are affiliate links. I may make a commission if you buy the components through these links. I would appreciate your support in this way!
UniHiker Specification:
Now let’s quickly go over the specs; because this tiny board is actually pretty powerful.
It runs on a Quad-Core ARM Cortex-A35 processor, clocked up to 1.2 GHz, with 512 MB of RAM and 16 GB of onboard storage, all running on Debian Linux.
It’s got built-in WiFi and Bluetooth 4.0 for easy wireless projects, and that 2.8-inch 240×320 touchscreen makes it feel more like a mini tablet than a microcontroller.
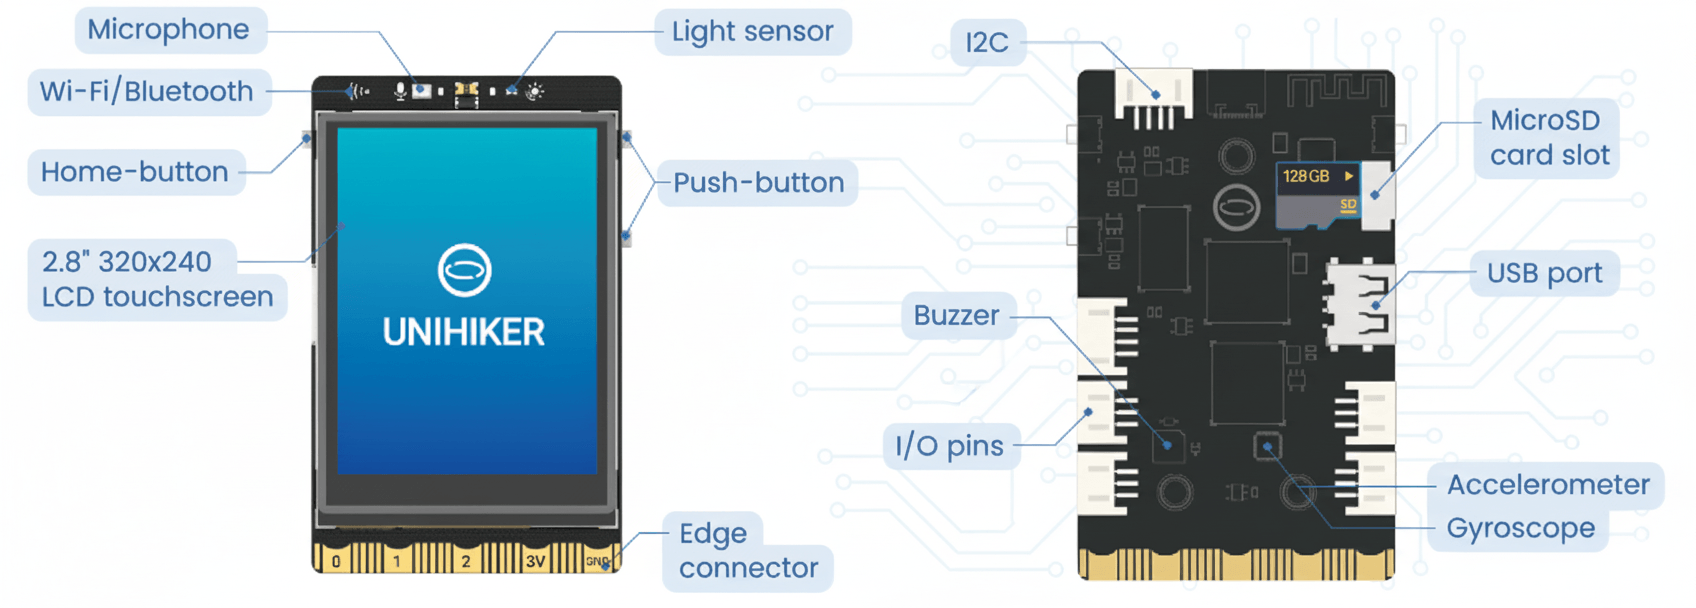
On top of that, it includes a secondary MCU, the GD32VF103, plus built-in sensors like Buttons, a microphone, light sensor, accelerometer, and gyroscope; and even a buzzer and LED as actuators.
For connectivity, you get a USB-C port, a full-size USB-A, Gravity ports, and an edge connector. All this runs on a simple 5V 2A power input. Honestly, that’s a lot packed into such a small board; perfect for learning, prototyping, or even serious AIoT projects.
Get Started with UniHiker!!!
Alright, now let’s get started with the setup. Before you can start building projects or controlling sensors, you need to set up the software side of the UniHiker. The great thing is; this board fully supports Python, and there are a few ways to program it.
You can use Mind+, VS Code, Thonny, or even SSH tools if you prefer. But the easiest and fastest option is the built-in Jupyter Notebook. It’s already pre-installed, so you don’t need to install anything on your computer.
Just connect the UniHiker to your Laptop and then wait for a few seconds.
Press the HOME button to enter the menu.
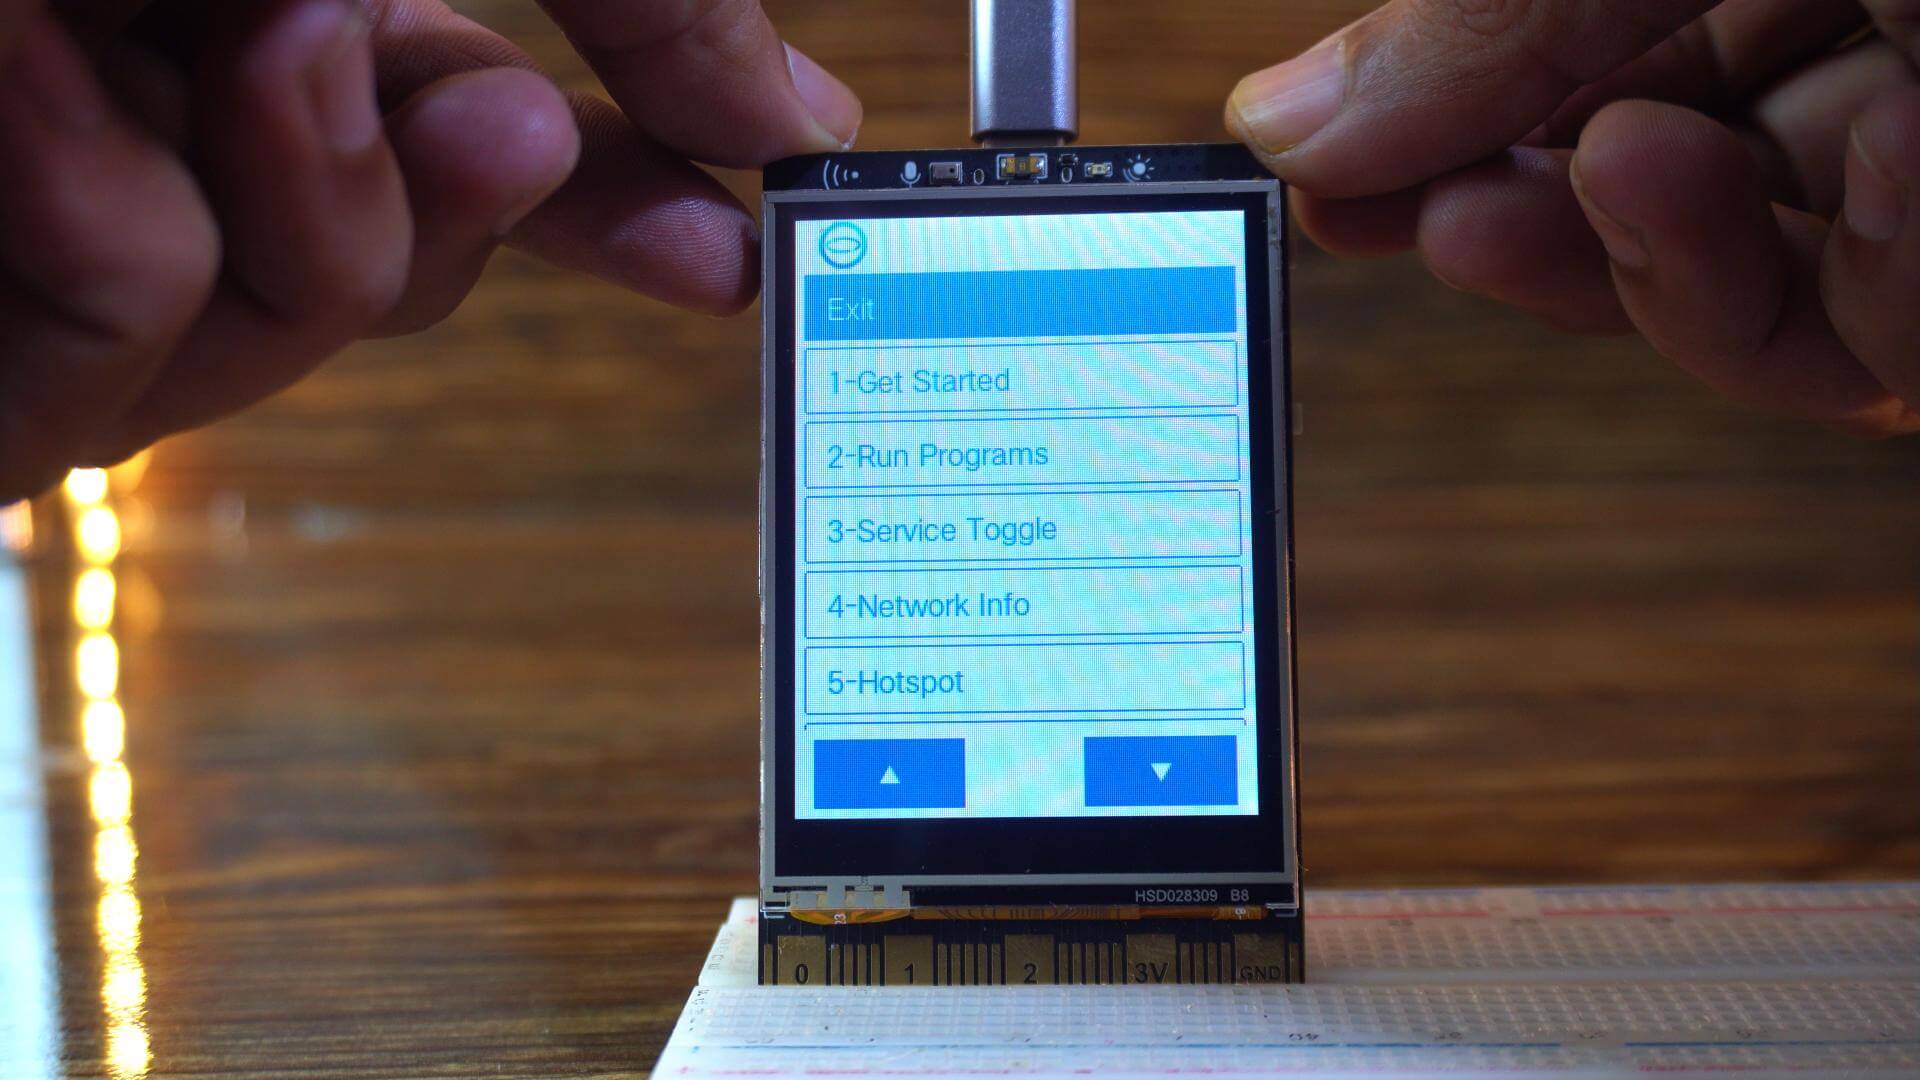
Let’s check “Get Started”.
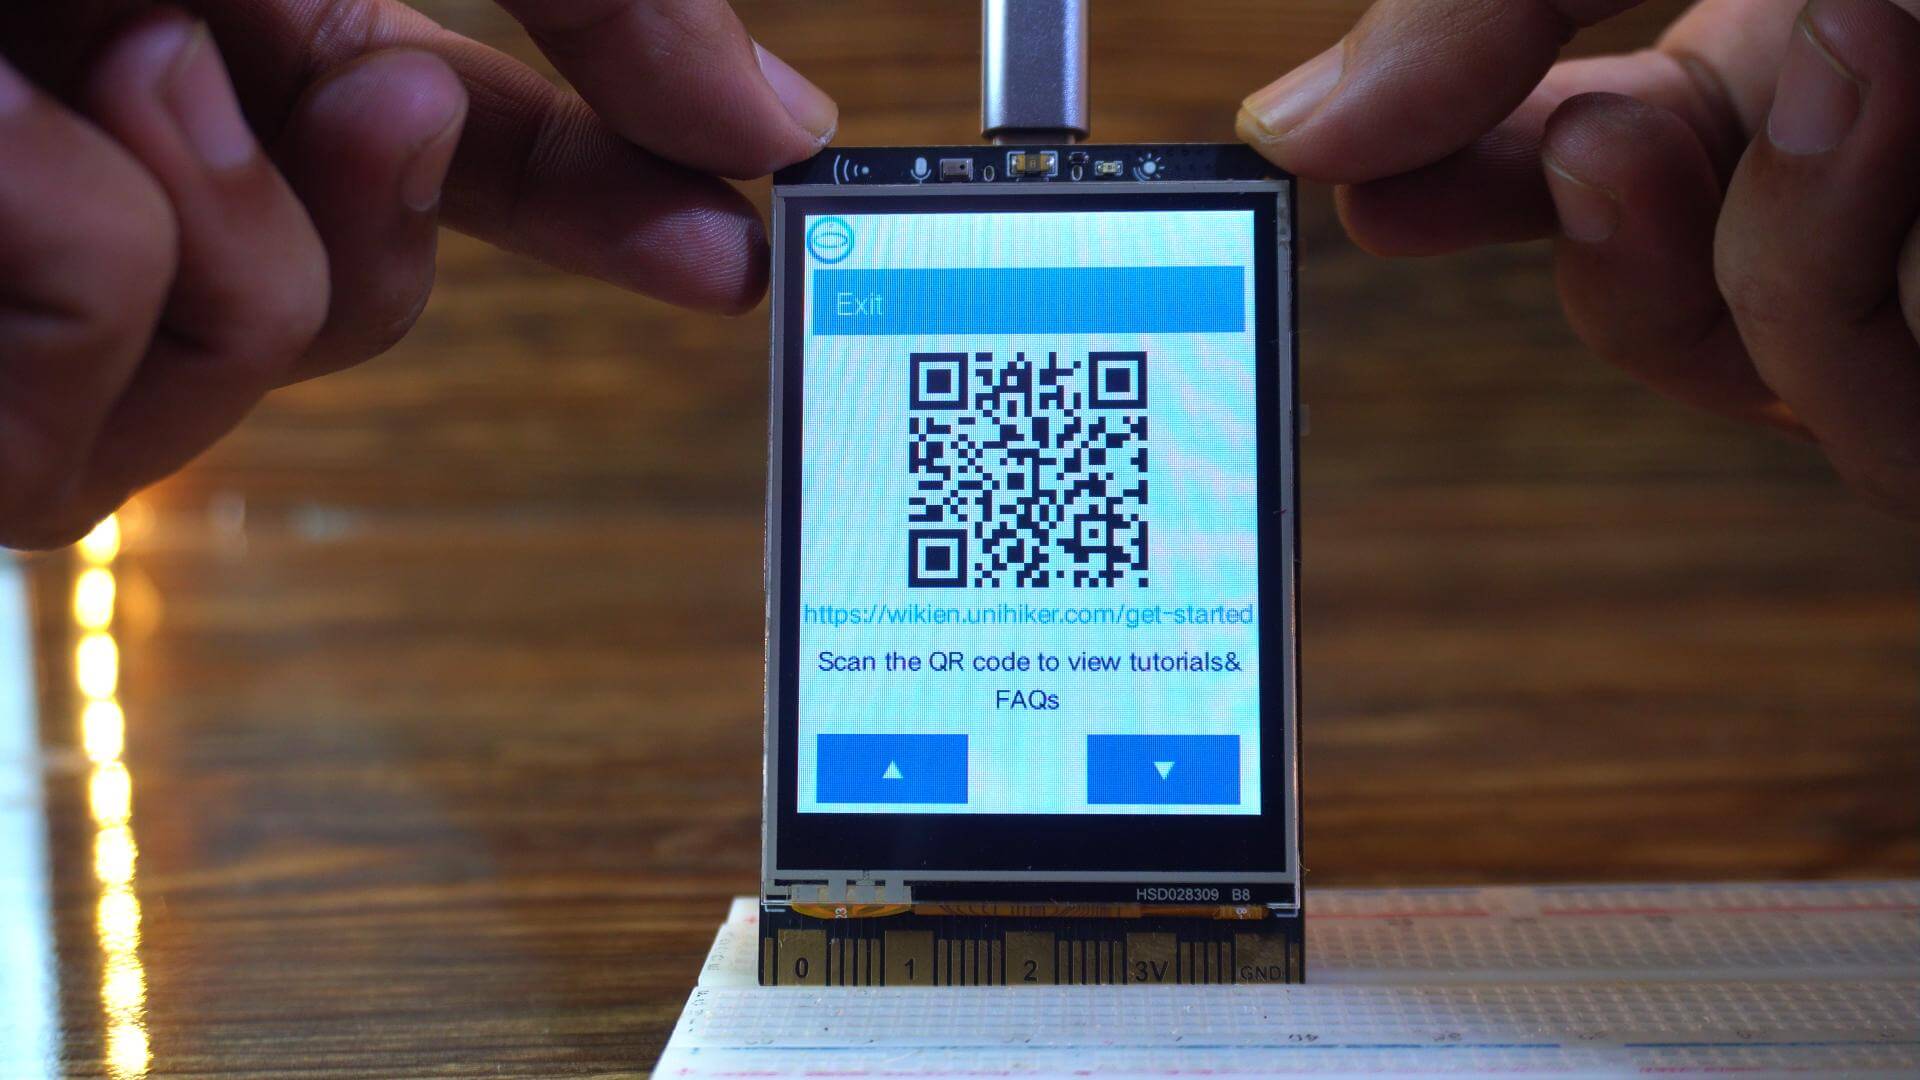
You can scan this QR code on your cell phone to view tutorials and frequently asked questions.
Let’s skip “Run Programs” for now.
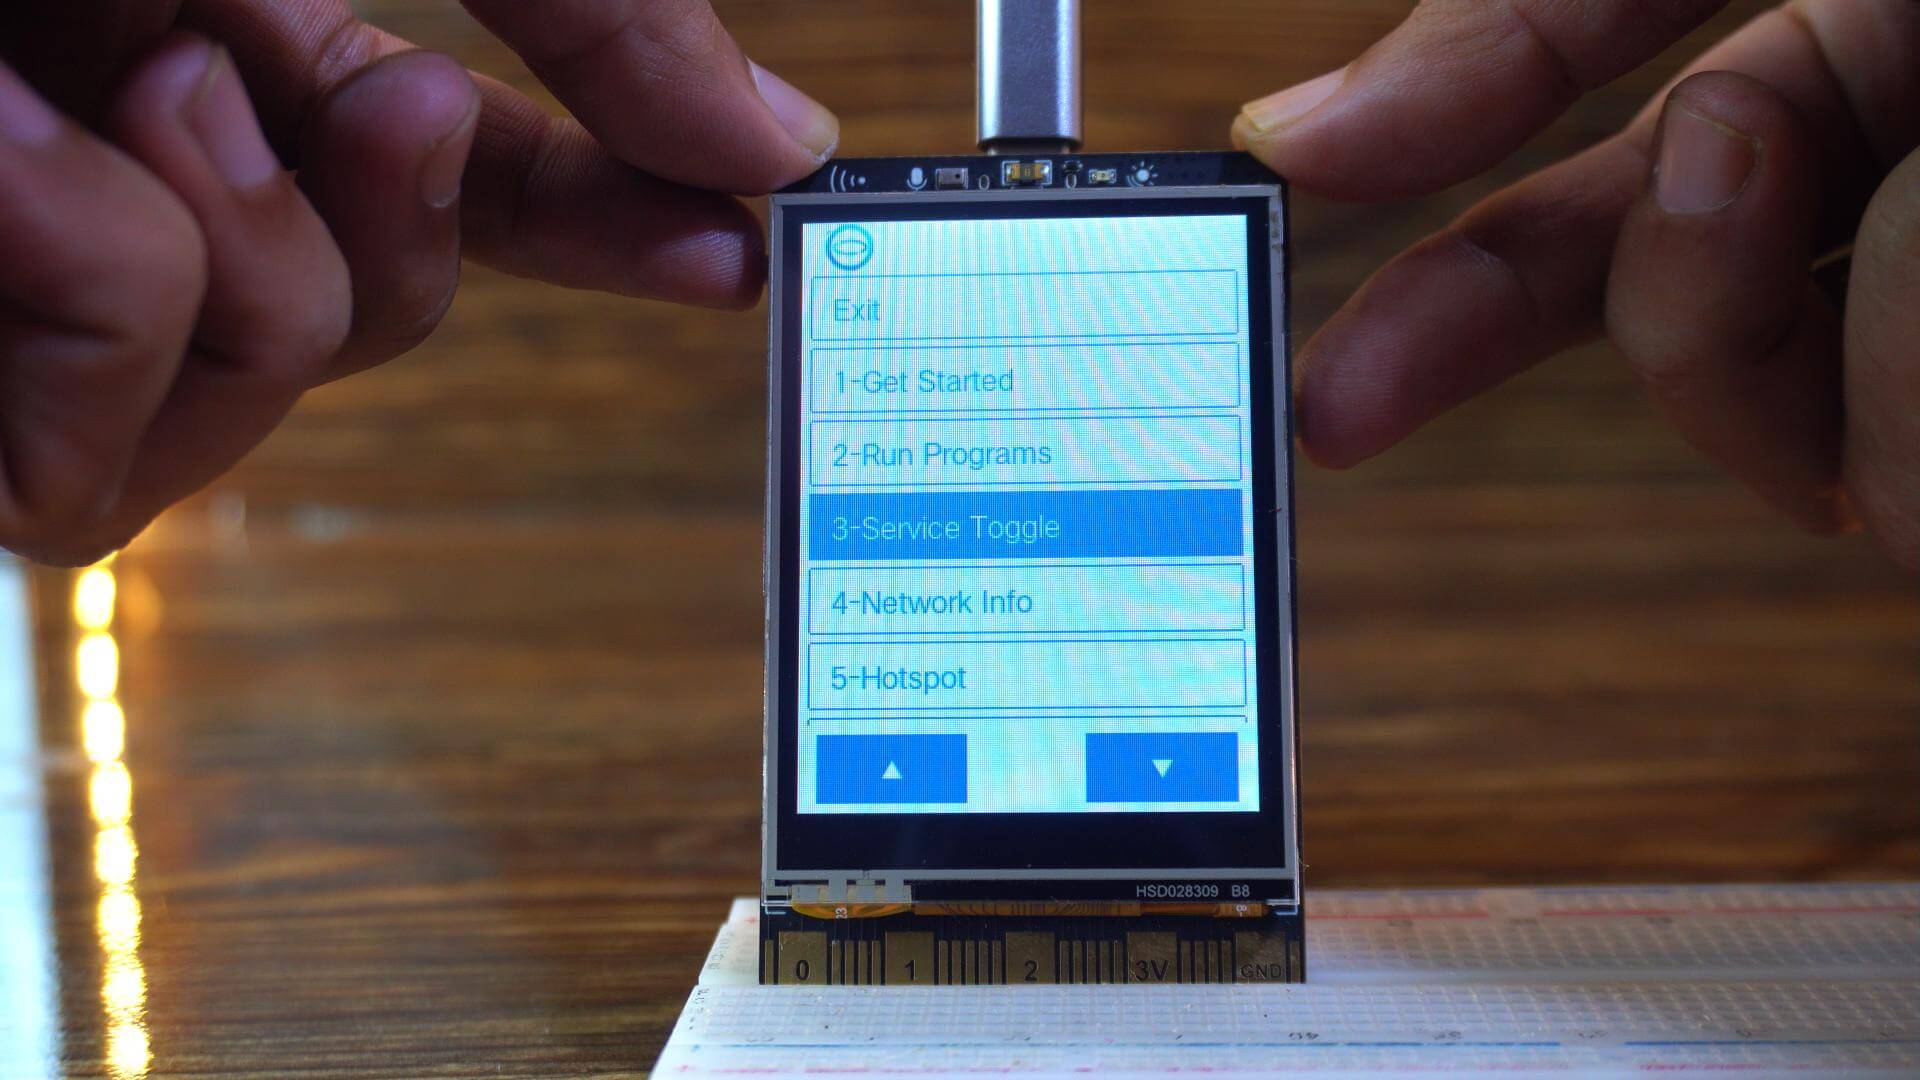
Let’s click on “Service Toggle”
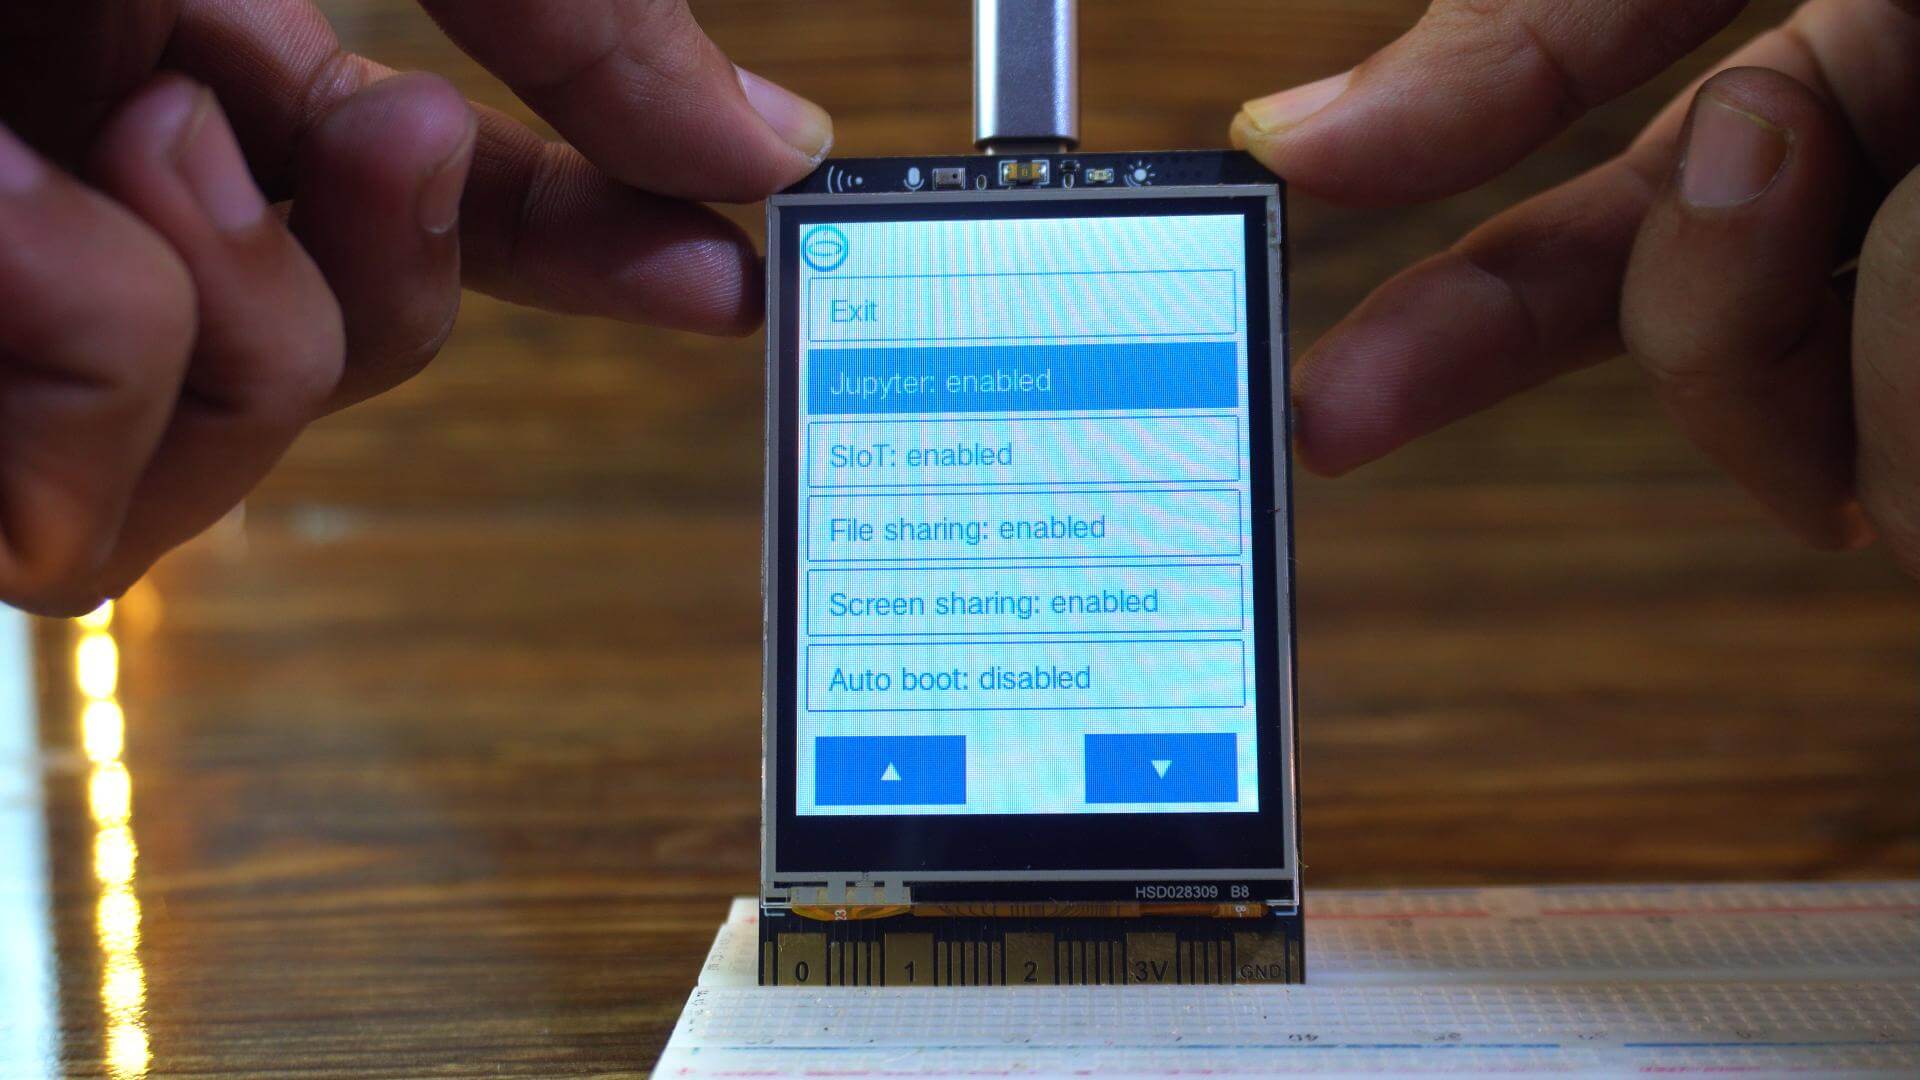
As you can see, Jupyter is already enabled by default. You can easily turn it on or off with just a single tap, which is really convenient.
For now, I will leave it as it is; everything looks good. If we ever need to change anything later, we can always come back to this setting.
Now, let’s move on and check what’s inside the Network Info section.
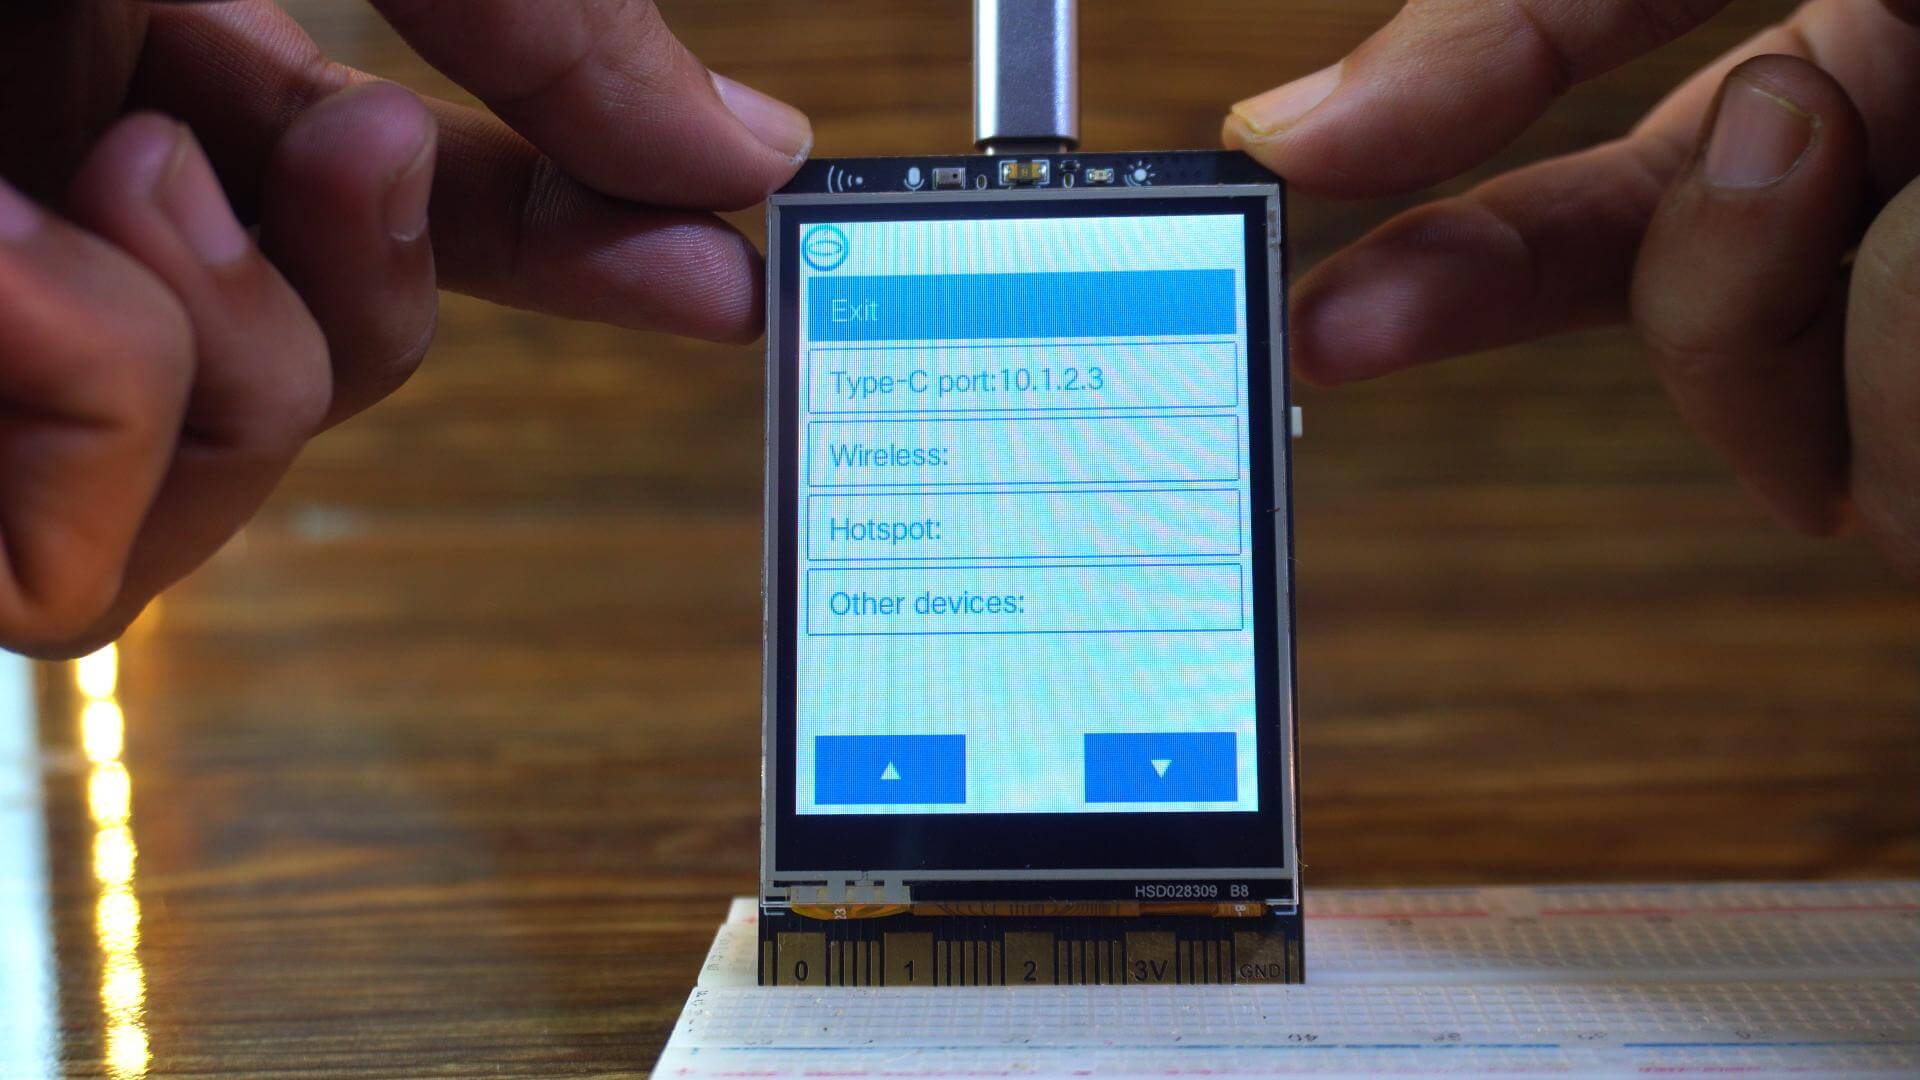
If your UniHiker is connected to your laptop using the Type-C cable, you can simply open your web browser and type 10.1.2.3 in the address bar.
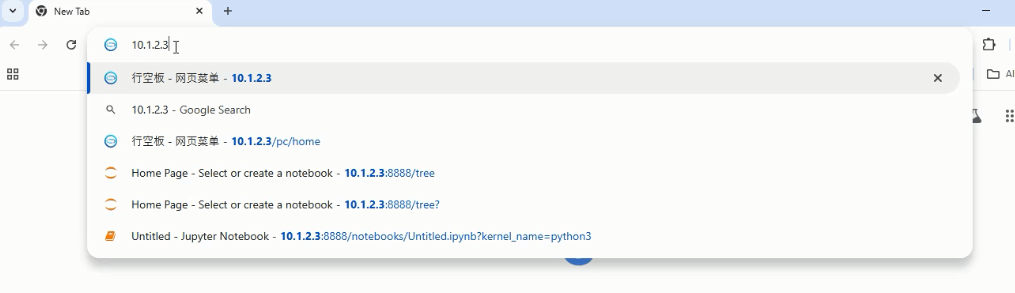
And just like that; it will instantly take you to the UniHiker home page. Super quick and easy!
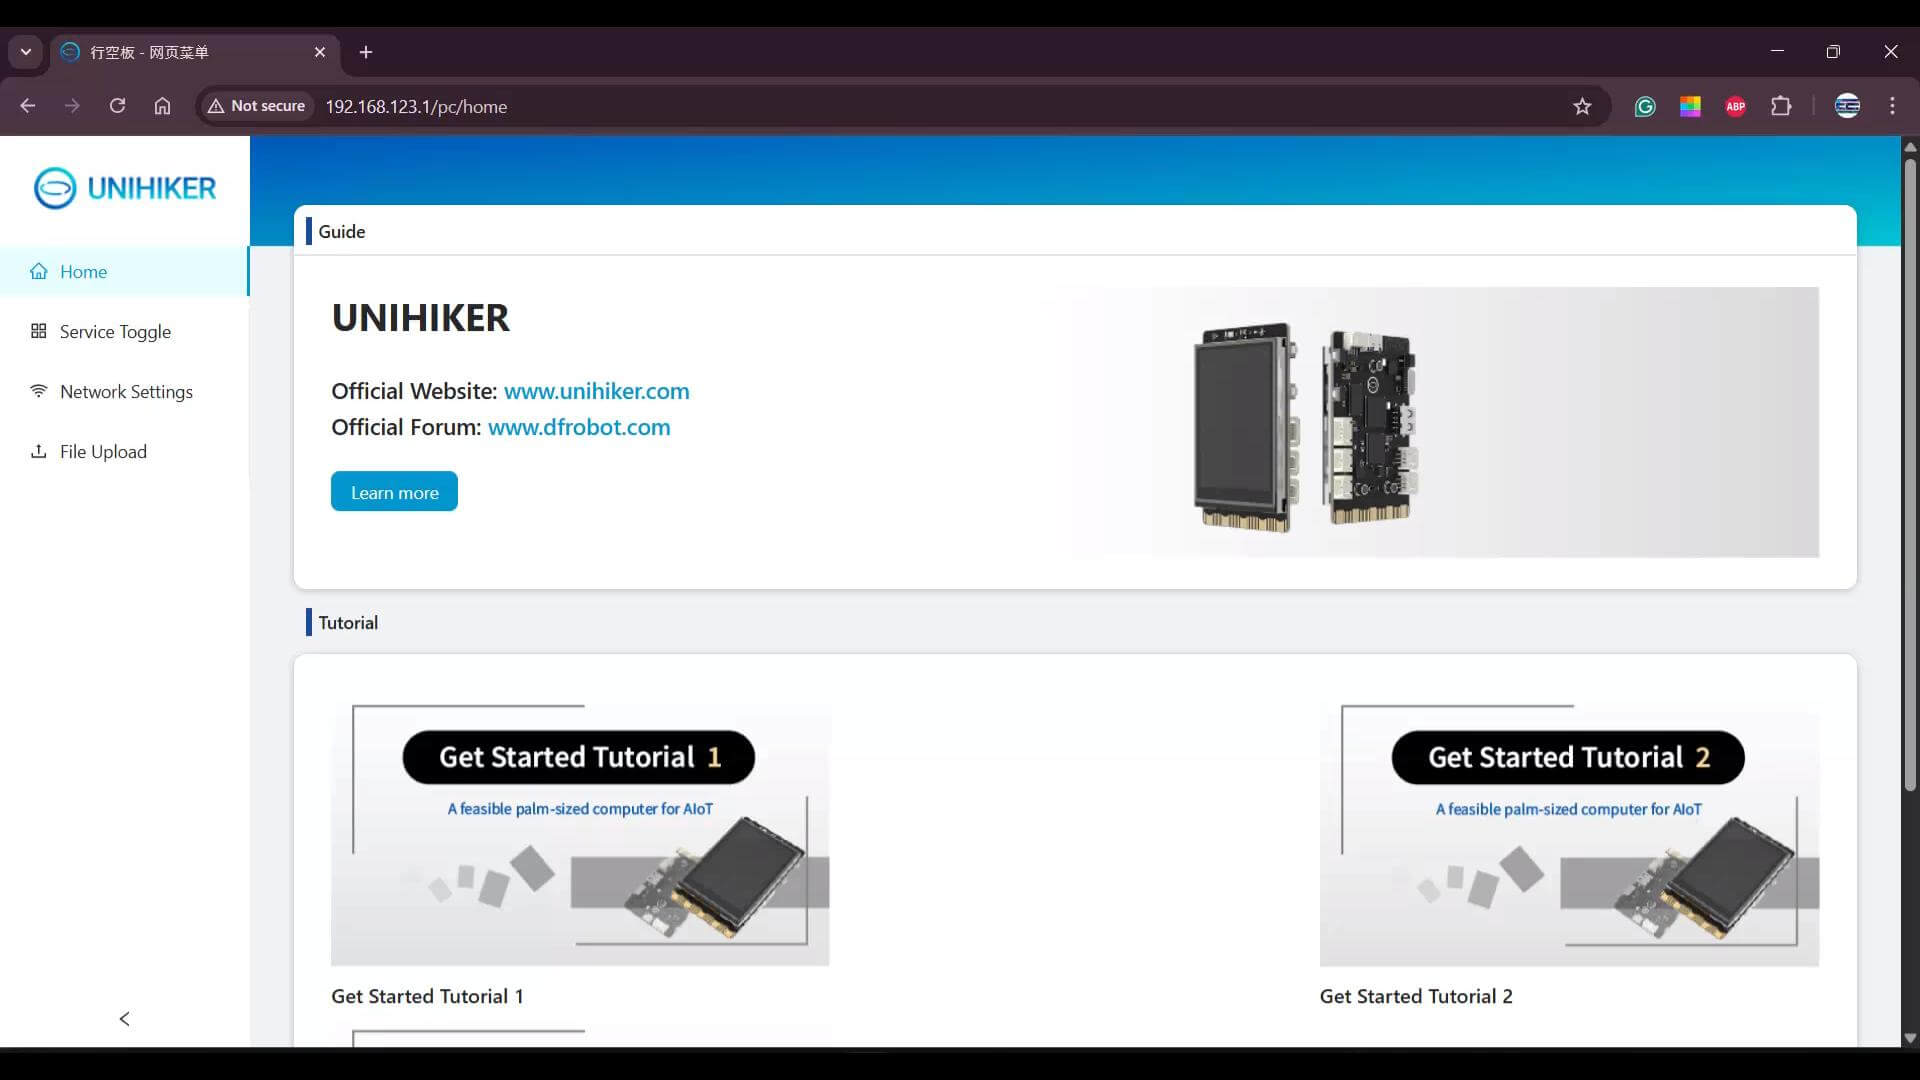
Here we can also see the Service Toggle option, where you can easily enable or disable SIoT and Jupyter. I am sure by now you already have a clear idea of how to connect the UniHiker through the USB-C port.
The cool thing is; you can also connect the UniHiker wirelessly to your laptop, tablet, or even your mobile phone. So, let’s first disconnect it from the laptop and power it up using a 5V 2A adapter.
Now, there is no physical connection between the UNIHIKER and my Laptop.
Now, go to the Home Menu on the UniHiker and tap on Hotspot.
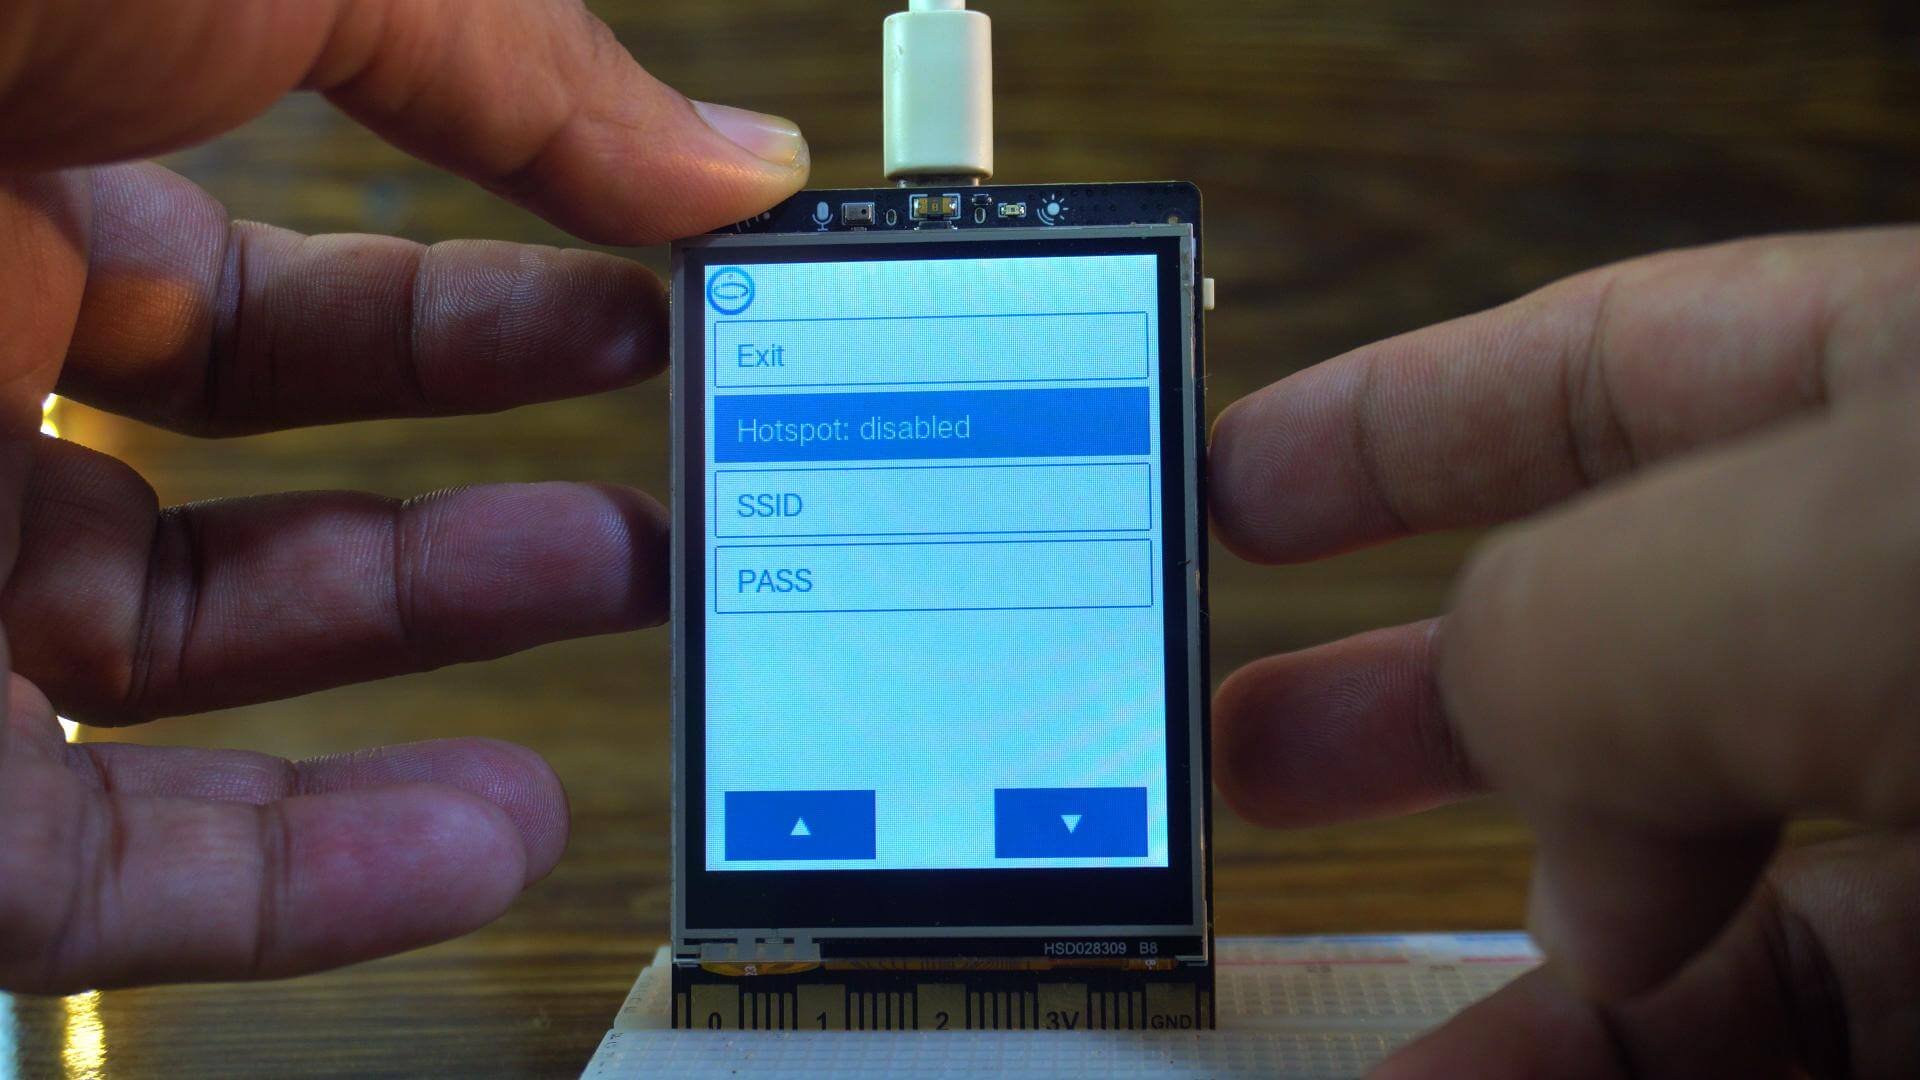
As you can see, the Hotspot is currently disabled; just tap it once to enable it. You will now see the SSID and password on the screen.
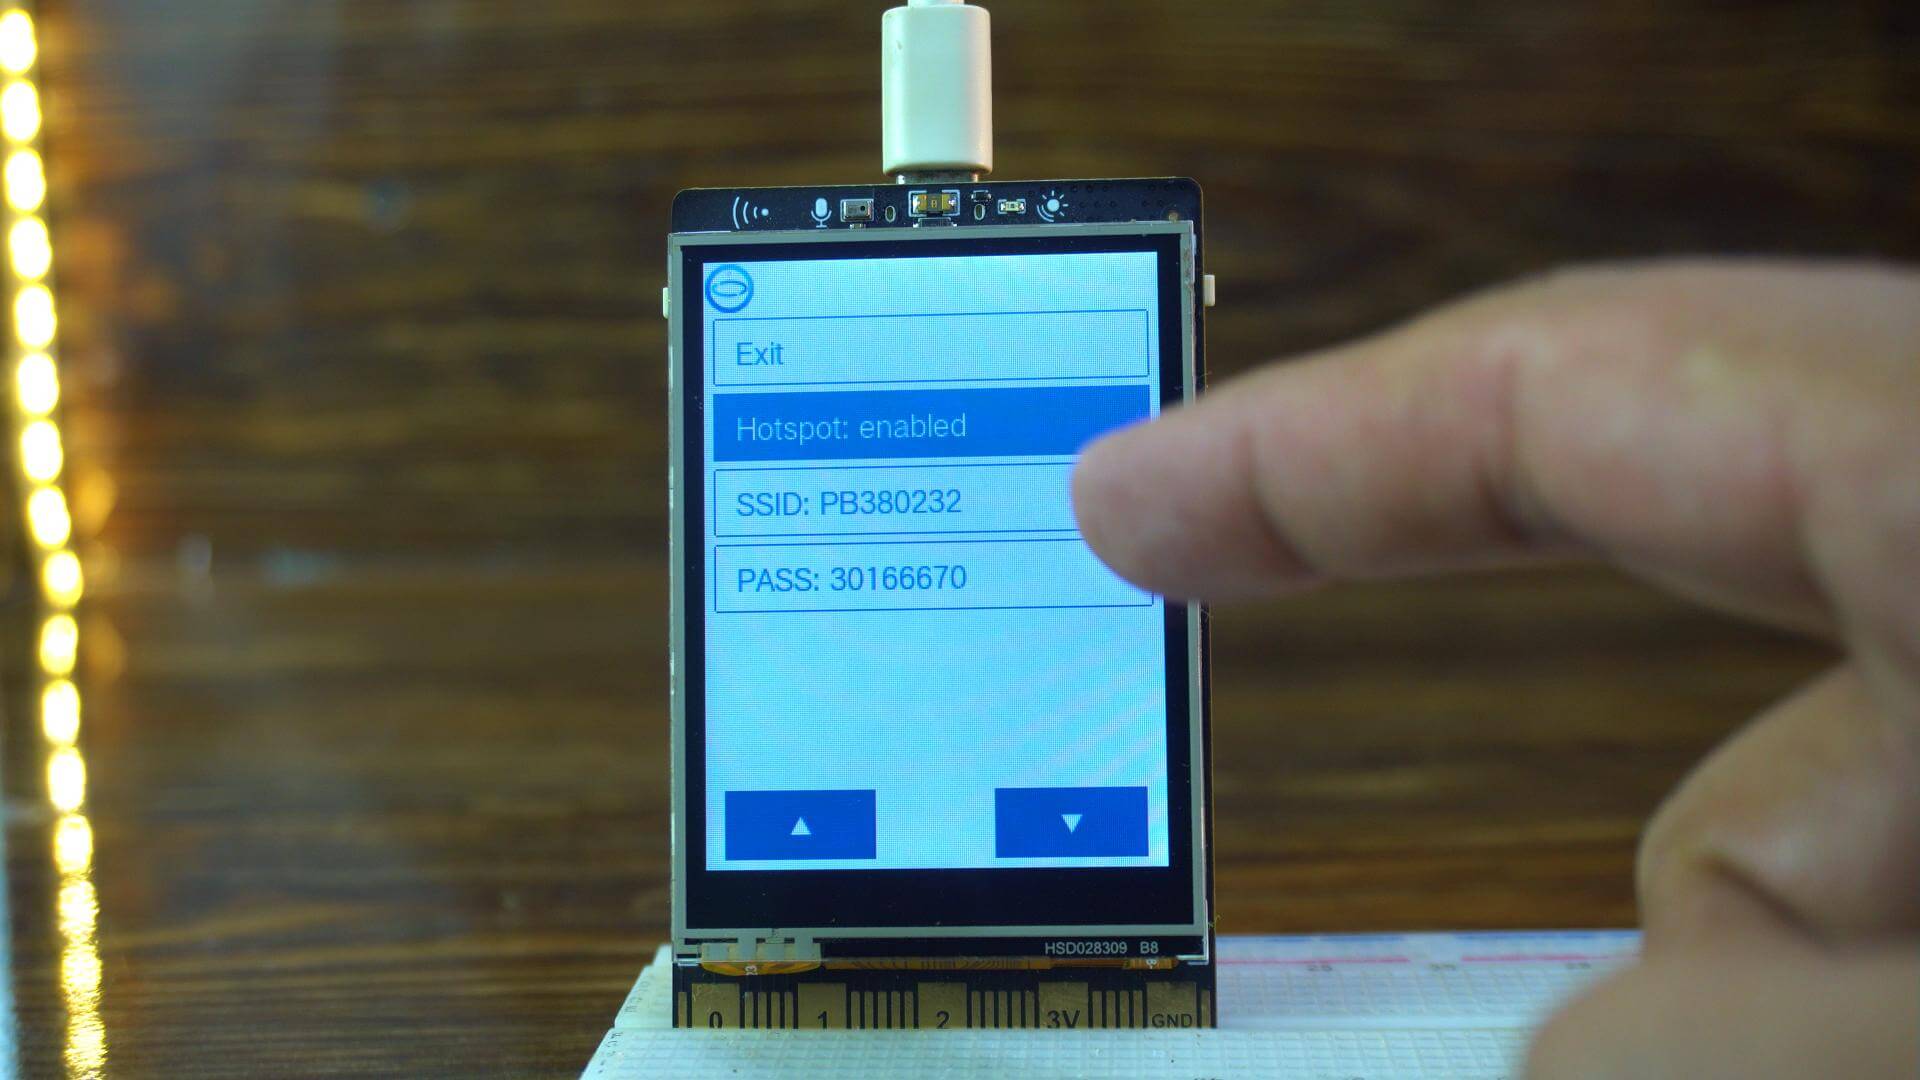
Simply connect your mobile or laptop to this hotspot.
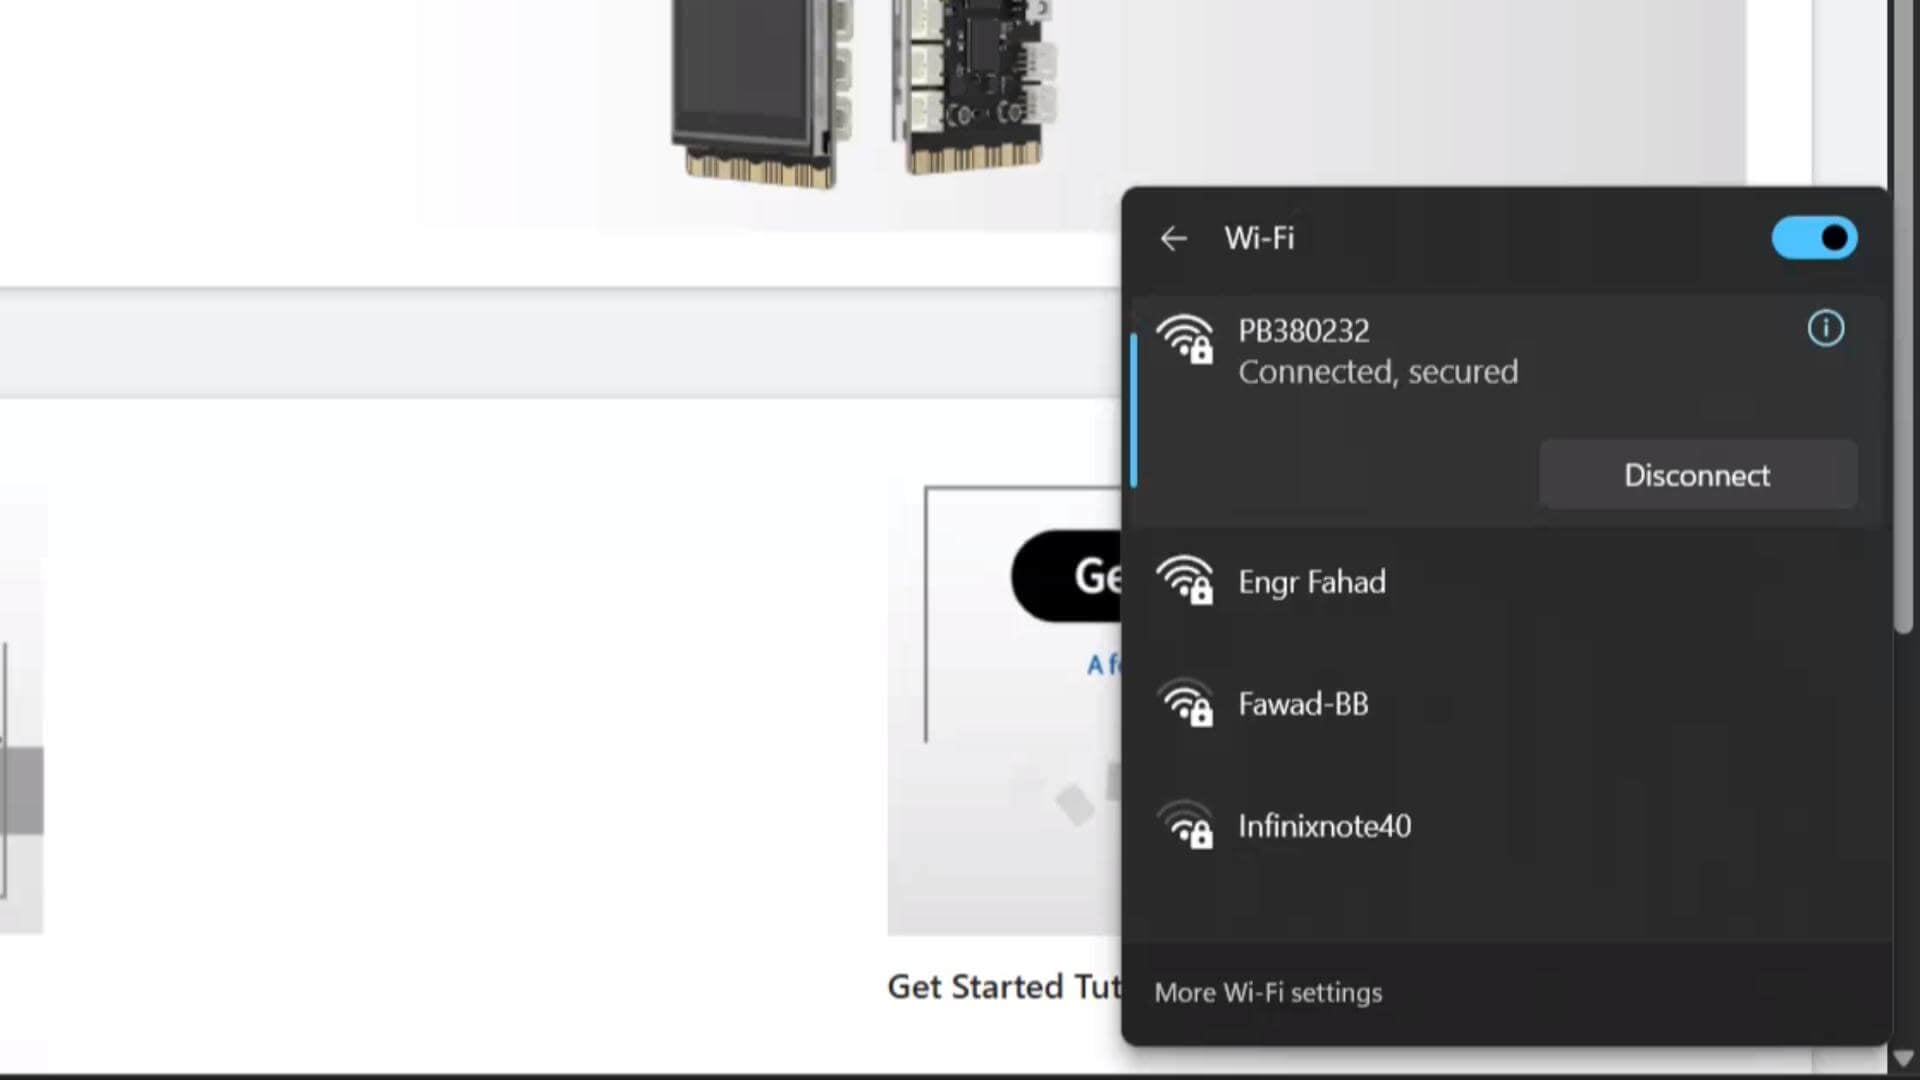
As you can see, my laptop is now successfully connected to the UniHiker’s hotspot.
Next, go back to the Home Menu and click on Network Info. Earlier, there was no IP address because the hotspot was disabled.
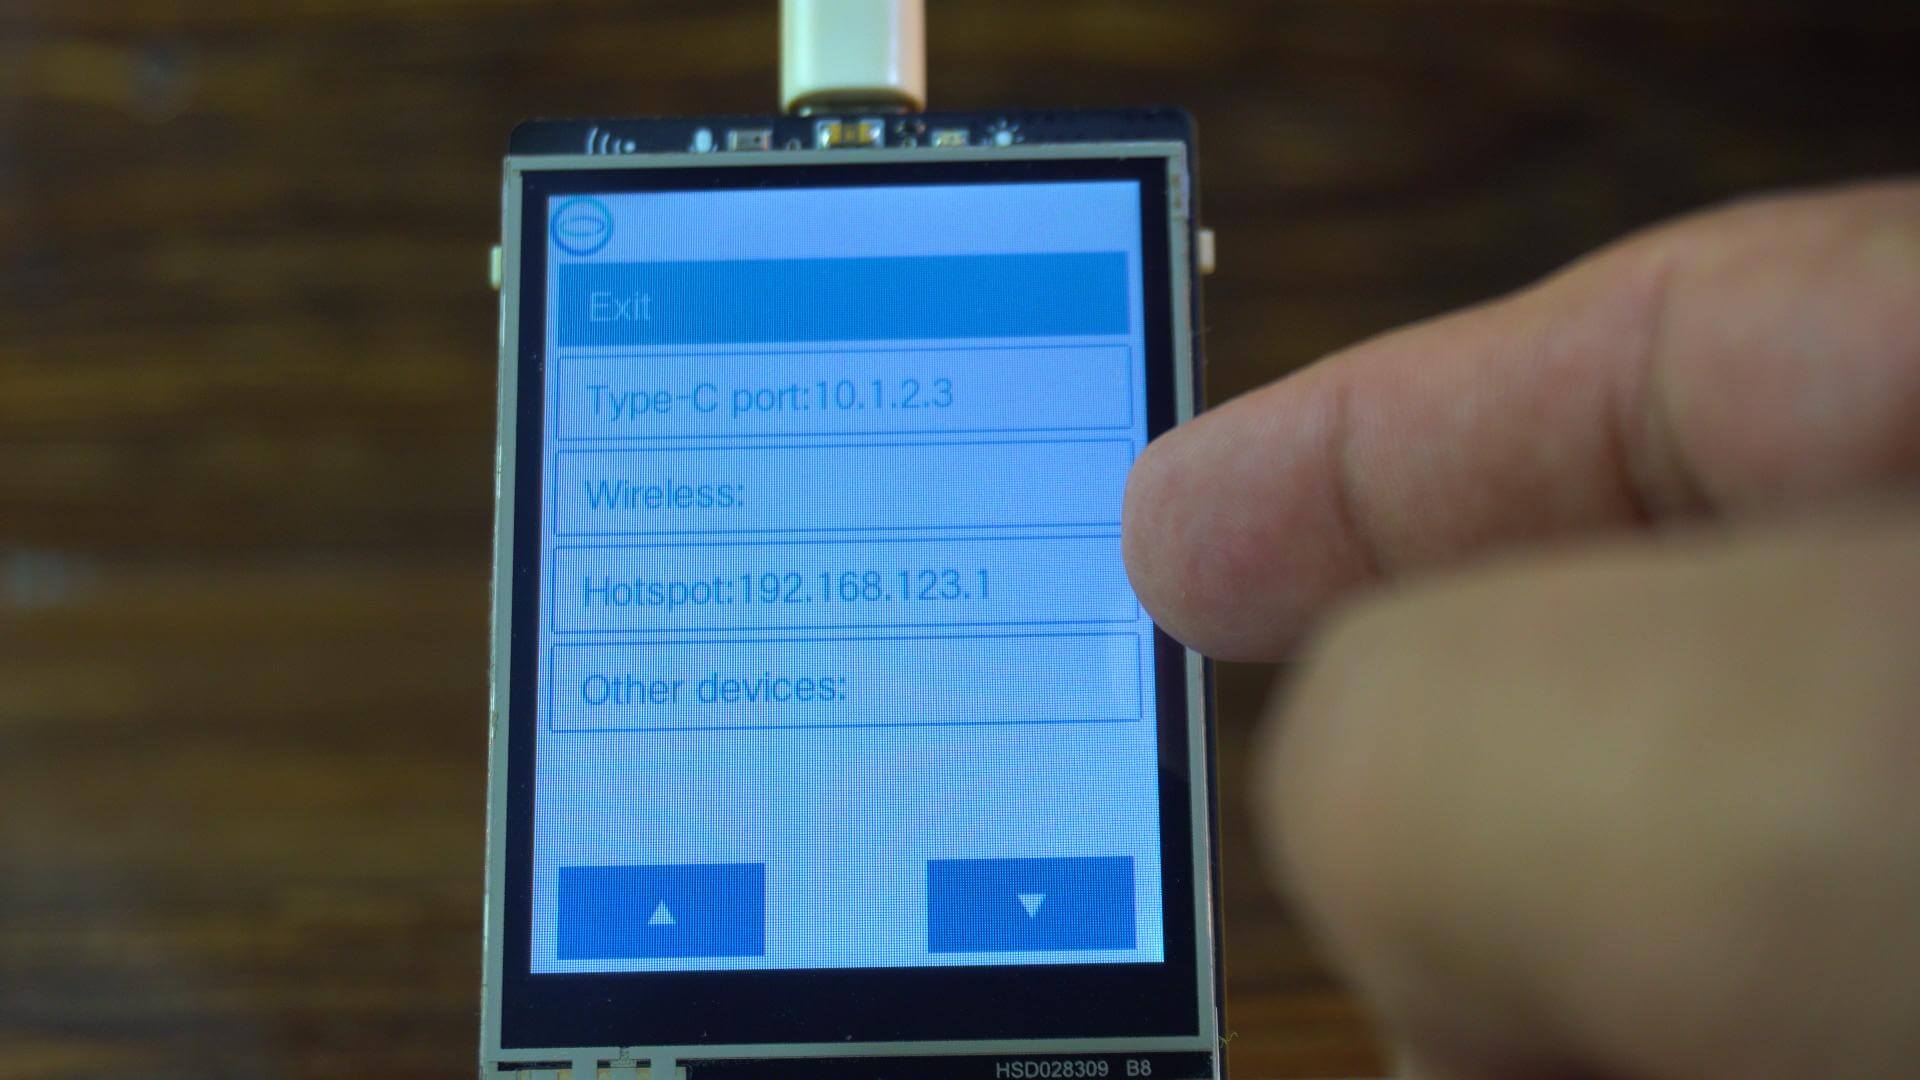
But now you will see one; just type this IP address into your web browser’s address bar and hit Enter, and the UniHiker home page will instantly open.
Whether you connect through the USB-C cable or wirelessly; it’s totally up to you. Now, all that’s left is to write and run some programs. I have already prepared a few examples for you; so let’s go ahead and try them one by one!
UniHiker Programming:
So, while you are on the UniHiker Home page, click on Service Toggle. Scroll down and make sure the Jupyter Status is enabled; you can start or stop it anytime using this button.
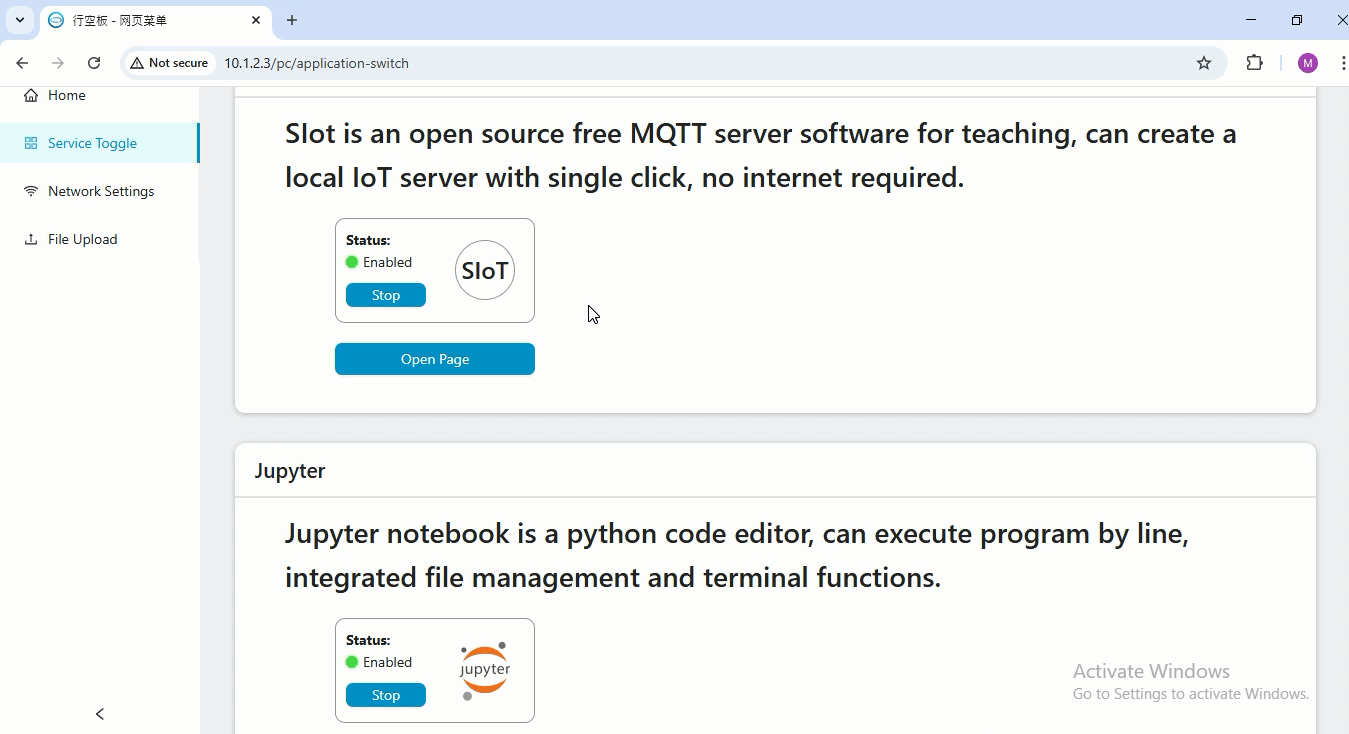
Once that’s done, click on the Open Page button.
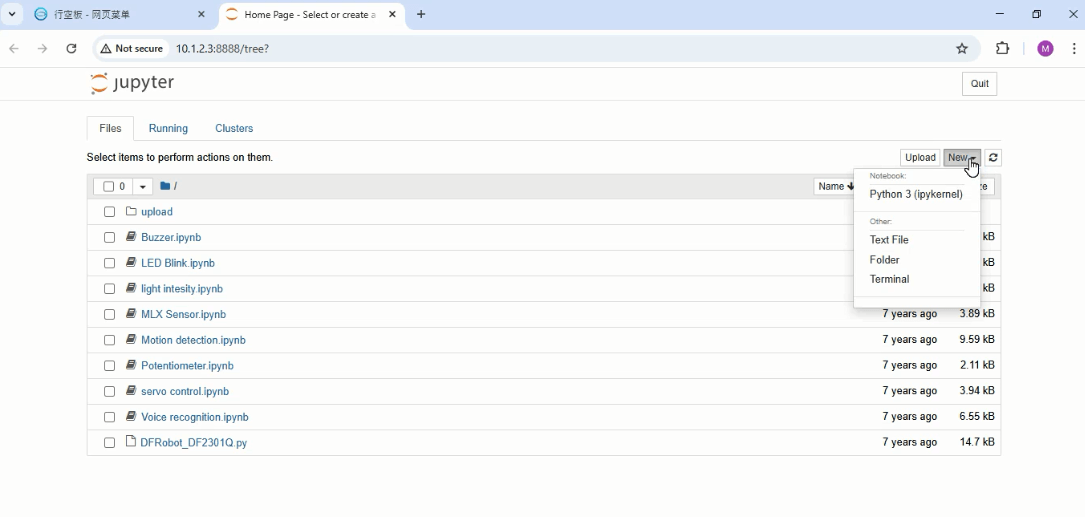
As you can see, these are some of the examples I have already prepared earlier. We will go through all of them one by one. But before that, let me show you something; if you already have Python files saved on your computer, you can easily upload them by clicking on the Upload button.
And if you want to start fresh and write your own code, just click on New and then select Python 3.
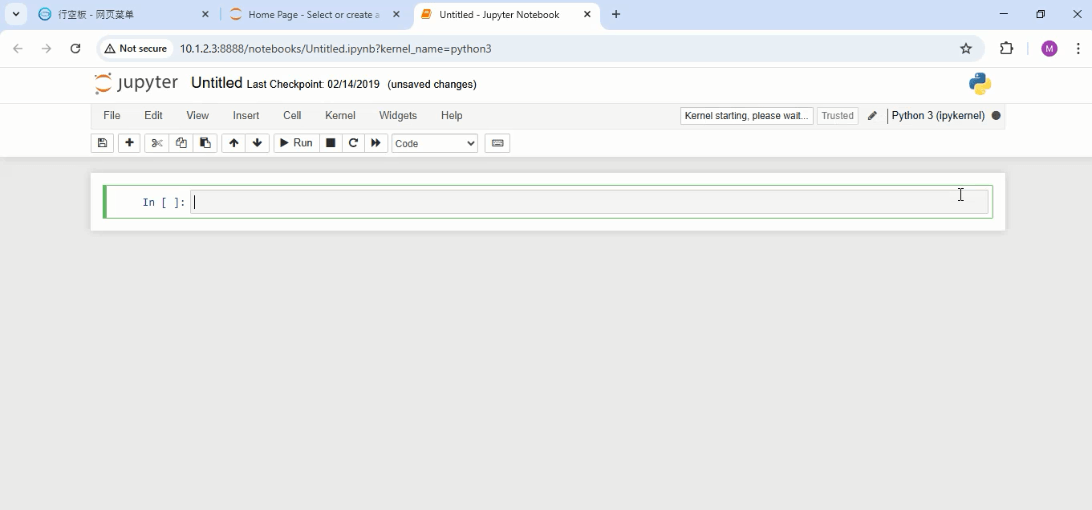
This will open up a clean workspace where you can enter the project name and begin coding right away.
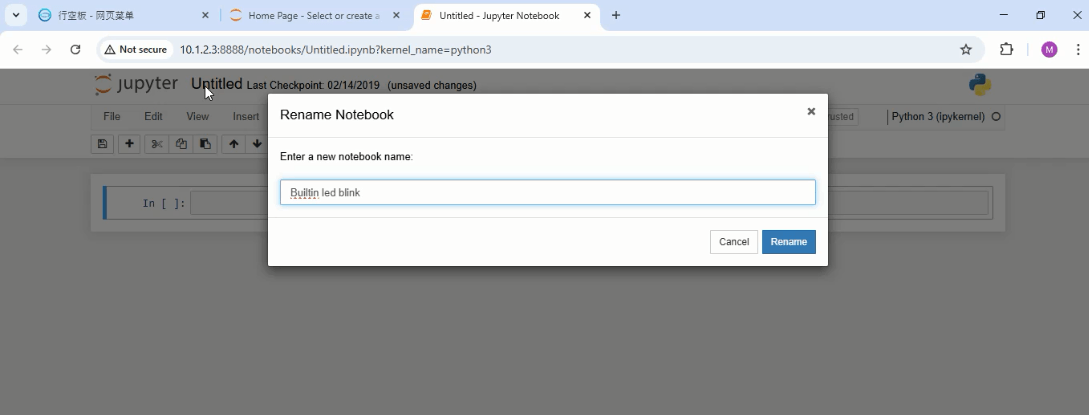
UniHiker Built-in LED Example:
|
1 2 3 4 5 6 7 8 9 10 11 12 13 14 15 16 17 18 |
# -*- coding: UTF-8 -*- import time from pinpong.board import Board, Pin Board().begin() # Initialize the UNIHIKER led = Pin(Pin.P25, Pin.OUT) # Set Pin P25 as an output pin for the LED while True: # led.value(1) # The second method led.write_digital(1) # Turn on the LED by setting the pin value to high print("The LED light is on") # Display a message indicating that the LED light is on time.sleep(1) # Pause the program for 1 second # led.value(0) # The second method led.write_digital(0) # Turn off the LED by setting the pin value to low print("The LED light is off") # Display a message indicating that the LED light is off time.sleep(1) # Pause the program for 1 second |
Copy the above program and paste it into your editor.
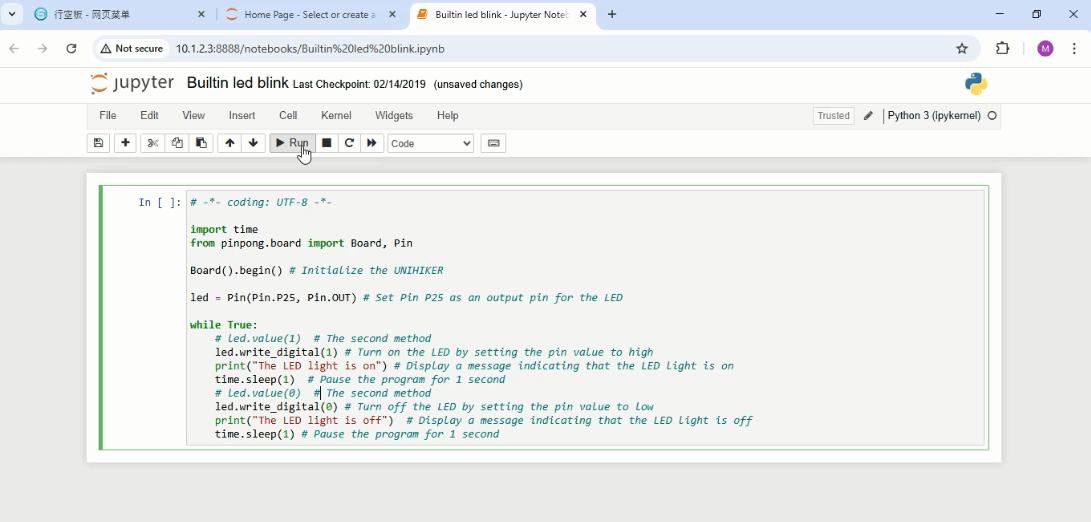
Then simply click on the Run button; and instantly, you can see the messages ‘The LED light is on’ and ‘The LED light is off’.
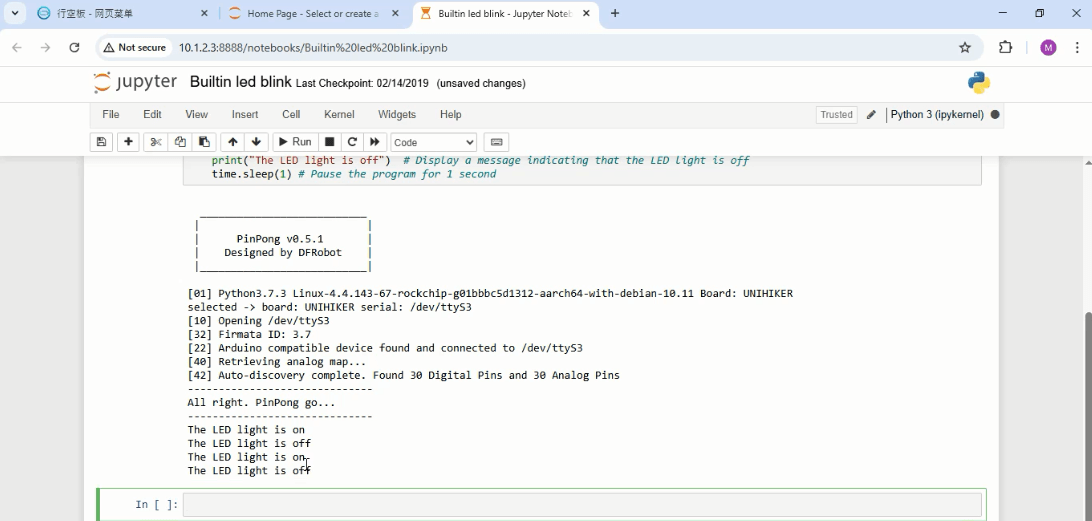
While the onboard Blue LED turns ON and OFF in real time.
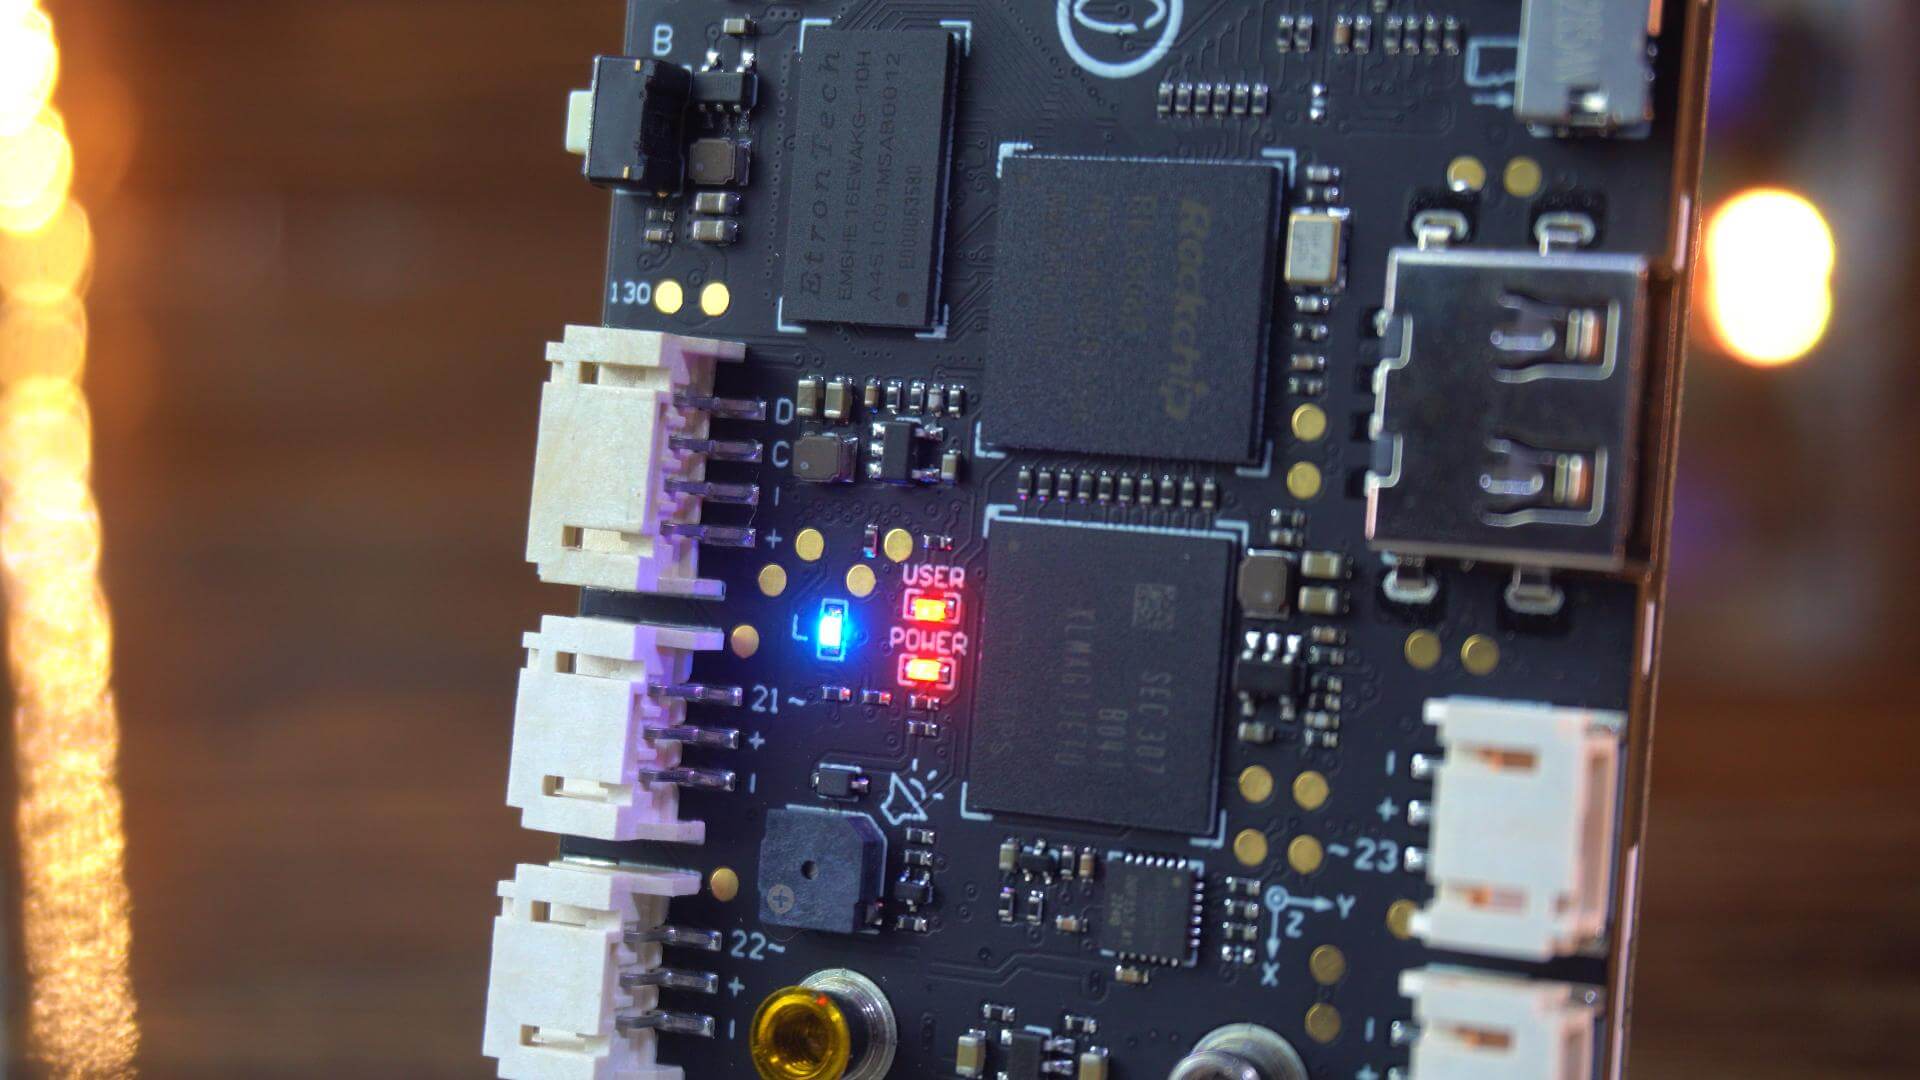
Honestly, I am speechless; this interface is incredibly user-friendly. It’s running straight out of the box without any effort at all!
UniHiker Buzzer Example:
Alright, now let’s play the Happy Birthday tone! But if you look at the code here, you’ll notice there are many other built-in tones as well. You can try any of them just by changing the name inside the code.
You can even loop it, change the tempo, or redirect the buzzer to a different pin if you want. Pretty cool for such a tiny board!
|
1 2 3 4 5 6 7 8 9 10 11 12 13 14 15 16 17 18 19 20 21 |
# -*- coding: utf-8 -*- import time from pinpong.board import Board, Pin from pinpong.extension.unihiker import * Board().begin() # Initialize the UNIHIKER # Music: DADADADUM ENTERTAINER PRELUDE ODE NYAN RINGTONE FUNK BLUES BIRTHDAY WEDDING FUNERAL PUNCHLINE # Music: BADDY CHASE BA_DING WAWAWAWAA JUMP_UP JUMP_DOWN POWER_UP POWER_DOWN # Play mode: Once (play once) Forever (play continuously) OnceInBackground (play once in the background) ForeverInBackground (play continuously in the background) buzzer.play(buzzer.BIRTHDAY, buzzer.Once) # Play music once # buzzer.set_tempo(4, 60) # Set the number of notes per beat and the beats per minute buzzer.pitch(494, 4) # Play a pitch/note # buzzer.pitch(494) # Play a pitch/note in the background # time.sleep(10) # buzzer.stop() # Stop playing in the background # buzzer.redirect(Pin.P0) # Redirect the buzzer to a specific pin, only supports PWM pins # buzzer.play(buzzer.ENTERTAINER, buzzer.ForeverInBackground) # Play music continuously in the background while True: time.sleep(1) # Wait for 1 second to maintain the state |
UniHiker Light Sensor Example:
Now, let’s run the Light Intensity example. But wait; this time, why not run it directly on the board itself? All these example programs are already saved inside.
So, tap on Run Programs > then open root > Use the buttons on the right side of the screen to scroll through the list of examples.
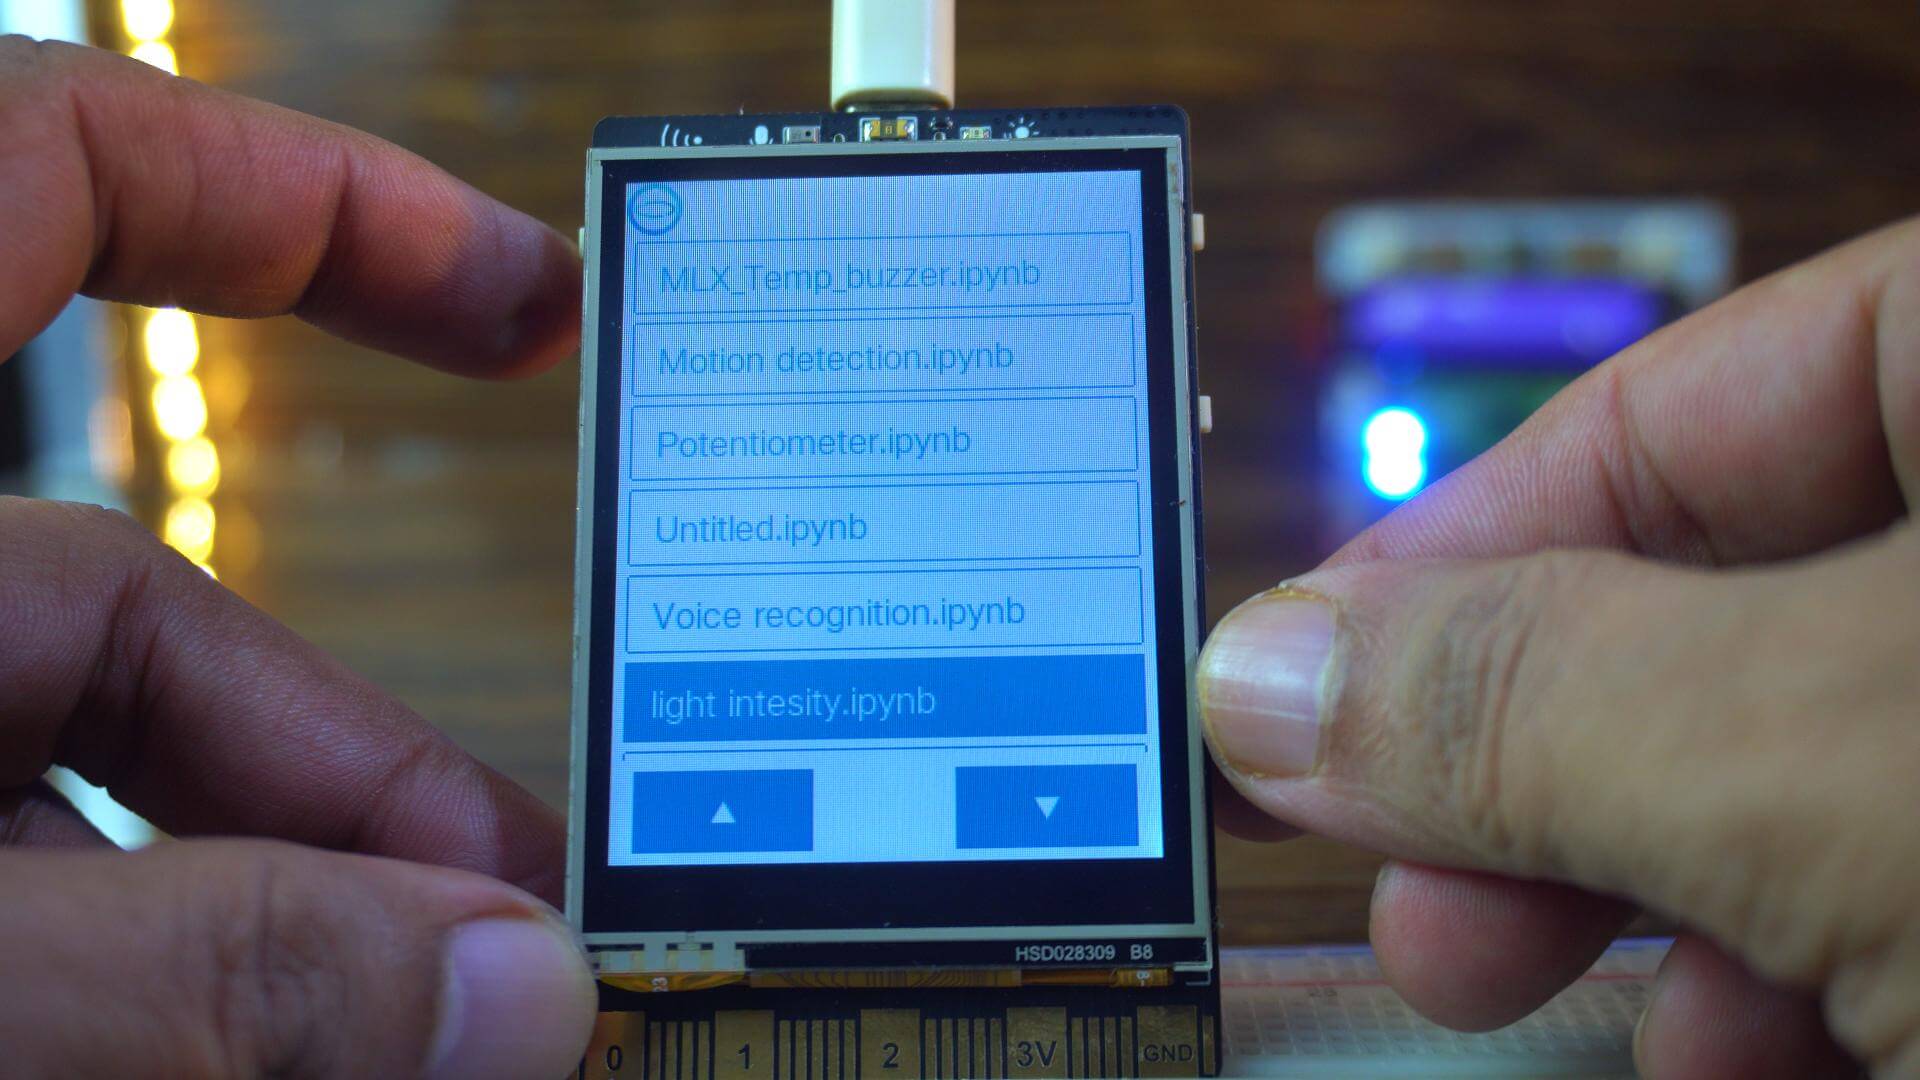
Once you find the Light Intensity code, simply tap the screen or press the Home button to run it.
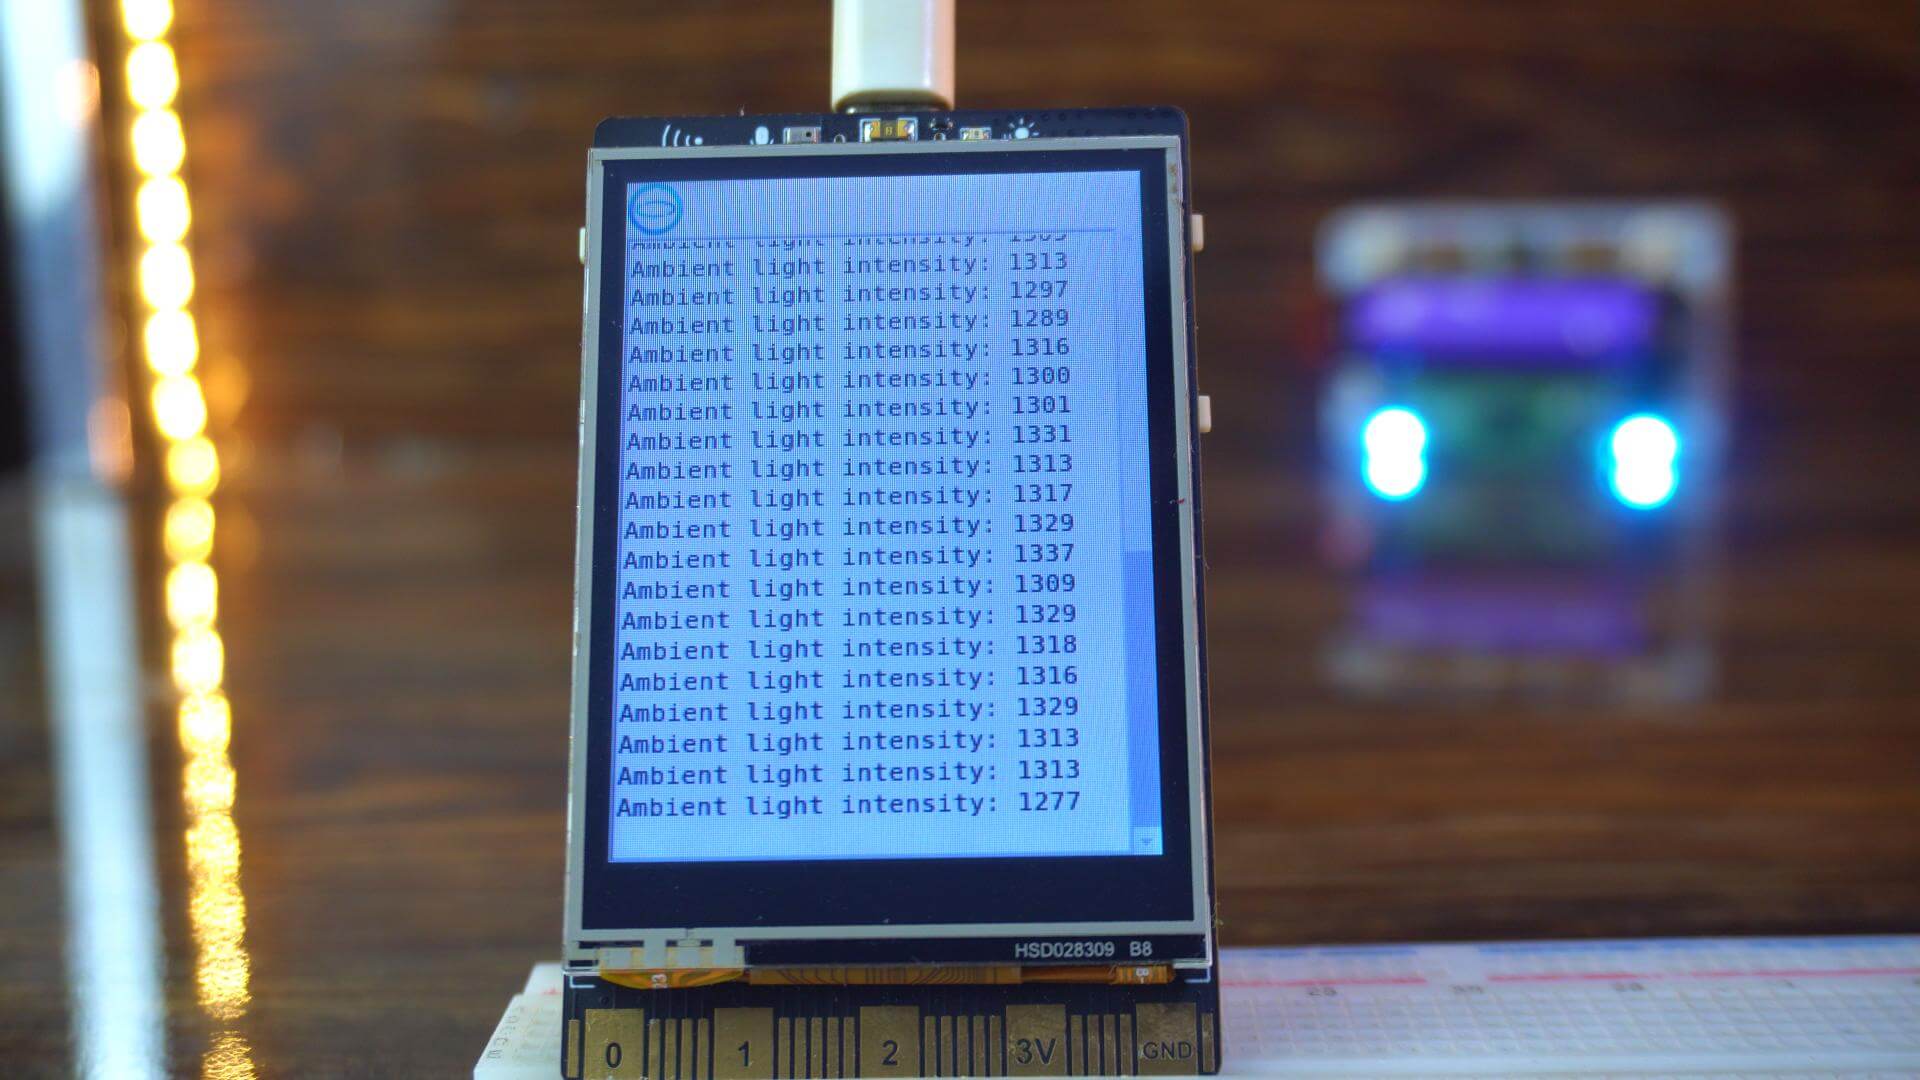
And just like that, I can now monitor the light intensity in my room in real time; this is absolutely mind-blowing! The best part is, you can store hundreds of projects right on the UniHiker and run any of them anytime; no laptop, no browser, completely standalone!
MLX90614 Infrared Temperature Sensor with UniHiker:
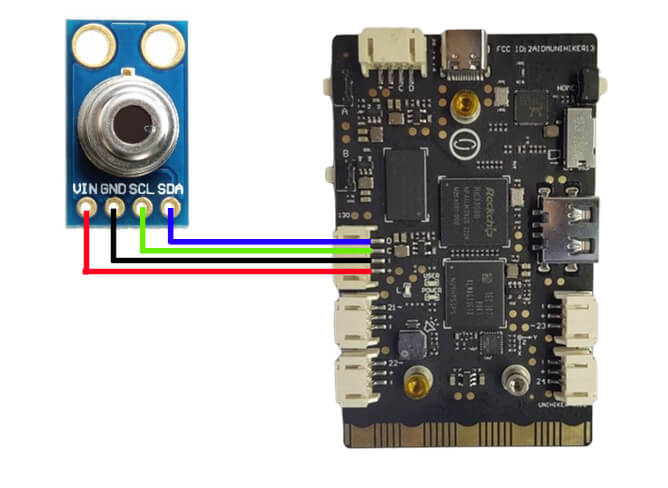
Now; let’s run the MLX90614 non-contact infrared temperature Sensor example; but for this first we will have to connect the MLX90614 non-contact infrared temperature sensor.
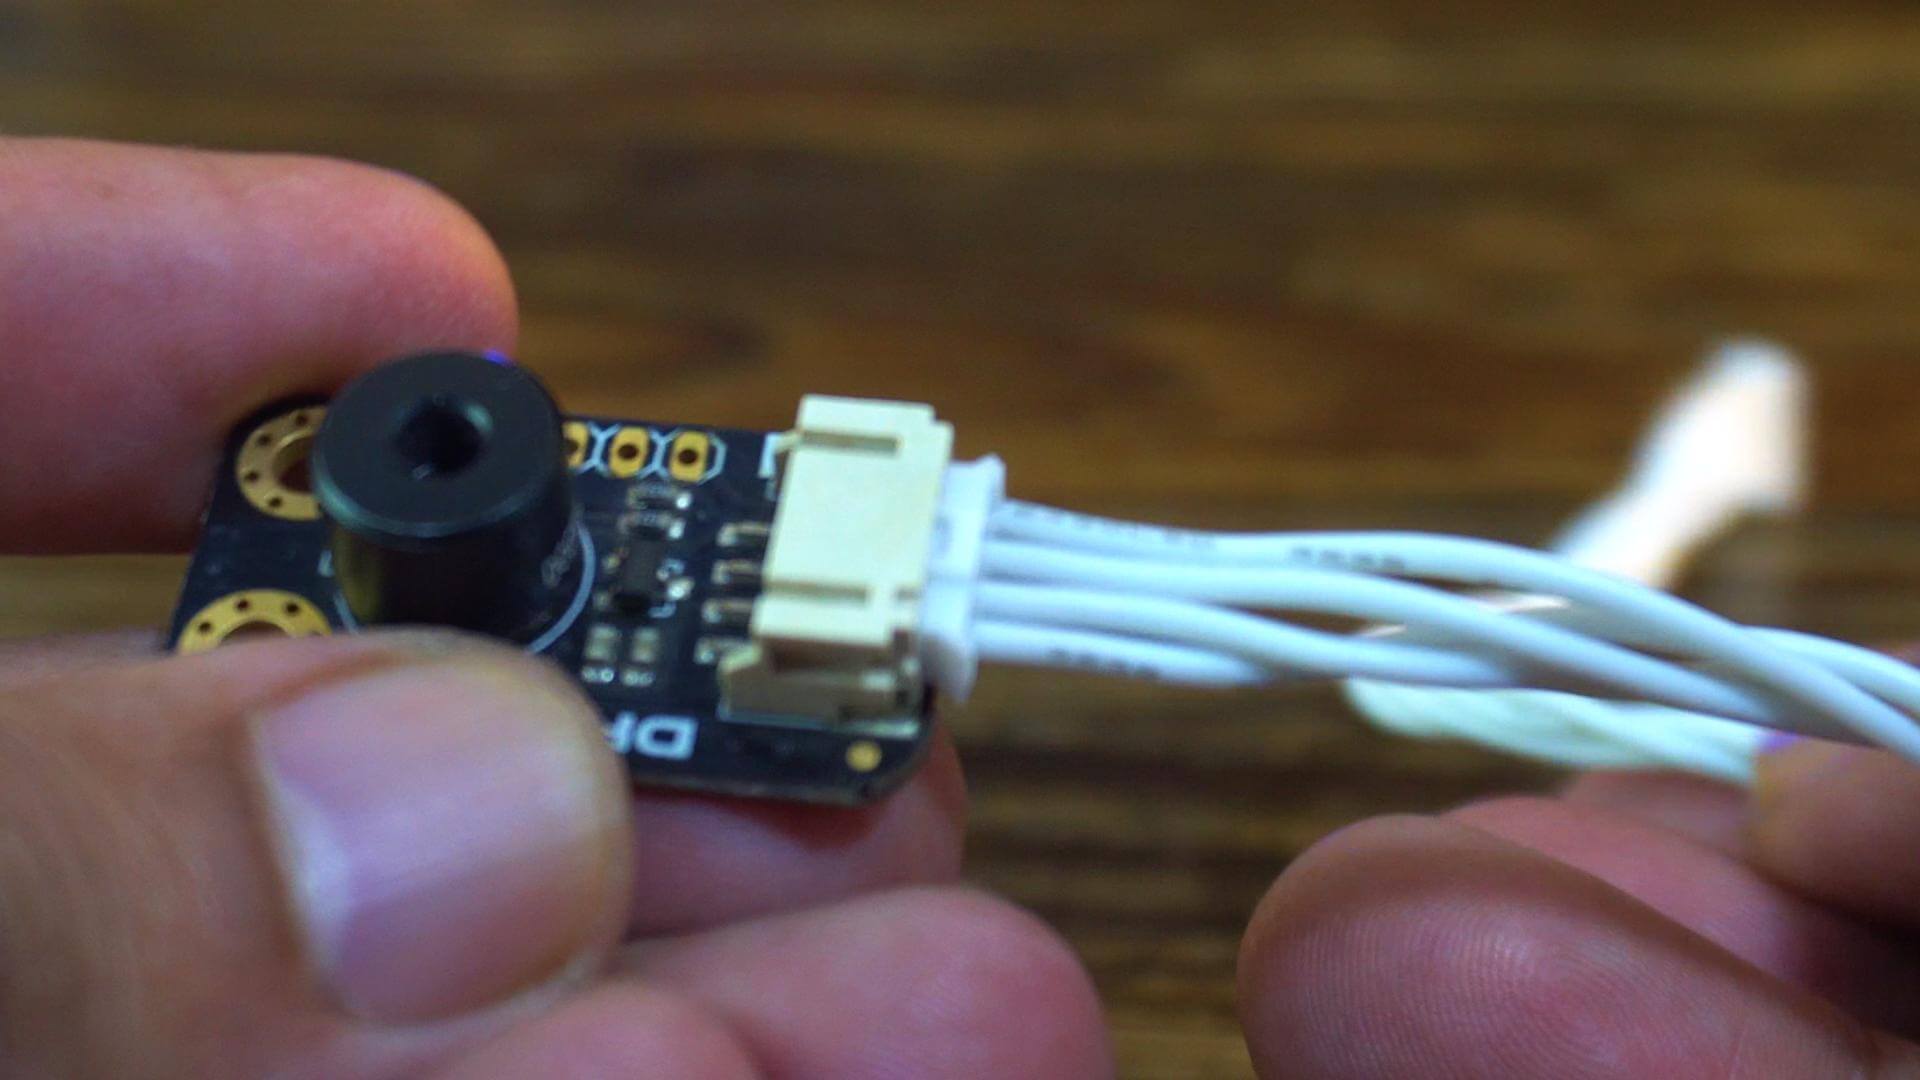
I am going to use the Double Sided PH2.0-4P white silicone wires; If you want; you can also use jumper wires.
You can follow this circuit diagram.
|
1 2 3 4 5 6 7 8 9 10 11 12 13 14 15 16 17 18 19 20 21 22 23 24 25 26 27 28 29 30 31 32 |
# -*- coding: utf-8 -*- # MLX90614 Temperature Monitor for UniHiker # Displays ambient and object temperatures in °C and °F import time from pinpong.board import Board, I2C from pinpong.libs.dfrobot_mlx90614 import MLX90614 # Import the mlx90614 library from libs from pinpong.extension.unihiker import * from unihiker import GUI # Import unihiker library # Initialize UniHiker board Board("UNIHIKER").begin() gui=GUI() irt = MLX90614() txt1=gui.draw_text(text="Temperature Monitoring",x=120,y=45,w = 240,origin='center',font_size=17,color="#0000FF") txt2=gui.draw_text(text="Celsius:",x=10,y=130,font_size=14,color="#0000FF") txt3=gui.draw_text(text="Farhenhite:",x=10,y=160,font_size=14,color="#0000FF") txt4=gui.draw_text(text="℃",x=185,y=130,font_size=14,color="#0000FF") txt5=gui.draw_text(text="F",x=185,y=160,font_size=14,color="#0000FF") value1 = gui.draw_text(x=135, y=130, text='25', font_size=14) # Display temperature value value2 = gui.draw_text(x=135, y=160, text='25', font_size=14) # Display humidity value while True: print("Object %s *C"% irt.obj_temp_c()) # Read the object temperature in Celsius (℃) print("Object %s *F"% irt.obj_temp_f()) # Read the object temperature in Fahrenheit (℉) print("Ambient %s *C"% irt.env_temp_c()) # Read the ambient temperature in Celsius (℃) print("Ambient %s *F"% irt.env_temp_f()) # Read the ambient temperature in Fahrenheit (℉) value1.config(text = irt.obj_temp_c()) # Update display temperature value value2.config(text = irt.obj_temp_f()) print() # Empty line time.sleep(1) |
Now, let’s run this example.
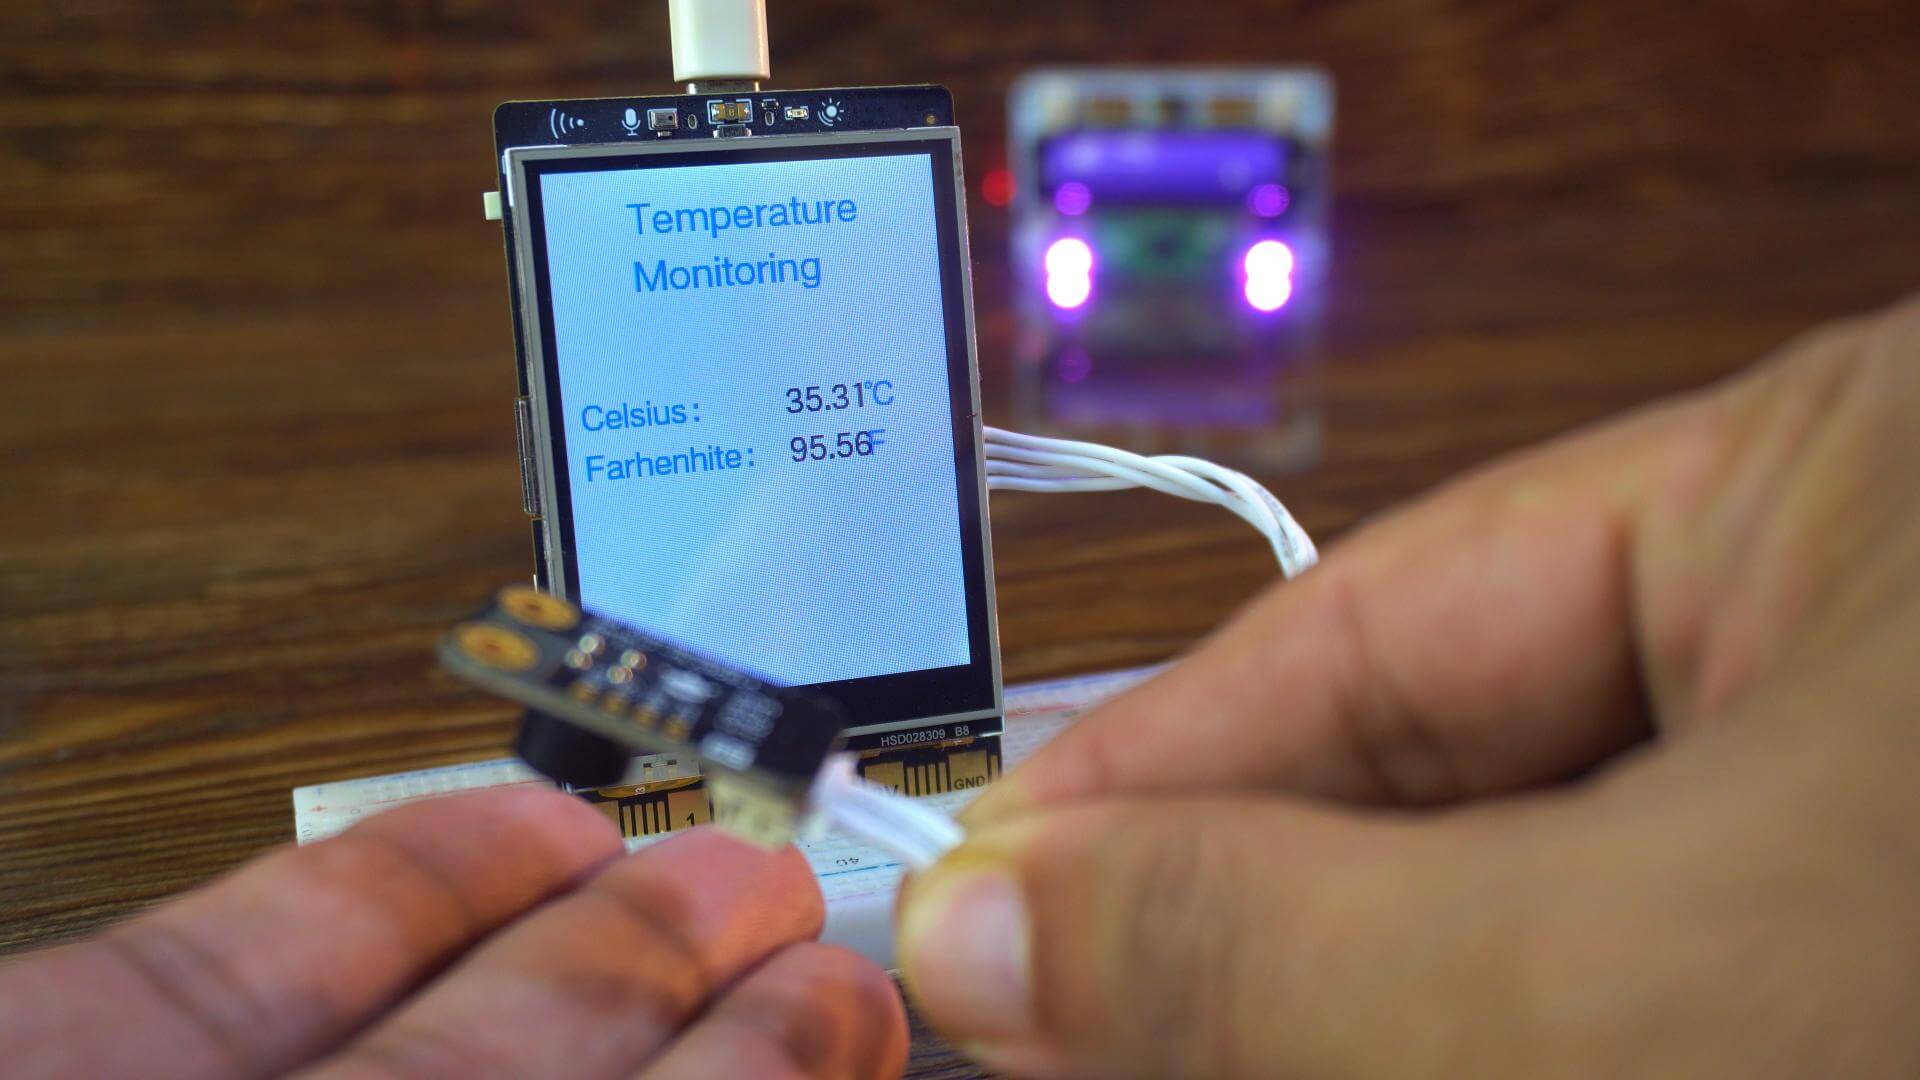
Oh my God! Now I can monitor the temperature in both Celsius and Fahrenheit without even making any physical contact. And look at this; it’s insanely fast and super responsive!
|
1 2 3 4 5 6 7 8 9 10 11 12 13 14 15 16 17 18 19 20 21 22 23 24 25 26 27 28 29 30 31 32 33 34 35 36 37 38 39 40 41 42 43 44 45 46 47 48 49 50 |
# -*- coding: utf-8 -*- # MLX90614 Temperature Monitor for UniHiker # Displays ambient and object temperatures in °C and °F # Plays buzzer tone when temperature > 40°C import time from pinpong.board import Board, I2C, Pin from pinpong.libs.dfrobot_mlx90614 import MLX90614 # Import the mlx90614 library from pinpong.extension.unihiker import * # Import UniHiker extensions from unihiker import GUI # Import GUI library # Initialize UniHiker board Board("UNIHIKER").begin() gui = GUI() irt = MLX90614() # GUI text setup txt1 = gui.draw_text(text="Temperature Monitoring", x=120, y=45, w=240, origin='center', font_size=17, color="#0000FF") txt2 = gui.draw_text(text="Celsius:", x=10, y=130, font_size=14, color="#0000FF") txt3 = gui.draw_text(text="Fahrenheit:", x=10, y=160, font_size=14, color="#0000FF") txt4 = gui.draw_text(text="℃", x=185, y=130, font_size=14, color="#0000FF") txt5 = gui.draw_text(text="F", x=185, y=160, font_size=14, color="#0000FF") value1 = gui.draw_text(x=135, y=130, text='25', font_size=14) value2 = gui.draw_text(x=135, y=160, text='25', font_size=14) # Main loop while True: temp_c = irt.obj_temp_c() # Read object temperature in Celsius temp_f = irt.obj_temp_f() # Read object temperature in Fahrenheit # Print values to console print("Object: {:.2f}°C".format(temp_c)) print("Object: {:.2f}°F".format(temp_f)) print("Ambient: {:.2f}°C".format(irt.env_temp_c())) print("Ambient: {:.2f}°F".format(irt.env_temp_f())) print() # Update on-screen values value1.config(text="{:.2f}".format(temp_c)) value2.config(text="{:.2f}".format(temp_f)) # Buzzer logic: play tone when temp > 40°C if temp_c > 40: buzzer.play(buzzer.BIRTHDAY, buzzer.Once) buzzer.pitch(494, 4) print("⚠️ High Temperature! Buzzer ON") else: buzzer.stop() time.sleep(1) |
I have this other version which automatically plays the Birthday tone when the temperature rises above 40°C.
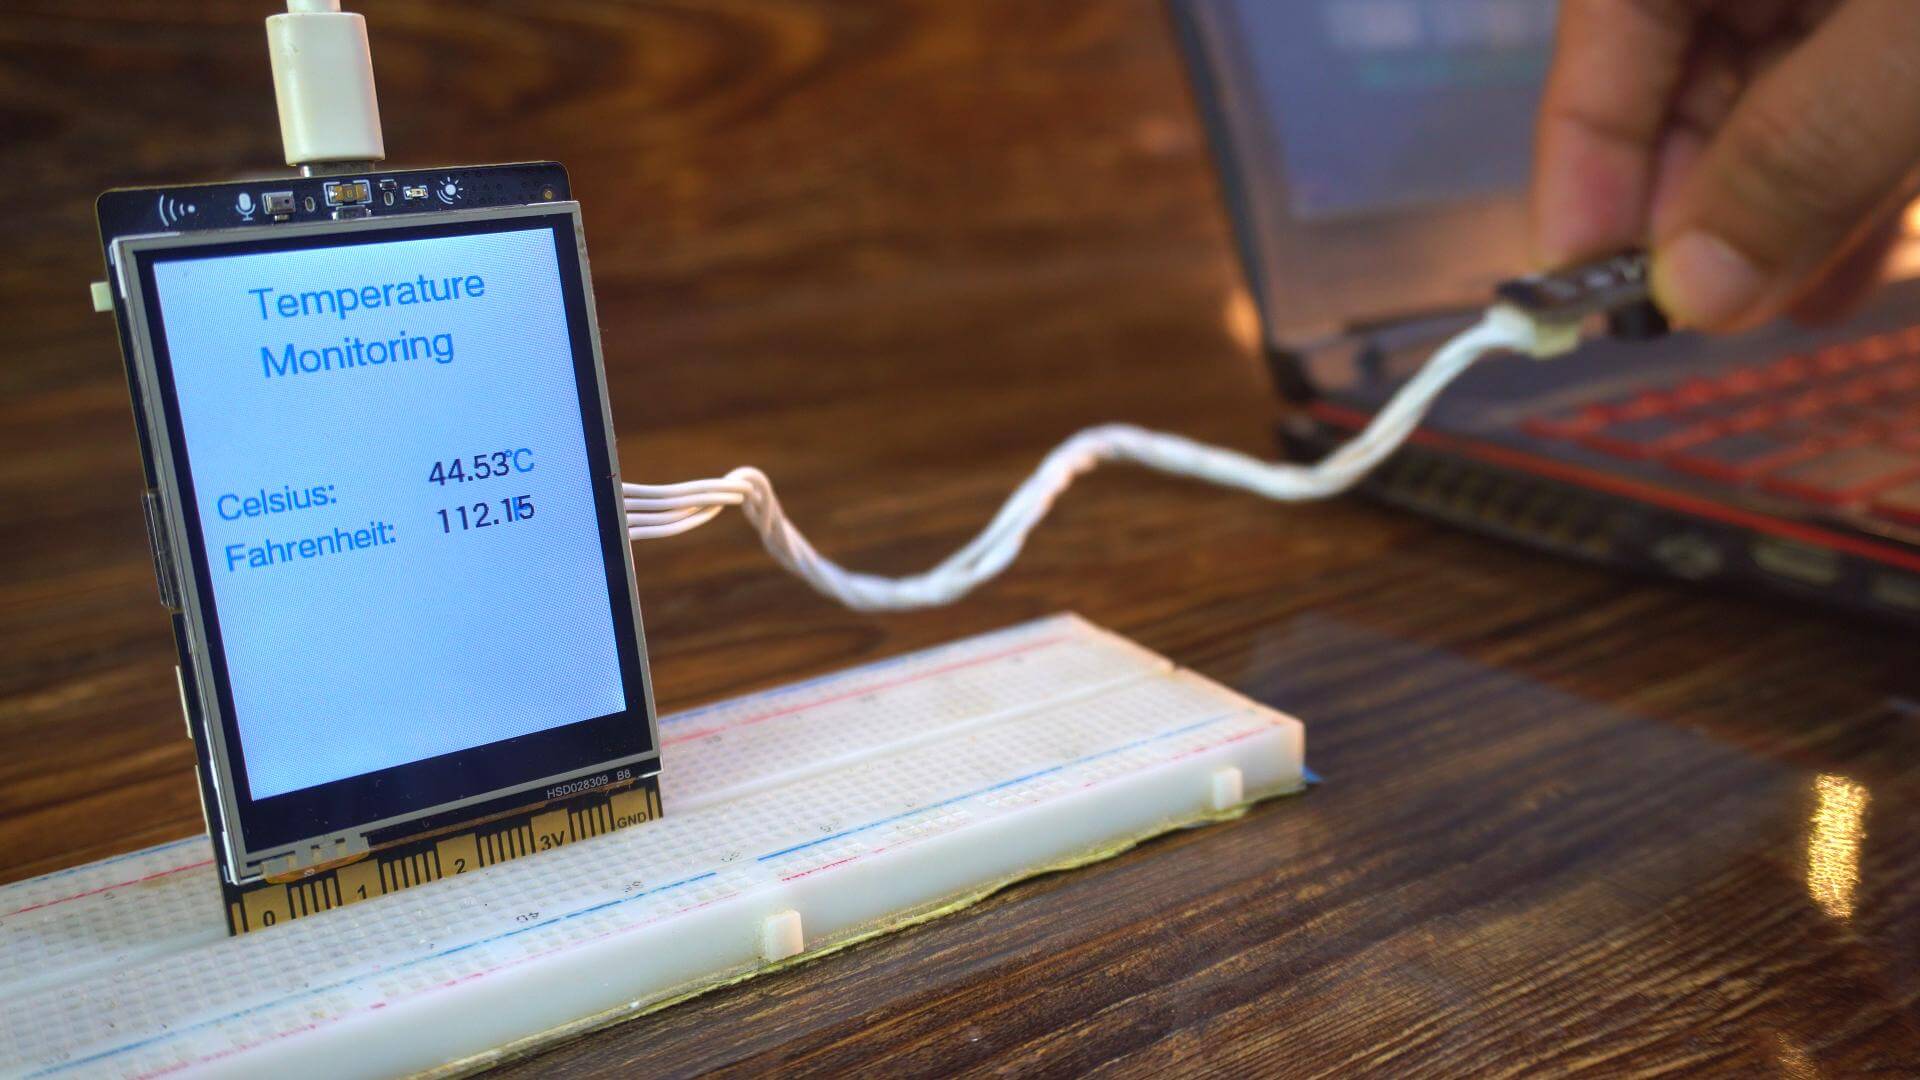
Download original source code from my Patreon page.
Potentiometer with UniHiker:
In this next example, I am going to show you how to read an analog sensor. Right now, I am using a potentiometer as the sensor; but you can use any other analog sensor in the same way.
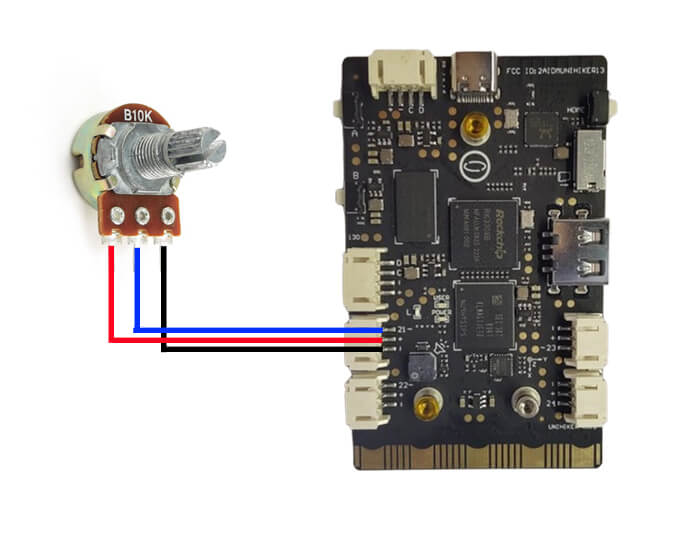
You can follow this circuit diagram for the wiring.
|
1 2 3 4 5 6 7 8 9 10 11 12 13 14 15 16 17 18 19 20 21 22 |
# -*- coding: UTF-8 -*- # Experiment Effect: Print the analog value of the UNIHIKER P21 pin # Wiring: Connect a potentiometer module to the UNIHIKER P21 pin import time from pinpong.extension.unihiker import * from unihiker import GUI # Import unihiker library from pinpong.board import Board,Pin Board().begin() # Initialize the UNIHIKER # ADC analog input pins supported: P0 P1 P2 P3 P4 P10 P21 P22 # adc21 = ADC(Pin(Pin.P21)) # Use Pin object with ADC to enable analog input - Method 1 adc21 = Pin(Pin.P21, Pin.ANALOG) # Initialize the pin as an analog input - Method 2 gui = GUI() gui.draw_text(text="POT VALUE",x=120,y=50,font_size=20, color="#0000FF", origin="center") potvalue = gui.draw_text(text="",x=120,y=170,font_size=55, color="#0000FF", origin="center") while True: # v = adc21.read() # Read the analog signal value from pin A0 - Method 1 v = adc21.read_analog() # Read the analog signal value from pin A0 - Method 2 print("P21 =", v) potvalue.config(text=v) time.sleep(0.5) # Wait for 0.5 seconds |
Now, let’s go ahead and run the Potentiometer example.
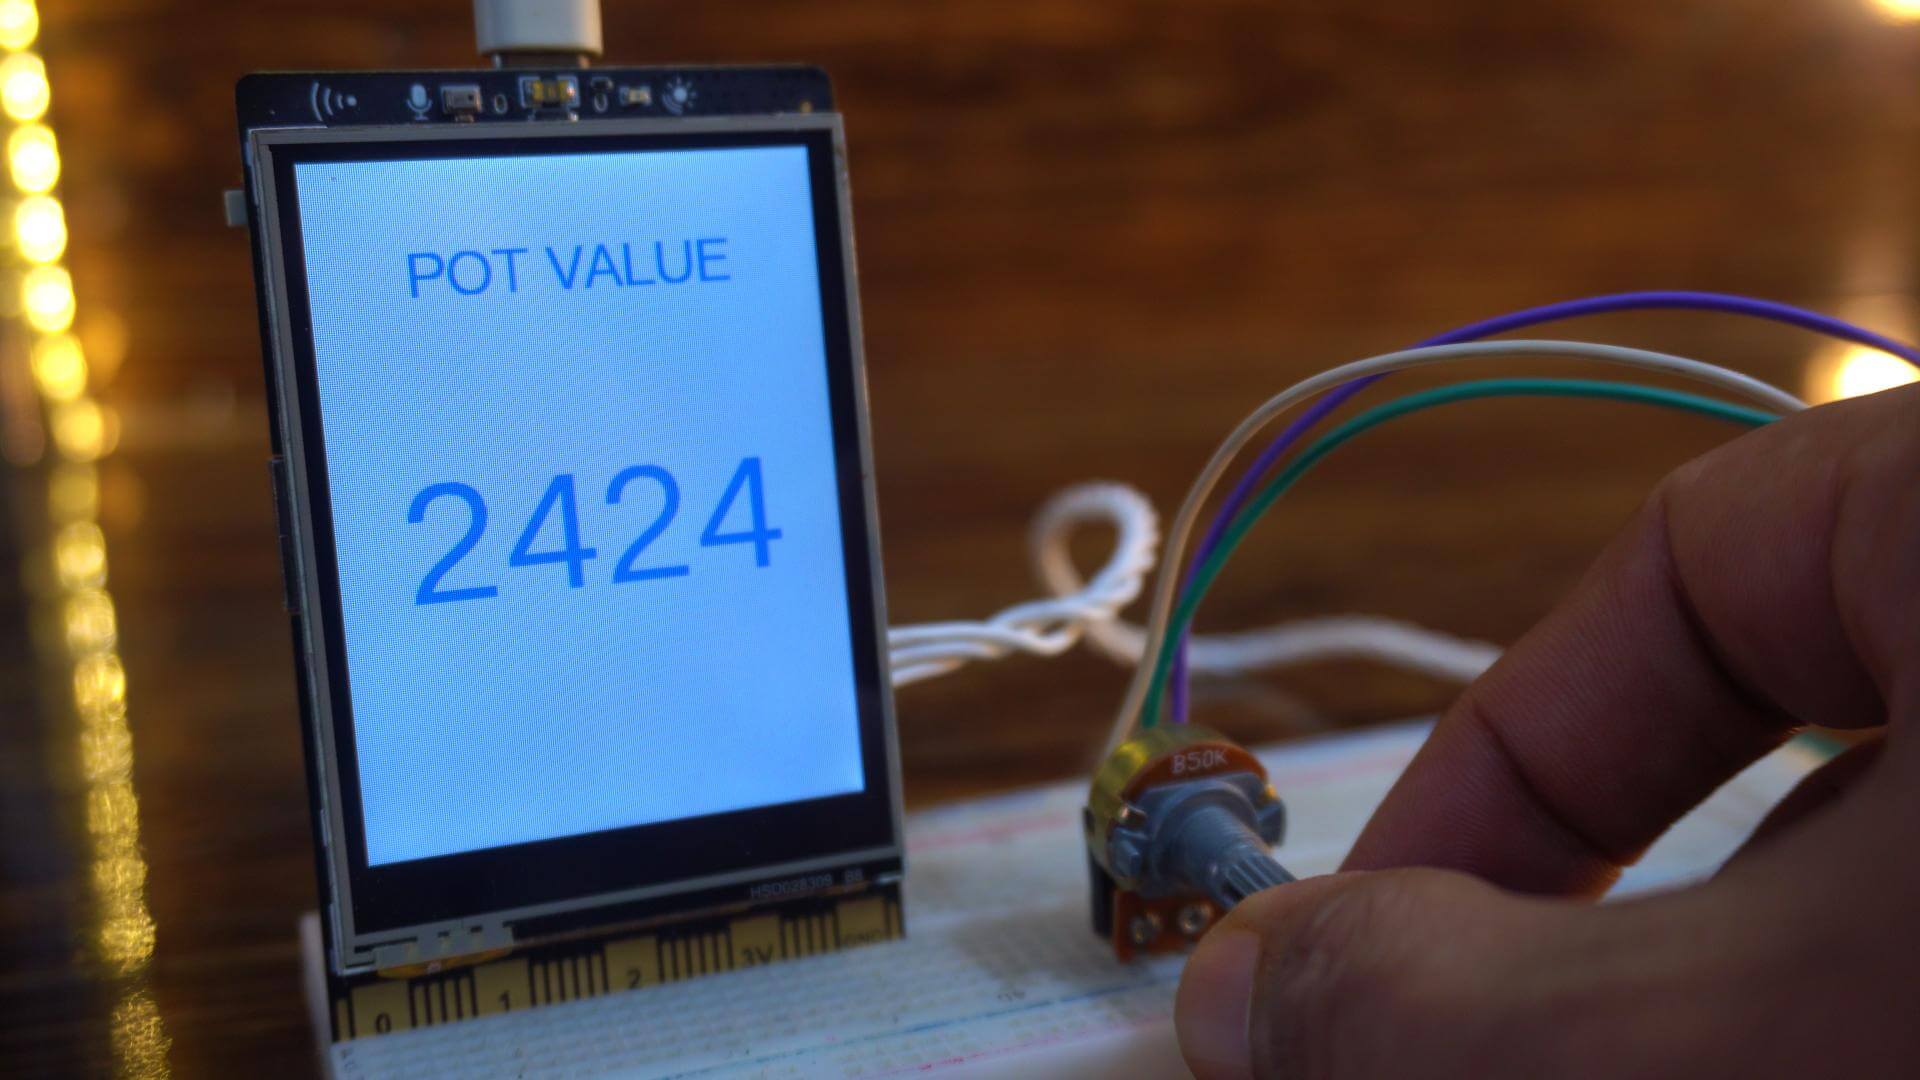
You can see, as I rotate the knob of the potentiometer, the sensor values change instantly on the screen; smooth and super responsive!
PIR Sensor with UniHiker:
I have also built this simple security system using a PIR sensor and a Traffic LED module.
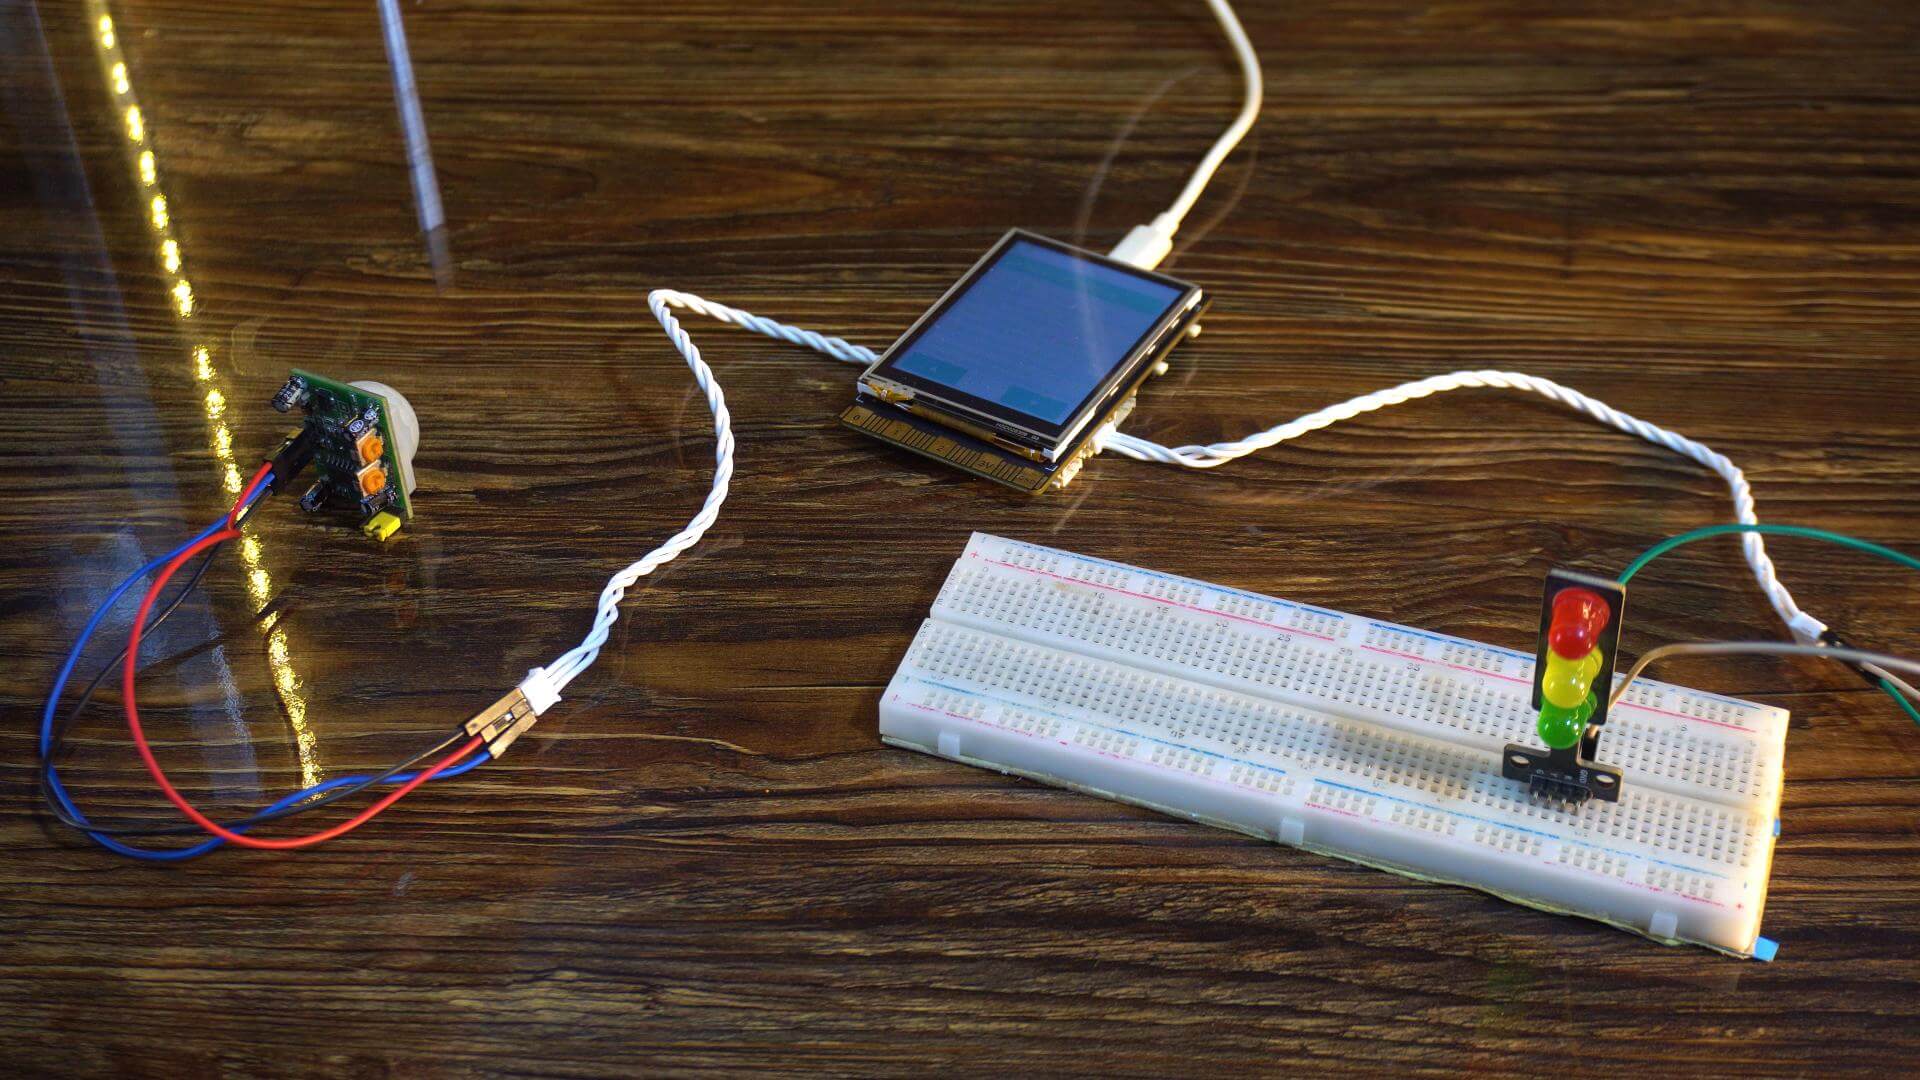
The idea is simple; the LED turns ON whenever motion is detected.
You can follow this circuit diagram for the connections.
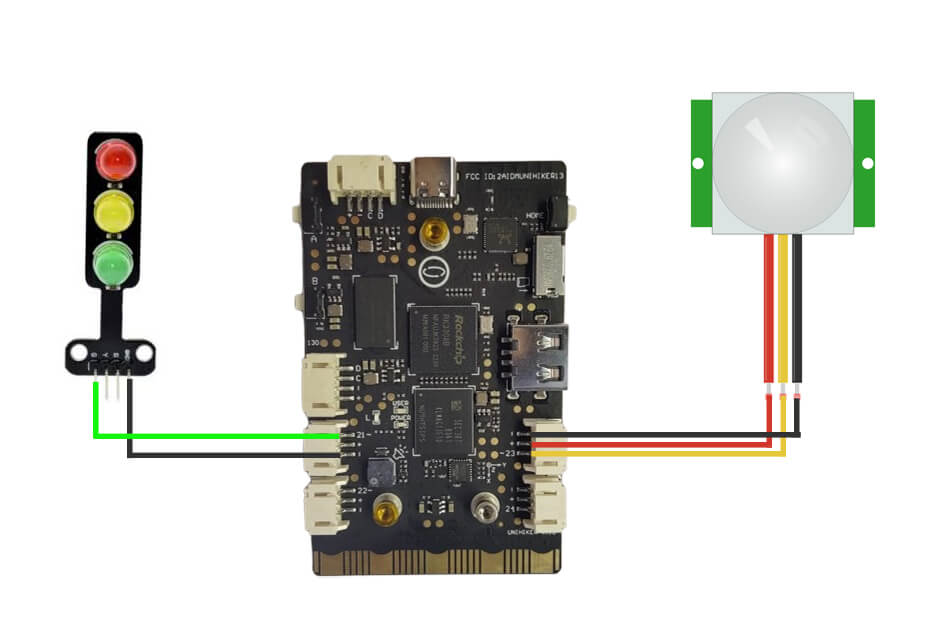
|
1 2 3 4 5 6 7 8 9 10 11 12 13 14 15 16 17 18 |
# -*- coding: UTF-8 -*- # Experiment Effect: Use the button to toggle the state of the blue LED labeled "L" on the back of the UNIHIKER. # Wiring: Connect a button module to the UNIHIKER P23 interface import time from pinpong.board import Board, Pin Board().begin() # Initialize the UNIHIKER sensor = Pin(Pin.P23, Pin.IN) # Initialize the pin as an input pin led = Pin(Pin.P21, Pin.OUT) # Initialize the LED pin as an output pin while True: # v = btn.value() # Read the pin level - Method 1 v = sensor.read_digital() # Read the pin level - Method 2 print(v) # Print the read pin level to the terminal # led.value(v) # Set the LED pin according to the button state - Method 1 led.write_digital(v) # Set the LED pin according to the button state - Method 2 time.sleep(0.1) # Wait for 0.1 seconds |
Now, let’s go ahead and run the Motion Detection example code. All the codes are also available on my Patreon page.
As you can see, the LED is currently OFF because the PIR sensor hasn’t detected any motion.
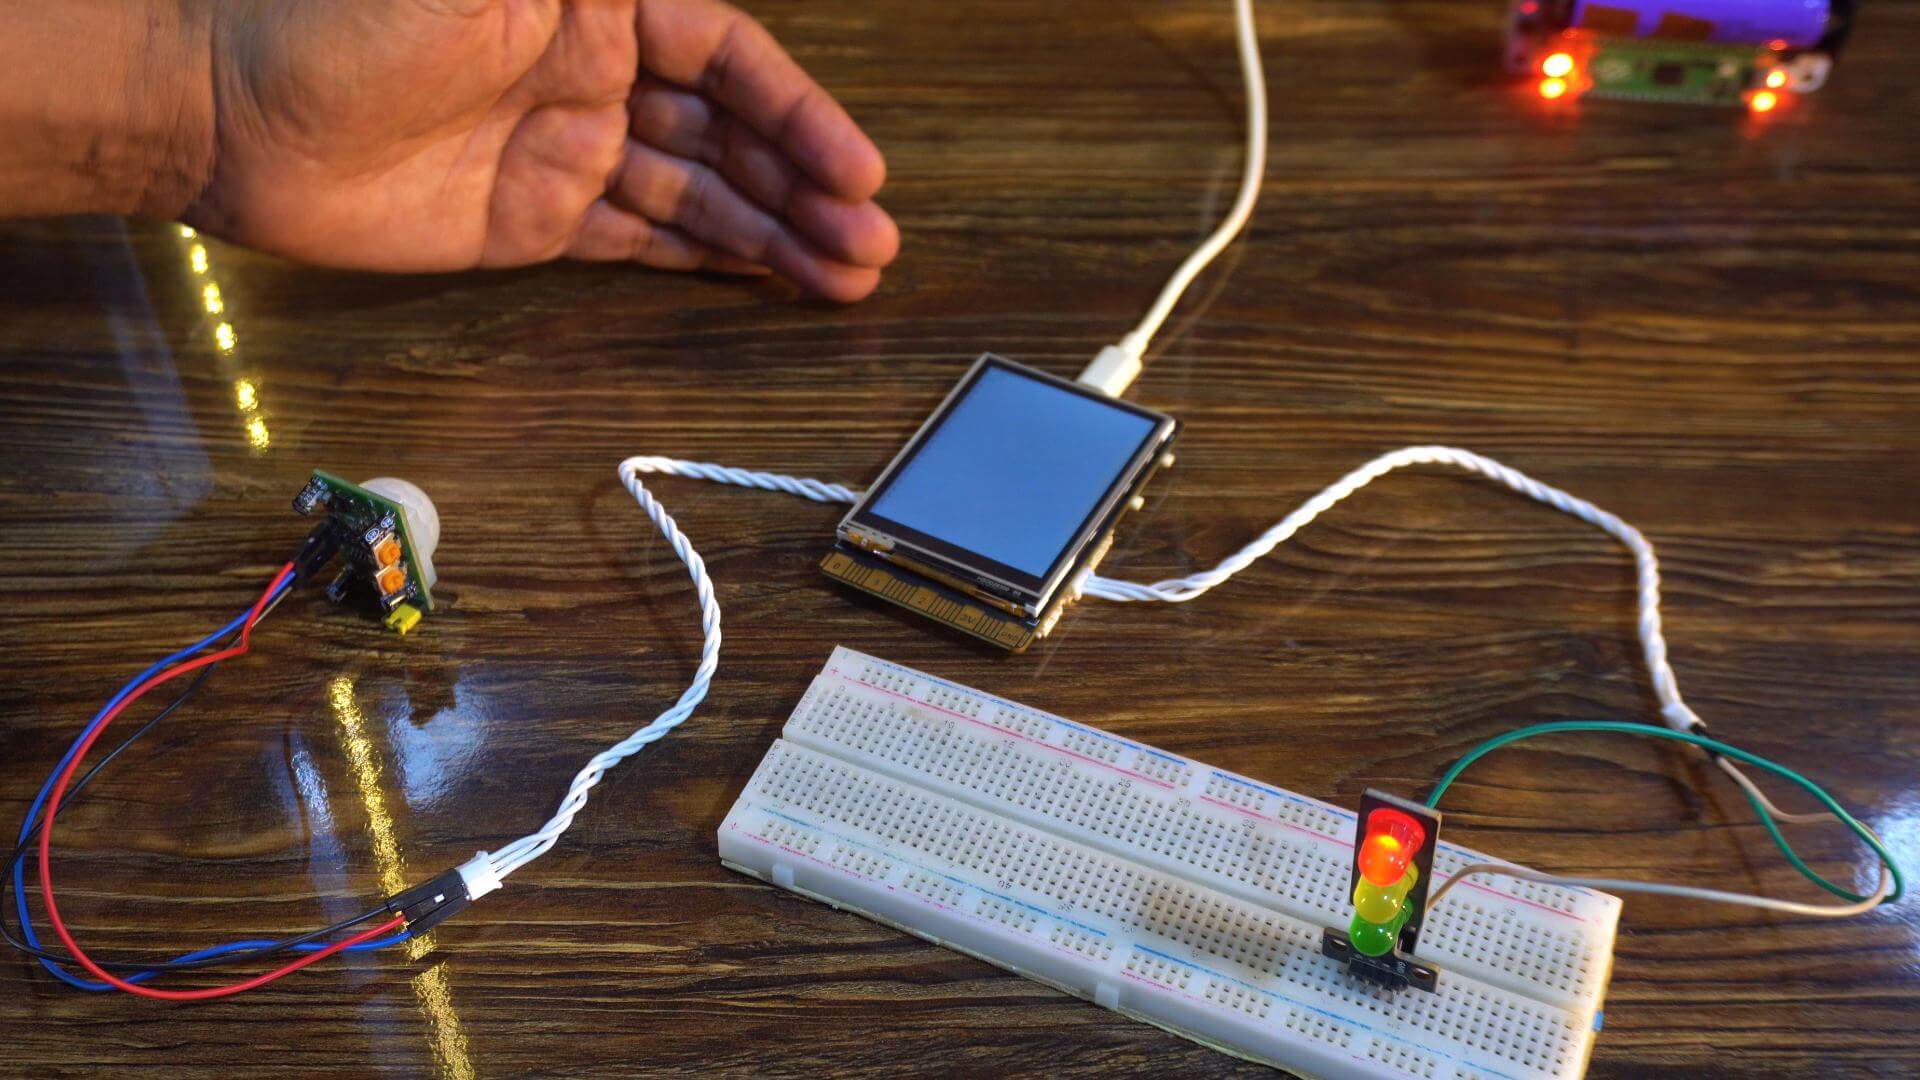
But the moment it senses movement; the red LED instantly turns ON. It’s a super simple yet really useful project for basic motion detection or security setups!
So, that’s all for now.
Support me on Patreon:
If you enjoy my work and find these projects helpful, please consider supporting me on Patreon. With just $1, you can get access to all project source codes, schematics, and extra resources that I share with my supporters. Your support helps me continue creating new electronics tutorials, experiments, and open projects for the community. Thank you so much for being part of this journey and for supporting my work!
Watch Video Tutorial:

Discover more from Electronic Clinic
Subscribe to get the latest posts sent to your email.