Gesture Controlled Music Player using ESP32-S3 | No Buttons, No Touch
Last Updated on September 9, 2026 by Engr. Shahzada Fahad
Table of Contents
Gesture Controlled Music Player:
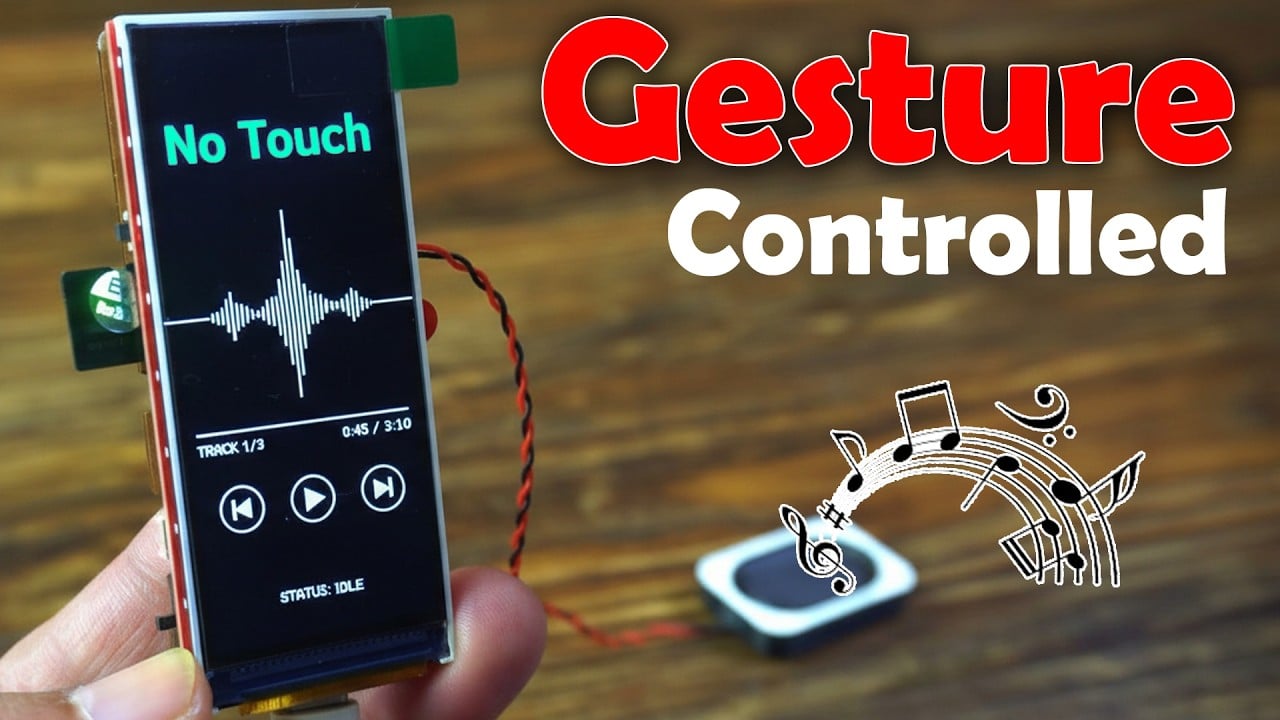
Gesture Controlled Music Player using ESP32-S3 | No Buttons, No Touch – You don’t need to press any button.
You don’t even need to look at the screen.
Just use hand gestures to play the next song… previous song… or stop the music.
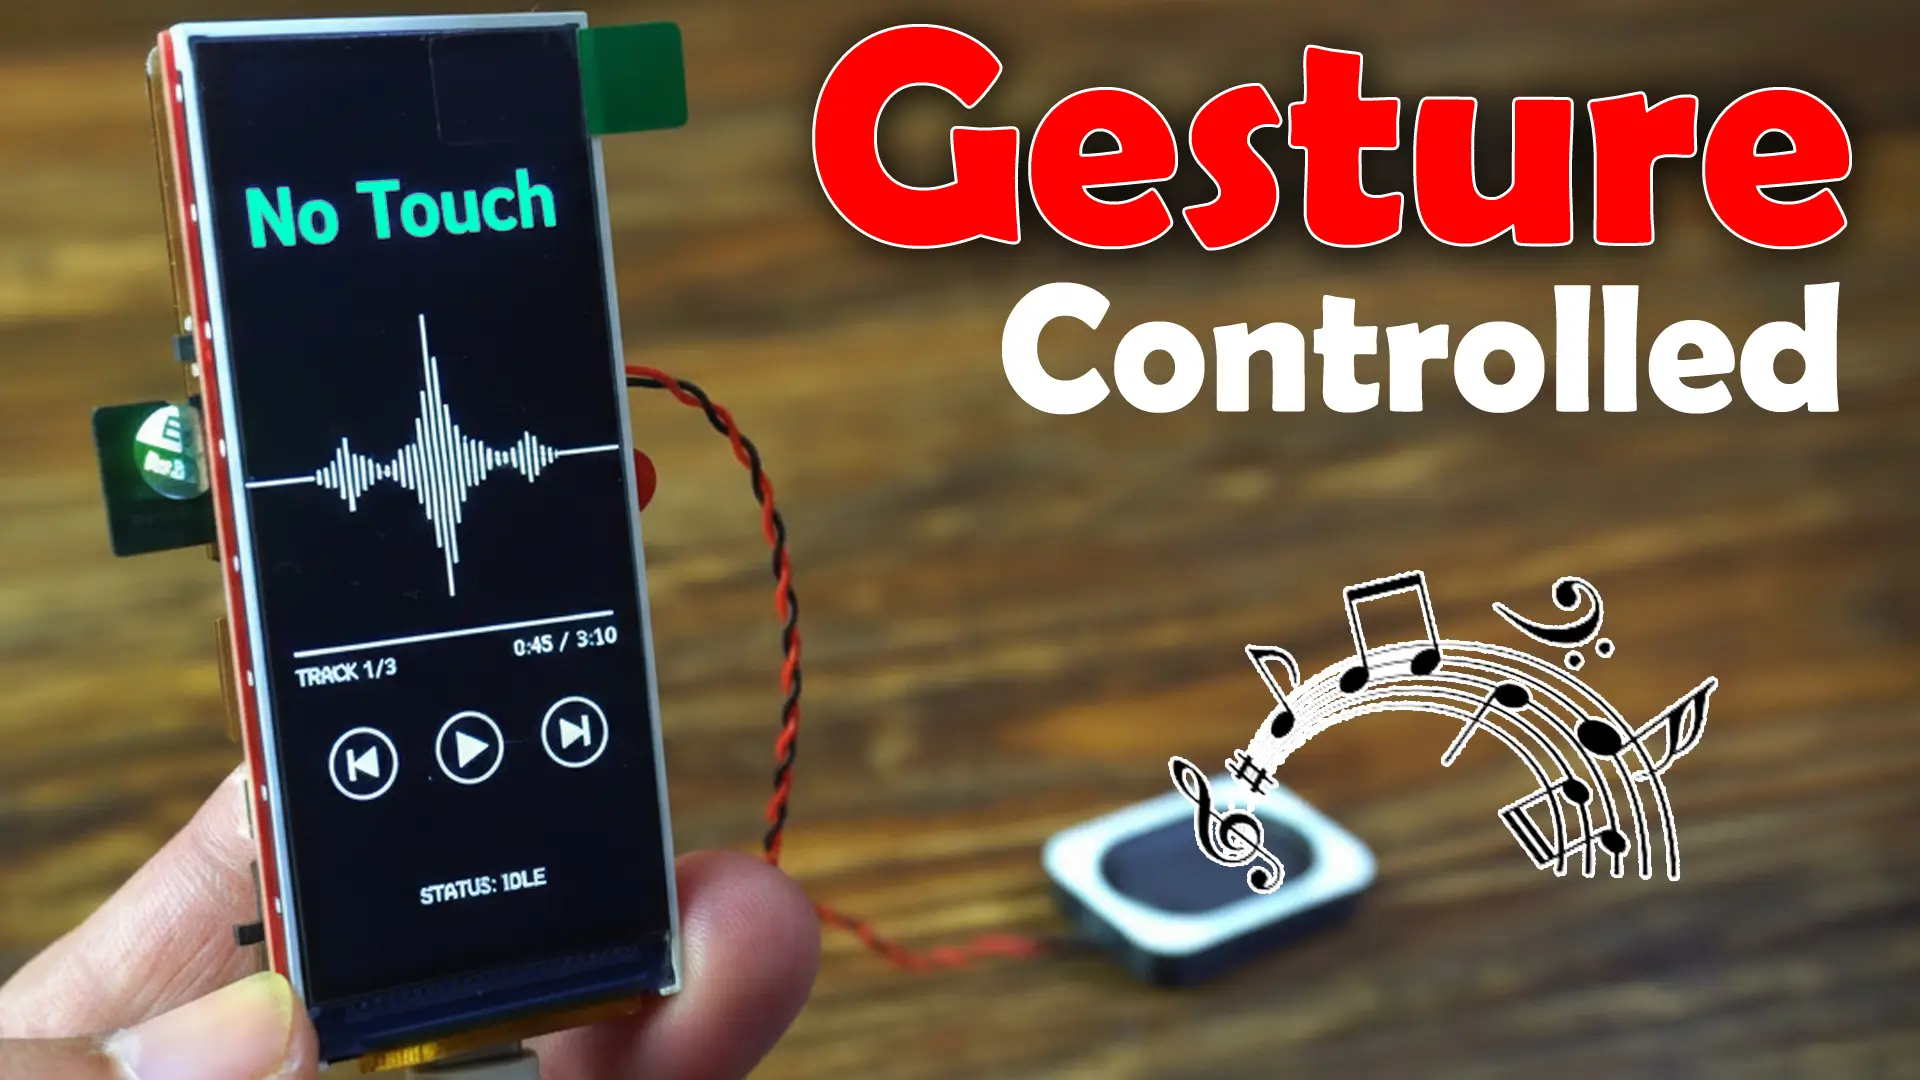
Just move your hand like a controller… and that’s it.
All this is possible because of the Makerfabs MaTouch ESP32-S3 Parallel TFT, with a 3.16-inch ST7701S display.
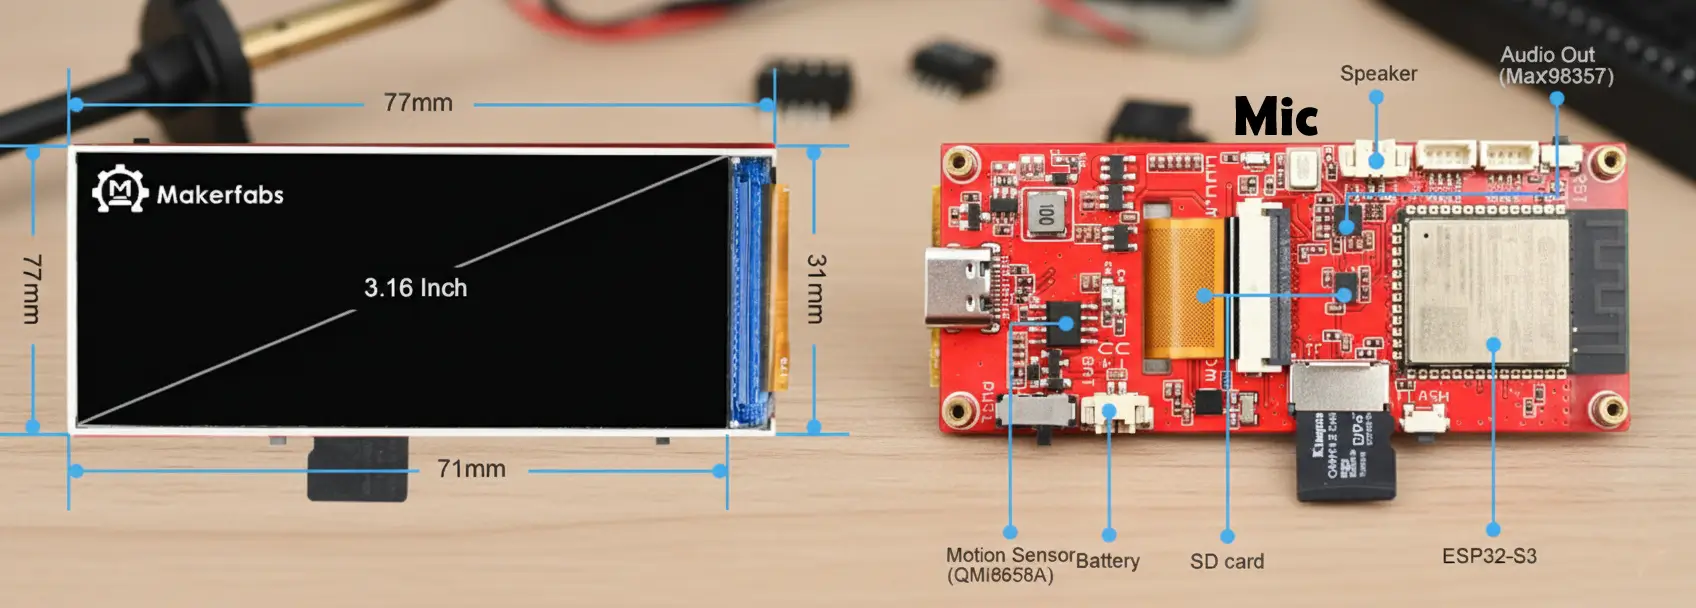
Now just imagine; If you wanted to build the same level project using Arduino, or any other development board, how many extra modules would you need?
- A separate MP3 player
- Speakers
- Arduino or ESP32
- SD card module
- RGB display
- Gyro and IMU module
- buttons
- A battery charger
So many parts… so many wires.
Because of that:
- Your cost increases
- Your wiring becomes complex
- And a lot of time gets wasted
So, why purchase all these modules separately and waste time on wiring, when you already get everything on one single board?
And let me tell you one thing; this board is not limited to building an MP3 player only.
This board also includes:
An onboard microphone, based on the INMP441
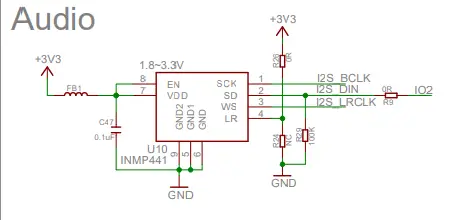
An RTC chip for time-based projects
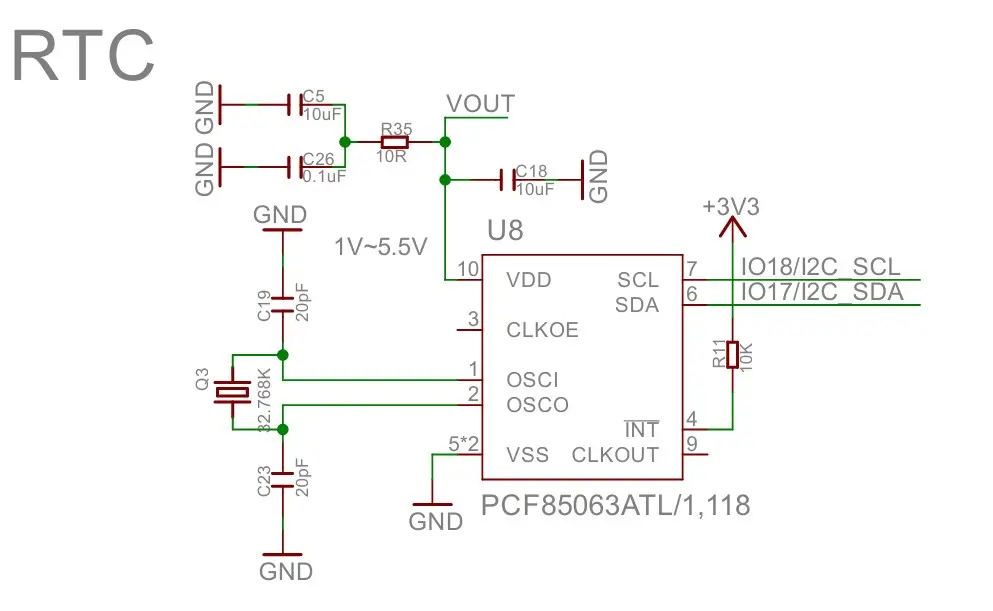
And that’s not all.
You get reserved UART, a 4-pin SH1.0 I2C header, and a 4-pin MX1.25 USB header.
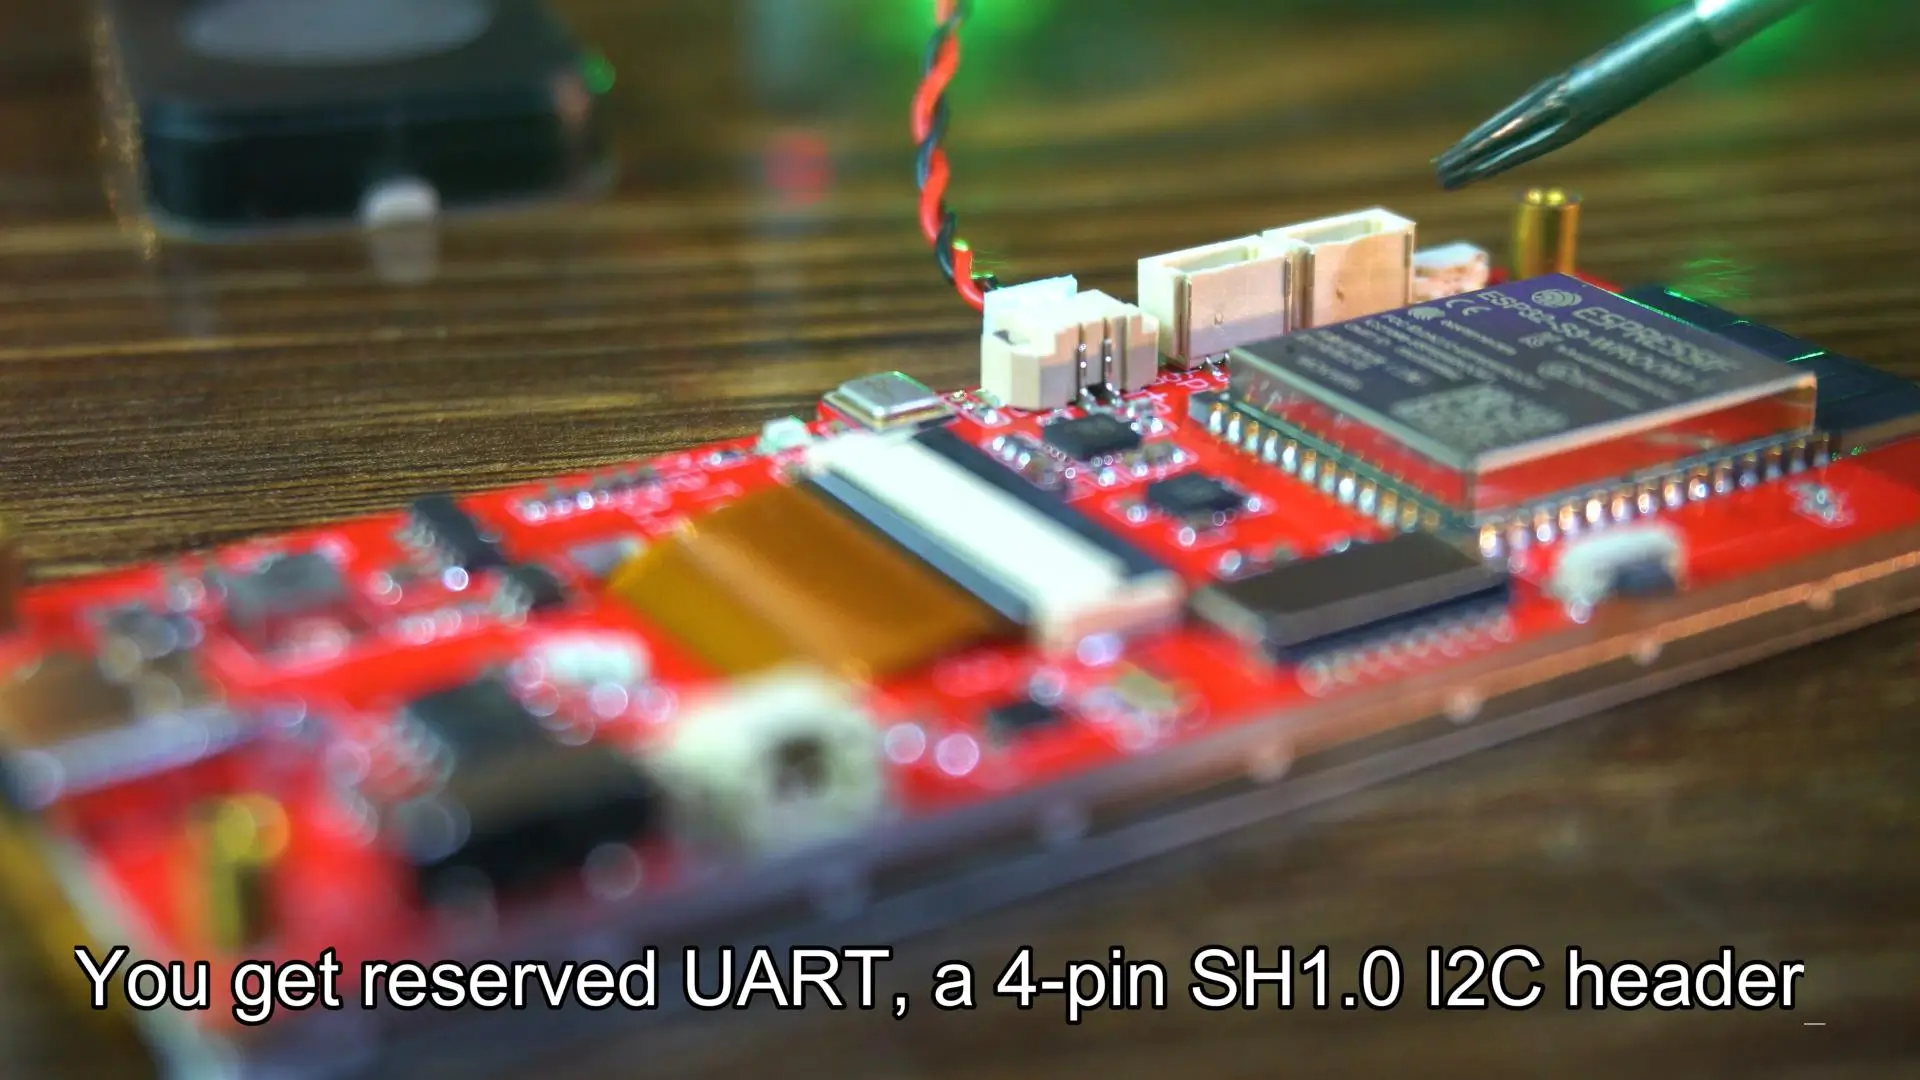
This means you can easily connect more sensors and breakout boards whenever you need them.
Because of all this, this board is perfect for portable and wearable projects, like:
- Sensor monitoring
- Mini photo album
- Gesture-controlled robotic car
- Voice recorder
- Self-balancing robot
- Digital spirit level or bubble level
- Portable receiver for monitoring important processes
- Home automation systems
- Real-time digital clock
- Vibration monitoring
- Time controlled loads
- Steps counter
- Dash board
- Earth-quack monitoring
The possibilities with this development board are almost endless.
At the heart of all this, you get a powerful ESP32-S3 controller, with WiFi and Bluetooth 5.0.
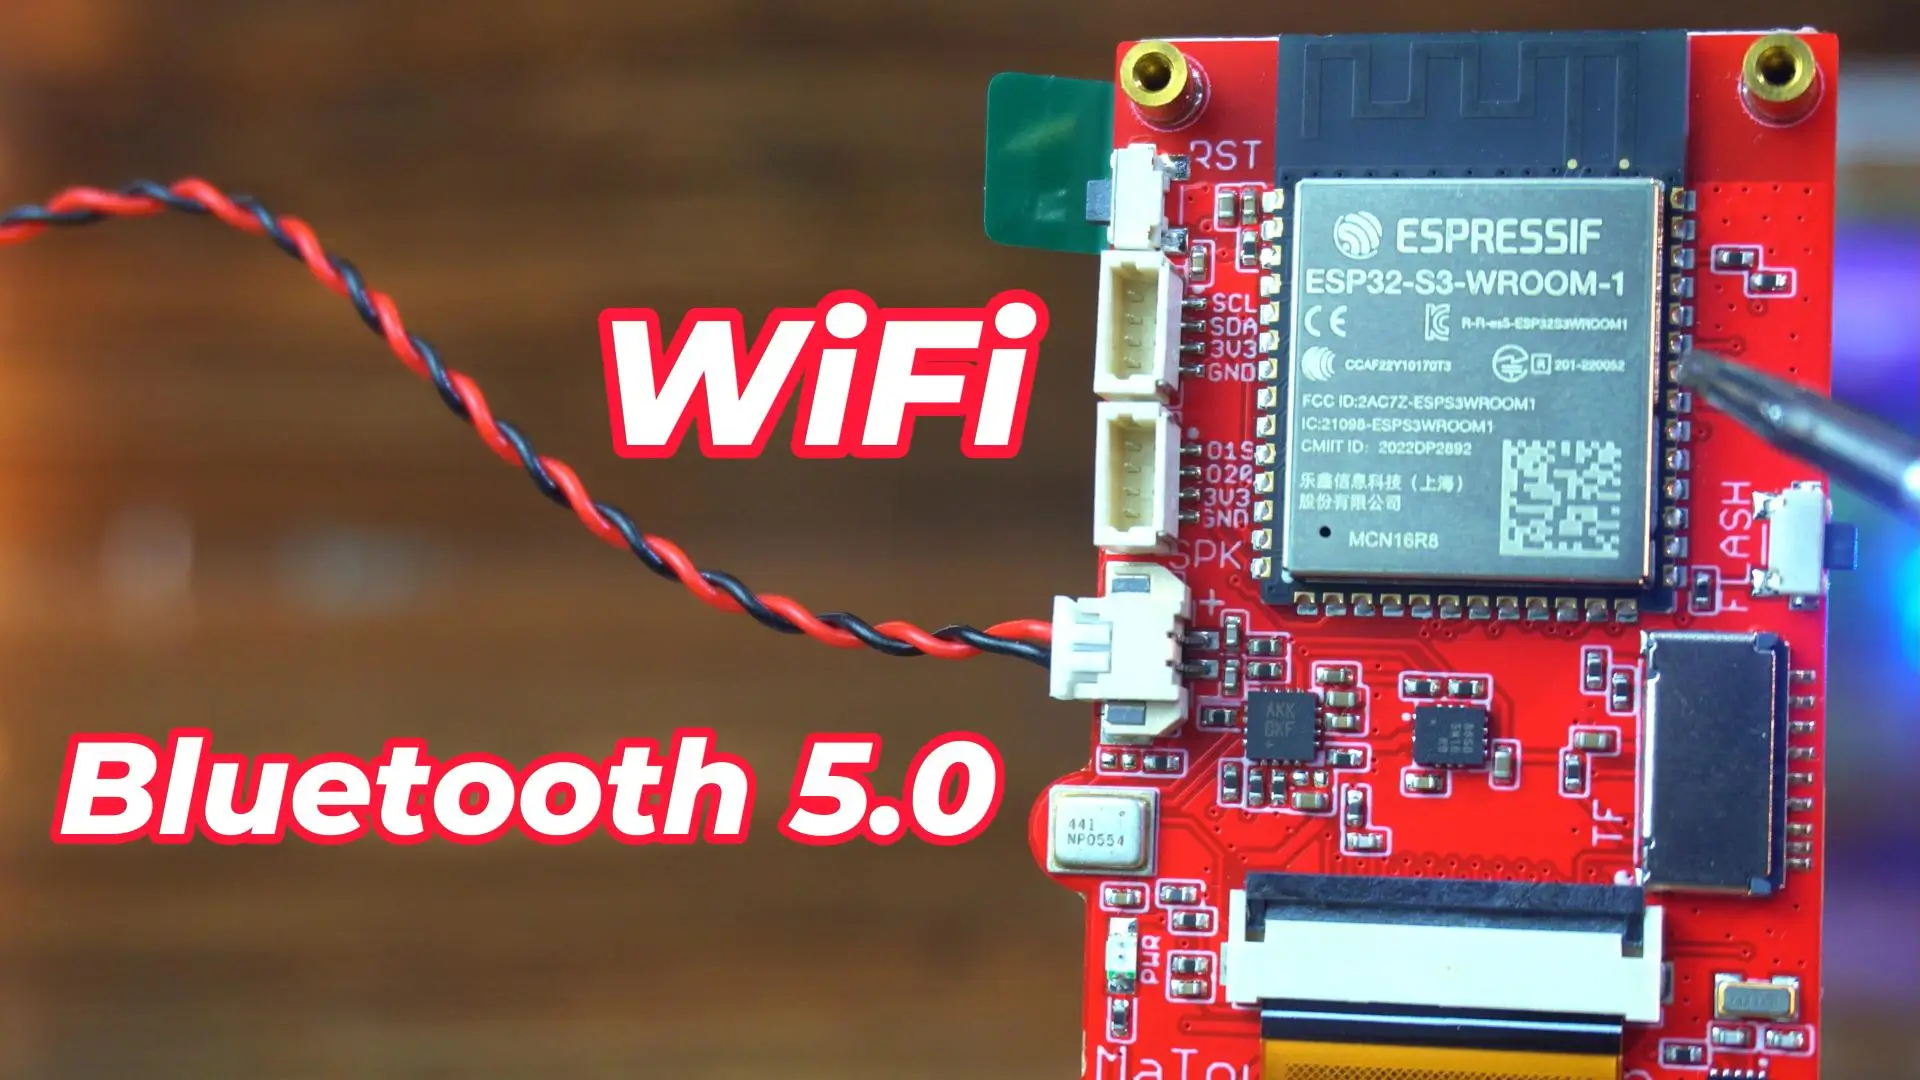
This makes it faster, smarter, and more capable than Arduino-based solutions.
And one more important thing I want to mention; this display is fully compatible with LVGL.
So you can use SquareLine Studio to design amazing and professional user interfaces.
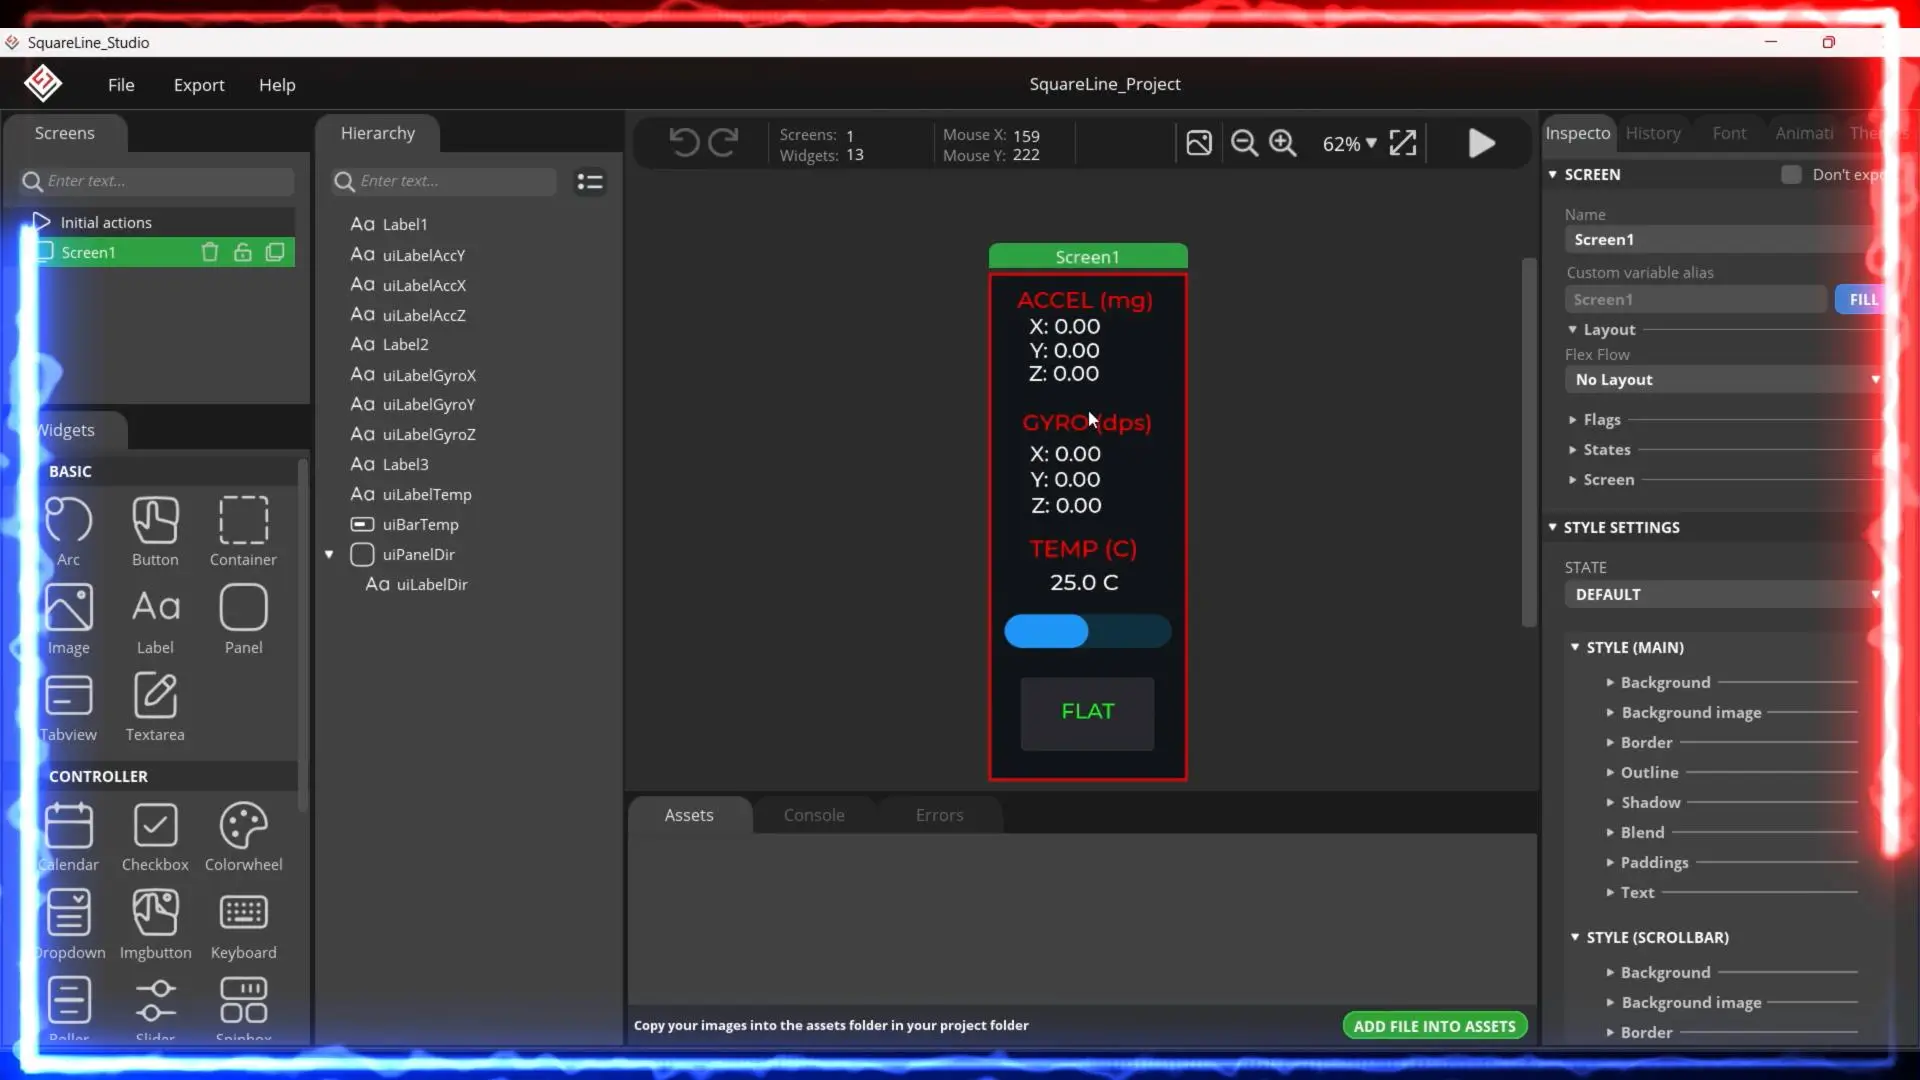
If you want ready-to-use project folders, with all the project files and extra resources, you can visit my Patreon page.
With just a 1-dollar subscription, you get access to all my projects and future updates.
By now, I am sure you have a very clear idea of how easily you can build a music player using this development board.
On the hardware side, you don’t really need to do anything, because everything is already available on the board.
About the Arduino IDE, ESP32, and Libraries:
However, on the software side, you need to be a little careful to avoid errors.
For that reason, I strongly recommend reading my Getting Started article on this board.
In that article, I explain:
Which Arduino IDE version you should use
right now, it is version 2.3.6
Which ESP32 board package version is required
And how to install all the necessary libraries
It’s very important that the library versions match exactly, otherwise you may run into compilation or runtime errors.
So, for a smooth and error-free experience, please read that previous article first.
Arduino IDE:
Arduino IDE 2.3.6
ESP32 Boards package:
esp32 V2.0.11 or V2.0.16
Libraries:
QMI8658 v1.0.1 library
Install JPEGDecoder v2.0.0 library
Once all the required libraries are installed, we are officially ready to move forward
Now let’s talk about the code, because this is where the real magic happens.
Gesture Controlled Music Player Code:
|
1 2 3 4 5 6 7 8 9 10 11 12 13 14 15 16 17 18 19 20 21 22 23 24 25 26 27 28 29 30 31 32 33 34 35 36 37 38 39 40 41 42 43 44 45 46 47 48 49 50 51 52 53 54 55 56 57 58 59 60 61 62 63 64 65 66 67 68 69 70 71 72 73 74 75 76 77 78 79 80 81 82 83 84 85 86 87 88 89 90 91 92 93 94 95 96 97 98 99 100 101 102 103 104 105 106 107 108 109 110 111 112 113 114 115 116 117 118 119 120 121 122 123 124 125 126 127 128 129 130 131 132 133 134 135 136 137 138 139 140 141 142 143 144 145 146 147 148 149 150 151 152 153 154 155 156 157 158 159 160 161 162 163 164 165 166 167 168 169 170 171 172 173 174 175 176 177 178 179 180 181 182 183 184 185 186 187 188 189 190 191 192 193 194 195 196 197 198 199 200 201 202 203 204 205 206 207 208 209 210 211 212 213 214 215 216 217 218 219 220 221 222 223 224 225 226 227 228 229 230 231 232 233 234 235 236 237 238 239 240 241 242 243 244 245 246 247 248 249 250 251 252 253 254 255 256 257 258 259 260 261 262 263 264 265 266 267 268 269 270 271 272 273 274 275 276 277 278 279 280 281 282 283 284 285 286 287 288 289 290 291 292 293 294 295 296 297 298 |
/* MaTouch ESP32-S3 TFT 3.16 Gesture Controlled Player YouTube Channel: Electronic Clinic Website: https://www.electroniclinic.com/ https://www.patreon.com/c/ElectroniClinic */ #include <SPI.h> #include <SD.h> #include <driver/i2s.h> #include <Arduino_GFX_Library.h> #include <QMI8658.h> // ================= AUDIO ================= #define I2S_BCLK 44 #define I2S_LRCLK 43 #define I2S_DOUT 19 // ================= SD ==================== #define SD_CS 42 #define SD_MOSI 40 #define SD_MISO 38 #define SD_SCK 39 // ================= TFT =================== #define TFT_BLK 46 // ================= IMU I2C =============== #define SDA 17 #define SCL 18 // ================= PARAMETERS ============ #define MAX_FILES 30 #define SHAKE_THRESHOLD 600 // Increased slightly to prevent accidental triggers #define FLAT_THRESHOLD 150 // mg #define STOP_HOLD_TIME 1000 // ms #define SHAKE_COOLDOWN 1000 // ms (Time to ignore sensor after a shake) // ================= TFT INIT =============== Arduino_DataBus *bus = new Arduino_SWSPI( GFX_NOT_DEFINED, 45, 39, 40, GFX_NOT_DEFINED); Arduino_ESP32RGBPanel *rgbpanel = new Arduino_ESP32RGBPanel( 7, 4, 5, 6, 12, 11, 8, 16, 15, 0, 14, 10, 9, 3, 13, 48, 47, 1, 21, 41, 1, 10, 8, 50, 1, 10, 8, 20); Arduino_RGB_Display *gfx = new Arduino_RGB_Display( 320, 820, rgbpanel, 0, true, bus, GFX_NOT_DEFINED, st7701_type9_init_operations, sizeof(st7701_type9_init_operations)); // ================= GLOBALS ================ QMI8658 imu; File audioFile; String wavFiles[MAX_FILES]; int totalFiles = 0; int currentTrack = 0; float lastAccelX = 0; unsigned long flatStartTime = 0; unsigned long lastShakeTime = 0; // Timestamp of the last valid shake unsigned long lastUiUpdate = 0; // For throttling screen draws bool nextSongRequest = false; bool prevSongRequest = false; bool isPlaying = true; // ================= PROTOTYPES ============ void scanWavFiles(); void playTrack(int index); void drawUI(); void updateIMU(float ax); void updateStatus(const char *txt); // ================= SETUP ================= void setup() { Serial.begin(115200); pinMode(TFT_BLK, OUTPUT); digitalWrite(TFT_BLK, LOW); gfx->begin(); drawUI(); // IMU if (!imu.begin(SDA, SCL)) { updateStatus("IMU FAIL"); while (1); } imu.setAccelRange(QMI8658_ACCEL_RANGE_2G); imu.setAccelODR(QMI8658_ACCEL_ODR_500HZ); imu.setAccelUnit_mg(true); imu.enableSensors(QMI8658_ENABLE_ACCEL); // SD SPI.begin(SD_SCK, SD_MISO, SD_MOSI, SD_CS); if (!SD.begin(SD_CS)) { updateStatus("SD FAIL"); while (1); } scanWavFiles(); if (totalFiles == 0) { updateStatus("NO WAV FILES"); while (1); } // I2S i2s_config_t i2s_config = { .mode = (i2s_mode_t)(I2S_MODE_MASTER | I2S_MODE_TX), .sample_rate = 44100, .bits_per_sample = I2S_BITS_PER_SAMPLE_16BIT, .channel_format = I2S_CHANNEL_FMT_RIGHT_LEFT, .communication_format = I2S_COMM_FORMAT_I2S, .intr_alloc_flags = ESP_INTR_FLAG_LEVEL1, .dma_buf_count = 8, .dma_buf_len = 512, .use_apll = false, .tx_desc_auto_clear = true }; i2s_pin_config_t pin_config = { .bck_io_num = I2S_BCLK, .ws_io_num = I2S_LRCLK, .data_out_num = I2S_DOUT, .data_in_num = I2S_PIN_NO_CHANGE }; i2s_driver_install(I2S_NUM_0, &i2s_config, 0, NULL); i2s_set_pin(I2S_NUM_0, &pin_config); playTrack(currentTrack); updateStatus("PLAYING"); } // ================= LOOP ================== void loop() { static uint8_t buffer[1024]; size_t bytesWritten; // 1. Audio Playback if (isPlaying) { if (audioFile.available()) { int bytesRead = audioFile.read(buffer, sizeof(buffer)); if (bytesRead > 0) { i2s_write(I2S_NUM_0, buffer, bytesRead, &bytesWritten, portMAX_DELAY); } } else { // Auto-play next song if file ends (Optional feature) nextSongRequest = true; } } // 2. Sensor Logic QMI8658_Data data; if (imu.readSensorData(data)) { // Only update UI every 200ms to prevent audio lag if(millis() - lastUiUpdate > 200) { updateIMU(data.accelX); lastUiUpdate = millis(); } // Check if we are in the "Cooldown" period bool inCooldown = (millis() - lastShakeTime < SHAKE_COOLDOWN); if (!inCooldown) { float deltaX = abs(data.accelX - lastAccelX); // -------- SHAKE DETECTION -------- if (deltaX > SHAKE_THRESHOLD) { // If magnitude is high enough, decide direction if (data.accelX > 0) { nextSongRequest = true; } else { prevSongRequest = true; } // SET COOLDOWN: Do not accept input for 1 second lastShakeTime = millis(); // Reset Flat detection logic flatStartTime = 0; } } lastAccelX = data.accelX; // -------- FLAT STOP DETECTION ---- // Only check flat if not shaking if (!inCooldown) { bool flat = abs(data.accelX) < FLAT_THRESHOLD && abs(data.accelY) < FLAT_THRESHOLD; if (flat) { if (flatStartTime == 0) flatStartTime = millis(); else if (millis() - flatStartTime > STOP_HOLD_TIME) { if (isPlaying) { i2s_zero_dma_buffer(I2S_NUM_0); isPlaying = false; updateStatus("STOPPED"); } } } else { flatStartTime = 0; } } } // -------- TRACK CHANGE ----------- if (nextSongRequest) { currentTrack = (currentTrack + 1) % totalFiles; audioFile.close(); playTrack(currentTrack); isPlaying = true; updateStatus("NEXT >>"); nextSongRequest = false; // Clear buffer to prevent playing leftover audio from old song i2s_zero_dma_buffer(I2S_NUM_0); } if (prevSongRequest) { currentTrack--; if (currentTrack < 0) currentTrack = totalFiles - 1; audioFile.close(); playTrack(currentTrack); isPlaying = true; updateStatus("<< PREV"); prevSongRequest = false; i2s_zero_dma_buffer(I2S_NUM_0); } } // ================= FUNCTIONS ============= void scanWavFiles() { File root = SD.open("/"); while (true) { File f = root.openNextFile(); if (!f) break; String n = f.name(); n.toLowerCase(); if (!f.isDirectory() && n.endsWith(".wav") && totalFiles < MAX_FILES) { wavFiles[totalFiles++] = String("/") + f.name(); } f.close(); } root.close(); } void playTrack(int index) { if (audioFile) audioFile.close(); audioFile = SD.open(wavFiles[index]); // WAV Header skip (simple 44 byte skip) if(audioFile) audioFile.seek(44); } void drawUI() { gfx->fillScreen(BLACK); gfx->setTextSize(3); gfx->setCursor(20, 20); gfx->println("GESTURE PLAYER"); gfx->setTextSize(2); gfx->setCursor(20, 120); gfx->println("ACCEL X (mg)"); gfx->setCursor(20, 260); gfx->println("STATUS"); } void updateIMU(float ax) { // Clearing a small rect is faster than full screen, but still slow // We throttled this in loop() gfx->fillRect(20, 150, 280, 40, BLACK); gfx->setCursor(20, 150); gfx->setTextSize(3); gfx->printf("%8.1f", ax); } void updateStatus(const char *txt) { gfx->fillRect(20, 290, 280, 40, BLACK); gfx->setCursor(20, 290); gfx->setTextSize(3); gfx->println(txt); } |
First of all, what I really like about this board is that Makerfabs has already exposed all the connections very clearly in the schematic. Because of that, we don’t have to guess anything. We already know exactly which pin is connected to what, and we simply map those pins directly in the code.
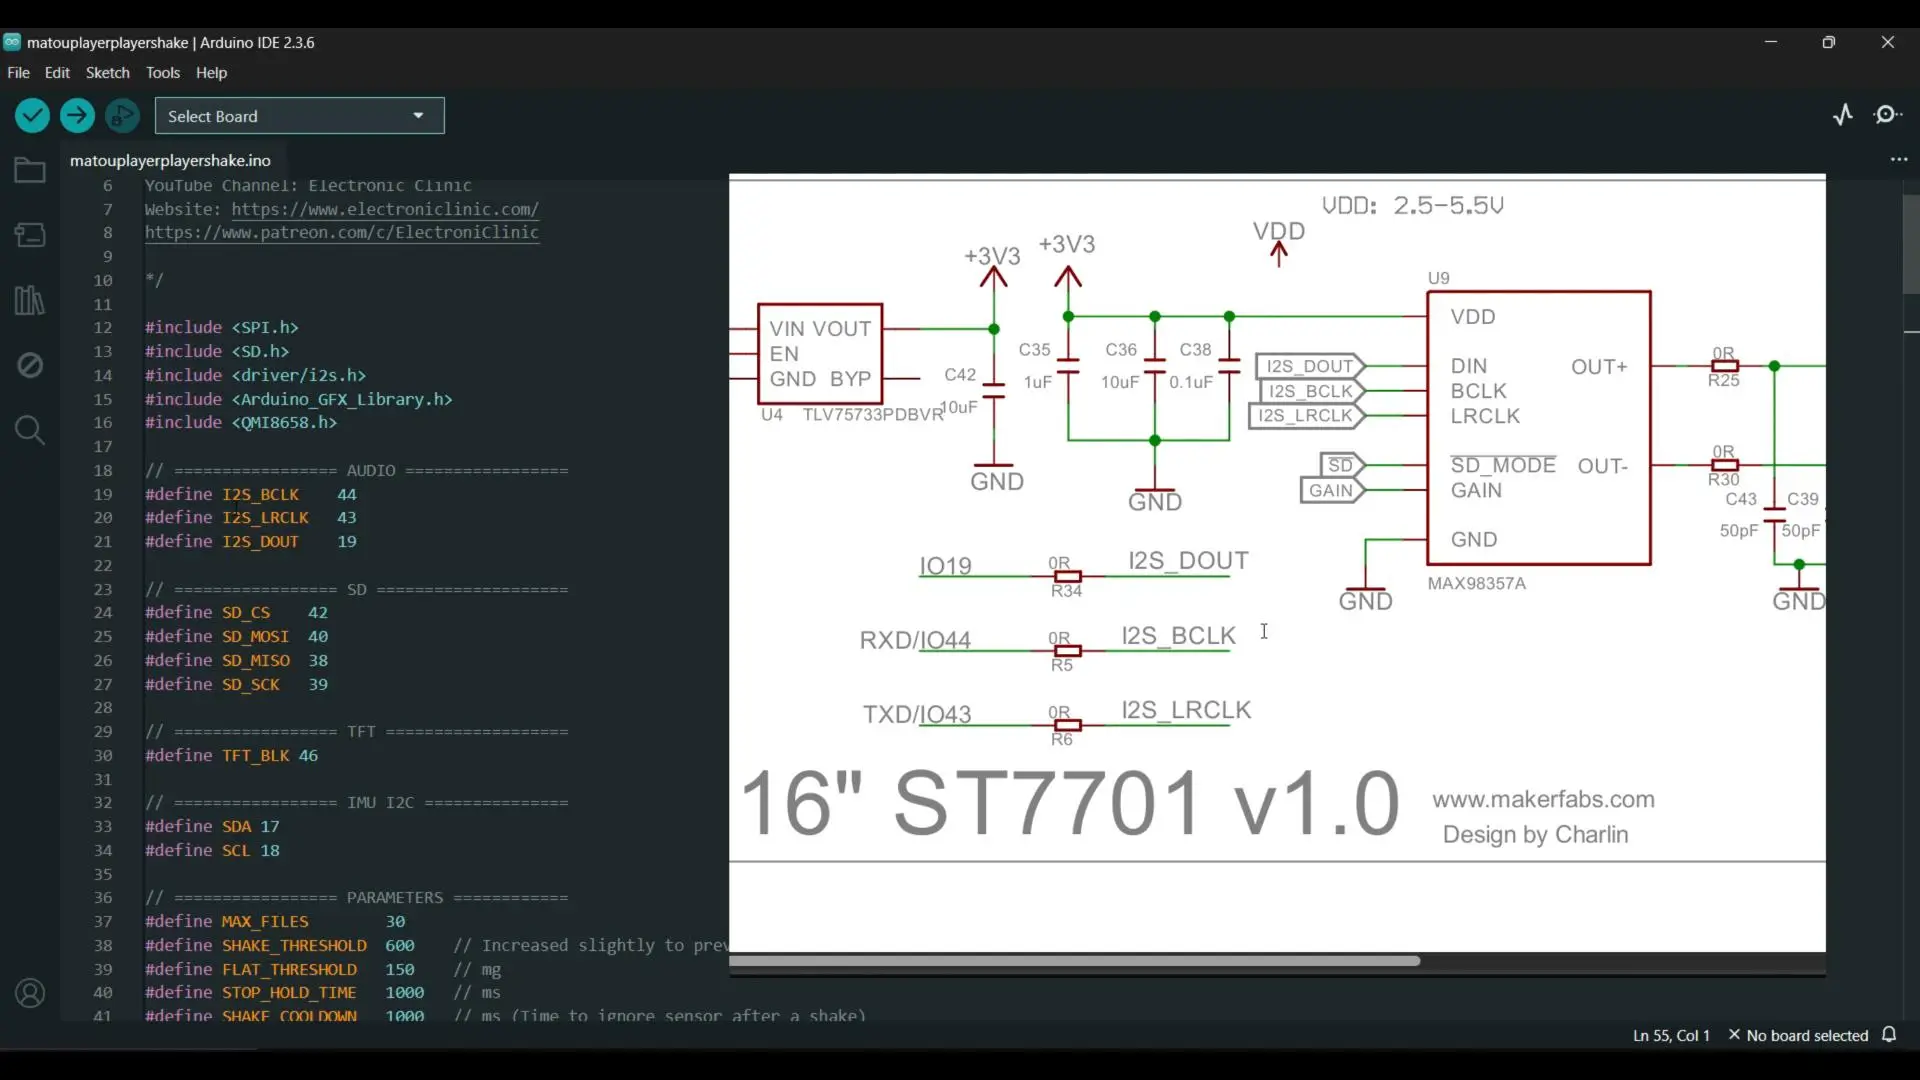
For audio output, we are using the I2S interface, which is the best choice for high-quality sound. According to the schematic, the I2S bit clock is connected to GPIO 44, left-right clock to GPIO 43, and audio data output to GPIO 19.
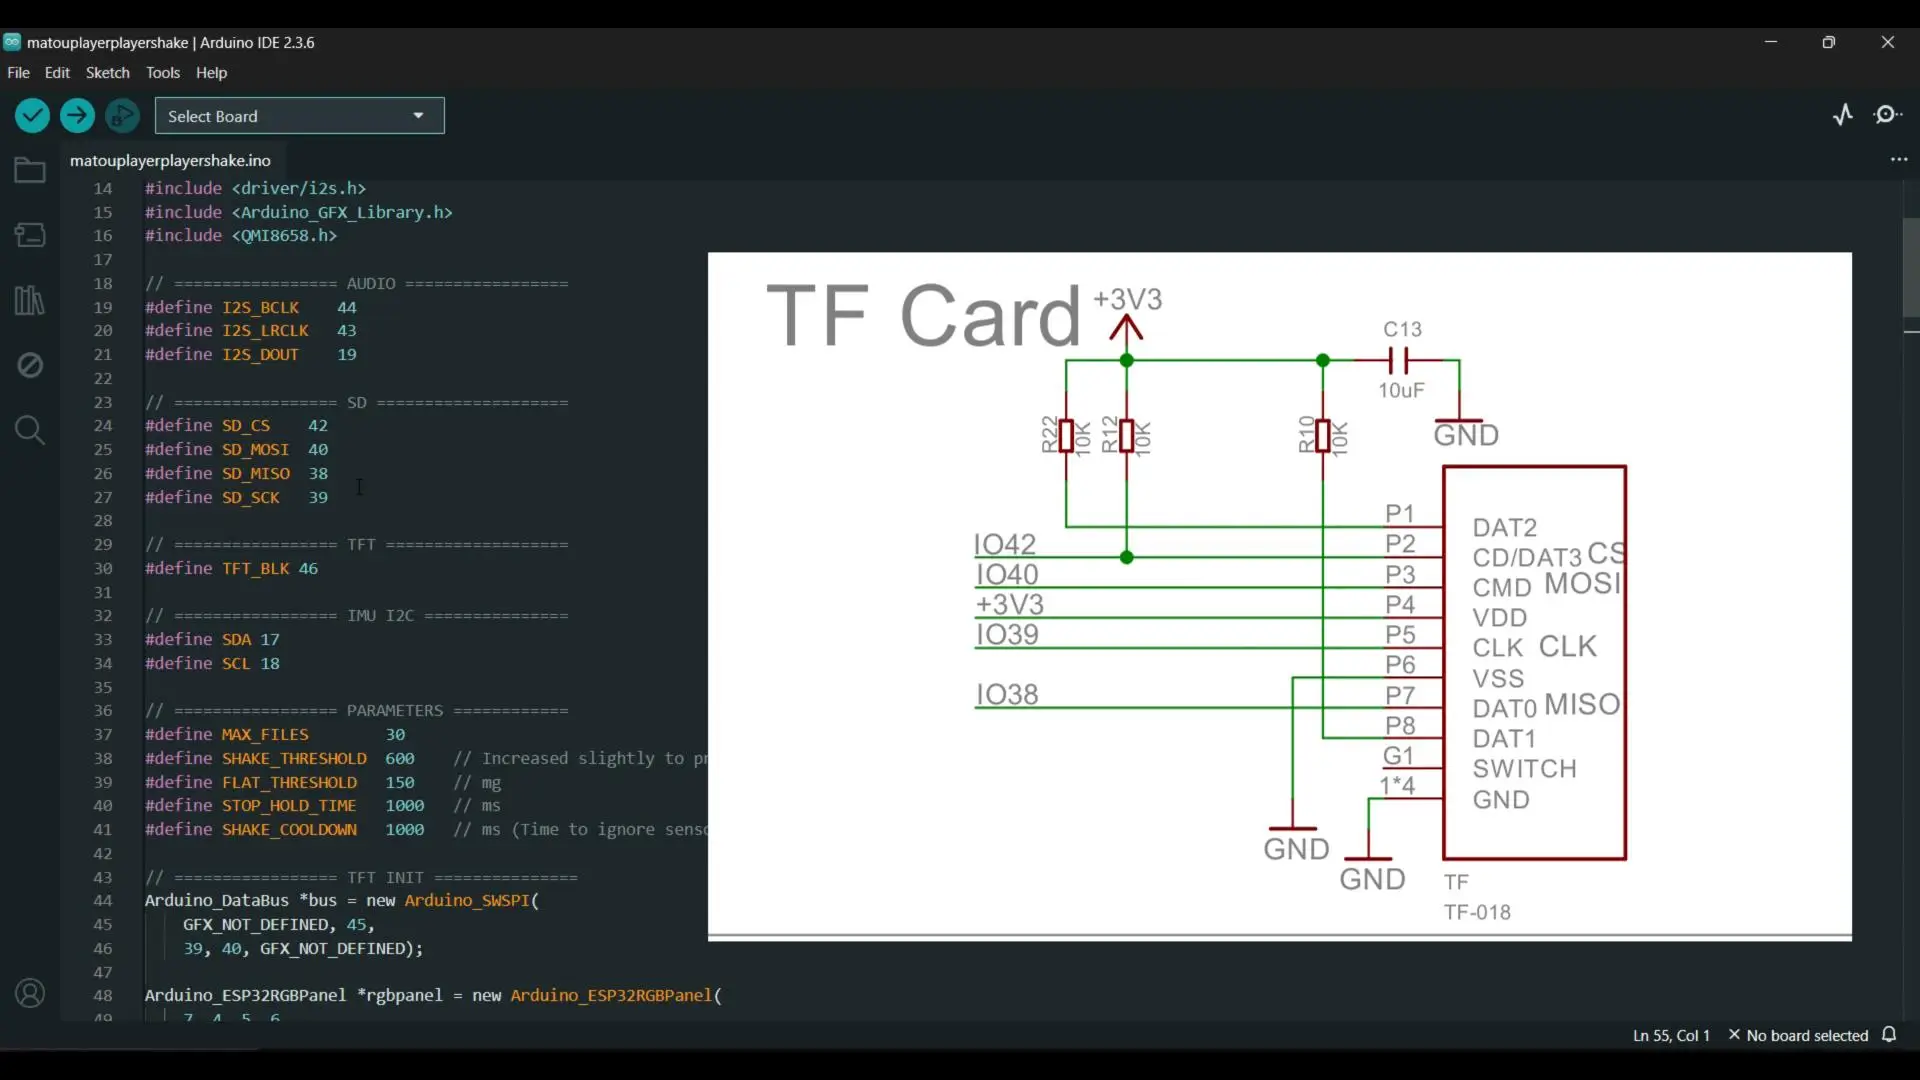
Next comes the SD card interface. Instead of using default SPI pins, we use the exact pins defined by Makerfabs. The chip select is on GPIO 42, MOSI on GPIO 40, MISO on GPIO 38, and clock on GPIO 39. This is important, because if you use wrong pins here, the SD card will not initialize at all. Once the SD card is ready, the code scans it and automatically collects all WAV files, so you don’t need to hardcode file names.
Now let’s talk about the display.
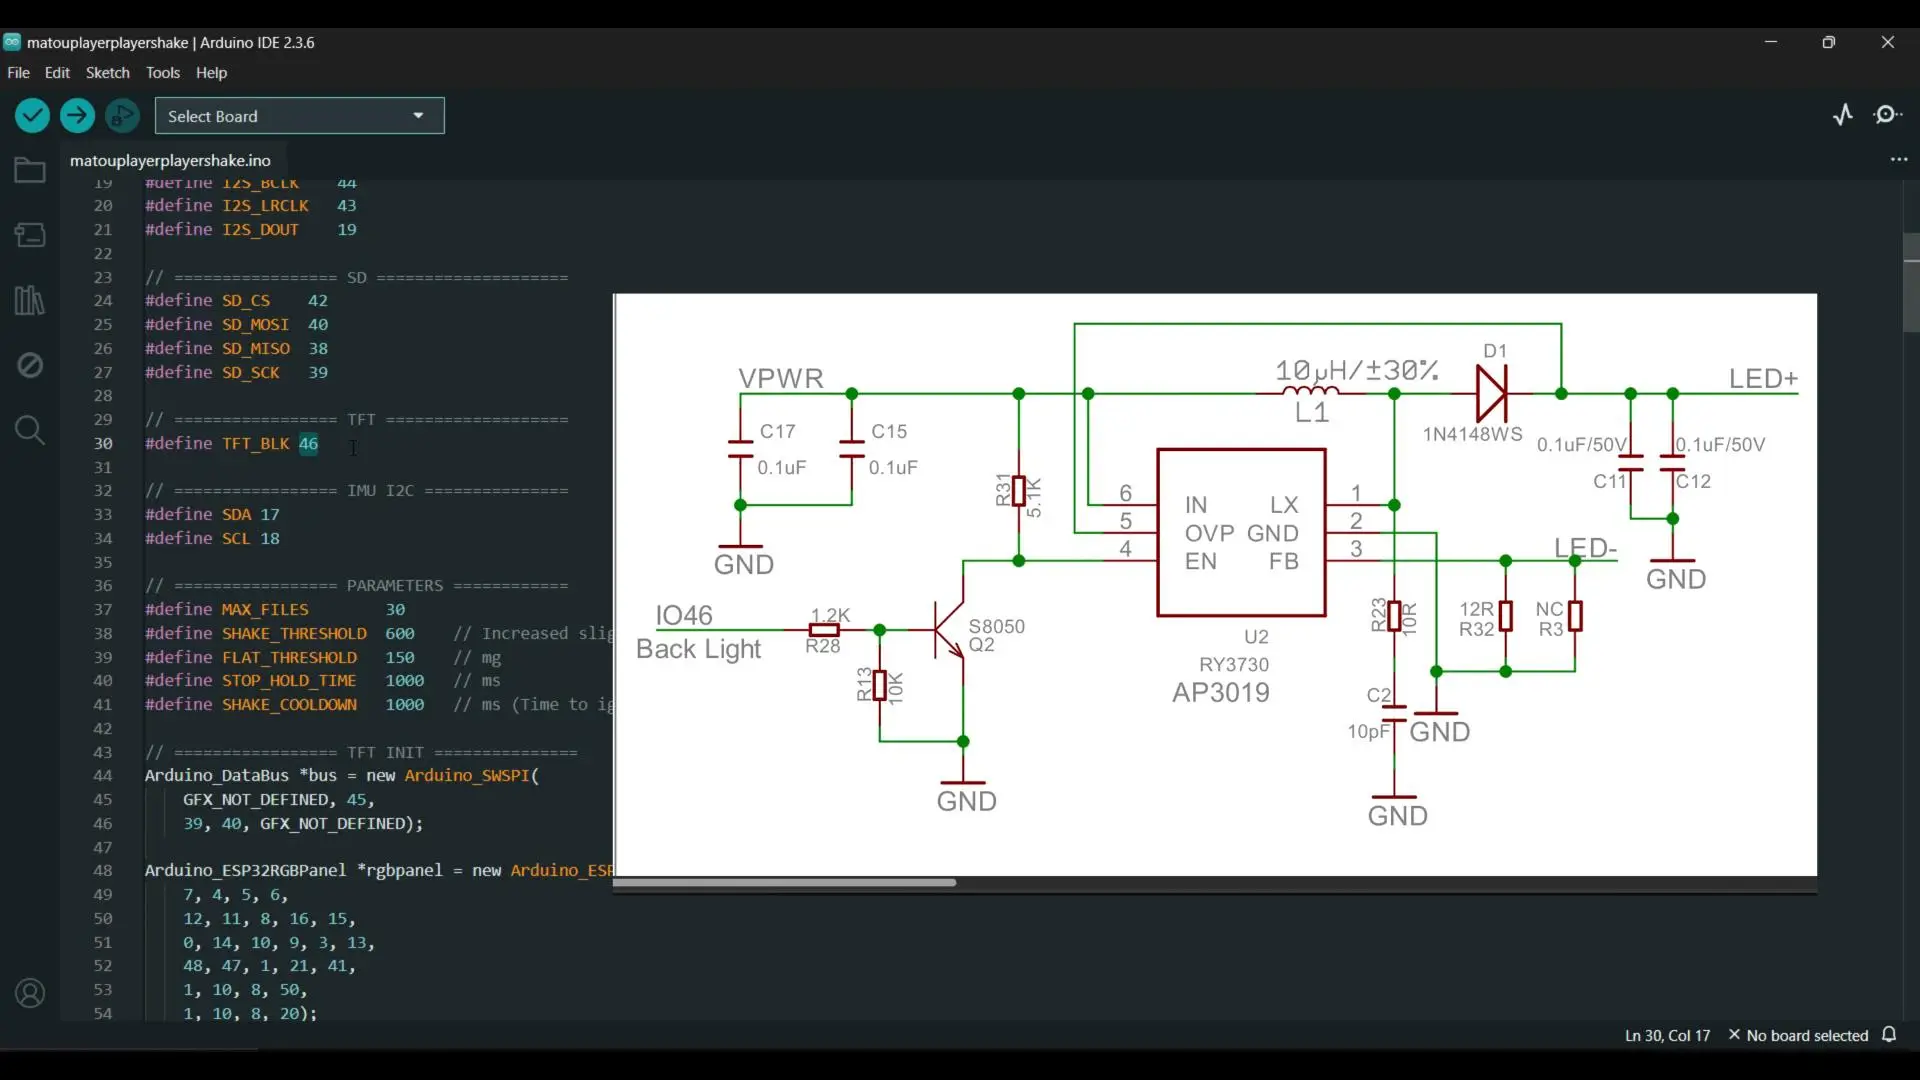
On this board, the TFT backlight is connected to GPIO 46. This pin controls the backlight directly, so we don’t need any external transistor or extra wiring. In the setup() function, we simply configure GPIO 46 as an output.
pinMode(TFT_BLK, OUTPUT);
digitalWrite(TFT_BLK, LOW);
One important thing to notice here is that the backlight is active-low, which means setting the pin LOW turns the display ON, and setting it HIGH turns it OFF. As soon as we pull this pin low, the backlight comes alive and the screen becomes visible.
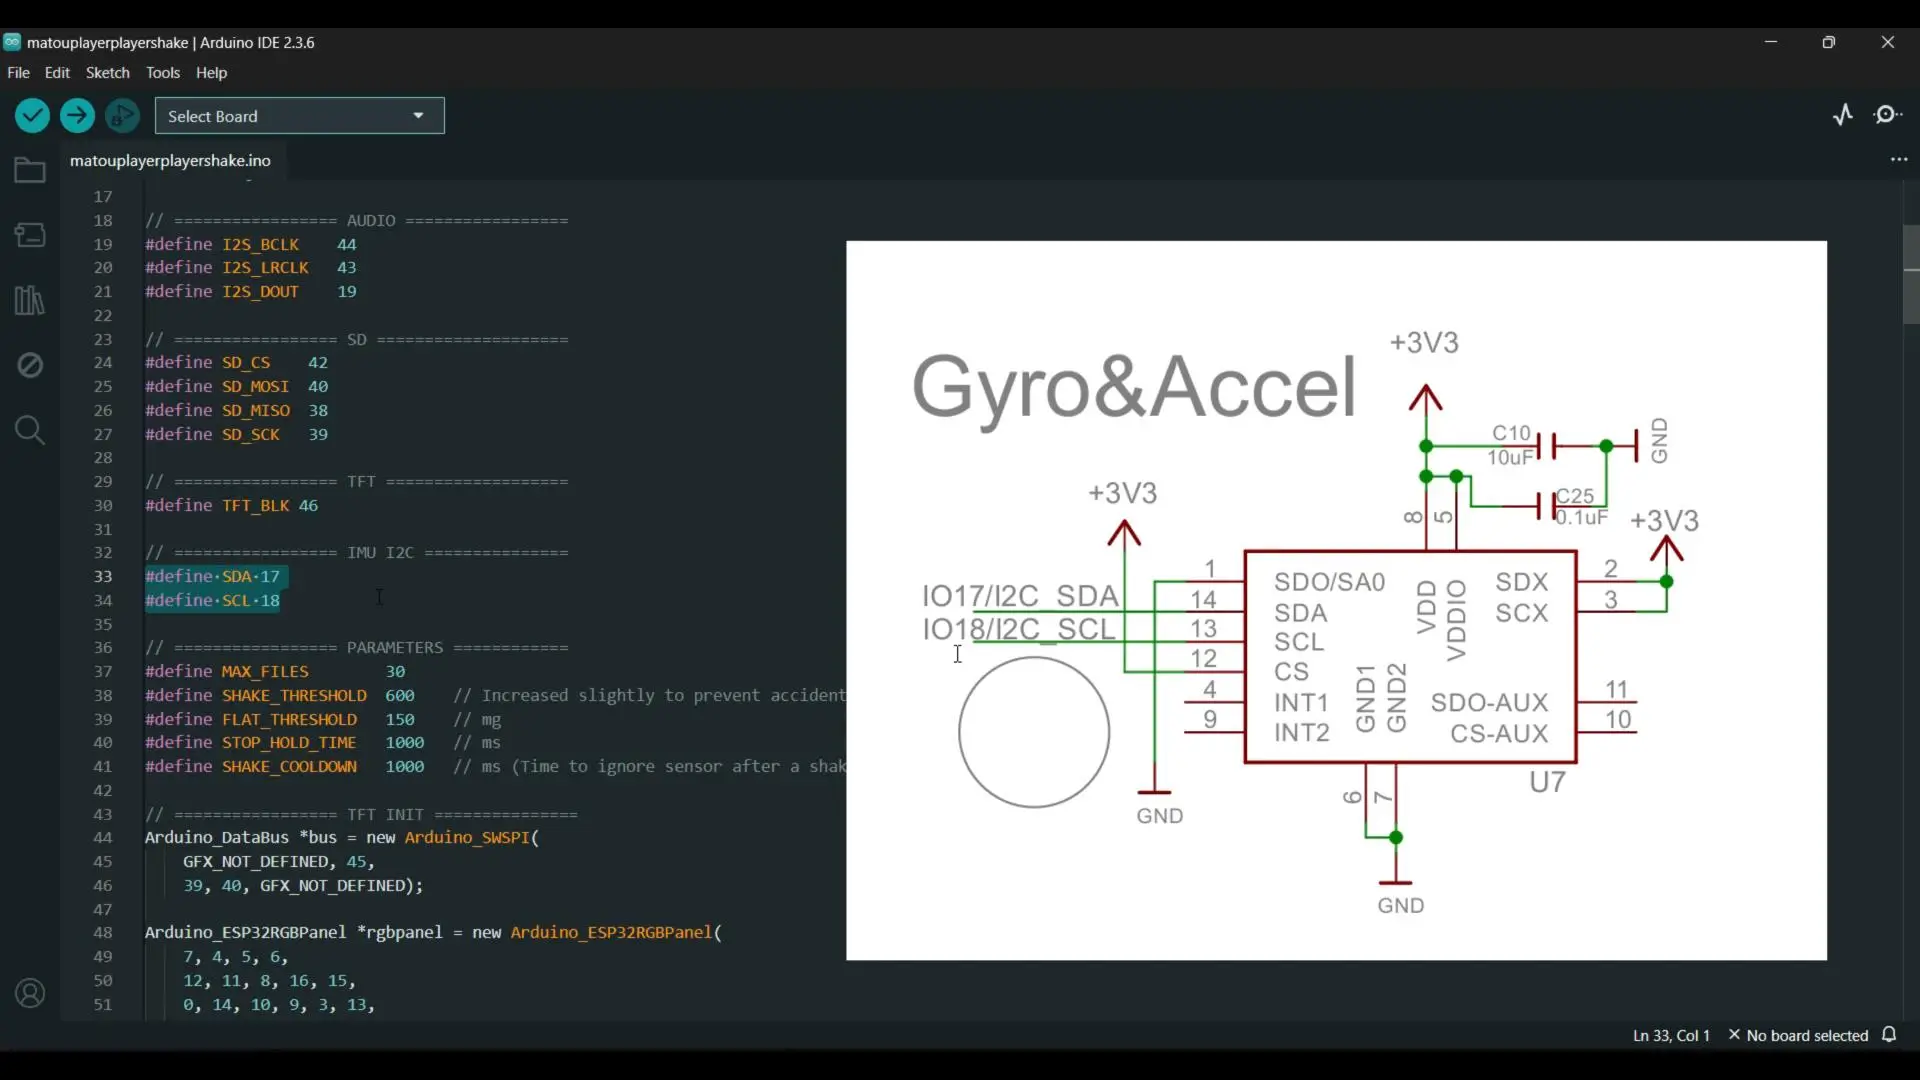
For gesture detection, we are using the QMI8658 IMU, which is already present on the board. The I2C pins are GPIO 17 for SDA and GPIO 18 for SCL, again taken directly from the schematic. In the setup, we configure the accelerometer for a 2G range and a 500Hz output data rate, which gives us fast and smooth motion detection.
Now here comes the interesting part — gesture logic.
float deltaX = abs(data.accelX – lastAccelX);
lastAccelX = data.accelX;
// ——– SHAKE DETECTION ——–
if (deltaX > SHAKE_THRESHOLD) {
if (data.accelX > 0) nextSongRequest = true;
else prevSongRequest = true;
flatStartTime = 0;
delay(300); // debounce
}
The code continuously reads the acceleration on the X-axis. Every time a new value comes in, we compare it with the previous reading. If the difference between these two values crosses a predefined threshold, the code treats it as a shake gesture.
A quick shake toward the right side triggers the next track, while a shake toward the left side plays the previous track. Slow tilting does nothing, so accidental movements are ignored.
To make the system more stable, a small delay is added after detecting a shake. This prevents false triggering and ensures the music player doesn’t skip multiple songs with a single gesture.
When the board is held flat and still for a specific amount of time, the code detects this condition and stops the playback. This is done by checking both X and Y acceleration values and making sure they stay below a defined limit for at least one second. No buttons, no touch; just natural movement.
On the audio side, the WAV file is read in small chunks and sent directly to the I2S driver. We skip the first 44 bytes, because that’s the WAV header, and then stream raw audio data to the speaker. This keeps memory usage low and playback smooth.
The user interface is kept simple on purpose. The screen shows the current acceleration value and the playback status, like playing or stopped. This helps you visually understand what the gestures are doing in real time, which is perfect for debugging and demonstrations.
So overall, this code is designed to be:
- Simple
- Efficient
- And very practical
All the hardware complexity is already handled by the board, and the software focuses only on logic and user experience.
Uploading the program into ESP32S3:
To upload the program, here is what you need to do:
First, go to the Tools menu > Board > ESP32, and select ESP32S3 Dev Module.
Go back to the Tools Menu > Port, and choose the correct communication port.
Again to the tools menu > Flash Size, and select 16MB.
Again go to the Tools menu > Partition Scheme and select 16M Flash
And one last time, go to Tools Menu > PSRAM, and select OPI PSRAM.
Once all these settings are done, you can simply click the Upload button.
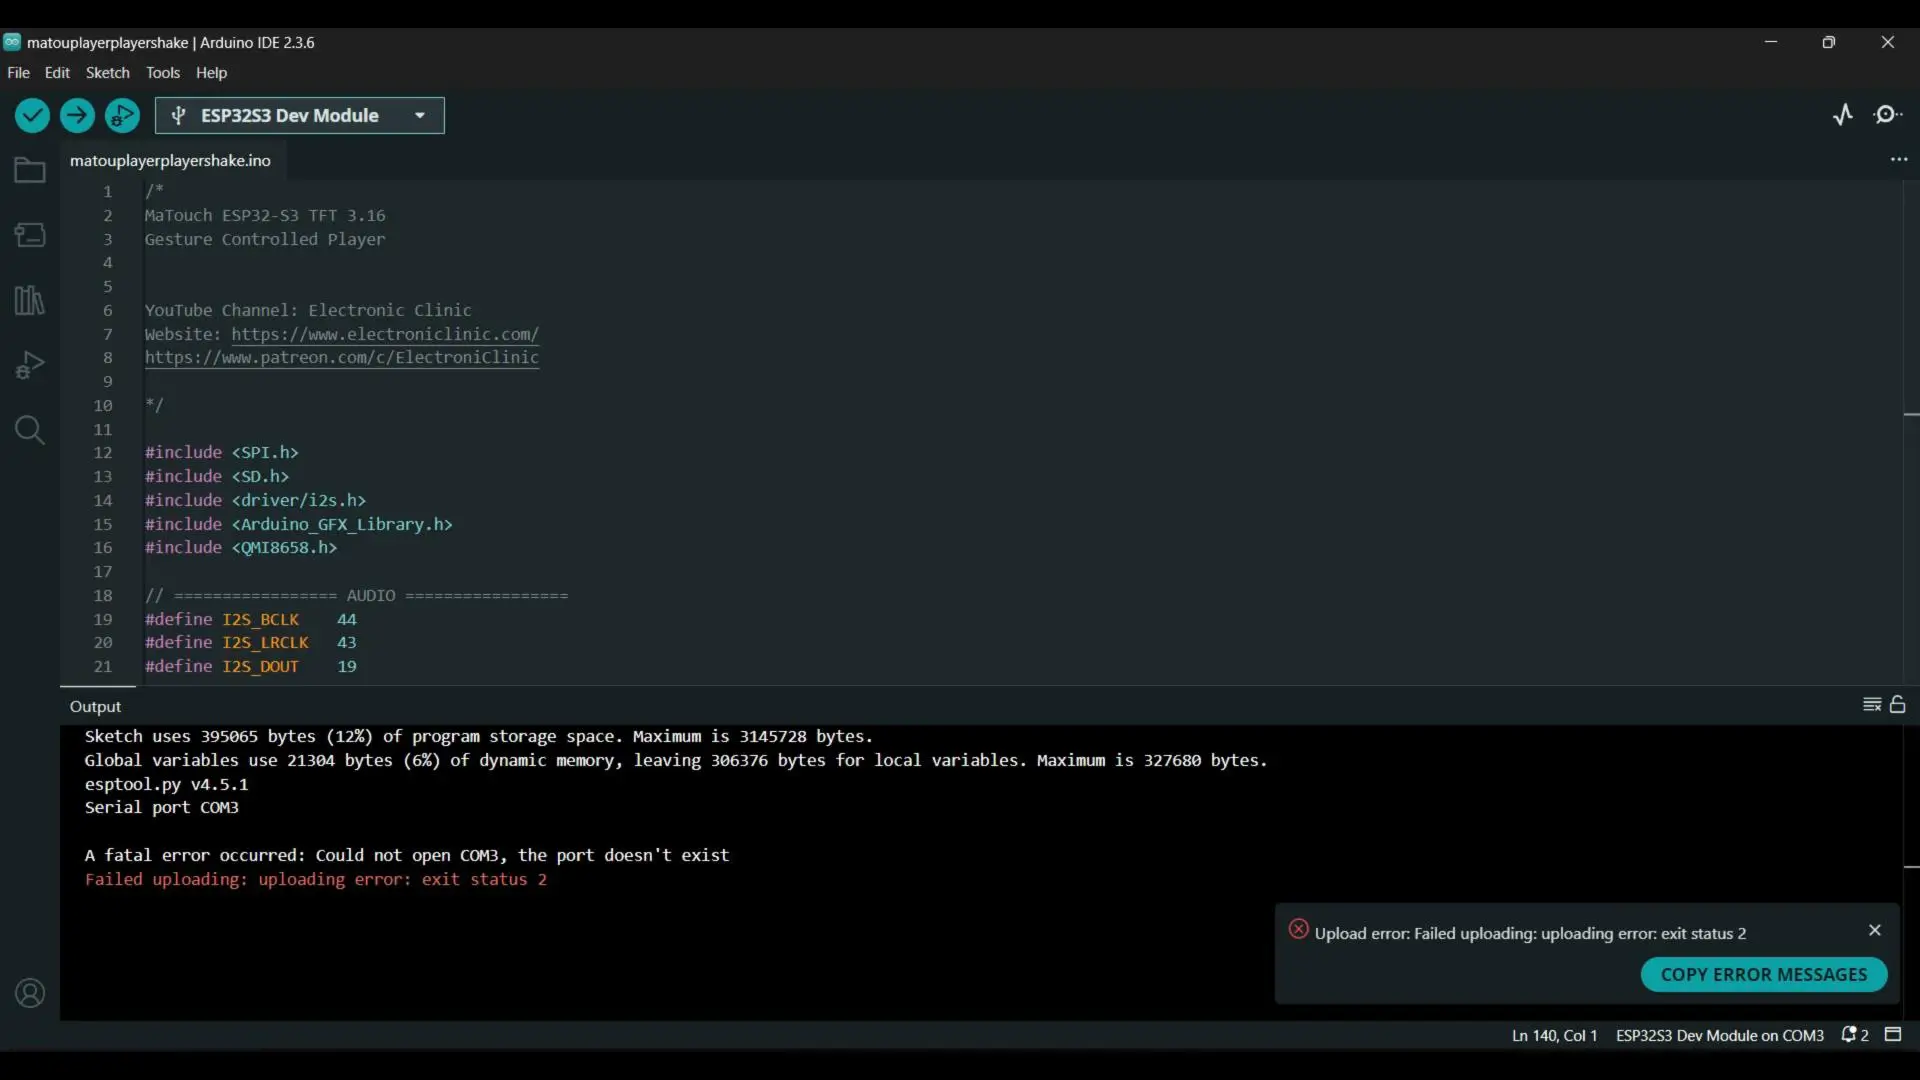
If you get an error during the upload, don’t panic; this is completely normal with ESP32 boards. Just disconnect the USB cable, then press and hold the Flash button, and while holding it, connect the USB cable again.
Now upload the code once more, and make sure you keep the Flash button pressed during the upload.
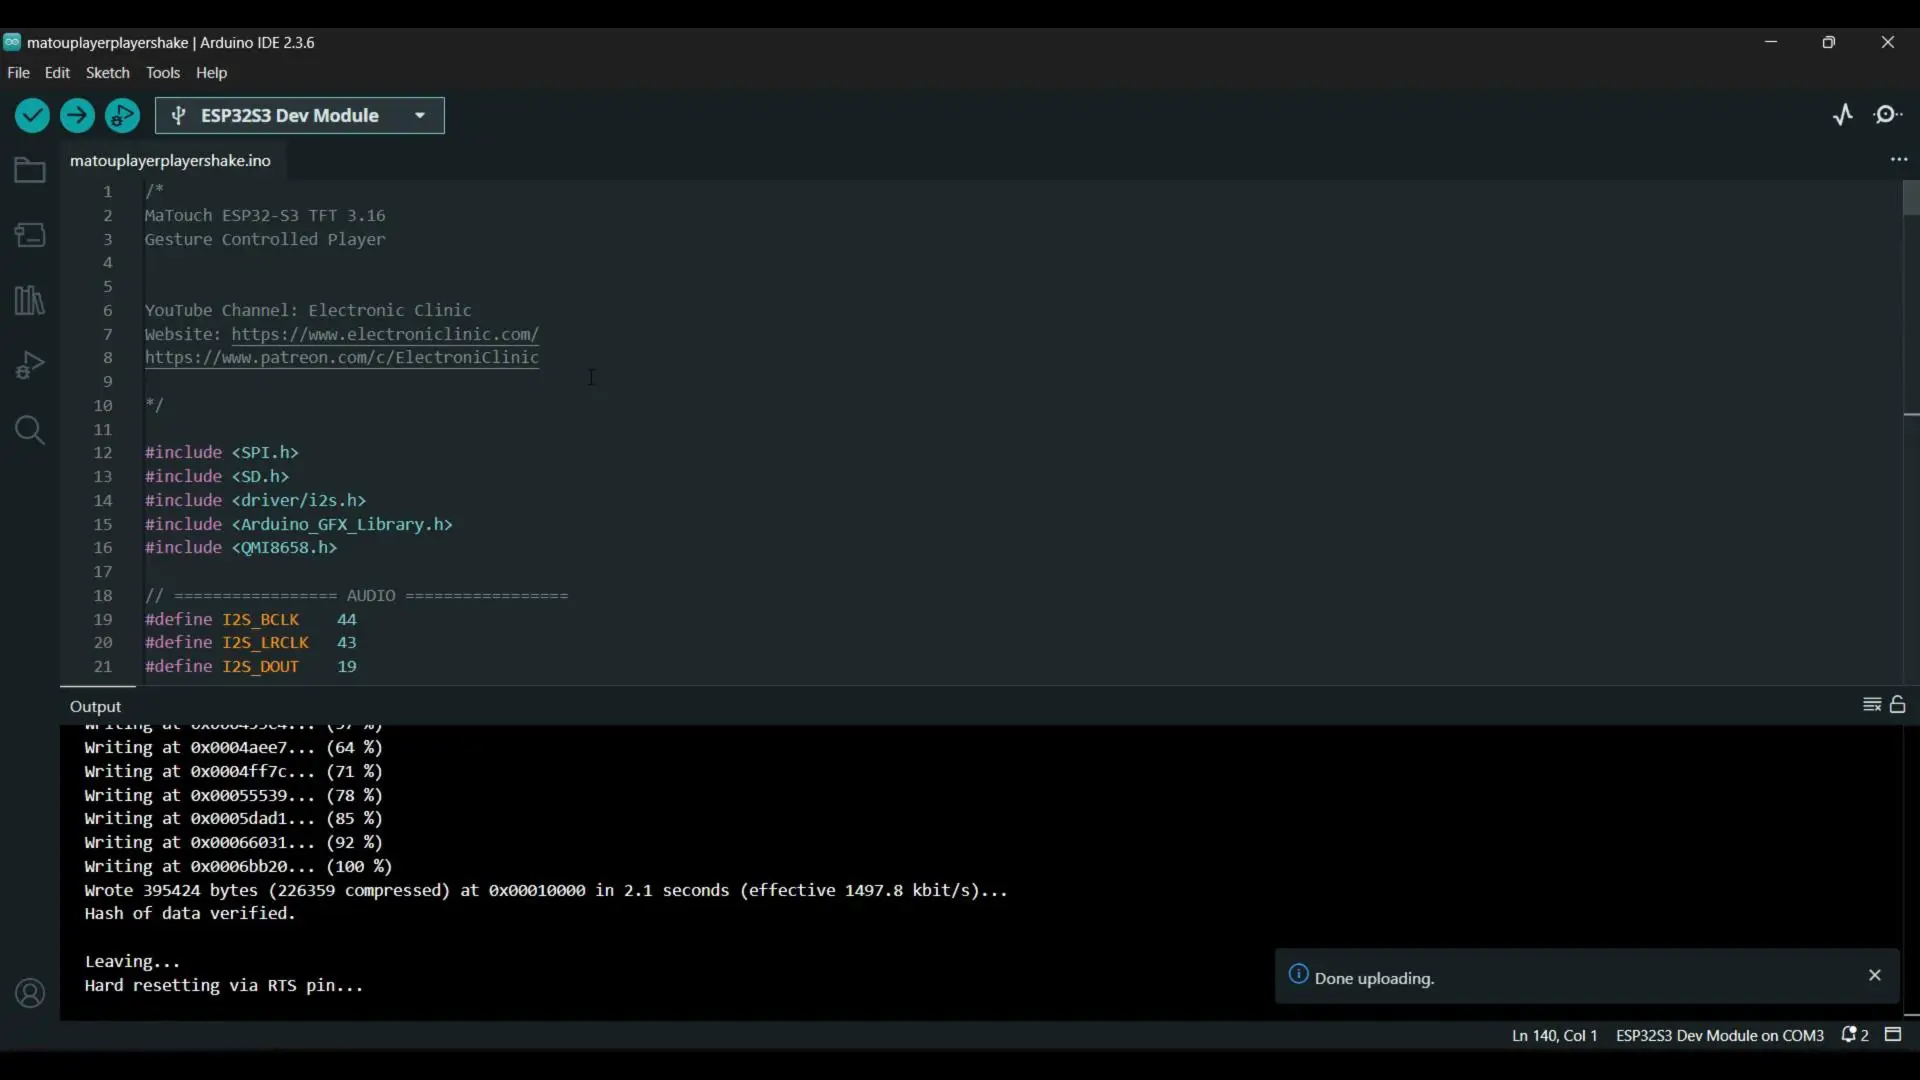
As you can see, the program has been uploaded successfully.
You can now unplug the USB cable and move on to the next step.
Practical Demo:
For the practical demo, I have already copied a few sound files to the SD card.
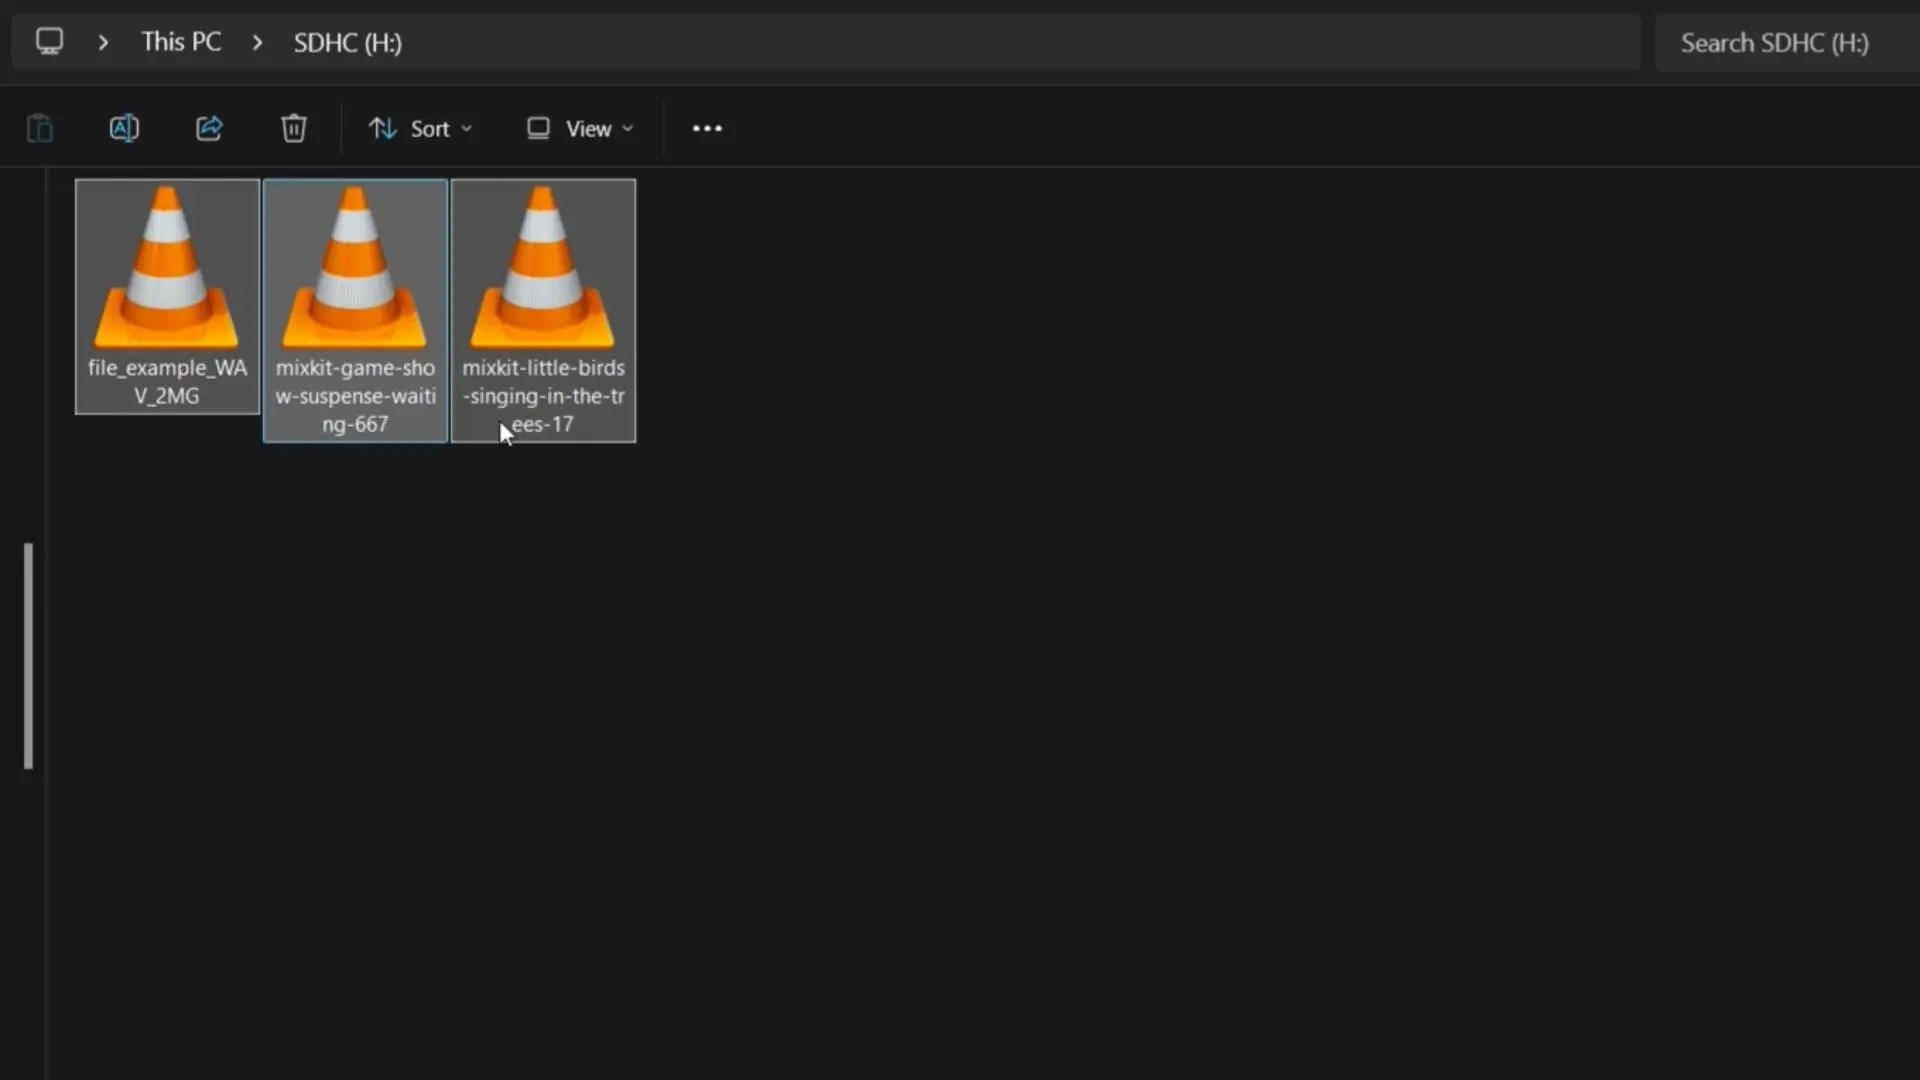
You can save songs, lectures, voice notes; anything you want, as long as it’s in WAV format.
Now, let’s insert the Micro SD card into the slot.
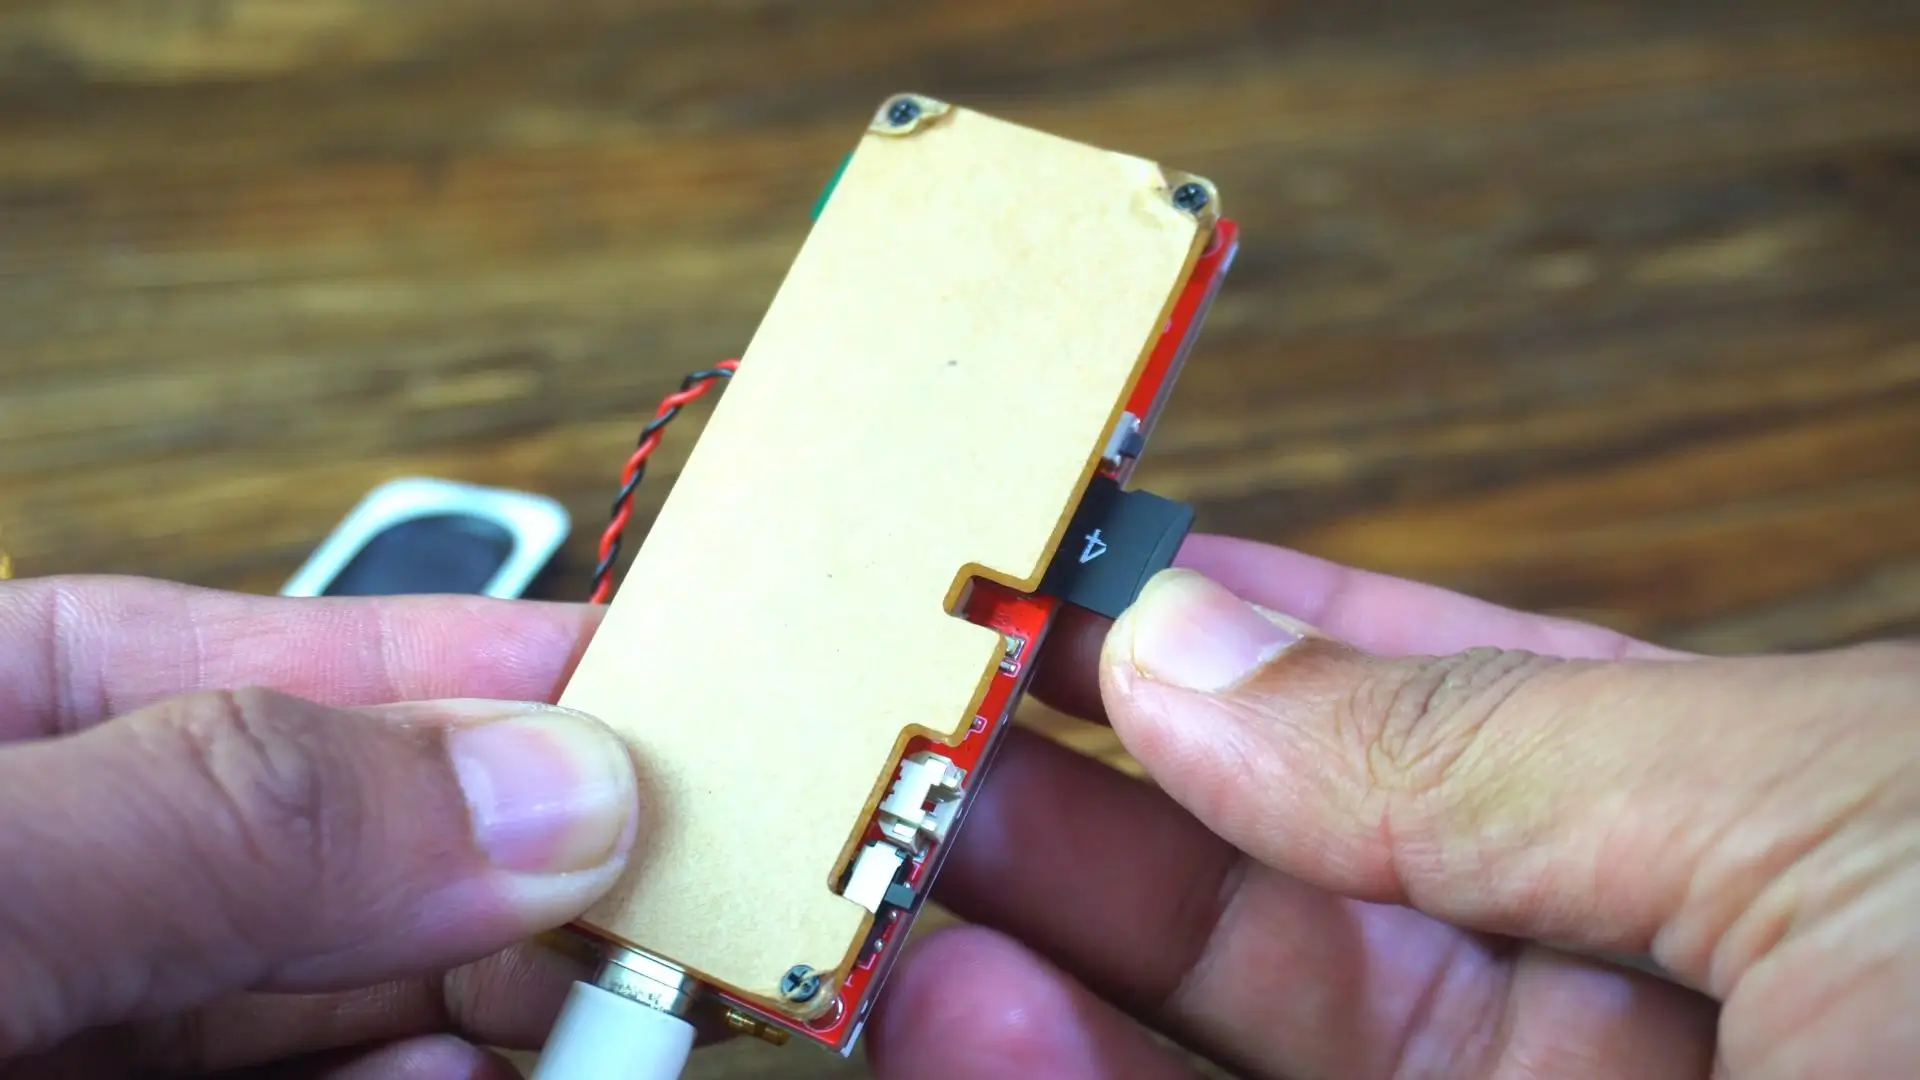
If you’re not using a battery, plug in the USB cable again to power the board.
Then turn ON the power switch, and the player will start automatically.
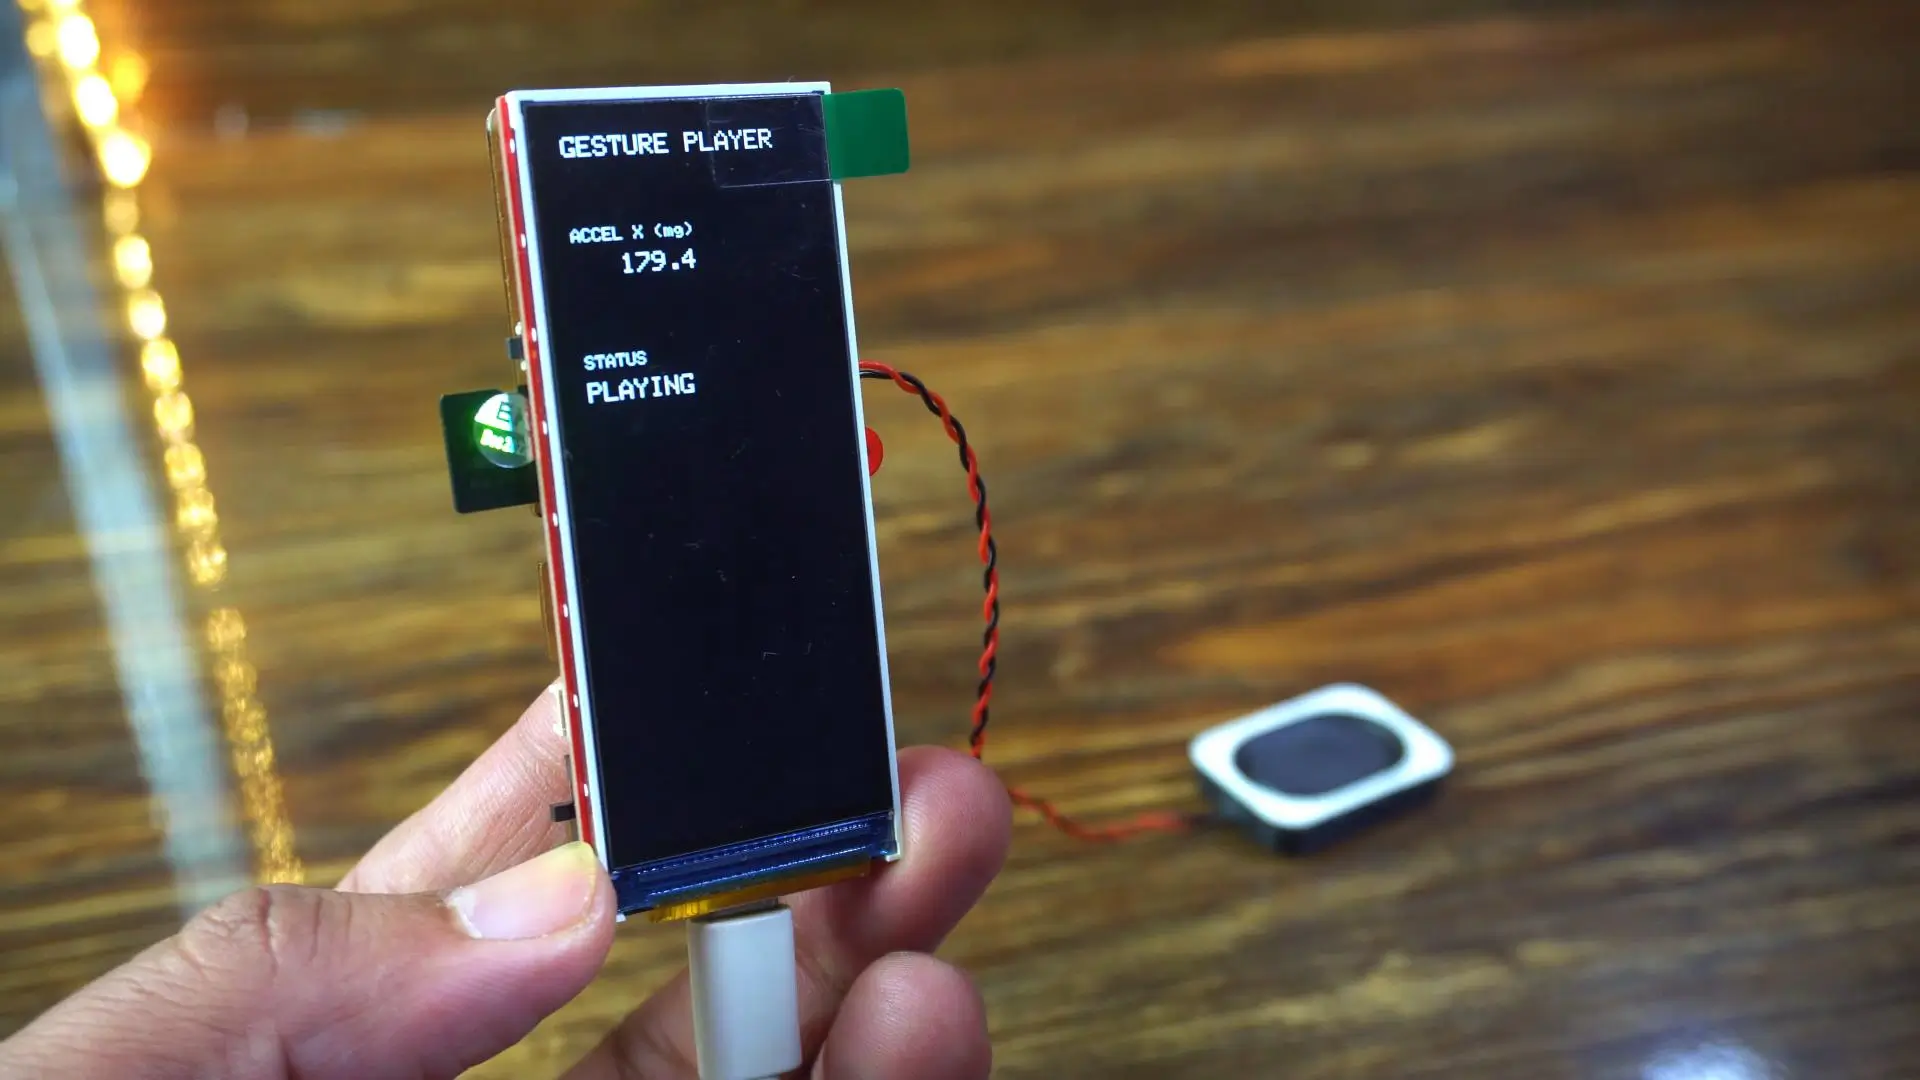
By default, the system plays all the sound files one by one, in sequence.
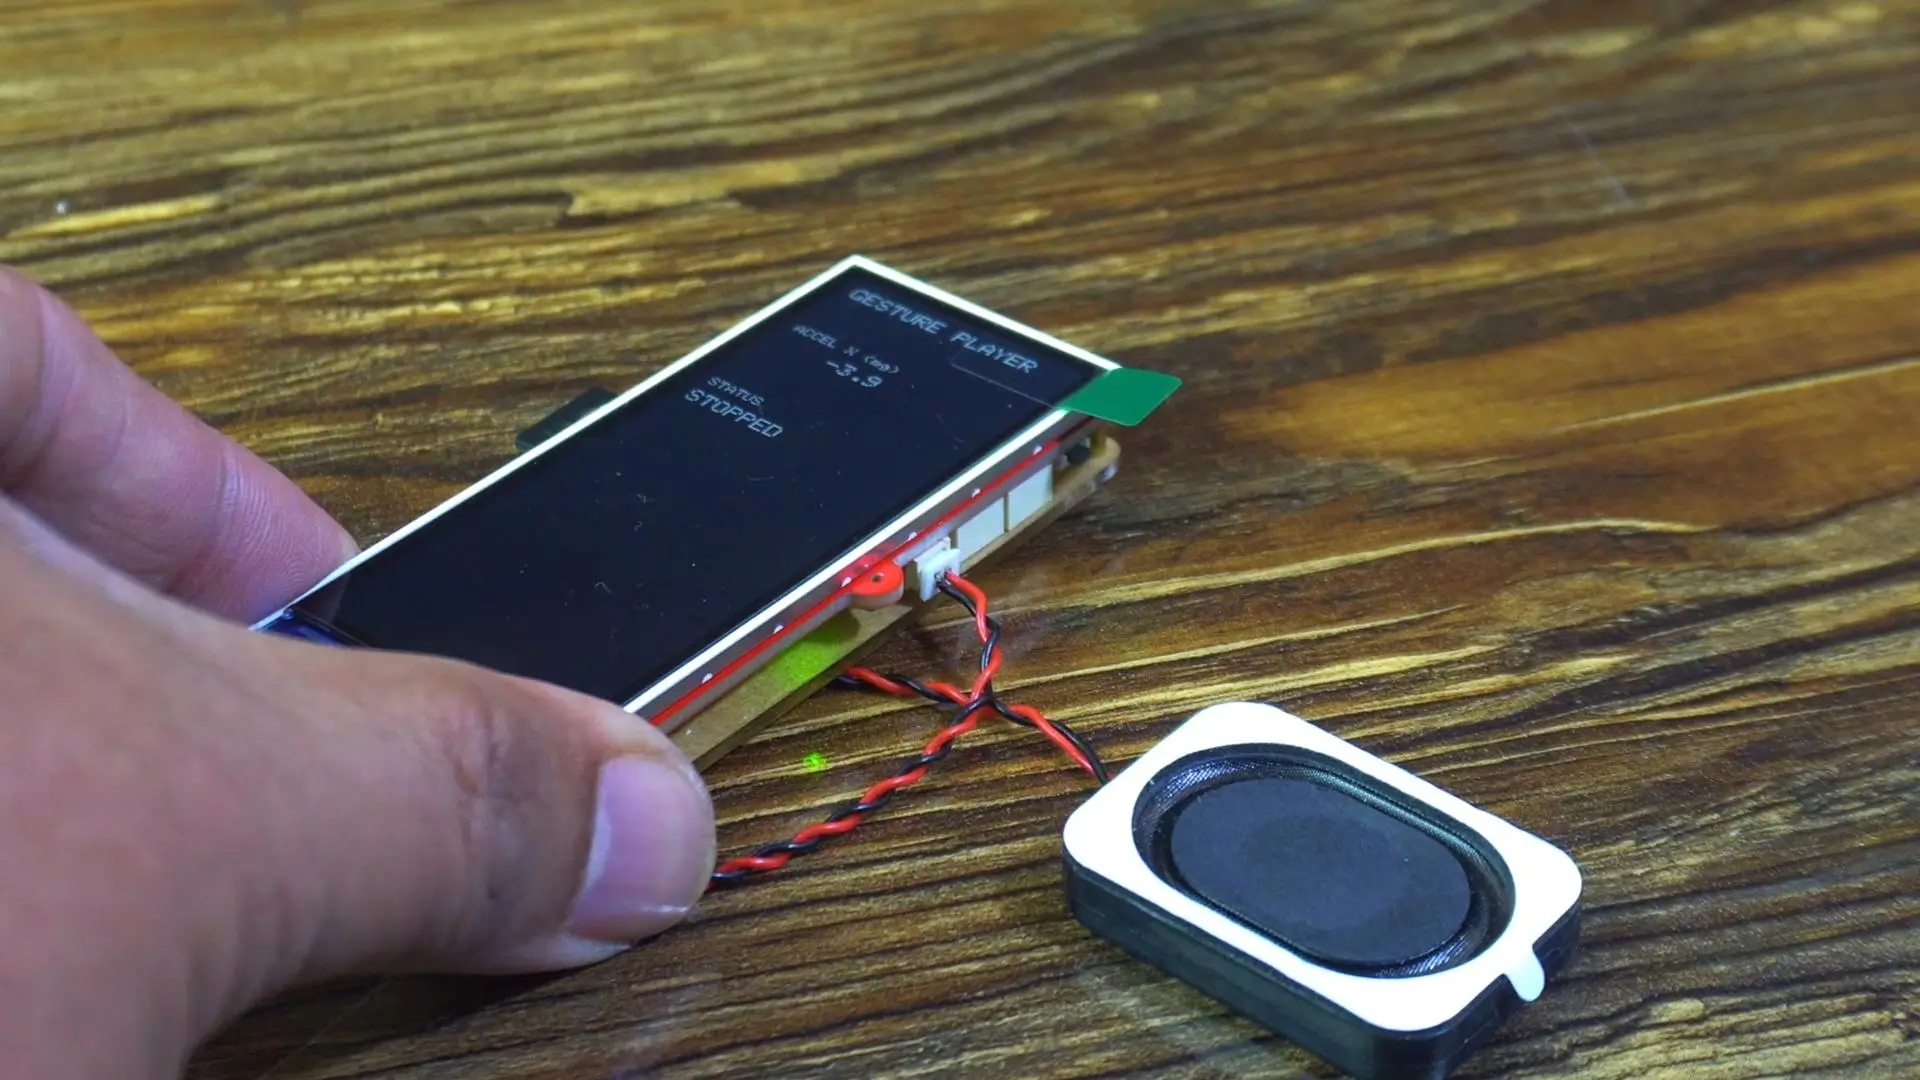
If you keep the board flat and still for about one second, the player will stop.
Give it a quick shake, and it will start playing again.
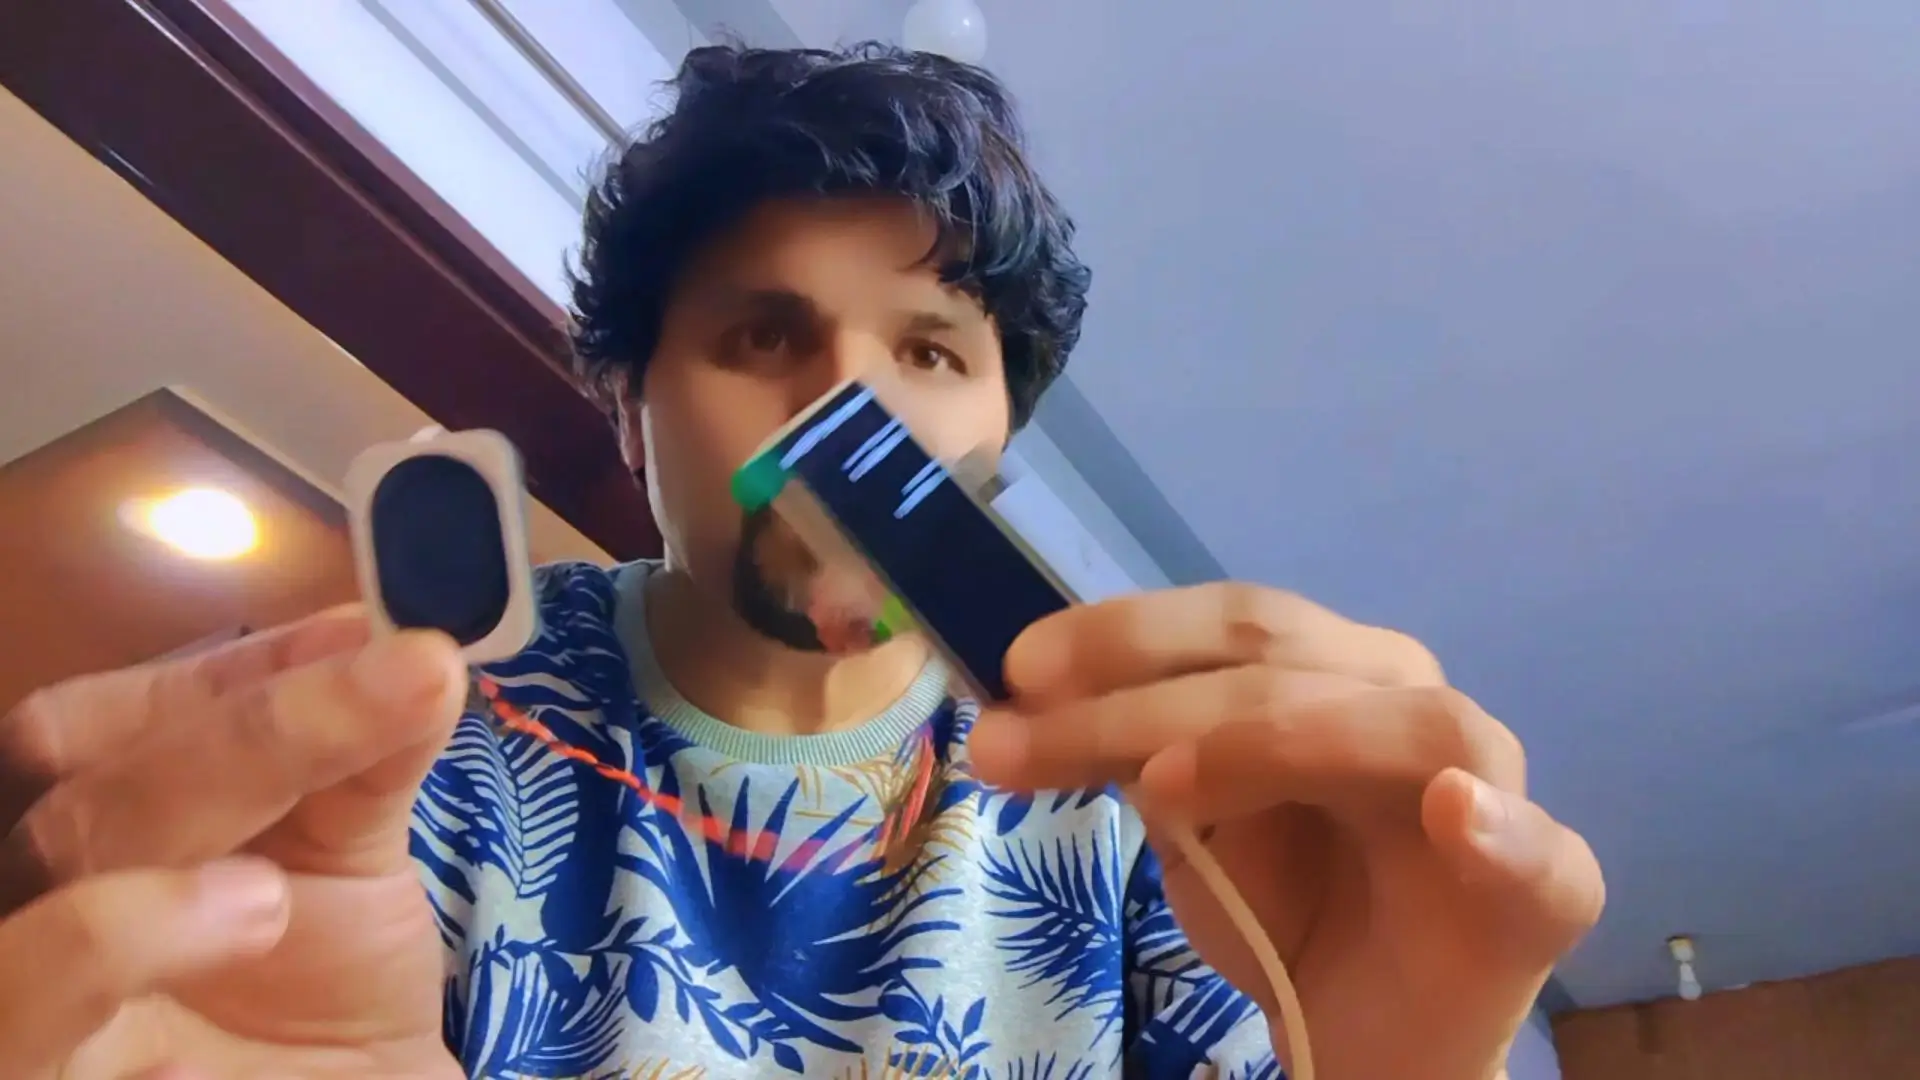
A normal tilt will do nothing; so there are no accidental skips.
To change the track, you need to give it a quick shake:
Shake to the right to play the next file
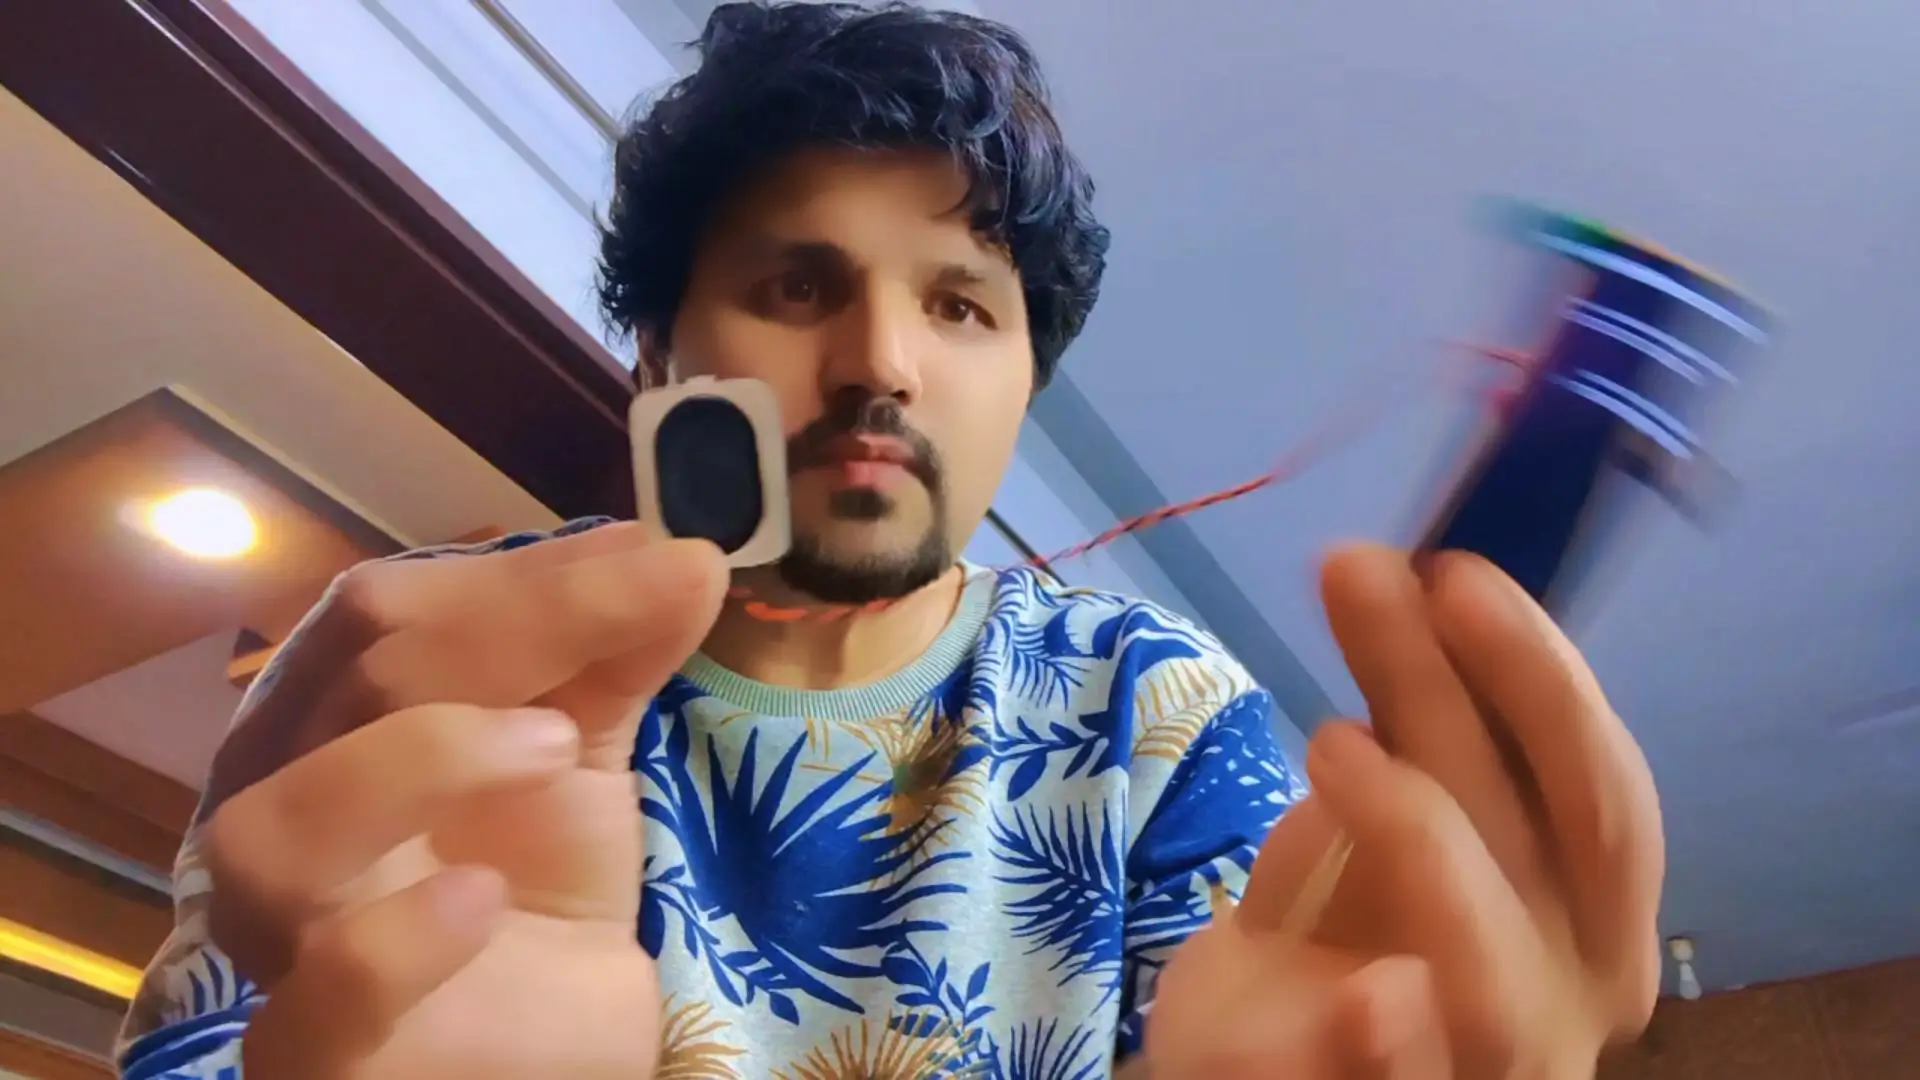
Shake to the left to go back to the previous one
There are no buttons to press, and you don’t even need to look at the display.
just shake your hand and that’s it.
So, that’s all for now.
Support me on Patreon:
If you enjoy my work and find these projects helpful, please consider supporting me on Patreon. With just $1, you can get access to all project source codes, schematics, and extra resources that I share with my supporters. Your support helps me continue creating new electronics tutorials, experiments, and open projects for the community. Thank you so much for being part of this journey and for supporting my work!
Watch Video Tutorial:
Discover more from Electronic Clinic
Subscribe to get the latest posts sent to your email.