C4001 mmWave Human Detection Sensor with Arduino and ESP32
Last Updated on April 9, 2025 by Engr. Shahzada Fahad
Table of Contents
C4001 mmWave Human Presence Sensor:
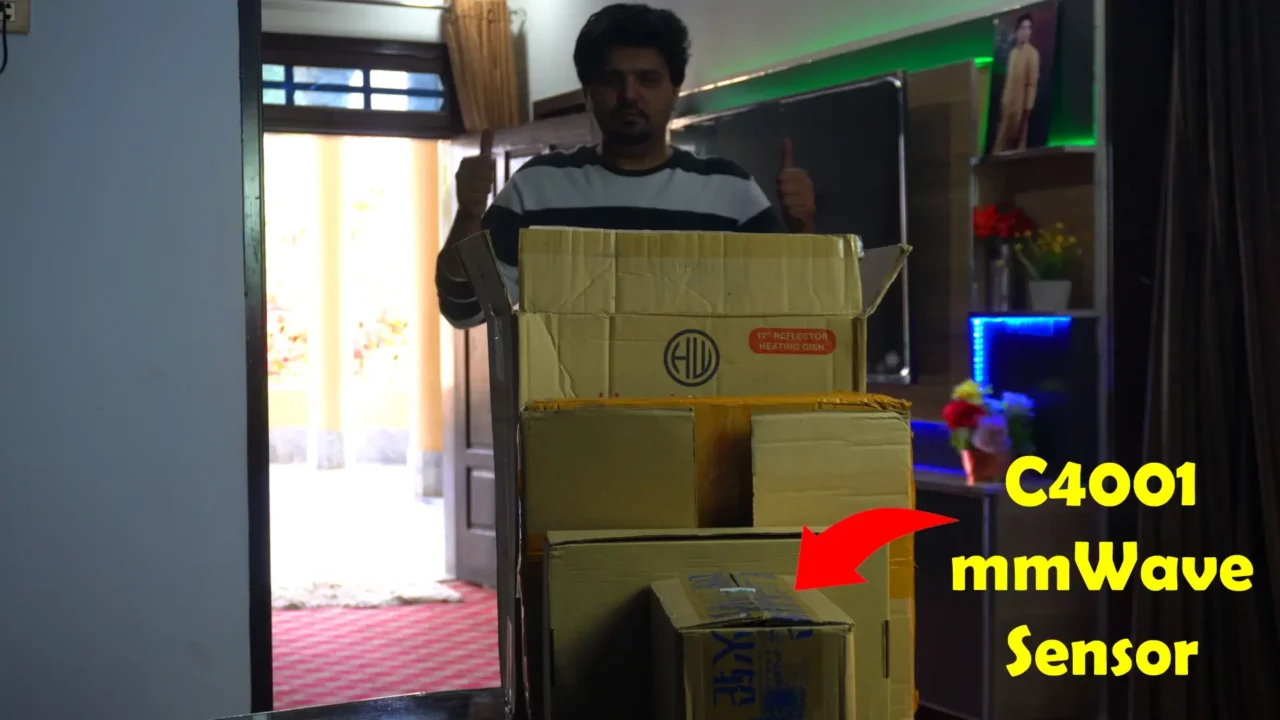
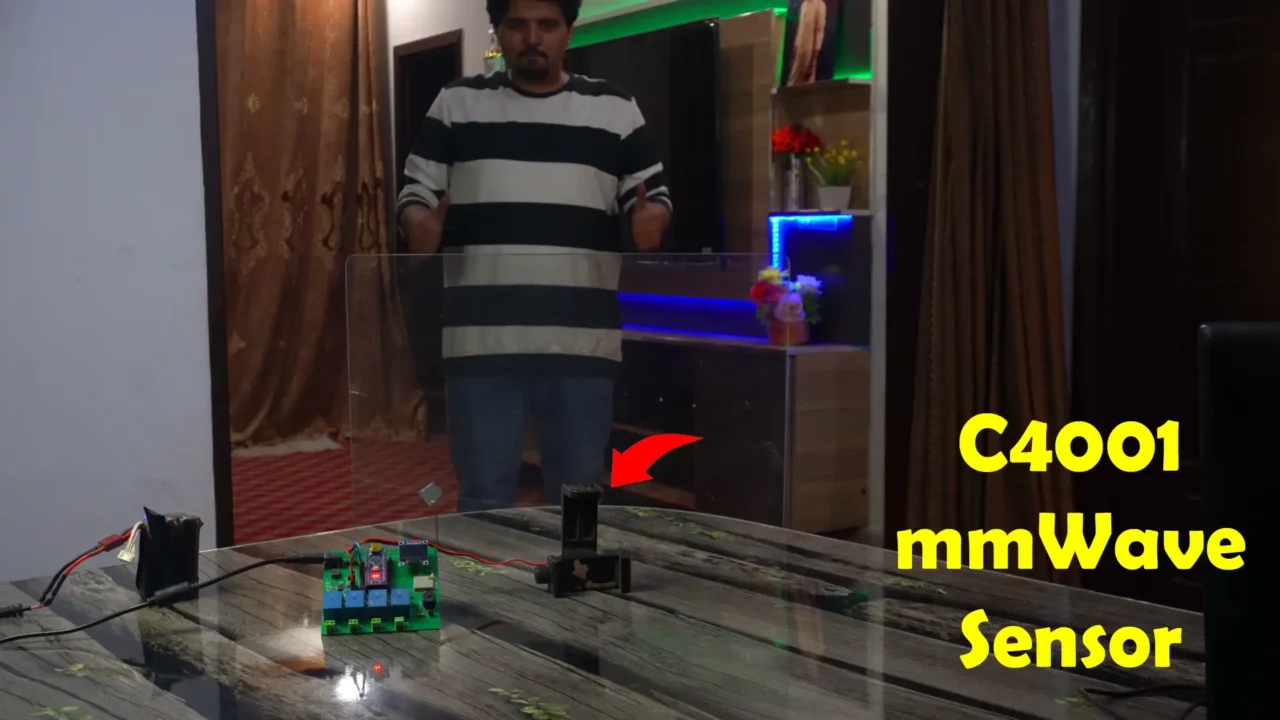
C4001 mmWave Human Detection Sensor with Arduino and ESP32- Today, I am pushing the DFrobot C4001 mmWave sensor to its absolute limits! Can it detect through walls, boxes, glass, or even under a ceiling fan? Let’s find out!

I personally found the DFrobot C4001 mmWave Human Presence Sensor quite impressive because it supports I2C and UART communication methods and is compatible with Arduino, ESP32, ESP8266, and Raspberry Pi development boards. And that’s not all—it has a human presence detection range of 8 meters and a motion detection and ranging range of 12 meters.
And let me tell you, the C4001 mmWave Sensor is entirely different from the C1001 mmWave Sensor.
We will use the C4001 mmWave sensor with both Arduino and ESP32. We will cover a total of four examples:
- Monitoring speed and velocity
- Using a filter to stabilize the values
- Implementing it for home automation and
- Monitoring the sensor using the Blynk application
After making the C4001 mmWave sensor fully functional, I will perform various tests on it. For example:
- Will the C4001 mmWave sensor work properly under a fan? Many people have already requested this test. It’s going to be mind-blowing if this sensor functions well directly under strong airflow.
- Can it detect people through;
- Fabric
- Boxes
- Hardboards
- Wood
- Plastic and
- Glass?
- And finally; the ultimate test – human detection through walls!
For performing these tests I will be using my designed ESP32 Development board and Arduino Nano Development board.
You can download the projects source codes and related material from my Patreon Page.
So, without any further delay let’s get started!!!
Amazon Links:
C4001 mmWave Human Presence Sensor
Arduino Nano USB C type (Recommended)
Other Tools and Components:
ESP32 WiFi + Bluetooth Module (Recommended)
*Please Note: These are affiliate links. I may make a commission if you buy the components through these links. I would appreciate your support in this way!
Human detection:
|
Feature |
Millimeter-wave Presence Sensor | Infrared Sensor |
| Sensing Principle | TOF radar principle + Doppler radar sensing (active detection) | Pyroelectric infrared sensing (passive radiation) |
| Motion Sensitivity | Can detect presence, slight movement, and motion of the human body | Can only detect motion and close-range slight movement of the human body |
| Sensing Range | Can be adjusted to different sensing distances | Sensing range cannot be adjusted |
| Environmental Temperature Impact | Not affected by environmental temperature | Sensitivity decreases when temperature is close to human body temperature |
| Application Environment | Not affected by heat sources, light sources, or air flow | Susceptible to heat sources and air flow |
| Penetration Ability | Can penetrate fabrics, plastics, glass, and other insulating materials | Can only penetrate some transparent plastics |
| Distance Measurement Support | Yes | No |
Unlike traditional infrared sensors, The C4001Millimeter Wave Presence Sensor utilizes a combination of TOF radar and Doppler radar sensing principles for active detection.
It can accurately detect human presence, slight movements, and body motion, making it highly effective for applications requiring precise monitoring.
One of its standout features is its adjustable sensing range, allowing customization based on specific needs.
Additionally, it has strong resistance to environmental factors, remaining unaffected by temperature changes, heat sources, light variations, and airflow.
A key advantage of this sensor is its penetration ability, enabling it to detect human presence through fabric, plastic, glass, and other insulating materials.
Moreover, it supports distance measurement, adding versatility to its functionality.
Installation Methods
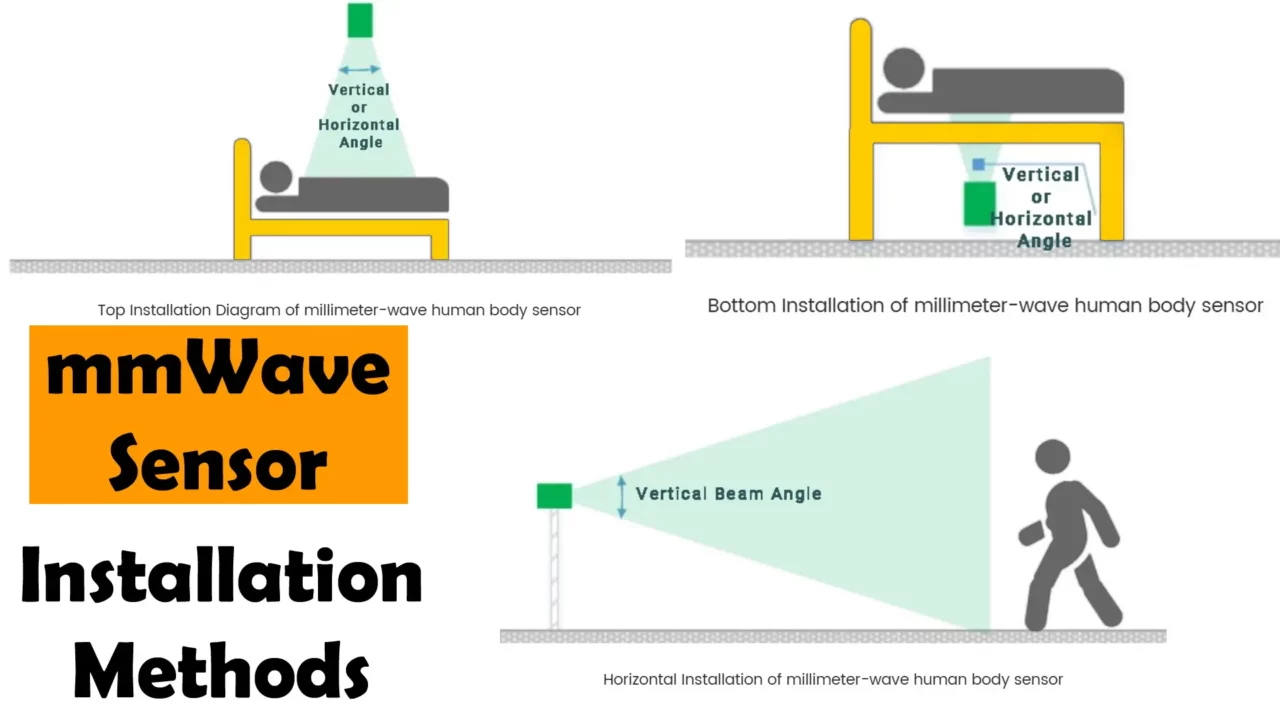
The performance of a millimeter-wave human body sensor depends on proper installation, as incorrect placement can impact its accuracy and functionality.
The commonly used installation methods for this module include top installation, bottom installation, horizontal installation, and downward tilted installation.
Specifications of C4001 mmWave Sensor:
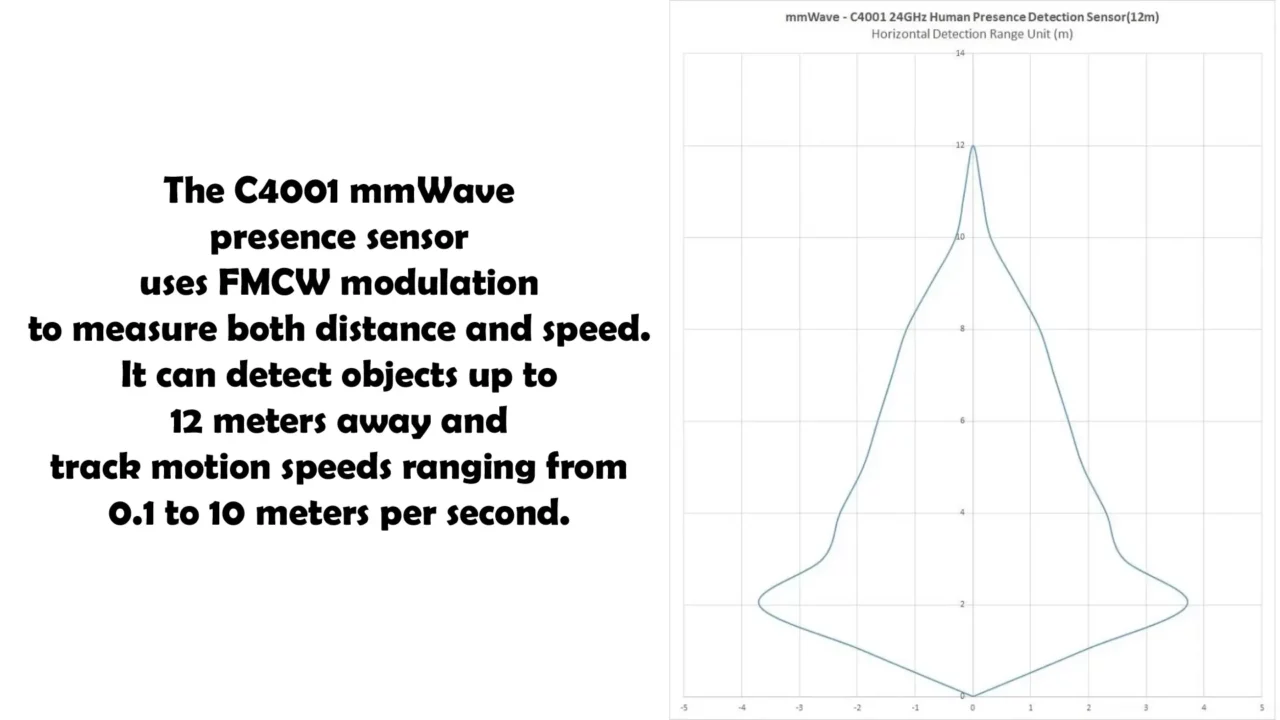
The C4001 mmWave presence sensor uses FMCW modulation to measure both distance and speed. It can detect objects up to 12 meters away and track motion speeds ranging from 0.1 to 10 meters per second.
The C4001 millimeter-wave human presence sensor operates on a 3.3V or 5V power supply, making it compatible with various microcontrollers.
Operating Voltage: 3.3V/5V
Maximum Detection Range: 12m
Beam Angle: 100*80°
Modulation Mode: FMCW
Operating Frequency: 24GHz
Operating Temperature: -40~85℃
Baud Rate: 9600
I2C Address: 0x2A/0x2B
Size: 22*30mm
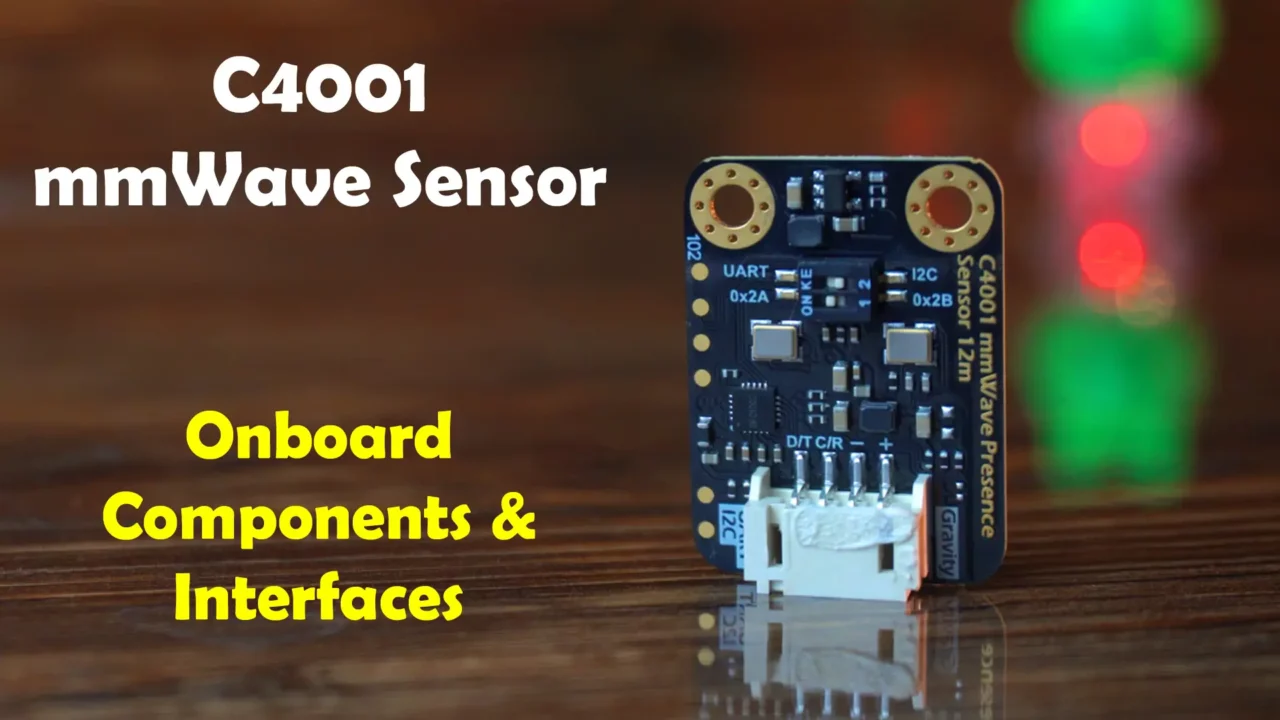
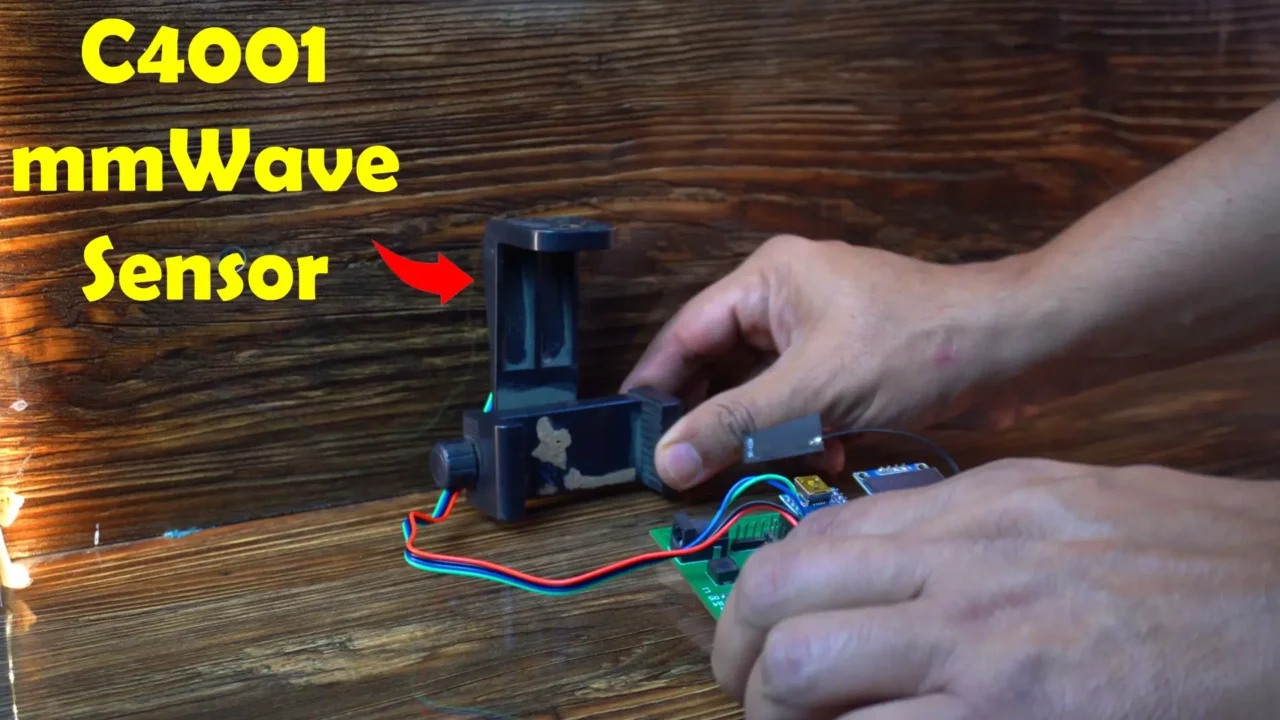
+ is the Power, – is the Ground, C/R is I2C Clock Line or RX, and D/T is the I2C Data Line or TX.
It comes with a Gravity-4P I2C/UART Sensor Connector.
It features a switch labeled “I2C/UART”, allowing me to toggle between I2C and UART communication based on my setup. Right next to it, there is another switch for selecting the I2C address (0x2A or 0x2B), which is useful when using multiple sensors on the same I2C bus.
Right now, I have set it to I2C mode. The advantage of this is that I don’t have to change the pins in the code for Arduino or ESP32. But if I select UART communication, I would have to change the pins every time. So, I will use I2C communication.
And let me tell you all the programs I am going to share with you will work on both Arduino and ESP32 without any changes.
Features
- Communication Methods: It supports two communication methods, I2C and UART.
- Interface: It uses the Gravity interface (PH2.0).
- Human Detection: It can detect the presence of humans up to 8 meters and detect human motion up to 12 meters.
- Distance Detection: It can measure distances from 1.2m to 12m.
- Speed Detection: It can detect speeds from 0.1m/s to 10m/s.
- Strong anti-interference capability: It is not affected by factors such as snow, haze, temperature, humidity, dust, light, and noise.
- Compact size and easy integration.
Applications
- Human Detection
- Distance and Velocity Detection
- Environmental Monitoring
- Industrial Automation
- Real-time Monitoring and Tracking
C4001 mmWave Sensor with Arduino:
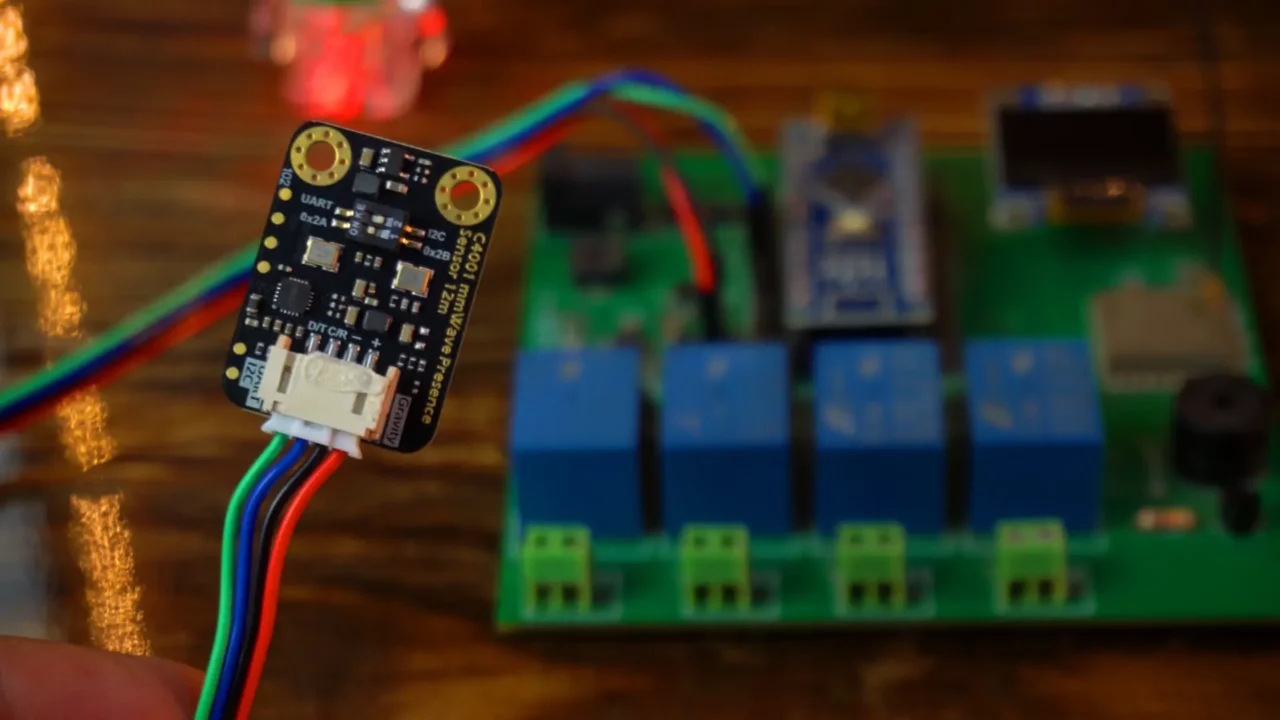
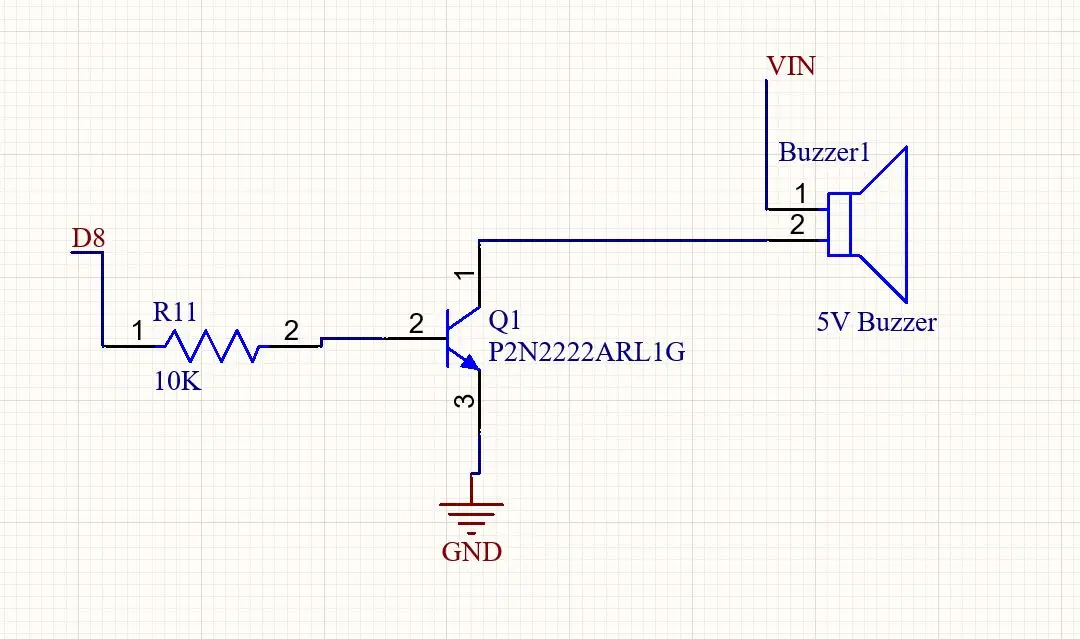
Connect the Red and Black wires to the Arduino 5V and Gnd. Connect the Blue wire to the Arduino A5 and the other wire to A4 pin on the Arduino. A4 is the SDA and A5 is the SCL.
The 5V buzzer is connected to the Arduino digital pin 8. For the connections you can follow this circuit diagram.
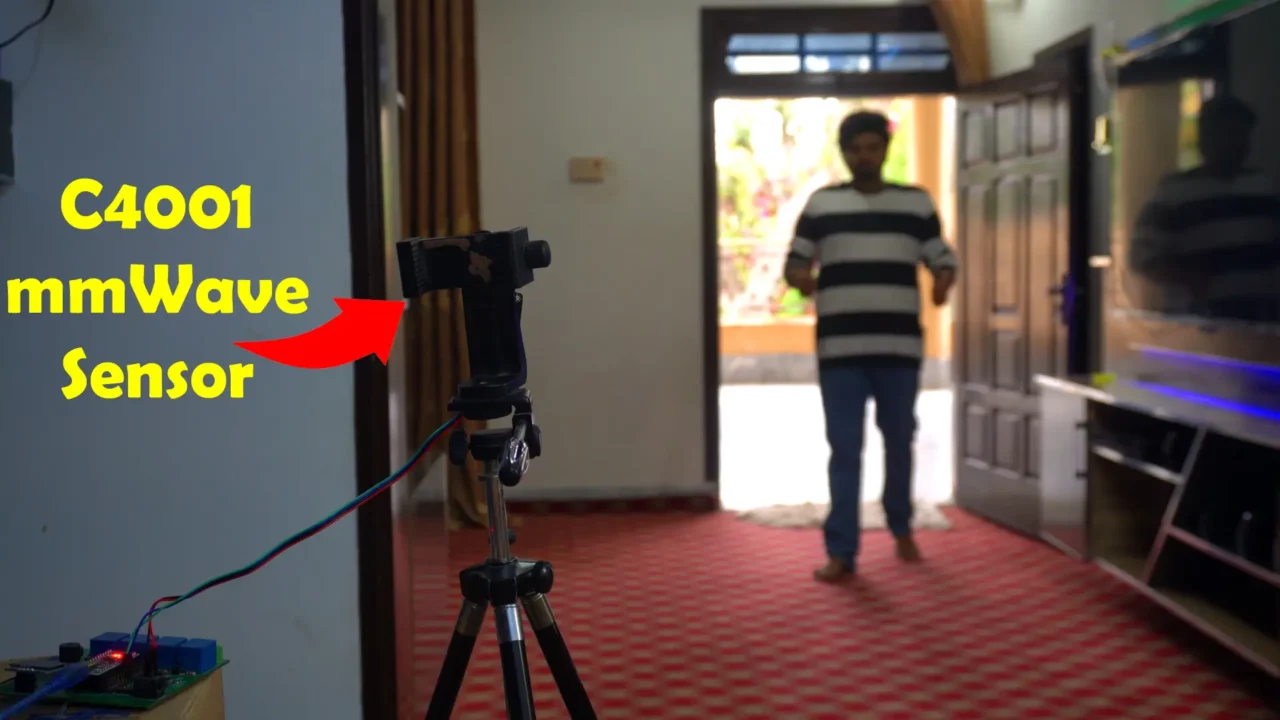
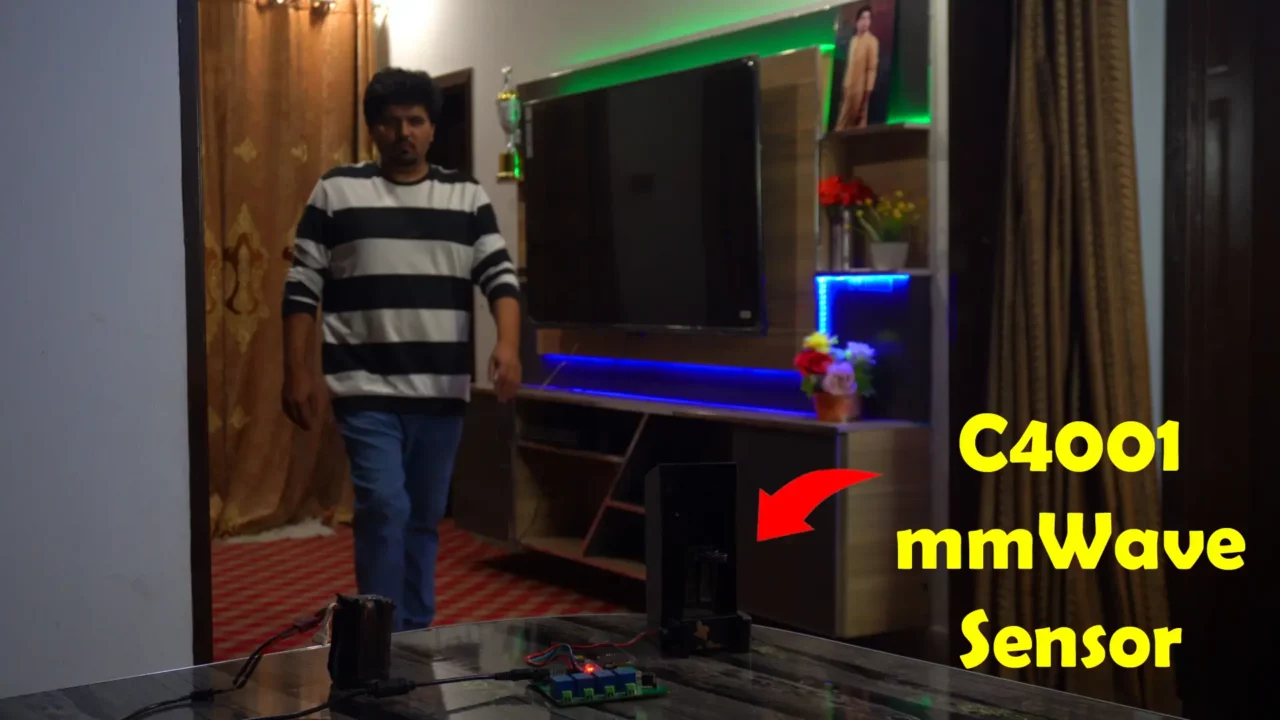
Right now, I can’t permanently fix the C4001 mmWave sensor because I need to perform multiple tests on it. So, that’s why I temporarily attached it to a mobile stand using double tape.
And let me tell you; It should be at least 1.5 meters above the floor. Now, let’s go ahead and take a look at the programming.
Install required library:
First, you need to install the DFRobot_C4001 library. To do this, go to the product’s wiki page and download the library from there. I have already downloaded it.
Next, go to the Sketch menu…then to Include Library…and click Add .ZIP Library.
Finally, select the folder and then click the open button.
Example1:
I downloaded this code from DFRobot’s Wiki page. You can also find the code for UART communication on the same page.
At first glance, this code might look a bit confusing, but it’s actually not that complicated. Once you read through it, you will understand it better. In the next examples, I have simplified the code significantly.
Code:
|
1 2 3 4 5 6 7 8 9 10 11 12 13 14 15 16 17 18 19 20 21 22 23 24 25 26 27 28 29 30 31 32 33 34 35 36 37 38 39 40 41 42 43 44 45 46 47 48 49 50 51 52 53 54 55 56 57 58 59 60 61 62 63 64 65 66 67 68 69 70 71 72 73 74 75 76 77 78 79 80 81 82 83 84 85 86 87 88 89 90 91 92 93 94 95 |
#include "DFRobot_C4001.h" #define I2C_COMMUNICATION //use I2C for communication, but use the serial port for communication if the line of codes were masked #ifdef I2C_COMMUNICATION /* * DEVICE_ADDR_0 = 0x2A default iic_address * DEVICE_ADDR_1 = 0x2B */ DFRobot_C4001_I2C radar(&Wire, DEVICE_ADDR_0); #else /* --------------------------------------------------------------------------------------------------------------------- * board | MCU | Leonardo/Mega2560/M0 | UNO | ESP8266 | ESP32 | microbit | m0 | * VCC | 3.3V/5V | VCC | VCC | VCC | VCC | X | vcc | * GND | GND | GND | GND | GND | GND | X | gnd | * RX | TX | Serial1 TX1 | 5 | 5/D6 | D2 | X | tx1 | * TX | RX | Serial1 RX1 | 4 | 4/D7 | D3 | X | rx1 | * ----------------------------------------------------------------------------------------------------------------------*/ /* Baud rate cannot be changed */ #if defined(ARDUINO_AVR_UNO) || defined(ESP8266) SoftwareSerial mySerial(4, 5); DFRobot_C4001_UART radar(&mySerial, 9600); #elif defined(ESP32) DFRobot_C4001_UART radar(&Serial1, 9600, /*rx*/ D2, /*tx*/ D3); #else DFRobot_C4001_UART radar(&Serial1, 9600); #endif #endif void setup() { Serial.begin(115200); while (!radar.begin()) { Serial.println("NO Deivces !"); delay(1000); } Serial.println("Device connected!"); // speed Mode radar.setSensorMode(eSpeedMode); sSensorStatus_t data; data = radar.getStatus(); // 0 stop 1 start Serial.print("work status = "); Serial.println(data.workStatus); // 0 is exist 1 speed Serial.print("work mode = "); Serial.println(data.workMode); // 0 no init 1 init success Serial.print("init status = "); Serial.println(data.initStatus); Serial.println(); /* * min Detection range Minimum distance, unit cm, range 0.3~20m (30~2500), not exceeding max, otherwise the function is abnormal. * max Detection range Maximum distance, unit cm, range 2.4~20m (240~2500) * thres Target detection threshold, dimensionless unit 0.1, range 0~6553.5 (0~65535) */ if (radar.setDetectThres(/*min*/ 30, /*max*/ 1200, /*thres*/ 10)) { Serial.println("set detect threshold successfully"); } // set Fretting Detection radar.setFrettingDetection(eON); // get confige params Serial.print("min range = "); Serial.println(radar.getTMinRange()); Serial.print("max range = "); Serial.println(radar.getTMaxRange()); Serial.print("threshold range = "); Serial.println(radar.getThresRange()); Serial.print("fretting detection = "); Serial.println(radar.getFrettingDetection()); } void loop() { Serial.print("target number = "); Serial.println(radar.getTargetNumber()); // must exist Serial.print("target Speed = "); Serial.print(radar.getTargetSpeed()); Serial.println(" m/s"); Serial.print("target range = "); Serial.print(radar.getTargetRange()); Serial.println(" m"); Serial.print("target energy = "); Serial.println(radar.getTargetEnergy()); Serial.println(); delay(100); } |
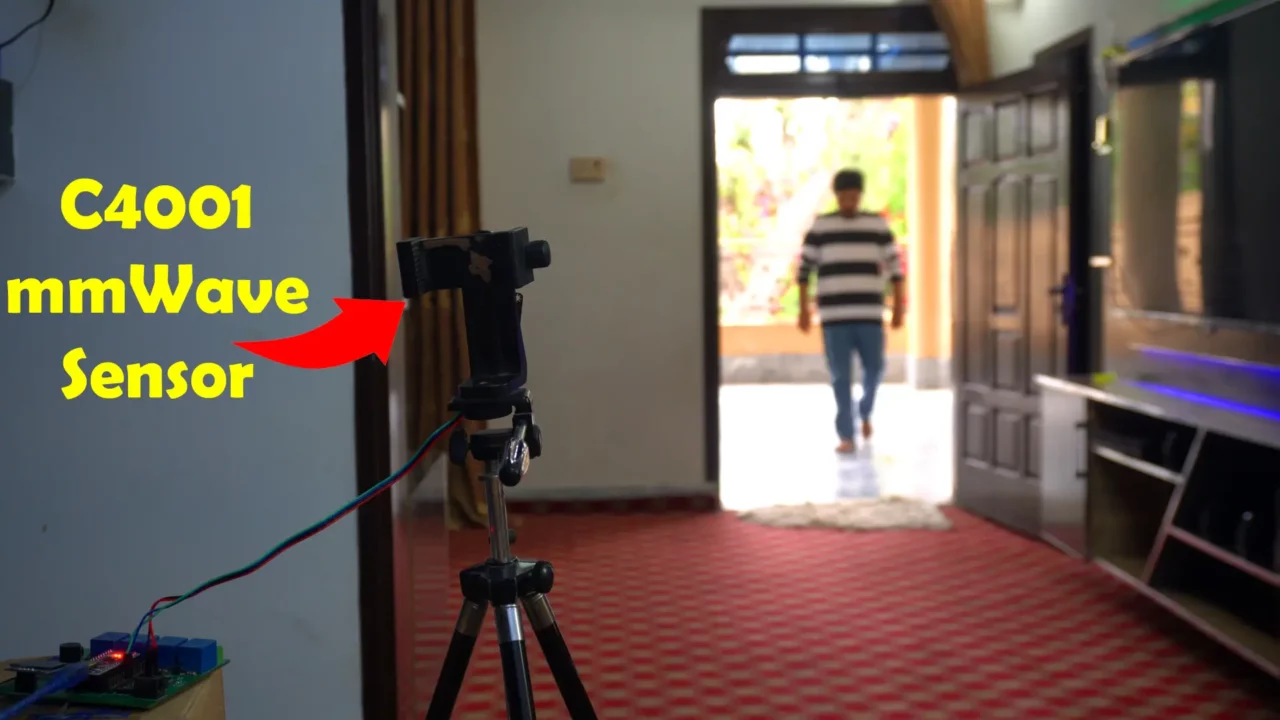
Practical Demonstration:
Look at the screen—Target Number, Target Speed, Target Range, and Target Energy—all updating in real-time!
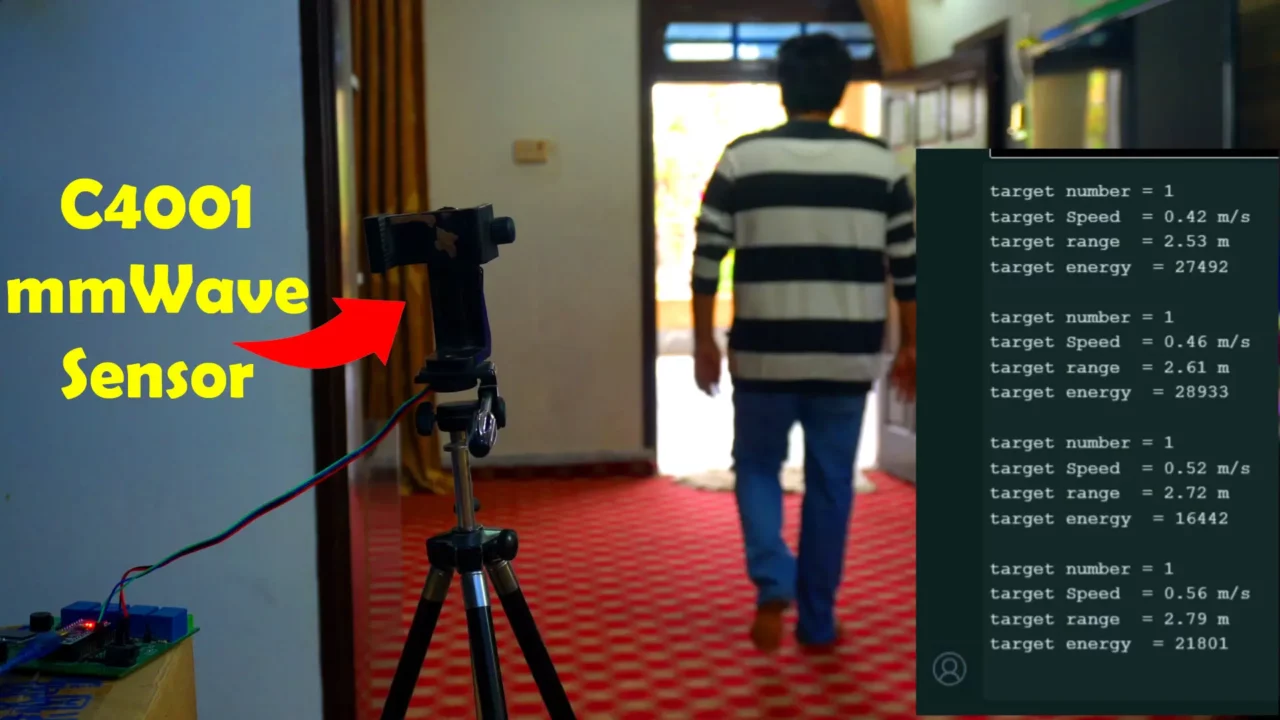
When I move towards the mmWave sensor, the Target Speed value shows a negative sign. But the moment I move away, the negative sign disappears!
From the Target Range value, you can already tell how accurate this sensor is!
And here’s the real game-changer; Target Energy! The more I move, the higher this value goes.
Example 2:
You might have noticed that the values were fluctuating a lot. So this time, we will use a filter to make the values more stable, and along with that, we will also use a timer. We will also define the range to check how accurate the sensor is.
C4001 Stable Value and Distance Program:
|
1 2 3 4 5 6 7 8 9 10 11 12 13 14 15 16 17 18 19 20 21 22 23 24 25 26 27 28 29 30 31 32 33 34 35 36 37 38 39 40 41 42 43 44 45 46 47 48 49 50 51 52 53 54 55 56 57 58 |
#include "DFRobot_C4001.h" #include <Wire.h> #define I2C_COMMUNICATION #define BUZZER_PIN 8 // Define buzzer pin #define OFF_DELAY 600 // 600ms delay before turning off DFRobot_C4001_I2C radar(&Wire, DEVICE_ADDR_0); float stableTargetRange = 0; const int ENERGY_THRESHOLD = 1000; unsigned long lastDetectionTime = 0; // Store the last detection timestamp void setup() { Serial.begin(115200); pinMode(BUZZER_PIN, OUTPUT); // Set buzzer pin as output digitalWrite(BUZZER_PIN, LOW); // Ensure buzzer is off initially while (!radar.begin()) { Serial.println("NO Devices!"); delay(1000); } Serial.println("Device connected!"); radar.setSensorMode(eSpeedMode); if (radar.setDetectThres(/*min*/ 30, /*max*/ 1200, /*thres*/ 10)) { //1200 Serial.println("set detect threshold successfully"); } radar.setFrettingDetection(eON); } void loop() { int targetNumber = radar.getTargetNumber(); float targetSpeed = radar.getTargetSpeed(); float targetRange = radar.getTargetRange(); int targetEnergy = radar.getTargetEnergy(); if (targetEnergy > ENERGY_THRESHOLD) { stableTargetRange = (0.7 * stableTargetRange) + (0.3 * targetRange); lastDetectionTime = millis(); // Reset the timer when person is detected } else { stableTargetRange = 0; } Serial.print("Target Range: "); Serial.print(stableTargetRange); Serial.println(" m"); // Control the buzzer if (stableTargetRange > 0.4 && stableTargetRange < 5.0) { digitalWrite(BUZZER_PIN, HIGH); // Keep buzzer ON } else if (millis() - lastDetectionTime > OFF_DELAY) { digitalWrite(BUZZER_PIN, LOW); // Turn buzzer OFF only if no detection for 600ms } //delay(100); } |
Code Explanation
|
1 2 3 |
#define BUZZER_PIN 8 // Define buzzer pin #define OFF_DELAY 600 // 600ms delay before turning off |
As you can see, I have simplified the code. The buzzer is connected to digital pin 8.
I have also defined a 600ms delay, meaning the buzzer will only turn OFF when no human is detected for 600ms.
|
1 2 3 4 5 |
if (radar.setDetectThres(/*min*/ 30, /*max*/ 1200, /*thres*/ 10)) { //1200 Serial.println("set detect threshold successfully"); } |
For now, you can see that I have set the minimum distance to 30cm and the maximum distance to 1200cm (12 meters full range). The threshold value is set to 10. You will understand the C4001 mmWave sensor better when you experiment with different values.
|
1 |
stableTargetRange = (0.7 * stableTargetRange) + (0.3 * targetRange); |
Additionally, I have used a filter to stabilize the targetRange value.
|
1 2 3 4 5 6 7 |
if (stableTargetRange > 0.4 && stableTargetRange < 5.0) { digitalWrite(BUZZER_PIN, HIGH); // Keep buzzer ON } else if (millis() - lastDetectionTime > OFF_DELAY) { digitalWrite(BUZZER_PIN, LOW); // Turn buzzer OFF only if no detection for 600ms |
The buzzer will only turn ON if the person’s distance is between 0.4 and 5.0 meters.
Otherwise, the buzzer will remain OFF.
As you can see, I have used a timer, so the buzzer will turn OFF only when there is no detection for 600ms.
I have already uploaded this program and now let’s watch the C4001 mmWave sensor in action.
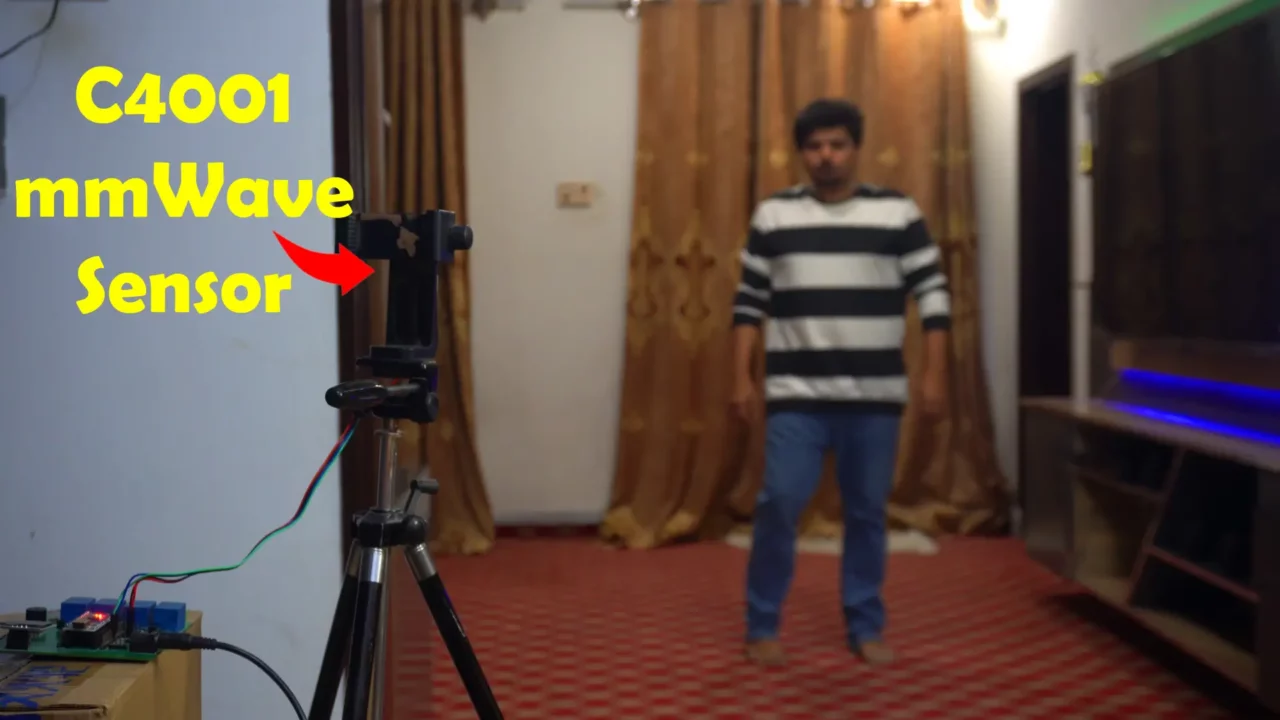
Practical Demonstration:
Right now, I am outside the room, and the buzzer is OFF. Now, I am about to enter the room; let’s see if the buzzer turns ON or not. For practical demonstration watch the video tutorial given at the end of this article.
Amazing! We have successfully used the C4001 mmWave sensor to turn the buzzer ON. The buzzer will remain ON as long as I stay within the defined range.
This, in itself, works as a security system; as soon as someone enters the room, the buzzer turns ON. By using the same code, you can also control lights. In a little while, we will also test it with a light.
Now, let’s try a different range.
I have set the maximum detection range to 300cm (3 meters) and also set the target range to 3 meters.
It limited the sensor’s detection range as per our preference. Similarly, you can also set your own custom range as needed.
In the next two examples, we will be using the ESP32. So now, it’s your choice whether you want to use an Arduino or the ESP32 WiFi + Bluetooth module.
C4001 mmWave Sensor with ESP32:
Connect the Red and Black wires of the C4001 mmWave Sensor to the ESP32’s 3.3V and GND pins.
Connect the Blue wire to GPIO22 and the other wire to GPIO21.
The 5V SPDT type relay is connected to the GPIO13. For the relay connections you can follow this circuit diagram.

Now, let’s go ahead and take a look at the programming.
C4001 mmWave ESP32 Relay Program:
|
1 2 3 4 5 6 7 8 9 10 11 12 13 14 15 16 17 18 19 20 21 22 23 24 25 26 27 28 29 30 31 32 33 34 35 36 37 38 39 40 41 42 43 44 45 46 47 48 49 50 51 52 53 54 55 56 57 58 59 60 |
#include "DFRobot_C4001.h" #include <Wire.h> #define I2C_COMMUNICATION DFRobot_C4001_I2C radar(&Wire, DEVICE_ADDR_0); #define RELAY_PIN 13 // gpio 13 on the esp32 to control the relay float stableTargetRange = 0; const int ENERGY_THRESHOLD = 1000; const int RELAY_ON_TIME = 7000; // 7 seconds const int SCAN_INTERVAL = 3000; // 3 seconds unsigned long relayTurnOffTime = 0; void setup() { Serial.begin(115200); pinMode(RELAY_PIN, OUTPUT); digitalWrite(RELAY_PIN, LOW); while (!radar.begin()) { Serial.println("NO Devices!"); delay(1000); } Serial.println("Device connected!"); radar.setSensorMode(eSpeedMode); if (radar.setDetectThres(/*min*/ 30, /*max*/ 1200, /*thres*/ 10)) { Serial.println("set detect threshold successfully"); } radar.setFrettingDetection(eON); } void loop() { int targetNumber = radar.getTargetNumber(); float targetSpeed = radar.getTargetSpeed(); float targetRange = radar.getTargetRange(); int targetEnergy = radar.getTargetEnergy(); if (targetEnergy > ENERGY_THRESHOLD) { stableTargetRange = (0.7 * stableTargetRange) + (0.3 * targetRange); } else { stableTargetRange = 0; } Serial.print("Target Range: "); Serial.print(stableTargetRange); Serial.println(" m"); if (stableTargetRange >= 1.0 && stableTargetRange <= 4.0) { digitalWrite(RELAY_PIN, HIGH); relayTurnOffTime = millis() + RELAY_ON_TIME; } if (millis() > relayTurnOffTime) { digitalWrite(RELAY_PIN, LOW); } delay(SCAN_INTERVAL); } |
Code Explanation:
The relay is connected to GPIO13. To further eliminate fluctuations, this time I am using two timers.
We could still use the previous code, but this is another approach where we can control the ON time and adjust the scan time.
Everything else is almost the same. The main purpose of this example is to demonstrate how to use the C4001 mmWave sensor with the ESP32 and show you how to control a light.
Practical Demonstration:
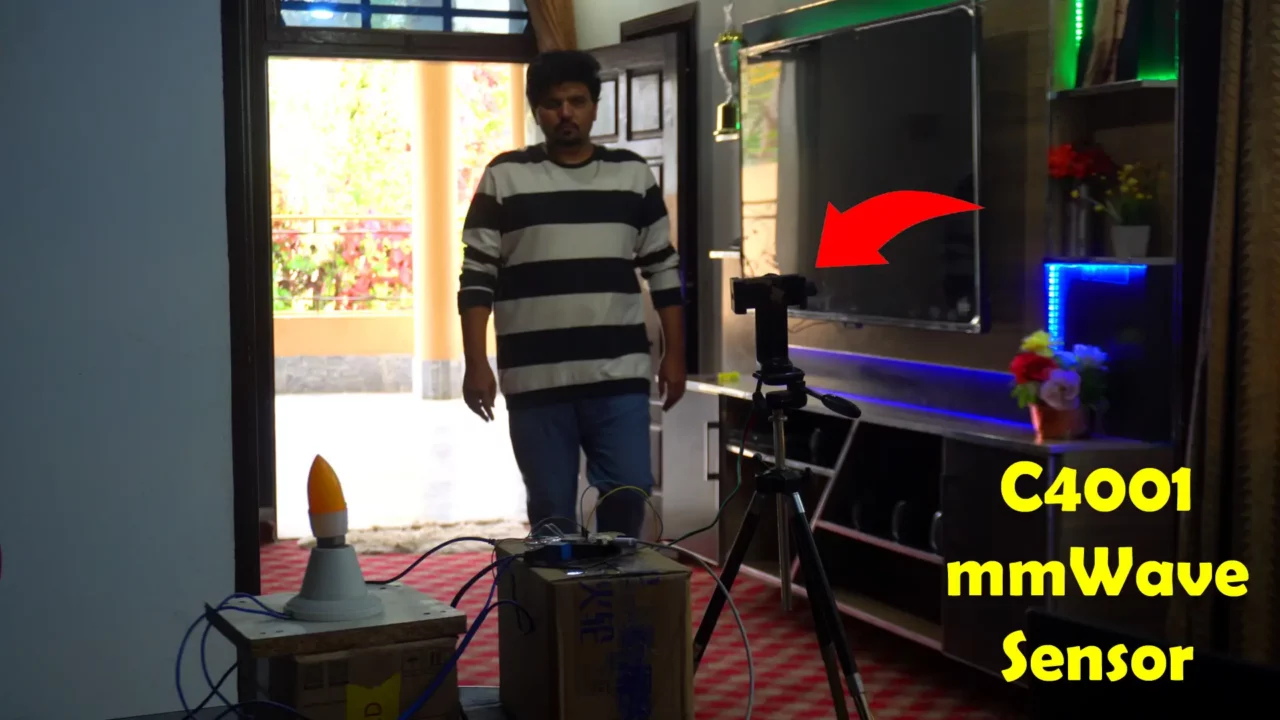
As you can see while I am outside the Sensor’s range, the light is OFF.
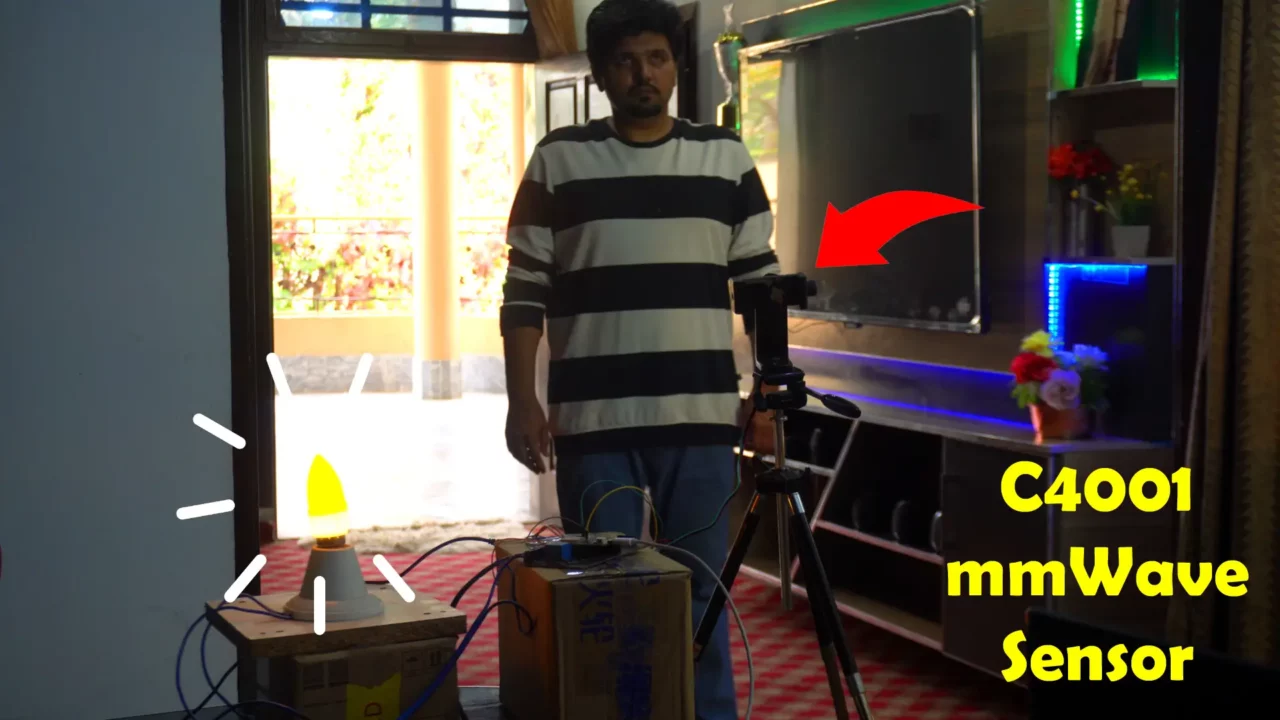
This time, the relay didn’t turn ON instantly. First, the C4001 mmWave sensor detected my presence for a few seconds, and only then did it turn the relay ON.
Now, the light will remain ON as long as I stay in this area.
When I leave the area, the C4001 mmWave sensor will scan the area for a few seconds, and if no movement is detected, it will turn the light OFF.
Now, it’s your choice whether you want to use the buzzer-based code or this one.
C4001 mmWave with ESP32 & Blynk:
Next, we will use the C4001 mmWave sensor with the Blynk application. With Blynk, we can monitor the C4001 sensor from anywhere in the world.
In my previous article and video, I set up Blynk for a Tilt sensor, and I will be using the same application for this project.
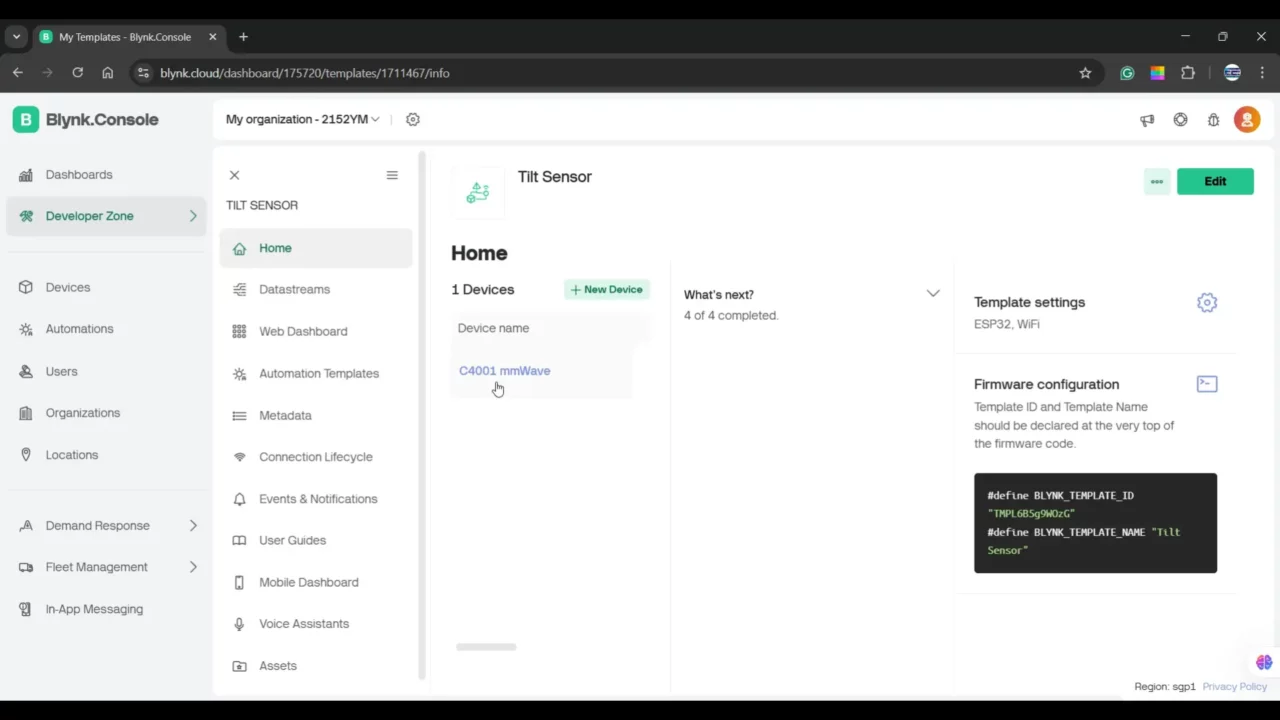
As you can see, I have named the device C4001 mmWave.
If I go to Datastreams, you will see that I am using the same virtual pin V0, but this time, I have changed its Data Type to Double.
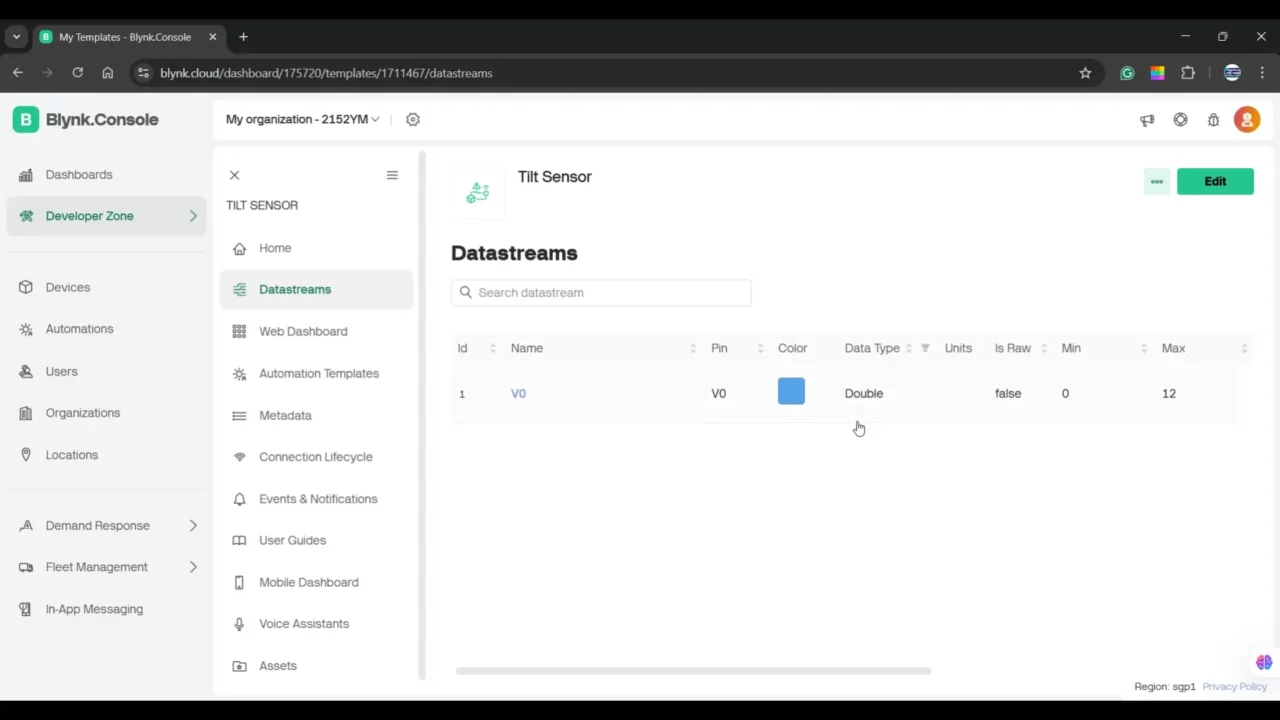
That’s it! If you still find it difficult, I recommend watching my previous video on the 360-degree Tilt sensor or you can also read the article.
If I open the ESP32 code, you will see that I am using the same Template name, ID, and authorization token.
I have also included a watchdog timer, so you won’t need to manually restart the ESP32 if it freezes.
The rest of the code is simple and straightforward. If you read it carefully, you will understand it easily.
And if you are using ESP32 and Blynk for the first time, I highly recommend watching my getting started video on ESP32 and Blynk V2.0.
Practical Demonstration:
With the Blynk application, I can now monitor the C4001 mmWave sensor in real time from anywhere in the world.
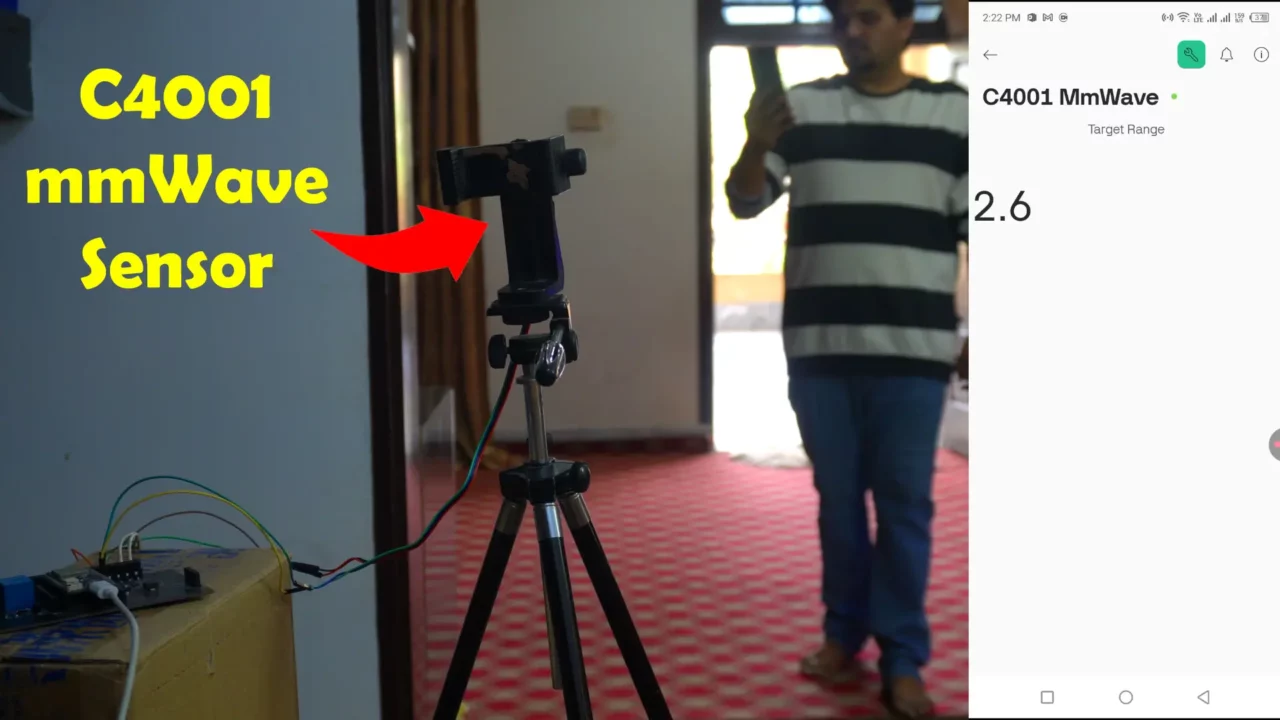
You can build a highly reliable security system that you can monitor from your Smartphone. And if you have a paid Blynk plan, you can even generate alert messages.
By now, you should have a good idea of how easily the C4001 mmWave sensor can be used with Arduino and ESP32.
Tests on C4001 mmWave Sensor:
Now, we are going to perform some tests, and after that, you can decide for yourself whether you should use the C4001 mmWave sensor or not.
Cardboard Box:
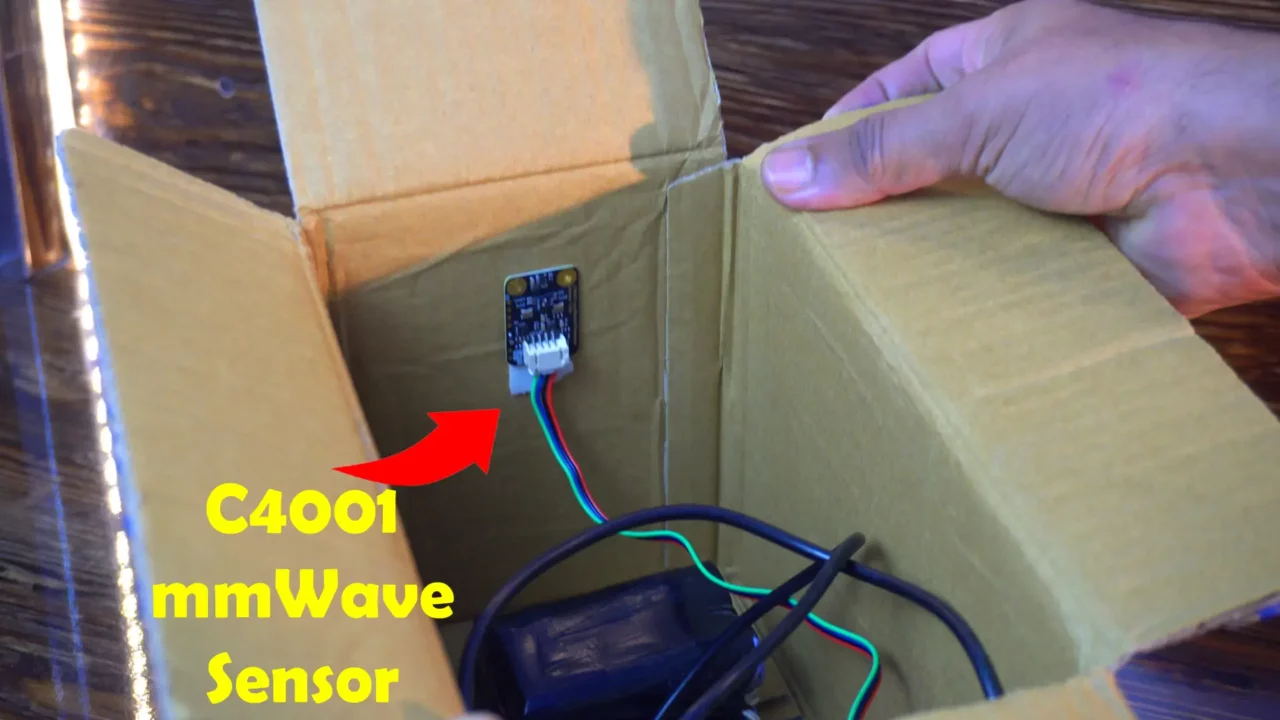
First, I am going to start with this cardboard box, and then we will gradually increase the complexity. I am using my 4S Lithium Ion battery pack to power up the Arduino Nano Development board.
So, let’s see if it can detect me.
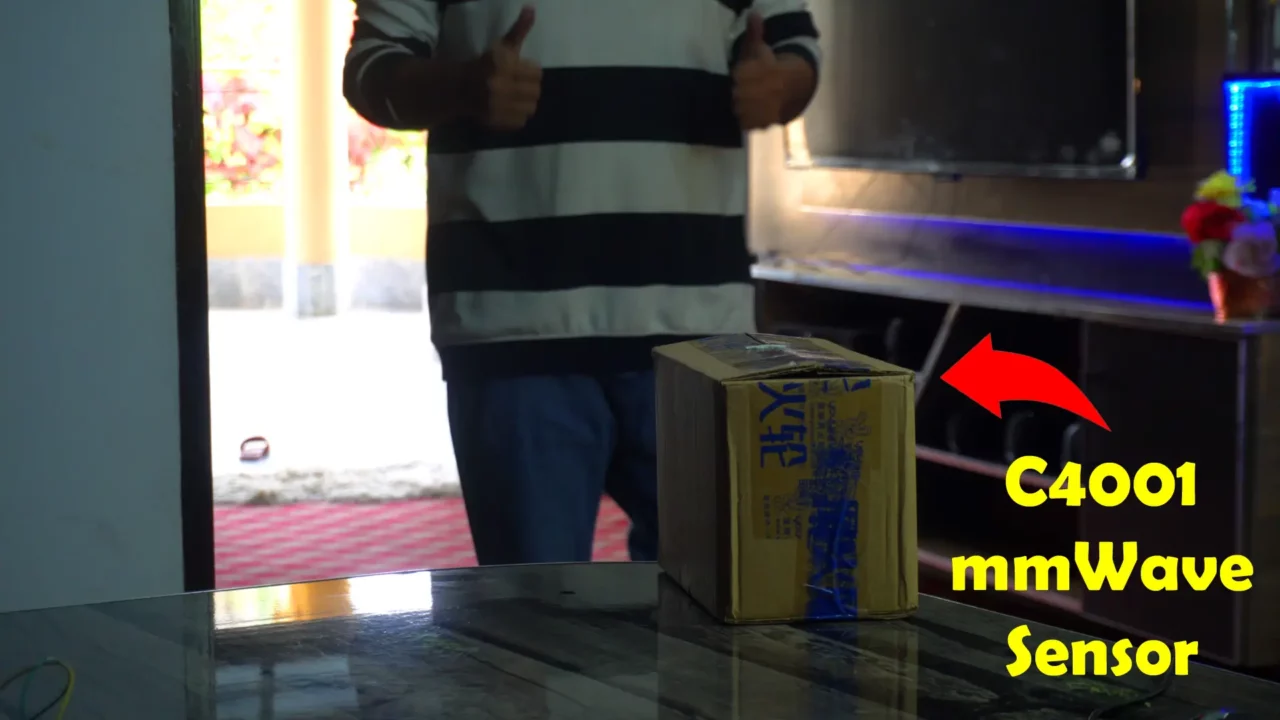
It detected me so easily from inside the box. I didn’t stop here. I put three more boxes in front of it; and it still detected me without any issues.
This is crazy! I can’t stop myself from testing one more Box, but this time I am going to do something different.
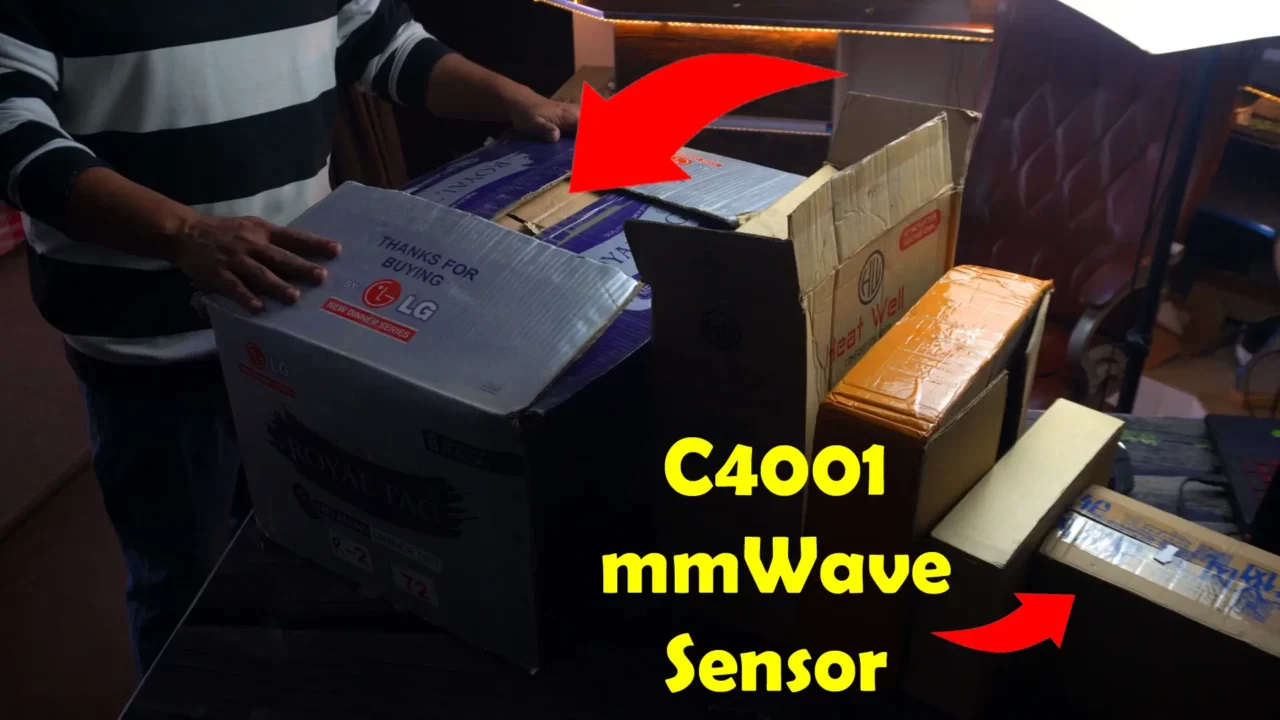
Finally, this giant box! Inside this box, there’s a dinner set “a lot of stuff inside”. Let’s see if the C4001 can still detect me through all these five boxes.
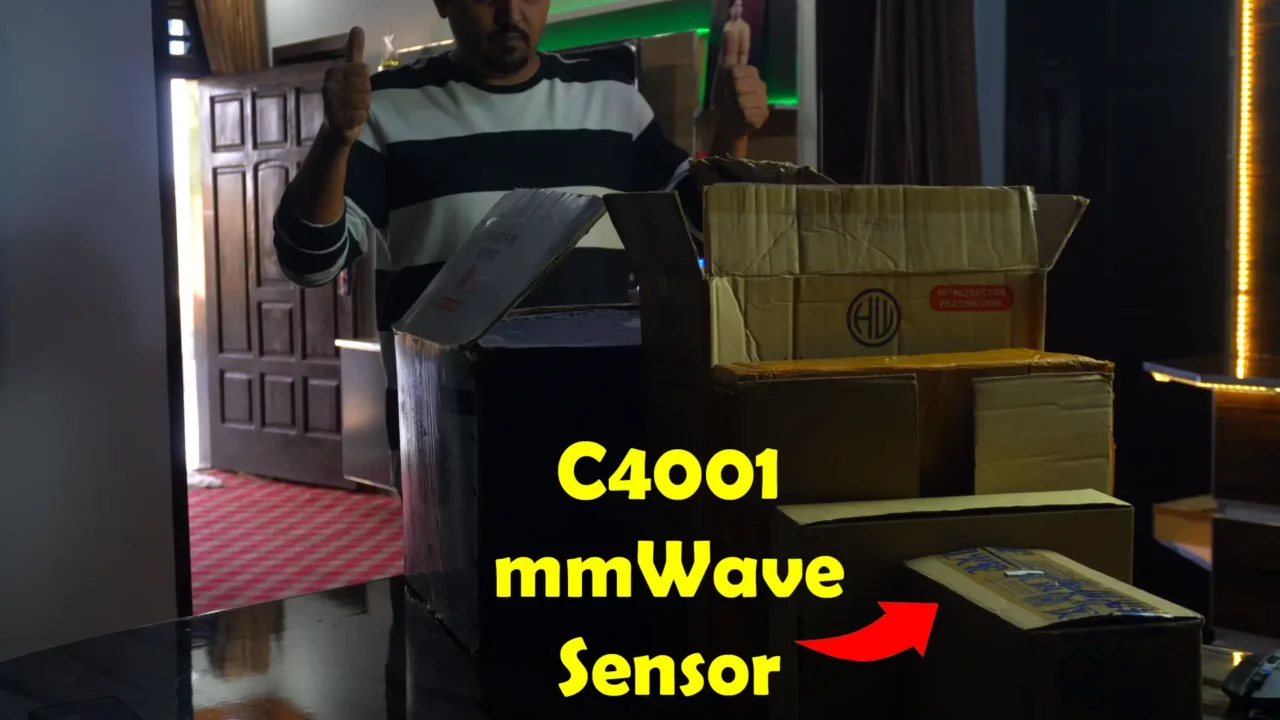
The range has reduced, likely because there’s a lot of stuff inside the box. When I’m close to the table, it detects me perfectly, but as I step back, the C4001 can’t detect me anymore. The first test was super impressive!
Human Detection through Hardboard:
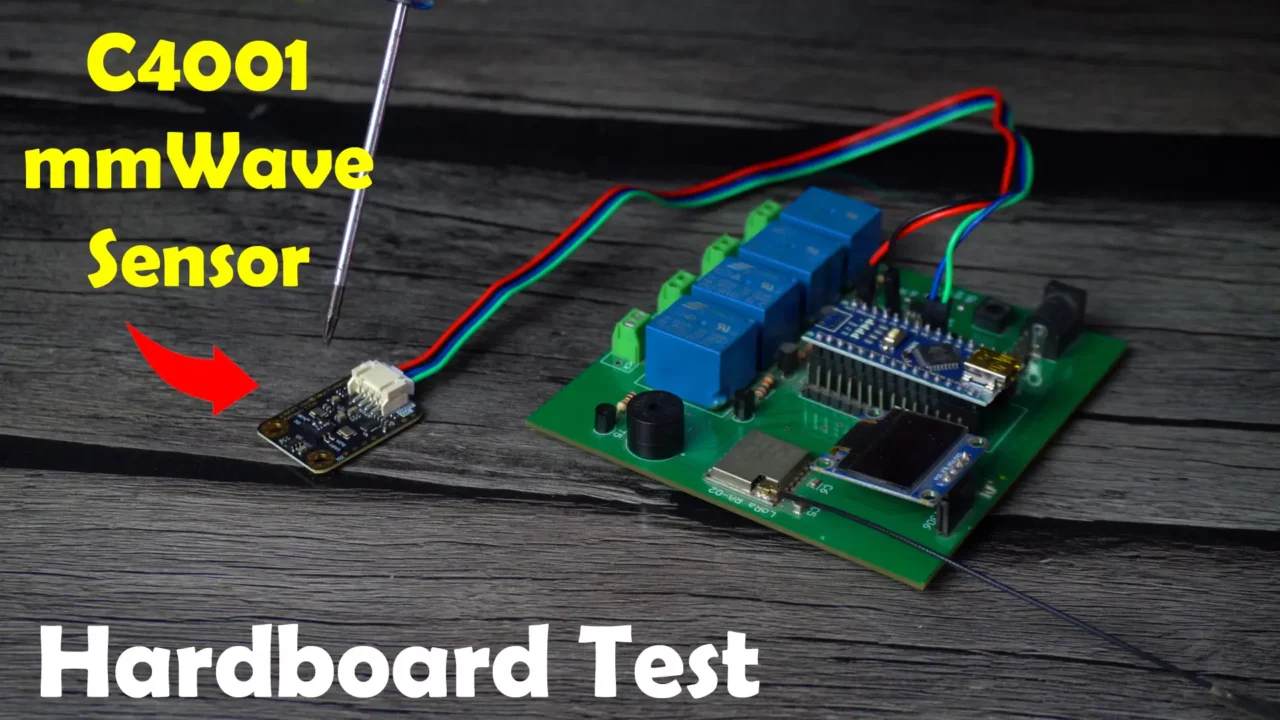
Next up, we are taking the challenge to the next level—testing it with this hardboard sheet! The sensor is facing downward, and the real question is… can it detect my foot movement through the board? This could be a game-changer for hidden security and smart automation! Let’s find out!

It was like a piece of cake for the C4001 mmWave Sensor. This is so incredible, we can use it inside Drawers to protect Jewelry, money, etc from being stolen.
C4001 mmWave Sensor Detection through Glass:

Can the C4001 mmWave sensor detect me through glass? This could be a game-changer for security systems in shops and offices! But here’s the real challenge—I haven’t placed it directly against the glass. I left some distance to truly push its limits. Will it pass or fail? Let’s find out!
This is absolutely mind blowing. I didn’t see any change in the range. You can use this behind a mirror in a Washroom/Bathroom to control the lights automatically. Hundreds of ideas are popping up in my mind. What’s in your mind? Let me know in the comment.
Human Detection through Plastic:
This time, I have placed a plastic case in front of the mmWave sensor. I’m sure it won’t have any trouble penetrating it and detecting my presence.
It detected me as if there is nothing in front of the C4001 mmWave sensor. From this test its obvious that we can use it in any plastic enclosure, this way we can make it waterproofed and then we can use it outside for security purposes or for controlling lights. There are more than a thousand ways it can be used. So, it’s up to you; how you plan to use it. Best of Luck!
Human Detection through Curtains “Fabric”:
Can this mmWave sensor see through a curtain?
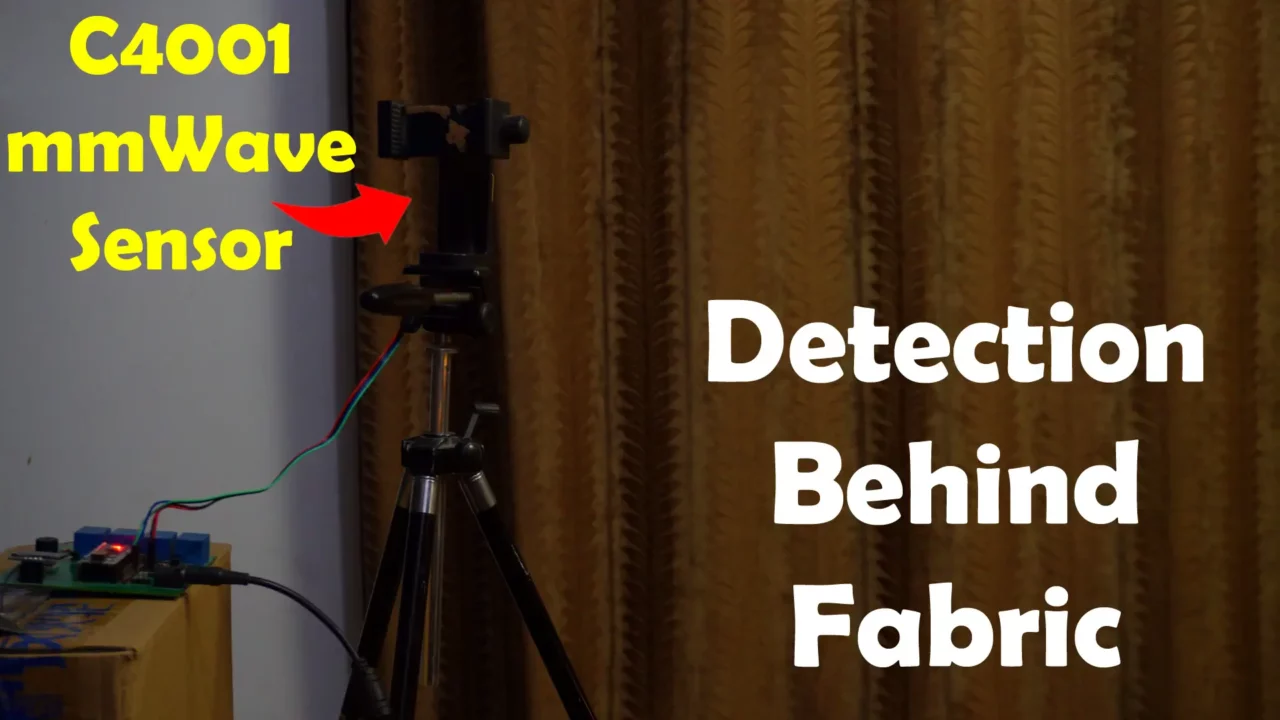
There’s quite a distance between the sensor and the curtain; so let’s put the C4001 mmWave to the test. Will it detect me even when I am completely hidden?
Just imagine… A sensor so powerful that it can detect movement without even seeing you! This could change the game for security systems, smart automation, and even futuristic tech!
Let’s find out!
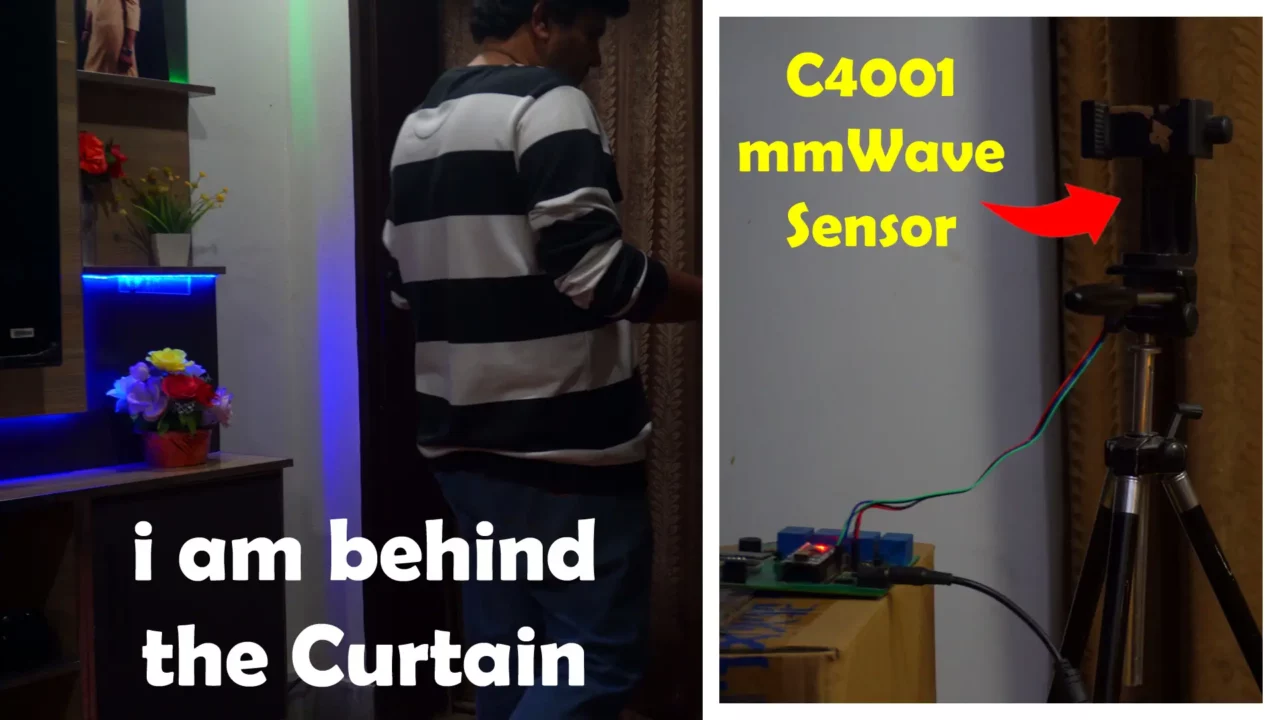
This is absolutely mind blowing; This tiny sensor just proved; it can detect movement through fabric! Imagine the possibilities—security systems, hidden monitoring, and more! What would you use this for? Let me know in the comments!
Detection through a Wood door:
Can the C4001 mmWave Sensor penetrate this door and still detect me on the other side?
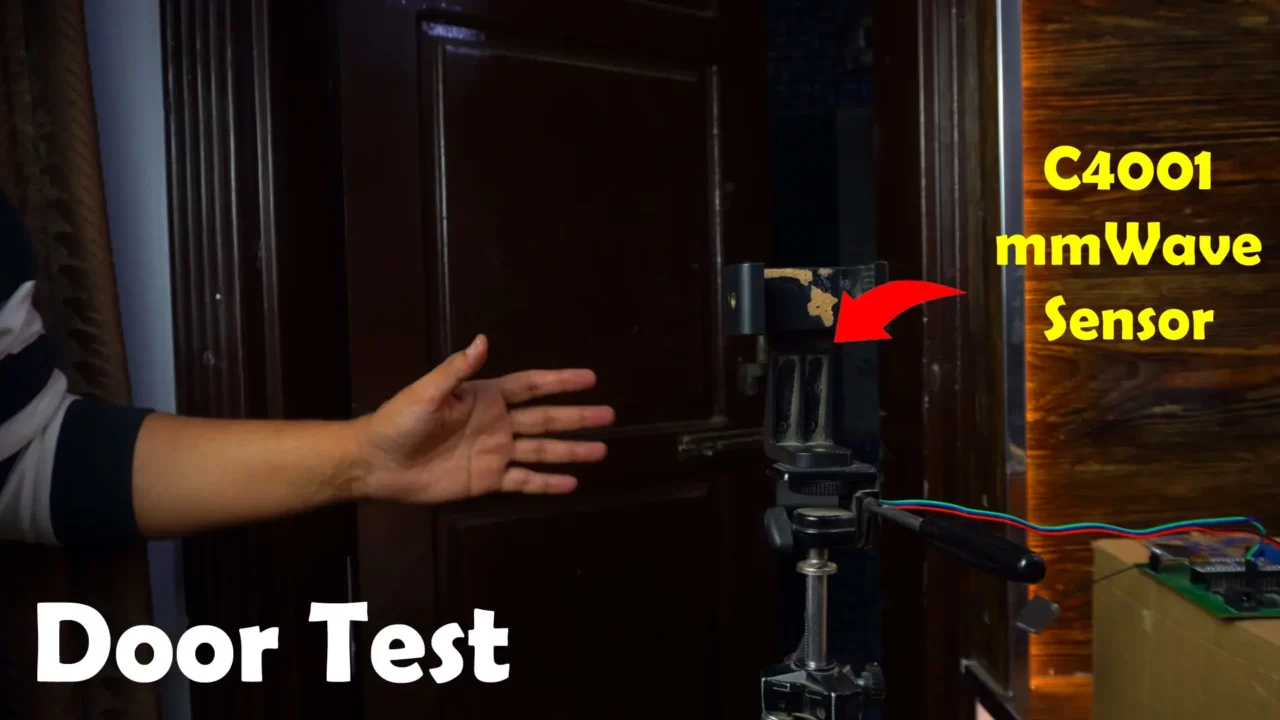
If it detects me, I’ll be seriously impressed!
As you can see, the sensor is quite far from the door. The real question is—can it still penetrate through and detect me on the other side? Let’s find out!

The C4001 mmWave sensor just shocked me! Even from a distance, it successfully detected my presence through the door!
Now imagine the possibilities; you can detect if someone is standing outside your room, create a contactless doorbell, or even build a completely invisible security system!
mmWave Sensor under a Fan:
Can It Survive Under a Ceiling Fan?
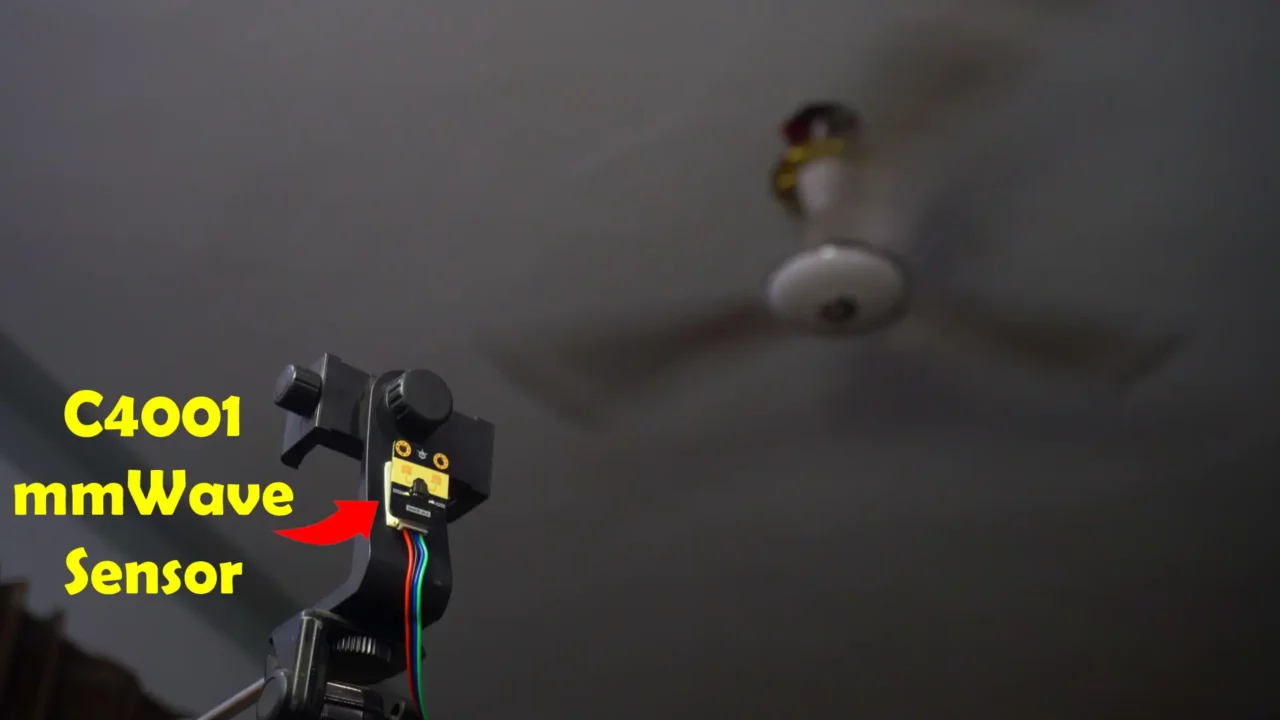
Many people complain that mmWave sensors struggle under direct airflow; so let’s put that to the test!
The C4001 mmWave sensor is right under a running ceiling fan; the airflow is strong, and if this sensor is truly reliable, it should still detect me without false triggers.
So what’s going to happen? Will it detect me accurately, or will the airflow confuse it? Let’s find out!
Drop your predictions in the comments before we begin! Do you think this sensor can handle it, or will it fail?
The fan is running at full speed, and I am standing outside the sensor’s range. The buzzer has been OFF for the last 3 minutes—no false triggering at all!
But now comes the real challenge!
I am about to step closer to the C4001 mmWave sensor—will it detect me accurately despite the strong airflow? Or will it fail like most other mmWave sensors? Let’s find out!

This is unbelievable! Most mmWave sensors struggle under direct air contact, but the C4001 is rock solid! This sensor is on a whole new level!
C4001 mmWave Sensor Detection through a Wall:
The Ultimate Challenge:
Can this mmWave Sensor Detect through Walls?
We have tested it through curtains… We have tested it through a Door… we have tested it under a running ceiling fan… but now comes the final and most insane test yet; human detection behind a wall!
I am going to step behind this wall; behind this hardboard sheet is a brick wall. Let’s see if the C4001 mmWave sensor can still detect me.
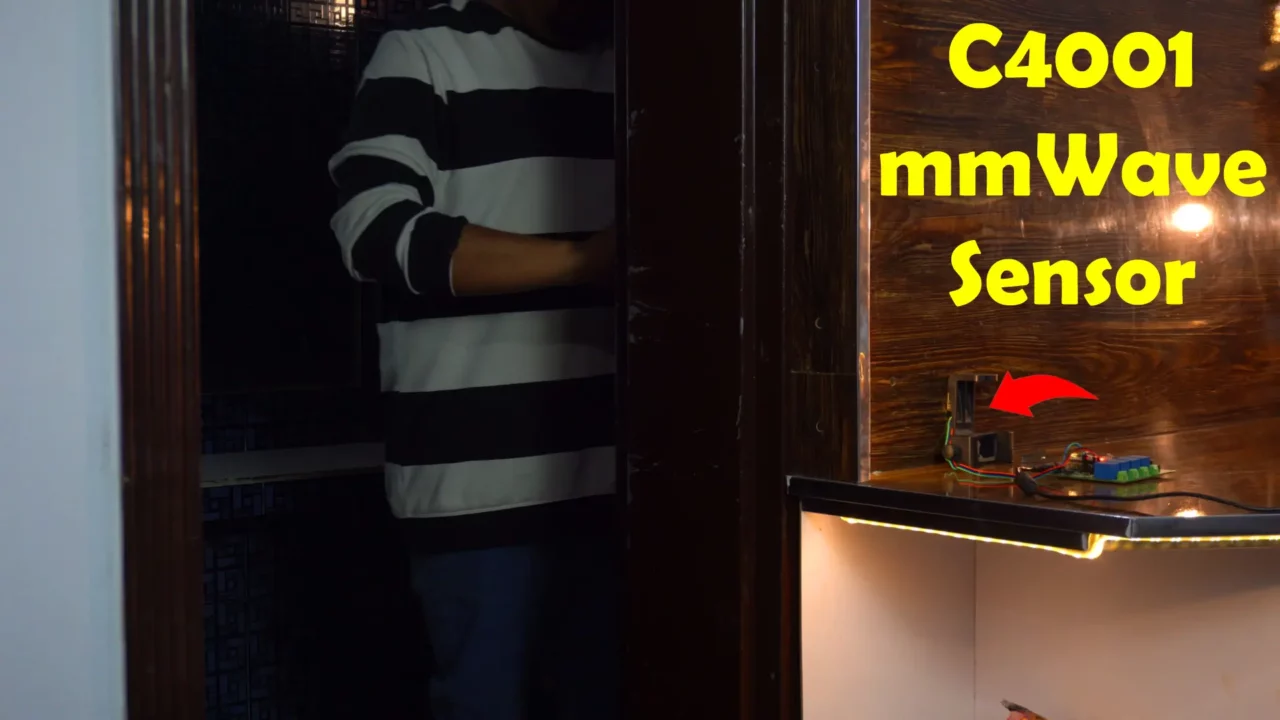
It’s NOT detecting me!
So, here is the reality; the C4001 mmWave sensor works great through most of the materials, but it struggles with solid walls. This is something you should definitely keep in mind when using it for security applications.
Not all mmWave sensors are the same—some are built for ultra-penetration, while others are designed for short-range detection. So, always test before you build!
Well if you are specifically looking for a sensor that can detect humans behind a wall then you should read my article on a Microwave sensor that can detect Humans behind the walls.
So, that’s all for now.
Support me on Patreon for more articles and videos.
Watch Video Tutorial:

Discover more from Electronic Clinic
Subscribe to get the latest posts sent to your email.


