I Made an AI CCTV That Decides When to Record (RDK X5 + YOLOv5)
Last Updated on September 4, 2026 by Engr. Shahzada Fahad
Table of Contents
Description:
Modern surveillance systems are moving away from continuous recording toward intelligent, event-based monitoring. An AI CCTV system can reduce storage usage, eliminate false alarms, and make real-time decisions based on what actually matters.
In this article, I explain how I built an AI-powered CCTV system using the RDK X5 and an optimized YOLOv5 model, comparing manual recording with a fully automatic, decision-based surveillance setup.
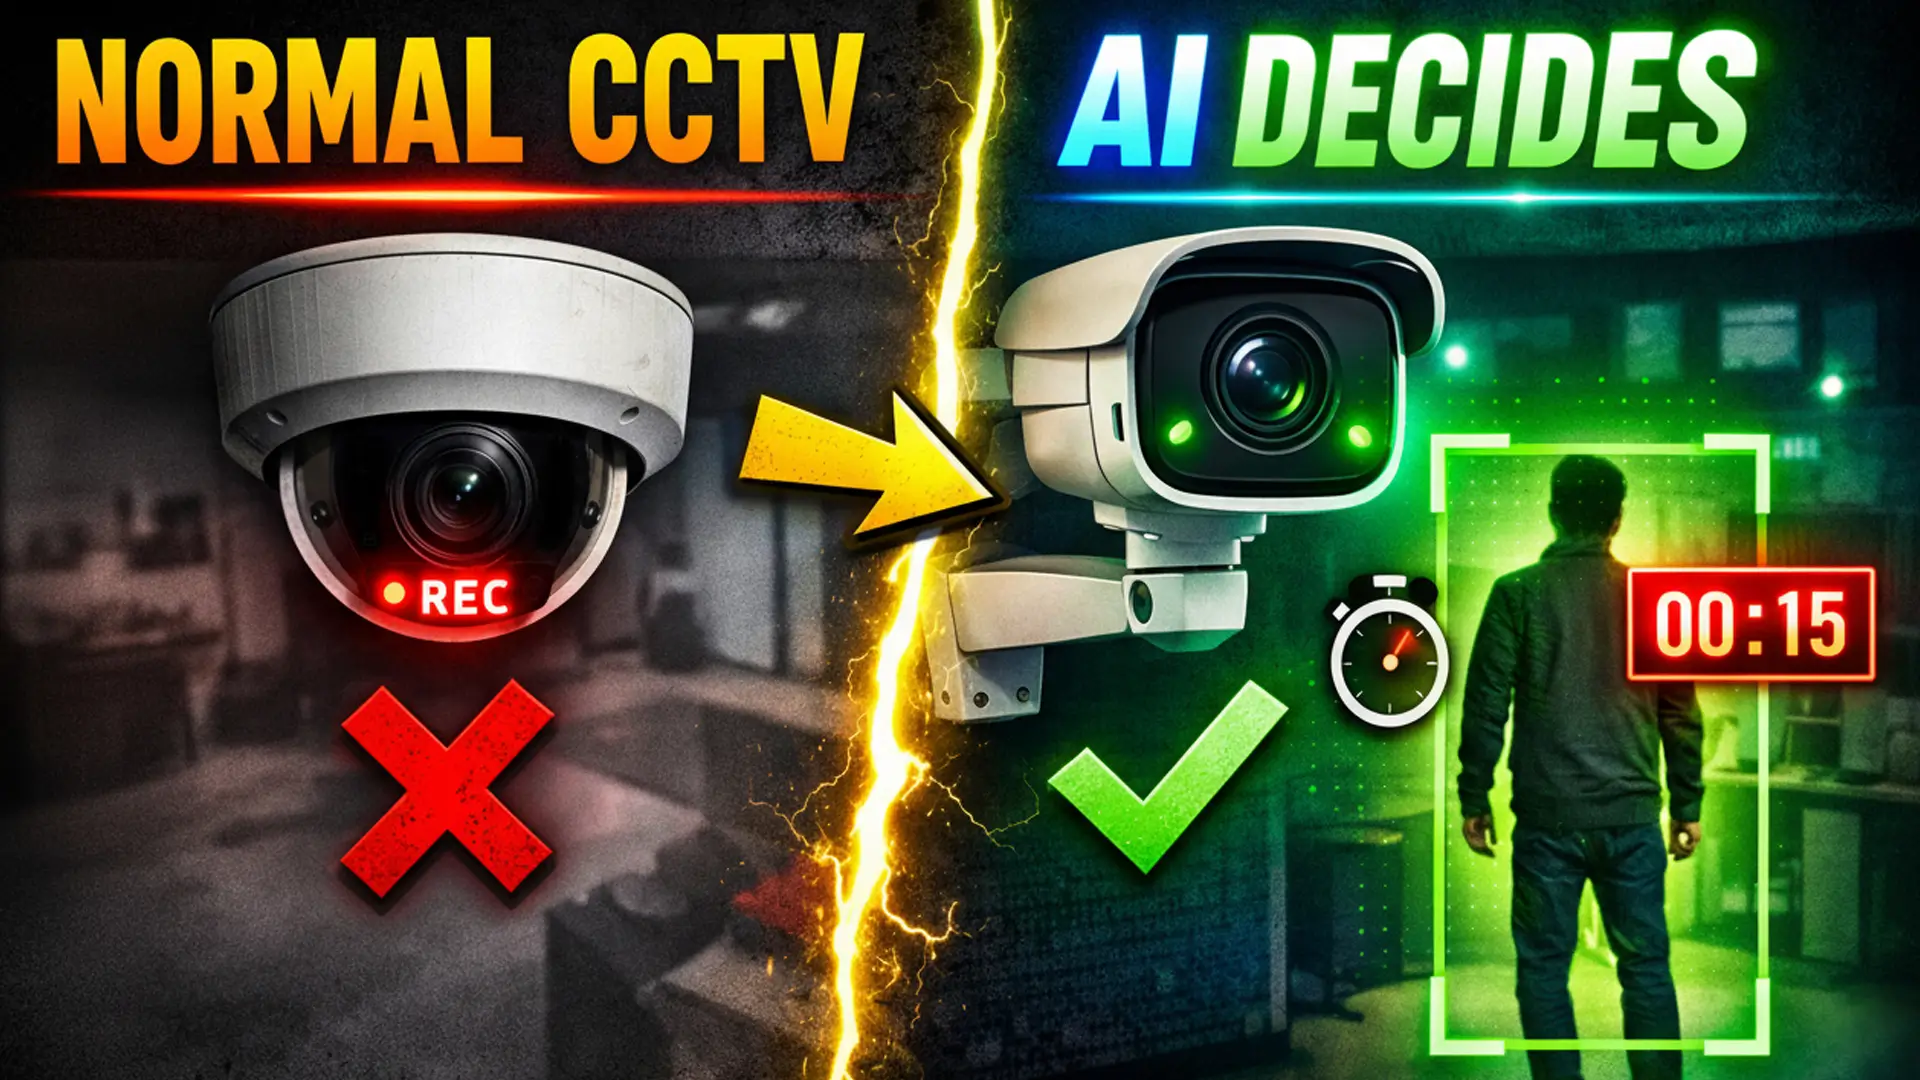
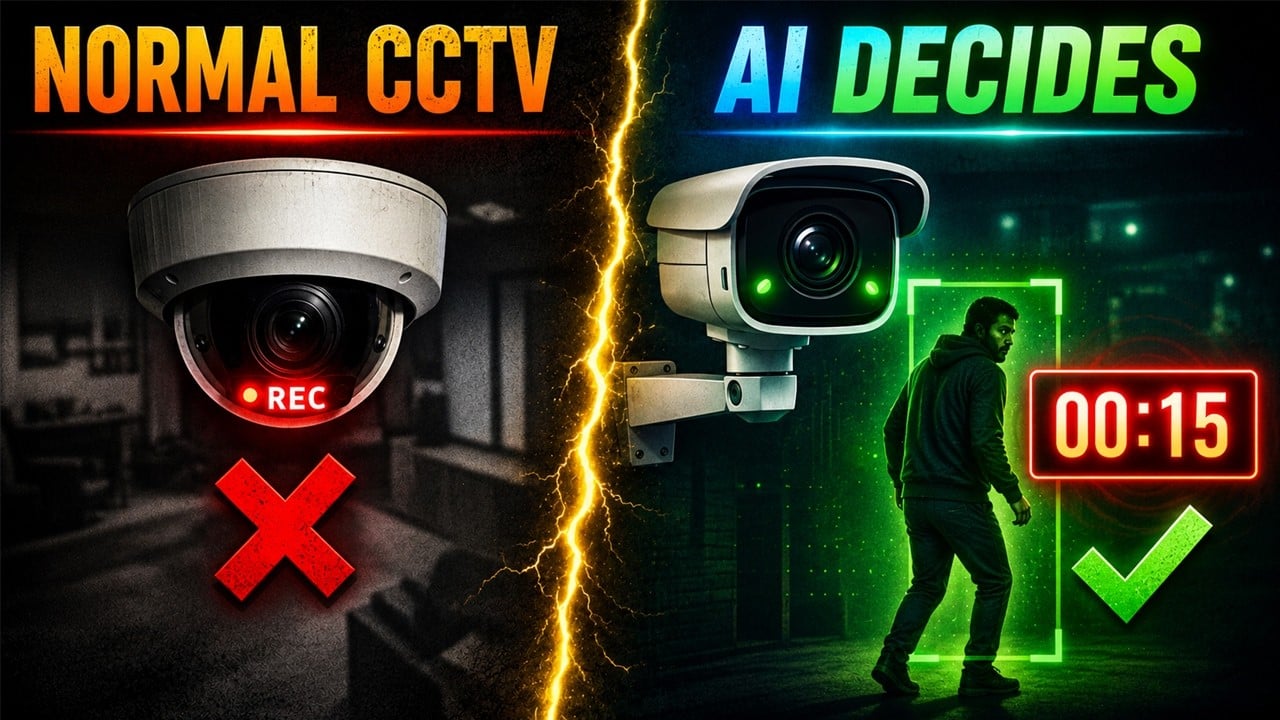
This is not a normal CCTV camera.
This is an AI CCTV system that decides on its own when something suspicious happens, starts recording automatically, and ignores random movements and false triggers.
In today’s article, I am building two completely different CCTV systems on the RDK X5 by D-Robotics.
One is a manual CCTV system, where I control the recording myself, and the second one is a fully automatic AI-based CCTV system.
Amazon Links:
Other Tools and Components:
ESP32 WiFi + Bluetooth Module (Recommended)
Arduino Nano USB C type (Recommended)
*Please Note: These are affiliate links. I may make a commission if you buy the components through these links. I would appreciate your support in this way!
WHAT THIS ARTICLE IS ABOUT
In this article, you are not going to see just a camera connected to a board. You are going to see how real CCTV logic is designed.
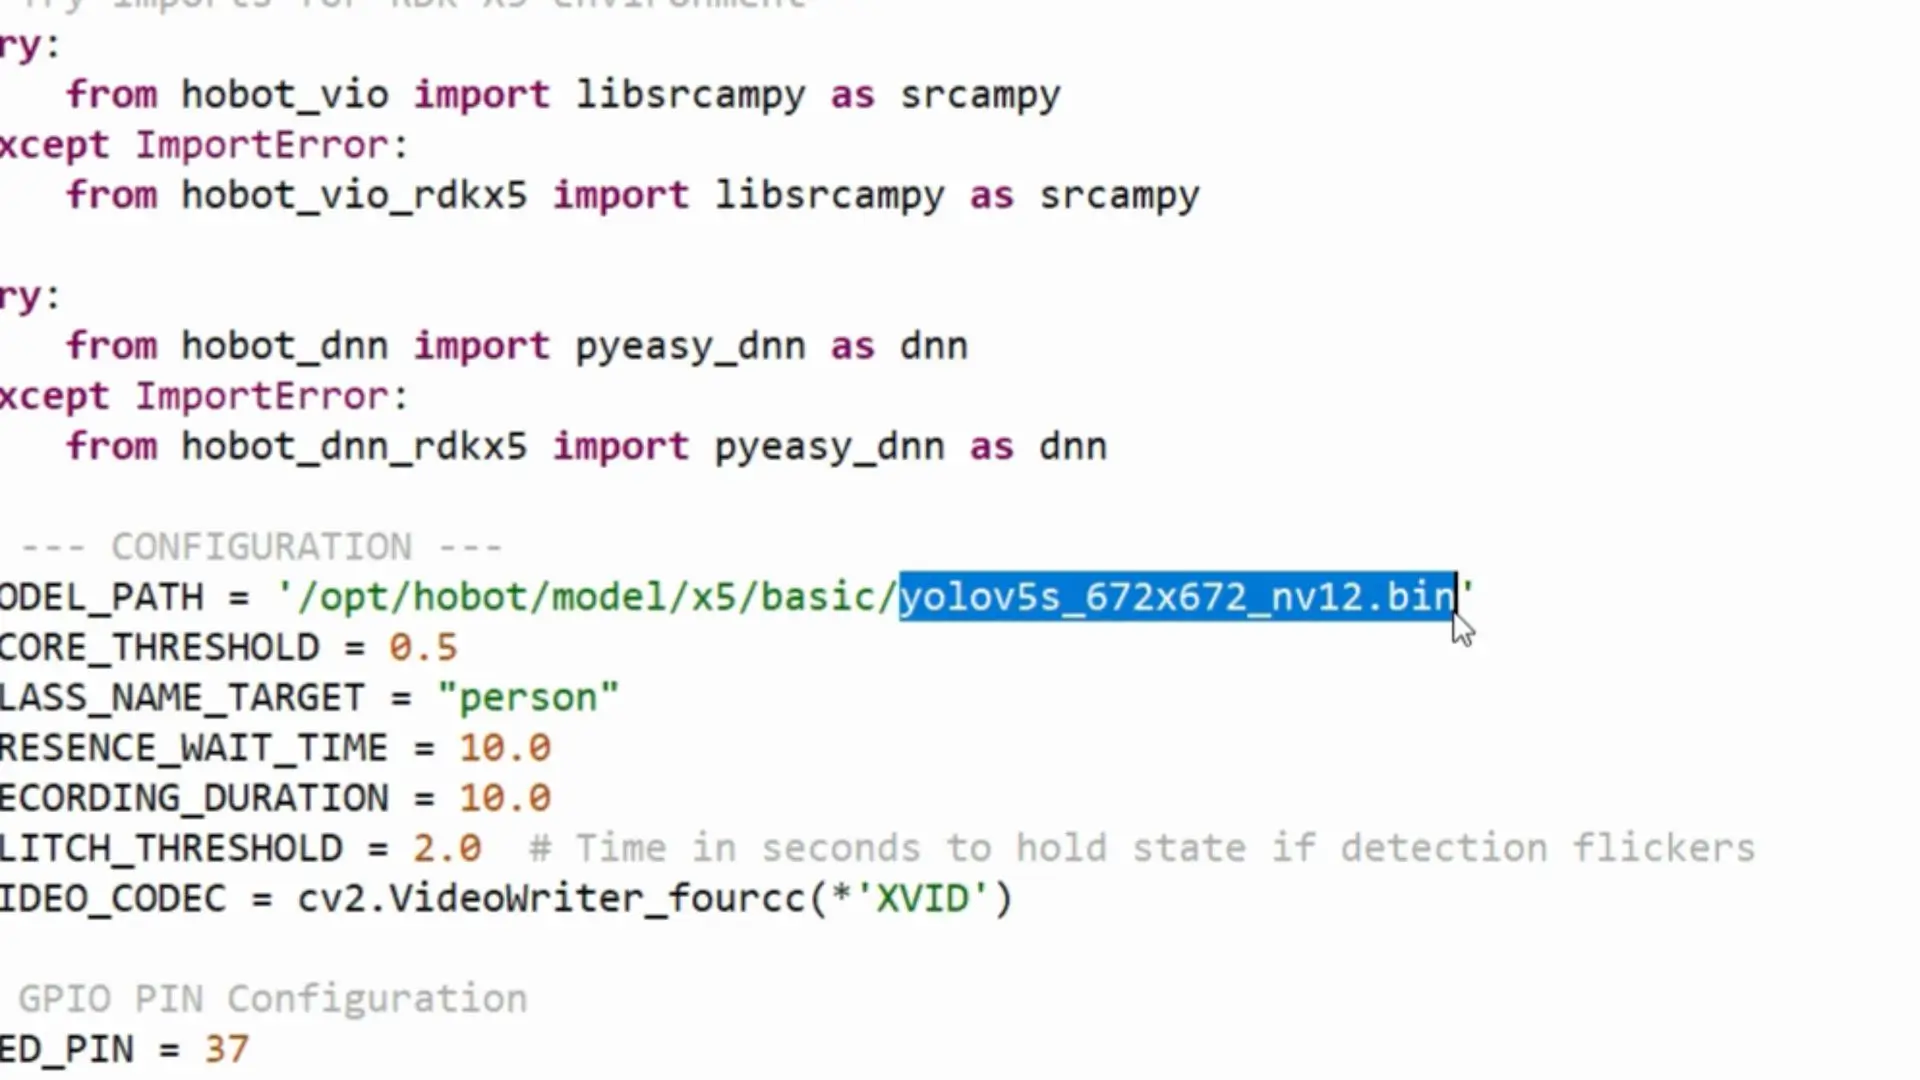
I am using the RDK X5, running an optimized YOLOv5 AI model, and I will show you the difference between manual control and automatic decision-making.
Both systems are practical, and they solve different problems.
MANUAL CCTV SYSTEM – OVERVIEW
Let’s start with the manual CCTV system. This system uses a USB camera connected to the RDK X5, and the idea is very simple and very realistic.
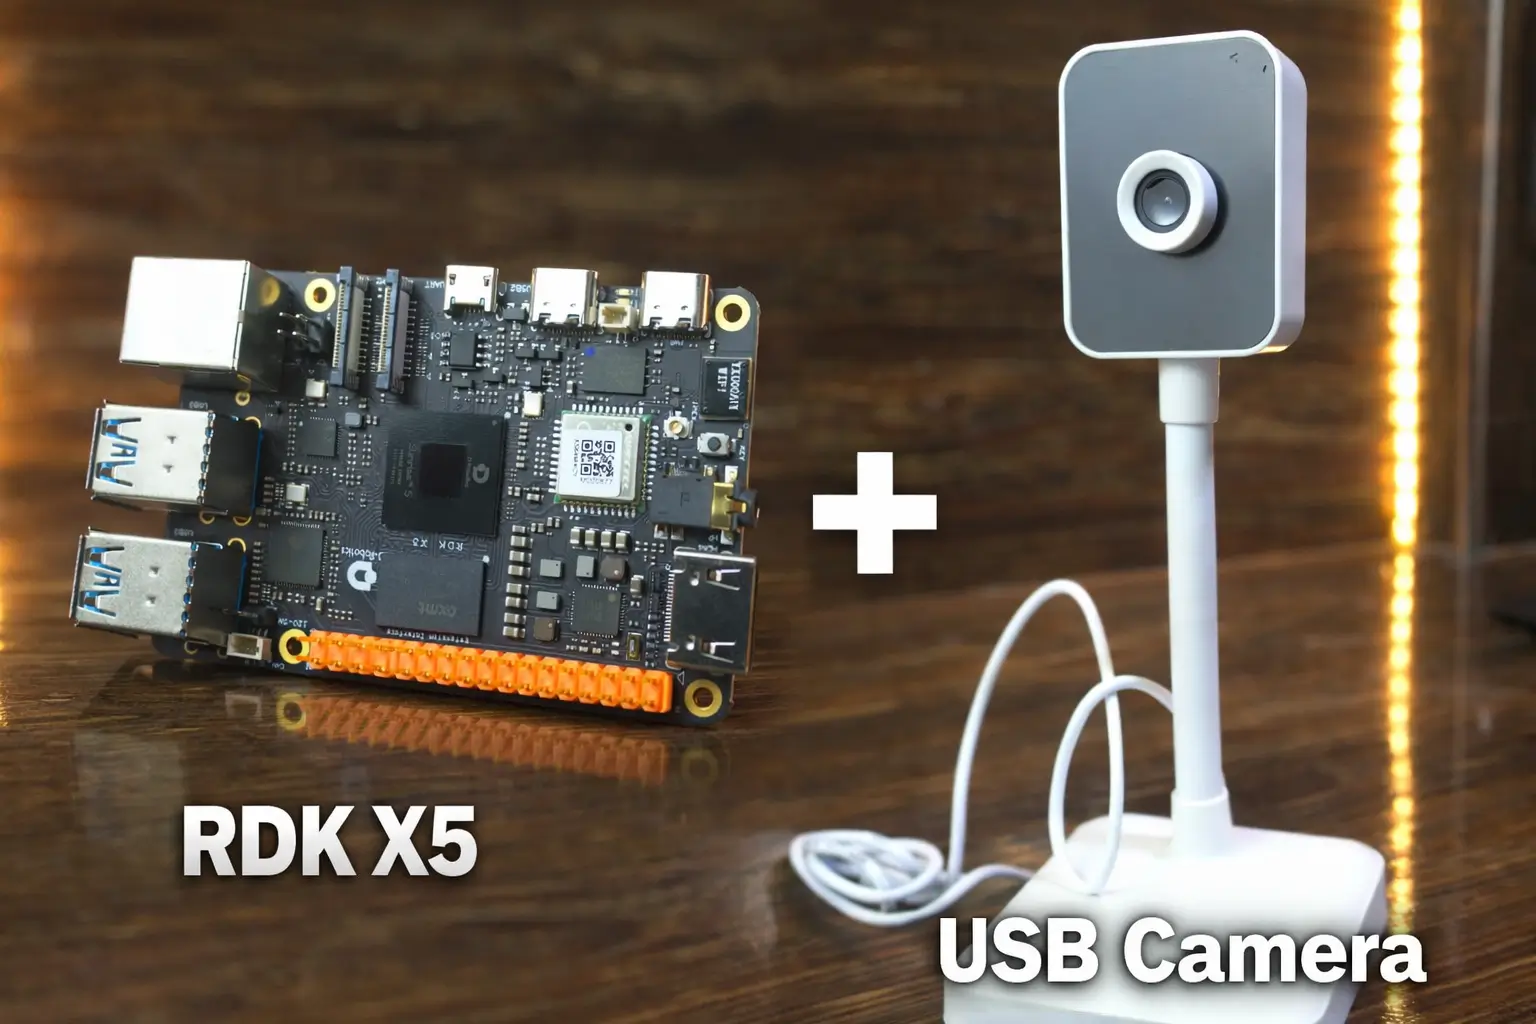
The camera is always live, AI is always running in the background, but the recording is fully controlled by the user. I can start recording manually, stop it whenever I want, and save the footage just like a traditional CCTV DVR system.
Even though this is called a manual CCTV system, it is not a basic system. AI is still working here.
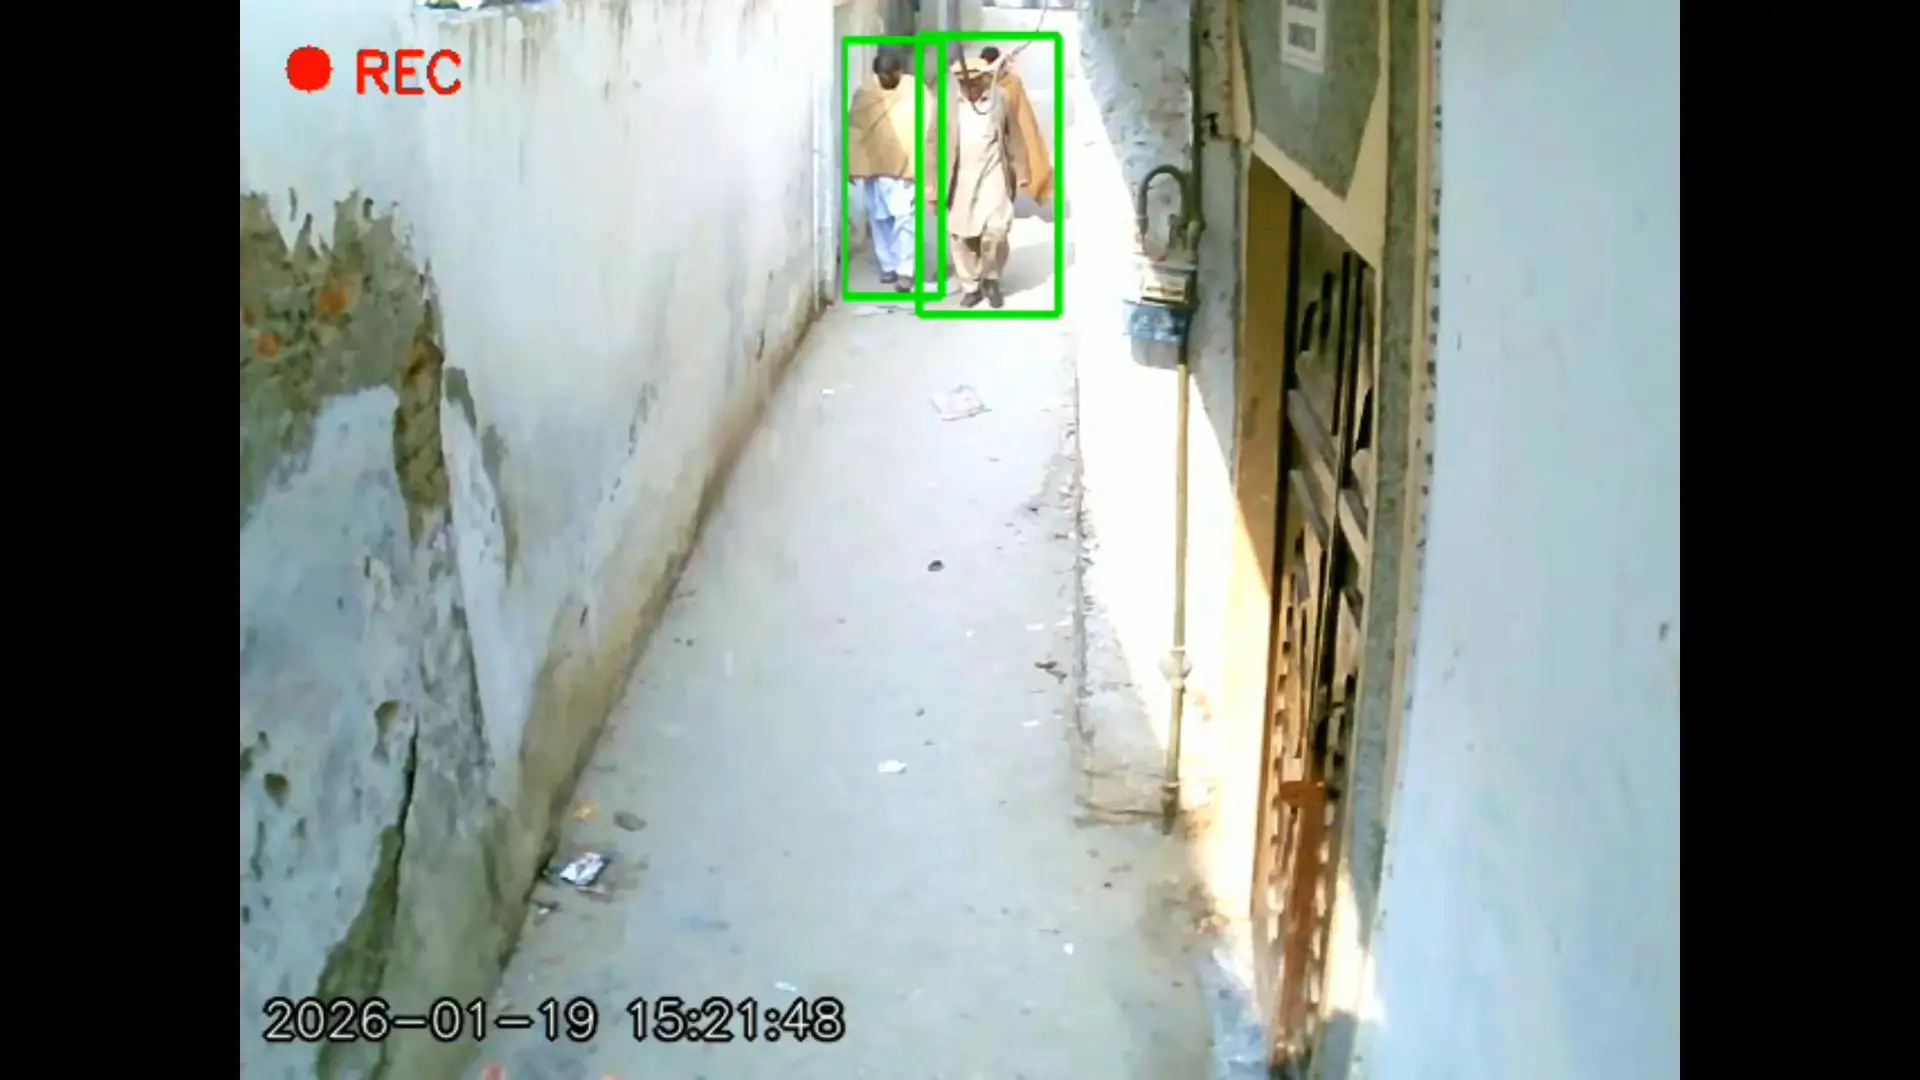
The YOLOv5 model is detecting people in real time, drawing bounding boxes, and adding a proper date and time stamp on the video, exactly like real CCTV footage you see in offices or shops.
MANUAL CCTV – WHY THIS APPROACH IS IMPORTANT
Manual CCTV systems are still extremely important in the real world. In many places, you don’t want automatic recording all the time. You want full control. Shops, small offices, personal labs, and testing environments often use this approach. It avoids false alarms, keeps storage usage under control, and gives the operator full authority over what gets recorded.
MANUAL CCTV CODE:
|
1 2 3 4 5 6 7 8 9 10 11 12 13 14 15 16 17 18 19 20 21 22 23 24 25 26 27 28 29 30 31 32 33 34 35 36 37 38 39 40 41 42 43 44 45 46 47 48 49 50 51 52 53 54 55 56 57 58 59 60 61 62 63 64 65 66 67 68 69 70 71 72 73 74 75 76 77 78 79 80 81 82 83 84 85 86 87 88 89 90 91 92 93 94 95 96 97 98 99 100 101 102 103 104 105 106 107 108 109 110 111 112 113 114 115 116 117 118 119 120 121 122 123 124 125 126 127 128 129 130 131 132 133 134 135 136 137 138 139 140 141 142 143 144 145 146 147 148 149 150 151 152 153 154 155 156 157 158 159 160 161 162 163 164 165 166 167 168 169 170 171 172 173 174 175 176 177 178 179 180 181 182 183 184 185 186 187 188 189 190 191 192 193 194 195 196 197 198 199 200 201 202 203 204 205 206 207 208 209 210 211 212 213 214 215 216 217 218 219 220 221 222 223 224 225 226 227 228 |
#!/usr/bin/env python3 import cv2 import numpy as np import time import signal import json import os import Hobot.GPIO as GPIO # Note: 'srcampy' import removed as it is for MIPI cameras, not USB. try: from hobot_dnn import pyeasy_dnn as dnn except ImportError: from hobot_dnn_rdkx5 import pyeasy_dnn as dnn # --- CONFIGURATION --- MODEL_PATH = '/opt/hobot/model/x5/basic/yolov5s_672x672_nv12.bin' SCORE_THRESHOLD = 0.5 CLASS_NAME_TARGET = "person" # Video Recording Settings VIDEO_CODEC = cv2.VideoWriter_fourcc(*'XVID') VIDEO_EXT = ".avi" # --------------------- # --- CTYPES DEFINITIONS FOR BPU POSTPROCESS --- import ctypes class hbSysMem_t(ctypes.Structure): _fields_ = [("phyAddr", ctypes.c_double), ("virAddr", ctypes.c_void_p), ("memSize", ctypes.c_int)] class hbDNNQuantiShift_yt(ctypes.Structure): _fields_ = [("shiftLen", ctypes.c_int), ("shiftData", ctypes.c_char_p)] class hbDNNQuantiScale_t(ctypes.Structure): _fields_ = [("scaleLen", ctypes.c_int), ("scaleData", ctypes.POINTER(ctypes.c_float)), ("zeroPointLen", ctypes.c_int), ("zeroPointData", ctypes.c_char_p)] class hbDNNTensorShape_t(ctypes.Structure): _fields_ = [("dimensionSize", ctypes.c_int * 8), ("numDimensions", ctypes.c_int)] class hbDNNTensorProperties_t(ctypes.Structure): _fields_ = [("validShape", hbDNNTensorShape_t), ("alignedShape", hbDNNTensorShape_t), ("tensorLayout", ctypes.c_int), ("tensorType", ctypes.c_int), ("shift", hbDNNQuantiShift_yt), ("scale", hbDNNQuantiScale_t), ("quantiType", ctypes.c_int), ("quantizeAxis", ctypes.c_int), ("alignedByteSize", ctypes.c_int), ("stride", ctypes.c_int * 8)] class hbDNNTensor_t(ctypes.Structure): _fields_ = [("sysMem", hbSysMem_t * 4), ("properties", hbDNNTensorProperties_t)] class Yolov5PostProcessInfo_t(ctypes.Structure): _fields_ = [("height", ctypes.c_int), ("width", ctypes.c_int), ("ori_height", ctypes.c_int), ("ori_width", ctypes.c_int), ("score_threshold", ctypes.c_float), ("nms_threshold", ctypes.c_float), ("nms_top_k", ctypes.c_int), ("is_pad_resize", ctypes.c_int)] libpostprocess = ctypes.CDLL('/usr/lib/libpostprocess.so') get_Postprocess_result = libpostprocess.Yolov5PostProcess get_Postprocess_result.argtypes = [ctypes.POINTER(Yolov5PostProcessInfo_t)] get_Postprocess_result.restype = ctypes.c_char_p # --- HELPER FUNCTIONS --- def get_TensorLayout(Layout): return 2 if Layout == "NCHW" else 0 def bgr2nv12_opencv(image): height, width = image.shape[0], image.shape[1] area = height * width yuv420p = cv2.cvtColor(image, cv2.COLOR_BGR2YUV_I420).reshape((area * 3 // 2,)) y = yuv420p[:area] uv_planar = yuv420p[area:].reshape((2, area // 4)) uv_packed = uv_planar.transpose((1, 0)).reshape((area // 2,)) nv12 = np.zeros_like(yuv420p) nv12[:height * width] = y nv12[height * width:] = uv_packed return nv12 def get_hw(pro): if pro.layout == "NCHW": return pro.shape[2], pro.shape[3] else: return pro.shape[1], pro.shape[2] # --- MAIN LOGIC --- is_stop = False def signal_handler(signal, frame): global is_stop is_stop = True def main(): global is_stop signal.signal(signal.SIGINT, signal_handler) # 1. Load Model try: models = dnn.load(MODEL_PATH) except Exception as e: print(f"Failed to load model: {e}") return model_h, model_w = get_hw(models[0].inputs[0].properties) # 2. Setup USB Camera cam_w, cam_h = 640, 480 # Device 0 is usually the first connected USB camera cap = cv2.VideoCapture(0) # Set resolution cap.set(cv2.CAP_PROP_FRAME_WIDTH, cam_w) cap.set(cv2.CAP_PROP_FRAME_HEIGHT, cam_h) if not cap.isOpened(): print("Error: Could not open USB Camera.") return # 3. Recording State Variables is_recording = False video_writer = None print("--- CONTROLS ---") print("Press 'r' to START/STOP Recording") print("Press 'q' to EXIT") print("----------------") try: while not is_stop: t_start = time.time() # 4. Get Image (Changed to standard OpenCV read) ret, img_bgr = cap.read() if not ret: print("Failed to grab frame") break # 5. Pre-process and Inference # Resize image to model input size resized_data = cv2.resize(img_bgr, (model_w, model_h), interpolation=cv2.INTER_AREA) # Convert BGR (from USB cam) to NV12 (required by Model) nv12_input = bgr2nv12_opencv(resized_data) # Forward pass outputs = models[0].forward(nv12_input) # 6. Post-process post_info = Yolov5PostProcessInfo_t() post_info.height, post_info.width = model_h, model_w post_info.ori_height, post_info.ori_width = cam_h, cam_w post_info.score_threshold, post_info.nms_threshold = SCORE_THRESHOLD, 0.45 post_info.nms_top_k, post_info.is_pad_resize = 20, 0 output_tensors = (hbDNNTensor_t * len(models[0].outputs))() for i in range(len(models[0].outputs)): output_tensors[i].properties.tensorLayout = get_TensorLayout(outputs[i].properties.layout) if len(outputs[i].properties.scale_data) == 0: output_tensors[i].properties.quantiType = 0 output_tensors[i].sysMem[0].virAddr = ctypes.cast(outputs[i].buffer.ctypes.data_as(ctypes.POINTER(ctypes.c_float)), ctypes.c_void_p) else: output_tensors[i].properties.quantiType = 2 output_tensors[i].properties.scale.scaleData = outputs[i].properties.scale_data.ctypes.data_as(ctypes.POINTER(ctypes.c_float)) output_tensors[i].sysMem[0].virAddr = ctypes.cast(outputs[i].buffer.ctypes.data_as(ctypes.POINTER(ctypes.c_int32)), ctypes.c_void_p) for j in range(len(outputs[i].properties.shape)): output_tensors[i].properties.validShape.dimensionSize[j] = outputs[i].properties.shape[j] libpostprocess.Yolov5doProcess(output_tensors[i], ctypes.pointer(post_info), i) result_ptr = get_Postprocess_result(ctypes.pointer(post_info)) result_str = result_ptr.decode('utf-8') # Parse & Draw Boxes try: detections = json.loads(result_str[16:]) except: detections = [] for result in detections: if result['name'] == CLASS_NAME_TARGET: bbox = result['bbox'] cv2.rectangle(img_bgr, (int(bbox[0]), int(bbox[1])), (int(bbox[2]), int(bbox[3])), (0, 255, 0), 2) # 7. Add CCTV Time/Date Stamp current_time = time.strftime("%Y-%m-%d %H:%M:%S") # Drawing a small black background for the text to make it readable cv2.putText(img_bgr, current_time, (10, cam_h - 20), cv2.FONT_HERSHEY_SIMPLEX, 0.7, (0, 0, 0), 4, cv2.LINE_AA) cv2.putText(img_bgr, current_time, (10, cam_h - 20), cv2.FONT_HERSHEY_SIMPLEX, 0.7, (255, 255, 255), 1, cv2.LINE_AA) # Show "RECORDING" indicator if is_recording: cv2.circle(img_bgr, (30, 30), 10, (0, 0, 255), -1) cv2.putText(img_bgr, "REC", (50, 40), cv2.FONT_HERSHEY_SIMPLEX, 0.8, (0, 0, 255), 2) # Write to file video_writer.write(img_bgr) # 8. Handle Keyboard Inputs cv2.imshow("CCTV Feed (USB)", img_bgr) key = cv2.waitKey(1) & 0xFF if key == ord('q'): break elif key == ord('r'): if not is_recording: # Start Recording filename = f"video_{time.strftime('%Y%m%d_%H%M%S')}{VIDEO_EXT}" video_writer = cv2.VideoWriter(filename, VIDEO_CODEC, 20.0, (cam_w, cam_h)) is_recording = True print(f"Started Recording: {filename}") else: # Stop Recording is_recording = False if video_writer: video_writer.release() print("Recording Stopped and Saved.") except Exception as e: print(f"Error: {e}") finally: if video_writer: video_writer.release() if cap: cap.release() cv2.destroyAllWindows() if __name__ == "__main__": main() |
You can download the project folder along with other resources from my Patreon Page.
MANUAL CCTV – HOW THE CODE WORKS
In the code, the YOLOv5 model is first loaded using the RDK X5 DNN library. This model is optimized to run on the BPU, which is why the input format must be NV12 instead of normal BGR. The USB camera provides BGR frames, so the image is converted into NV12 format before inference. This step is very important because it allows hardware-accelerated AI processing instead of slow CPU-based inference.
Once inference is complete, the post-processing extracts only the required object, which in this case is a person. Bounding boxes are drawn, and a CCTV-style timestamp is added to the video frame. When I press the R key, the system starts recording, and when I press it again, the recording stops and the video is saved with a timestamped filename. This is exactly how a real CCTV recorder behaves.
MANUAL CCTV – PRACTICAL DEMO
Now let me show you the manual CCTV system in action. As you can see, the live feed is running continuously, and AI is detecting people in real time.
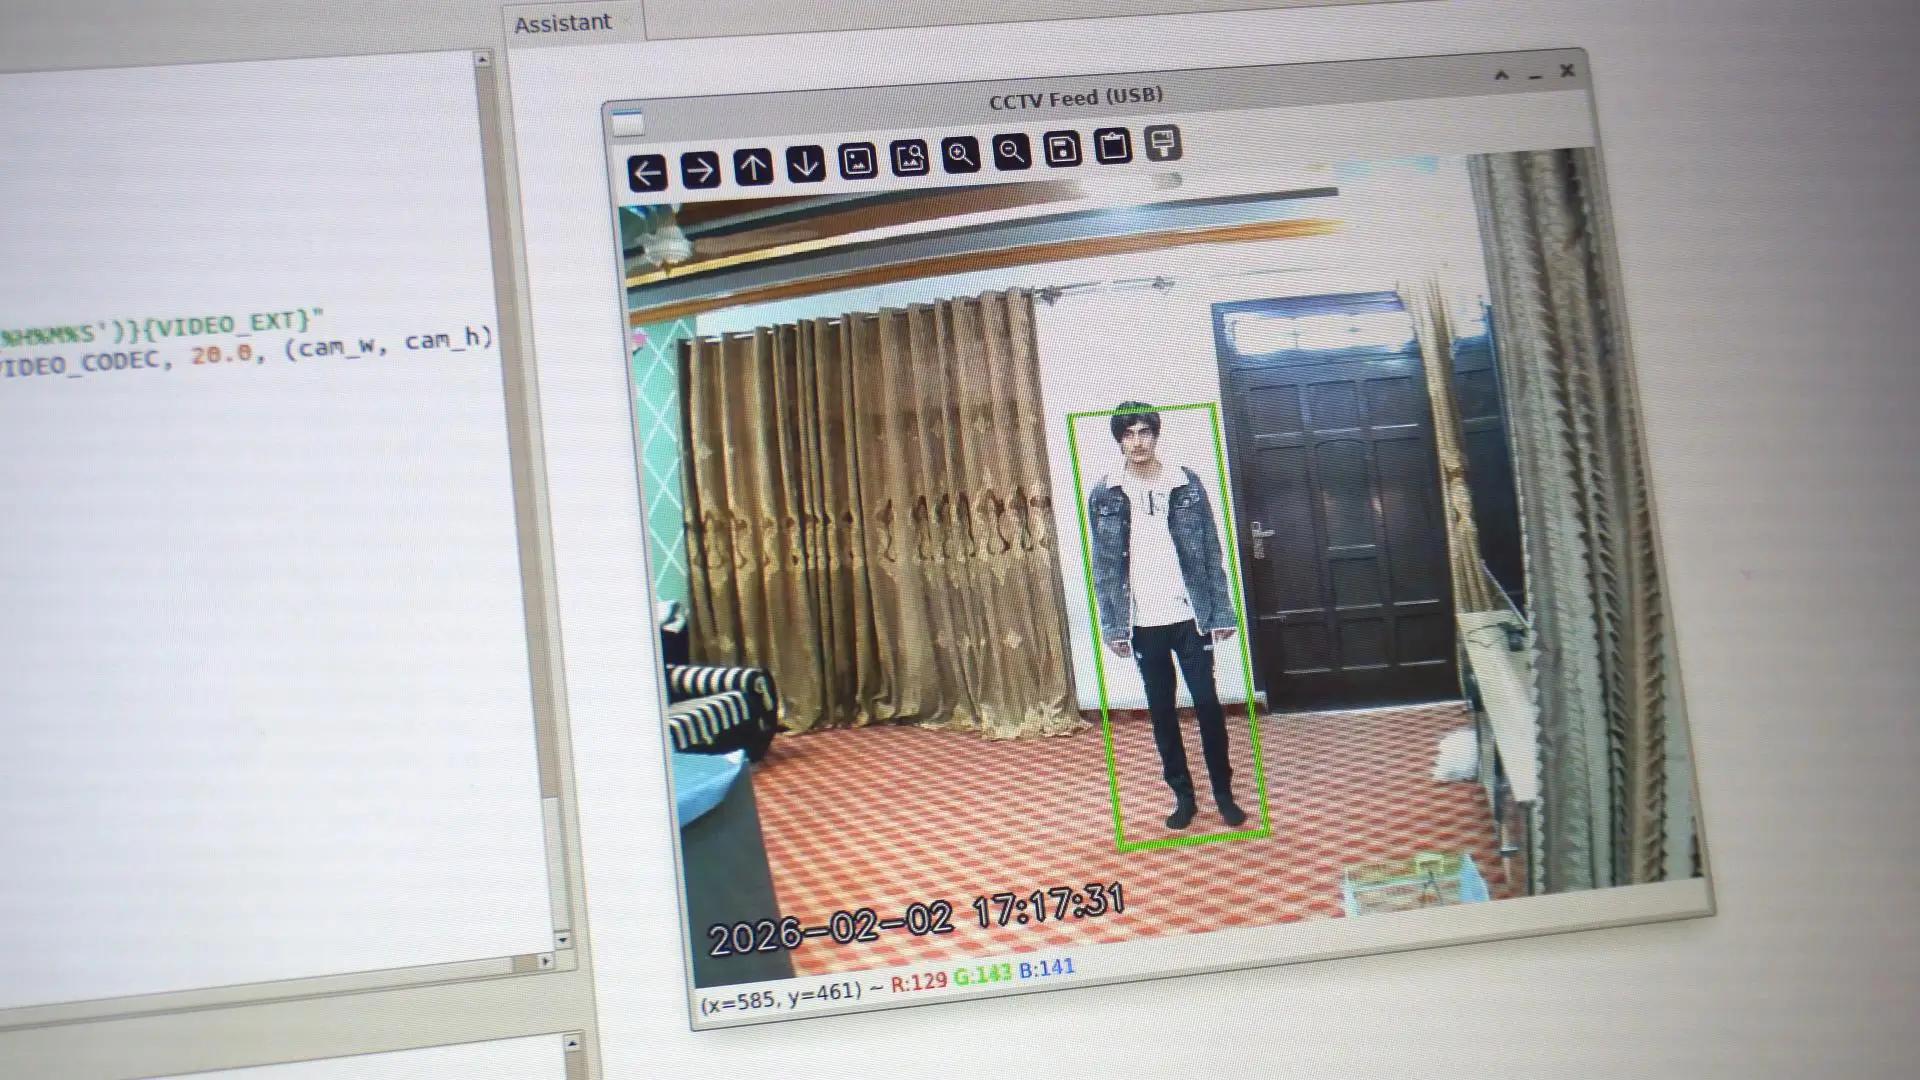
The bounding boxes appear immediately, and the timestamp is always visible on the screen.
When I press the R key, recording starts instantly.
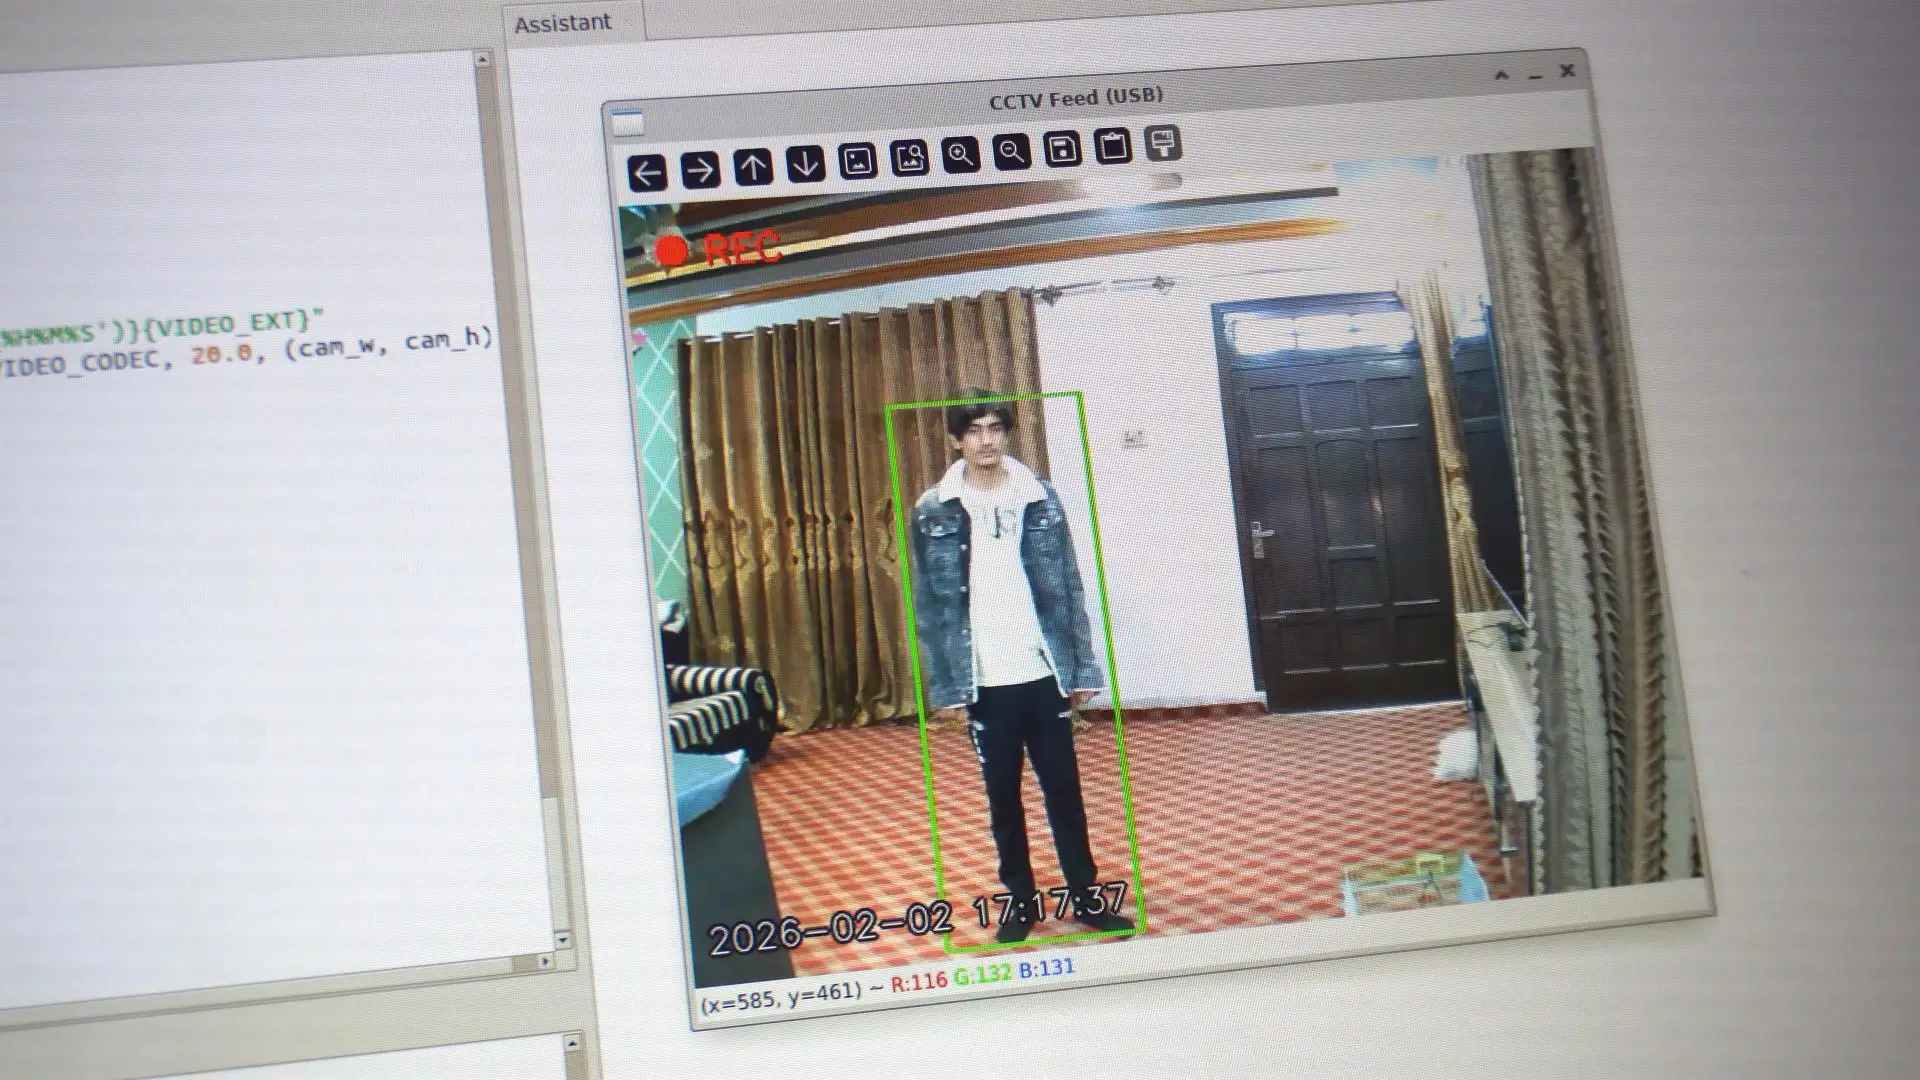
You can see the recording indicator on the screen, and the video is being saved frame by frame.
When I press R again, the recording stops, and the file is saved.
This gives full control to the user and is perfect for environments where manual supervision is required. Manual CCTV systems are good, but modern surveillance systems are moving toward automation.
AUTOMATIC CCTV SYSTEM – OVERVIEW
In the automatic CCTV system, I am using a MIPI camera instead of a USB camera.
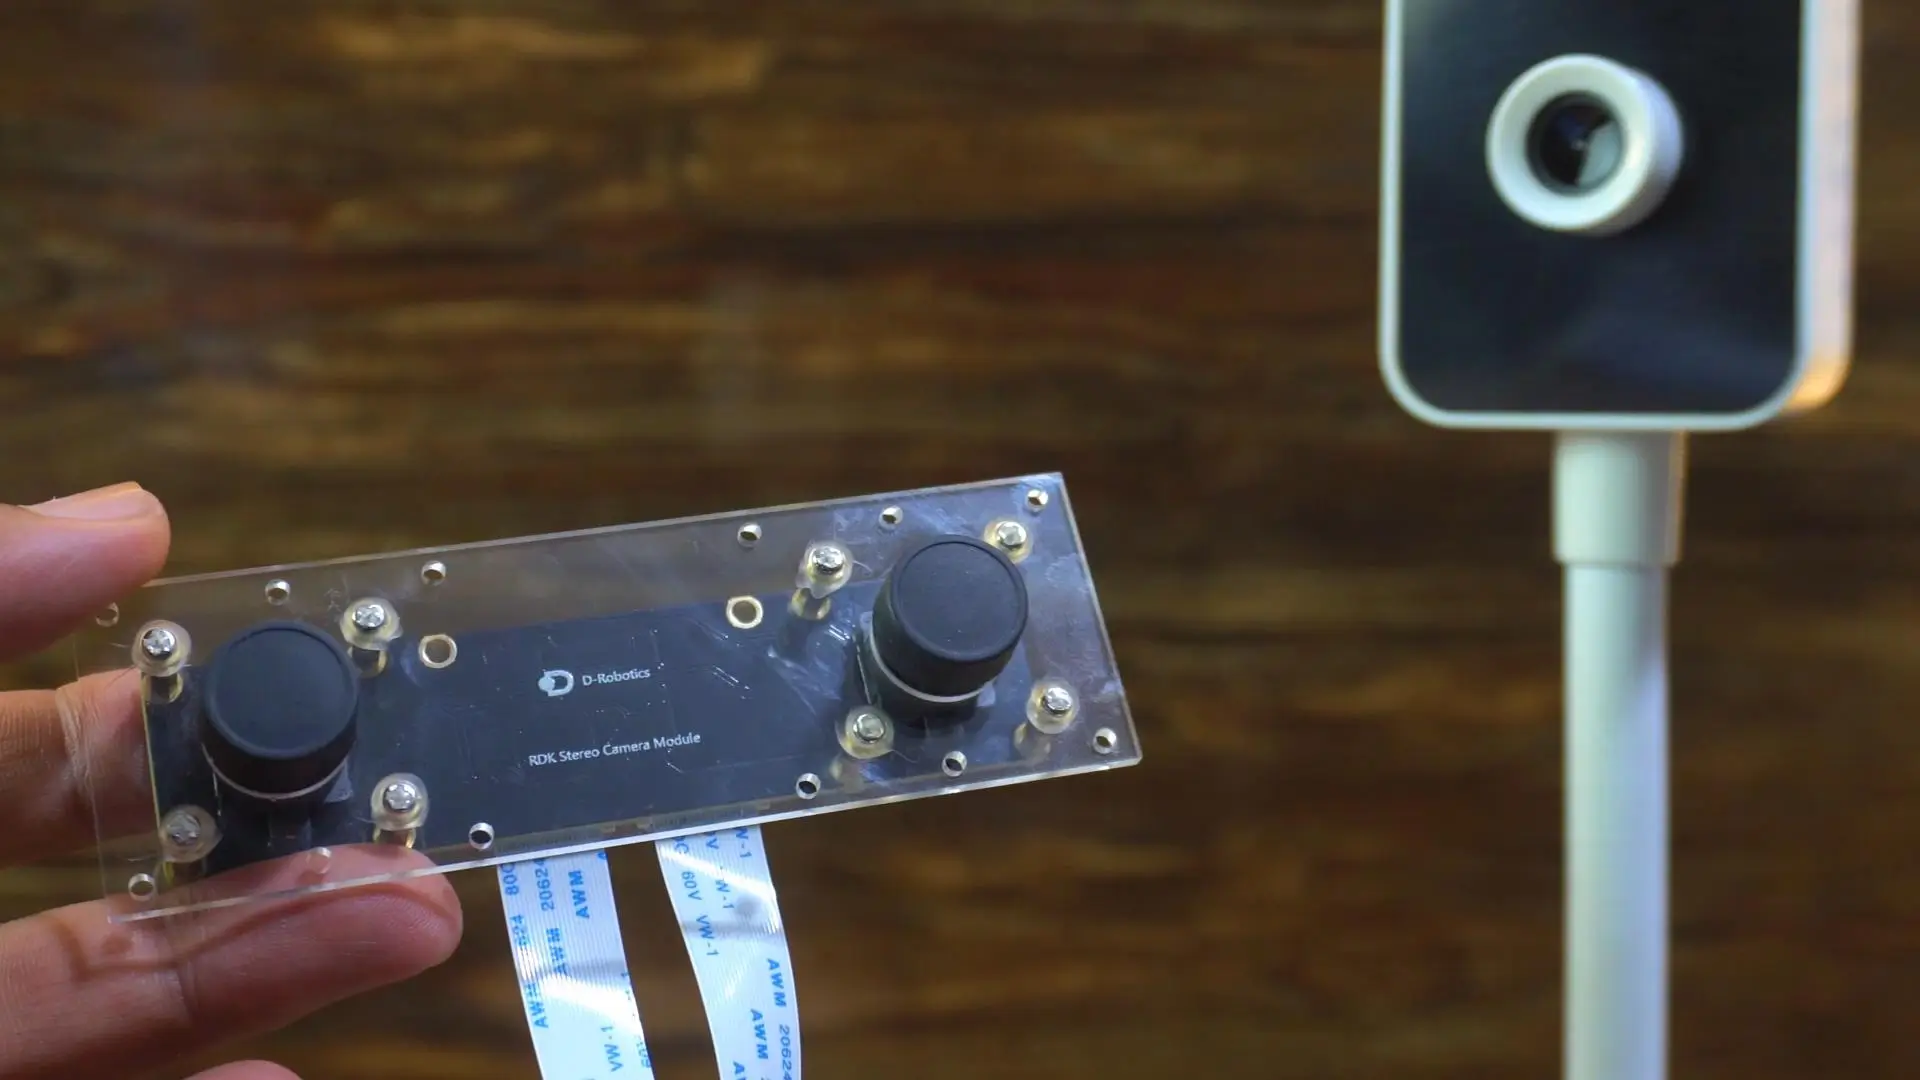
MIPI cameras provide lower latency, better synchronization, and are more suitable for embedded AI systems.
This system does not wait for me to press any button. Instead, it uses AI, logic, and time-based decision-making to automatically start recording when a specific condition is met.
AUTOMATIC CCTV CODE:
|
1 2 3 4 5 6 7 8 9 10 11 12 13 14 15 16 17 18 19 20 21 22 23 24 25 26 27 28 29 30 31 32 33 34 35 36 37 38 39 40 41 42 43 44 45 46 47 48 49 50 51 52 53 54 55 56 57 58 59 60 61 62 63 64 65 66 67 68 69 70 71 72 73 74 75 76 77 78 79 80 81 82 83 84 85 86 87 88 89 90 91 92 93 94 95 96 97 98 99 100 101 102 103 104 105 106 107 108 109 110 111 112 113 114 115 116 117 118 119 120 121 122 123 124 125 126 127 128 129 130 131 132 133 134 135 136 137 138 139 140 141 142 143 144 145 146 147 148 149 150 151 152 153 154 155 156 157 158 159 160 161 162 163 164 165 166 167 168 169 170 171 172 173 174 175 176 177 178 179 180 181 182 183 184 185 186 187 188 189 190 191 192 193 194 195 196 197 198 199 200 201 202 203 204 205 206 207 208 209 210 211 212 213 214 215 216 217 218 219 220 221 222 223 224 225 226 227 228 229 230 231 232 233 234 235 236 237 238 239 240 241 242 243 244 245 246 247 248 249 250 251 252 253 254 255 256 257 258 259 260 261 262 263 |
#!/usr/bin/env python3 import cv2 import numpy as np import time import signal import json import os import ctypes import Hobot.GPIO as GPIO # Try imports for RDK X5 environment try: from hobot_vio import libsrcampy as srcampy except ImportError: from hobot_vio_rdkx5 import libsrcampy as srcampy try: from hobot_dnn import pyeasy_dnn as dnn except ImportError: from hobot_dnn_rdkx5 import pyeasy_dnn as dnn # --- CONFIGURATION --- MODEL_PATH = '/opt/hobot/model/x5/basic/yolov5s_672x672_nv12.bin' SCORE_THRESHOLD = 0.5 CLASS_NAME_TARGET = "person" PRESENCE_WAIT_TIME = 10.0 RECORDING_DURATION = 10.0 GLITCH_THRESHOLD = 2.0 # Time in seconds to hold state if detection flickers VIDEO_CODEC = cv2.VideoWriter_fourcc(*'XVID') # GPIO PIN Configuration LED_PIN = 37 # --- GLOBALS FOR ROI --- roi_points = [] def mouse_callback(event, x, y, flags, param): global roi_points if event == cv2.EVENT_LBUTTONDOWN: roi_points.append((x, y)) elif event == cv2.EVENT_RBUTTONDOWN: roi_points = [] print("ROI Cleared") # --- CTYPES DEFINITIONS --- class hbSysMem_t(ctypes.Structure): _fields_ = [("phyAddr", ctypes.c_double), ("virAddr", ctypes.c_void_p), ("memSize", ctypes.c_int)] class hbDNNQuantiShift_yt(ctypes.Structure): _fields_ = [("shiftLen", ctypes.c_int), ("shiftData", ctypes.c_char_p)] class hbDNNQuantiScale_t(ctypes.Structure): _fields_ = [("scaleLen", ctypes.c_int), ("scaleData", ctypes.POINTER(ctypes.c_float)), ("zeroPointLen", ctypes.c_int), ("zeroPointData", ctypes.c_char_p)] class hbDNNTensorShape_t(ctypes.Structure): _fields_ = [("dimensionSize", ctypes.c_int * 8), ("numDimensions", ctypes.c_int)] class hbDNNTensorProperties_t(ctypes.Structure): _fields_ = [("validShape", hbDNNTensorShape_t), ("alignedShape", hbDNNTensorShape_t), ("tensorLayout", ctypes.c_int), ("tensorType", ctypes.c_int), ("shift", hbDNNQuantiShift_yt), ("scale", hbDNNQuantiScale_t), ("quantiType", ctypes.c_int), ("quantizeAxis", ctypes.c_int), ("alignedByteSize", ctypes.c_int), ("stride", ctypes.c_int * 8)] class hbDNNTensor_t(ctypes.Structure): _fields_ = [("sysMem", hbSysMem_t * 4), ("properties", hbDNNTensorProperties_t)] class Yolov5PostProcessInfo_t(ctypes.Structure): _fields_ = [("height", ctypes.c_int), ("width", ctypes.c_int), ("ori_height", ctypes.c_int), ("ori_width", ctypes.c_int), ("score_threshold", ctypes.c_float), ("nms_threshold", ctypes.c_float), ("nms_top_k", ctypes.c_int), ("is_pad_resize", ctypes.c_int)] libpostprocess = ctypes.CDLL('/usr/lib/libpostprocess.so') get_Postprocess_result = libpostprocess.Yolov5PostProcess get_Postprocess_result.argtypes = [ctypes.POINTER(Yolov5PostProcessInfo_t)] get_Postprocess_result.restype = ctypes.c_char_p # --- HELPERS --- def get_TensorLayout(Layout): return 2 if Layout == "NCHW" else 0 def bgr2nv12_opencv(image): height, width = image.shape[0], image.shape[1] area = height * width yuv420p = cv2.cvtColor(image, cv2.COLOR_BGR2YUV_I420).reshape((area * 3 // 2,)) y = yuv420p[:area] uv_planar = yuv420p[area:].reshape((2, area // 4)) uv_packed = uv_planar.transpose((1, 0)).reshape((area // 2,)) nv12 = np.zeros_like(yuv420p) nv12[:height * width] = y nv12[height * width:] = uv_packed return nv12 def get_hw(pro): return (pro.shape[2], pro.shape[3]) if pro.layout == "NCHW" else (pro.shape[1], pro.shape[2]) is_stop = False def signal_handler(signal, frame): global is_stop is_stop = True def main(): global is_stop, roi_points signal.signal(signal.SIGINT, signal_handler) # 1. Initialize GPIO GPIO.setwarnings(False) GPIO.setmode(GPIO.BOARD) GPIO.setup(LED_PIN, GPIO.OUT) GPIO.output(LED_PIN, GPIO.LOW) # 2. Init DNN & Camera models = dnn.load(MODEL_PATH) model_h, model_w = get_hw(models[0].inputs[0].properties) cam_w, cam_h = 640, 480 cam = srcampy.Camera() cam.open_cam(0, -1, -1, [cam_w, 1920], [cam_h, 1080], 1080, 1920) window_name = "CCTV_Stable_Dot" cv2.namedWindow(window_name) cv2.setMouseCallback(window_name, mouse_callback) # State Variables presence_timer_start = None recording_timer_start = None is_recording = False video_writer = None last_blink_time = 0 led_state = False last_roi_detection_time = 0 print("LEFT CLICK: Draw zone | RIGHT CLICK: Clear | Q: Exit") try: while not is_stop: img_data = cam.get_img(2, cam_w, cam_h) img_nv12 = np.frombuffer(img_data, dtype=np.uint8).reshape((int(cam_h * 1.5), cam_w)) img_bgr = cv2.cvtColor(img_nv12, cv2.COLOR_YUV2BGR_NV12) # 3. AI Inference resized = cv2.resize(img_bgr, (model_w, model_h), interpolation=cv2.INTER_AREA) nv12_input = bgr2nv12_opencv(resized) outputs = models[0].forward(nv12_input) # 4. Post-Process post_info = Yolov5PostProcessInfo_t(model_h, model_w, cam_h, cam_w, SCORE_THRESHOLD, 0.45, 20, 0) output_tensors = (hbDNNTensor_t * len(models[0].outputs))() for i in range(len(models[0].outputs)): output_tensors[i].properties.tensorLayout = get_TensorLayout(outputs[i].properties.layout) if len(outputs[i].properties.scale_data) == 0: output_tensors[i].properties.quantiType = 0 output_tensors[i].sysMem[0].virAddr = ctypes.cast(outputs[i].buffer.ctypes.data_as(ctypes.POINTER(ctypes.c_float)), ctypes.c_void_p) else: output_tensors[i].properties.quantiType = 2 output_tensors[i].properties.scale.scaleData = outputs[i].properties.scale_data.ctypes.data_as(ctypes.POINTER(ctypes.c_float)) output_tensors[i].sysMem[0].virAddr = ctypes.cast(outputs[i].buffer.ctypes.data_as(ctypes.POINTER(ctypes.c_int32)), ctypes.c_void_p) for j in range(len(outputs[i].properties.shape)): output_tensors[i].properties.validShape.dimensionSize[j] = outputs[i].properties.shape[j] libpostprocess.Yolov5doProcess(output_tensors[i], ctypes.pointer(post_info), i) result_ptr = get_Postprocess_result(ctypes.pointer(post_info)) detections = json.loads(result_ptr.decode('utf-8')[16:]) # 5. Polygon Check & Visualization person_in_roi_this_frame = False for det in detections: if det['name'] == CLASS_NAME_TARGET: x1, y1, x2, y2 = det['bbox'] # --- DOT CALCULATION --- # We define the "Point to Check" as the bottom-center (between the feet) # If you want the absolute center, use: (int((x1+x2)/2), int((y1+y2)/2)) check_point = (int((x1 + x2) / 2), int(y2)) # Check if DETECTED POINT is inside ROI is_inside = False if len(roi_points) >= 3: if cv2.pointPolygonTest(np.array(roi_points, np.int32), check_point, False) >= 0: is_inside = True person_in_roi_this_frame = True # Determine Colors # Green = Safe, Red = Warning status_color = (0, 0, 255) if is_inside else (0, 255, 0) # 1. Draw Bounding Box cv2.rectangle(img_bgr, (int(x1), int(y1)), (int(x2), int(y2)), status_color, 2) # 2. Draw the DOT (The exact point being checked) # White Outline so we can see it on dark backgrounds cv2.circle(img_bgr, check_point, 6, (255, 255, 255), -1) # Colored Inner Dot cv2.circle(img_bgr, check_point, 4, status_color, -1) # 3. Label label_txt = f"{CLASS_NAME_TARGET} {'(IN)' if is_inside else '(OUT)'}" cv2.putText(img_bgr, label_txt, (int(x1), int(y1)-5), 2, 0.5, status_color, 1) # 6. Logic Engine (With Glitch Protection) now = time.time() if person_in_roi_this_frame: last_roi_detection_time = now # Buffer logic: Detection is "Stable" if seen recently is_person_stable = (now - last_roi_detection_time) < GLITCH_THRESHOLD if is_recording: # STATE: RECORDING GPIO.output(LED_PIN, GPIO.HIGH) elapsed_rec = now - recording_timer_start video_writer.write(img_bgr) rec_text = f"REC: {int(RECORDING_DURATION - elapsed_rec)}s" cv2.rectangle(img_bgr, (5, 35), (150, 75), (0, 0, 0), -1) cv2.putText(img_bgr, rec_text, (10, 65), 2, 0.8, (0, 0, 255), 2) if elapsed_rec >= RECORDING_DURATION: is_recording = False video_writer.release() GPIO.output(LED_PIN, GPIO.LOW) elif is_person_stable: # STATE: COUNTING if presence_timer_start is None: presence_timer_start = now elapsed = now - presence_timer_start # Blink LED if now - last_blink_time > 0.2: led_state = not led_state GPIO.output(LED_PIN, GPIO.HIGH if led_state else GPIO.LOW) last_blink_time = now warn_text = f"WARN: {int(PRESENCE_WAIT_TIME - elapsed)}s" cv2.rectangle(img_bgr, (5, 35), (150, 75), (0, 0, 0), -1) cv2.putText(img_bgr, warn_text, (10, 65), 2, 0.8, (0, 255, 255), 2) if elapsed >= PRESENCE_WAIT_TIME: is_recording = True recording_timer_start = now fname = f"auto_{time.strftime('%Y%m%d_%H%M%S')}.avi" video_writer = cv2.VideoWriter(fname, VIDEO_CODEC, 20.0, (cam_w, cam_h)) GPIO.output(LED_PIN, GPIO.HIGH) else: # STATE: IDLE presence_timer_start = None if not is_recording: GPIO.output(LED_PIN, GPIO.LOW) # 7. Draw ROI if len(roi_points) > 0: pts = np.array(roi_points, np.int32).reshape((-1, 1, 2)) cv2.polylines(img_bgr, [pts], True, (255, 0, 0), 2) cv2.imshow(window_name, img_bgr) if cv2.waitKey(1) & 0xFF == ord('q'): break finally: GPIO.output(LED_PIN, GPIO.LOW) GPIO.cleanup() if video_writer: video_writer.release() cam.close_cam() cv2.destroyAllWindows() if __name__ == "__main__": main() |
Although the core source code is shared in this article, additional supporting files are required to successfully build and run the project. These include configuration files, and platform-specific dependencies for the RDK X5 environment. To make things easier and avoid setup issues, the complete project folder is available for download on my Patreon page, where everything is already organized and ready to run. It’s just a 1$ subscription and you get access to all my projects.
AUTOMATIC CCTV – CODE EXPLANATION:
Now let’s understand how this works in the code.
First, the AI model is loaded exactly the same way as in the previous demo using the RDK X5 DNN library.
The YOLOv5 model runs on the BPU, so the input frames must be in NV12 format before inference can happen. Since the MIPI camera already outputs NV12 data, there is no need for additional color conversion. This makes the pipeline faster, more efficient, and much better suited for real-time AI processing compared to a USB camera.
Once inference is completed, the code moves into the post-processing stage. Here, all detected objects are extracted from the model output, including their class IDs, confidence values, and bounding box coordinates.
Next, the system applies a filtering rule based on the selected object class. In this demo, the target class is set to person, so only detections belonging to the “person” category are processed further. All other detected objects are ignored. If you want, you can easily change this to any object available in the COCO class list, or modify the logic to allow multiple object types at the same time.
This clear separation between inference, post-processing, and filtering makes the code easy to understand, modify, and extend for real-world surveillance applications.
PRACTICAL DEMO:
Now let me show you how all of this works in real time.
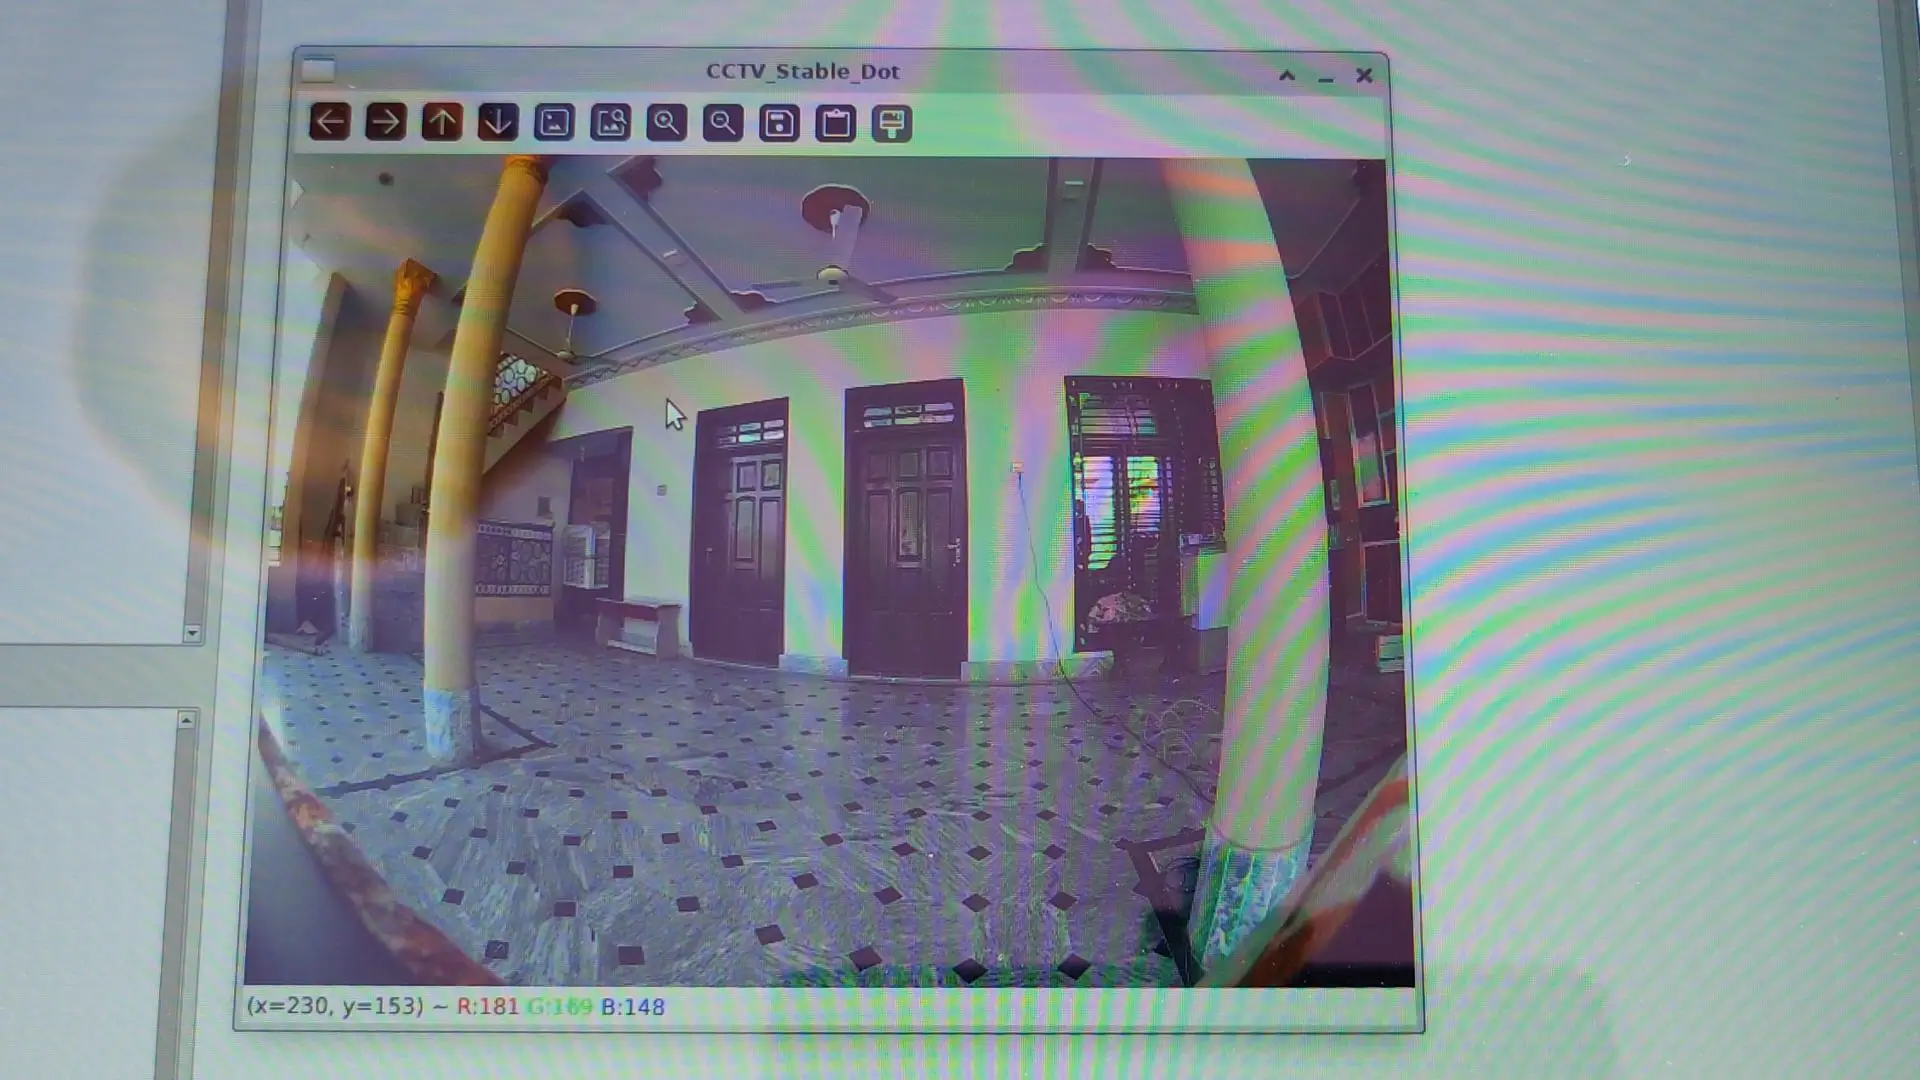
First, I define a region of interest on the screen. Using the mouse, I can draw any shape I want; a rectangle, a triangle, or even a custom polygon.
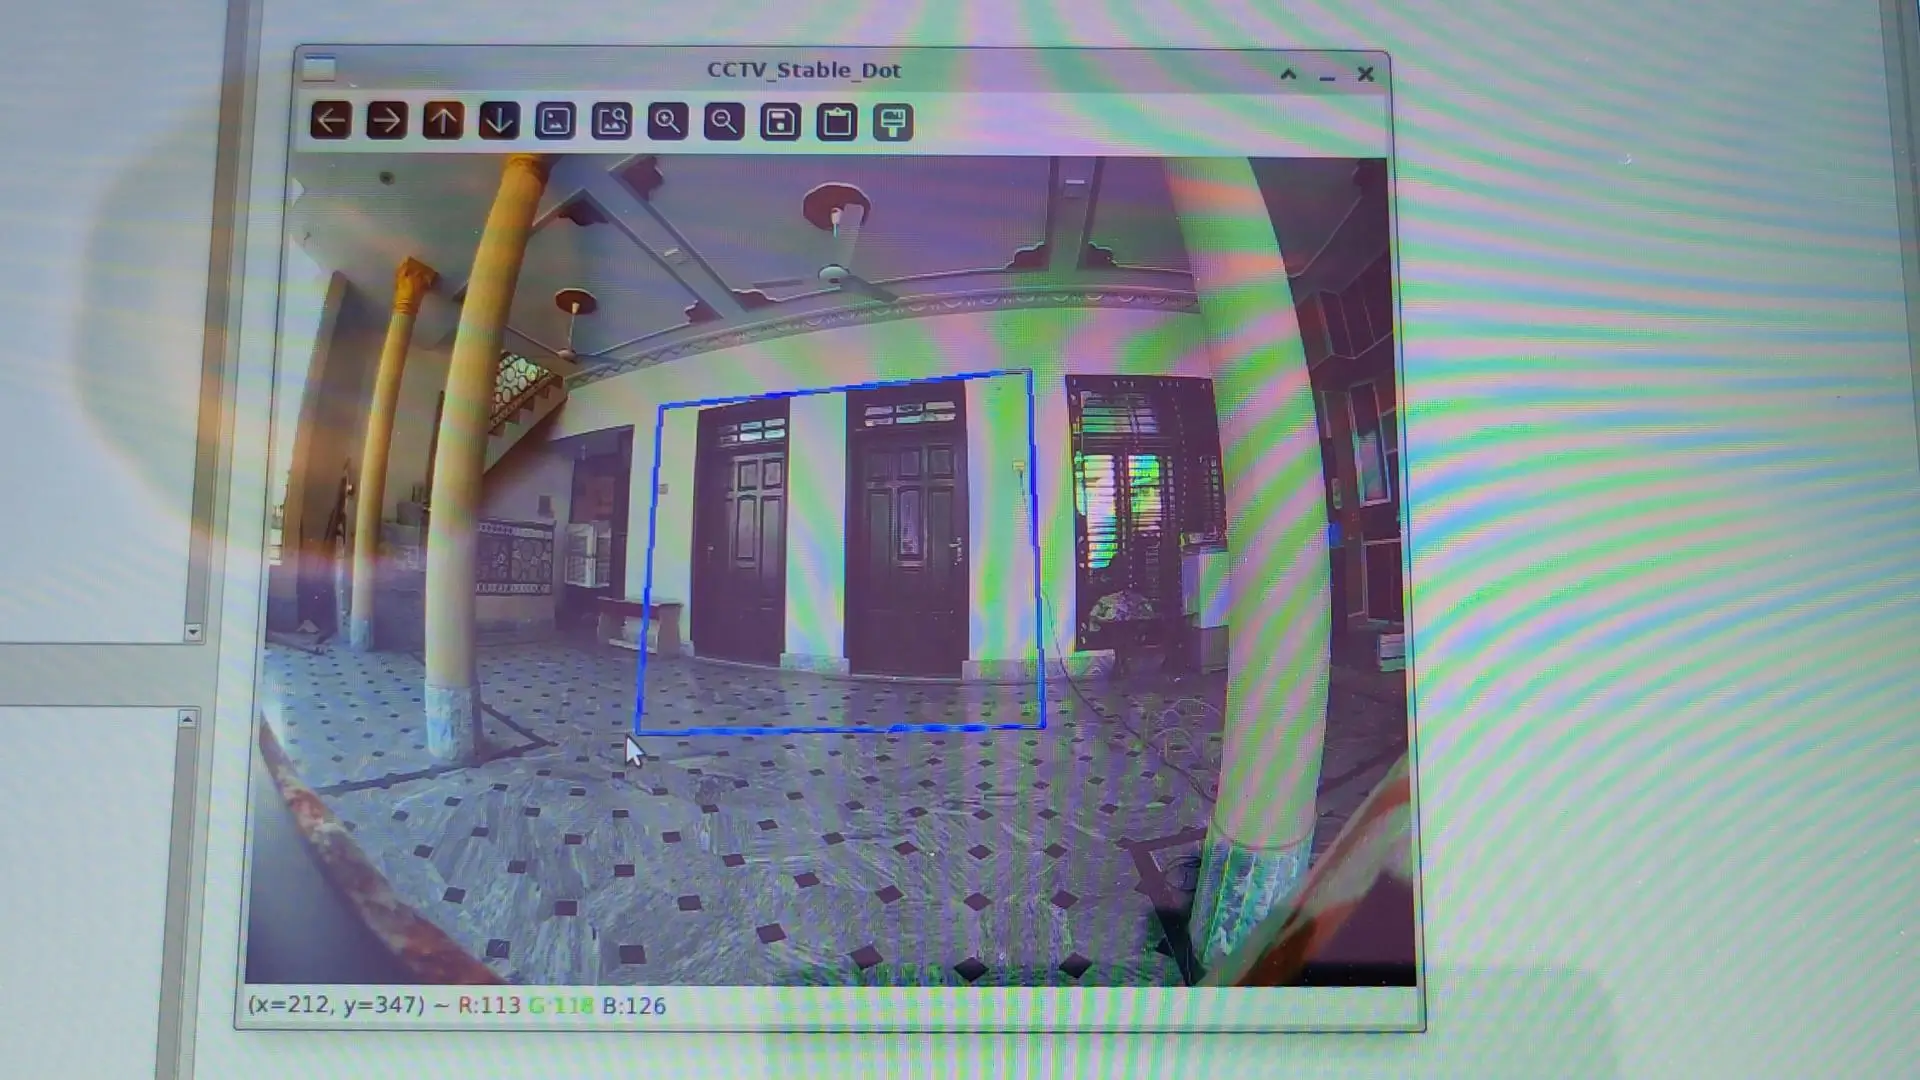
This tells the AI exactly where it should monitor activity. In real-world surveillance, this is critical. You usually care about specific areas like doors, windows, or restricted zones, not the entire camera view.
Next comes smart object-based detection. The system doesn’t record everything it sees.
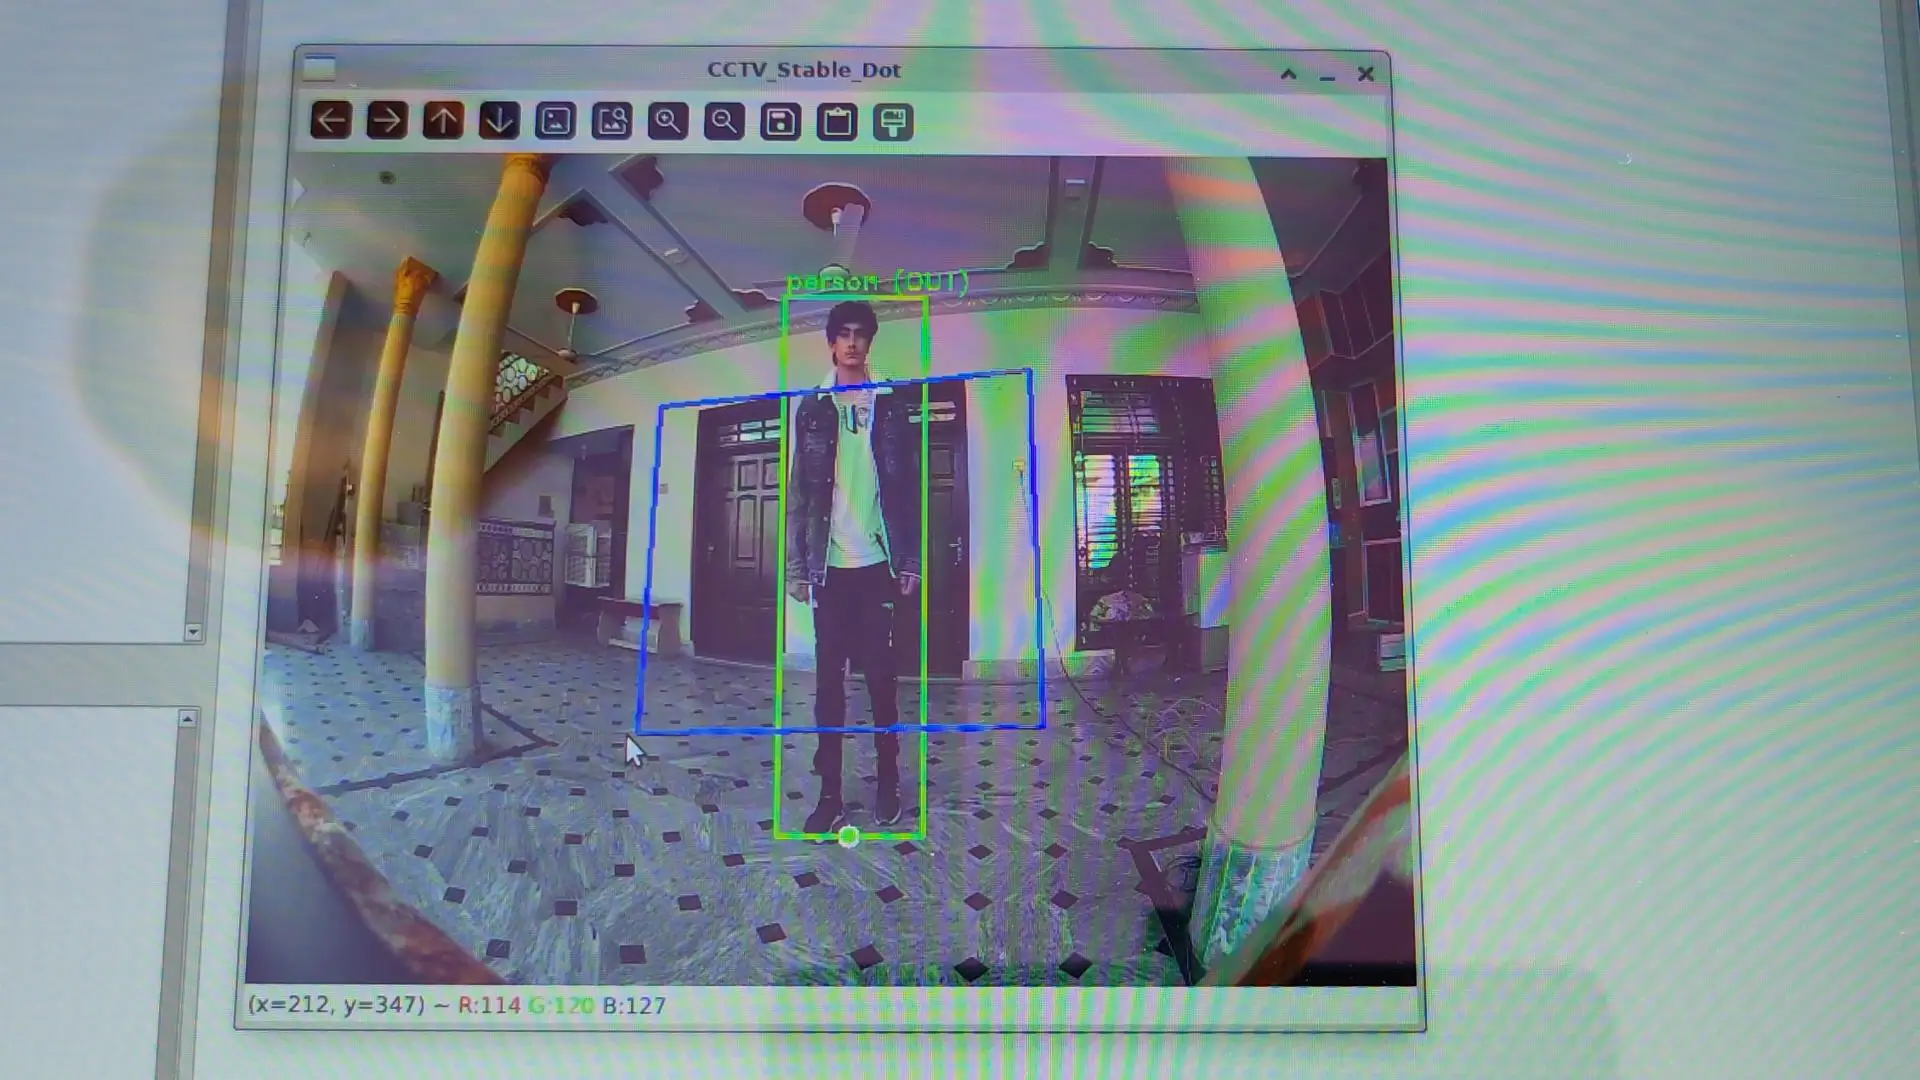
It only looks for specific objects. In this demo, I am detecting a person, but the same logic can be applied to other objects, or even multiple object types at the same time.
To make detection more accurate, the system doesn’t check the full bounding box. Instead, it checks a very precise point; the bottom center of the box, which represents where the feet touch the ground.
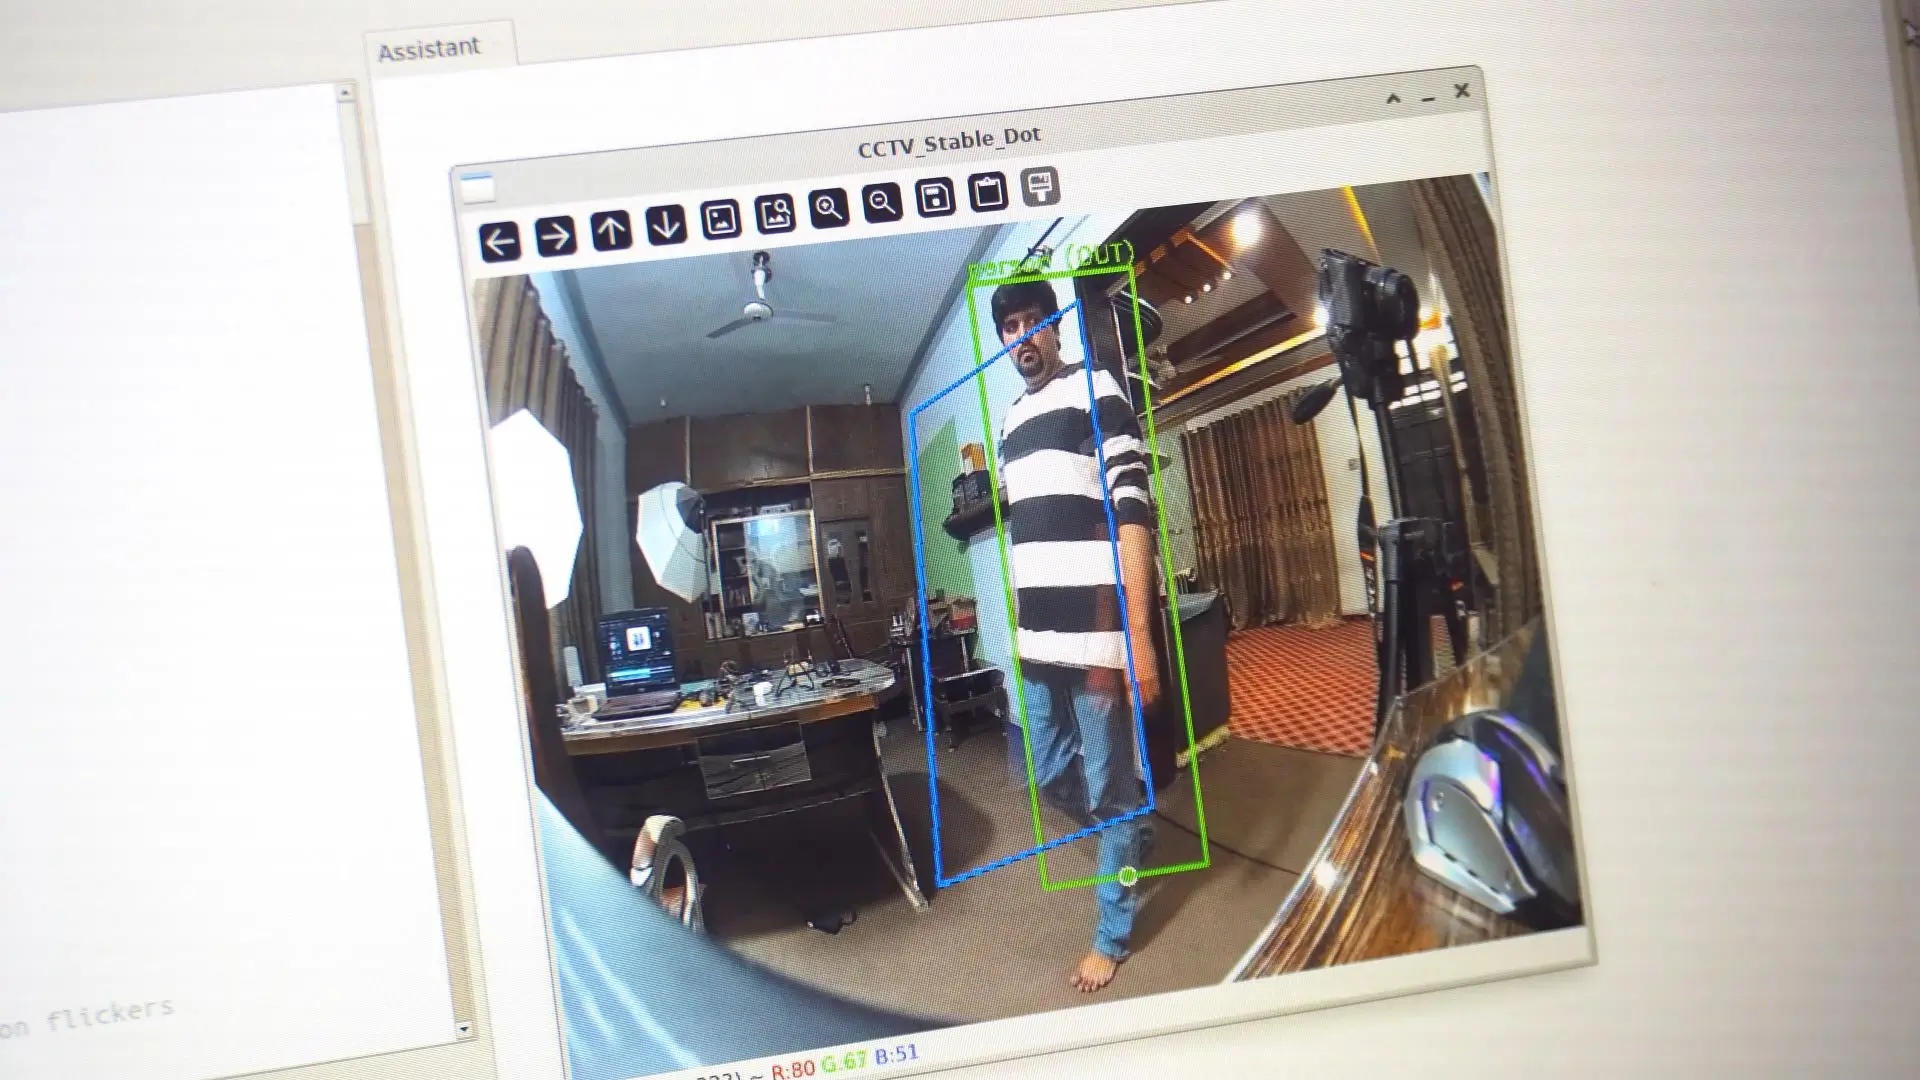
This means a person is only detected when they actually step inside the region.
Just passing near the boundary doesn’t trigger anything, which greatly reduces false alarms.
Now, real environments aren’t perfect.
Detections can flicker because of lighting changes or occlusion. That’s why the system includes glitch protection. If a person disappears for a split second, the system doesn’t immediately reset. It waits and confirms the detection is stable, making it reliable for real-world use.
Even after detection, recording doesn’t start immediately.
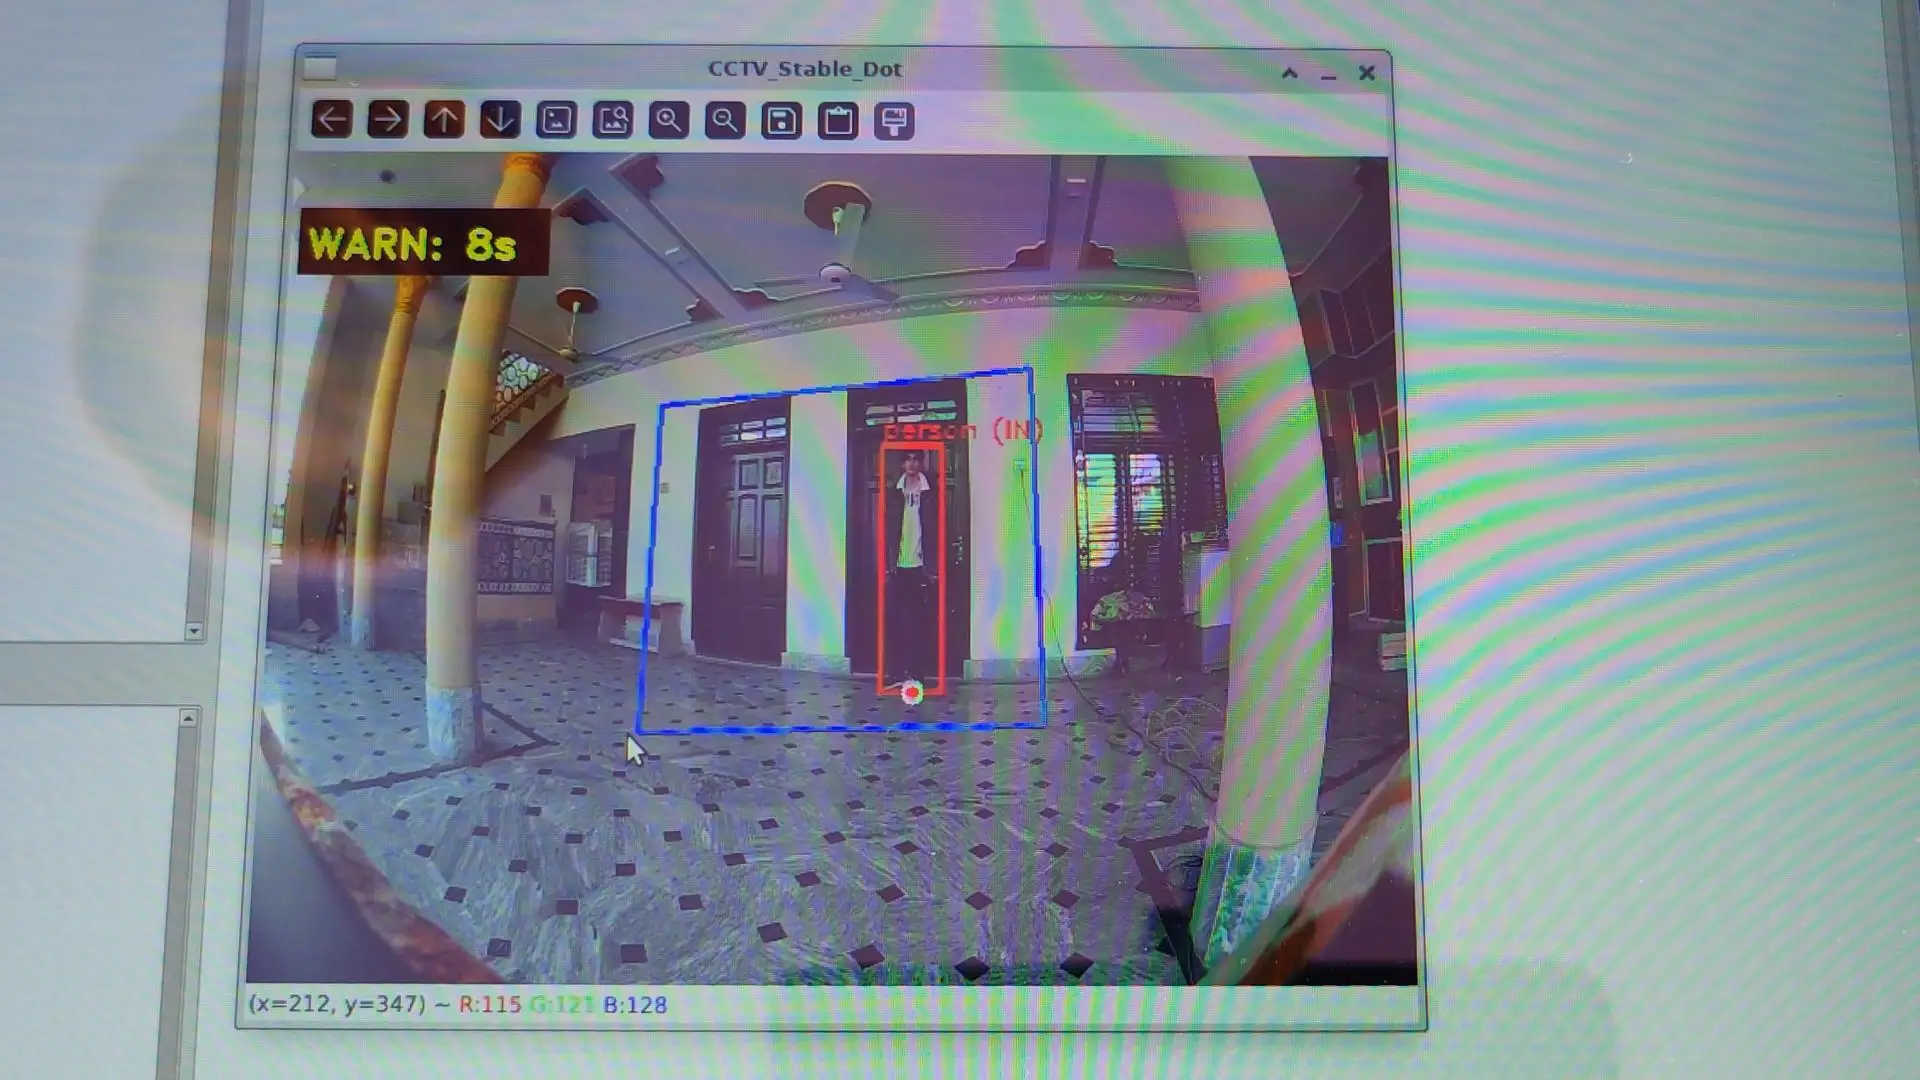
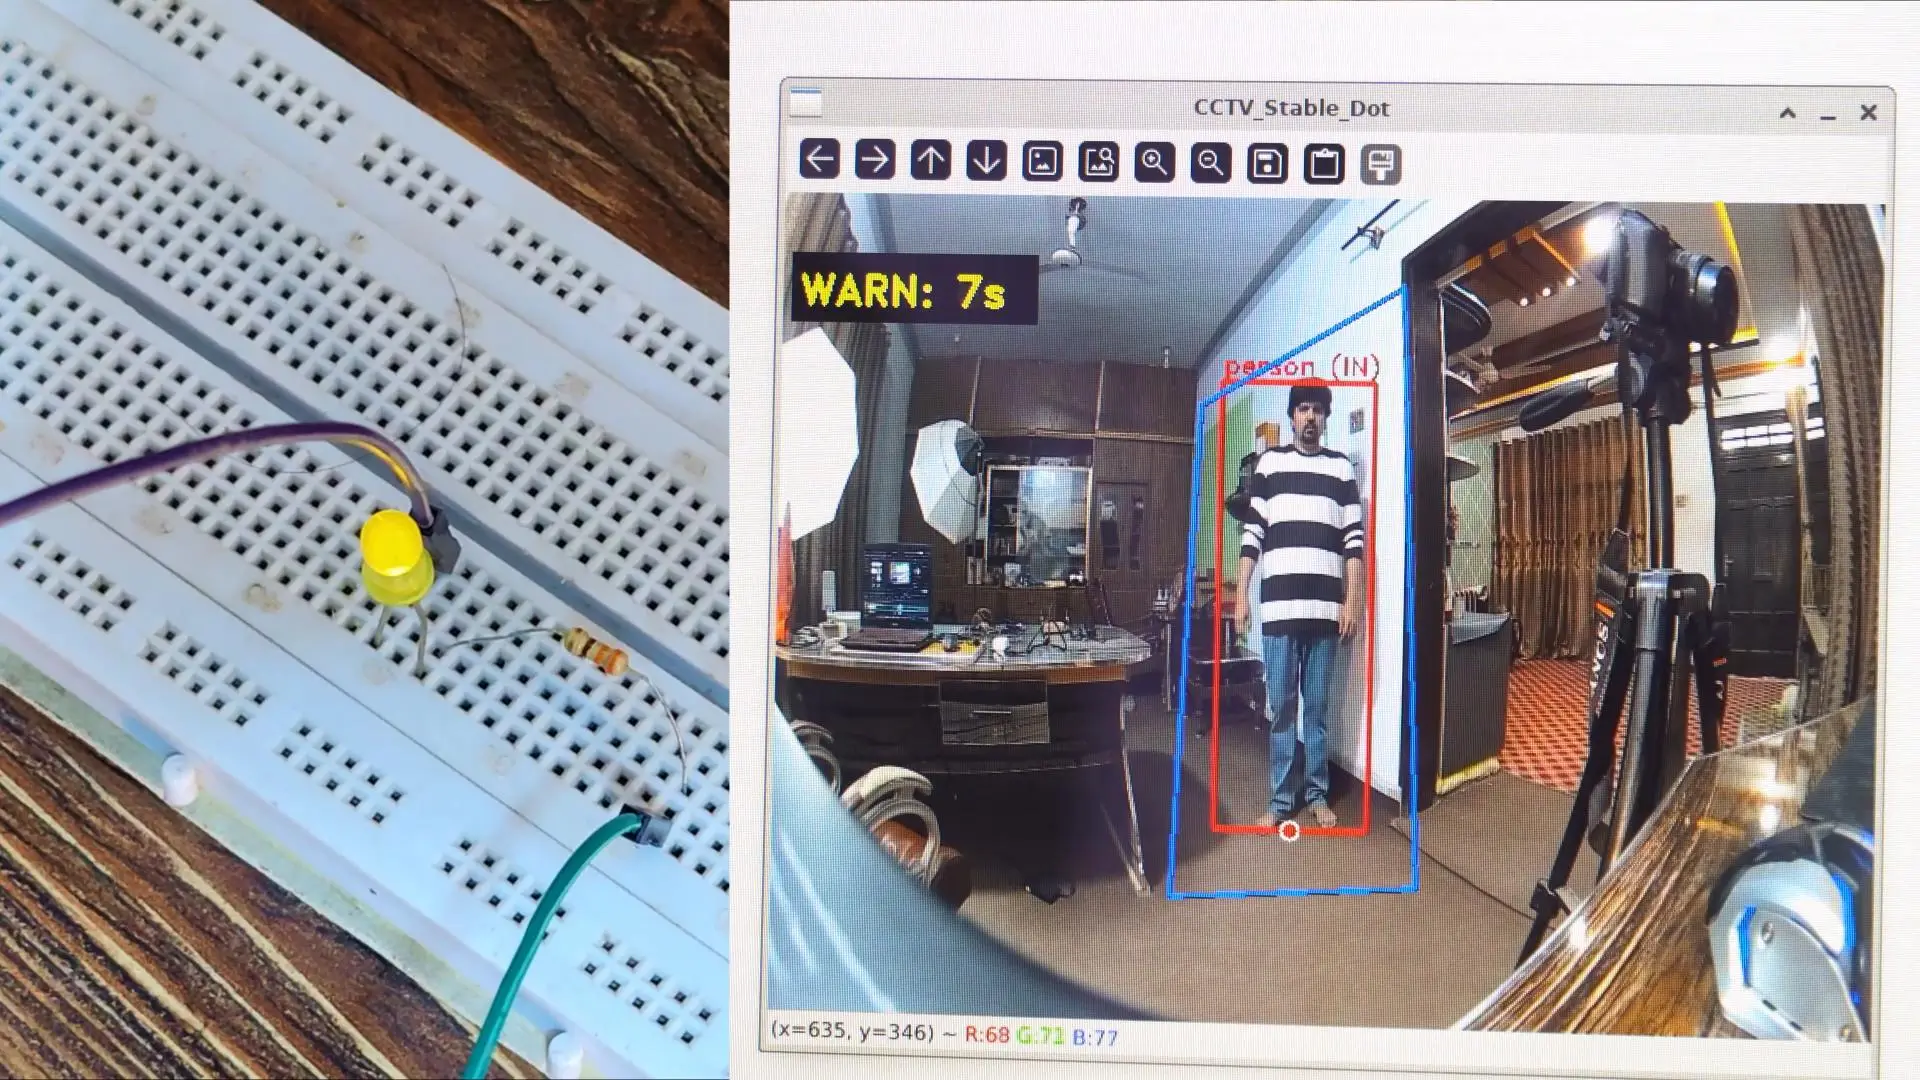
The system uses time-based logic. The person must stay inside the region for a predefined duration. This filters out people who are just walking past and focuses only on meaningful activity.
Once all the conditions are met, the system works completely automatically. When a person enters the defined region, the system starts counting time in the background. If the person stays inside the area for the required duration, the event is confirmed and video recording starts on its own.
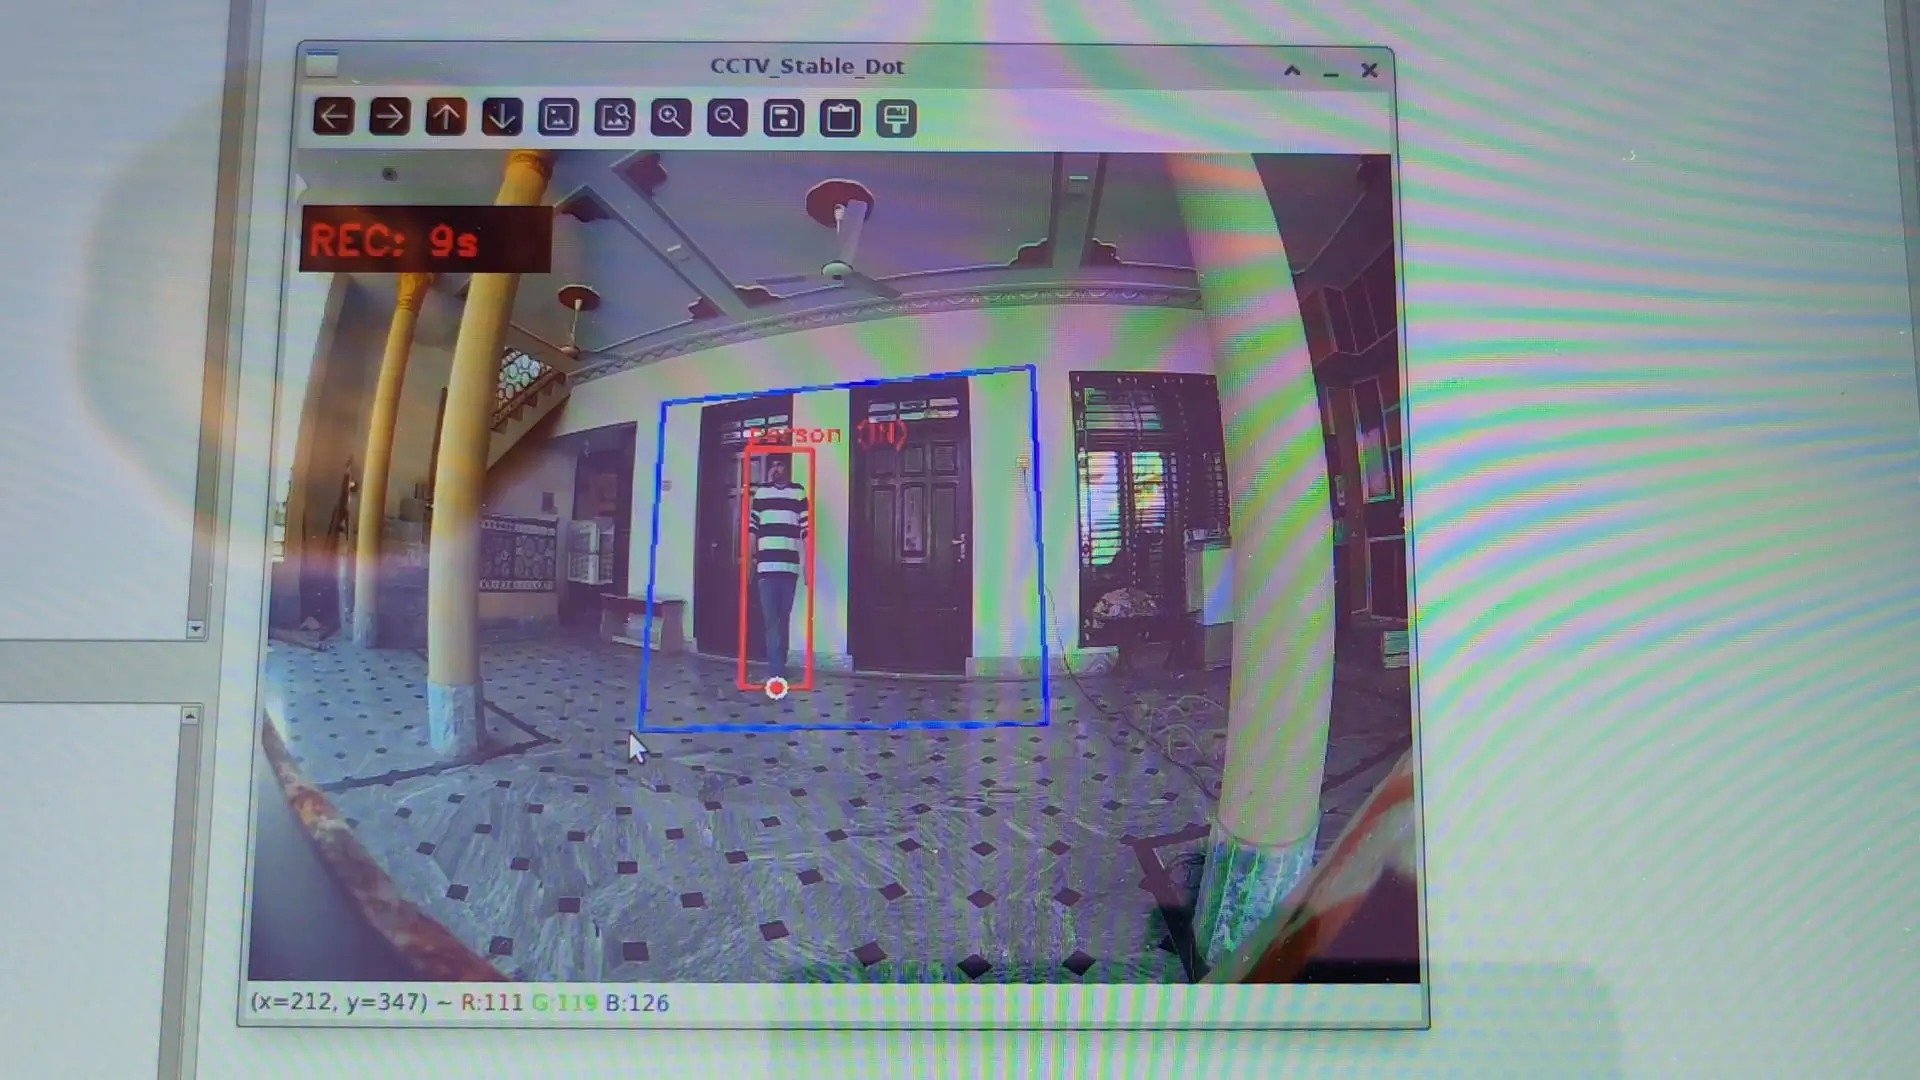
There are no buttons, no manual control; everything is handled by AI and logic.
For those who want to go deeper, I have shared the complete project folders on my Patreon. Everything is ready to run, so you can focus on learning instead of setup.
At the same time, the system provides clear hardware feedback using an LED connected to a GPIO pin. When the object enters the region, the LED starts blinking, indicating that detection is active and the timer is running.
Once the time threshold is reached, the LED stops blinking and turns solid, showing that recording has started.
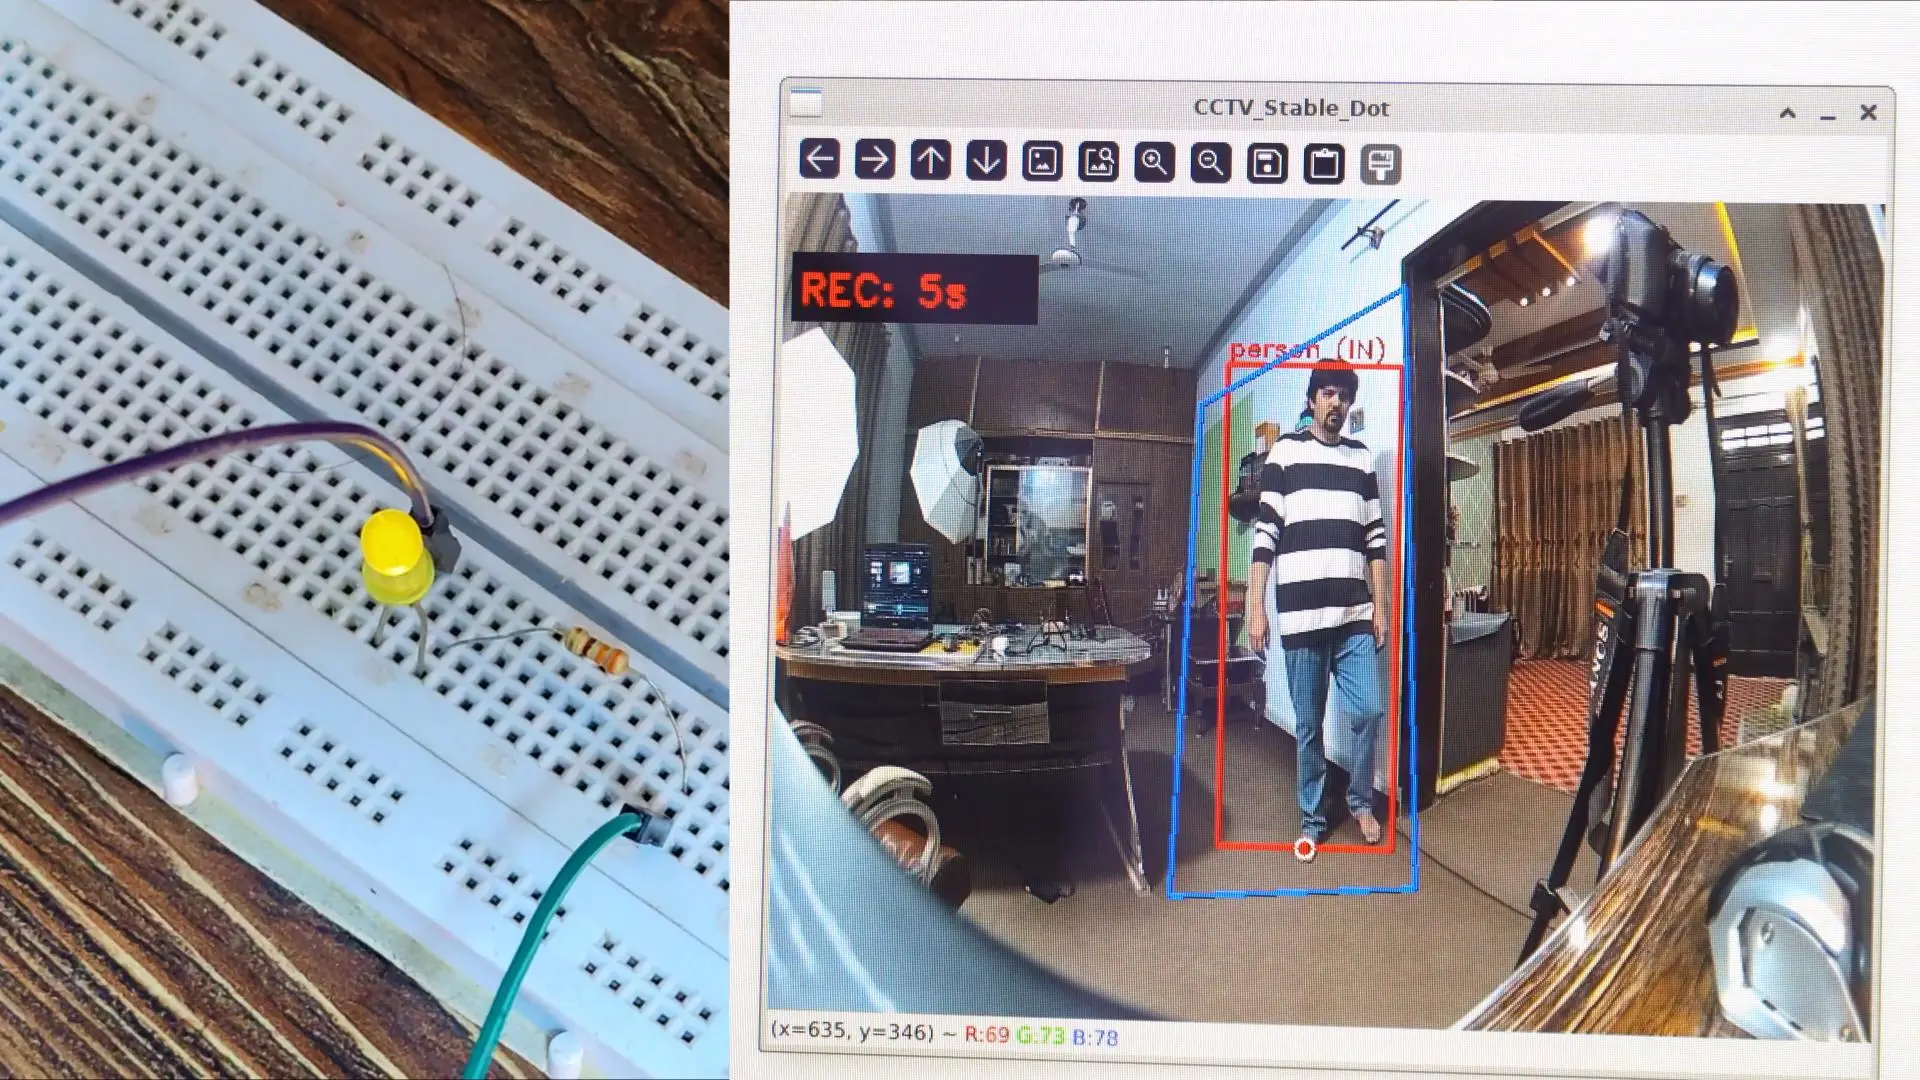
This kind of hardware feedback is extremely useful in embedded systems, especially when a display is not available. With just an LED, you can instantly understand the system state; exactly how professional systems behave.
So, that’s all for now.
Support me on Patreon:
If you enjoy my work and find these projects helpful, please consider supporting me on Patreon. With just $1, you can get access to all project source codes, schematics, and extra resources that I share with my supporters. Your support helps me continue creating new electronics tutorials, experiments, and open projects for the community. Thank you so much for being part of this journey and for supporting my work!
Watch Video Tutorial:
Discover more from Electronic Clinic
Subscribe to get the latest posts sent to your email.