LM75 with ESP8266 & Blynk, IoT temperature Sensor WiFi
Last Updated on September 21, 2024 by Engr. Shahzada Fahad
Table of Contents
LM75 with ESP8266 and Blynk:
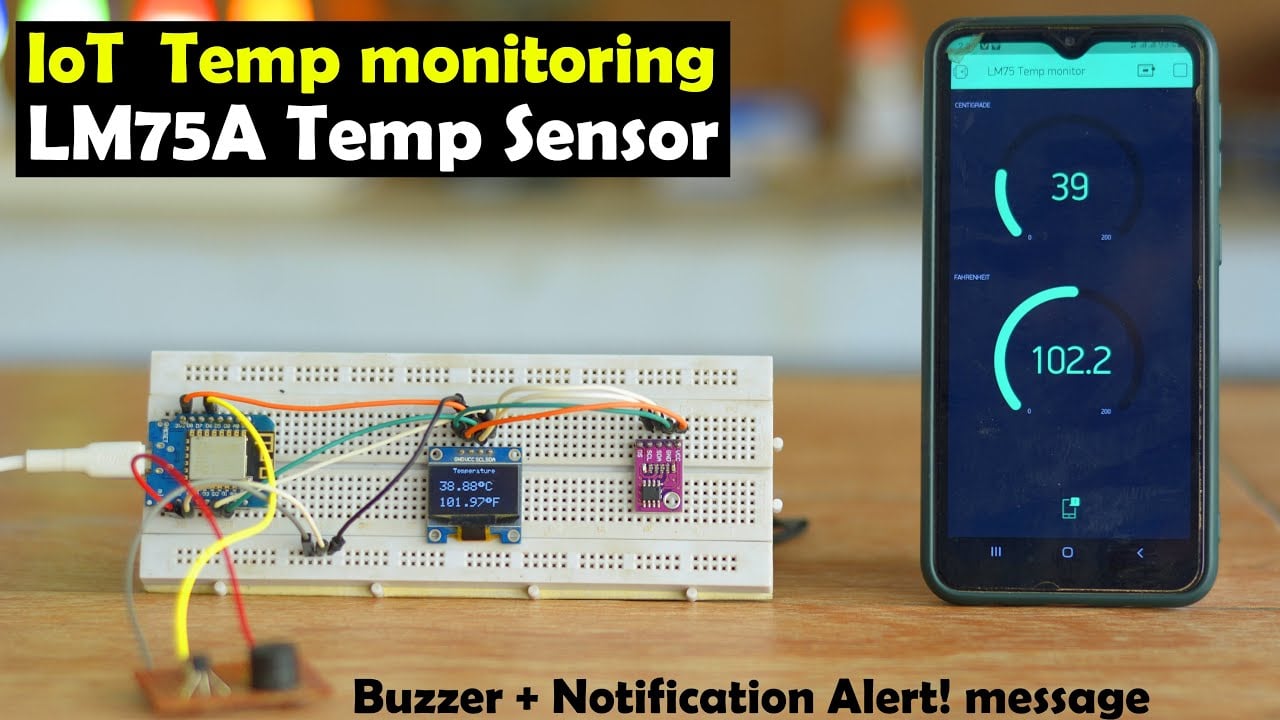
LM75 with ESP8266 & Blynk, IoT temperature Sensor WiFi- In this article, you will learn how to make an IoT temperature monitoring system using I2C supported CJMCU-75 or LM75A temperature sensor, ESP8266 Wemos D1 Mini, SSD1306 I2C supported Oled display module, a 5V buzzer, and Blynk application.
In my previous article, I used the LM75A temperature sensor with the Arduino, which was basically a getting-started tutorial. In that article, I covered the most basic things including the LM75A features, specifications, Pinout, applications, its interfacing with Arduino, LM75A library installation, and it’s programming. So, if you want to learn about the most basic things, then I highly recommend; read my previous article.
Note: this old version of the Blynk app is no more functional. For the blynk mobile App setup and Blynk.cloud dashboard setup ready my article on the New Blynk V2.0. In this article I have explained how to migrate your projects from Blynk 1.0 to the new Blynk V2.0. You can also watch the video.
Anyway, the reason behind writing this article is, that the LM75A temperature sensor is not yet so popular and there is not enough data available on the internet. So, I thought I should make a complete series on this temperature sensor. So, that’s why, first, I used the LM75A sensor with the Arduino, and today I will be using it with the ESP8266 WiFi module. Because I believe many of you guys might be interested in sending the temperature values to the Blynk application, I am sure you know about the Blynk application. Anyway, Blynk is an IoT platform designed for Android and IOS which you use to design dashboards for monitoring different types of sensors and for controlling electronic devices from any part of the world.

One more thing that I would like to talk about is, right from the beginning I have been using the Nodemcu version of the ESP8266 WiFi module which is no doubt one of the most popular WiFi boards for IoT projects and personally this is my favorite one. But there are also some other versions of the ESP8266 which are low-cost and much smaller in size.
Like the one you can see on the screen is the ESP8266 d1 mini which is also known as Lolin Wemos D1 R2 Mini. You may also call this as the mini Nodemcu ESP8266 WiFi module. The only difference between the two boards are d1 mini is smaller in size and it has less IO pins. The programming is 100% the same. Any program which is written for the Nodemcu ESP8266 WiFi module will also run on the D1 Mini version of the ESP8266. Just don’t use the pins which are not available in D1 Mini version of the ESP8266.
So, today, I will be using this mini D1 module. But you can also use the Nodemcu ESP8266. Anyway, before I explain the circuit diagram and programming first let’s watch the LM75A sensor based IoT temperature monitoring system in action.

I have connected the SSD1306 Oled display module, LM75A temperature sensor, and the 5V buzzer as per the circuit diagram which I will explain in a minute. You can power up the ESP8266 D1 Mini using a 3.7V Lipo battery or you can use your laptop or computer. For now, I am going to use my laptop to power up this project.

My Blynk application and ESP8266 D1 Mini both are connected with the WiFi. You can see the temperature in Celsius and Fahrenheit on the Oled display module and also on the Blynk application. I have done its programming in a way that when the temperature exceeds 45 Celsius a notification message is sent to the Blynk application.

I am sure by now, you might have got an idea of how does this system work. So, without any further delay let’s get started.
Amazon Links:
LM75A I2C supported Temperature Sensor
ESP32 WiFi + Bluetooth Module (Recommended)
Disclosure: These are affiliate links. As an Amazon Associate I earn from qualifying purchases.
LM75A Temperature Sensor:

This is the CJMCU-75 I2C supported temperature sensor which is also known as LM75 or LM75A temperature sensor. With this temperature sensor, you can read temperature in both Celsius and Fahrenheit. The temperature range is from -55 Celsius to +125 degree Celsius.
The LM75A is an industrial standard digital temperature sensor with an integrated sigma-delta analog-to-digital converter (ADC). The LM75A provides 9-bit digital temperature readings with an accuracy of ±2°C from –25°C to 100°C and with an accuracy of ±3°C over –55°C to 125°C.
The LM75A operates with a single supply from 2.7 V to 5.5 V. Due to this wide range of input voltages it can be easily used with 3.3V compatible controller boards like esp8266, ESP32, etc., and 5V compatible controller boards.

Communication is accomplished over a 2-wire interface which operates up to 400 kHz. LM75A has three selectable logic address pins A0, A1, and A2, allowing up to eight LM75A devices to operate on the same 2-wire bus. A0, A1, and A2 can be used to set an I2C address. You can short any of these address pins with the VCC or ground. This way you will be able to connect 8 temperature sensors without any address conflict.
The LM75A has a dedicated over-temperature output (O.S.) with programmable limit and hysteresis.
LM75A temperature sensor can be used in base stations, electronic test equipment, office electronics, personal computers, Environmental Monitoring, and any other system in which thermal management is critical to performance.
ESP8266 D1 mini (Wemos Lolin):

The D1 Mini V2 NodeMcu is 4M Bytes Lua WIFI Internet Of Things Development Board Based ESP8266, it is a mini WIFI board based on ESP-8266EX. 11 digital input/output pins, all pins have interrupt/PWM/I2C/one-wire supported(except D0) 1 analog input(3.3V max input) and a Micro USB connection.
The development board features WiFi-SoC ESP8266 and is made for fast Internet-of-Things (IoT) prototyping. It is flashed with the latest firmware version and can be set up and programmed right away with the onboard micro USB connection. With only a few lines of code, the NodeMCU Dev Kit connects to your local network and ready for control by other network members like computers and smartphones.
The d1 mini is an ESP8266 development board that is compact, versatile and very easy to use with the Arduino IDE. It supports natively by the Expressive SDK.
Pins Description:
| Pin | Function | ESP-8266 mini Pin |
| TX | TXD | TXD |
| RX | RXD | RXD |
| A0 | Analog input, max 3.2V | A0 |
| D0 | IO | GPIO16 |
| D1 | IO, SCL | GPIO5 |
| D2 | IO, SDA | GPIO4 |
| D3 | IO, 10k Pull-up | GPIO0 |
| D4 | IO, 10k Pull-up, BUILTIN_LED | GPIO2 |
| D5 | IO, SCK | GPIO14 |
| D6 | IO, MISO | GPIO12 |
| D7 | IO, MOSI | GPIO13 |
| D8 | IO, 10k Pull-down, SS | GPIO15 |
| G | Ground | GND |
| 5V | 5V | – |
| 3V3 | 3.3V | 3.3V |
| RST | Reset | RST |
Features:
- 11 digital input/output pins
- Interrupt/PWM/I2C/one-wire
- 1 analog input(3.2V max input)
- 16M bytes(128M bit) Flash
- External antenna connector
- Built-in ceramic antenna
- New CP2104 USB-TO-UART IC
Now, let’s take a look at the circuit diagram.
LM75 interfacing with the ESP8266:

The SCL and SDA pins of the LM75A temperature sensor and Oled display module are connected together and then connected with the ESP8266 D1 and D2 pins. D1 is the SCL and D2 is the SDA. While the VCC and GND pins are connected with the 3.3V and GND pins.
The 5V buzzer is controlled using D6 pin of the ESP8266 D1 mini. We use 2n2222 NPN transistor and a 10K ohm resistor to control the 5V buzzer. The transistor and resistor make the driver circuit. Now, let’s work on the Blynk application. Follow the same exact steps.
Creating a Dashboard in Blynk application:
Open the Blynk application and click on the New Project.

As we are using ESP8266, so click on the ESP8266 and give name to the project which is LM75 Temp monitor.

After that click on the create button an authentication token will be sent on a registered email id.

After that click on the add button and add the gauge for the Centigrade.
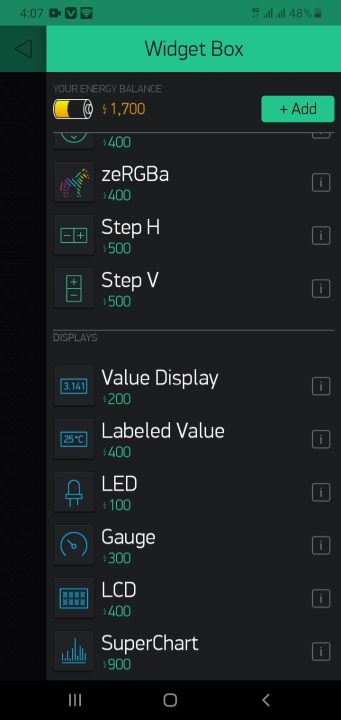
The gauge name will be Centigrade and in pin select virtual pin V1 and set the maximum value to 200.

Similarly, add another gauge for the Fahrenheit and set the pin to V2 and the maximum value to 200.

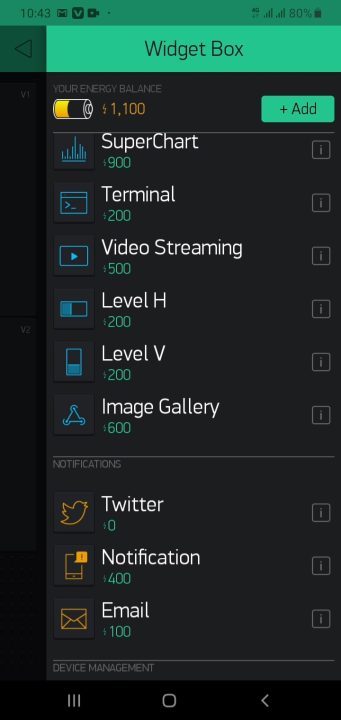
After that, we will add a notification widget in order to receive the exceeded temperature notification.
My dashboard is completed, as you can see in the image given below.

Required Libraries:
Before, you start the programming, first of all, make sure you download all the necessary libraries. The Adafruit_GFX.h and Adafruit_SSD1306.h libraries I have been using for quite a long time and I have already explained how to download and use these libraries.
I have also a very detailed getting started tutorial on the ESP8266 WiFi module, in which I have explained how to install the ESP8266 using the Boards manager URL link and how to install and use the BlynkSimpleEsp8266.h.
You will also need the LM75A library.

To add this library simply click on the Sketch menu and then go to Include Library and click on the Add ZIP library… browse to the desired location and select the zip folder and then finally click on the open button.

As I have already added this library so I will click on the cancel button.
LM75 ESP8266 Programming:
|
1 2 3 4 5 6 7 8 9 10 11 12 13 14 15 16 17 18 19 20 21 22 23 24 25 26 27 28 29 30 31 32 33 34 35 36 37 38 39 40 41 42 43 44 45 46 47 48 49 50 51 52 53 54 55 56 57 58 59 60 61 62 63 64 65 66 67 68 69 70 71 72 73 74 75 76 77 78 79 80 81 82 83 84 85 86 87 88 89 90 91 92 93 94 95 96 97 |
#include <SPI.h> // include libraries #include <Wire.h> #include <Adafruit_GFX.h> #include <Adafruit_SSD1306.h> #include <BlynkSimpleEsp8266.h> #include <LM75A.h> // Create I2C LM75A instance LM75A lm75a_sensor(false, // A0 LM75A pin state (connected to ground = false) false, // A1 LM75A pin state (connected to ground = false) false); // A2 LM75A pin state (connected to ground = false) // Equivalent to "LM75A lm75a_sensor;" char auth[] = "-HrsXL8bXKhJrZdFOmVQgK6VfzGoVQqv"; ///Connect SCL to D1 and Connect SDA to D2 /* WiFi credentials */ char ssid[] = "AndroidAP3DEC"; char pass[] = "electroniclinic"; #define SCREEN_WIDTH 128 // OLED display width, in pixels #define SCREEN_HEIGHT 64 // OLED display height, in pixels // Declaration for an SSD1306 display connected to I2C (SDA, SCL pins) #define OLED_RESET -1 // Reset pin # (or -1 if sharing Arduino reset pin) Adafruit_SSD1306 display(SCREEN_WIDTH, SCREEN_HEIGHT, &Wire, OLED_RESET); int buzzer = D6; void setup(void) { Serial.begin(9600); Wire.begin(); Serial.println("Temperatures will be displayed every second:"); pinMode(buzzer, OUTPUT); Blynk.begin(auth, ssid, pass); display.begin(SSD1306_SWITCHCAPVCC, 0x3C); delay(2000); display.clearDisplay(); display.setTextColor(WHITE); pinMode(buzzer, OUTPUT); } void loop() { Blynk.run(); float temperature_in_degrees = lm75a_sensor.getTemperatureInDegrees(); if (temperature_in_degrees == INVALID_LM75A_TEMPERATURE) { Serial.println("Error while getting temperature"); } else { Serial.print("Temperature: "); Serial.print(temperature_in_degrees); Serial.print(" degrees ("); Serial.print(LM75A::degreesToFahrenheit(temperature_in_degrees)); Serial.println(" fahrenheit)"); display.clearDisplay(); display.setCursor(25,0); display.setTextSize(1); display.setTextColor(WHITE); display.println(" Temperature"); display.setCursor(10,20); display.setTextSize(2); //display.print("C: "); display.print(temperature_in_degrees); display.print((char)247); display.print("C"); display.setCursor(10,45); display.setTextSize(2); //display.print("F: "); display.print(LM75A::degreesToFahrenheit(temperature_in_degrees)); display.print((char)247); display.print("F"); display.display(); Blynk.virtualWrite(V1,temperature_in_degrees); Blynk.virtualWrite(V2,LM75A::degreesToFahrenheit(temperature_in_degrees)); if (temperature_in_degrees >= 45 ) { Blynk.notify("Temperature Exceeded!!!"); digitalWrite( buzzer, HIGH); } if (temperature_in_degrees < 45 ) { digitalWrite( buzzer, LOW); } } //delay(1000); } |
This code is the modified version of the code I used with the Arduino. This time I made a few changes in order to send temperature values to the Blynk application. The first addition is the BlynkSimpleEsp8266.h header file. I also added the authorization and WiFi credentials. This time, I am using D6 pin to control the buzzer, while previously I was using digital pin 3 on the Arduino.
In the void setup() function, I activated the Blynk.
In the loop() function I only added 4 lines.
The Blynk.run()
Blynk.virtualWrite(V1,temperature_in_degrees);
Blynk.virtualWrite(V2,LM75A::degreesToFahrenheit(temperature_in_degrees));
These two instructions sends the temperature values in Celsius and Fahrenheit on the virtual pins V1 and V2 which I defined while making the Blynk application. And
Finally, I added this Blynk.notify() to send a notification message. So, that’s all about the programming.
Now, to upload the program, go to the Tools menu, then to boards, and select LOLIN(WEMOS) D1 R2 & mini.

Again go to the Tools menu and this time check if the correct communication port is selected. Finally, click on the upload button and wait for a while.
Watch Video Tutorial:
Discover more from Electronic Clinic
Subscribe to get the latest posts sent to your email.


