This $6 Sensor Does Insane Things mmWave Radar + RDK X5 + ESP32-C3
Last Updated on September 29, 2026 by Engr. Shahzada Fahad
Table of Contents
Description:
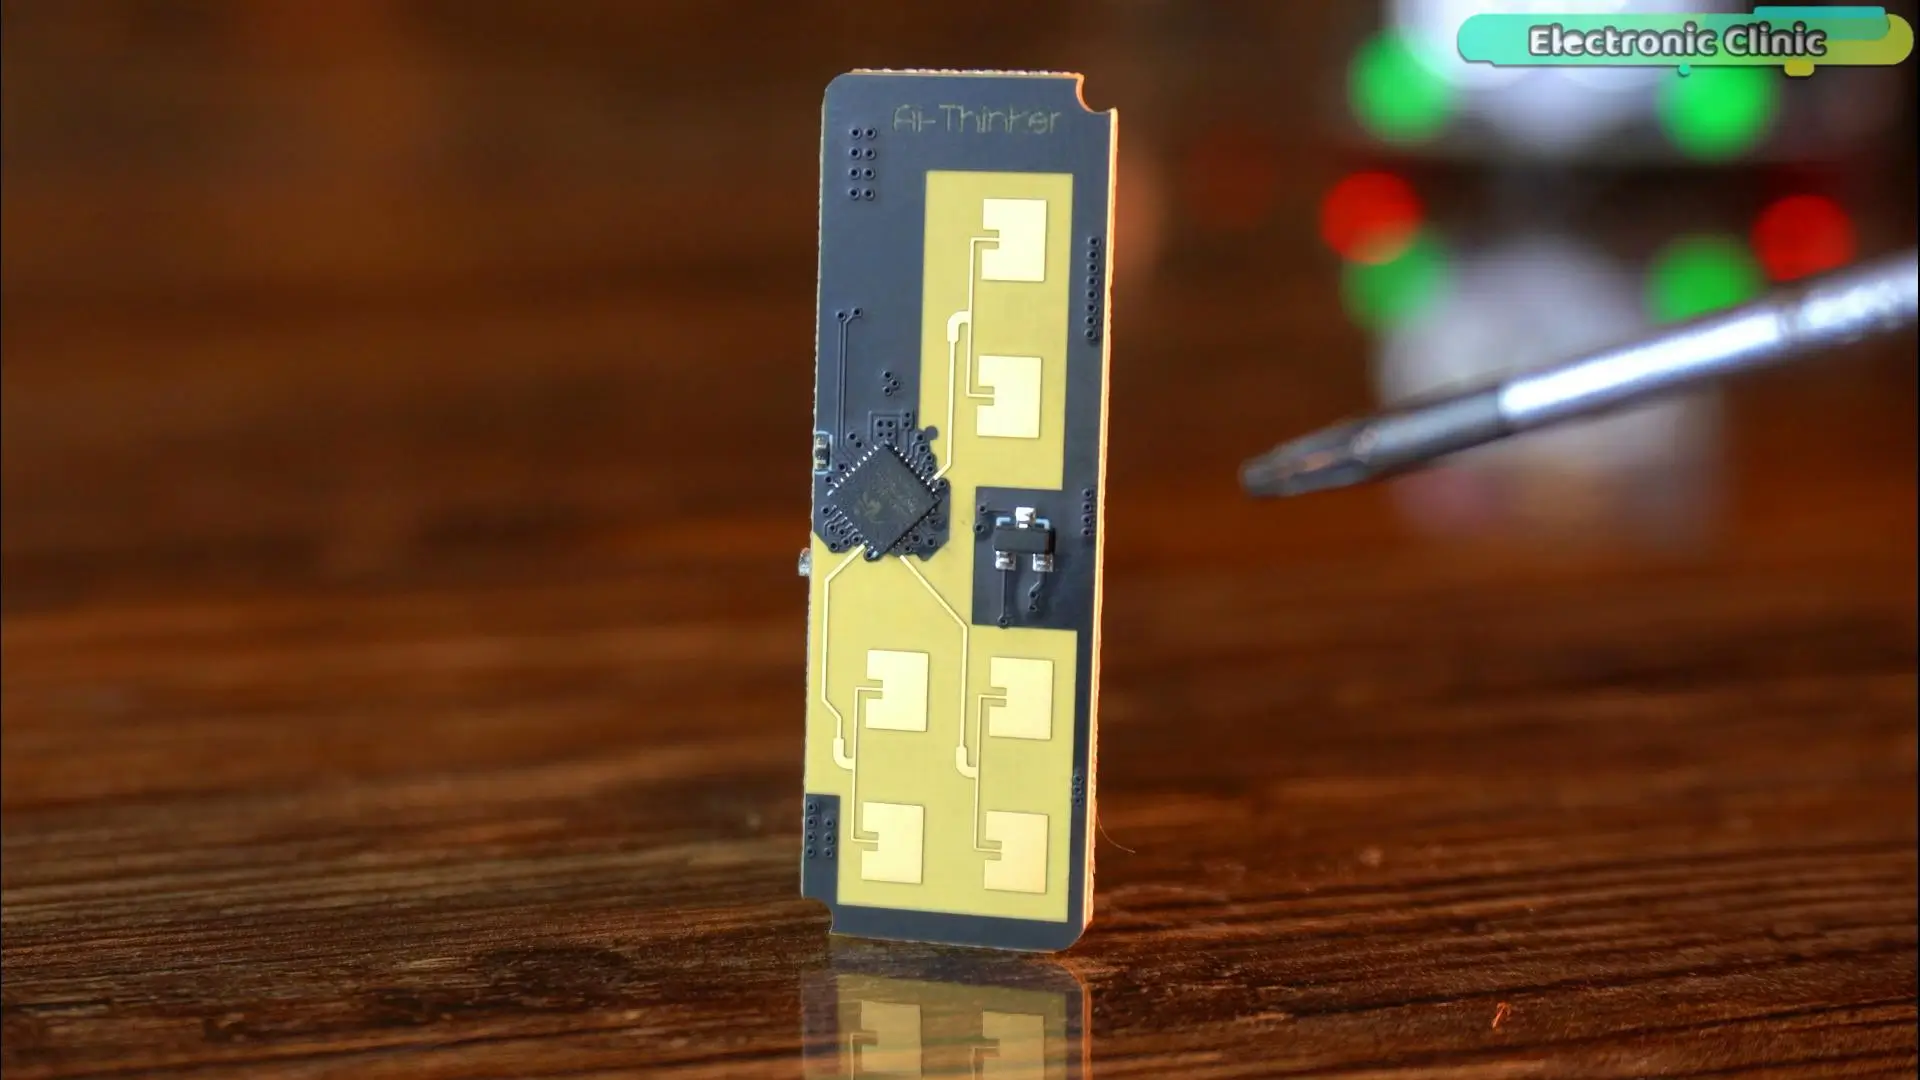
Every single one of these just happened because a 6-dollar radar sensor knew I was there. And I am about to show you the easiest way to build this yourself no complicated code.
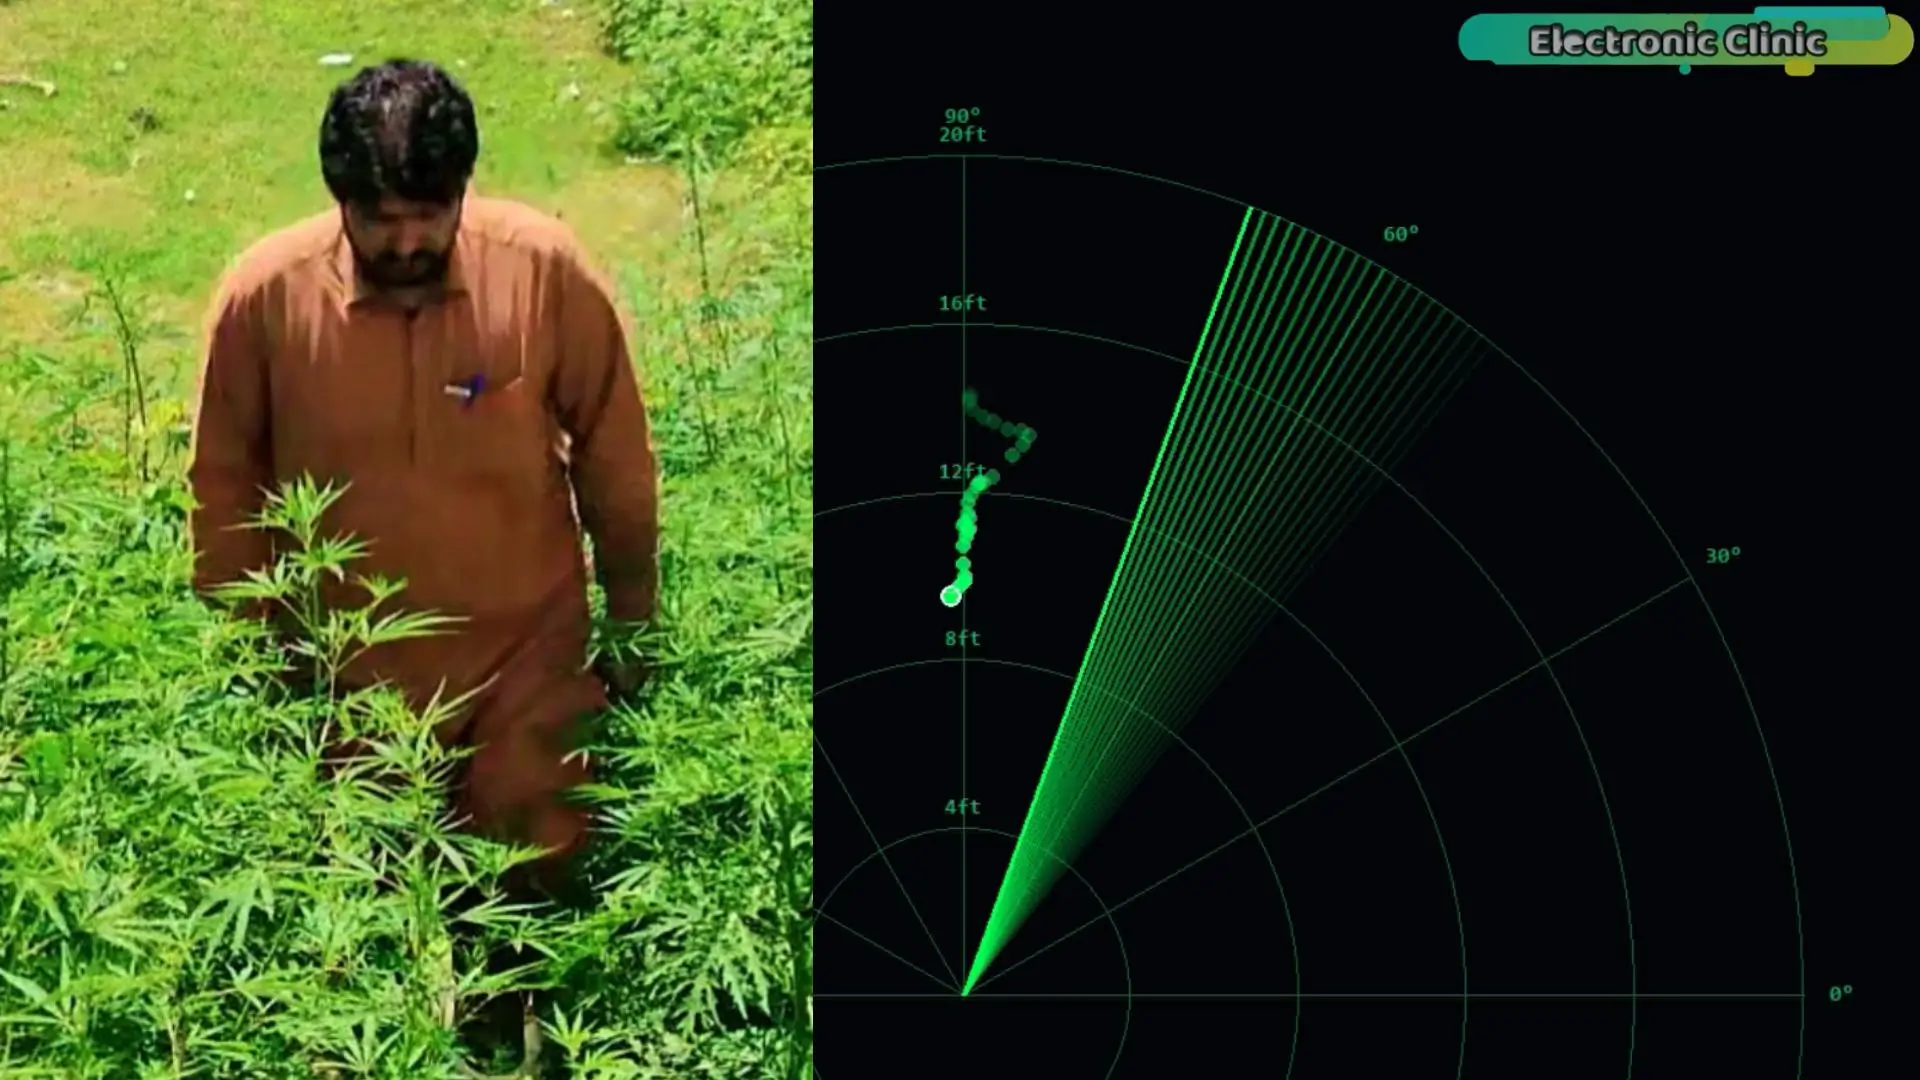
This is the RD-03D mmWave radar, and it can detect people.
- Behind Cardboard
- Behind Plastic
- Behind Hardboard
- Behind Glass
- Behind Curtains
- Behind Door
- Under a Bed
- Under a Table
- Behind a Sofa
- In complete Darkness
- Behind a Tree
- In Bushes
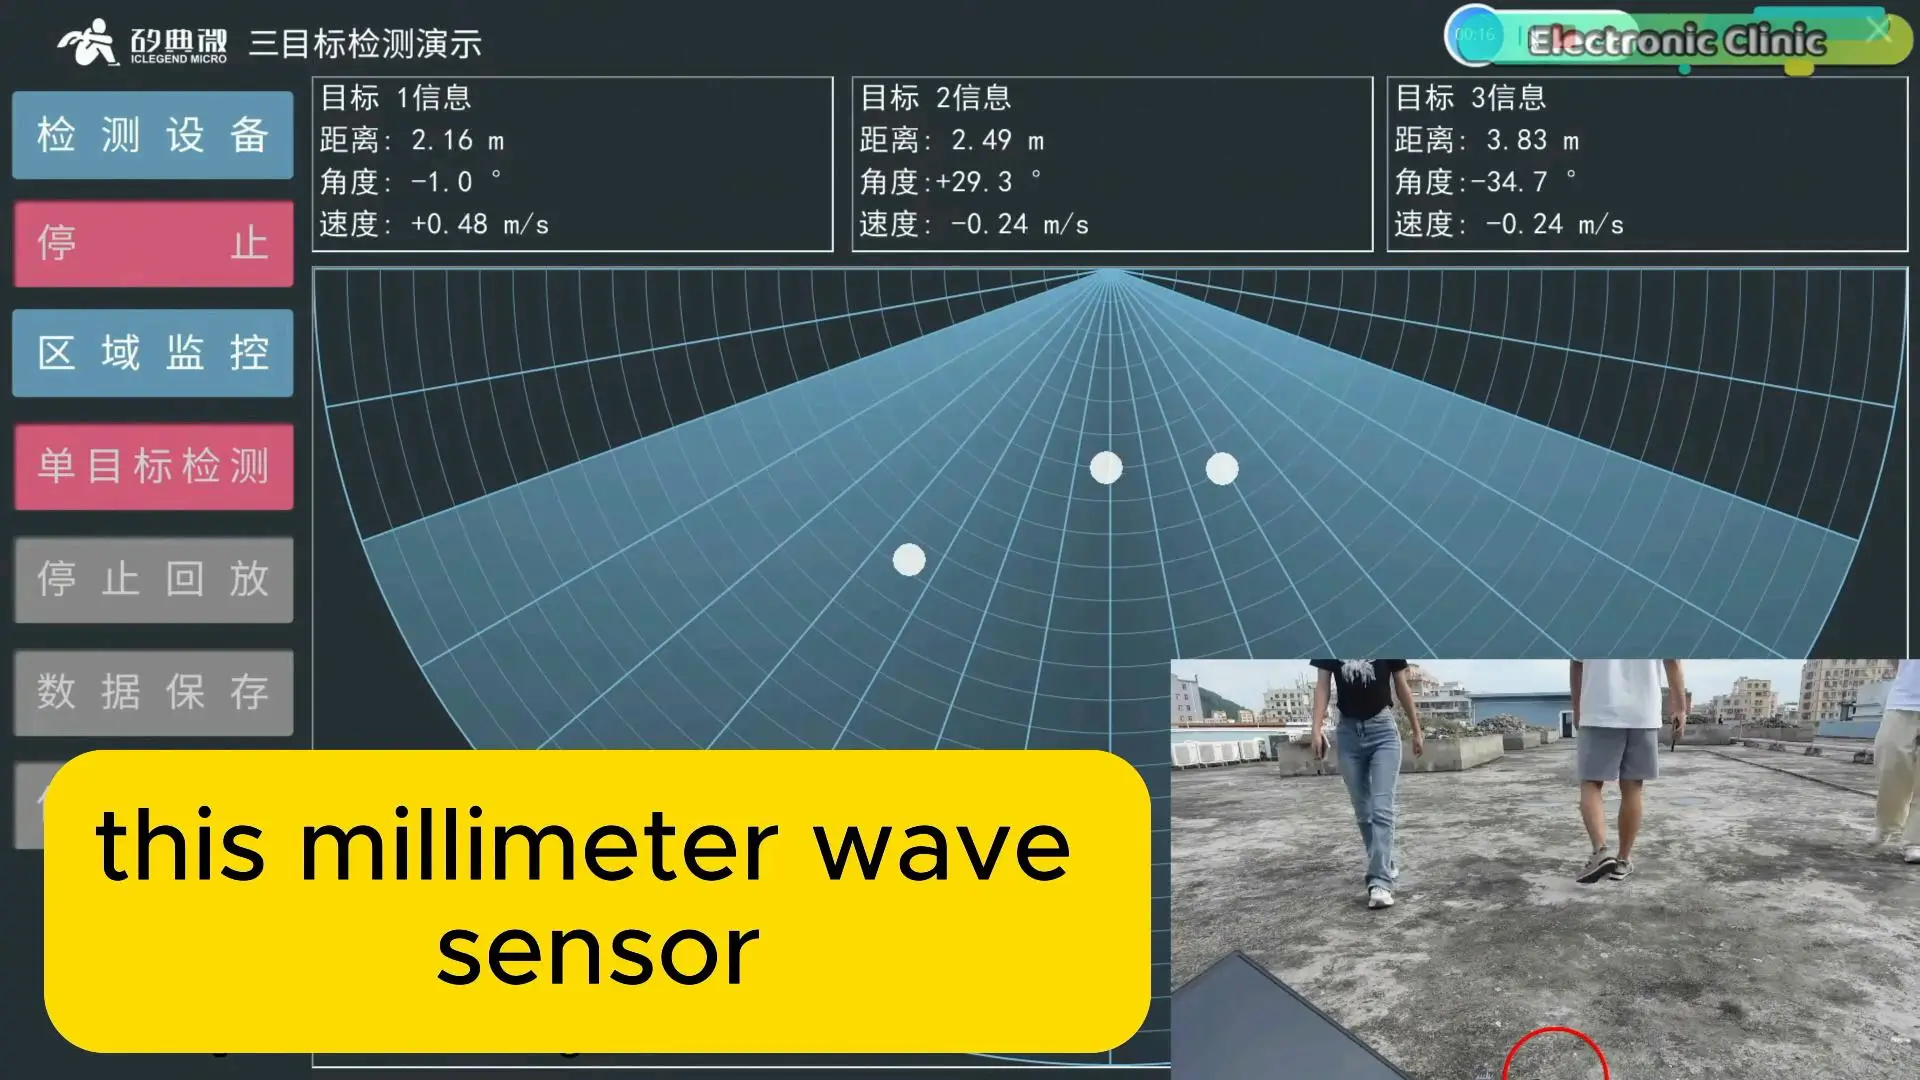
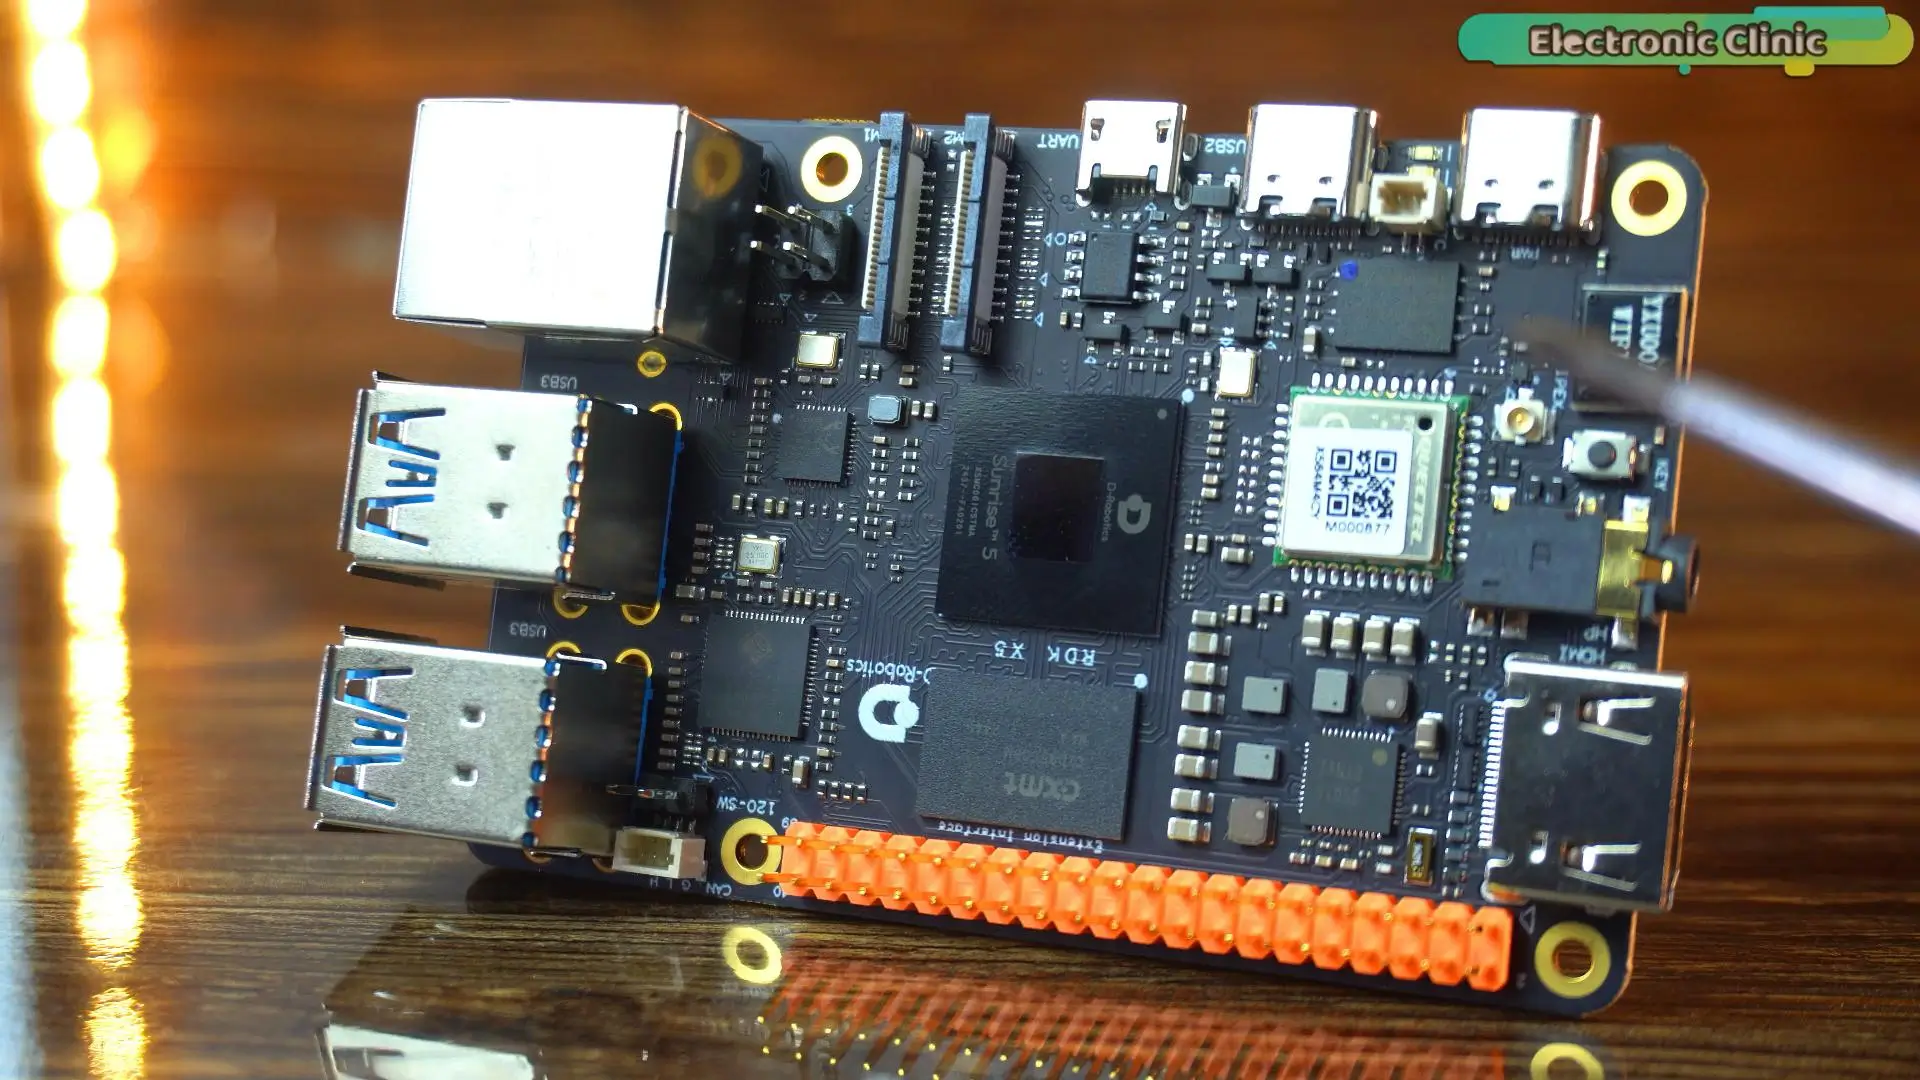
Today I am connecting it to D-Robotics’ RDK X5. But getting that data into an AI computer usually means dealing with registers, hexadecimal values, and a lot of low-level programming. That’s exactly how I built my first version, and while it worked, it’s definitely not the easiest way to build projects. So I started looking for a better solution, and I found one. In this article, I will show you the simple shortcut that completely changes the experience.
Amazon Links:
Other Tools and Components:
ESP32 WiFi + Bluetooth Module (Recommended)
Arduino Nano USB C type (Recommended)
*Please Note: These are affiliate links. I may make a commission if you buy the components through these links. I would appreciate your support in this way!
By the end, you will see this tiny radar track people in real time, trigger an LED, automatically capture photos, and even control a game using nothing but body movement.
If your programming skills are strong, you can connect the RD-03D directly to the RDK X5 and communicate with it at the register level, exactly like I did in my first article. But I wanted a version that almost anyone could build, so instead, I let a small Xiao ESP32-C3 handle all the radar communication first.
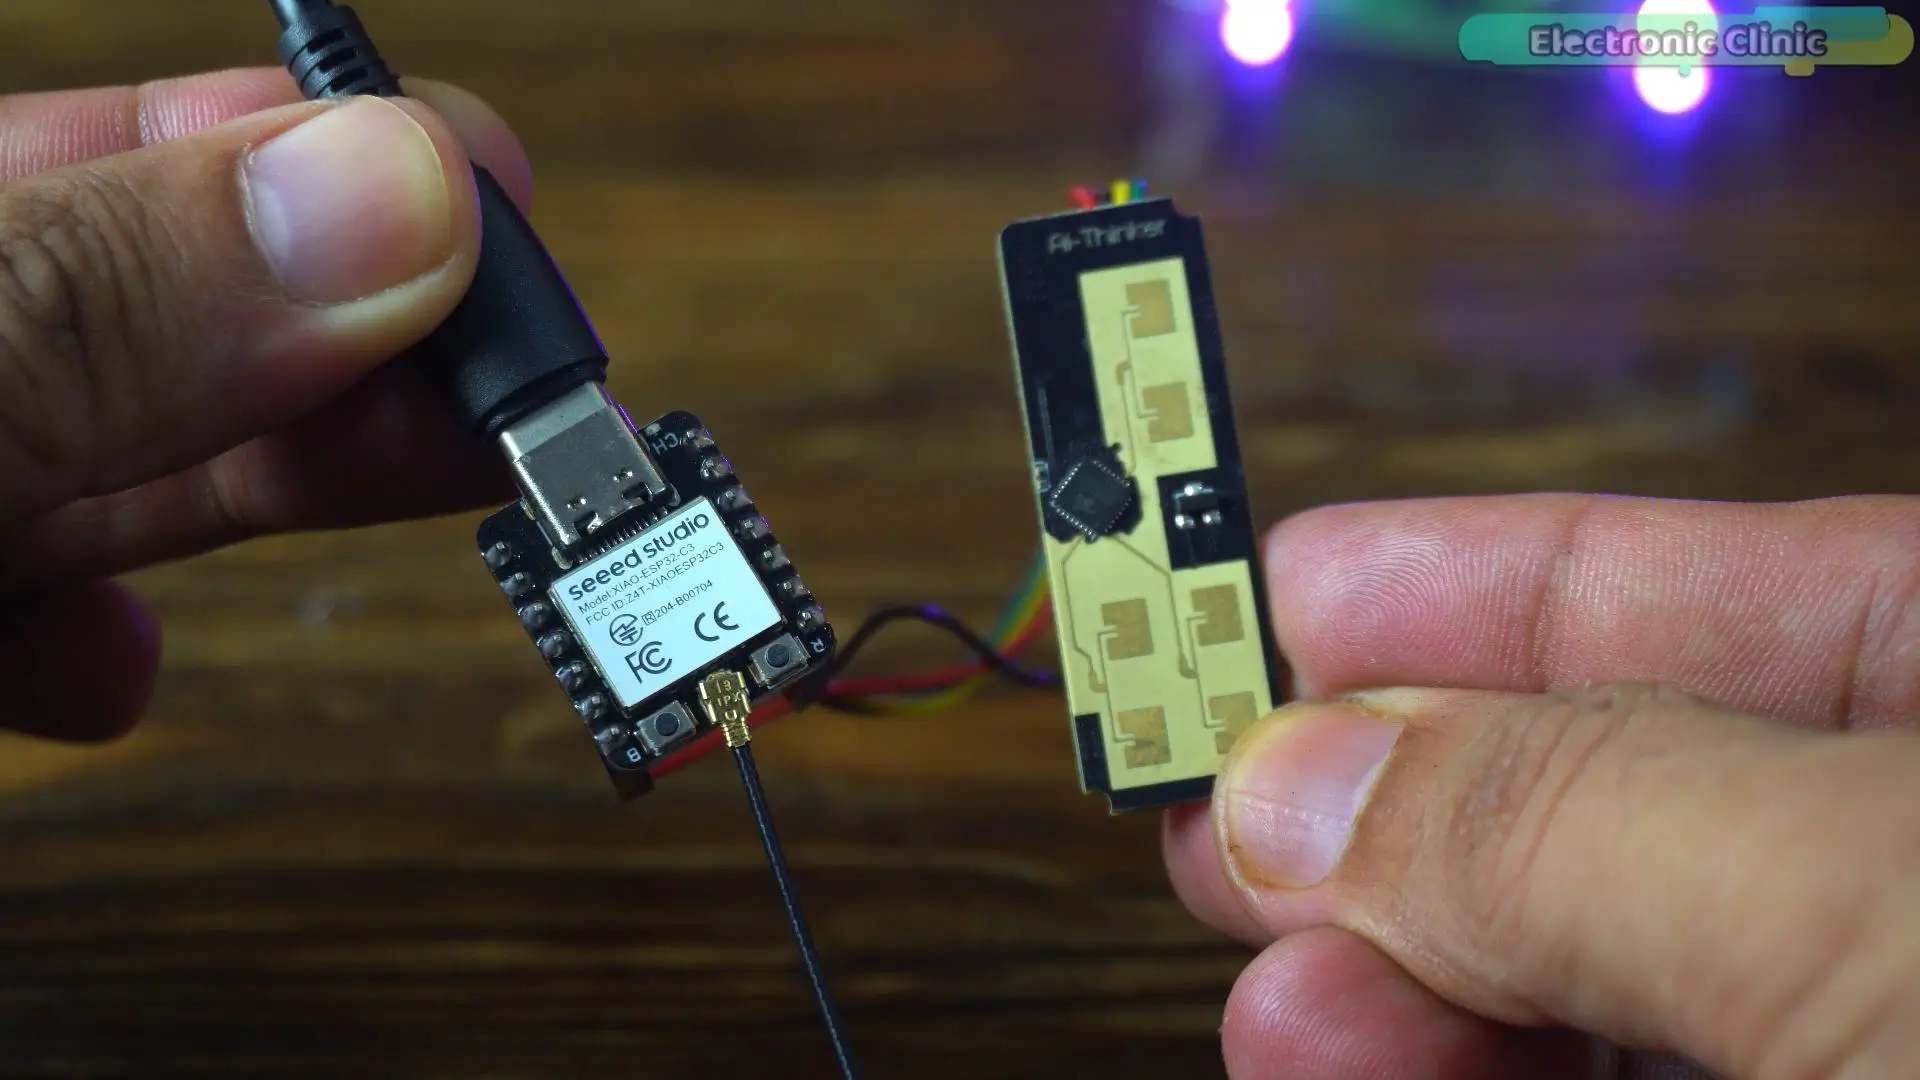
It reads the radar data, processes it, and then sends clean, easy-to-use information to the RDK X5 over a simple USB cable – the same way you would connect a mouse or keyboard. It removes nearly all of the complicated programming while making the entire setup much easier to build, test, and troubleshoot.
This simple change gives you several big advantages. You don’t have to write complicated register-level code, you can test the radar without even connecting the AI board, development becomes much faster, troubleshooting is easier because both devices can be tested independently, and the whole system becomes much more portable. It’s one of those small changes that saves a huge amount of time.
- WHY THE XIAO ESP32-C3?
Now, you don’t have to use the Xiao ESP32-C3. I actually tested
this radar with several different boards, including a regular ESP32 Dev Module and the TTGO LoRa32, which I used throughout my three-part radar series.
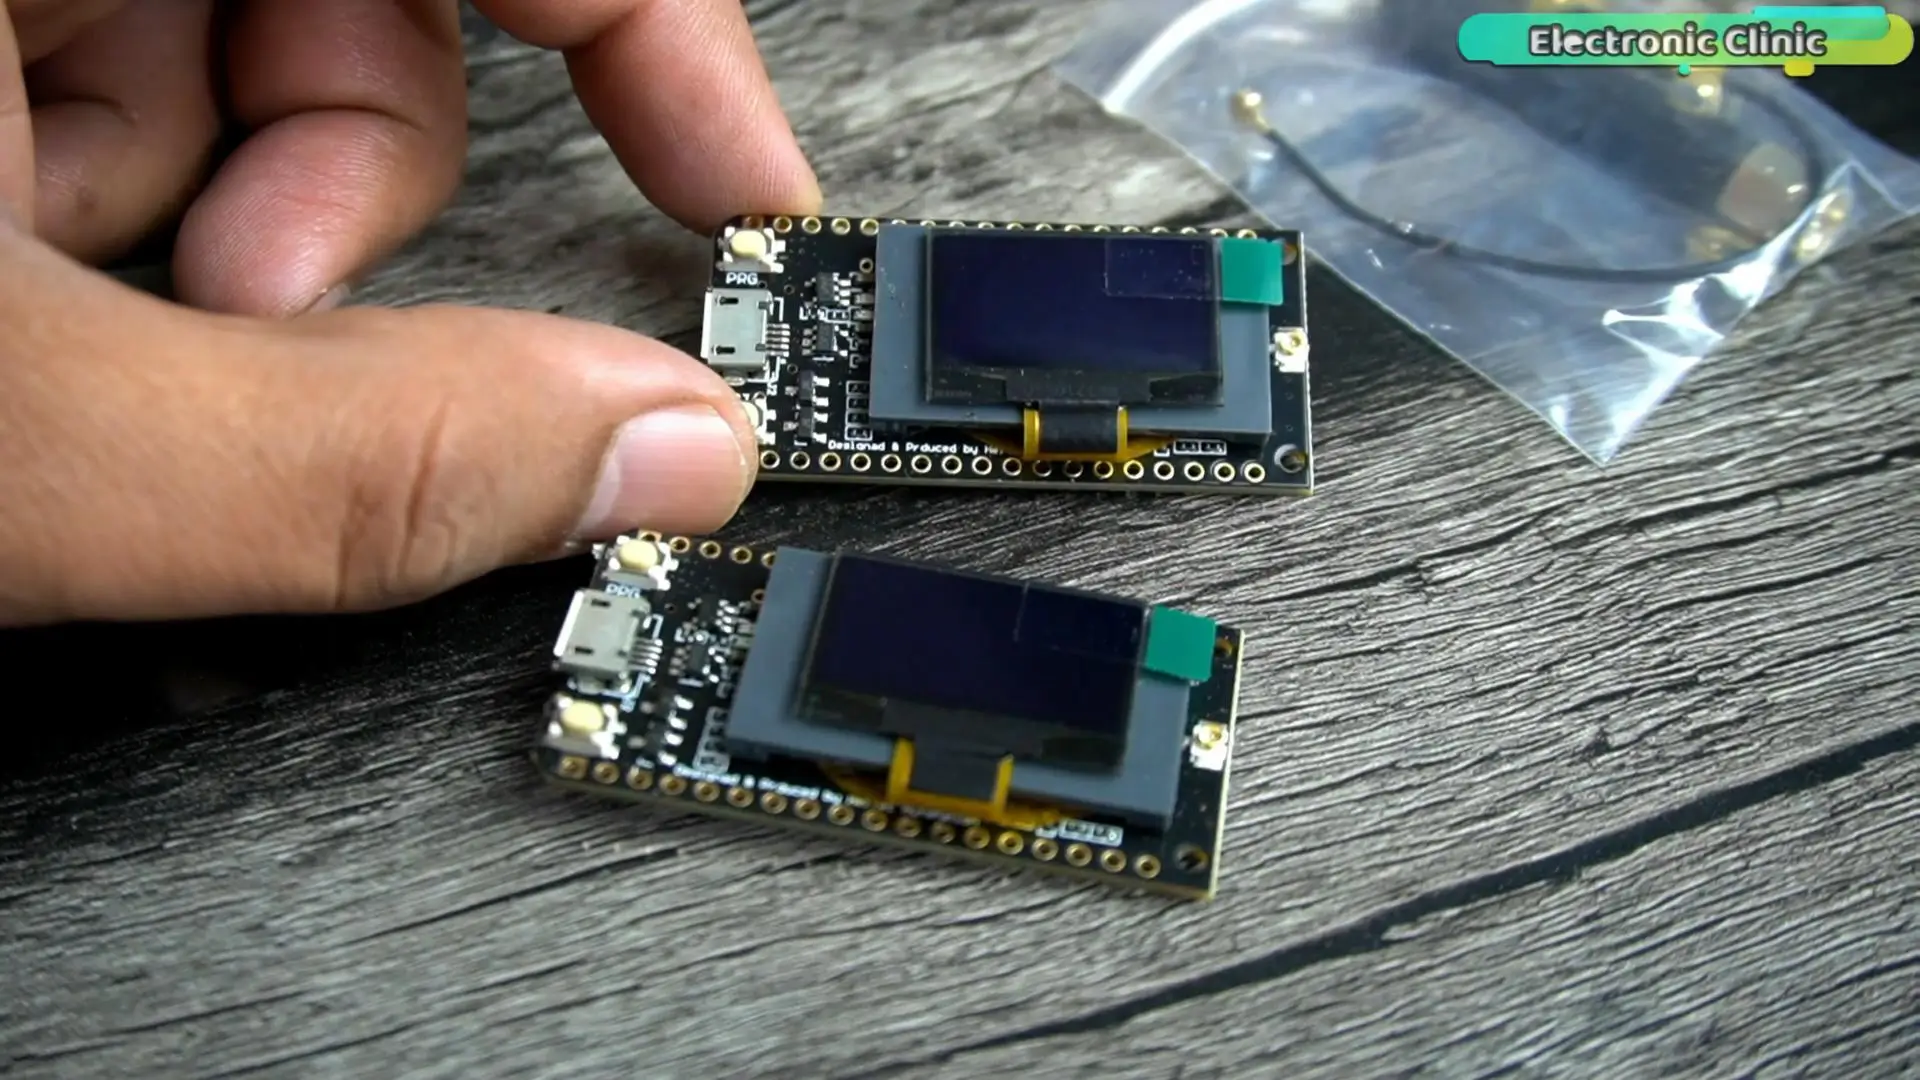
They all worked, but once I switched to the Xiao ESP32-C3, the tracking felt noticeably smoother and more responsive. It wasn’t just about speed – it made the whole development process feel much cleaner and easier. If your project needs long-range
wireless communication, I would still recommend the TTGO LoRa32 because of its built-in LoRa radio. But for today’s project, where everything connects directly to the RDK X5 over USB, the Xiao ESP32-C3 turned out to be my favorite choice.
- ROADMAP
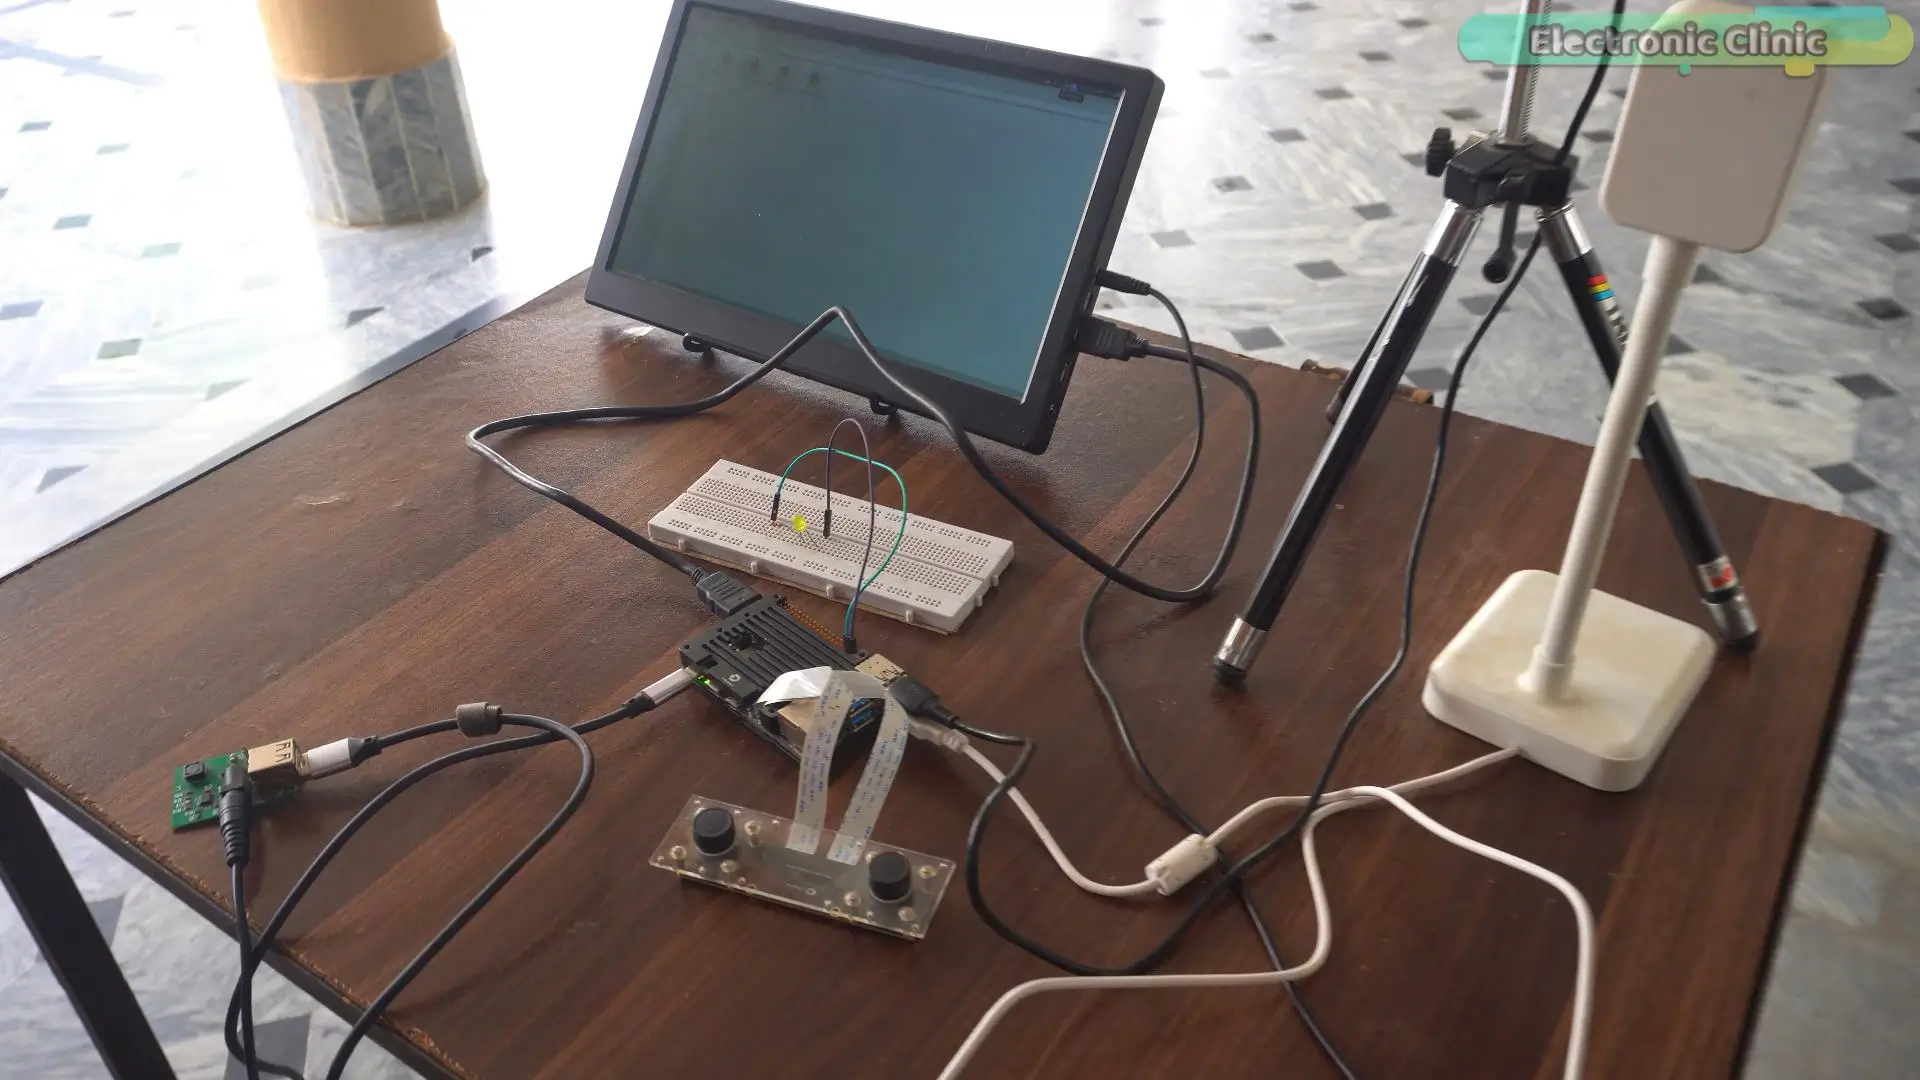
Here is what we will build together. First, I will show you the hardware connections and get the Xiao ESP32-C3 communicating with the RD-03D radar. Then we will connect everything to the RDK X5 and watch the radar track people in real time. After that, we’ll build five practical projects that get progressively more interesting: a live radar display, a secure-zone alarm, a radar-triggered camera that automatically captures photos, a snake game controlled entirely by your body movements, and finally, the same game running on your smartphone. And don’t skip the third project, because we’re going to take that exact idea much further later in this series. It becomes the foundation for something even more powerful.
So, let’s start with the easiest part – the hardware. The wiring only takes a minute, and once it’s done, everything else becomes much easier to follow.
HARDWARE CONNECTIONS
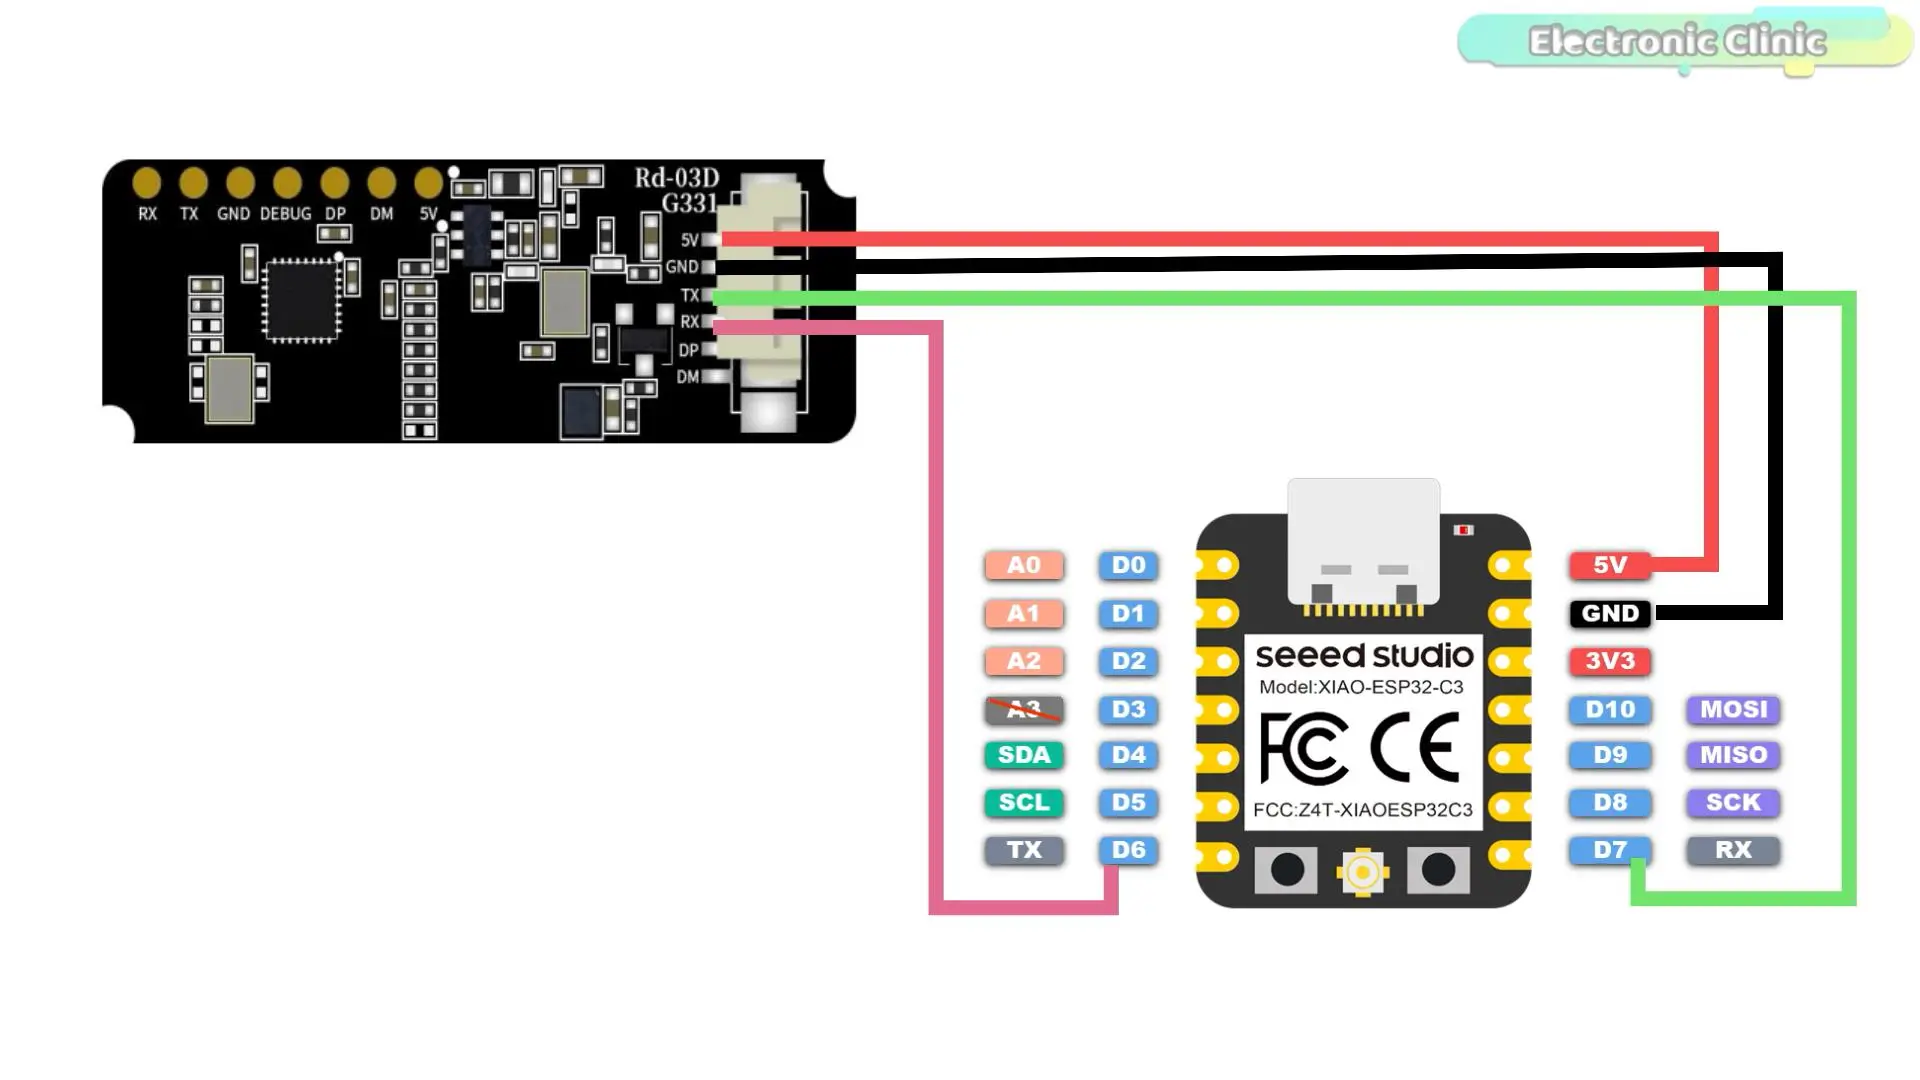
Connect the 5V pin of the RD-03D to the 5V pin on the Xiao ESP32-C3, and connect GND to GND.
Next, connect the radar’s TX pin to D7 on the Xiao, and its RX pin to D6. That’s all the wiring required.
Once you have made these four connections, we are ready to upload the firmware and see if the radar starts detecting people.
Uploading the Code:
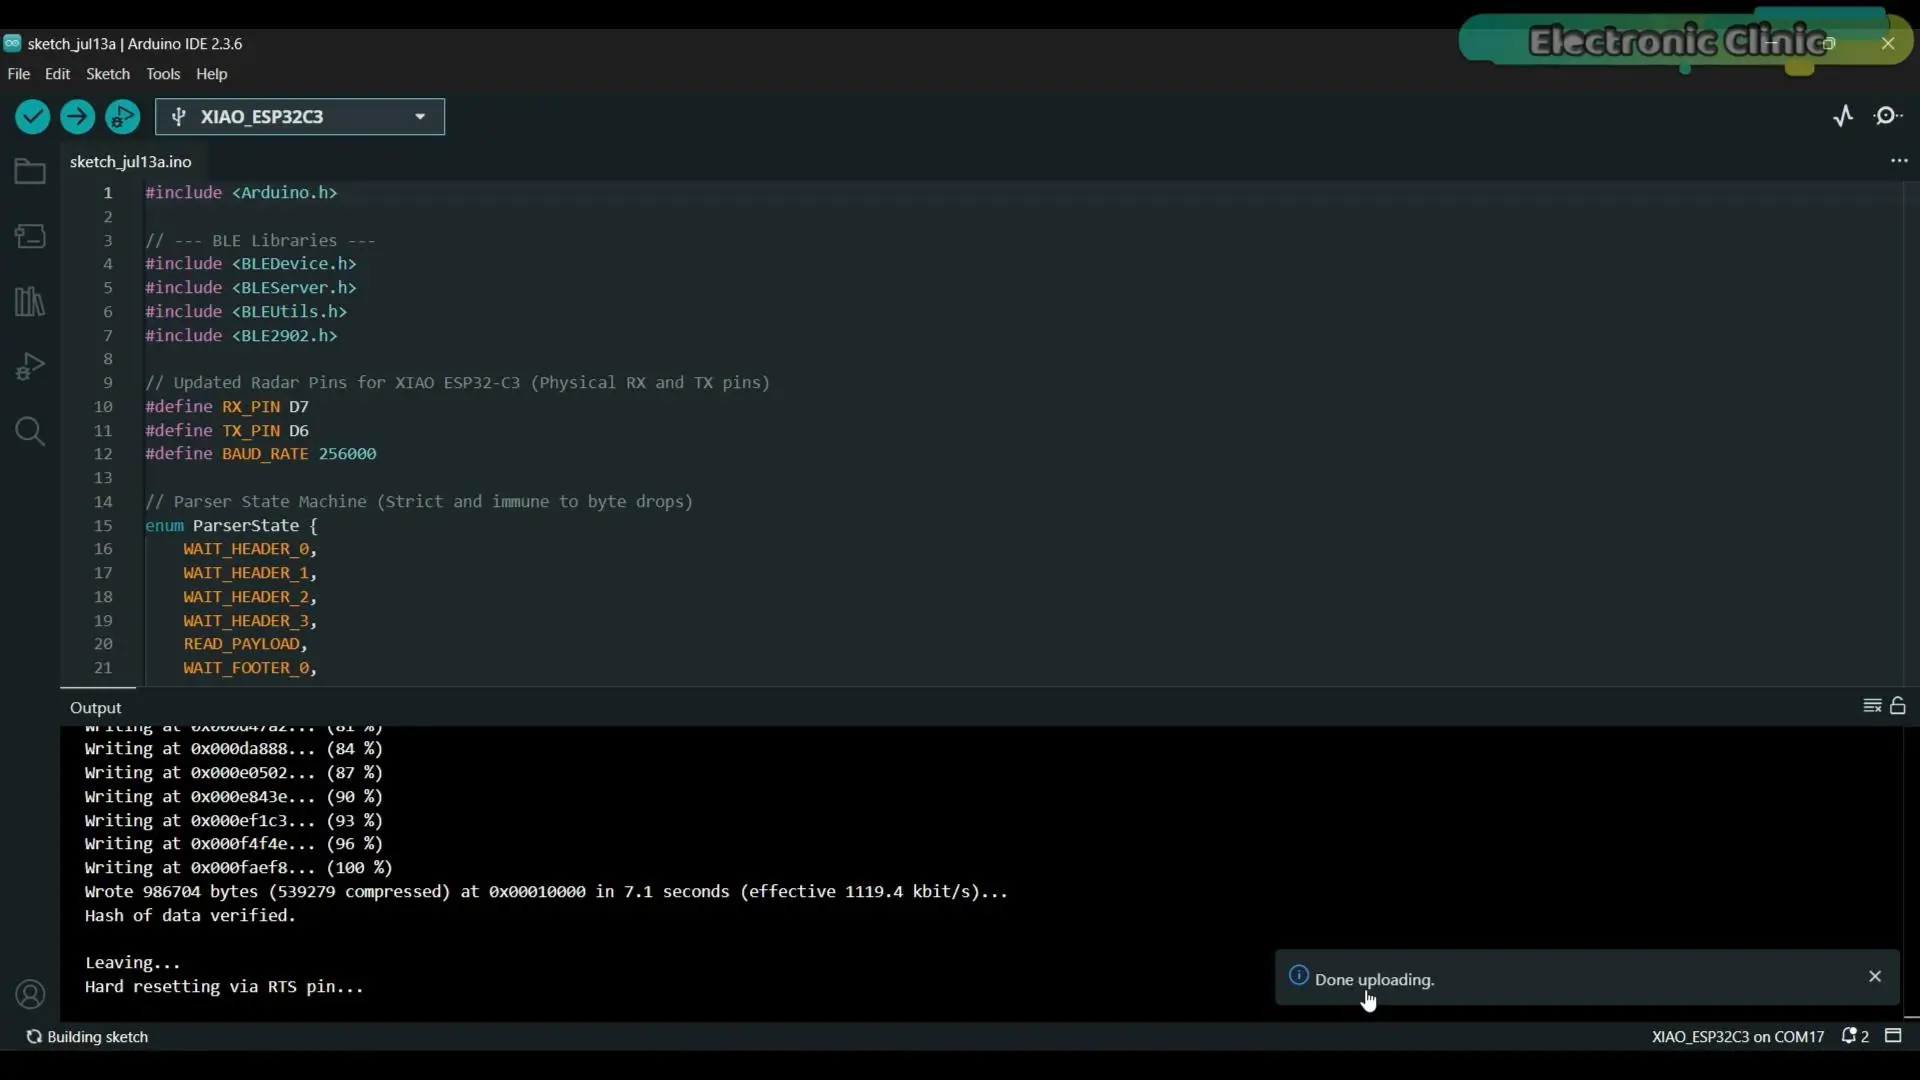
With the hardware ready, the next step is uploading the firmware to the Xiao ESP32-C3. Open the Tools menu, go to Board > ESP32, and select XIAO ESP32-C3. Then go back to Tools > Port and choose the correct COM port for your board. One more setting before uploading – under the Tools menu, make sure USB CDC On Boot is set to Enabled. Now simply click the Upload button.
If you want to save time and follow along without typing everything yourself, you can download all the source code – including the Arduino sketches, Python scripts, and the complete Android app source code – from my Patreon. Your support allows me to keep building and sharing projects like this. Thank you so much!
The code has been successfully uploaded.
Serial Monitor Demo
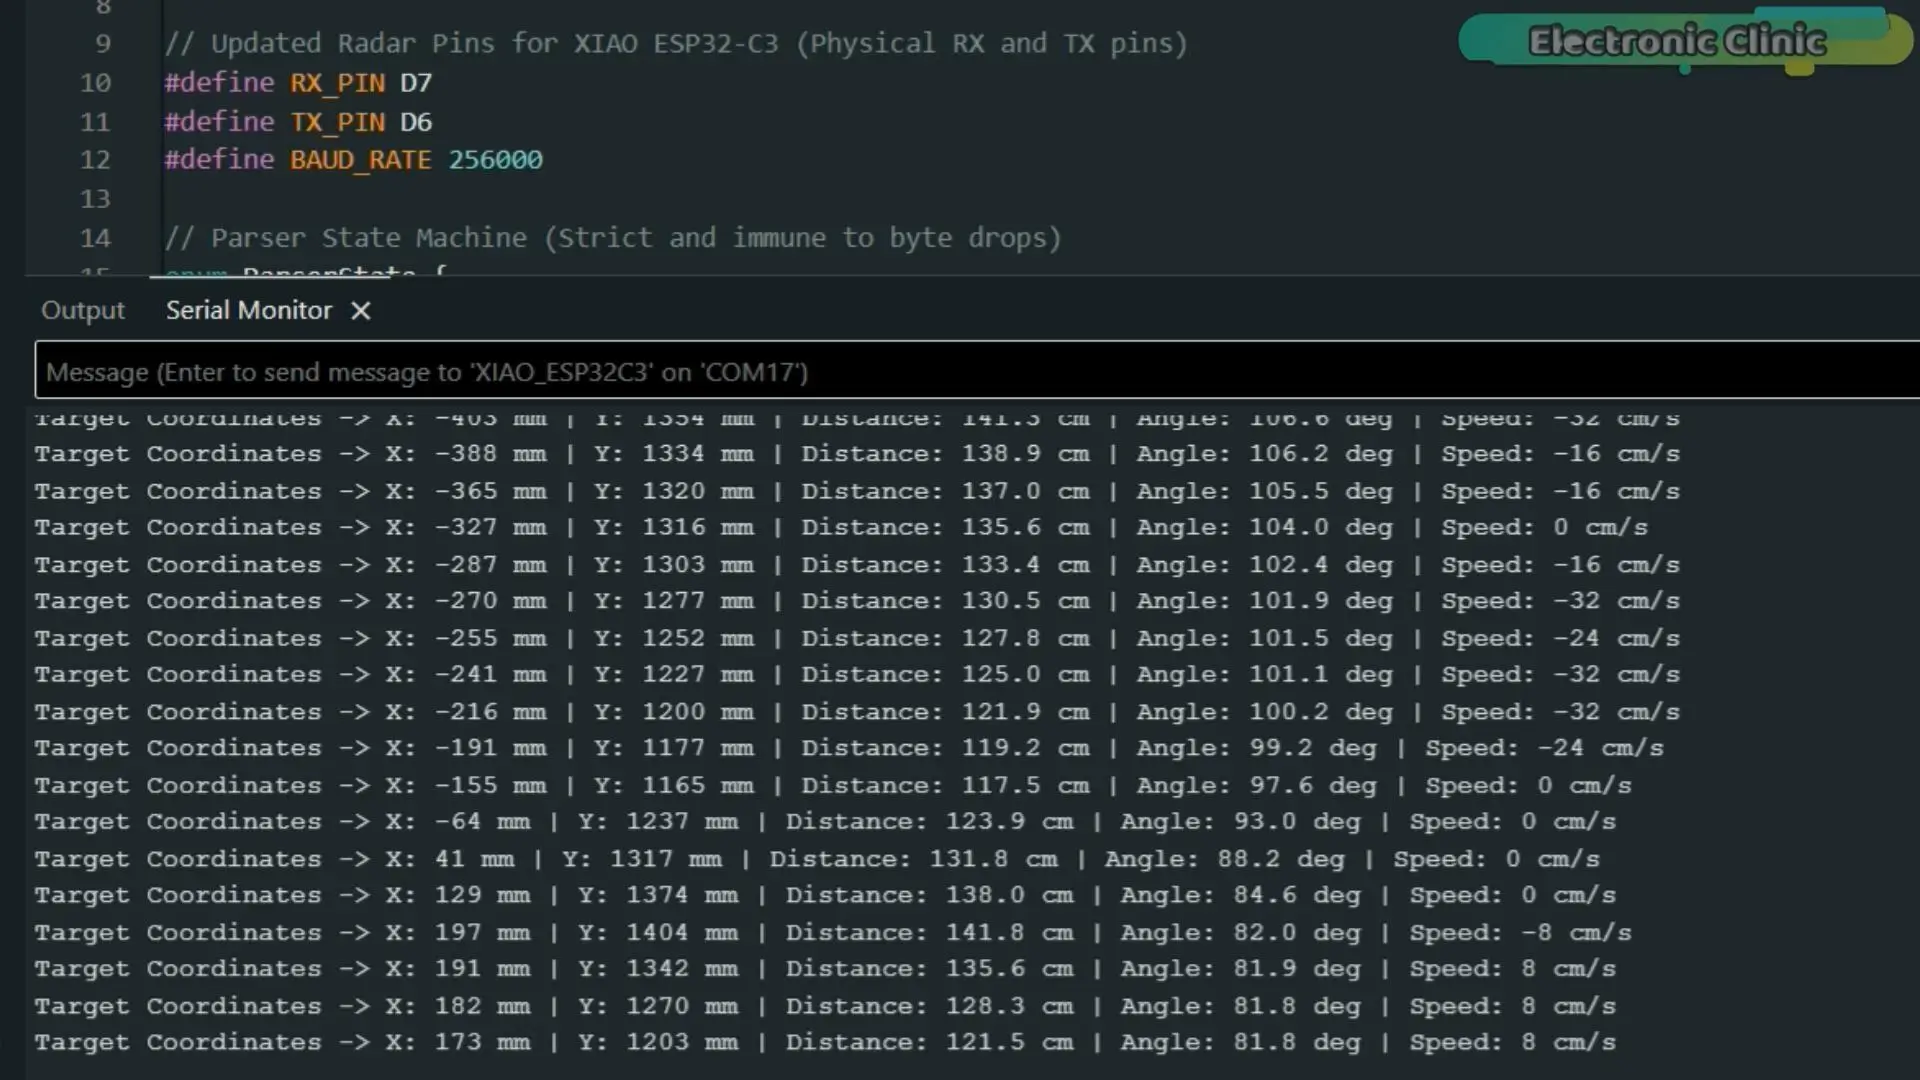
That’s it – the firmware is running successfully. As I walk in front of the radar, you can see it continuously streaming my X and Y coordinates, distance, angle, and even my walking speed. Seeing all of this working for the first time is honestly an amazing feeling. After spending hours wiring everything up and writing the code, finally watching the radar understand where you are in real time is incredibly satisfying.
But there’s one problem. While all this information is useful, trying to understand dozens of numbers scrolling past on the Serial Monitor is not exactly practical. You have to mentally convert all of these values into a picture of what’s actually happening in front of the radar, and after a while, that gets pretty difficult.
So I decided to build something much more intuitive. I designed a complete Android application in Android Studio that turns all of this raw data into a live radar interface. All you need to do is import the project, build it, and install it on your Android phone.
So… let’s see what this feels like on the smartphone.
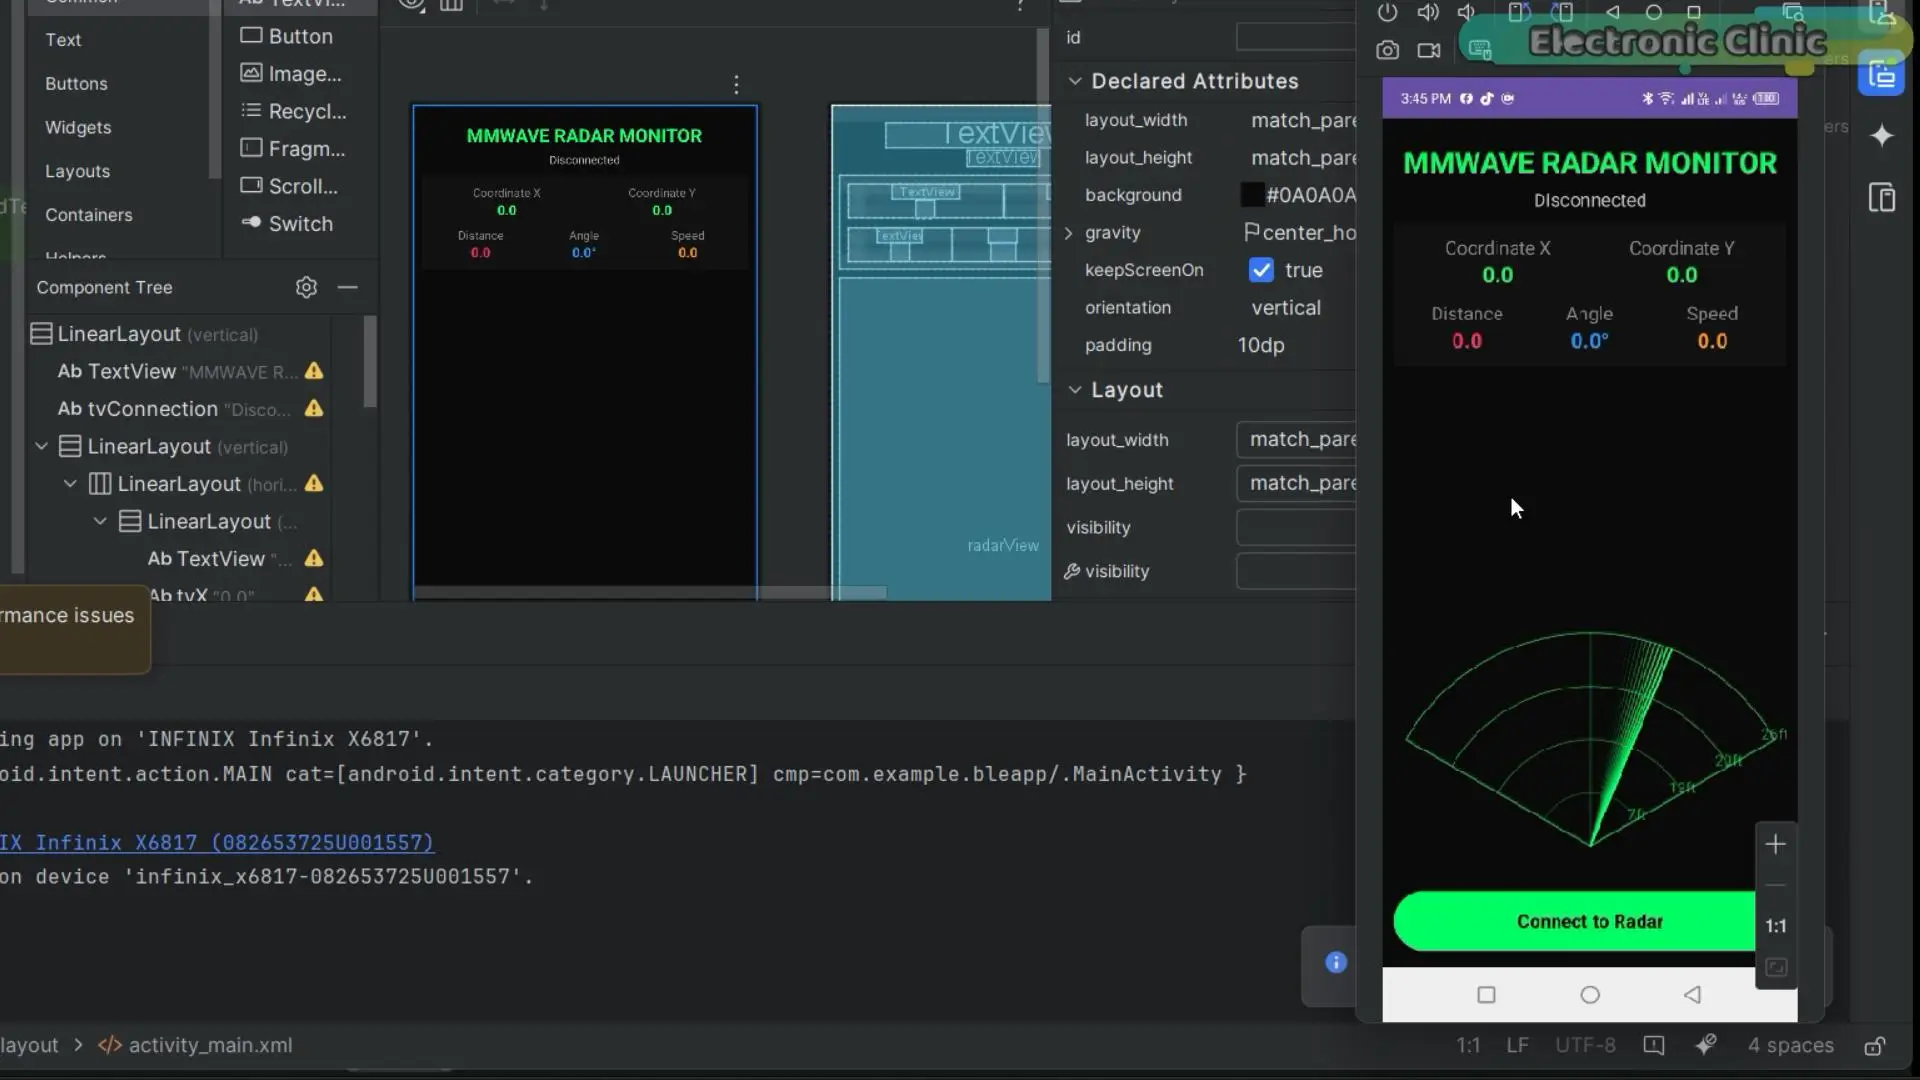
Android App Demo
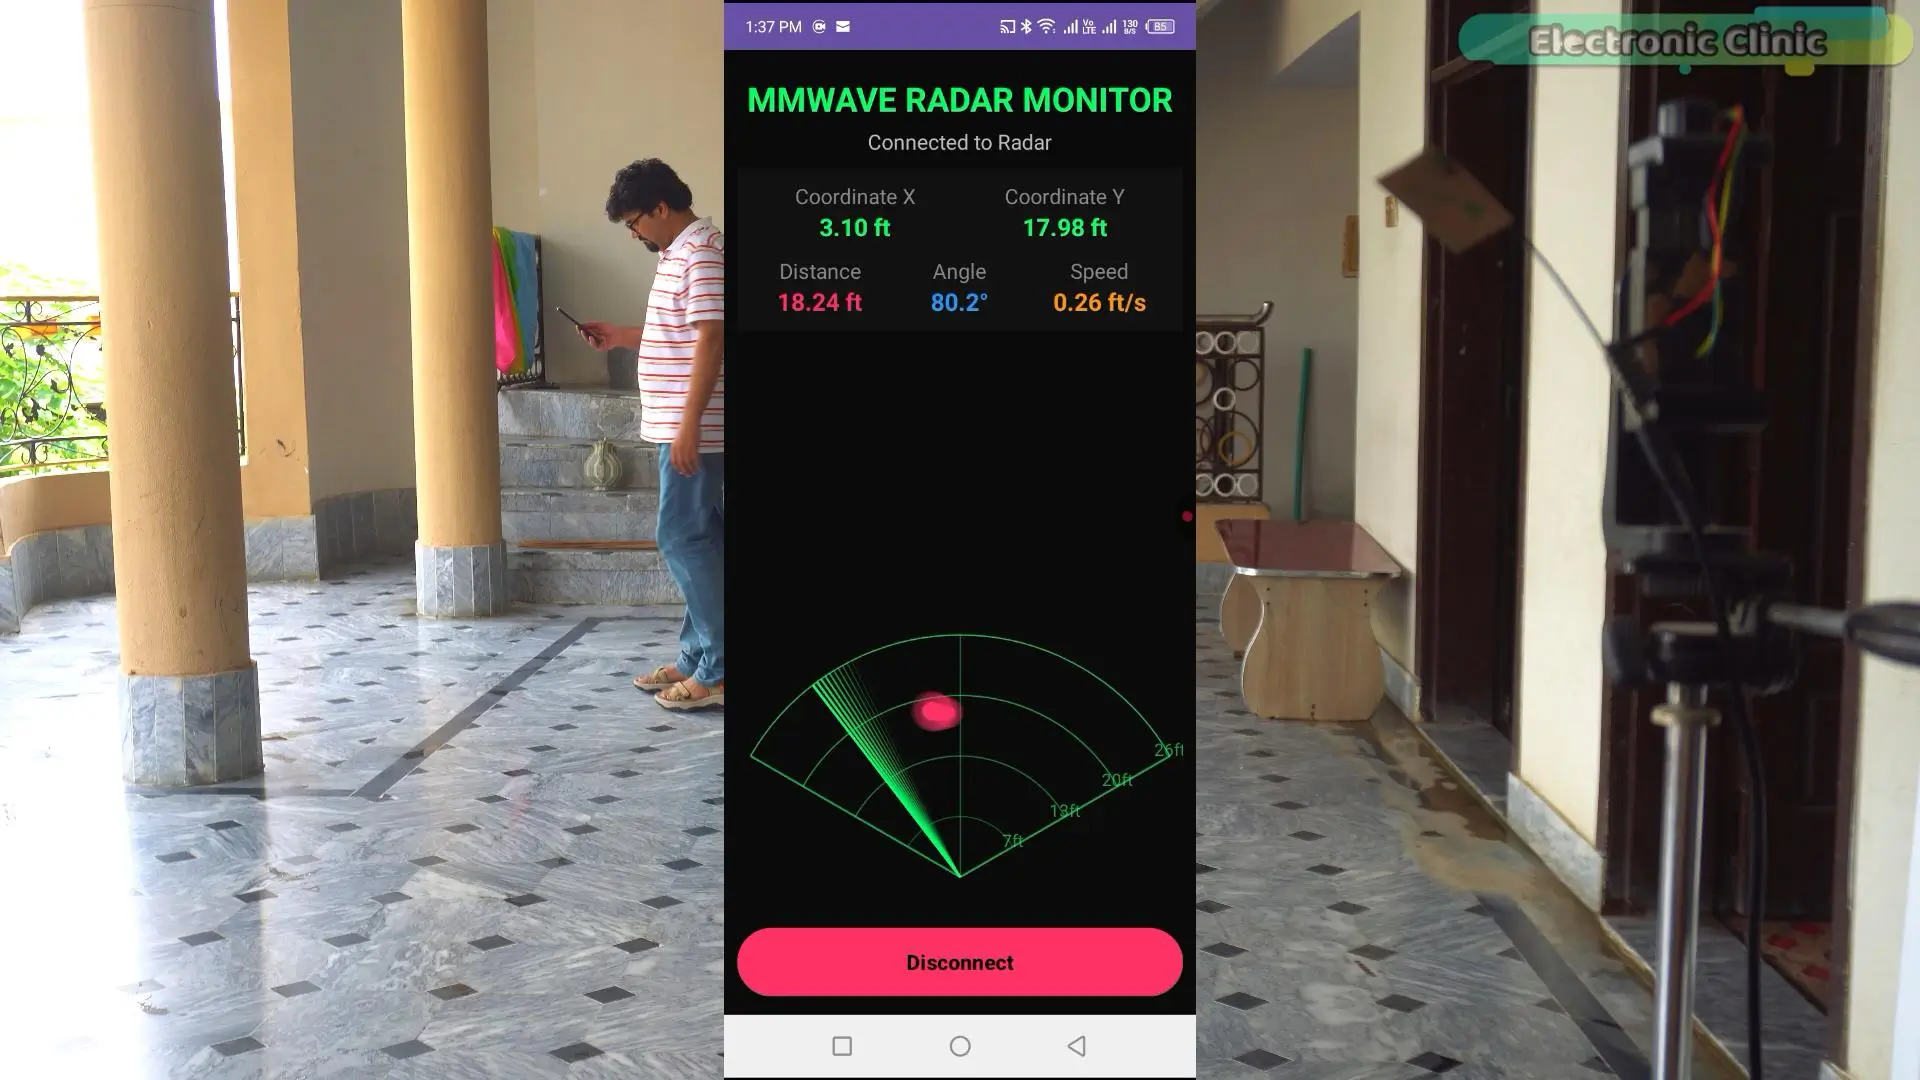
This is where the project starts to feel really exciting. Instead of sitting in front of a laptop watching numbers scroll by, I can simply open the app and instantly see exactly where the target is in real time. As I walk, the radar tracks my position smoothly, making it feel like I am carrying a portable radar system in my pocket.
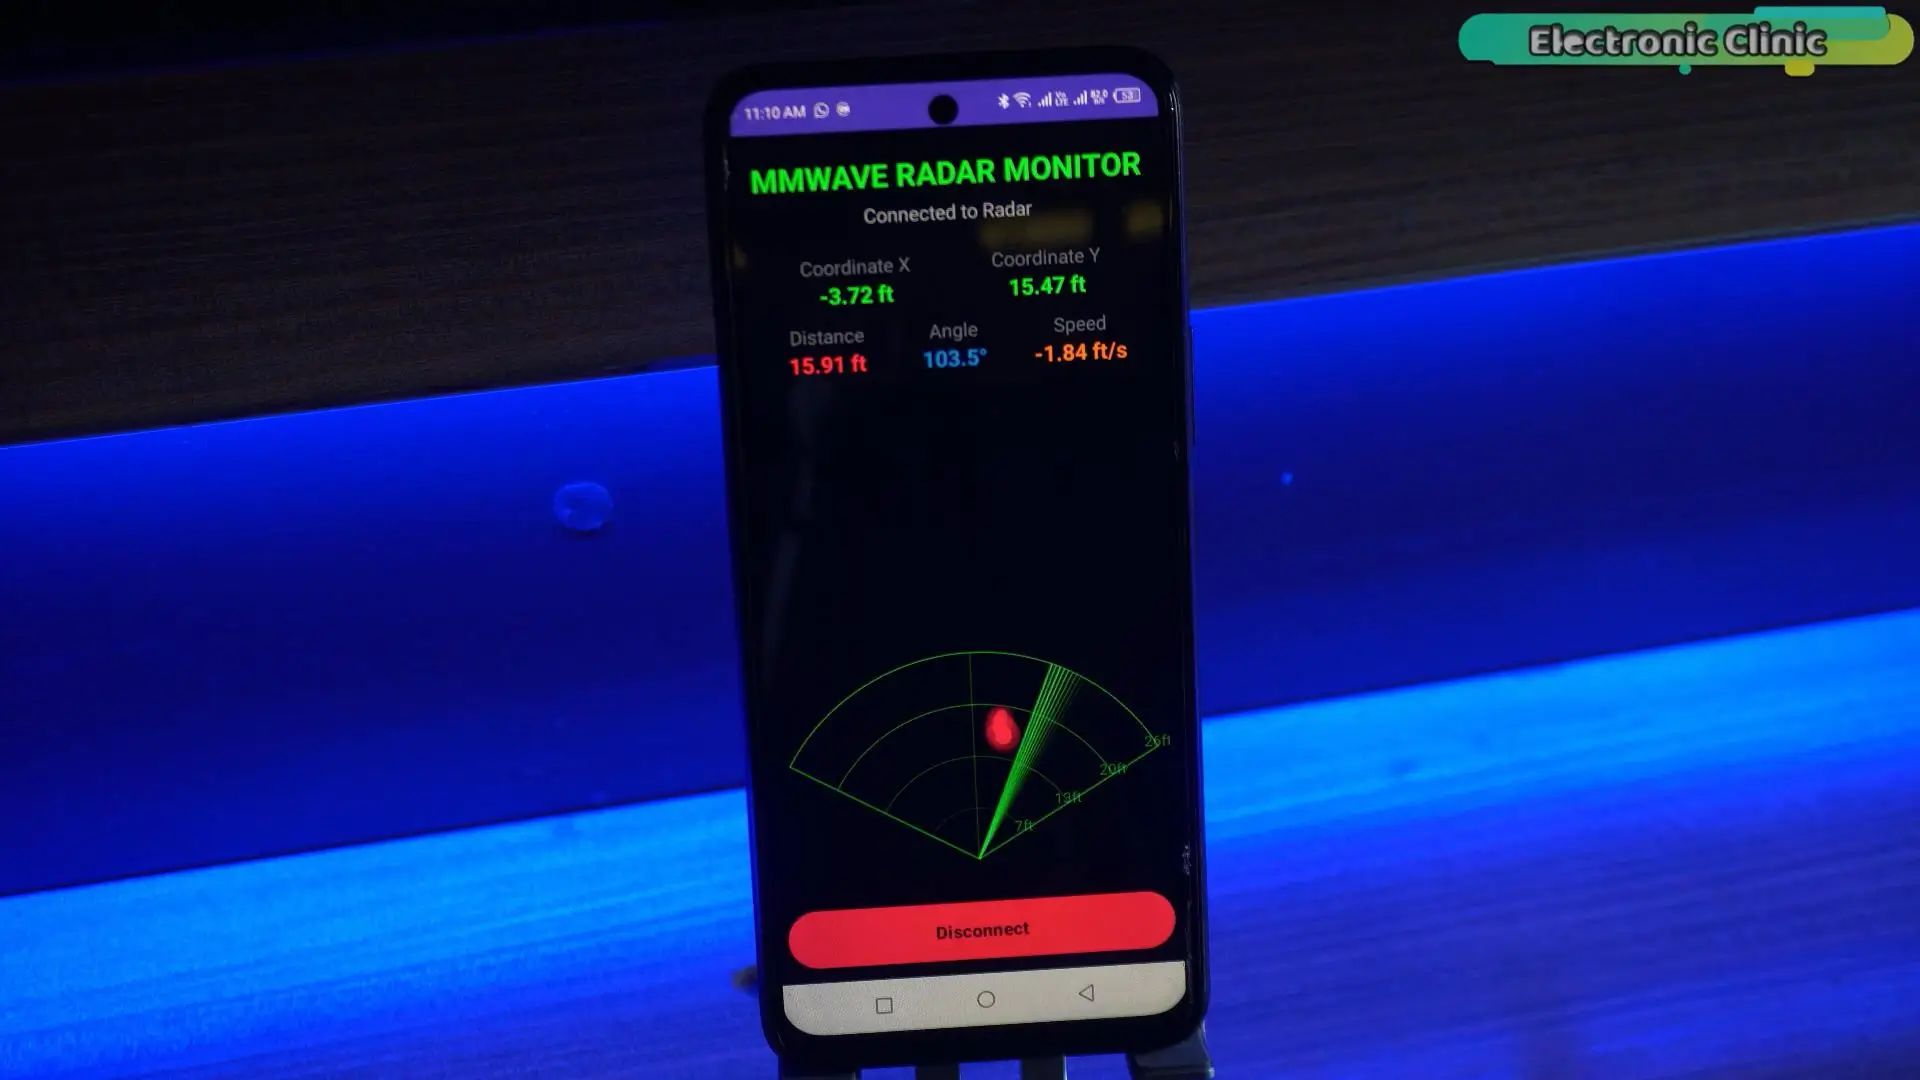
And this is the part I really love – you no longer have to stay next to the hardware. You don’t have to keep looking at the laptop, and you don’t have to read a tiny display on the controller. As long as you are within Bluetooth range, you can walk around freely while monitoring your radar from your phone. Whether you’re testing a security system, monitoring a room, or building your own smart automation project, having a live radar display in your hand makes the whole experience feel so much more futuristic and practical. Now that our radar controller is fully working; it’s time for the next step.
We are going to connect it to the RDK X5 using the very same USB cable.
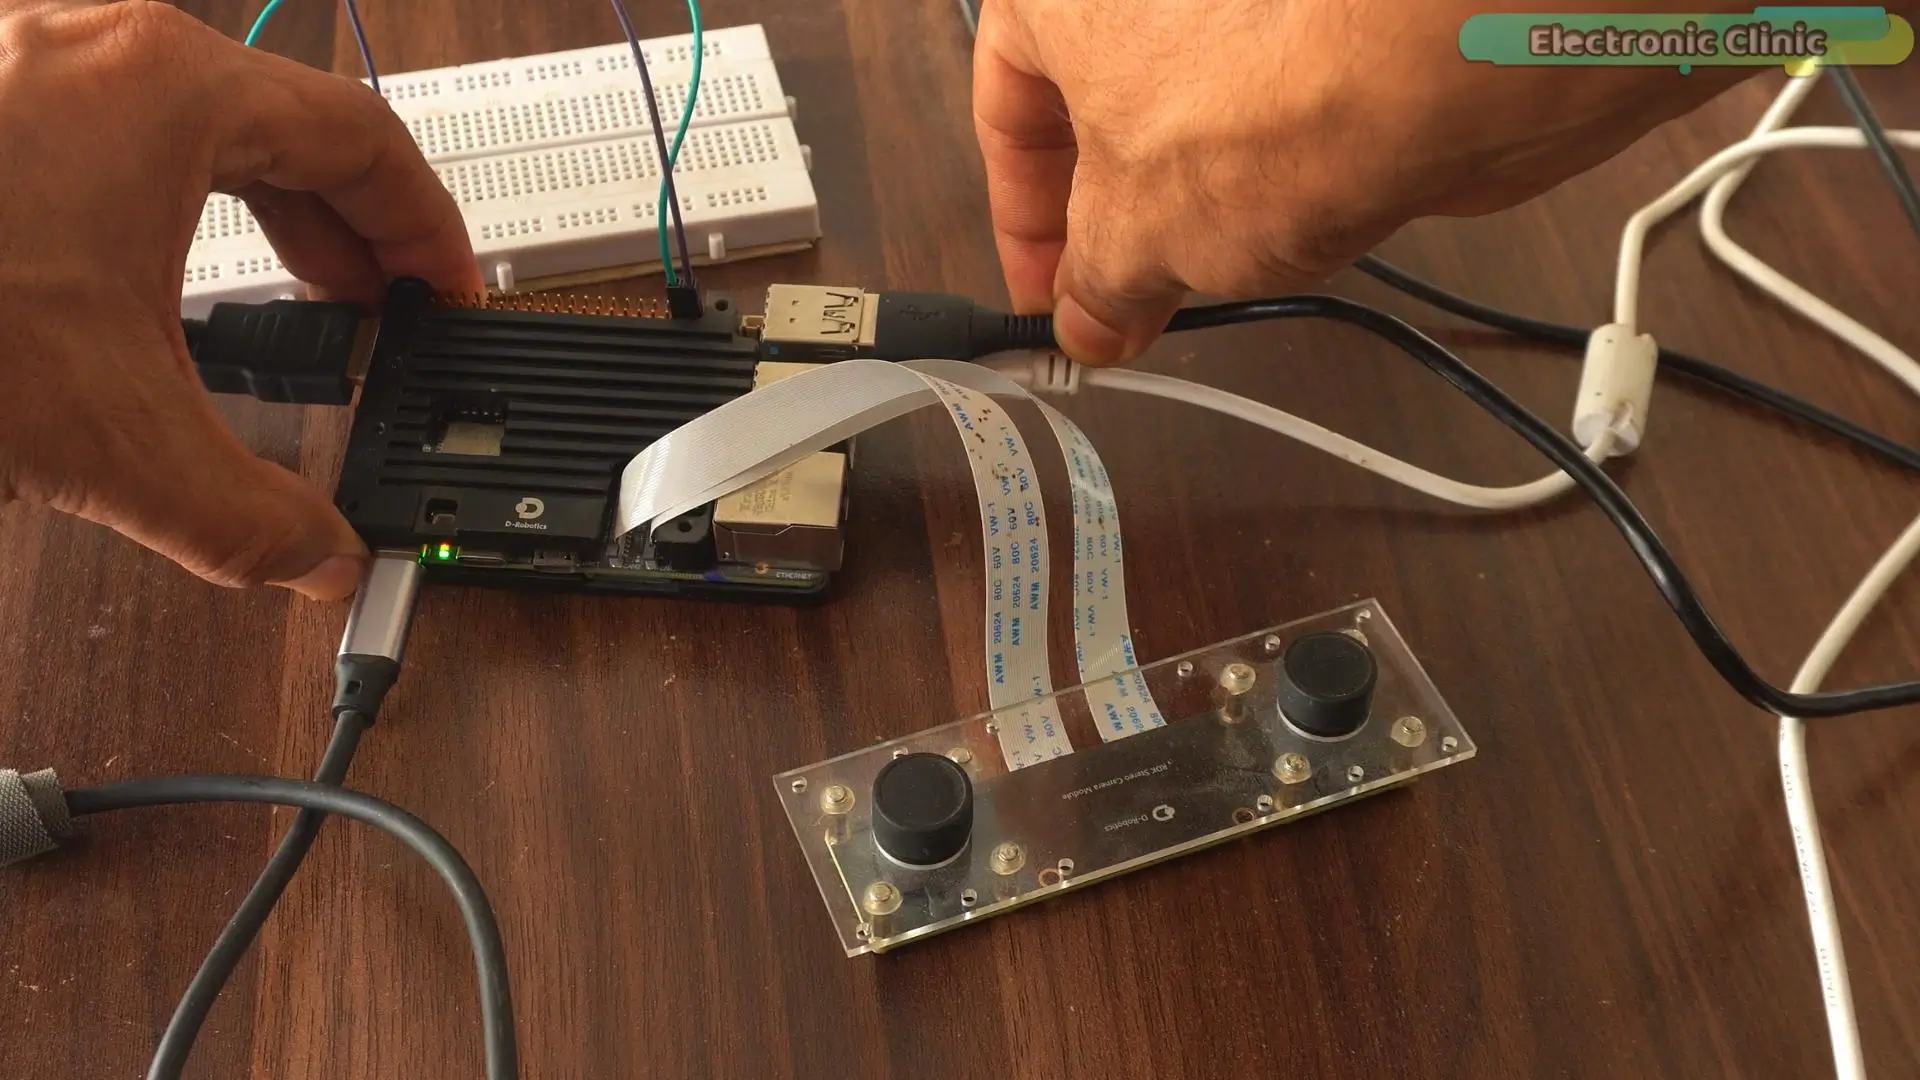
And this is where things start to get really interesting. The Xiao ESP32-C3 will continue doing what it does best – reading and decoding the radar data – while the RDK X5 takes care of the heavy lifting. That means we can stop worrying about low-level communication and start building intelligent applications on top of it. Before we jump into our first project, we need to prepare the software environment on the RDK X5. The setup only takes a couple of minutes.
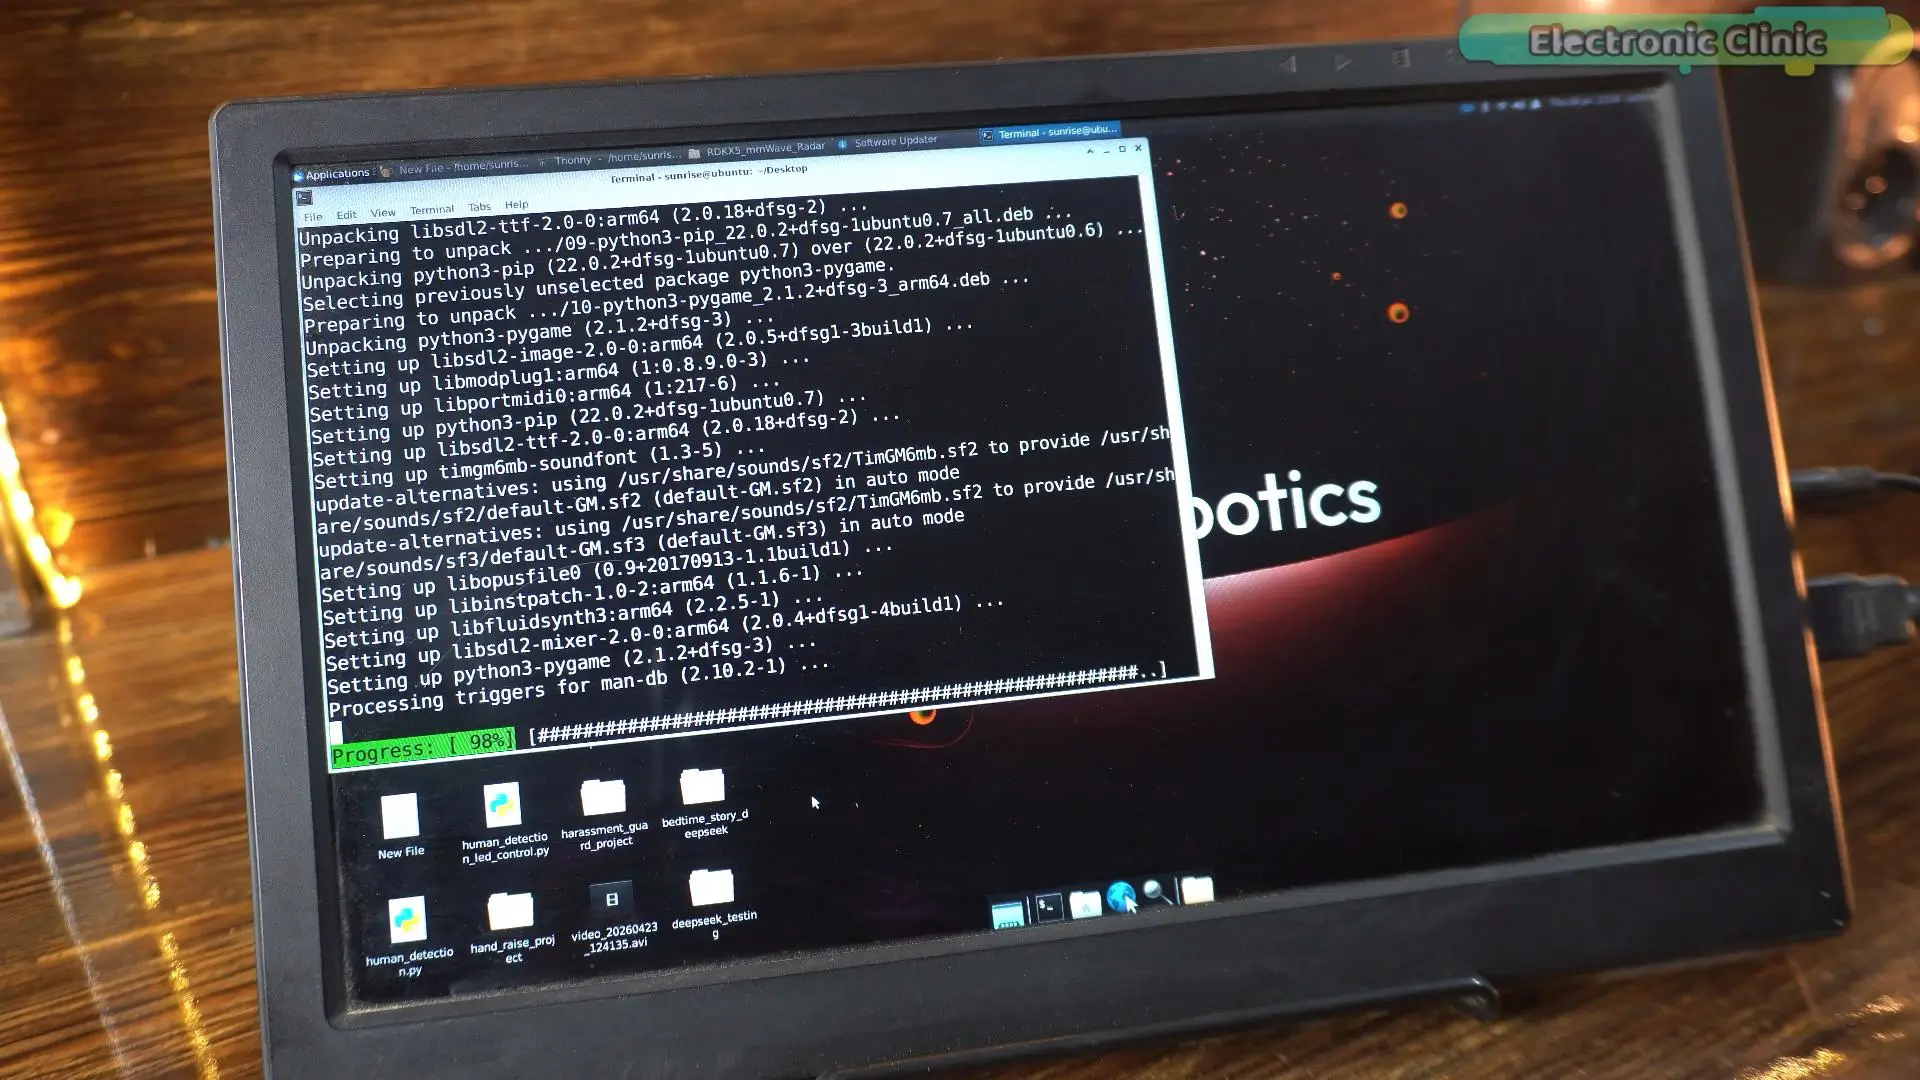
While you are on the RDK X5 Desktop, open the Terminal… then run this command
sudo apt update
to update the package list,
Next; Install system dependencies for Pygame and Python package manager
sudo apt install -y python3-pip python3-pygame
Finally, install the PySerial library so Python can communicate with the Xiao ESP32-C3 over USB.
sudo pip3 install pyserial
On Linux-based systems like the RDK X5, it usually appears as something like this /dev/ttyACM0, although on some systems it may show up as /dev/ttyACM1. To verify the assigned port, simply open a terminal and run this command.
ls /dev/ttyACM*
If you see /dev/ttyACM0, the RDK X5 has successfully detected the Xiao ESP32-C3, and we are ready to communicate with it.
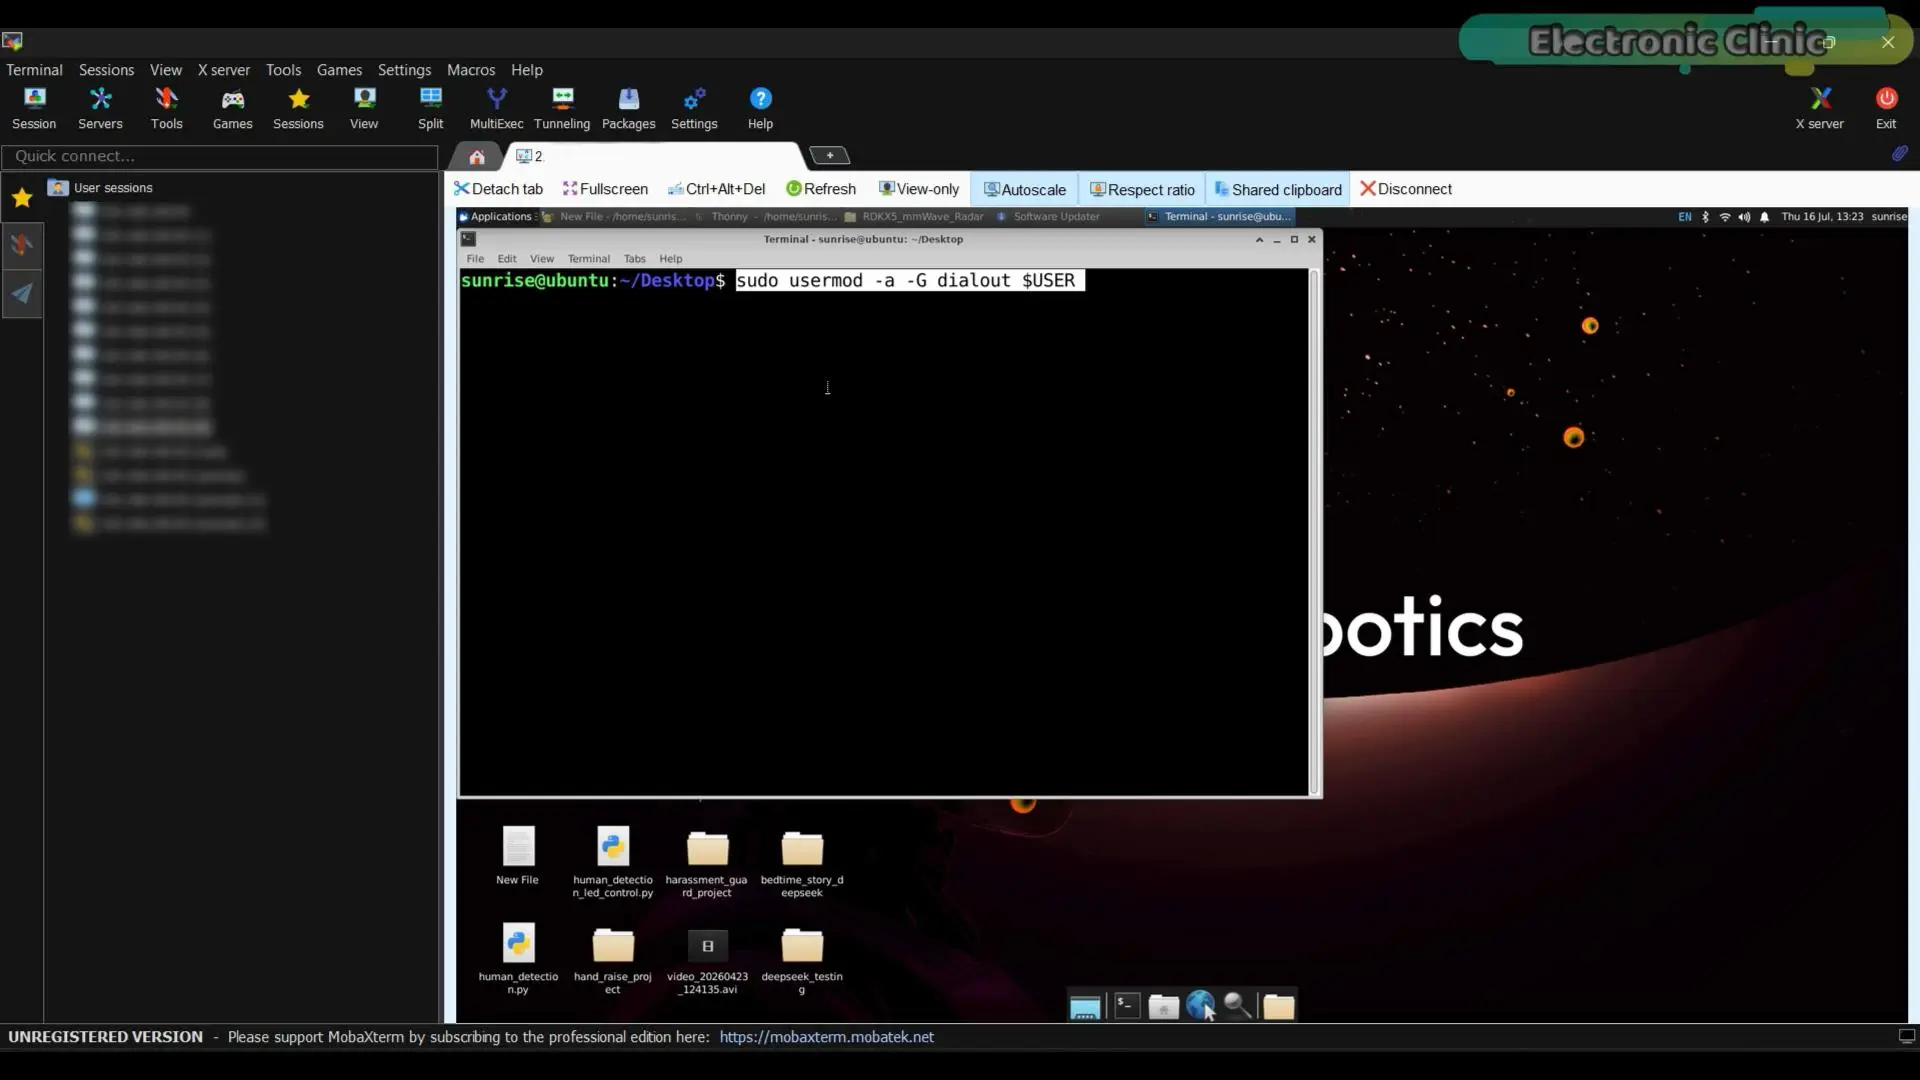
Before running the Python program, there is one small Ubuntu setting we need to take care of. By default, normal users don not have permission to access serial devices, so we will add the current user to the dialout group with this command.
sudo usermod -a -G dialout $USER
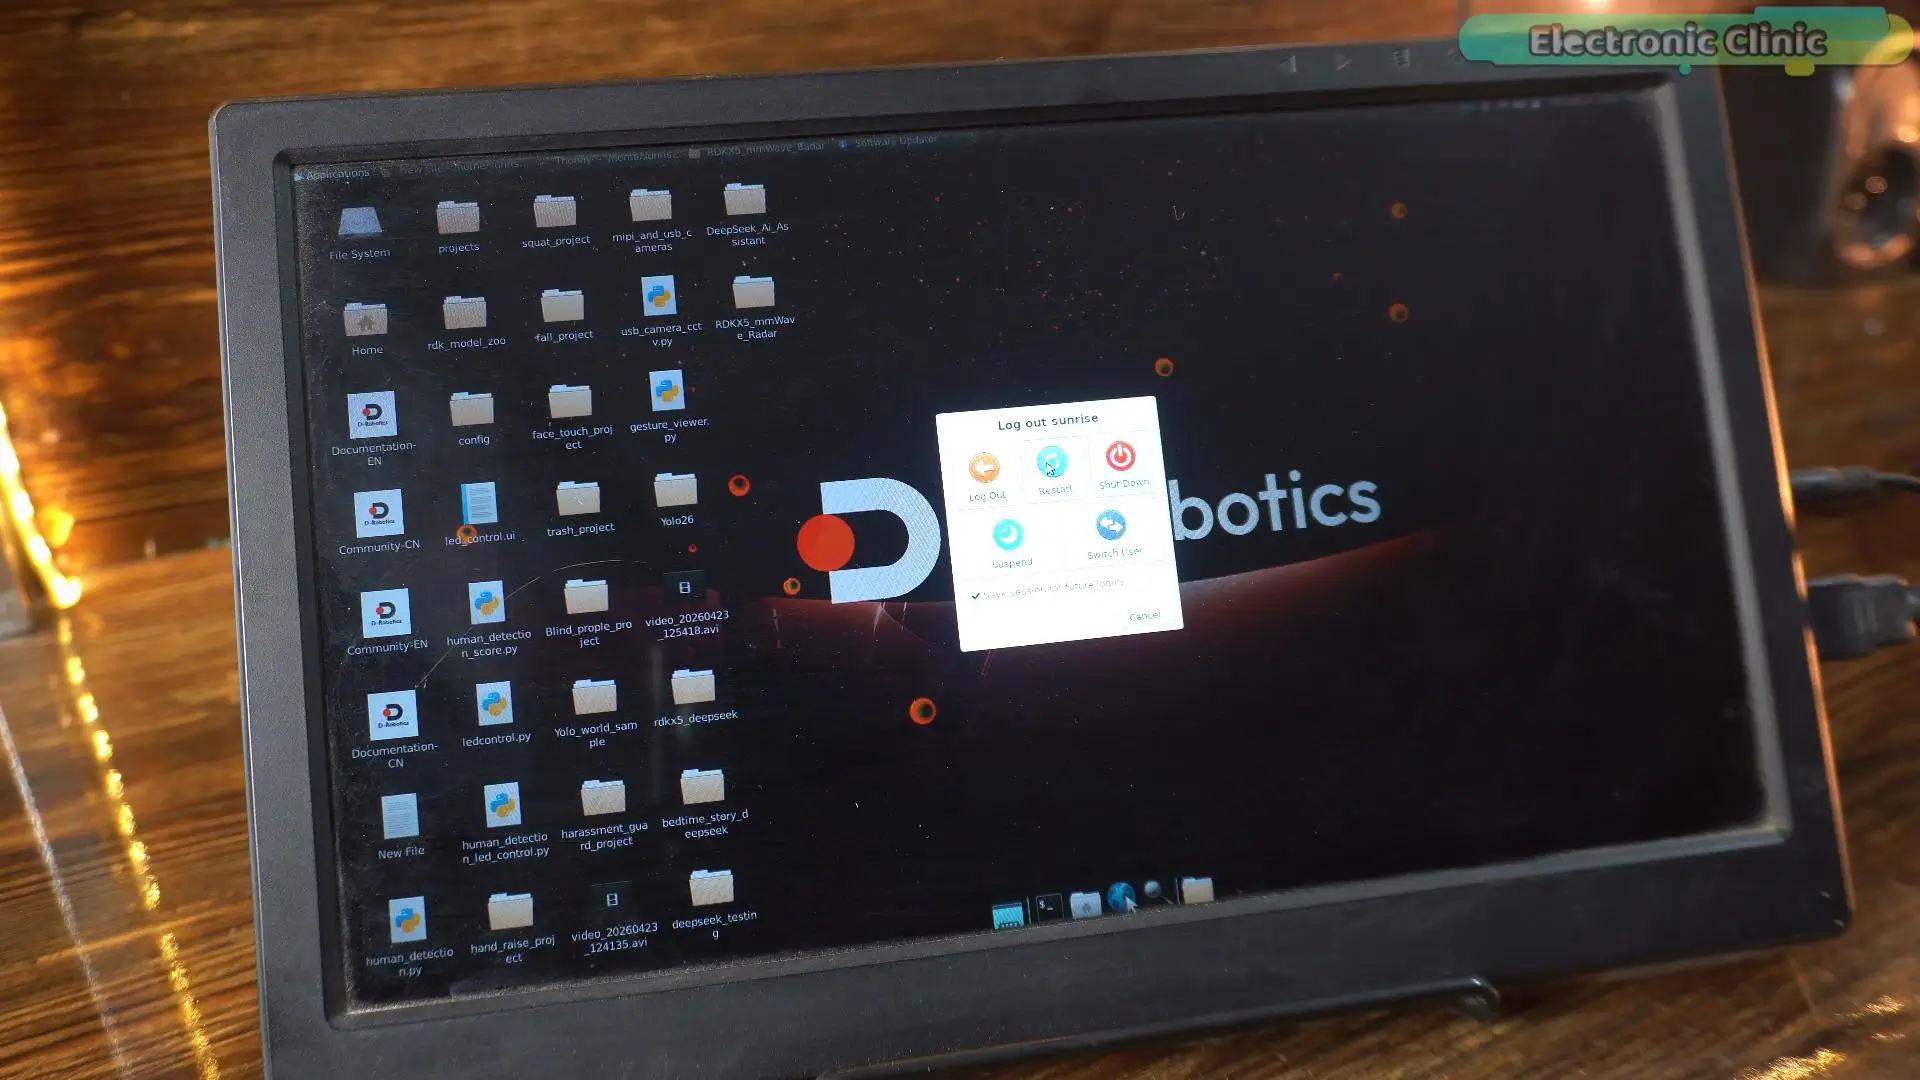
After running it, simply log out and log back in – or reboot the RDK X5 – for the change to take effect.
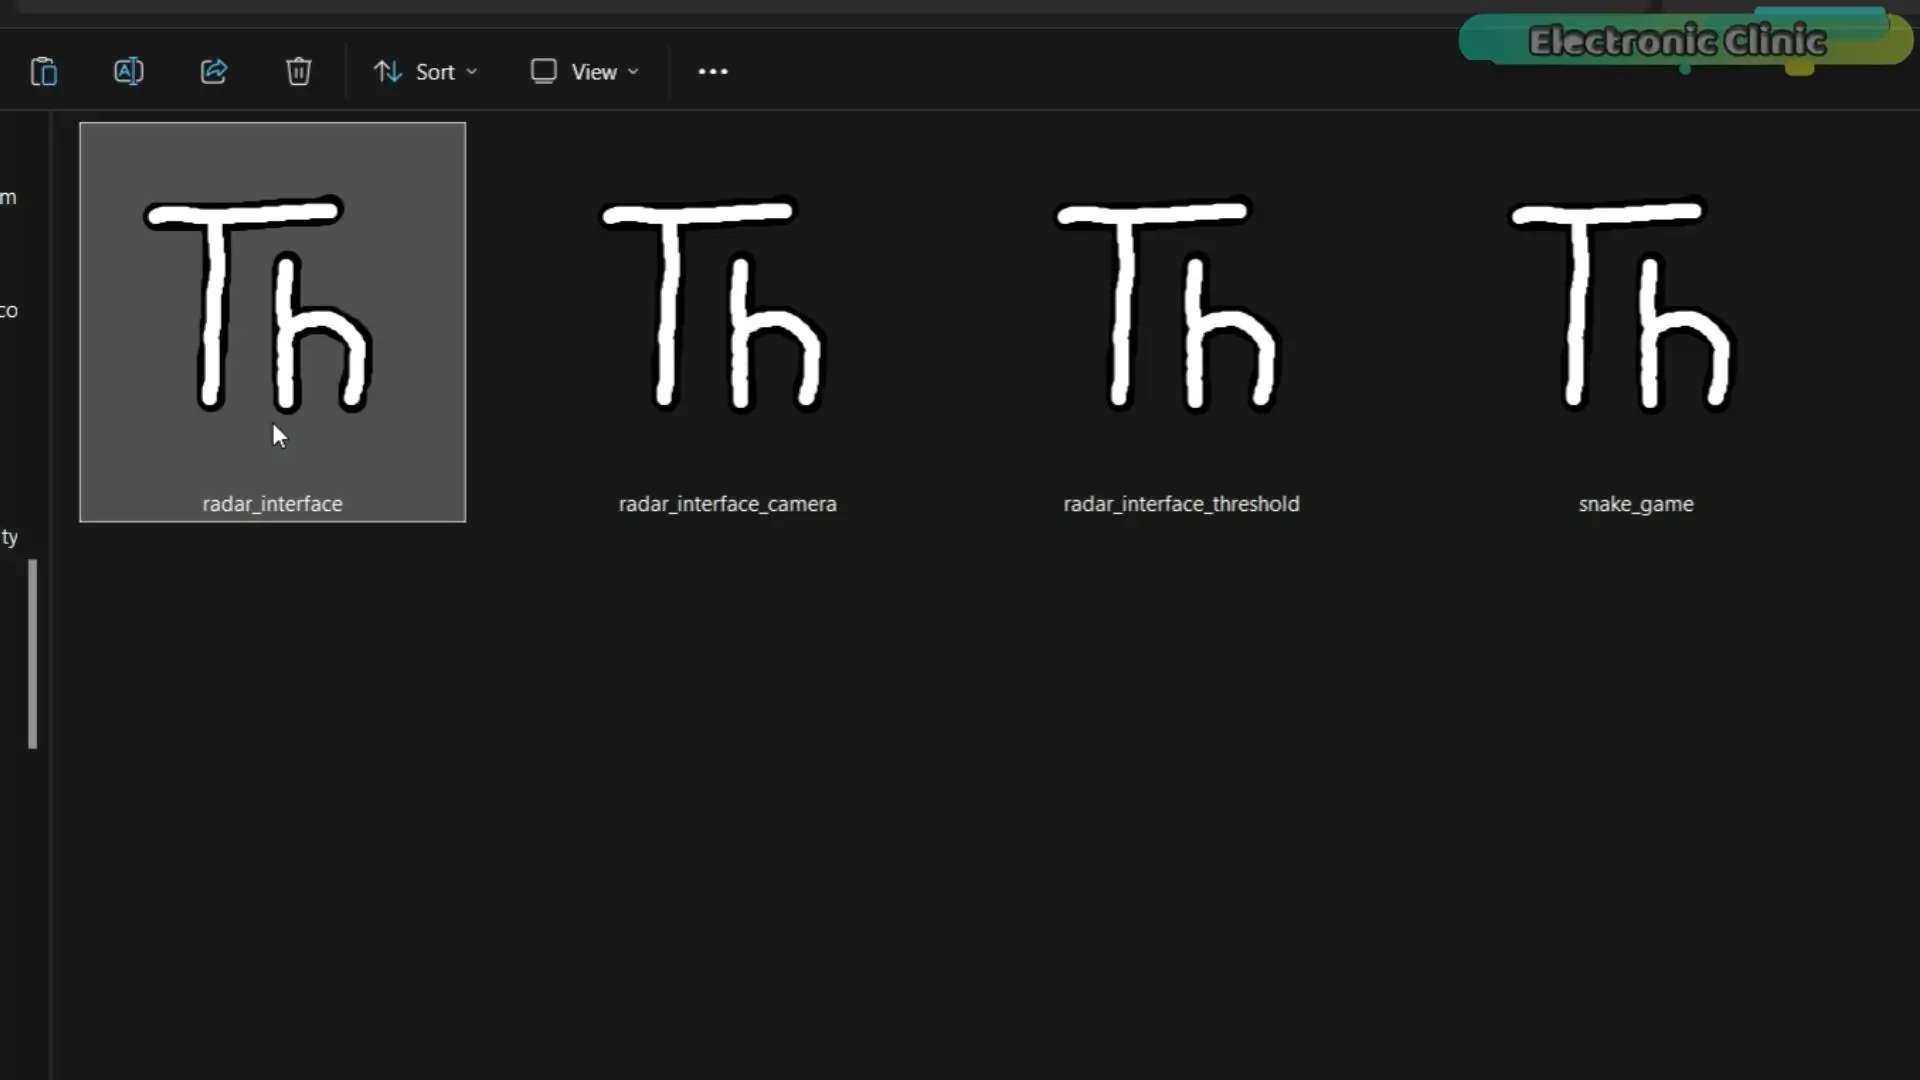
With everything configured, we are finally ready to start building applications. I have written four Python programs that demonstrate different ways of using the RD-03D with the RDK X5, and we are going to explore them one by one. Each application builds on the previous one, gradually adding new features and showing what’s possible when you combine radar sensing with an AI computer.
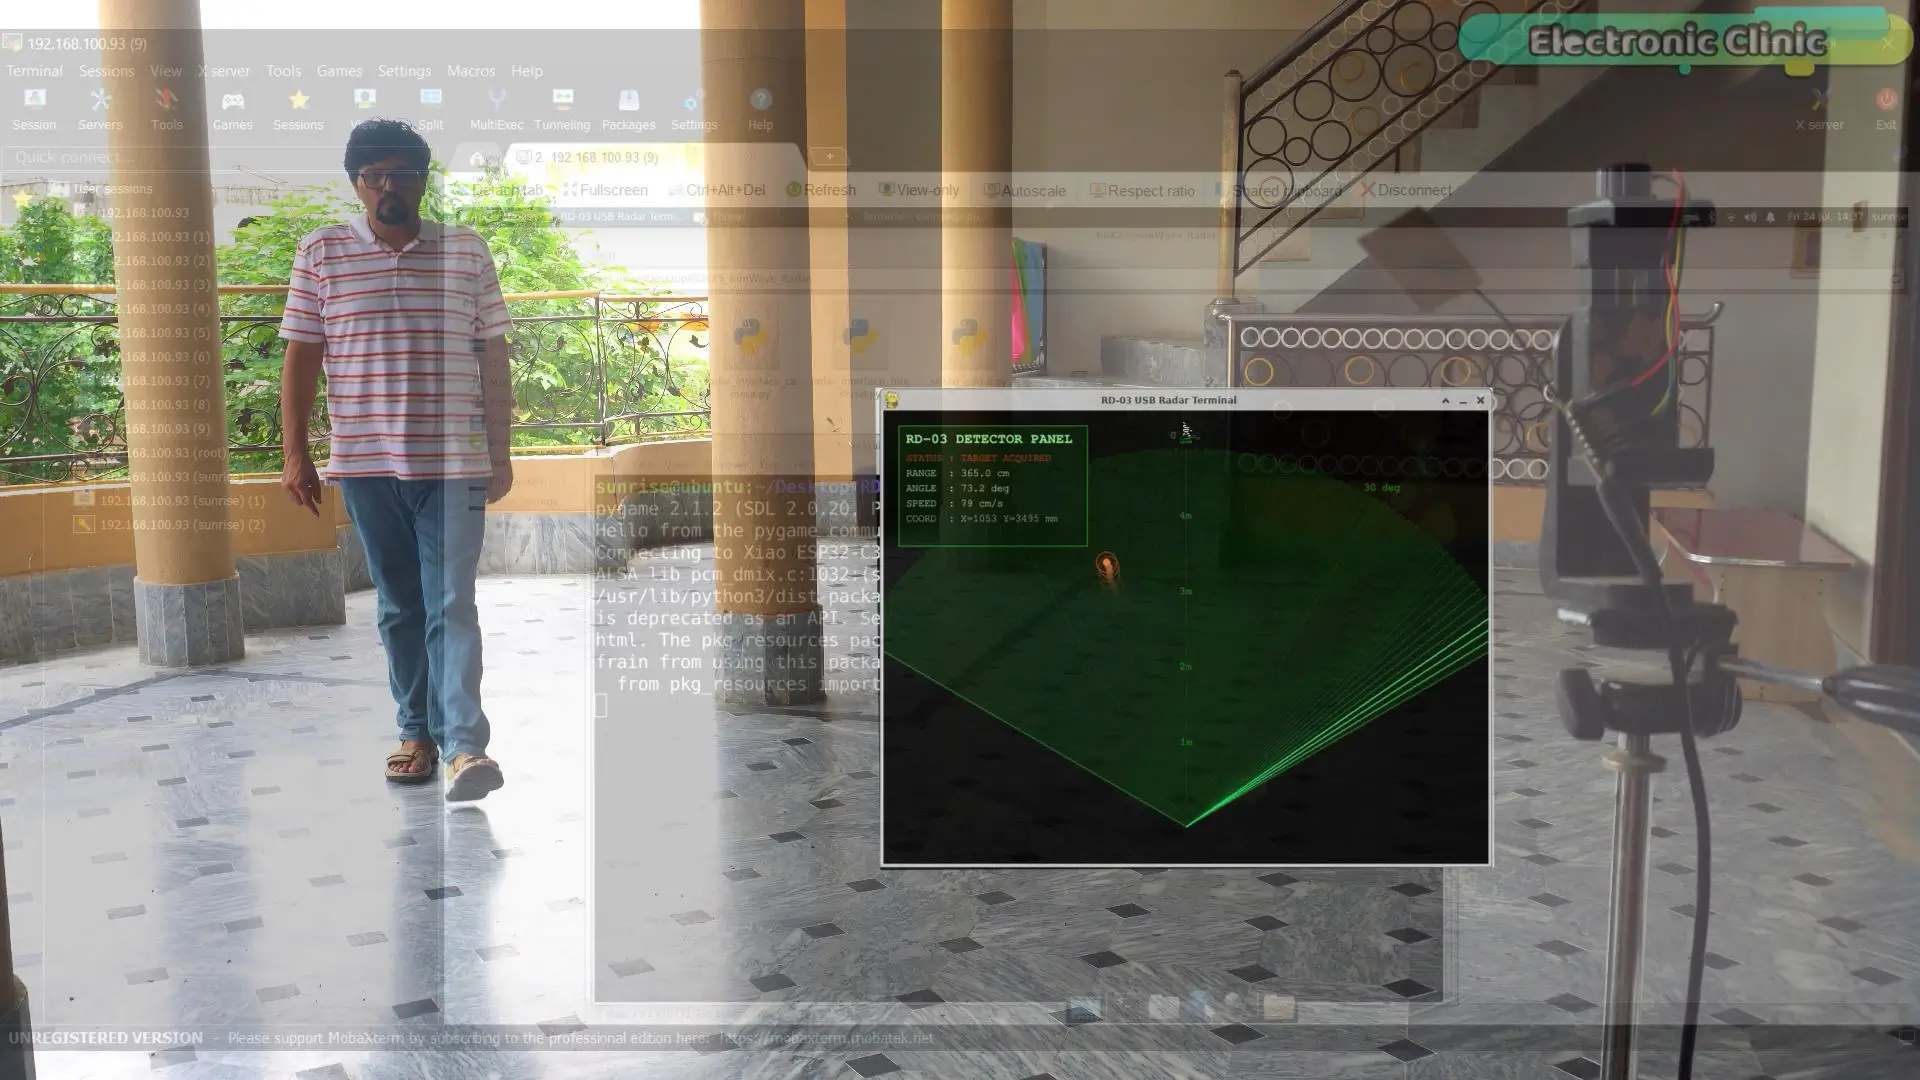
We will begin with the simplest one, radar_interface.py. To launch it, make sure you are in the same folder. Then right click and select Open Terminal Here.
Once the terminal opens, run the following
sudo python3 radar_interface.py
And there it is. Our very first radar application is now running entirely on the RDK X5. Watching this for the first time was an incredible feeling because it’s no longer just a radar sensor connected to a microcontroller – it’s a complete portable radar computer. Everything is happening right here on the RDK X5, so you don’t need a bulky laptop to process or visualize the data anymore. Just power up the system, and you’re ready to monitor an area almost anywhere.
As I walk in front of the radar, you can see it tracking my position smoothly in real time. The sweeping beam follows my location, while the panel continuously updates my distance, angle, coordinates, and walking speed. It’s surprisingly responsive, and seeing your movement visualized live never gets old.
But as cool as this looks, it’s still only showing us information. It’s telling us where someone is, but it’s not doing anything with that information yet.
So let’s make it useful.
Instead of simply tracking a person, let’s define a secure zone. The moment someone enters that area, an LED connected to GPIO 37 will turn on automatically. Of course, that’s just for demonstration. You can replace this LED with almost anything – a relay to switch 110- or 220-volt AC appliances, a DC motor, a siren, an electronic door lock, or practically any device you want to automate.
So, let’s move on to the next application and
radar_interface_threshold.py. That’s where this radar starts interacting with the real world.
sudo python3 radar_interface_threshold.py
And… this is where the project starts to feel like a real security system.
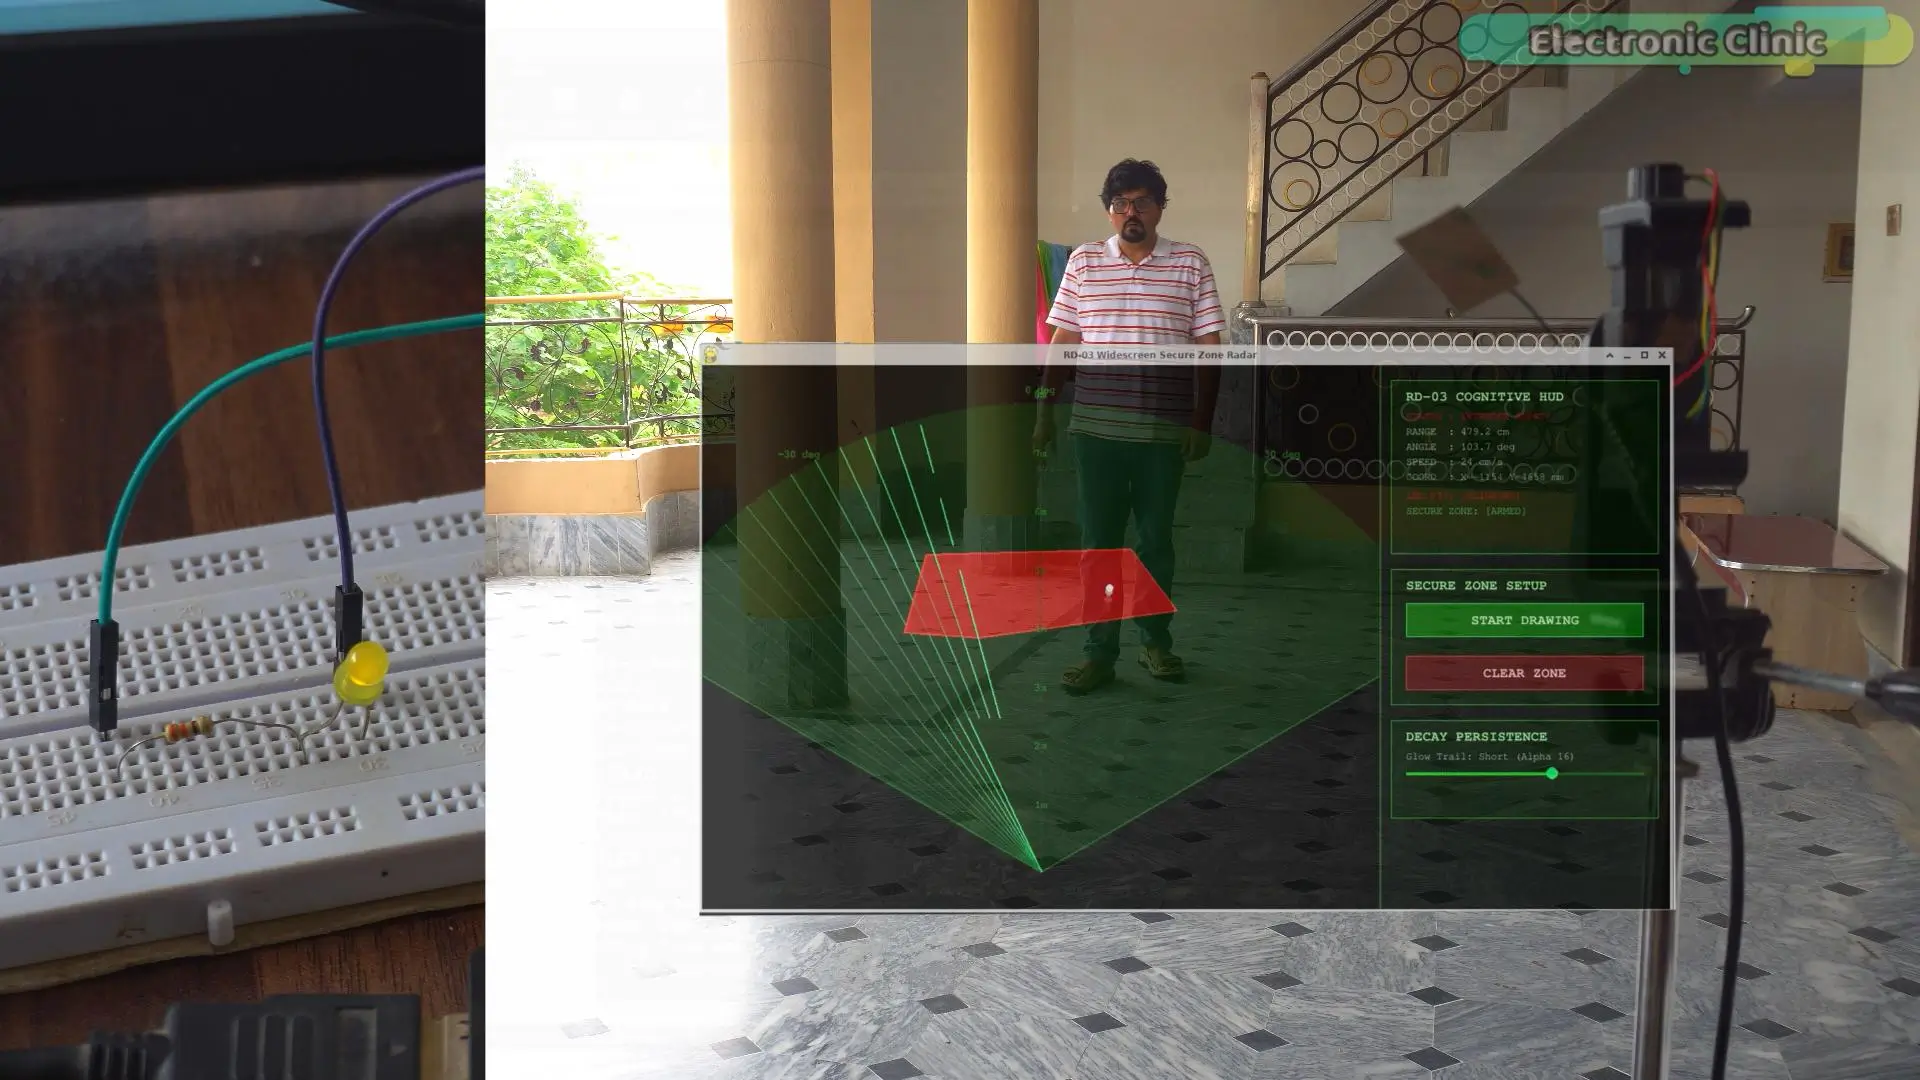
The radar is still tracking me in real time, but now it has a memory. Instead of treating the entire room the same, I can tell it exactly which area to watch. Everything outside that region is ignored. Everything inside it becomes important.
Let me show you.
I will click Start Drawing and create a custom secure zone directly on the radar screen. It can be almost any shape or size, so you are not limited to a simple rectangle or fixed detection distance. Once I’m happy with it, I will arm the zone.
Now the RDK X5 is watching just this area.
As long as I stay outside the zone… nothing happens.
But the instant I step inside…
There it is.
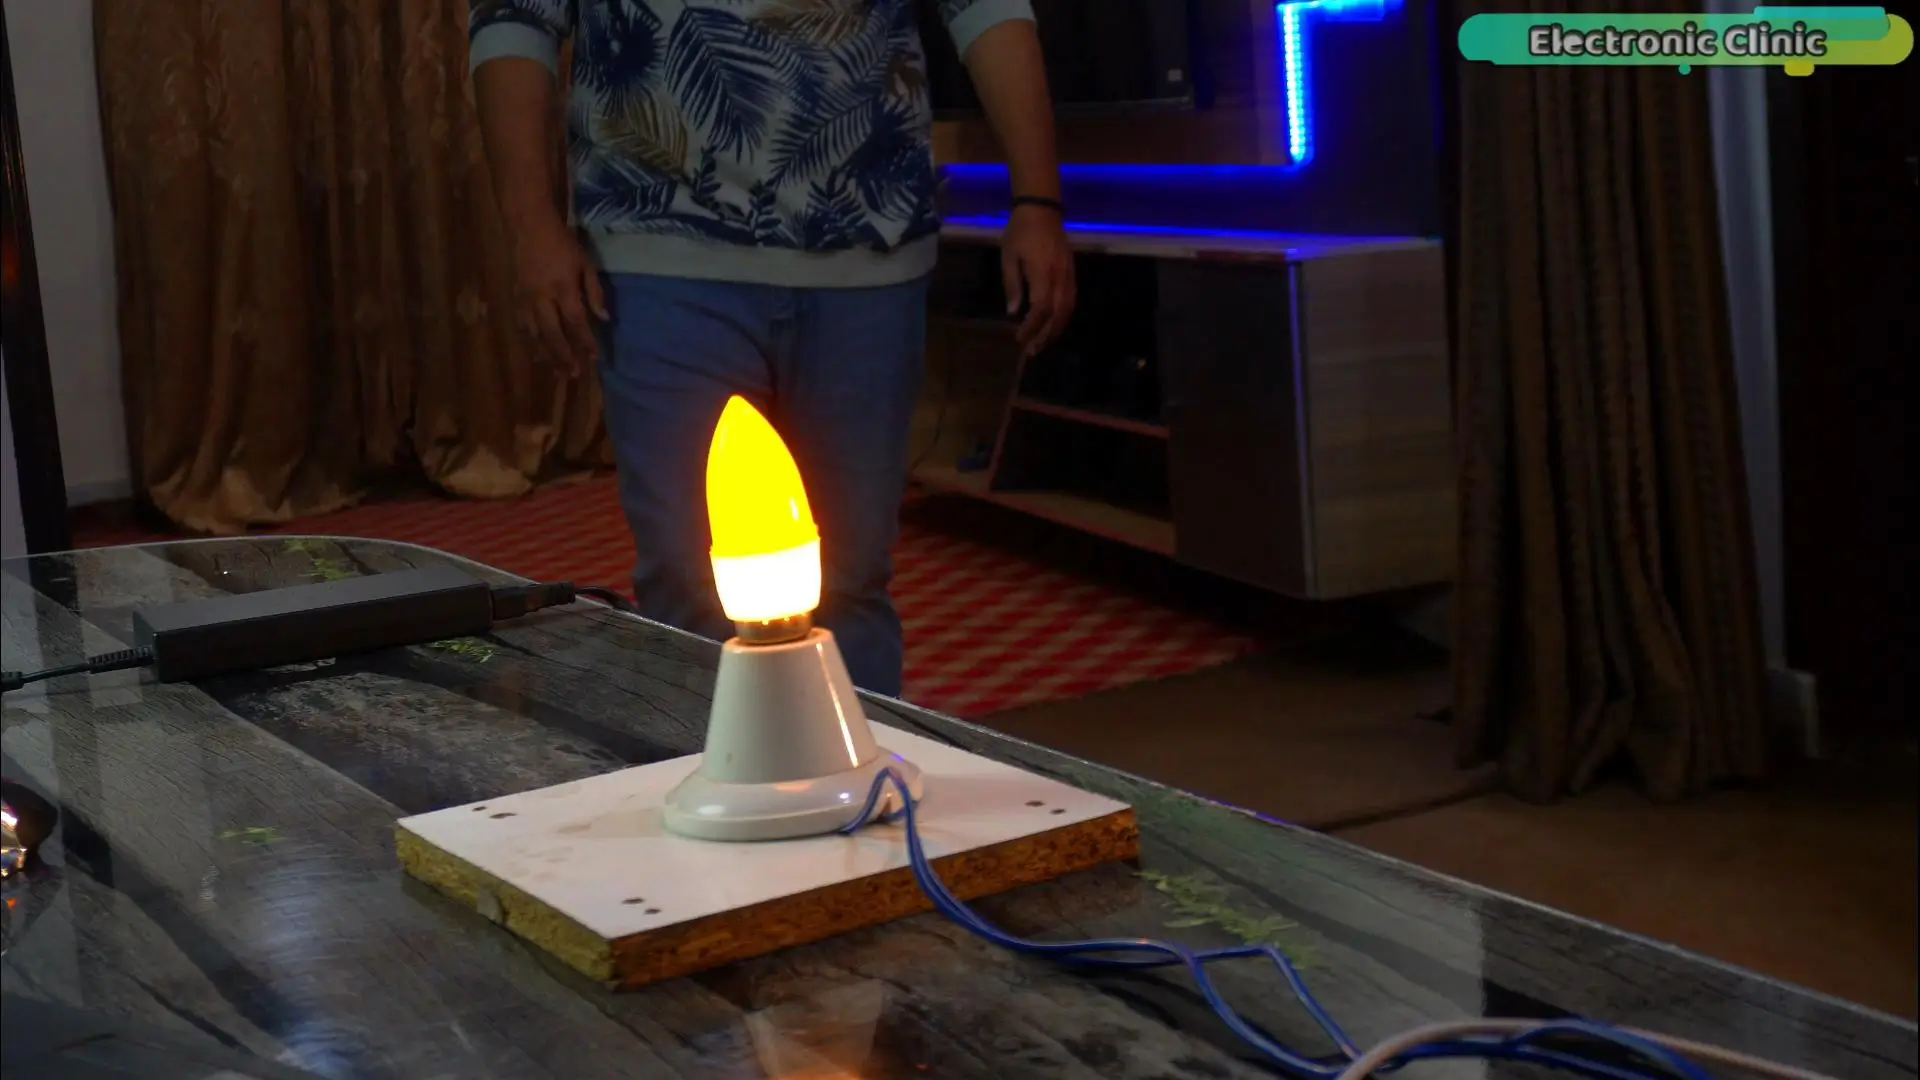
The LED connected to GPIO 37 starts blinking immediately. Step back out… it stops. Step in again… it triggers instantly. There is virtually no noticeable delay.
And here is the exciting part – this LED is only standing in for something much bigger. Replace it with a relay, and you can switch 110- or 220-volt AC loads. Connect a siren, an electronic door lock, a DC motor, or any other actuator. The secure zone becomes the trigger, and what happens next is entirely up to your imagination.
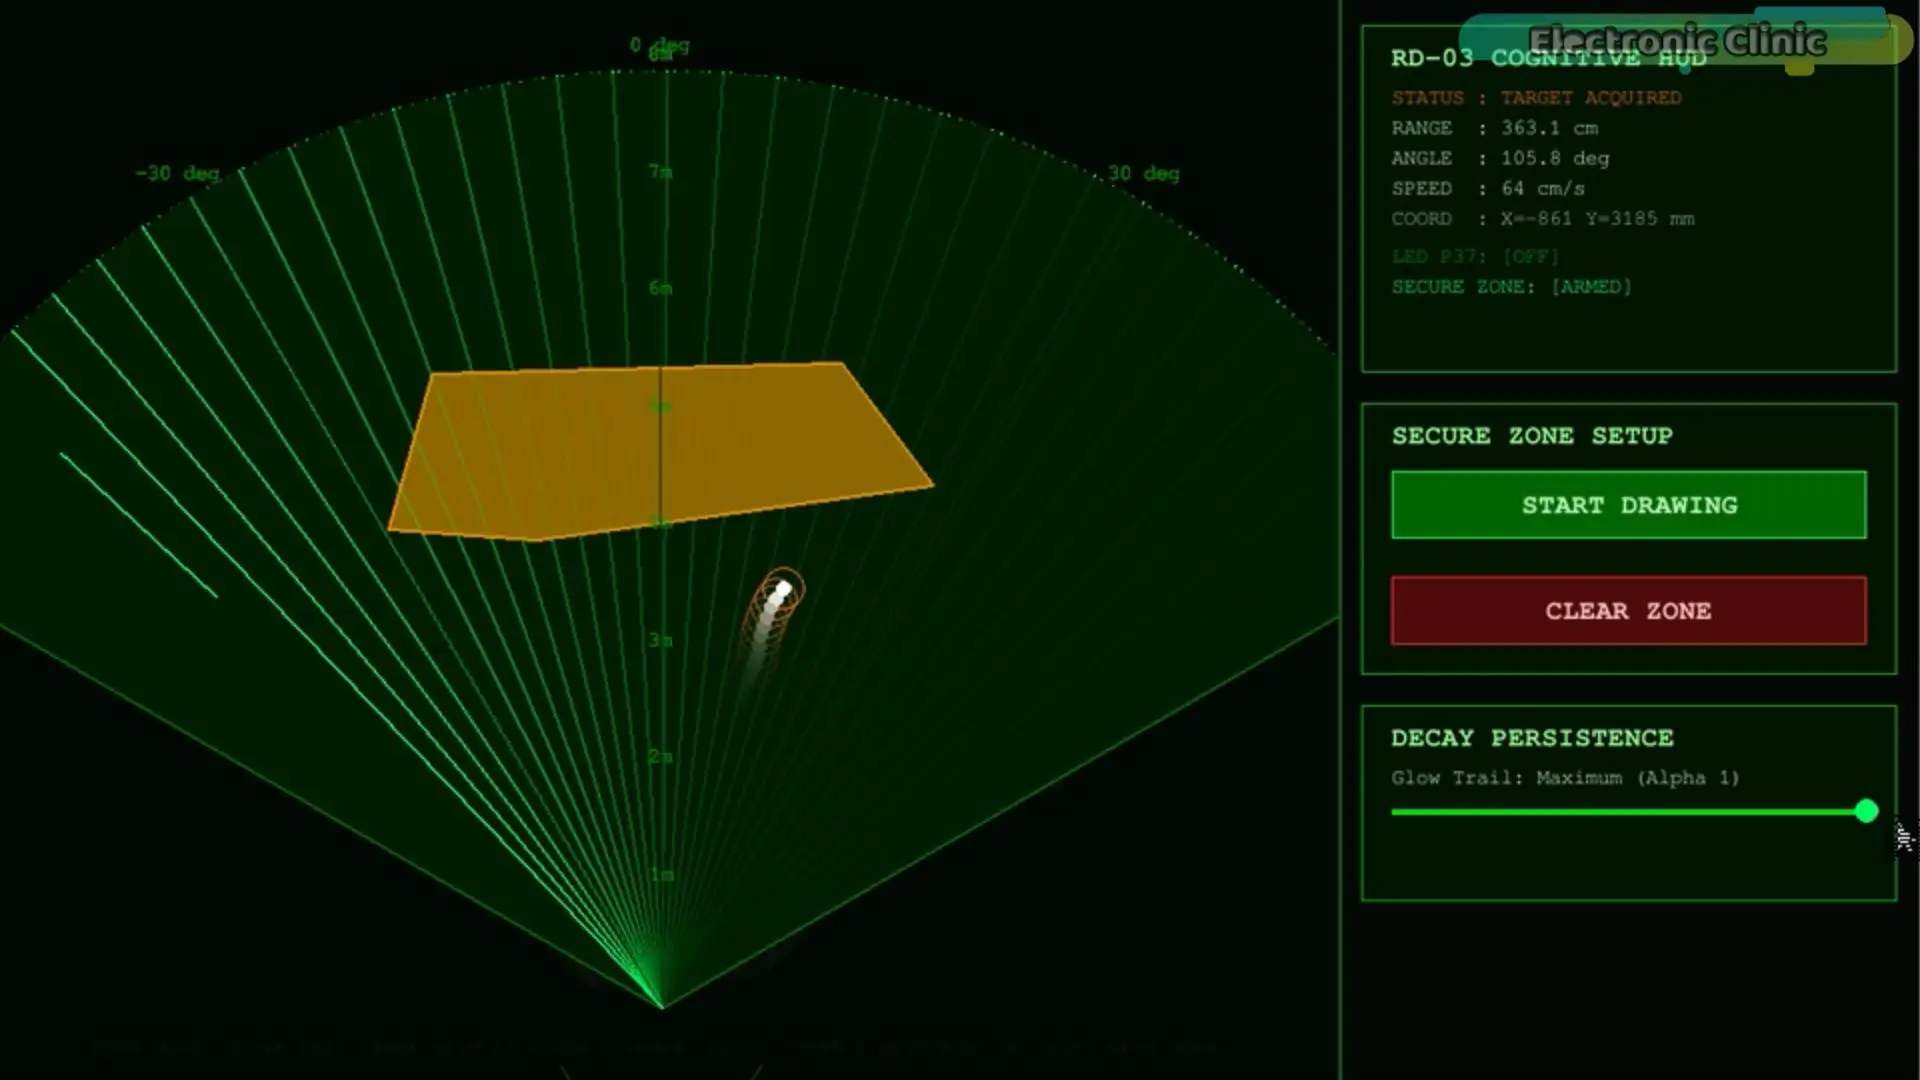
One feature I don’t want you to miss is the Decay Persistence slider. Watch the target trail as I move. Lower the value, and the trail disappears almost immediately for a clean live view. Increase it, and the trail lingers longer, making it easy to visualize the exact path someone has taken through the monitored area. It’s a small adjustment, but it makes analyzing movement much more intuitive.
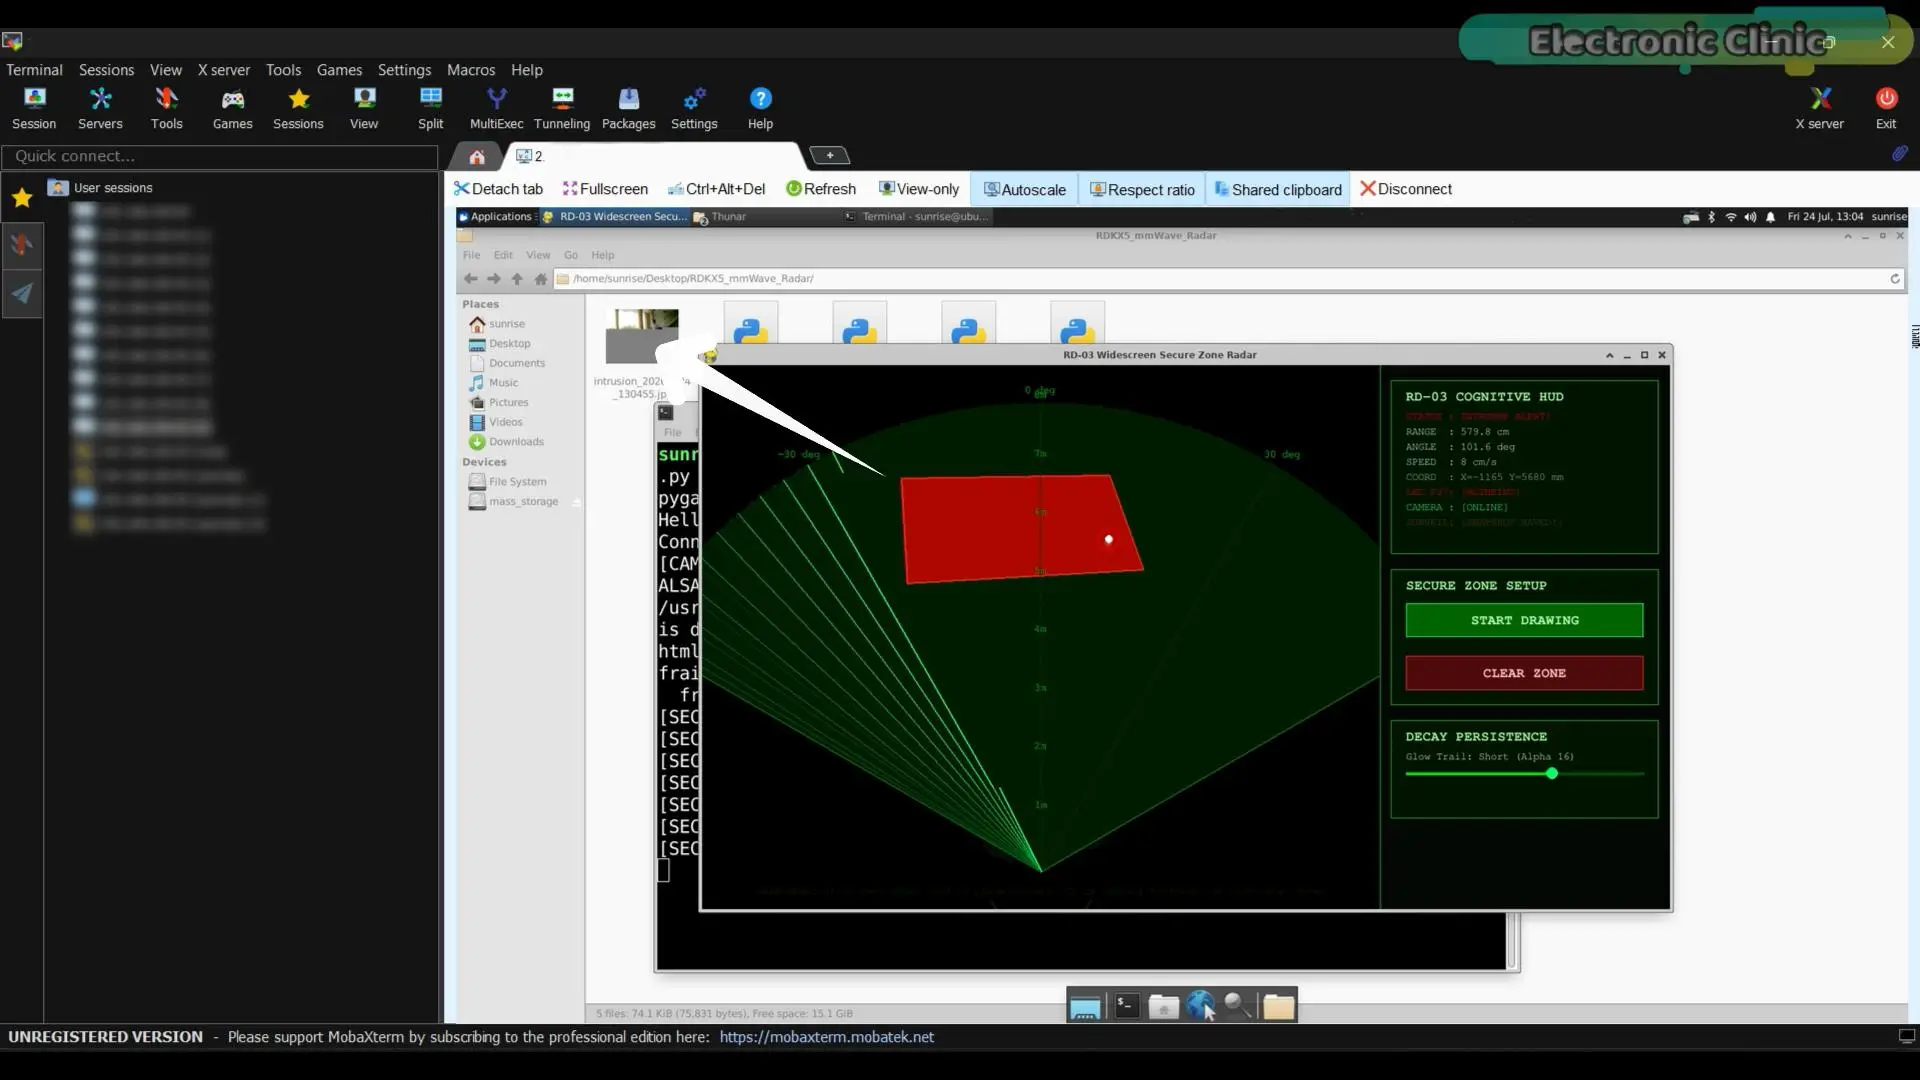
A blinking LED is a nice proof of concept, but it’s not something you would actually deploy. So let’s replace it with something far more useful. I have already written another application where the radar becomes the trigger for a camera. The moment someone enters the secure zone, the RDK X5 captures their photo automatically. Let’s launch it and see how well it works.
sudo python3 radar_interface_camera.py
As you can see, the interface looks familiar, but there’s one major difference. This time, the radar isn’t just watching the area – it’s working together with a USB camera.
The first thing I will do is create a secure zone, just like before. Once it’s armed, the system sits quietly in the background, constantly watching that region. Nothing happens outside the zone.
But here is the real test…
What happens the instant someone crosses the boundary?
Let’s find out.
Now I will walk toward the protected area.
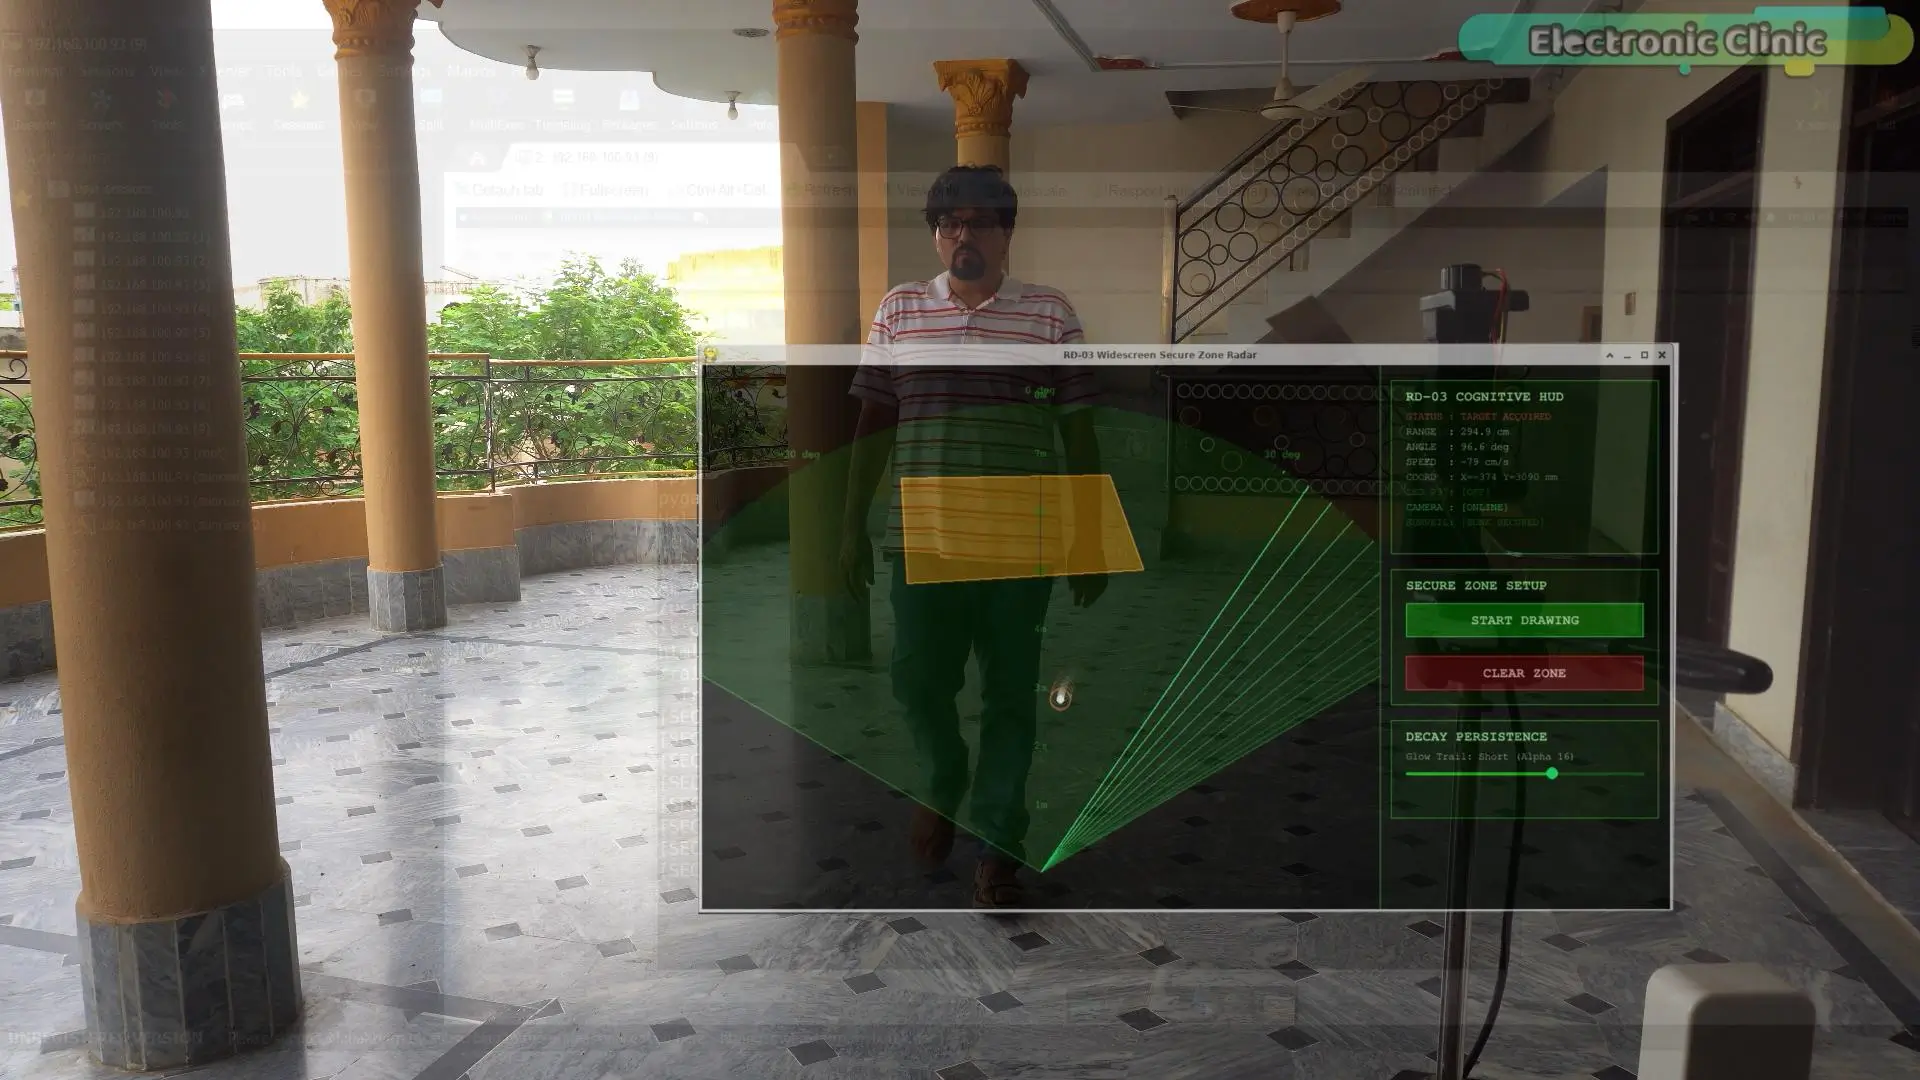
The moment I cross the boundary… the radar detects the intrusion, the LED starts blinking, and at the exact same time, the RDK X5 commands the USB camera to capture a snapshot automatically.
No buttons.
No keyboard.
No human intervention.
Just a person entering the secure zone.
And there it is.
The image is automatically saved with a timestamped filename, giving you a record of exactly when the intrusion occurred. That’s the kind of feature you’d expect from a commercial security system, yet it’s all running on a tiny AI computer with a six-dollar radar sensor.
And this is only scratching the surface.
Instead of saving the image locally, you could upload it to the cloud, send it to your phone, trigger a Telegram or WhatsApp notification, or even run an AI model to identify who just walked into the protected area.
But before we add AI…
We have used the radar to track people. We have turned it into a virtual security system. We have even used it to trigger a camera automatically.
But I kept wondering…
Could this radar control something that’s actually fun?
So I wrote one last application that completely changes what you expect from a six-dollar sensor.
To launch it, simply run:
sudo python3 snake_game.py
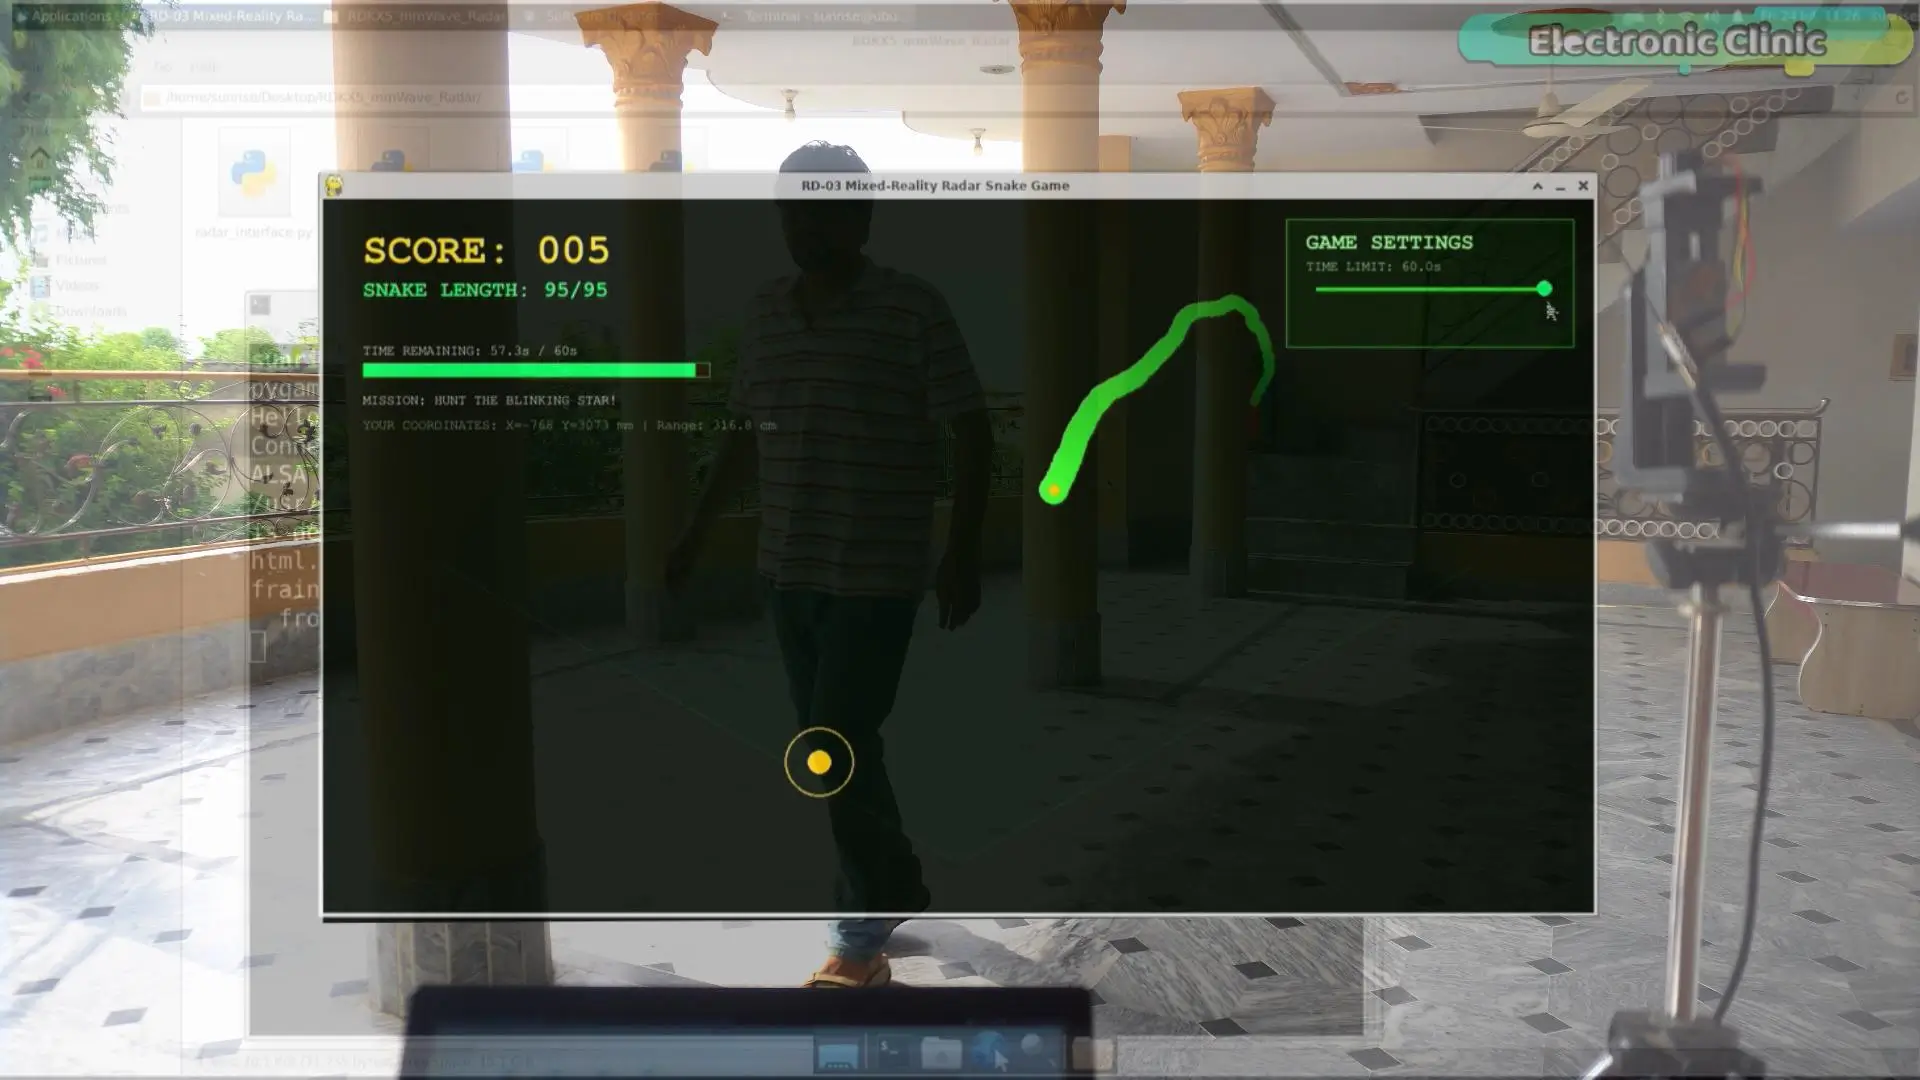
And here it is. This is my radar-controlled snake game running entirely on the RDK X5. At the top, you can see your current score and the snake’s length, so you always know how well you’re doing. Just below that is a countdown timer showing how much time you have left to complete the mission. On the right, there’s a slider that lets you adjust the game duration, making it easier or more challenging depending on how you want to play. And right here in the middle is the blinking target the snake has to reach.
Now, at first glance, this might look like an ordinary snake game.
But it’s not.
There’s no keyboard.
No mouse.
No joystick.
In fact, I am not going to touch the computer at all.
Instead, I become the controller.
Every step I take in front of the radar is translated into movement inside the game. Walk to the left, and the snake moves left. Walk to the right, and it follows. Move forward or backward, and the snake responds in real time.
It’s a fun demonstration, but it also proves something much bigger. If a six-dollar radar sensor can turn my position into game controls, it can just as easily control robots, machines, user interfaces, or almost any software application you can imagine.
But while testing it, I ran into one problem.
To hunt the next blinking target, I had to keep looking at the RDK X5 screen. Since it was sitting several feet away from me – and I was facing the radar – the game looked reversed from my perspective. That made it surprisingly difficult to react quickly and move toward the target.
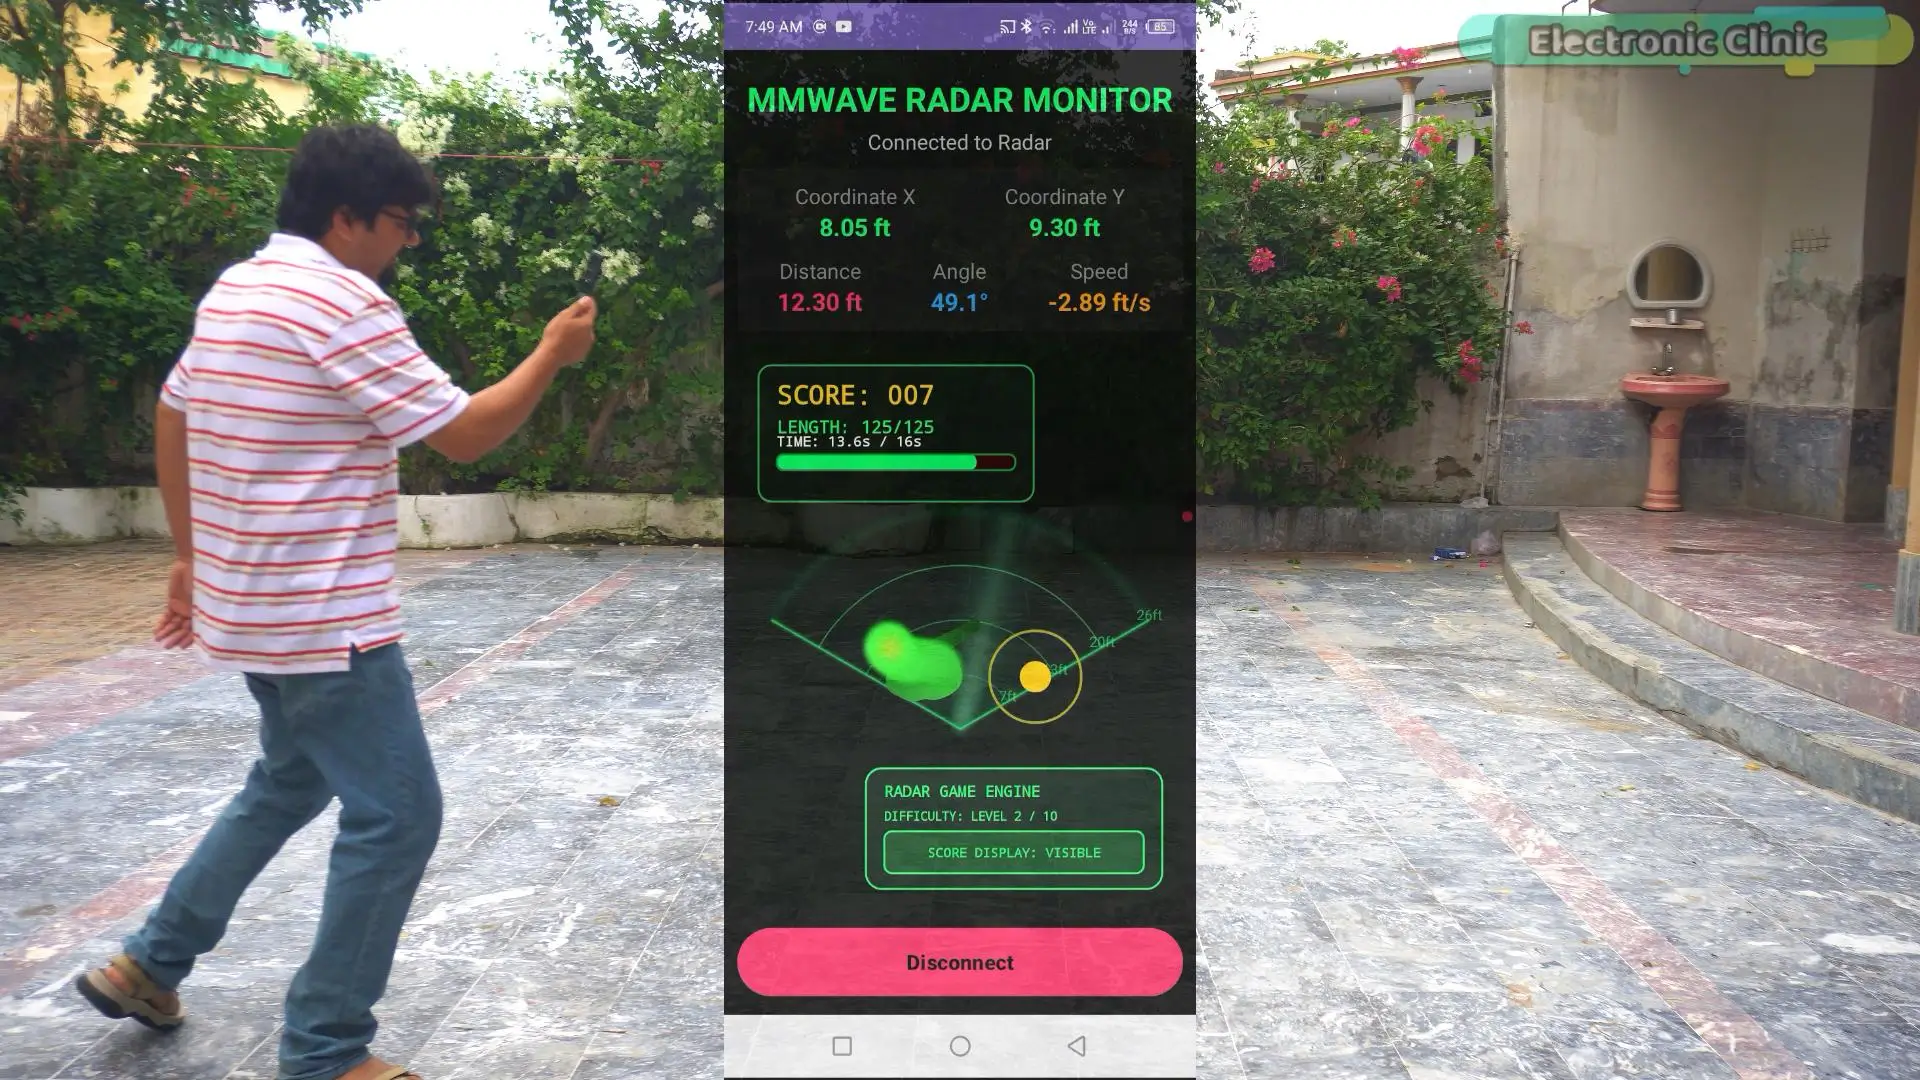
So… I built another solution.
I created a smartphone version of the game.
Now I can simply hold my phone, look at the screen right in front of me, and hunt the targets much more naturally. It feels far more immersive because I no longer have to keep looking back and forth between myself and the RDK X5.
I also made one more improvement. Instead of setting a fixed game duration, the timer now decreases automatically as you play, making every second count and adding much more excitement.
Honestly, it’s a lot more fun than I expected. Since every new target appears at a different location, you never know where you will have to move next. You have to make quick decisions, change direction instantly, and keep moving almost the entire time. After playing for a few minutes, I realized it’s not just a fun radar demo – it actually gets you moving. It turns into a surprisingly good reaction and movement exercise.
Everything you have seen so far uses radar only. In the next video… we are going to combine radar… with AI vision… so the RDK X5 doesn’t just know someone is there… it knows who they are.
So, that’s all for now.
Support me on Patreon:
If you enjoy my work and find these projects helpful, please consider supporting me on Patreon. With just $1, you can get access to all project source codes, schematics, and extra resources that I share with my supporters. Your support helps me continue creating new electronics tutorials, experiments, and open projects for the community. Thank you so much for being part of this journey and for supporting my work!
Watch Video Tutorial:
Discover more from Electronic Clinic
Subscribe to get the latest posts sent to your email.