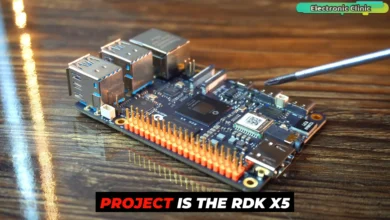
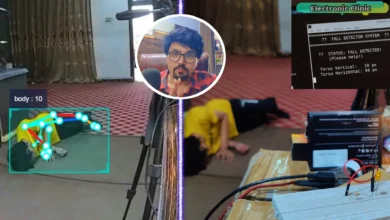
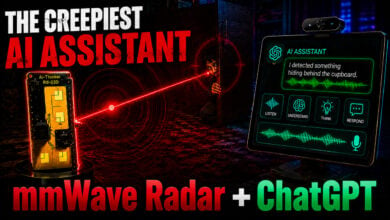
DeepSeek AI on RDK X5 Can Guide Blind People in Real Time
Last Updated on September 16, 2026 by Engr. Shahzada Fahad
Table of Contents
Description:
What if a camera could think, speak, and guide a blind person through the real world; in real time? In this project, I combined DeepSeek V4 with the RDK X5 to build an AI vision assistant that doesn’t just detect objects, but understands the scene, prioritizes danger, and speaks like a human guide. This is Version 2; and it changes everything.
Today, I am turning a simple camera into a real AI assistant
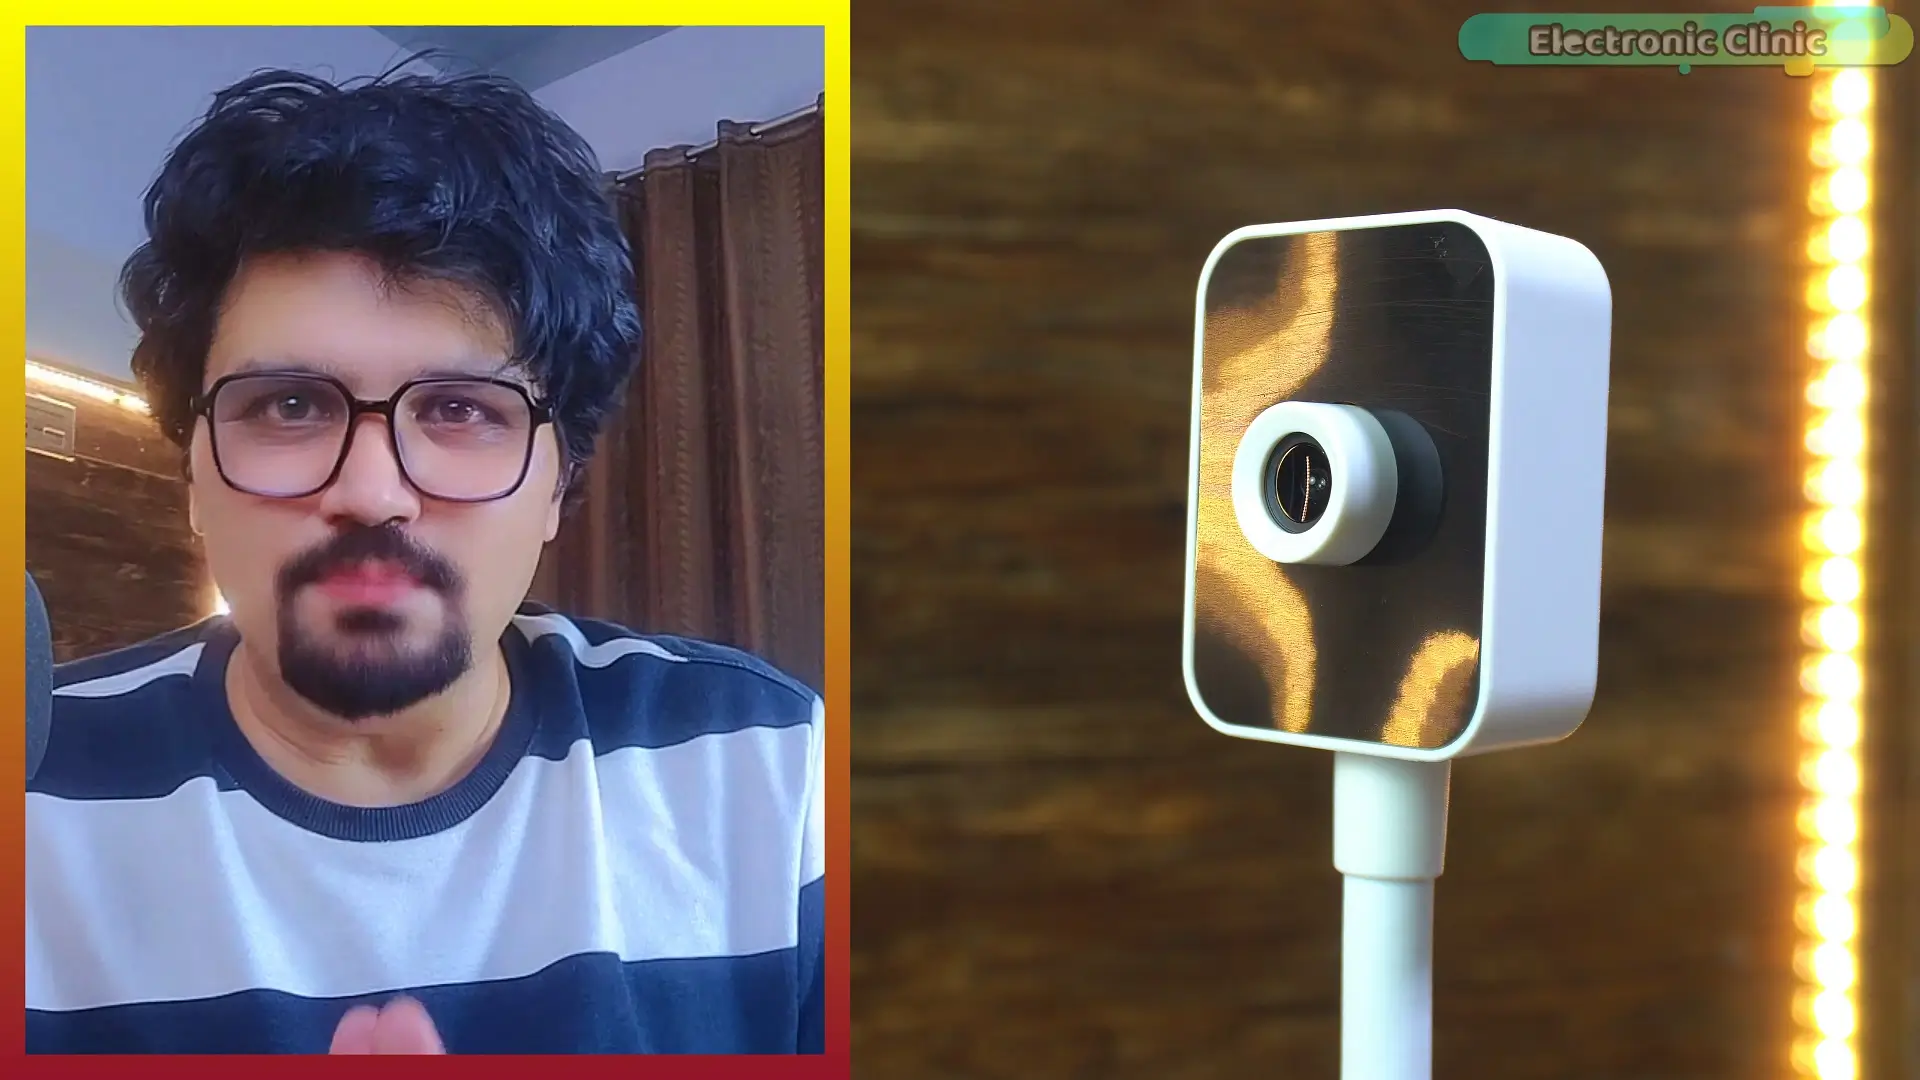
using DeepSeek V4 and the RDK X5…
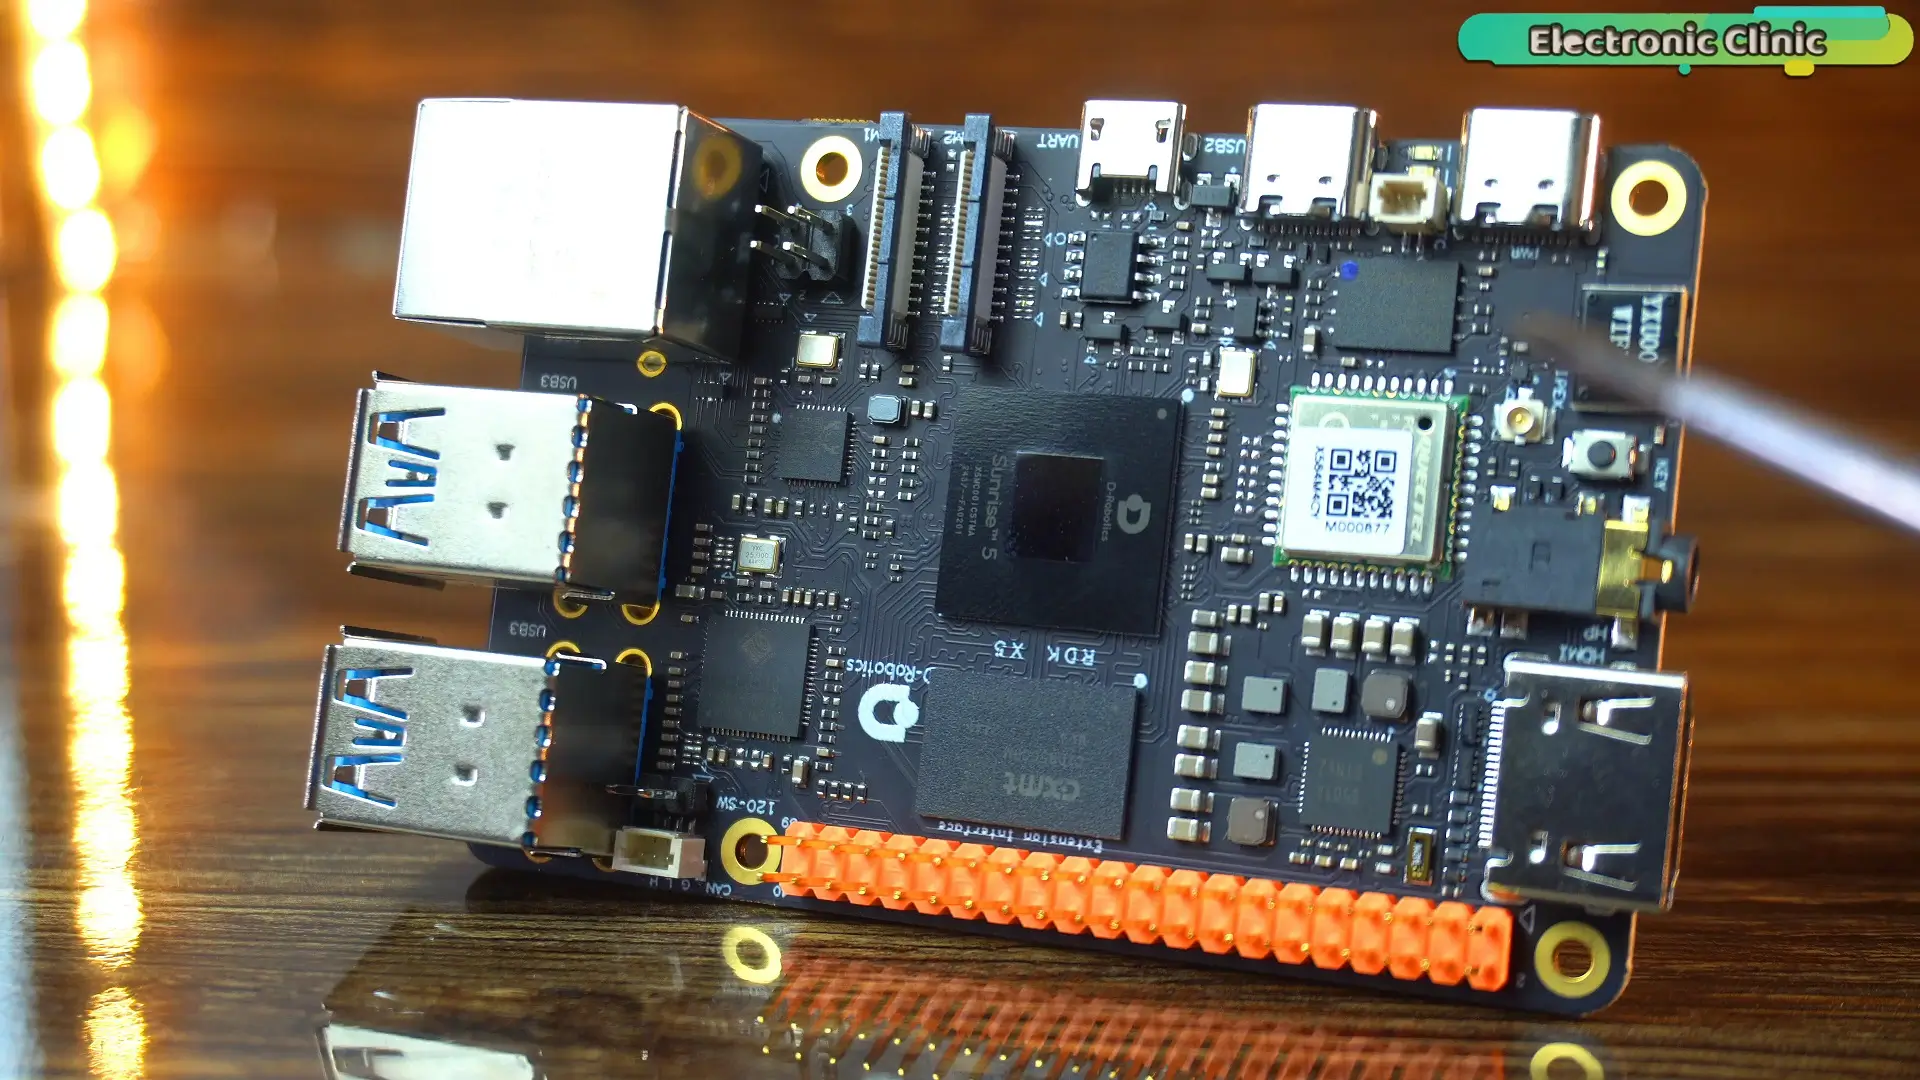
And what it can do for visually impaired people is honestly insane.
Imagine walking outside…but you can’t see anything.
Now imagine…
Your camera doesn’t just detect objects…
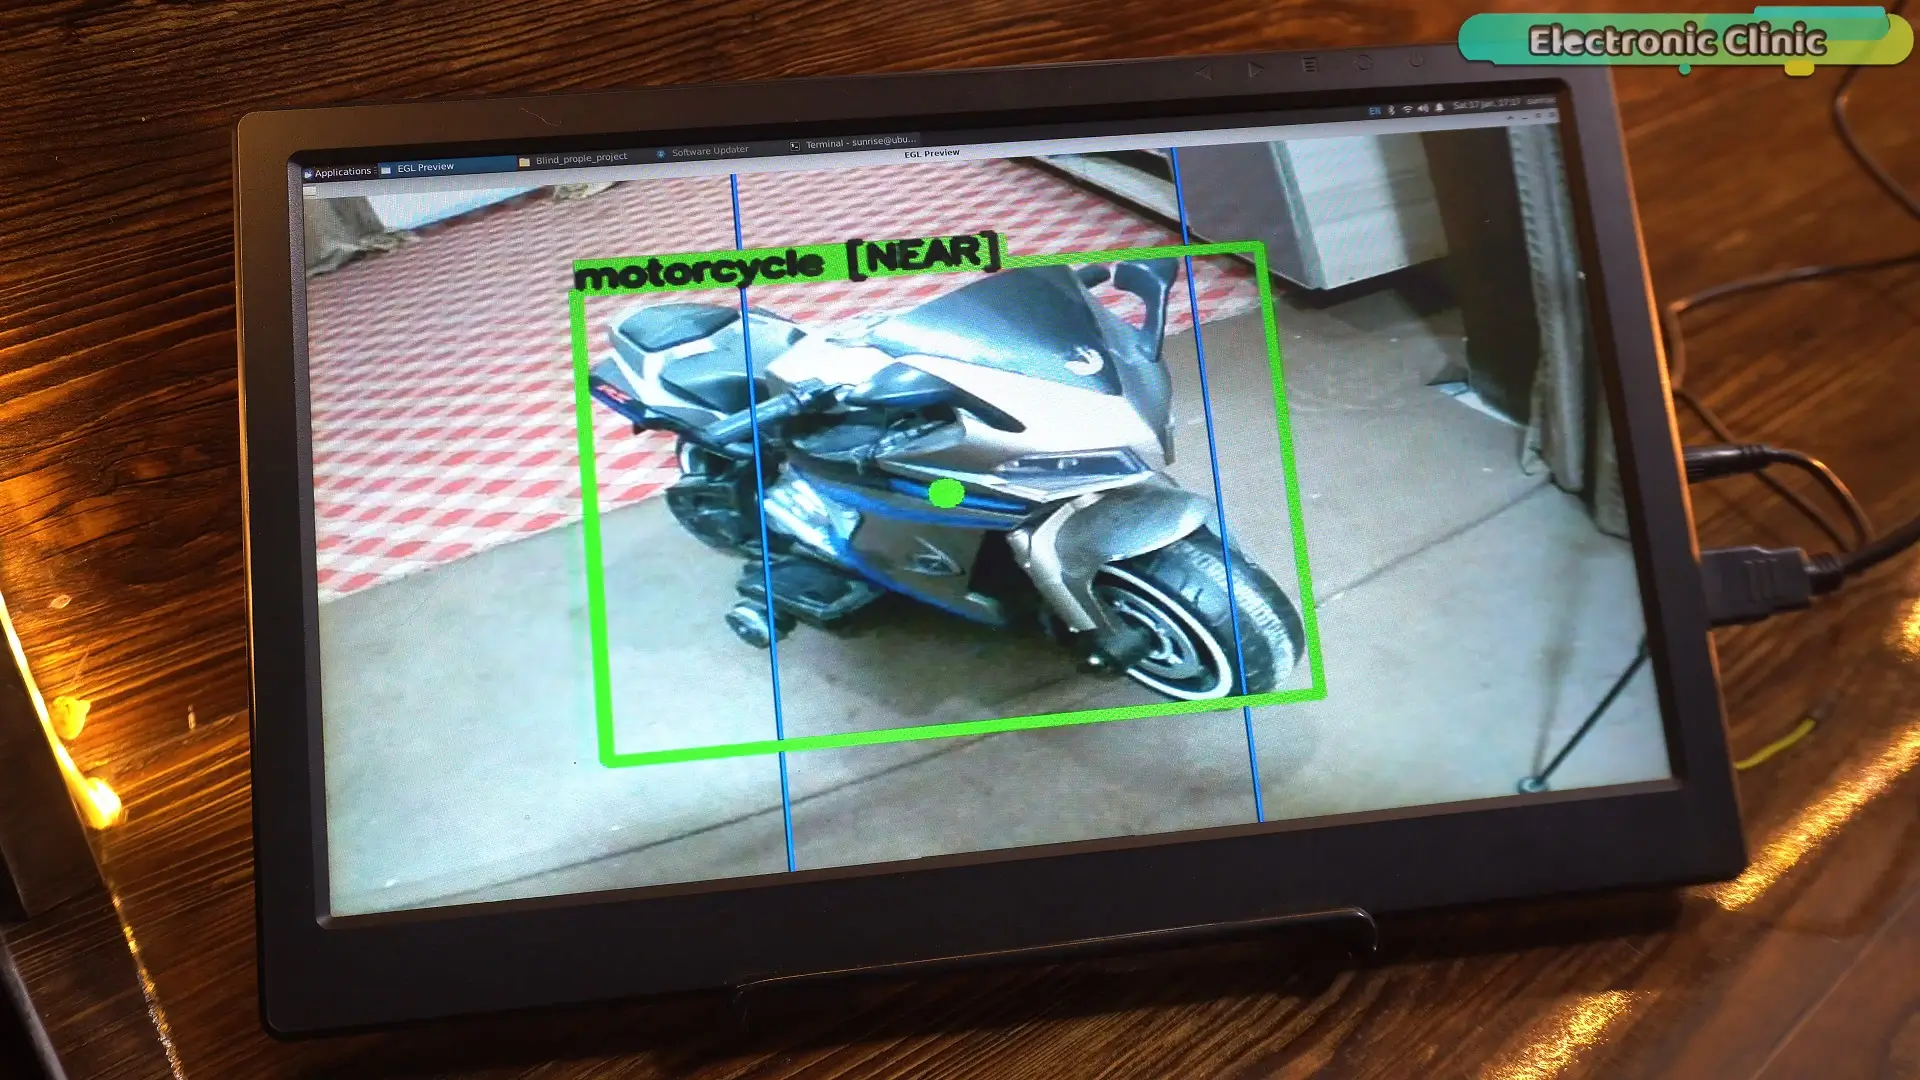
But, it actually TALKS like a human and guides you.
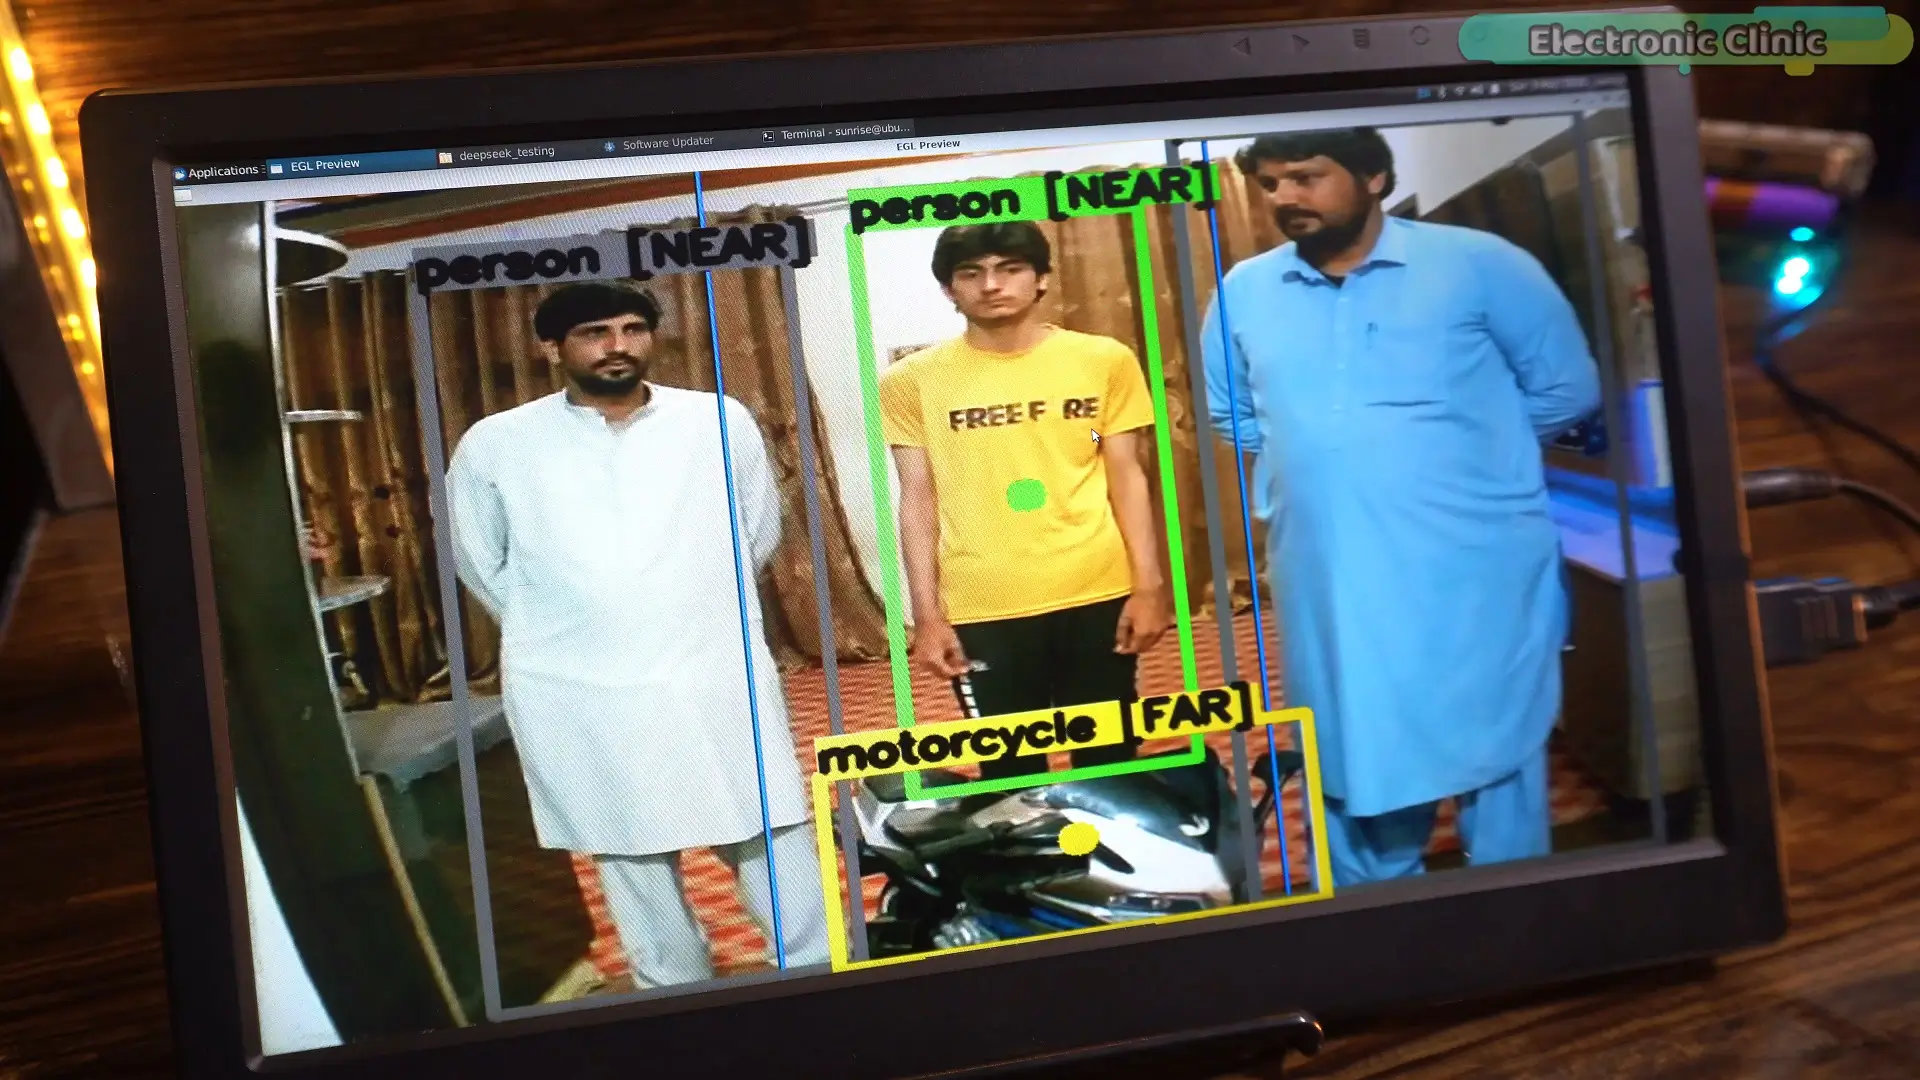
“Person approaching from the left, move right”
This… is Version 2 of my AI vision system.
But this time… it’s not just detecting objects.
It’s understanding the world…
thinking about what actually matters…
And speaking like a real human assistant.
Amazon Links:
Other Tools and Components:
ESP32 WiFi + Bluetooth Module (Recommended)
Arduino Nano USB C type (Recommended)
*Please Note: These are affiliate links. I may make a commission if you buy the components through these links. I would appreciate your support in this way!
In my previous article AI That Talks for the Blind, a real-time object detection system using the RDK X5.
It could:
Detect objects
Identify distance
Speak simple warnings like “person”, “car”, “motorcycle”, “bus”
And honestly… it worked.
But there was one big problem…
Version 1 was too robotic.
It only said:
“person”
“car”
“dog”
That’s not how humans communicate.
A visually impaired person doesn’t just need detection…
They need understanding.
They need:
Context
Direction
Priority
Basically… they need intelligence
So in Version 2…
I integrated DeepSeek V4
Now instead of just detecting objects…
The system analyzes the entire scene.
It understands:
What is dangerous
What is important
Where the object is
And what the user should do
And then it generates a natural spoken sentence.
“Car approaching from the right, stay left.”“real voice output of the version 2”
That’s a huge difference.
With DeepSeek:
It reduces confusion
It prioritizes danger
It gives actionable guidance
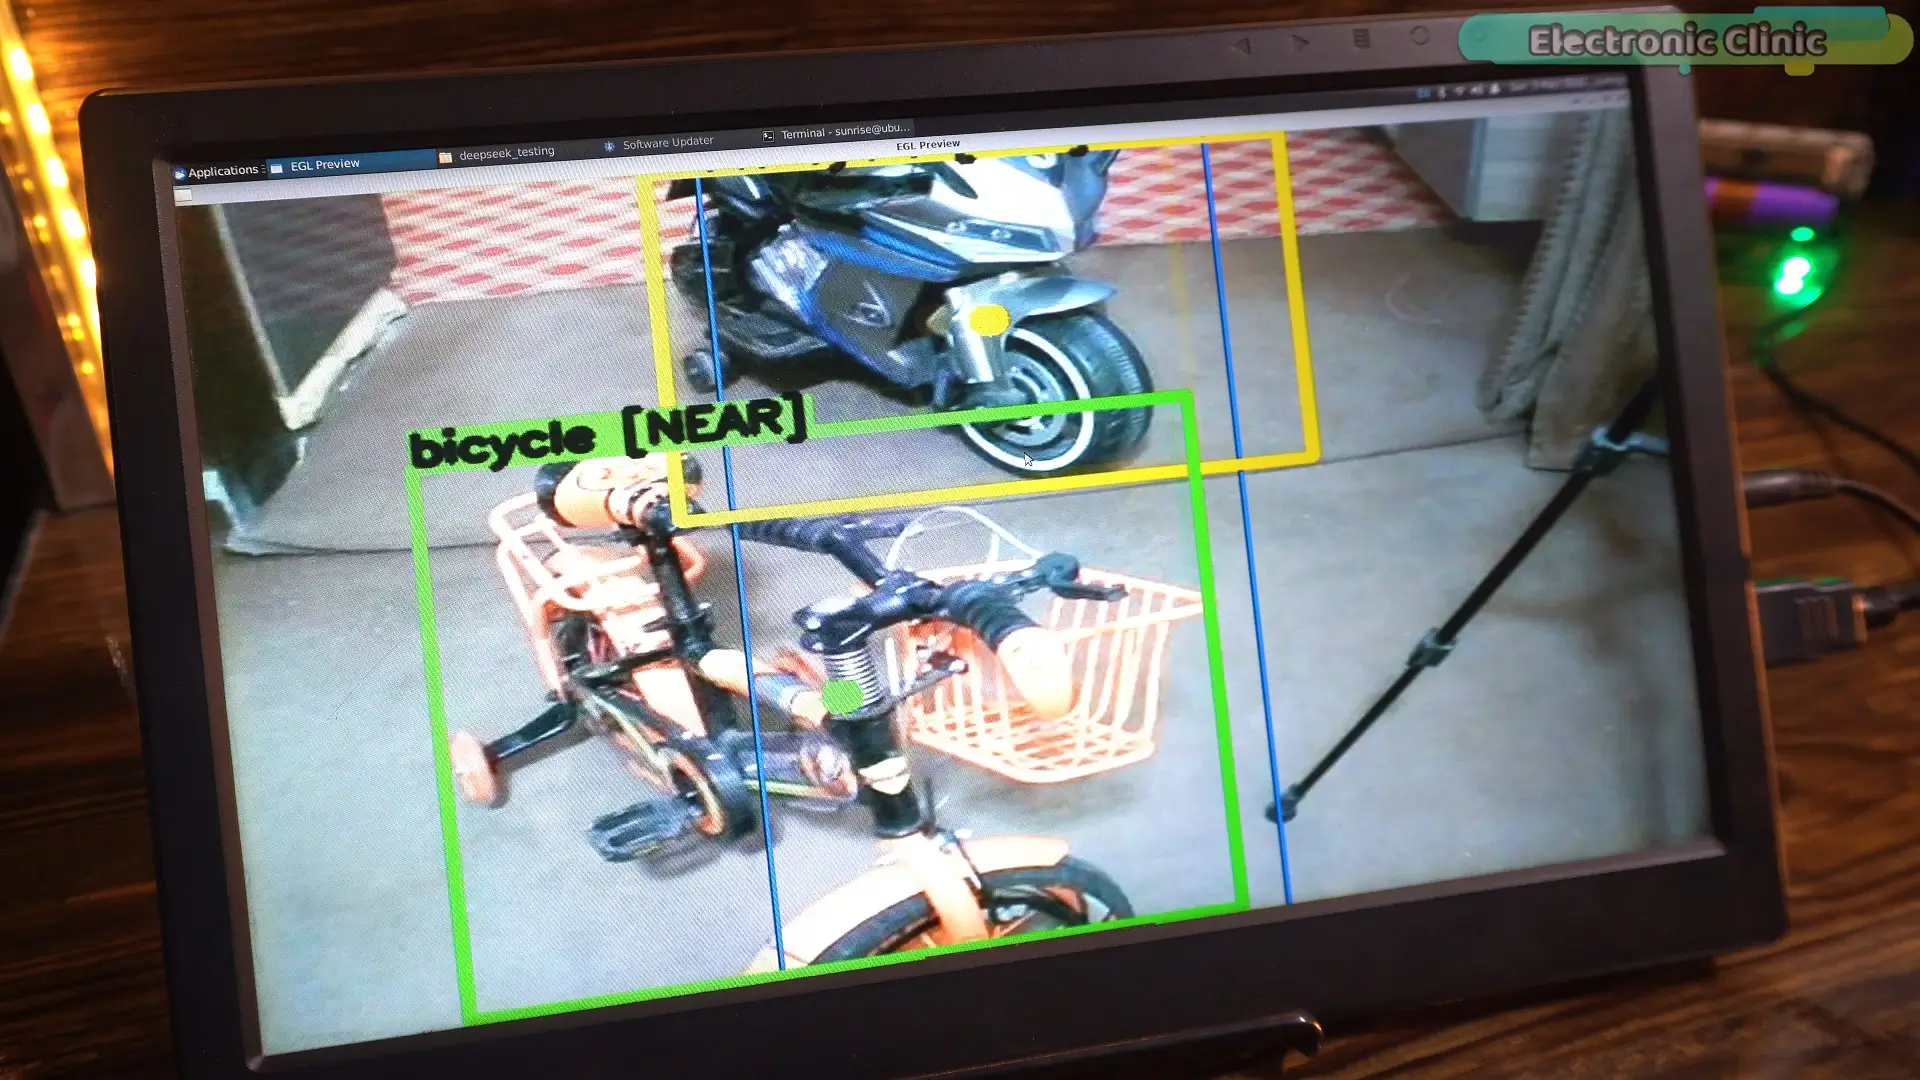
It feels like a real assistant, not a machine
Instead of overwhelming the user with noise…
it gives one clear instruction at a time.
And that’s exactly what matters in real-world navigation.
Here’s the best part…
We didn’t rebuild everything from scratch.
We used the same:
Detection model
Camera pipeline and
Distance logic from Version 1.
We only added:
API integration
Scene analysis logic and
Smart prompt
So if you already built Version 1…
You are 90% done already.
Now, let me explain step by step, how to do it.
HOW TO GET DEEPSEEK API KEY:
To use DeepSeek V4, you will need an API key.
So here is how to get it step by step.
First, go to the DeepSeek official website…
and click on “Access API.”
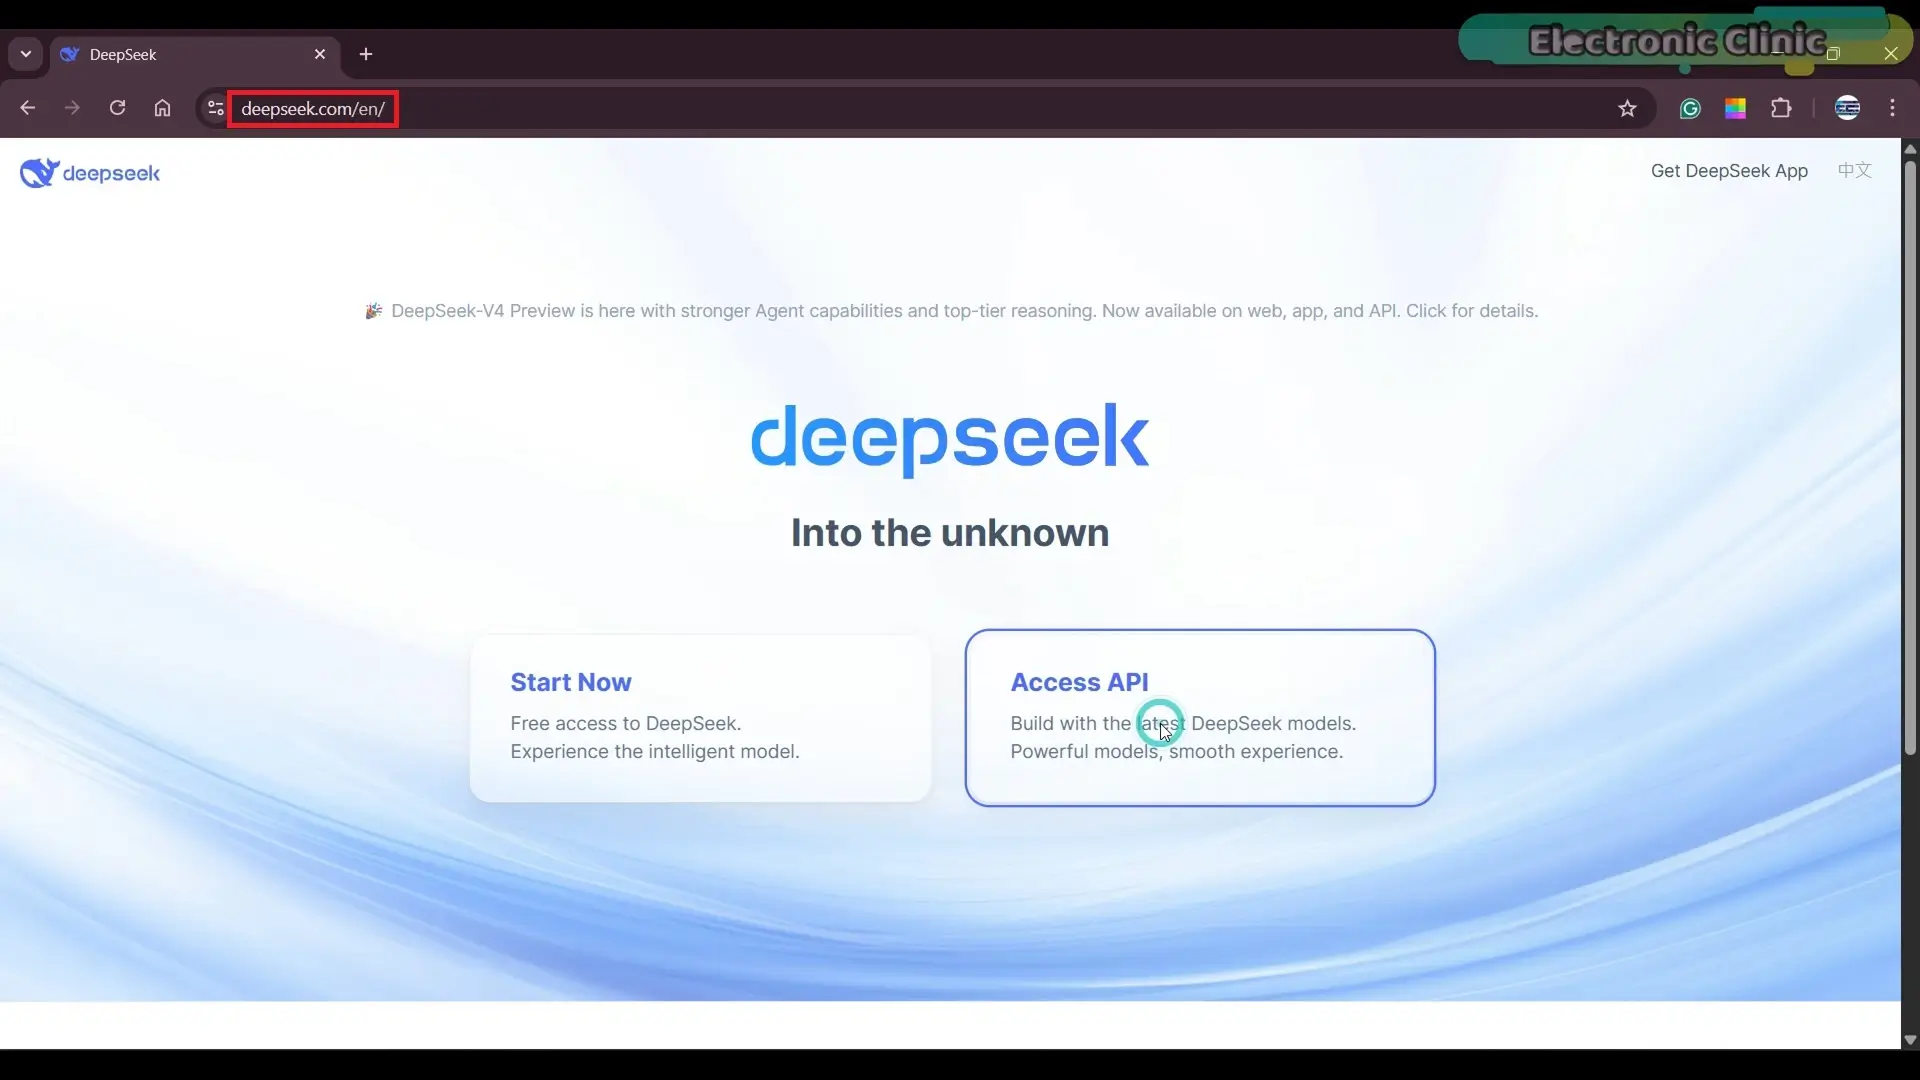
Now if you already have an account…
just hit Log In.
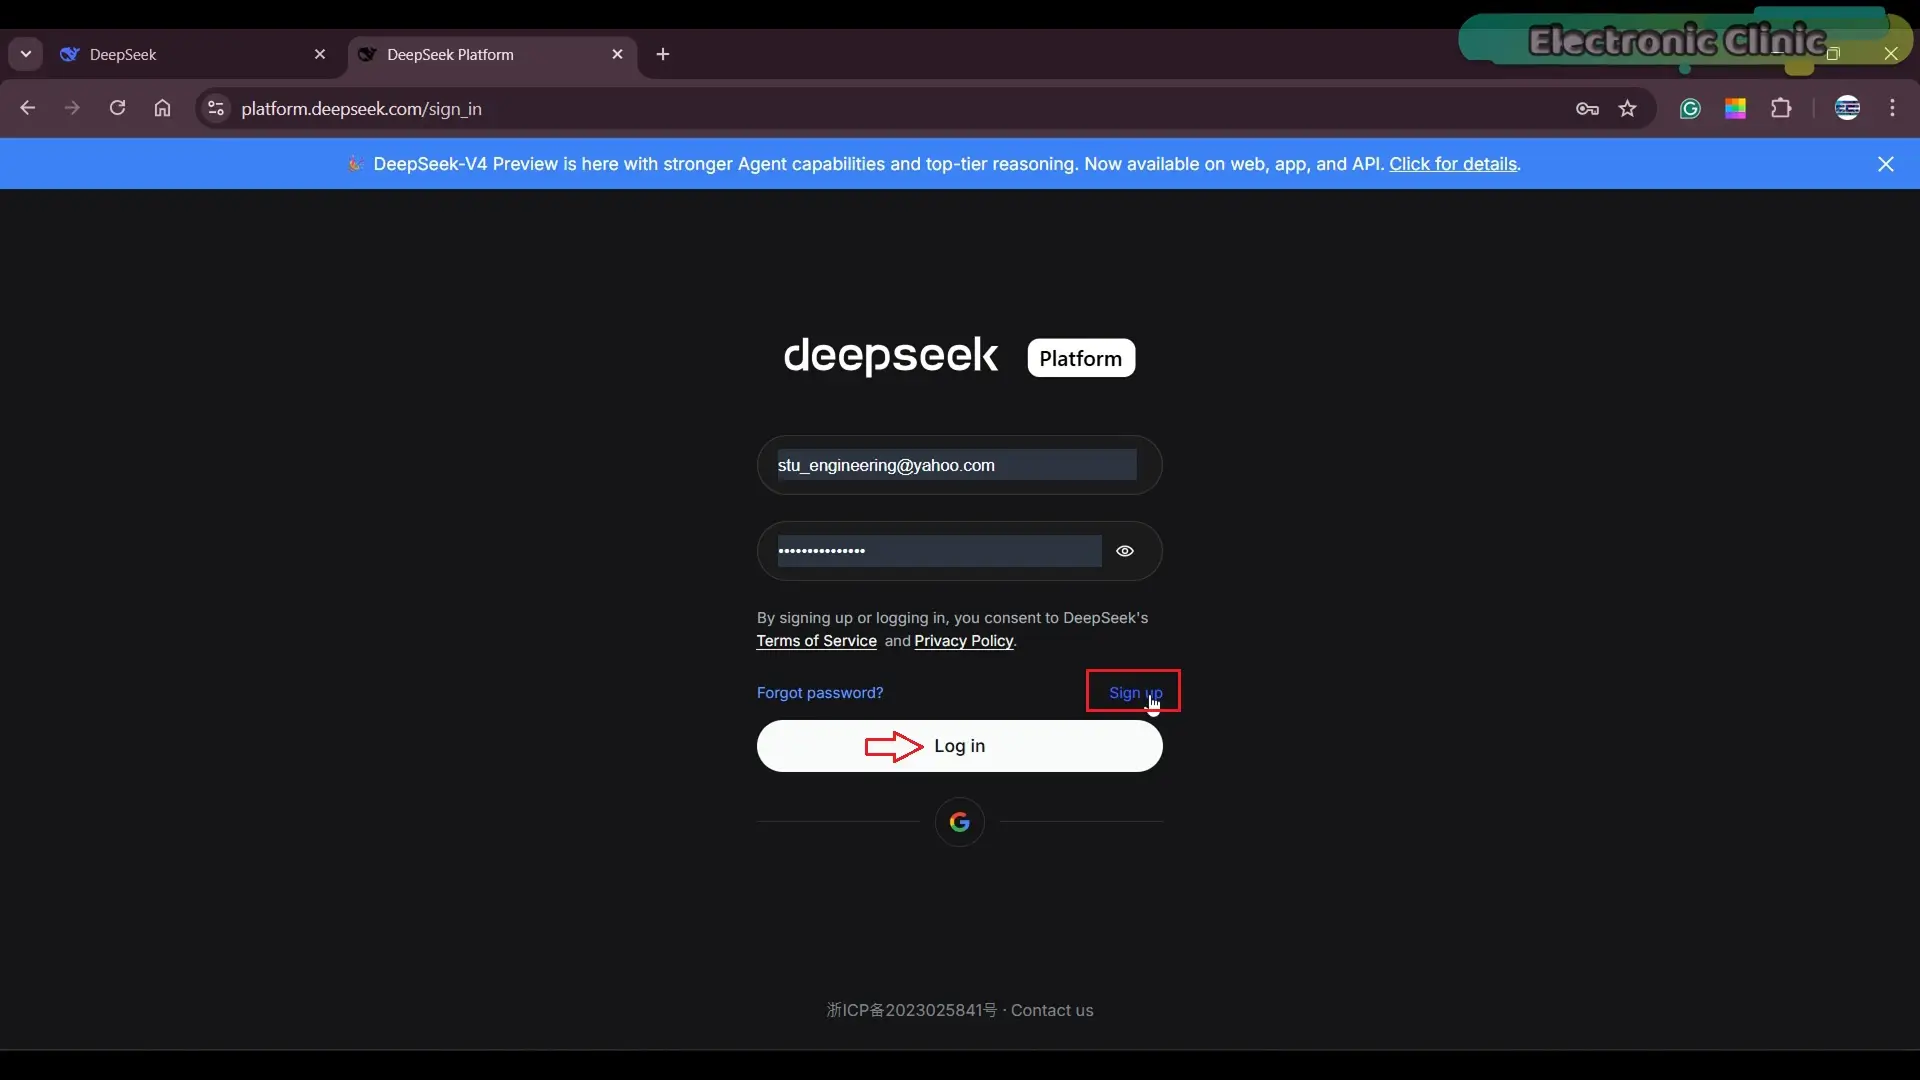
But if you are new…
click on Sign Up and create your account.
Once you enter your details…
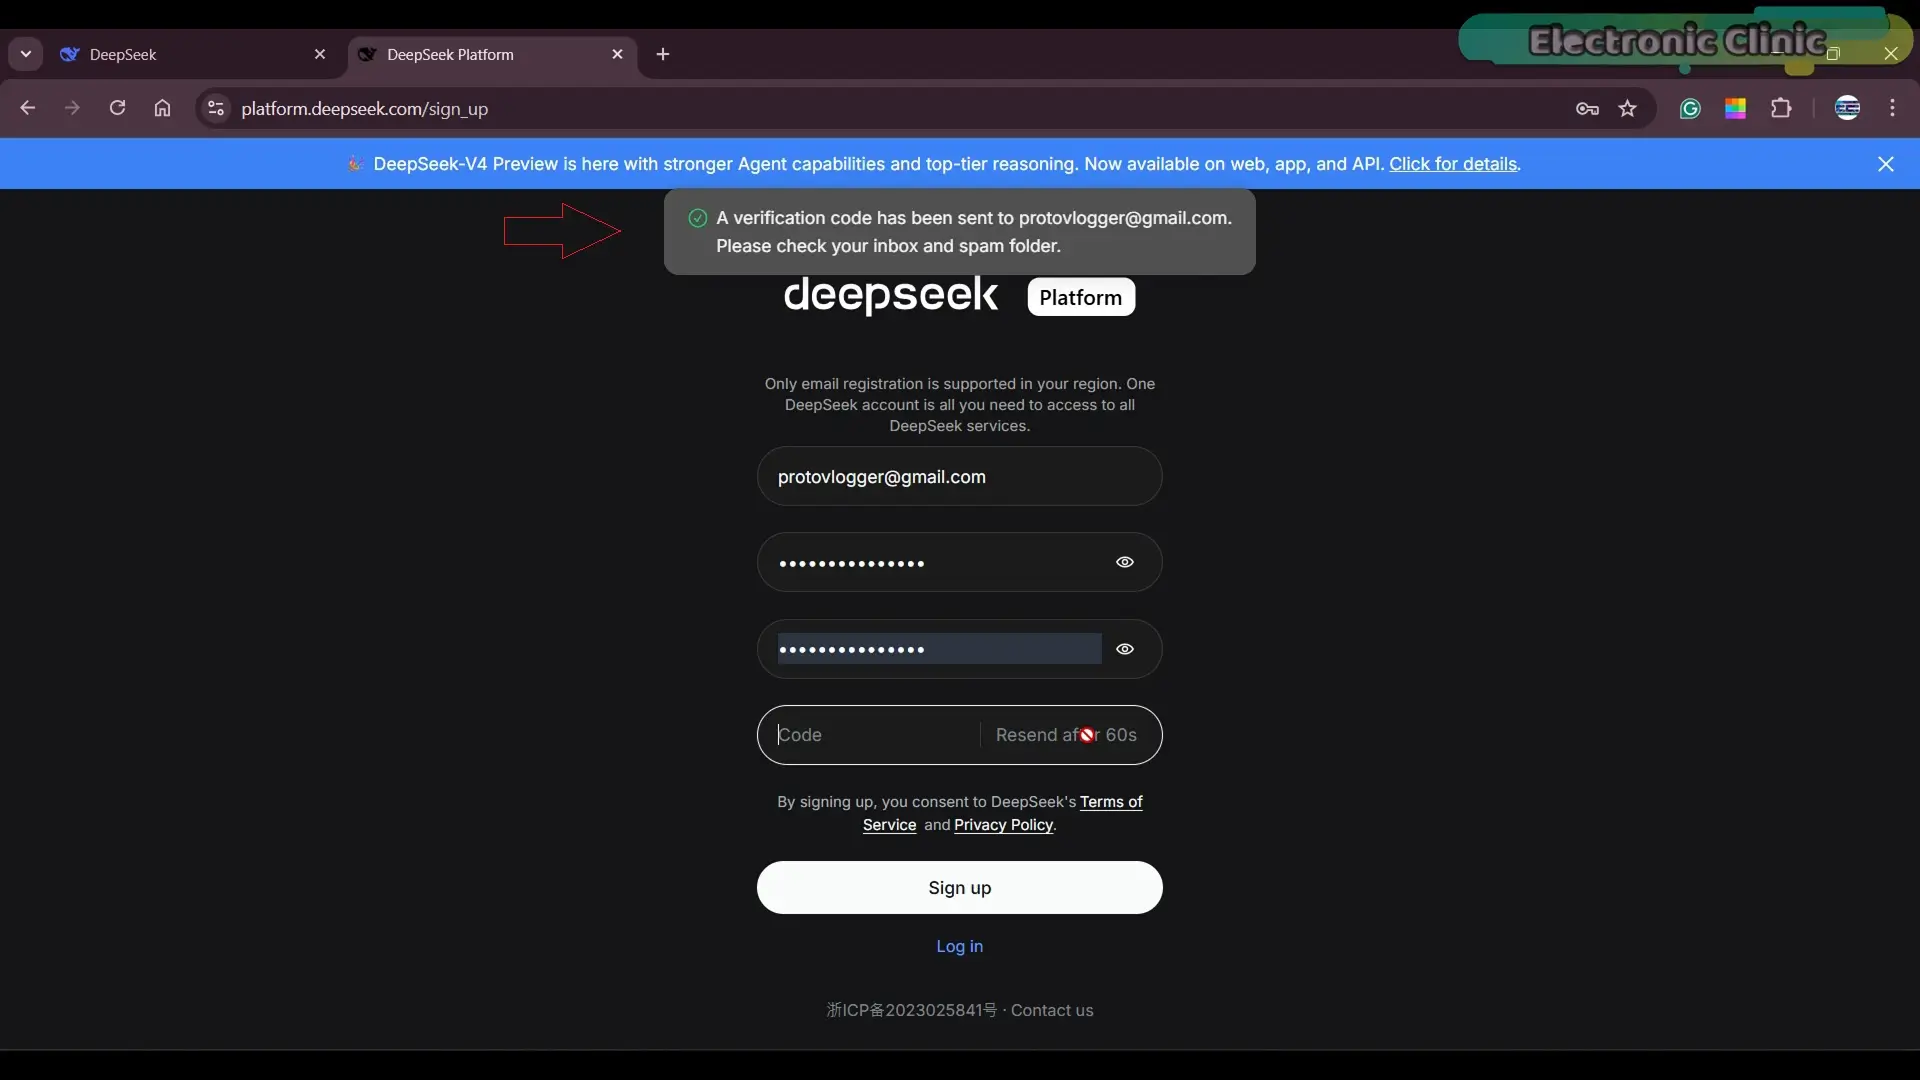
paste the verification code…
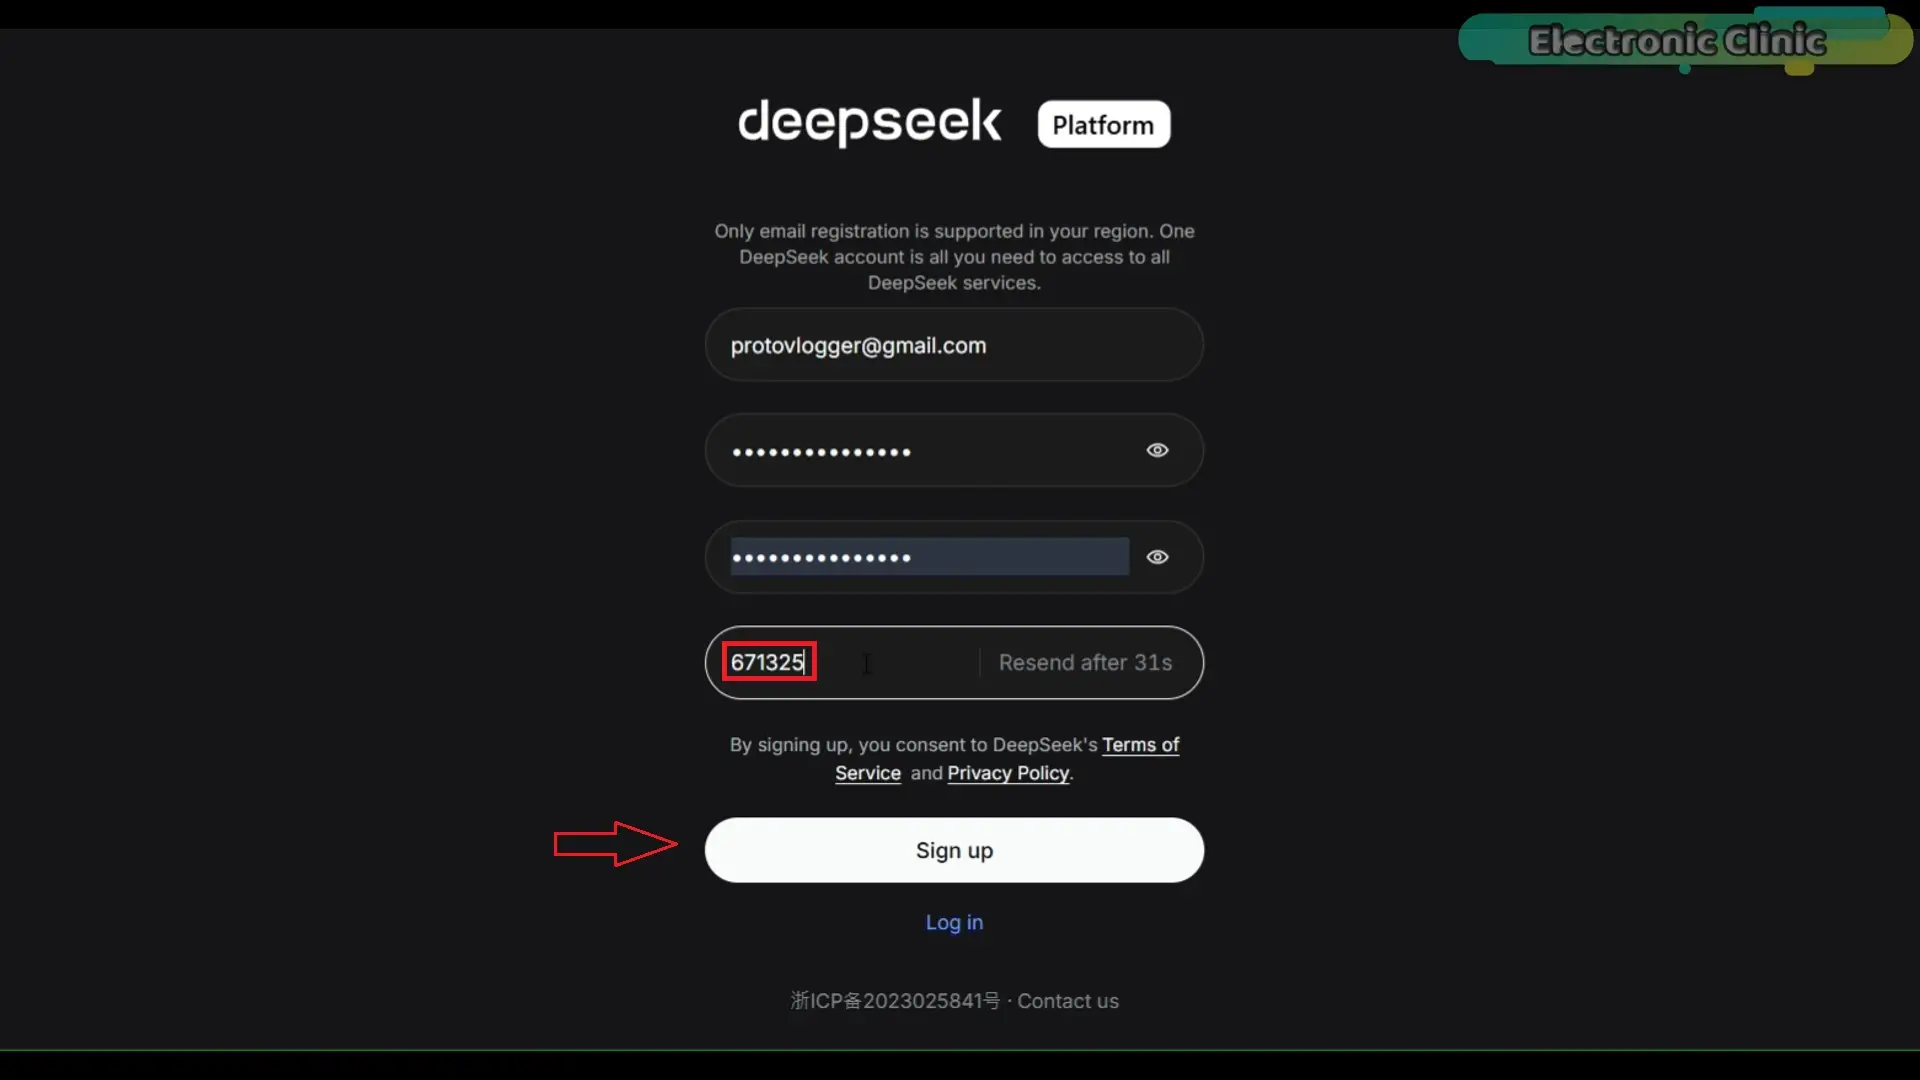
And press the Sign Up button to continue.
Now, when you log in for the first time…
You will notice your balance is zero.
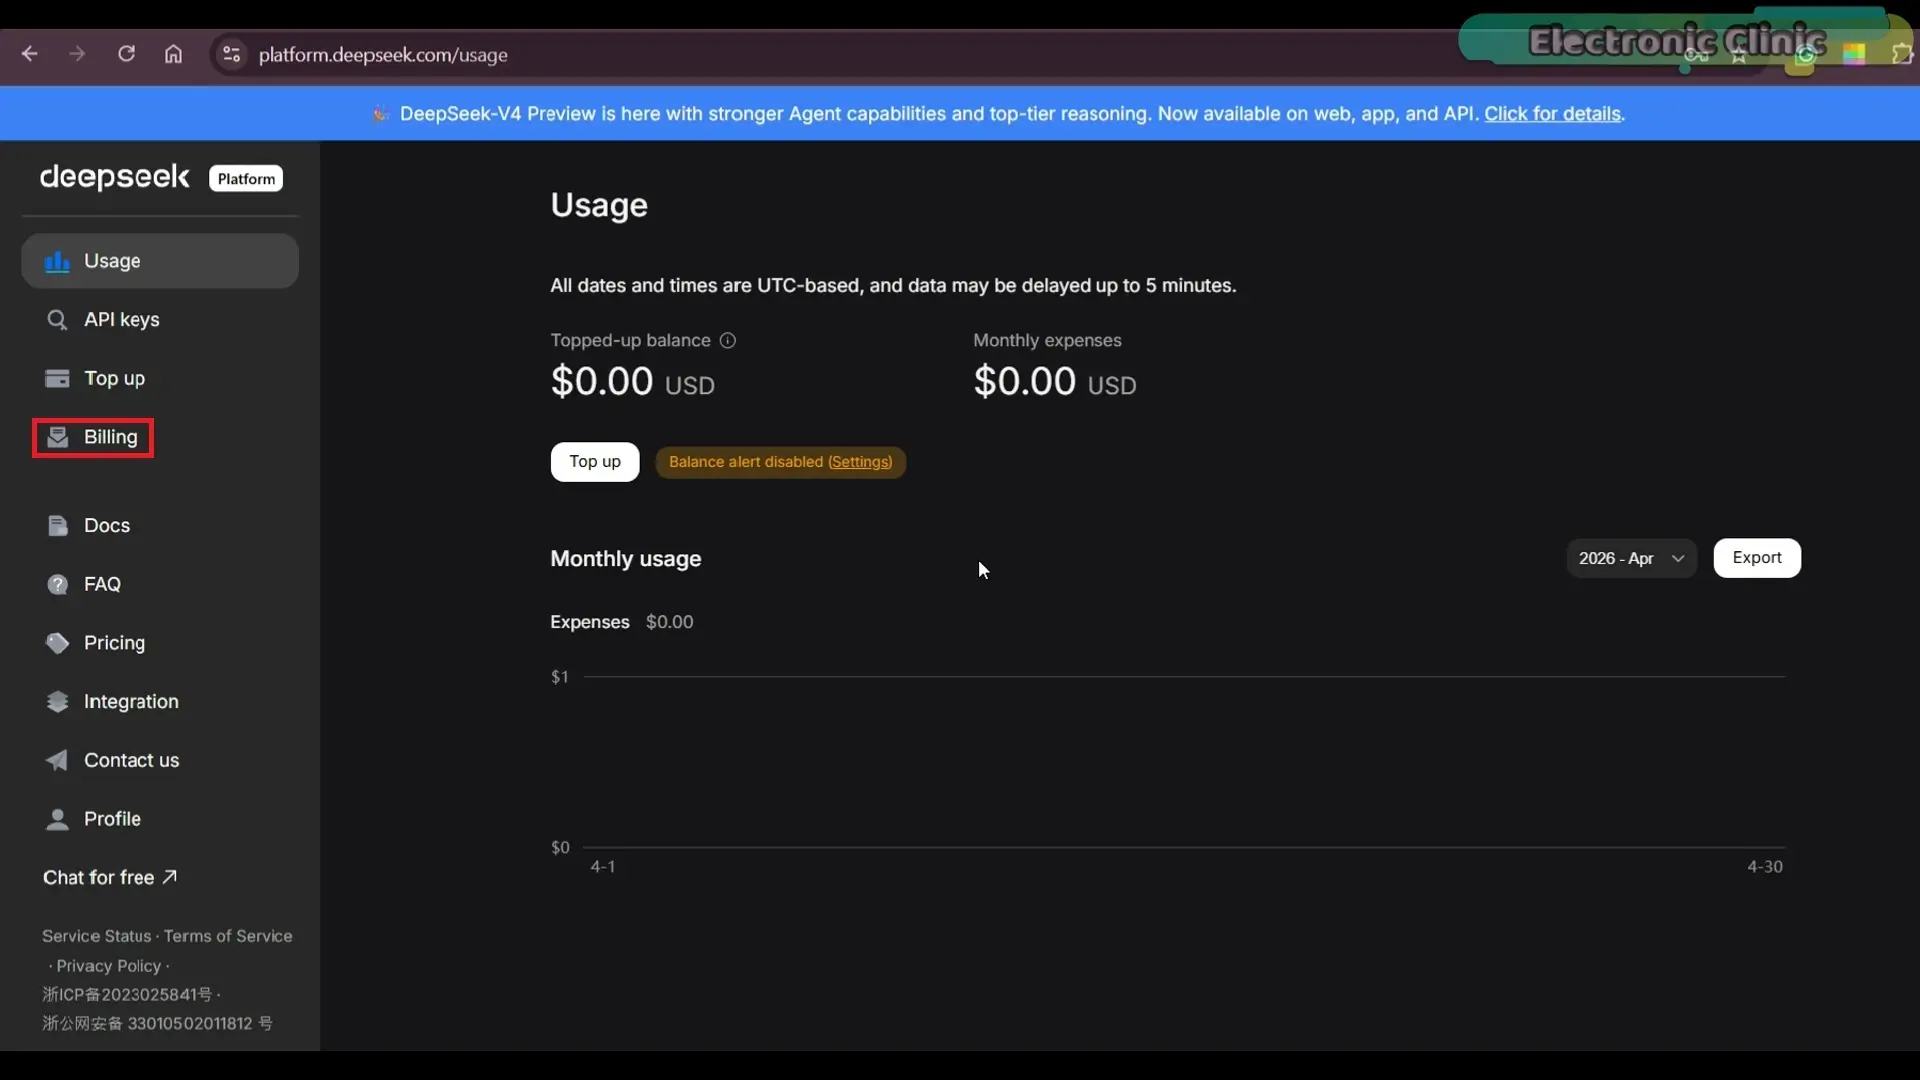
So what you need to do is:
Go to the Billing section
and top up your account.
I am not going too deep into this part
because it’s pretty simple.
Once your balance is added…
Head over to the API section.
As you can see on my screen,
I have already created an API key.
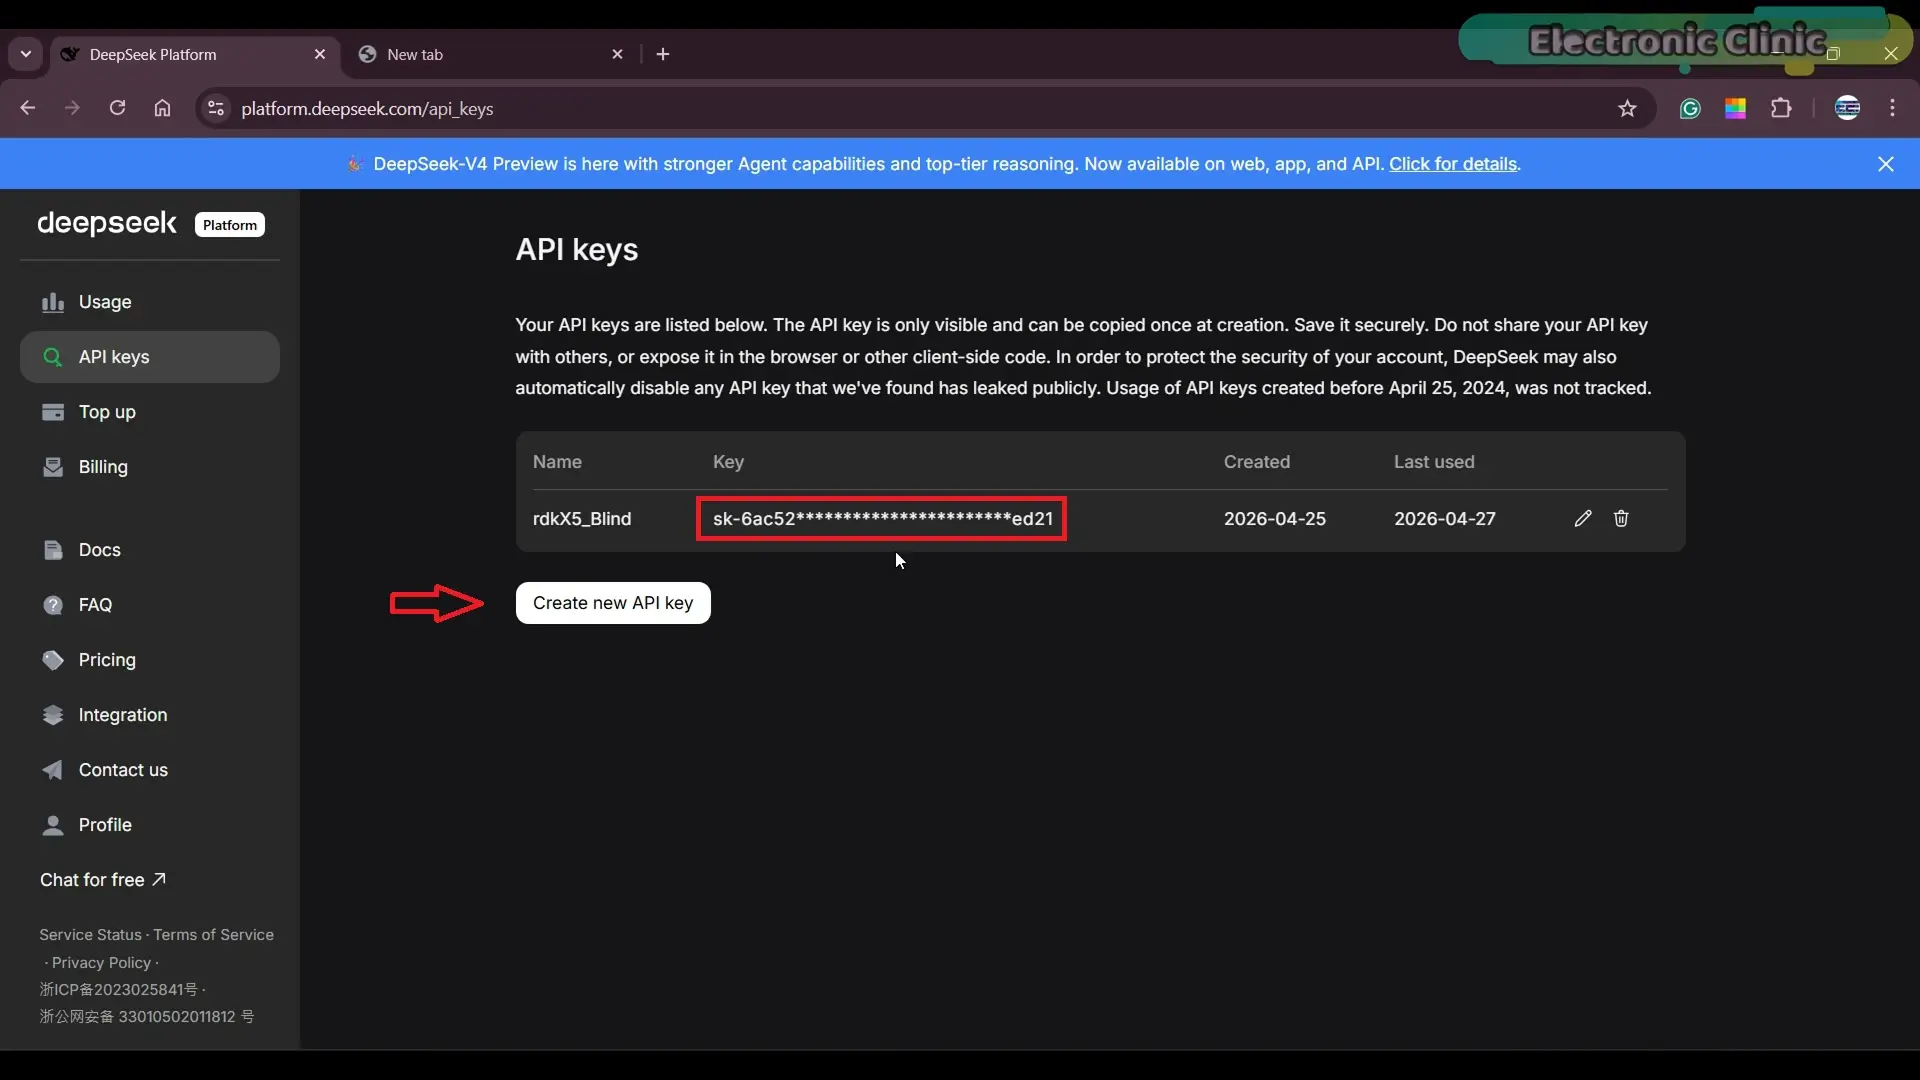
To generate yours:
Click on “Create New API Key”
And that’s it.
Your API key will be created instantly.
Now just copy it…
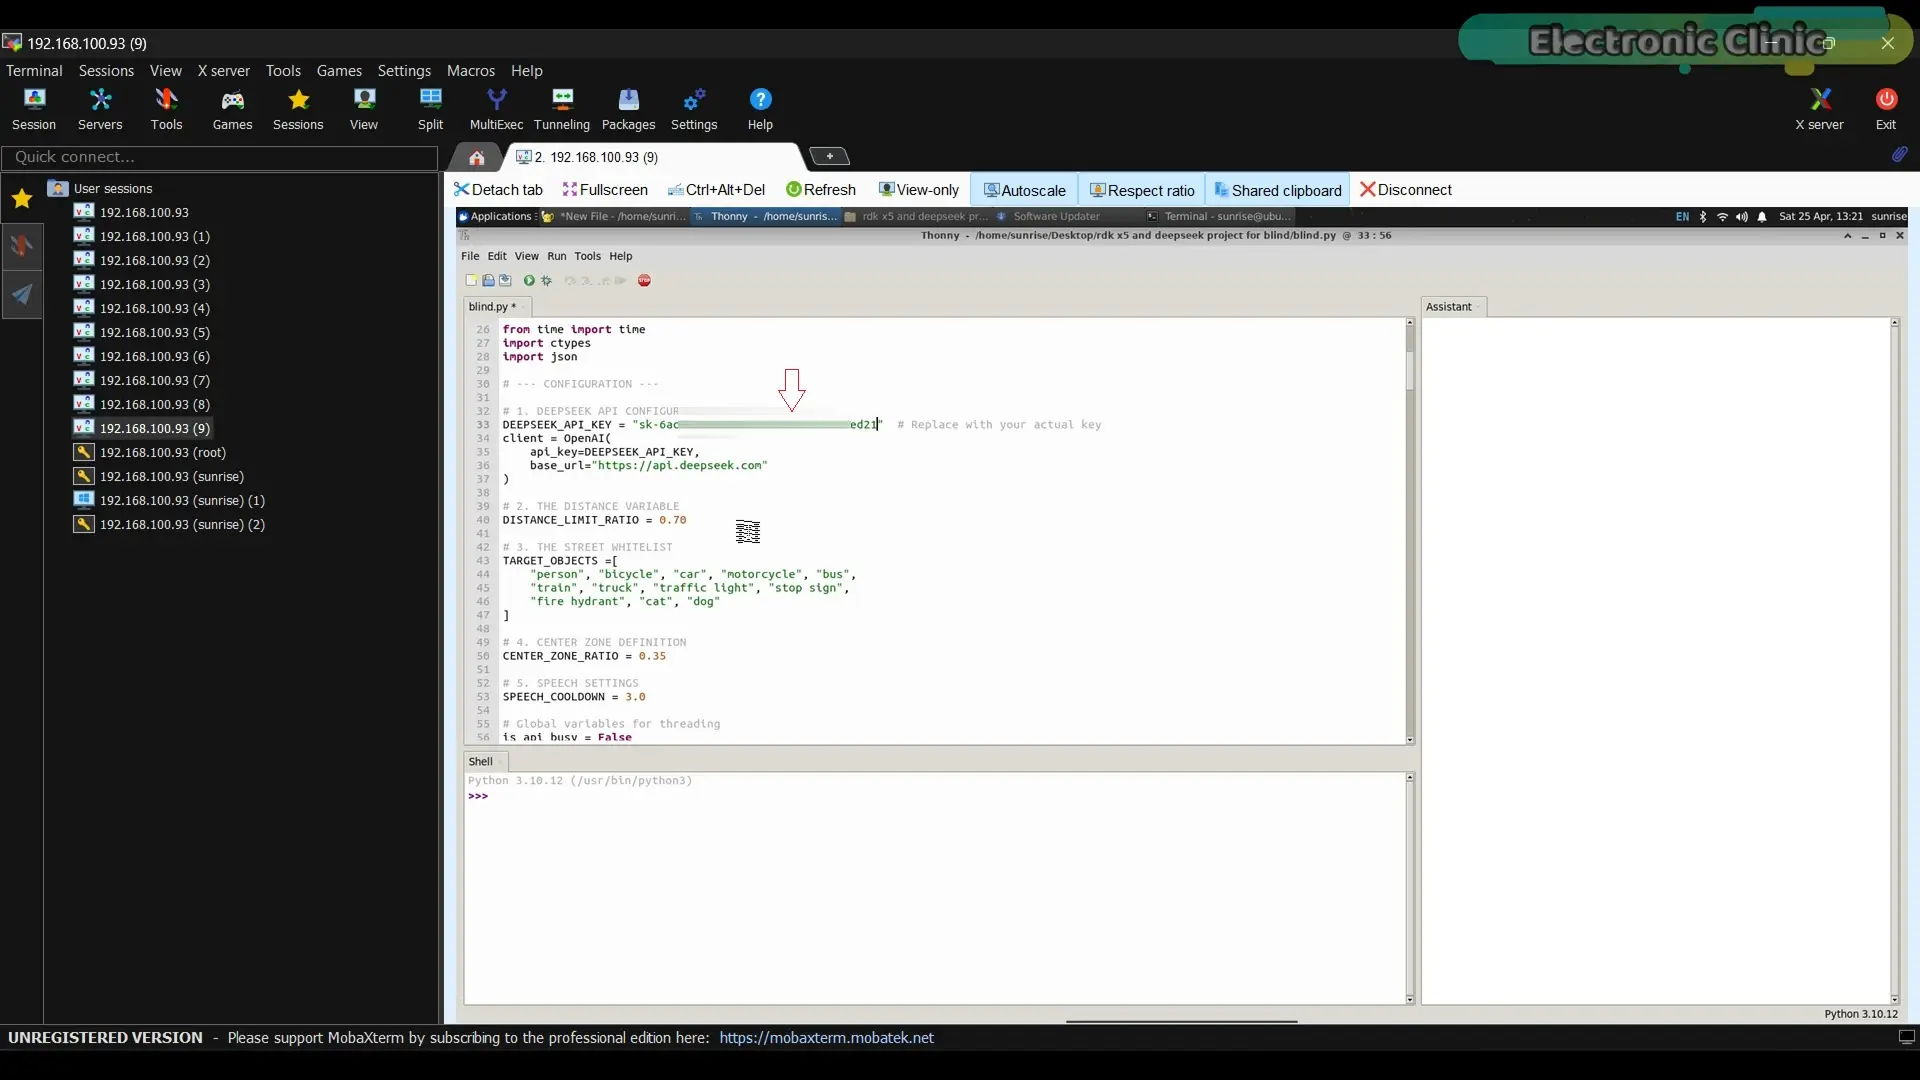
and paste it into your code like this:
Never share your API key publicly.
While you are on the RDK X5 Desktop; Open terminal…
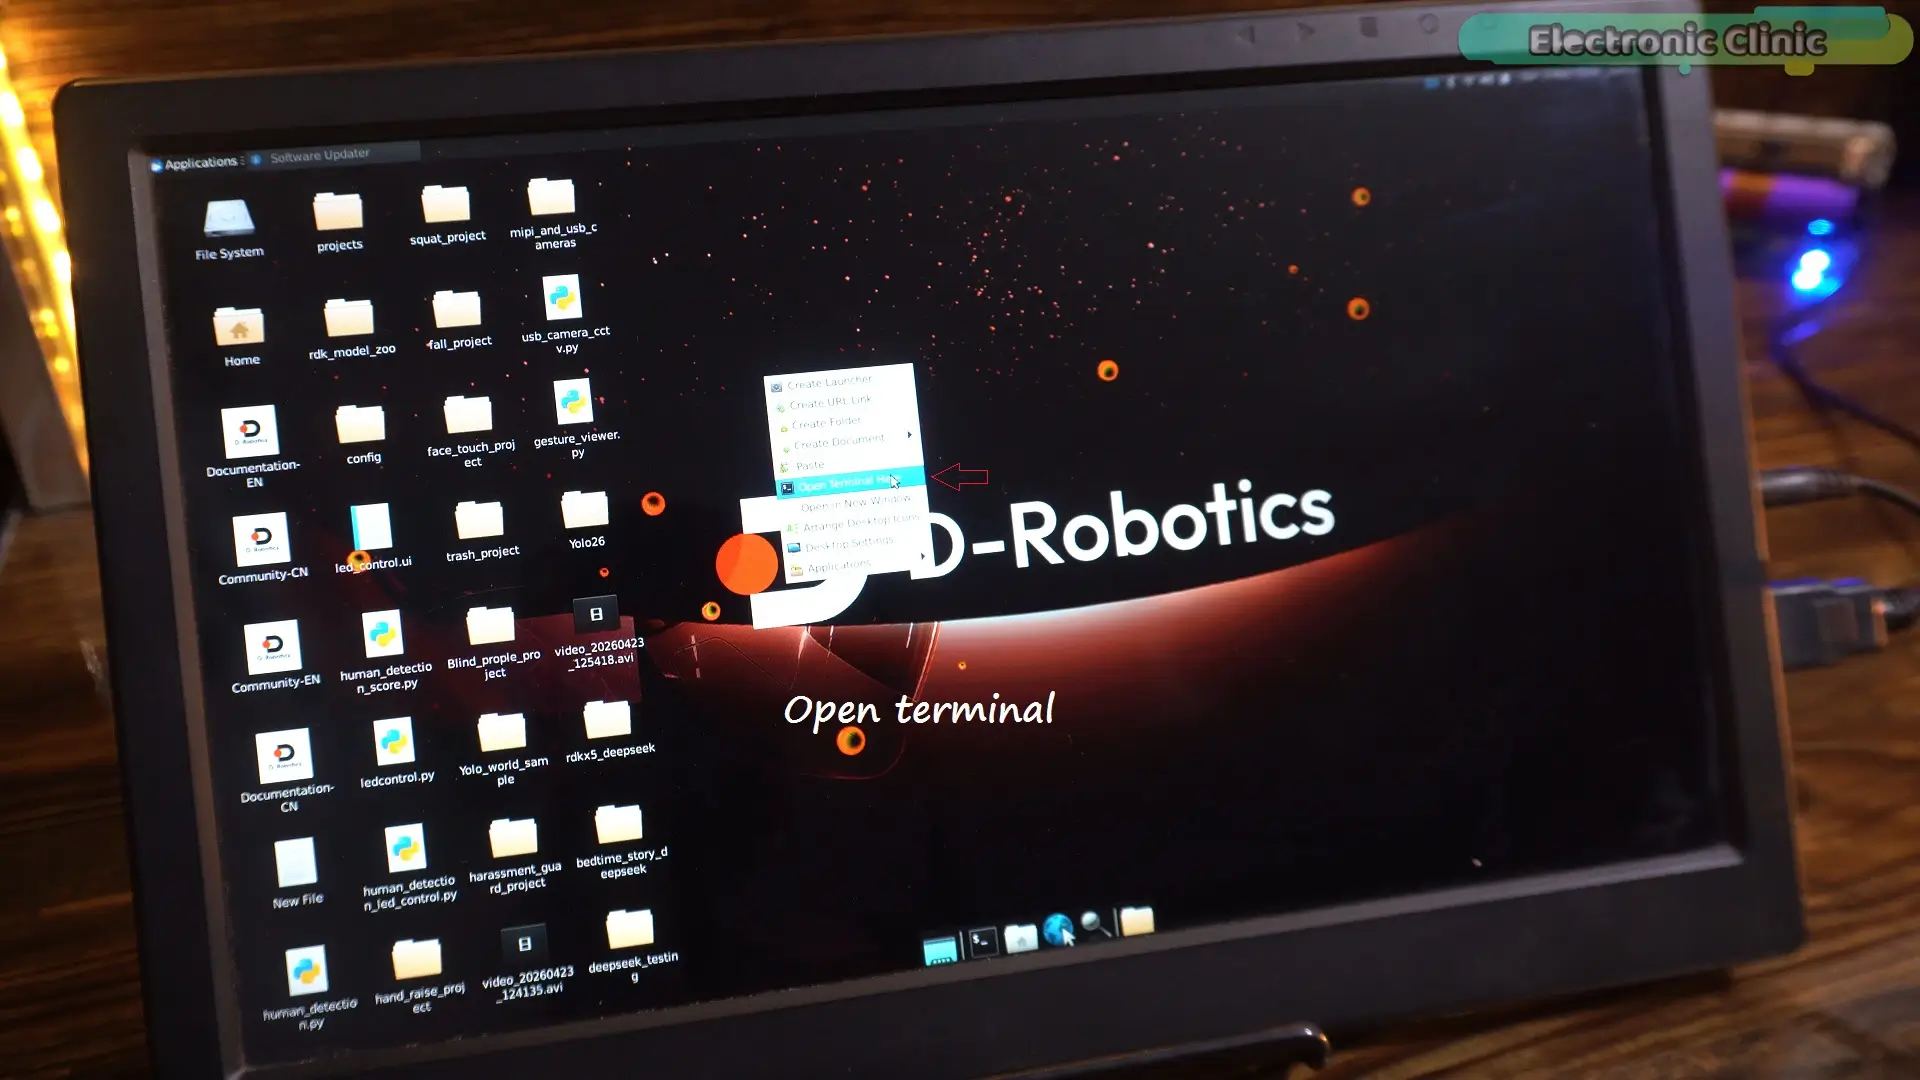
and run:
sudo apt update
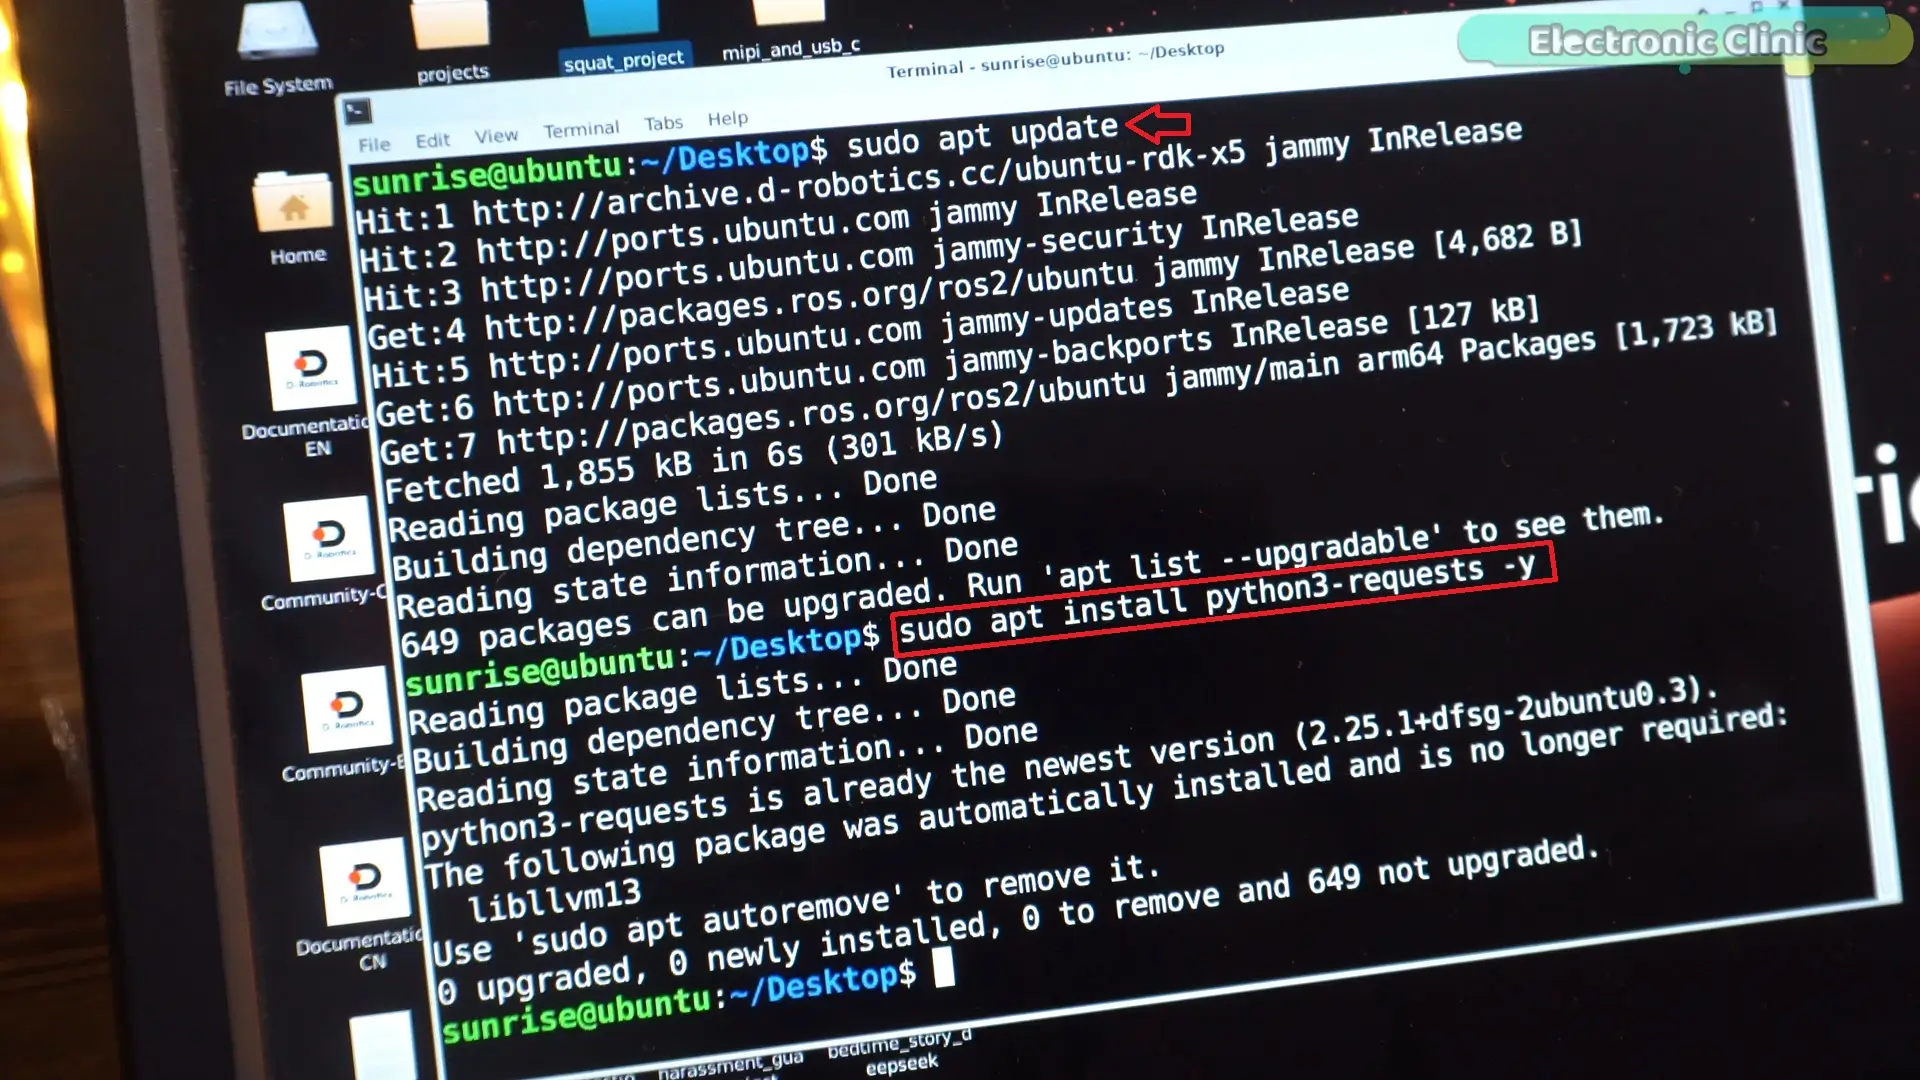
sudo apt install python3-requests -y
That’s it. No heavy setup.
CODE EXPLANATION
Now let’s talk about the magic part.
- Scene Collection
We take detected objects and convert them into structured data:
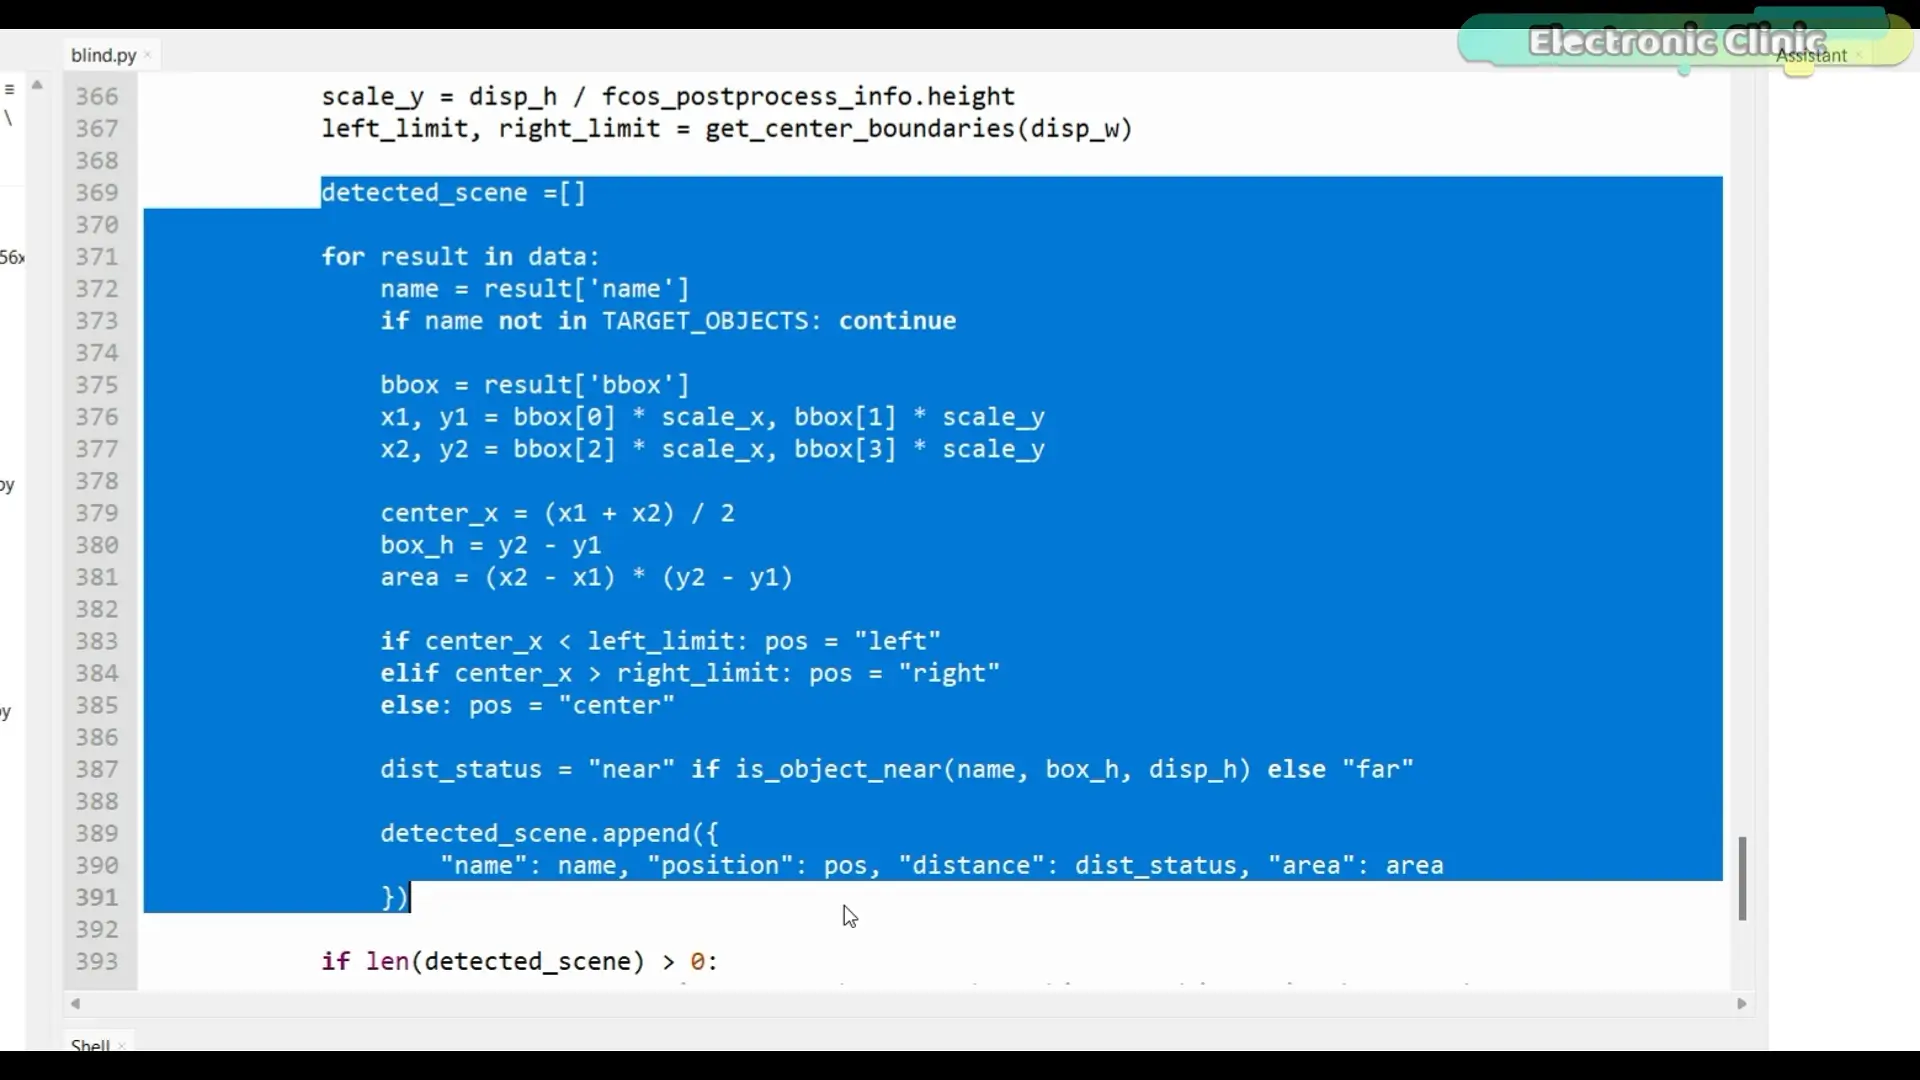
Object name
Position (left, center, right)
Distance (near or far)
- Prompt Engineering
This is the most important part.
We send this prompt to DeepSeek:
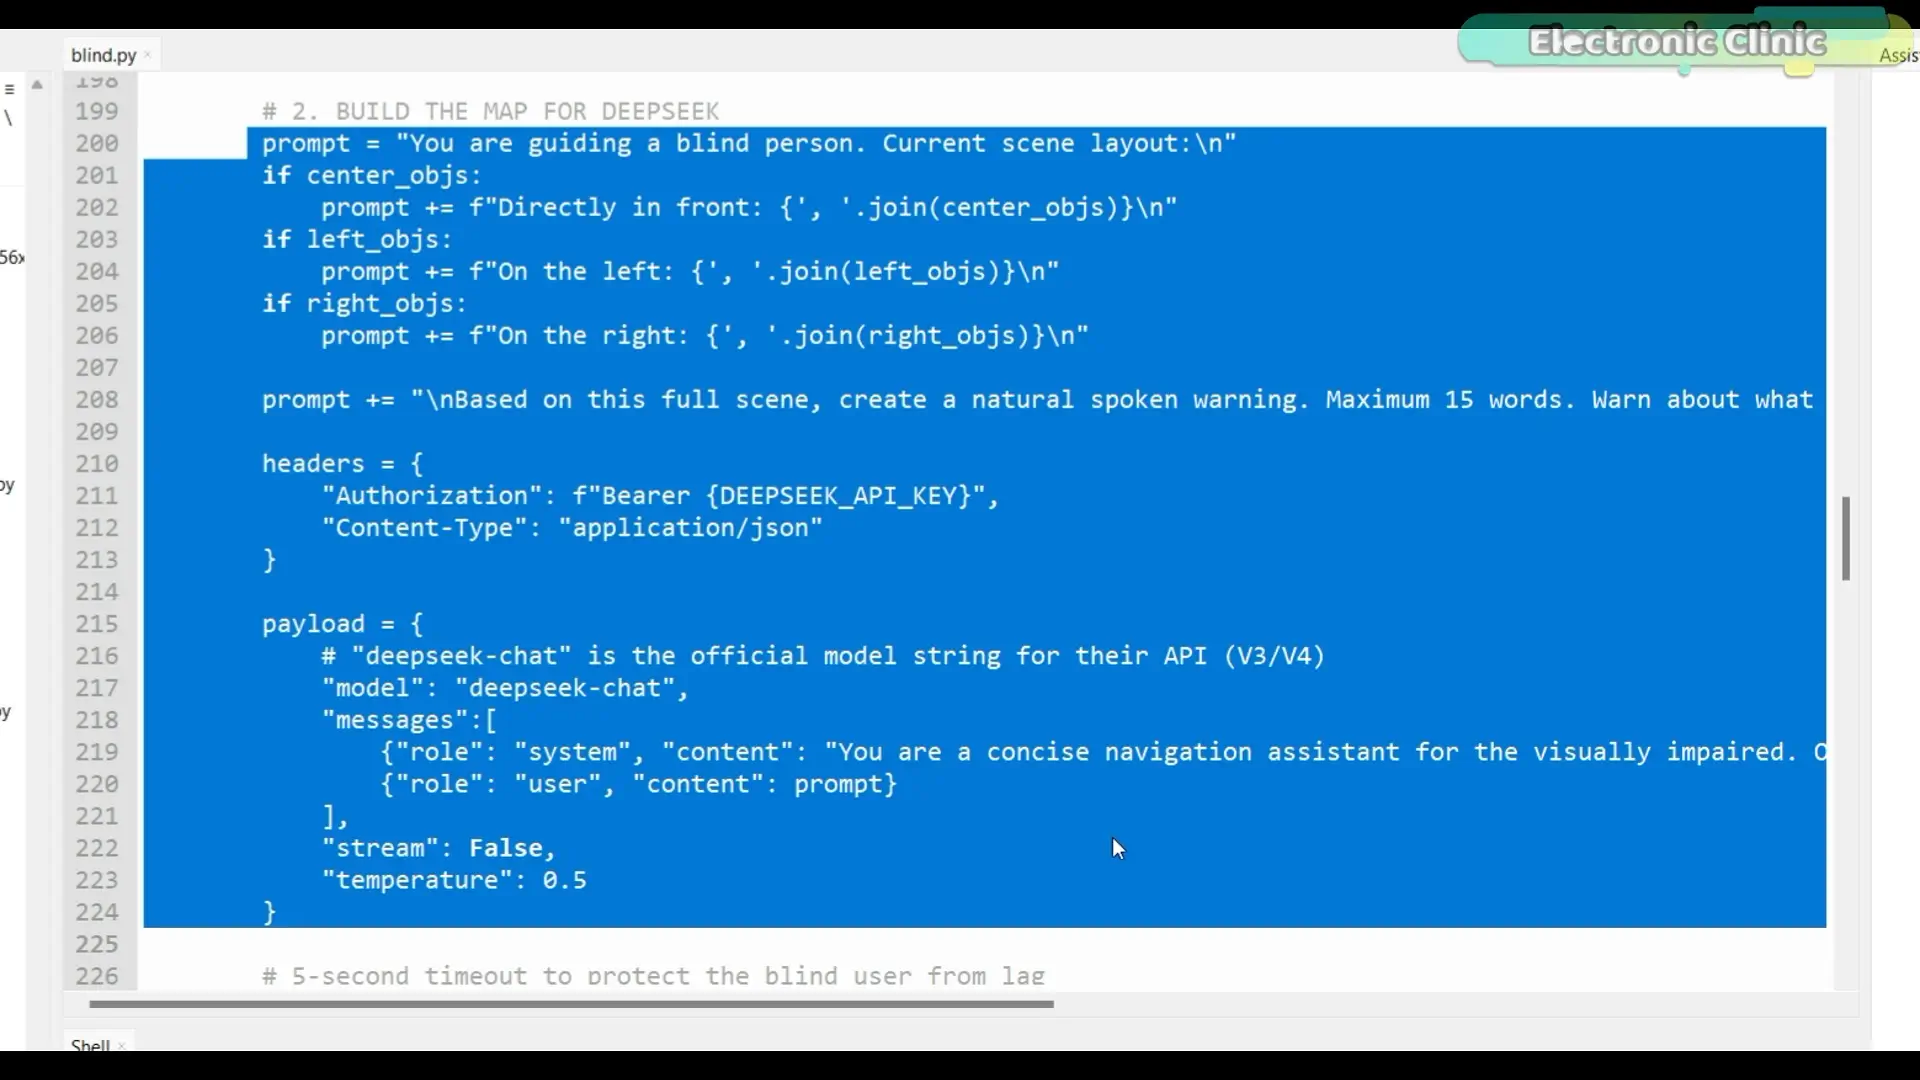
“You are a smart camera on the chest of a blind person…”
This tells the AI:
Who it is
What its role is
What kind of response we want
Then we force constraints:
Max 12 words
No explanation
Only final warning
This is how we control the AI output.
- API Call
We send a request using Python:
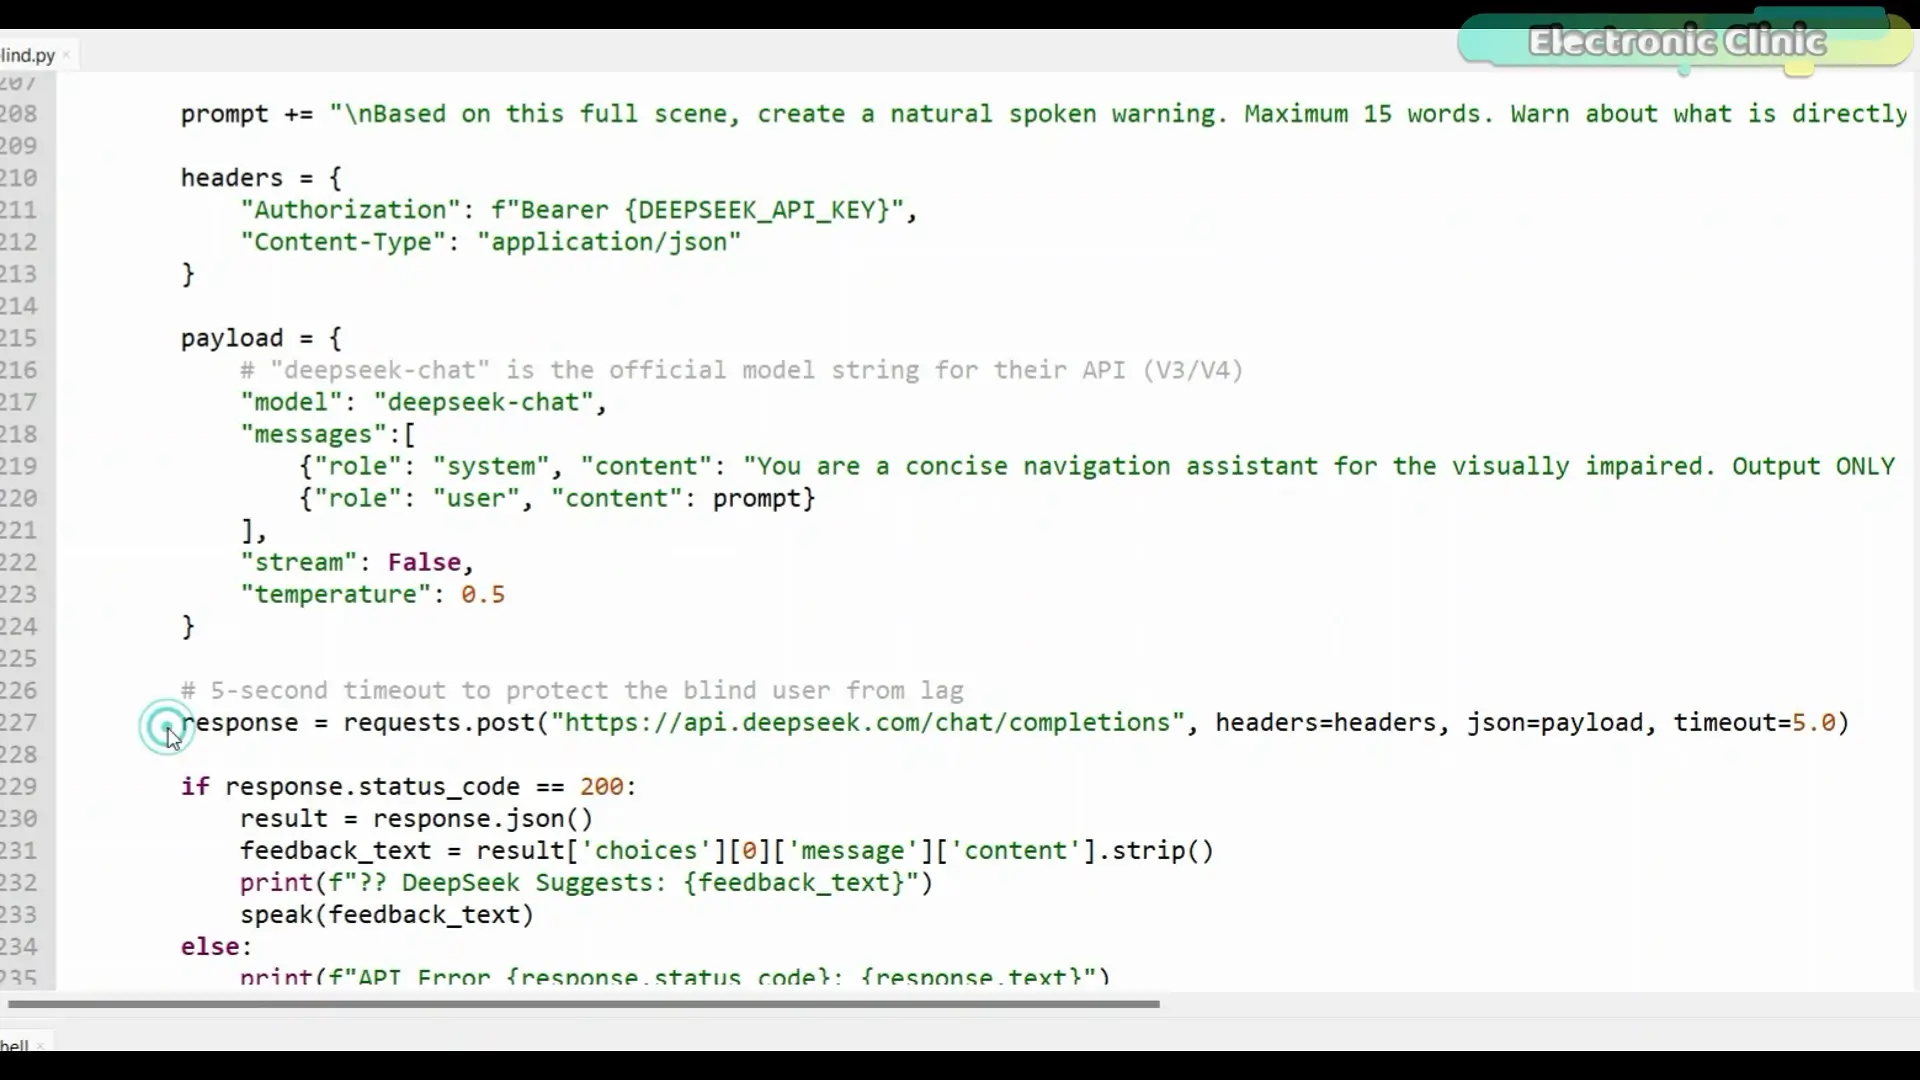
response = requests.post(…)
DeepSeek processes the scene…
and returns a human-like instruction.
- Smart Output
Instead of multiple alerts…
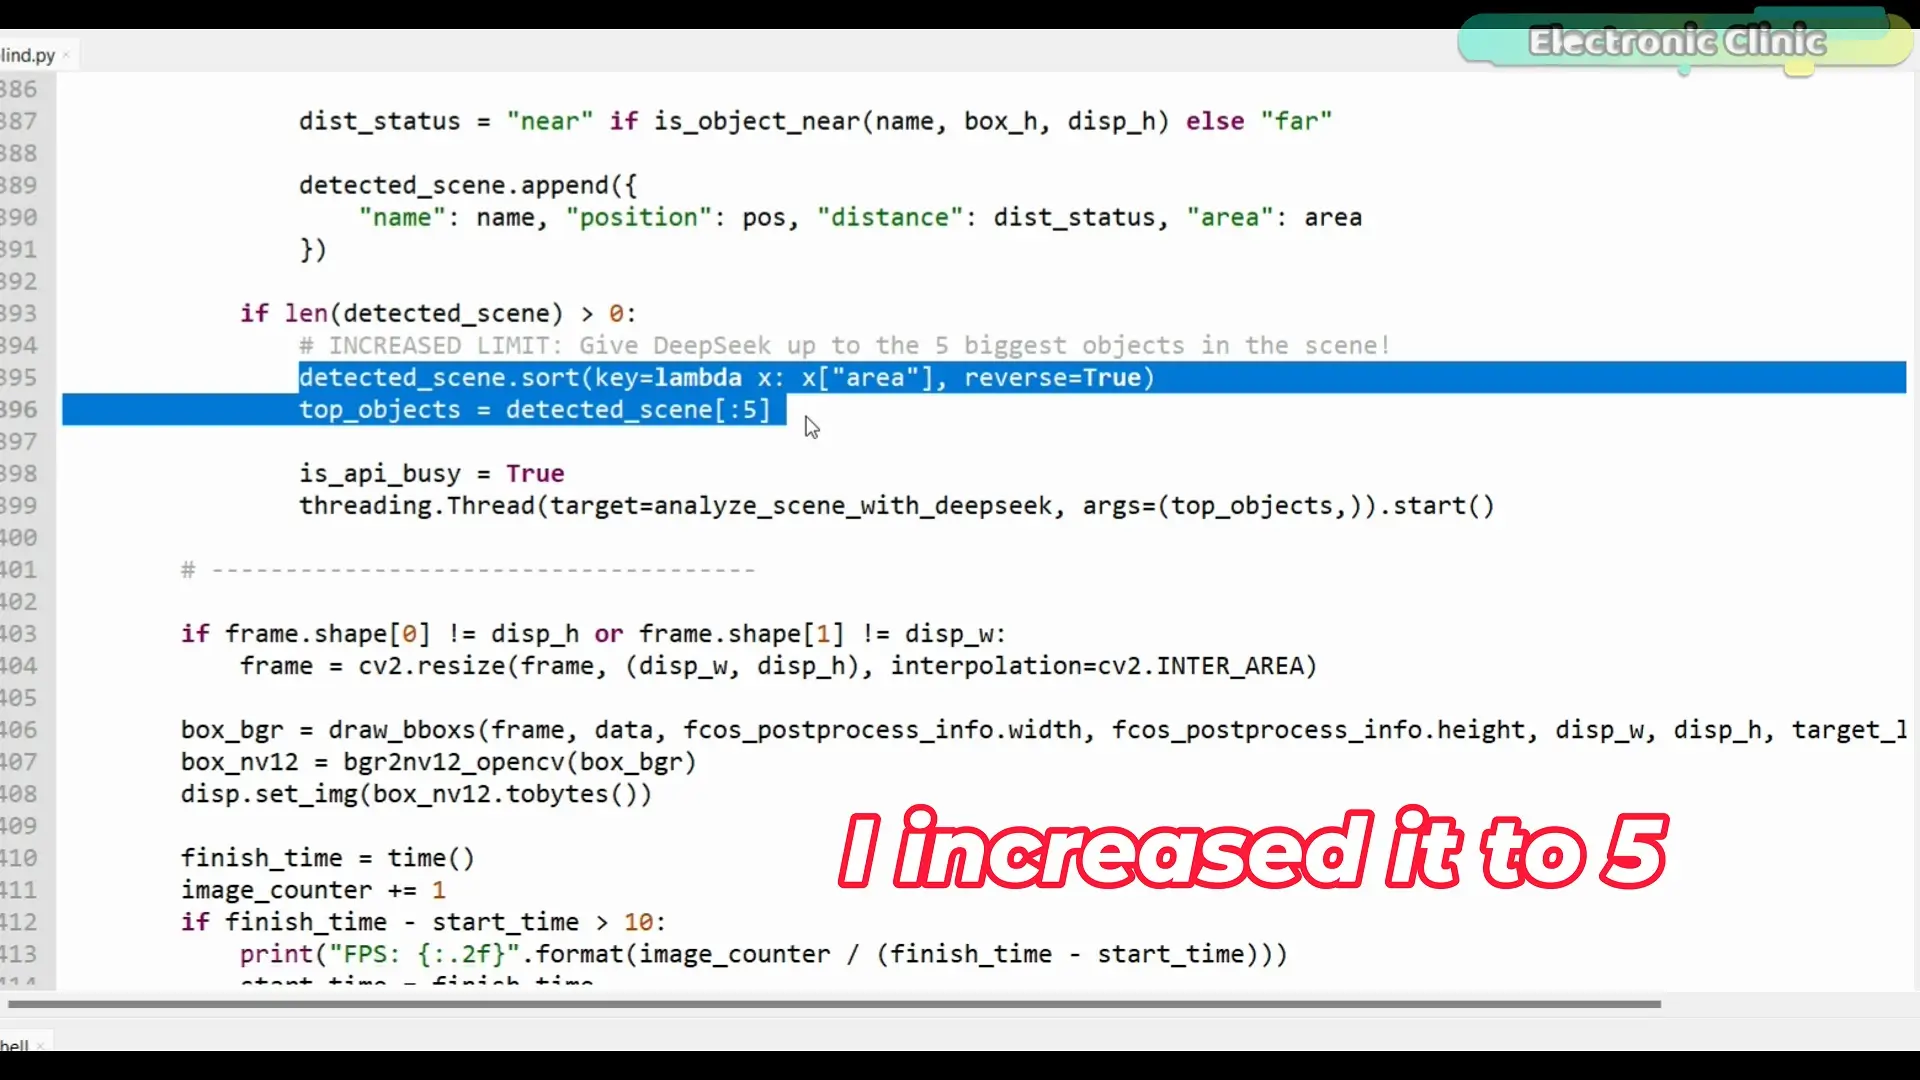
we only send the top 5 important objects.
Then DeepSeek decides:
what matters most
- Speech Output
Finally, we convert that into voice:
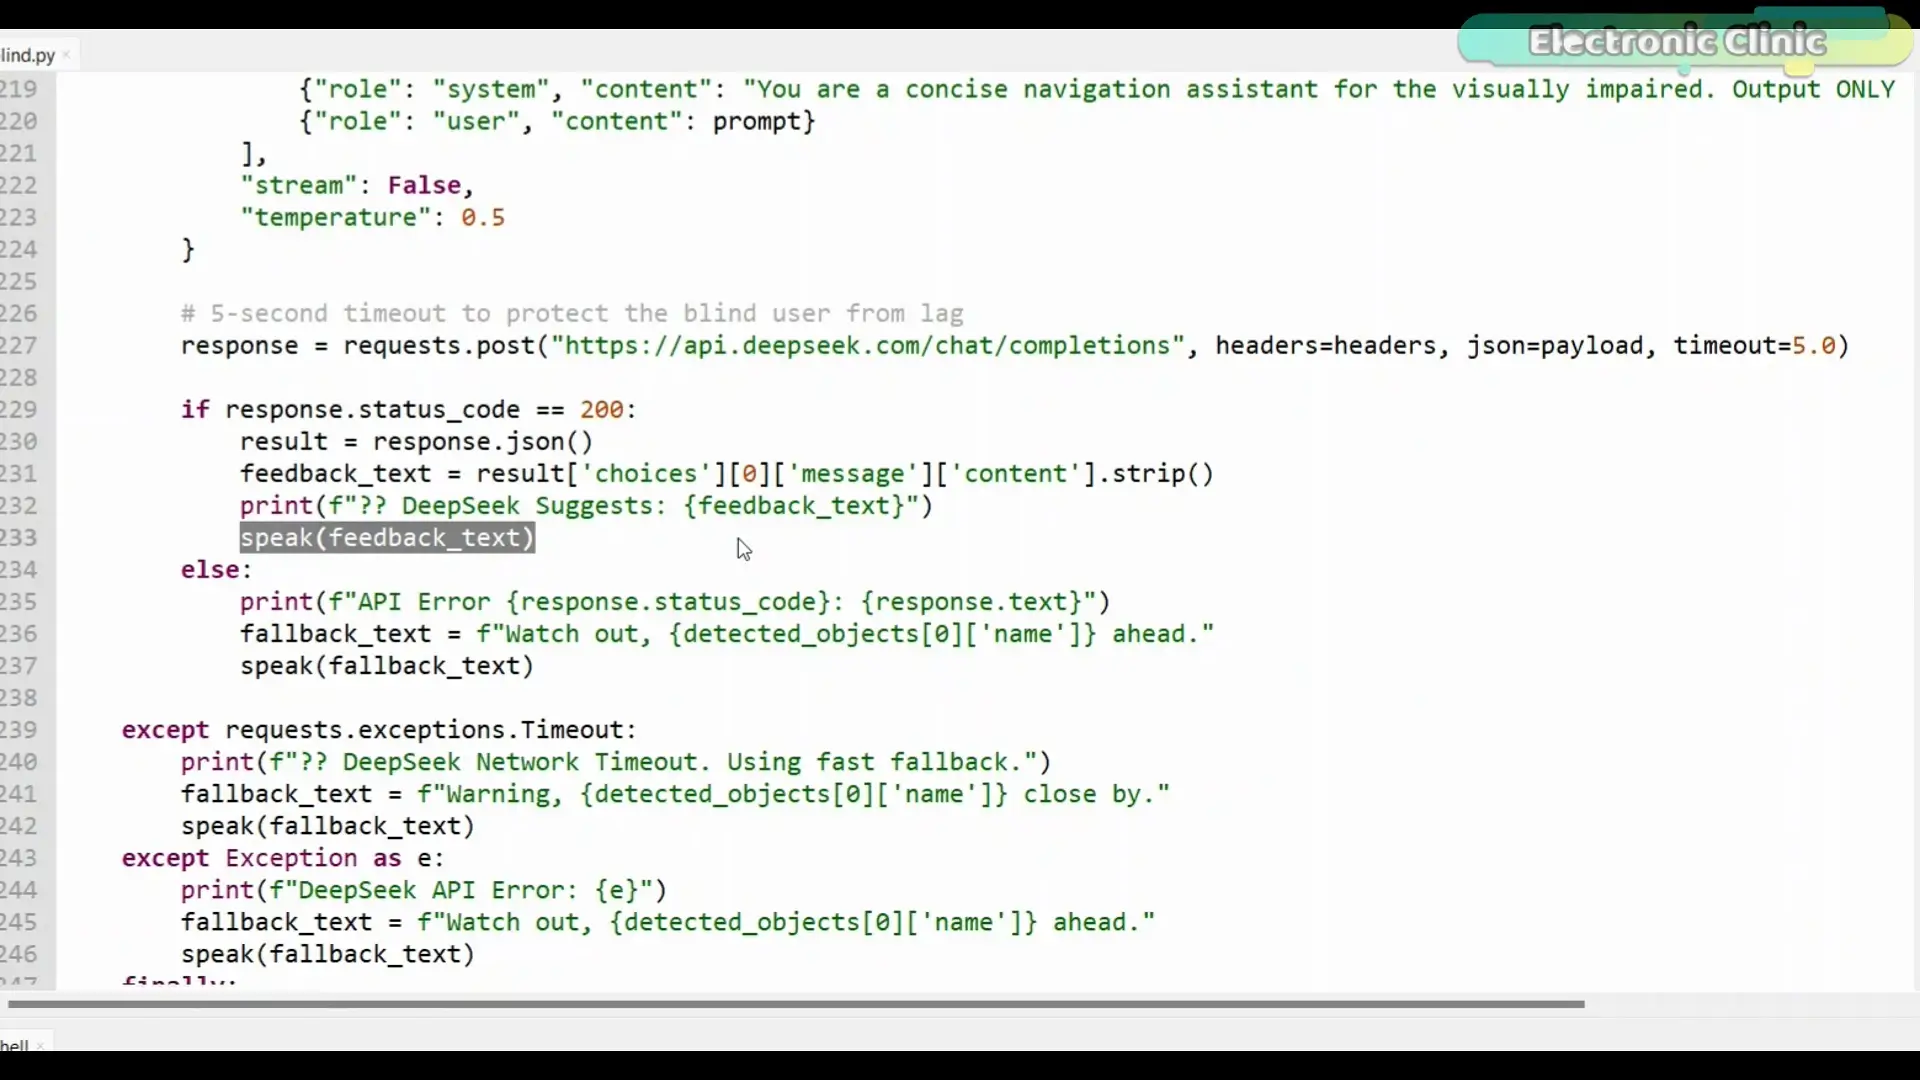
speak(feedback_text)
And now…
our system literally talks like a human assistant.
Practical Demo:
A USB camera and speakers are connected to the RDK X5. This is actually the same hardware setup from Version 1.
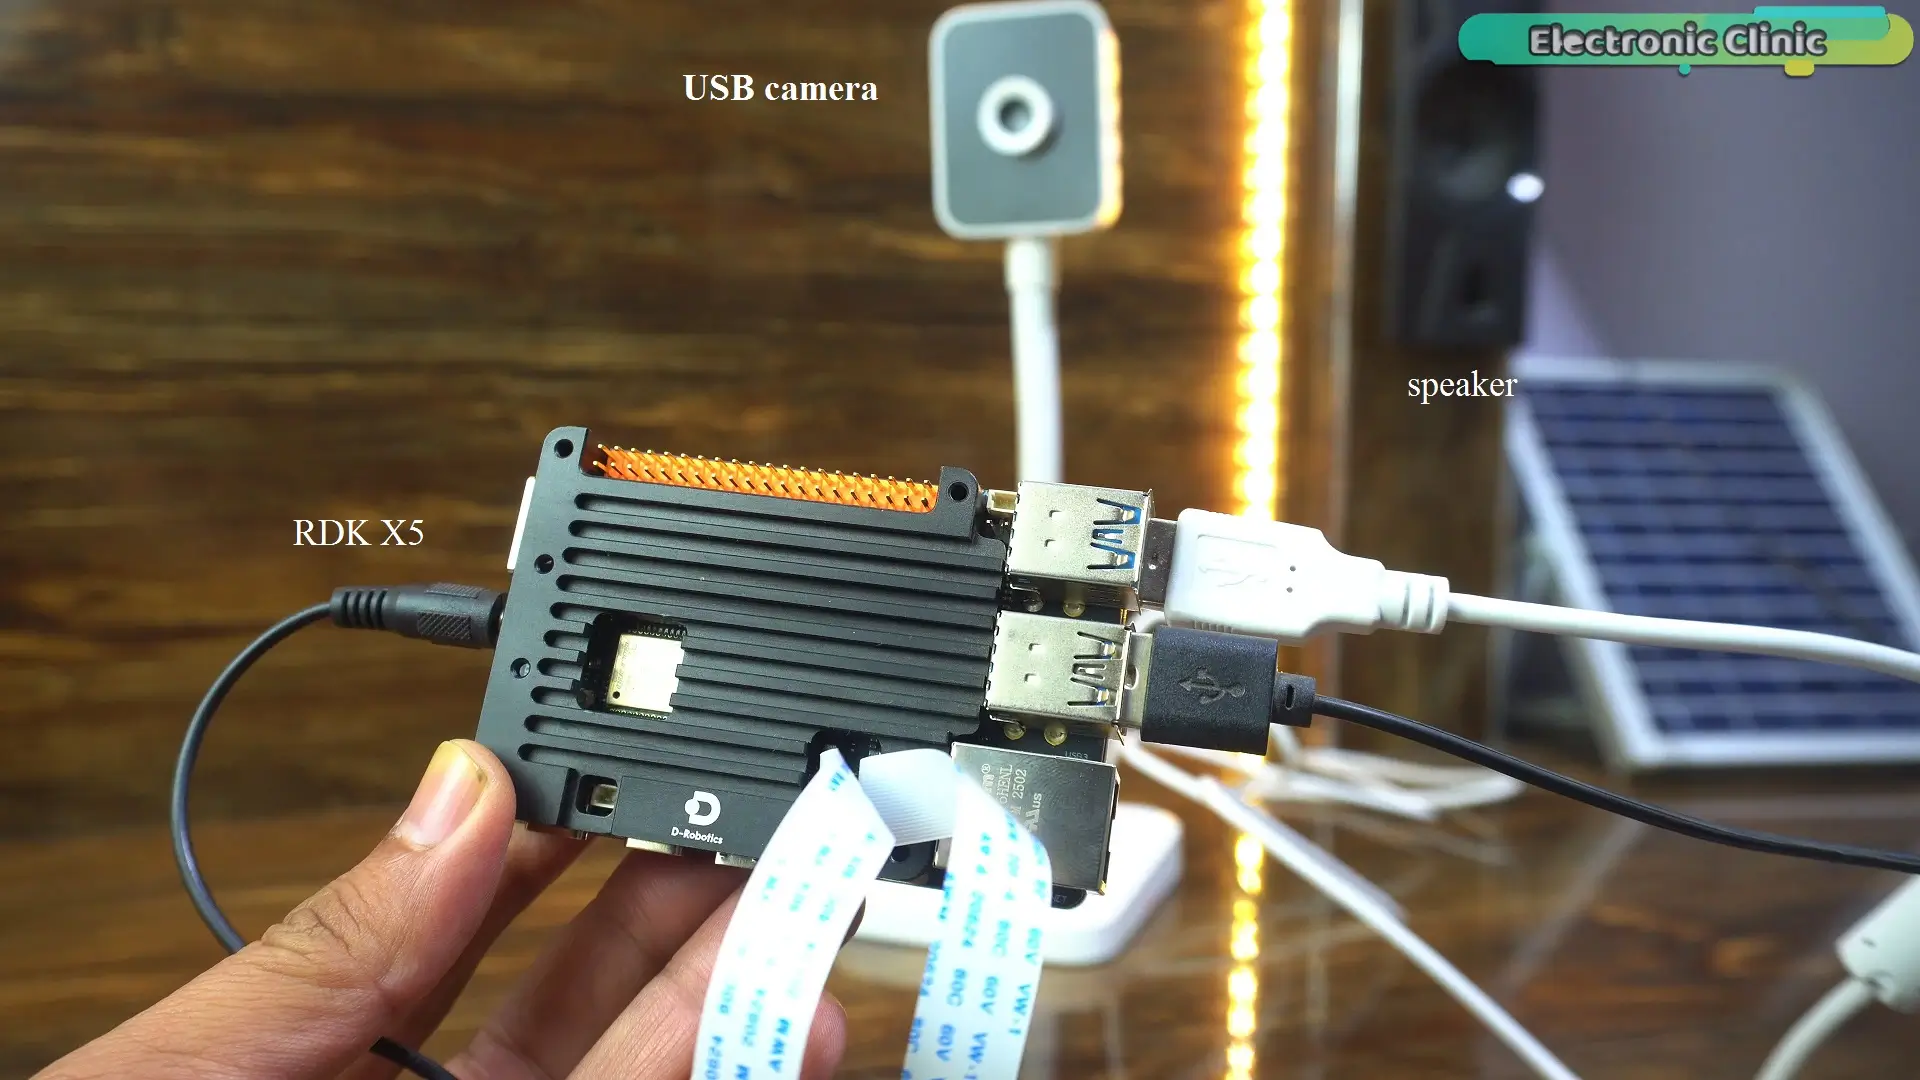
I have already explained the full setup in my previous article…
Including how we use eSpeak to convert text into speech.
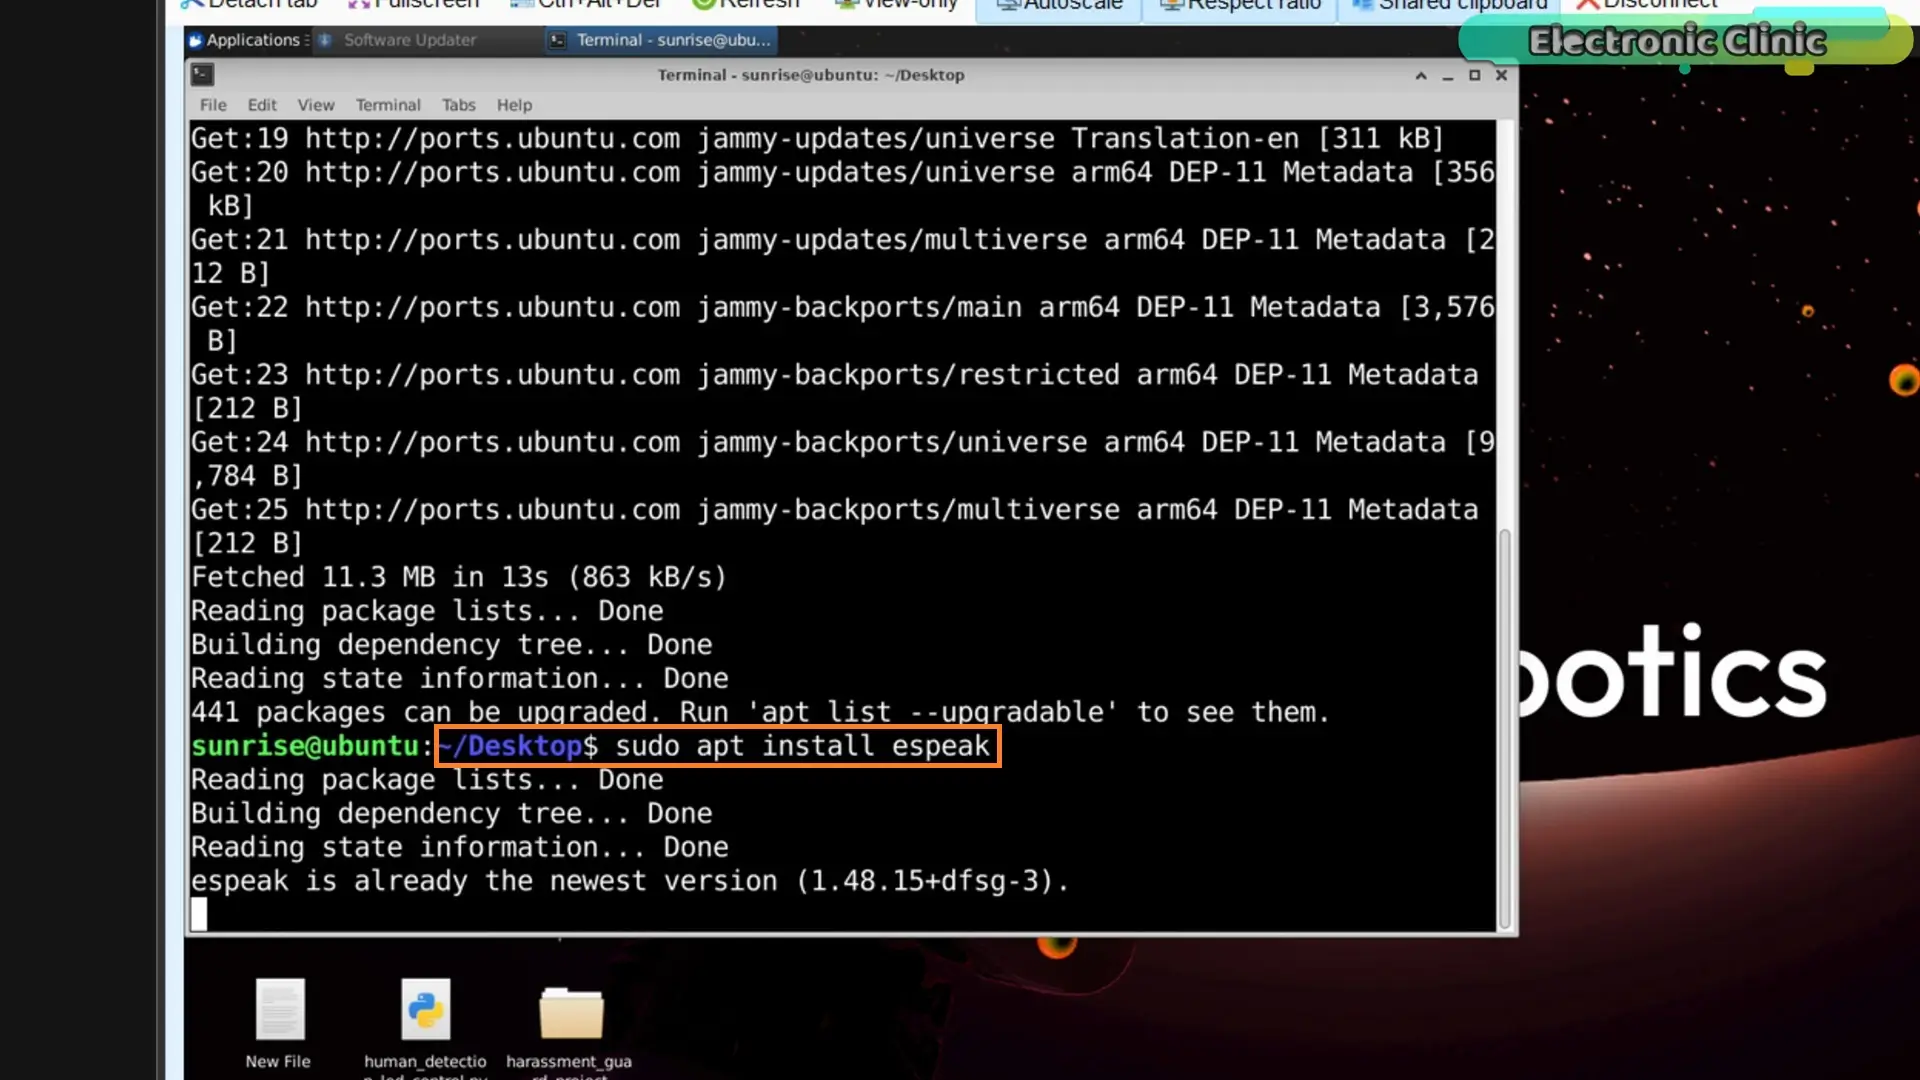
So if you have already built Version 1…
You are completely ready for this upgrade.
To run this project, make sure you are inside the project folder… Right-click the mouse and select Open Terminal Here.
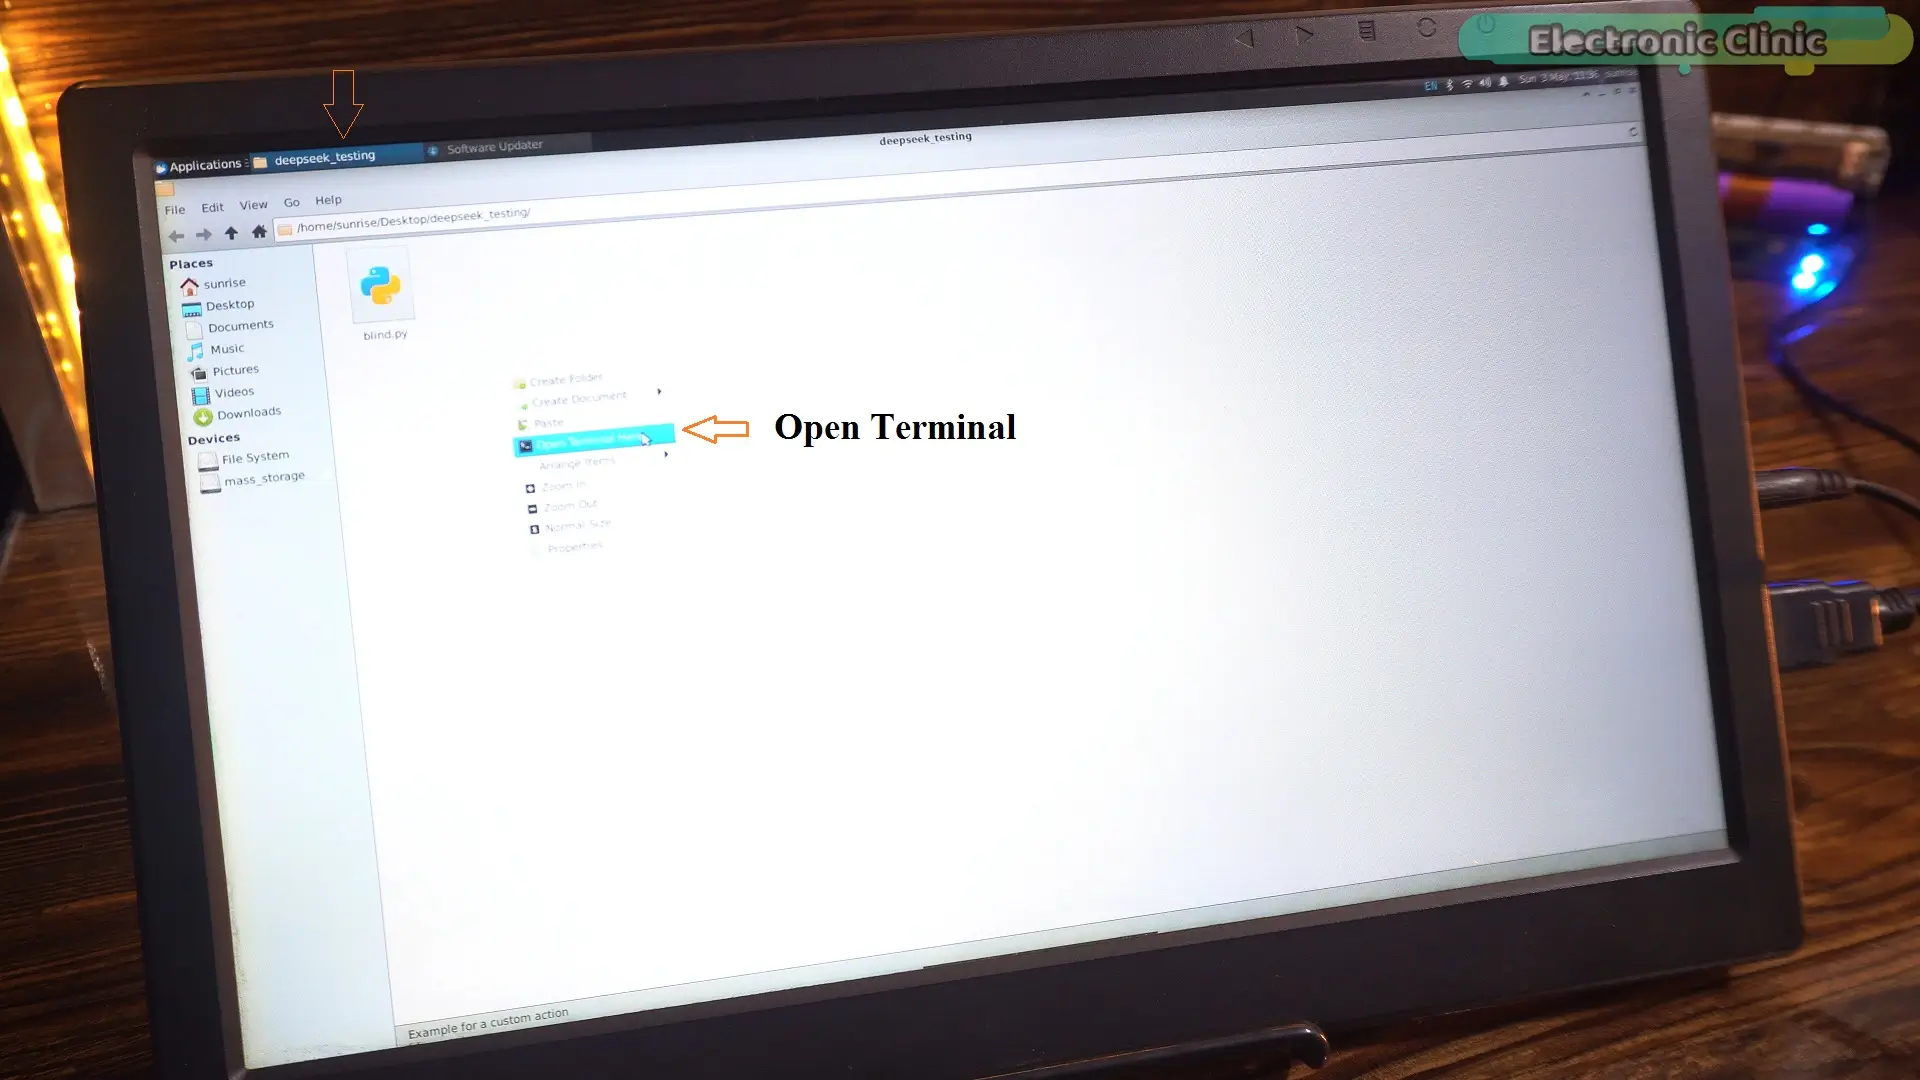
After that, type this command.
sudo python3 blind.py
I have mounted the camera on my chest…
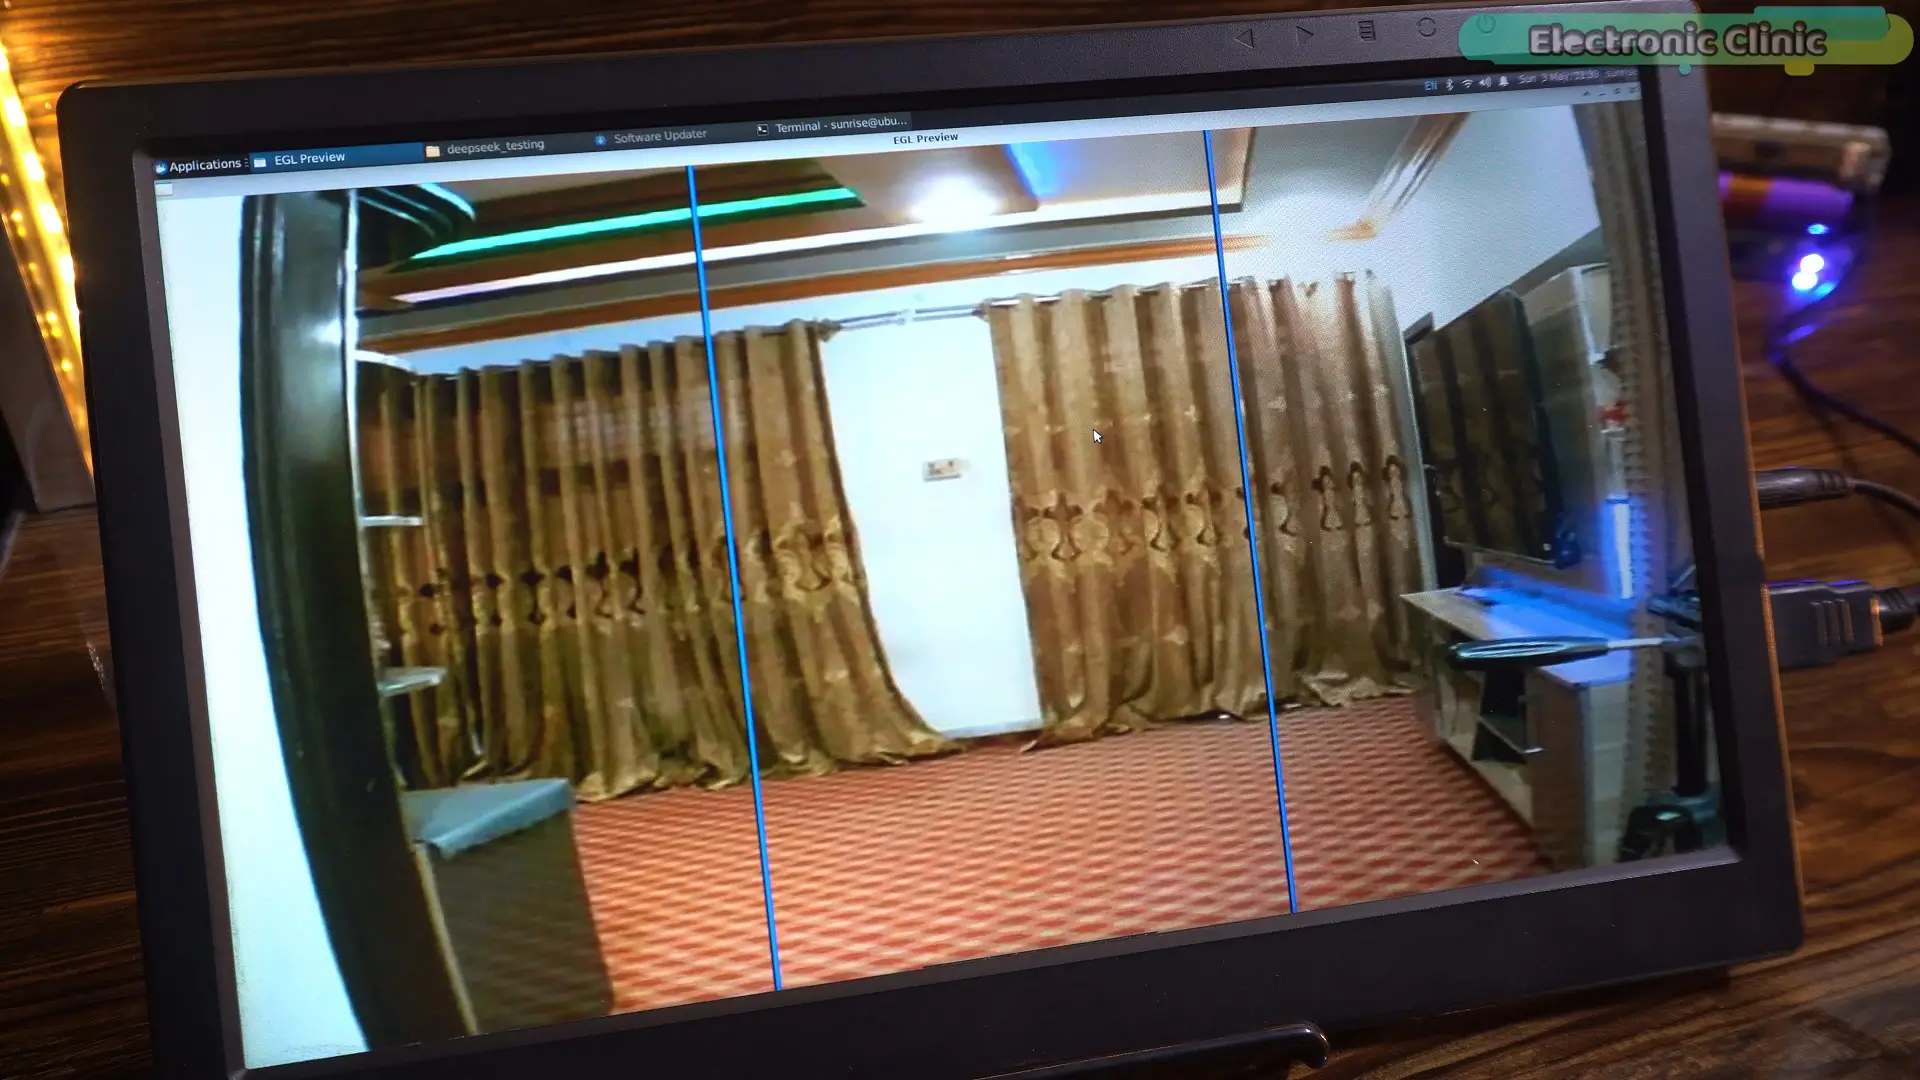
so what you are about to see is exactly what the system sees.
Now let’s find out…
does Version 2 really make a difference?
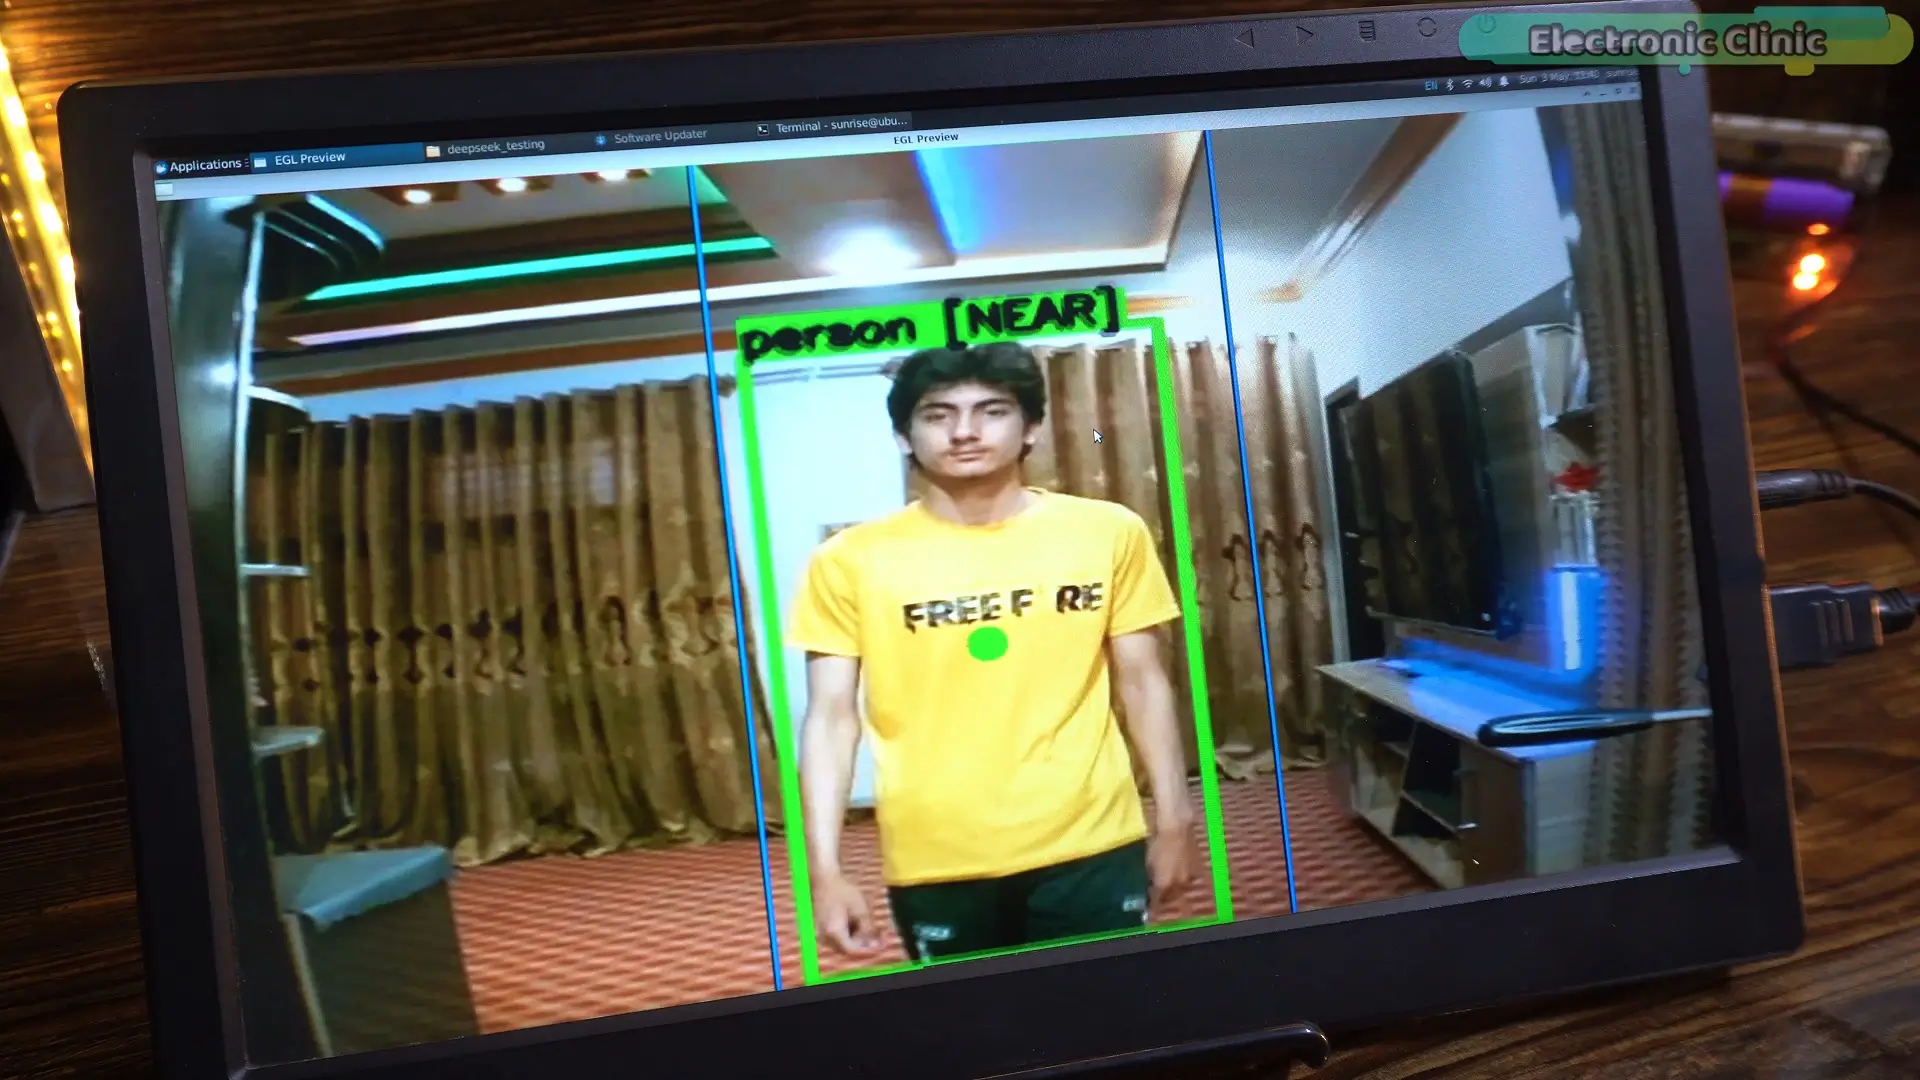
Oh my God… this is insane.
It’s literally telling me when to stop…
when to move…
and where the danger is…
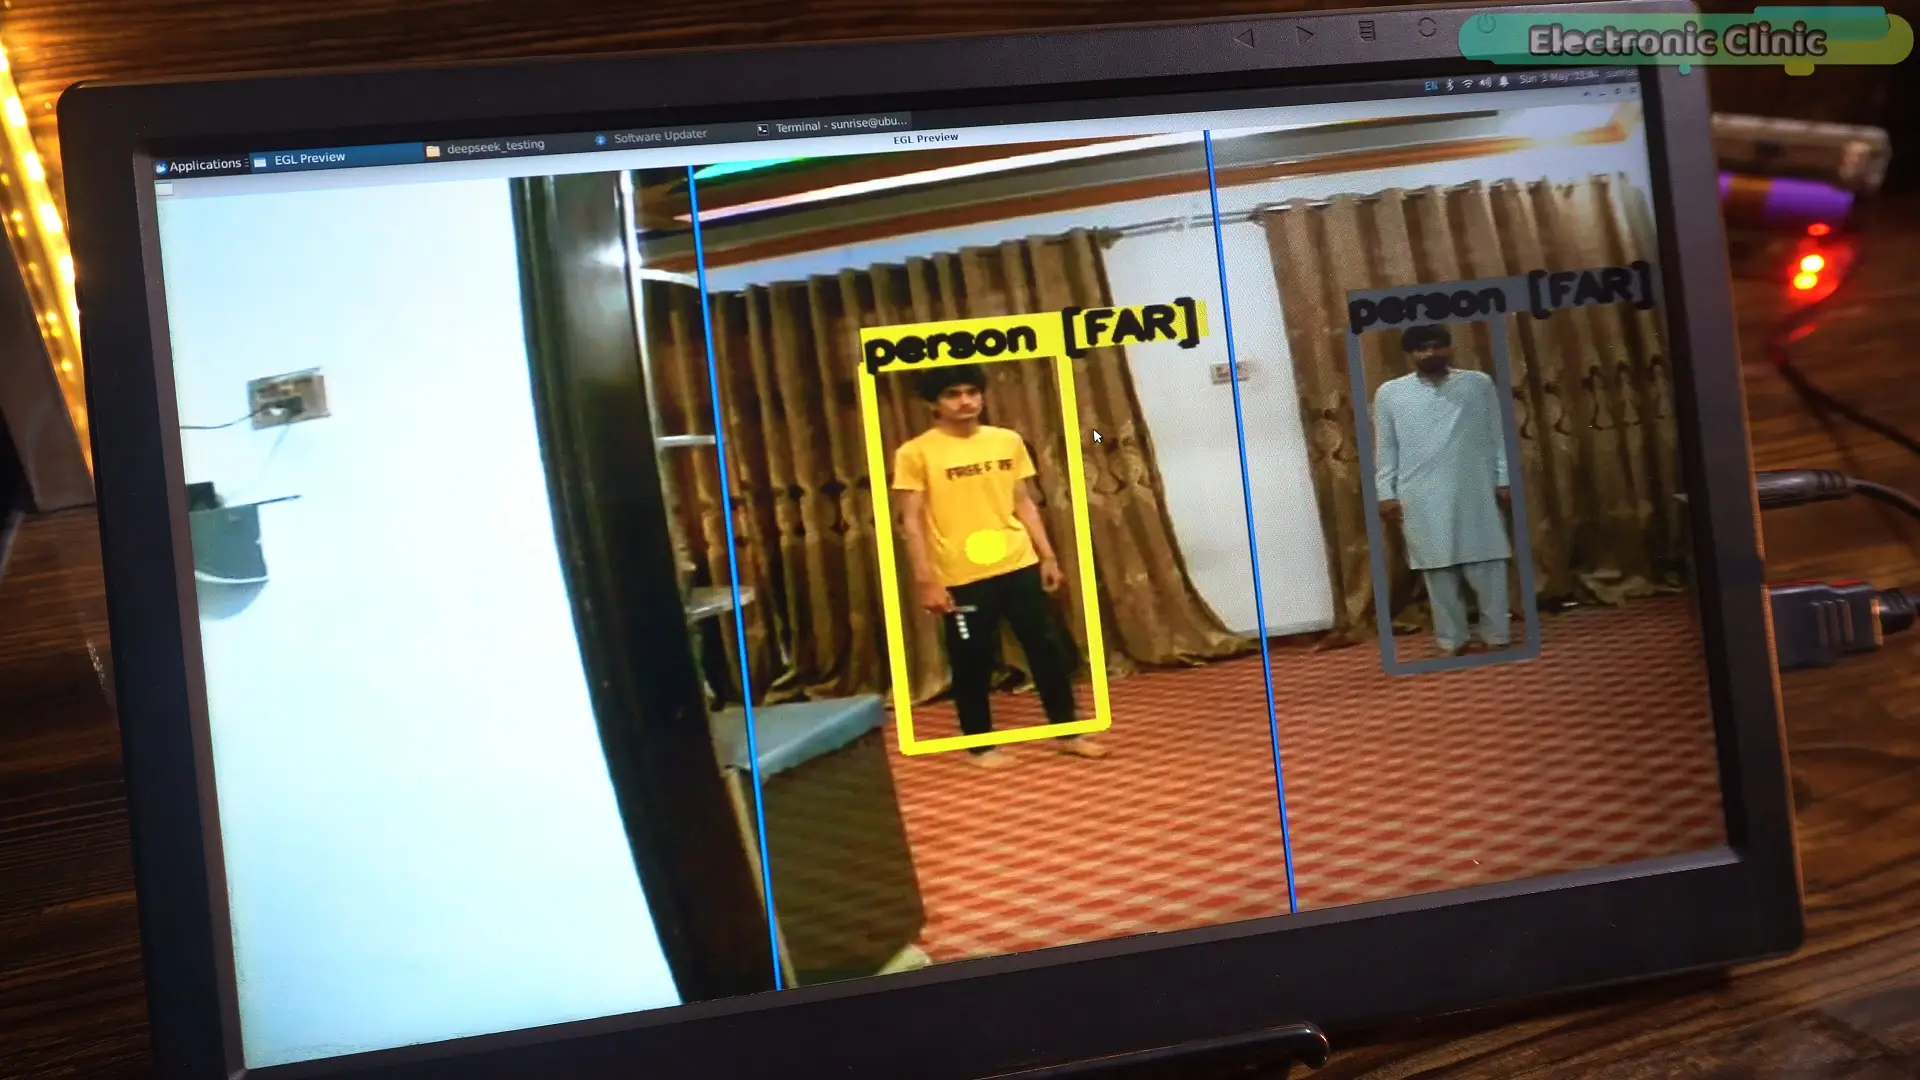
This feels like having a real assistant walking with you.
There’s just one thing in Version 2…
that I still didn’t like.
The voice.
I was using eSpeak…
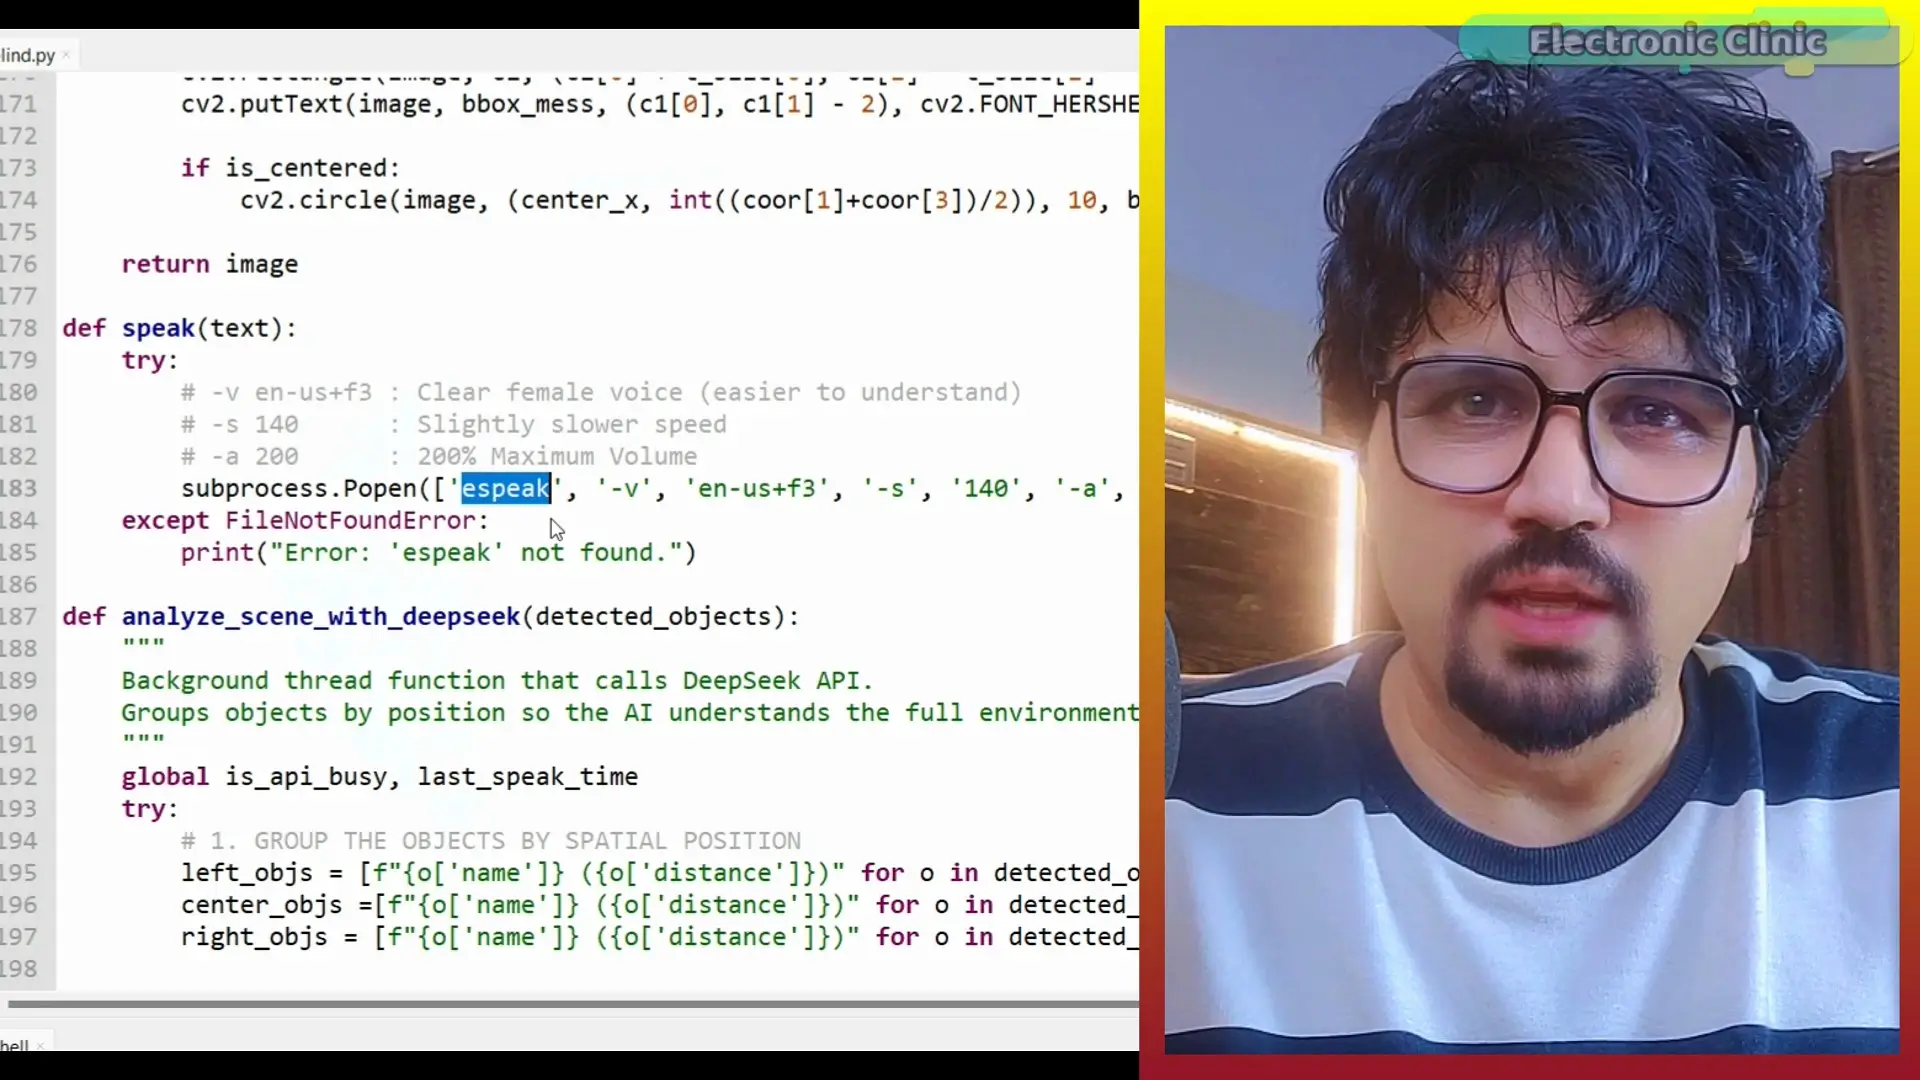
and honestly; it sounds too robotic.
And when you are building something for real-world use; especially for visually impaired users;
the voice isn’t a small detail…it’s everything.
It needs to feel natural.
Clear.
Easy to trust.
So instead of sticking with eSpeak…I switched to Google Text-to-Speech.
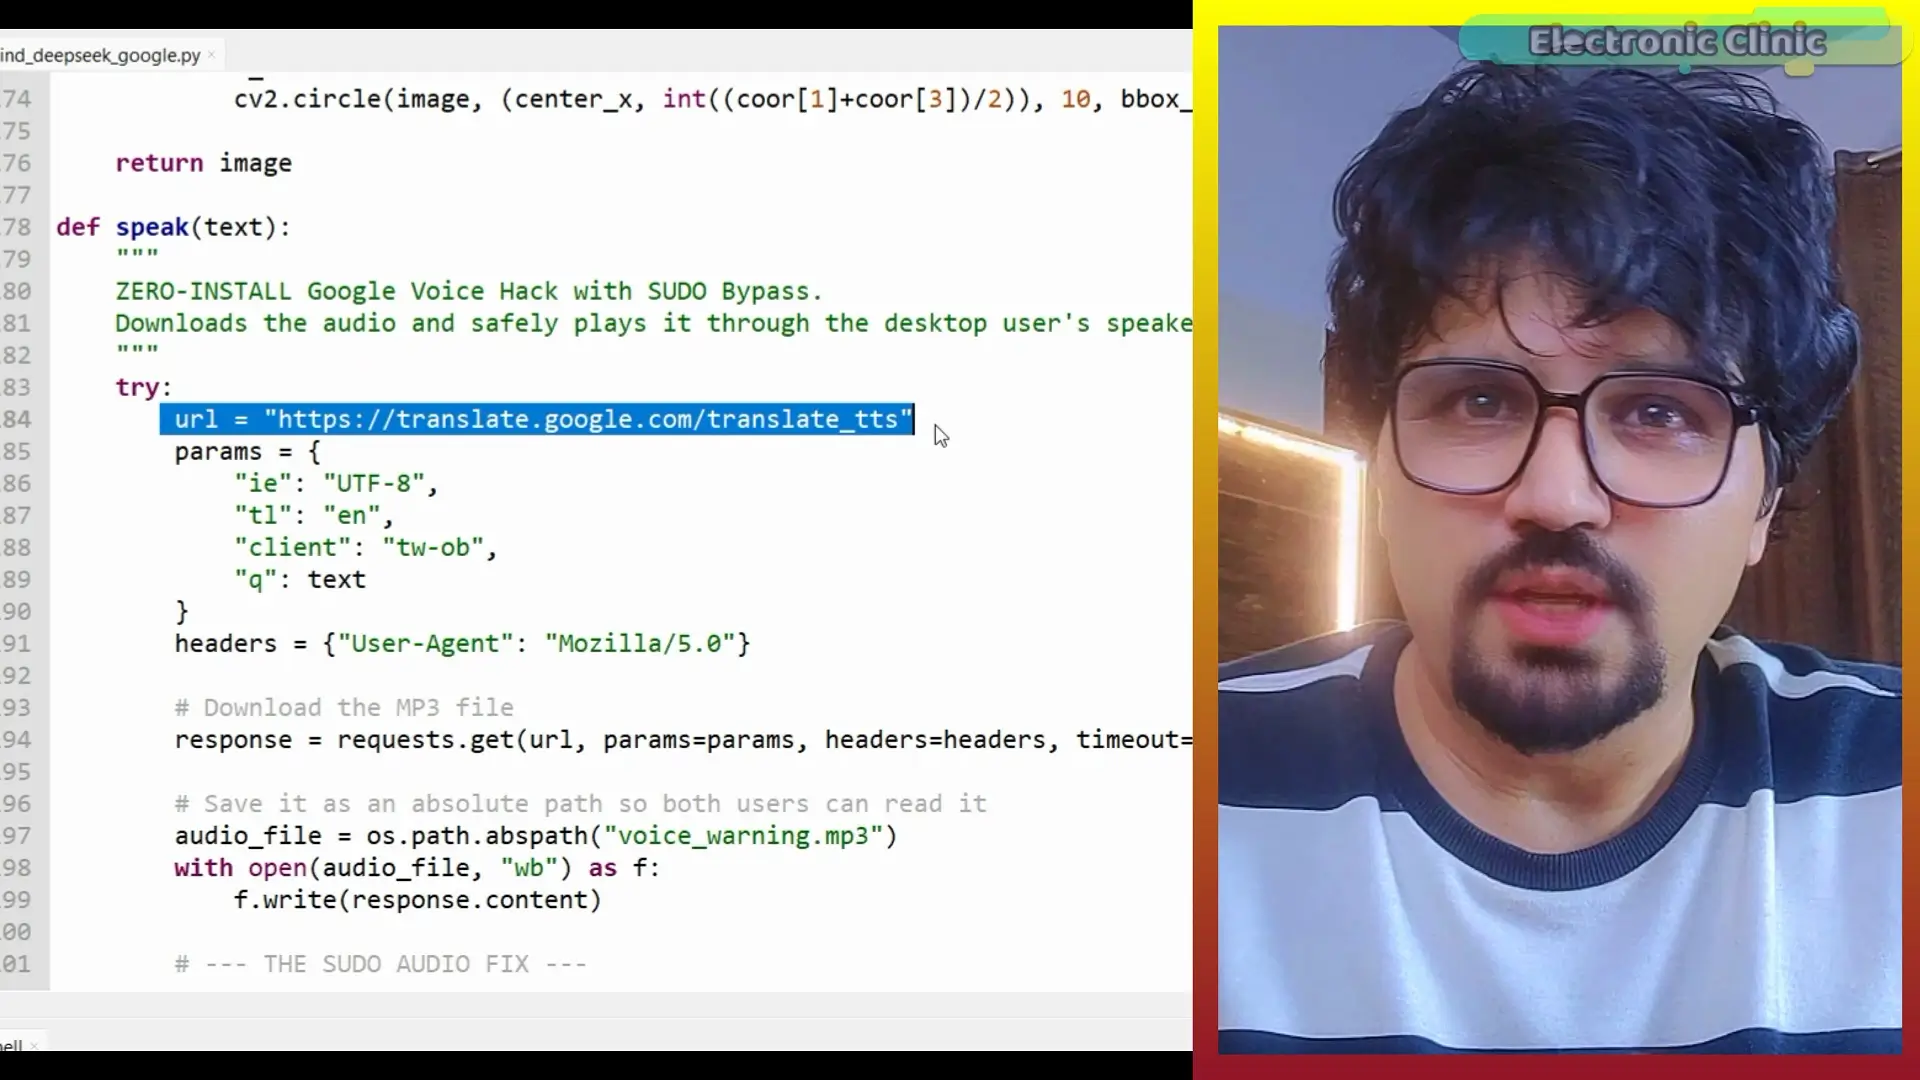
Now the system doesn’t just think like a human…it actually sounds like one too.
Before using it, just run:
sudo apt update
sudo apt install mpg123 –y
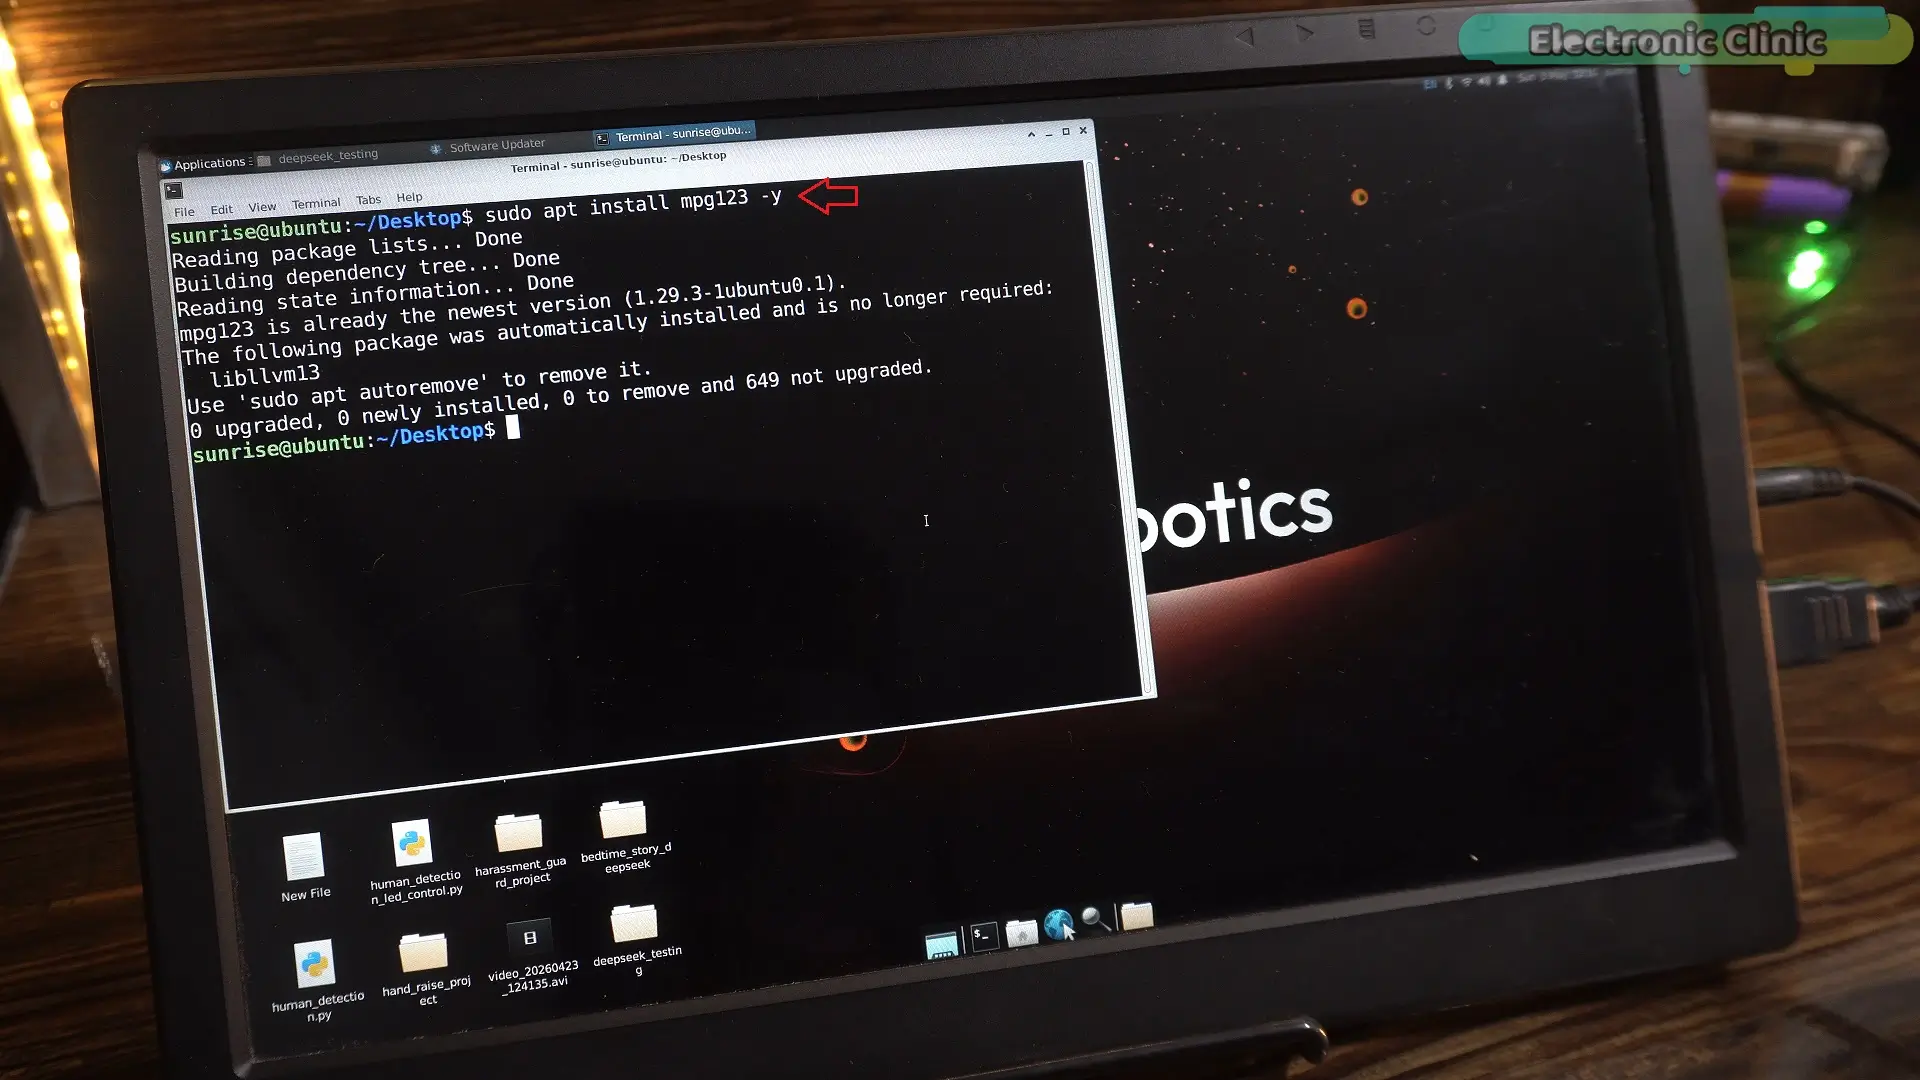
Now here’s what’s happening behind the scenes.
Inside the speak() function…
We send the text to Google’s TTS service.
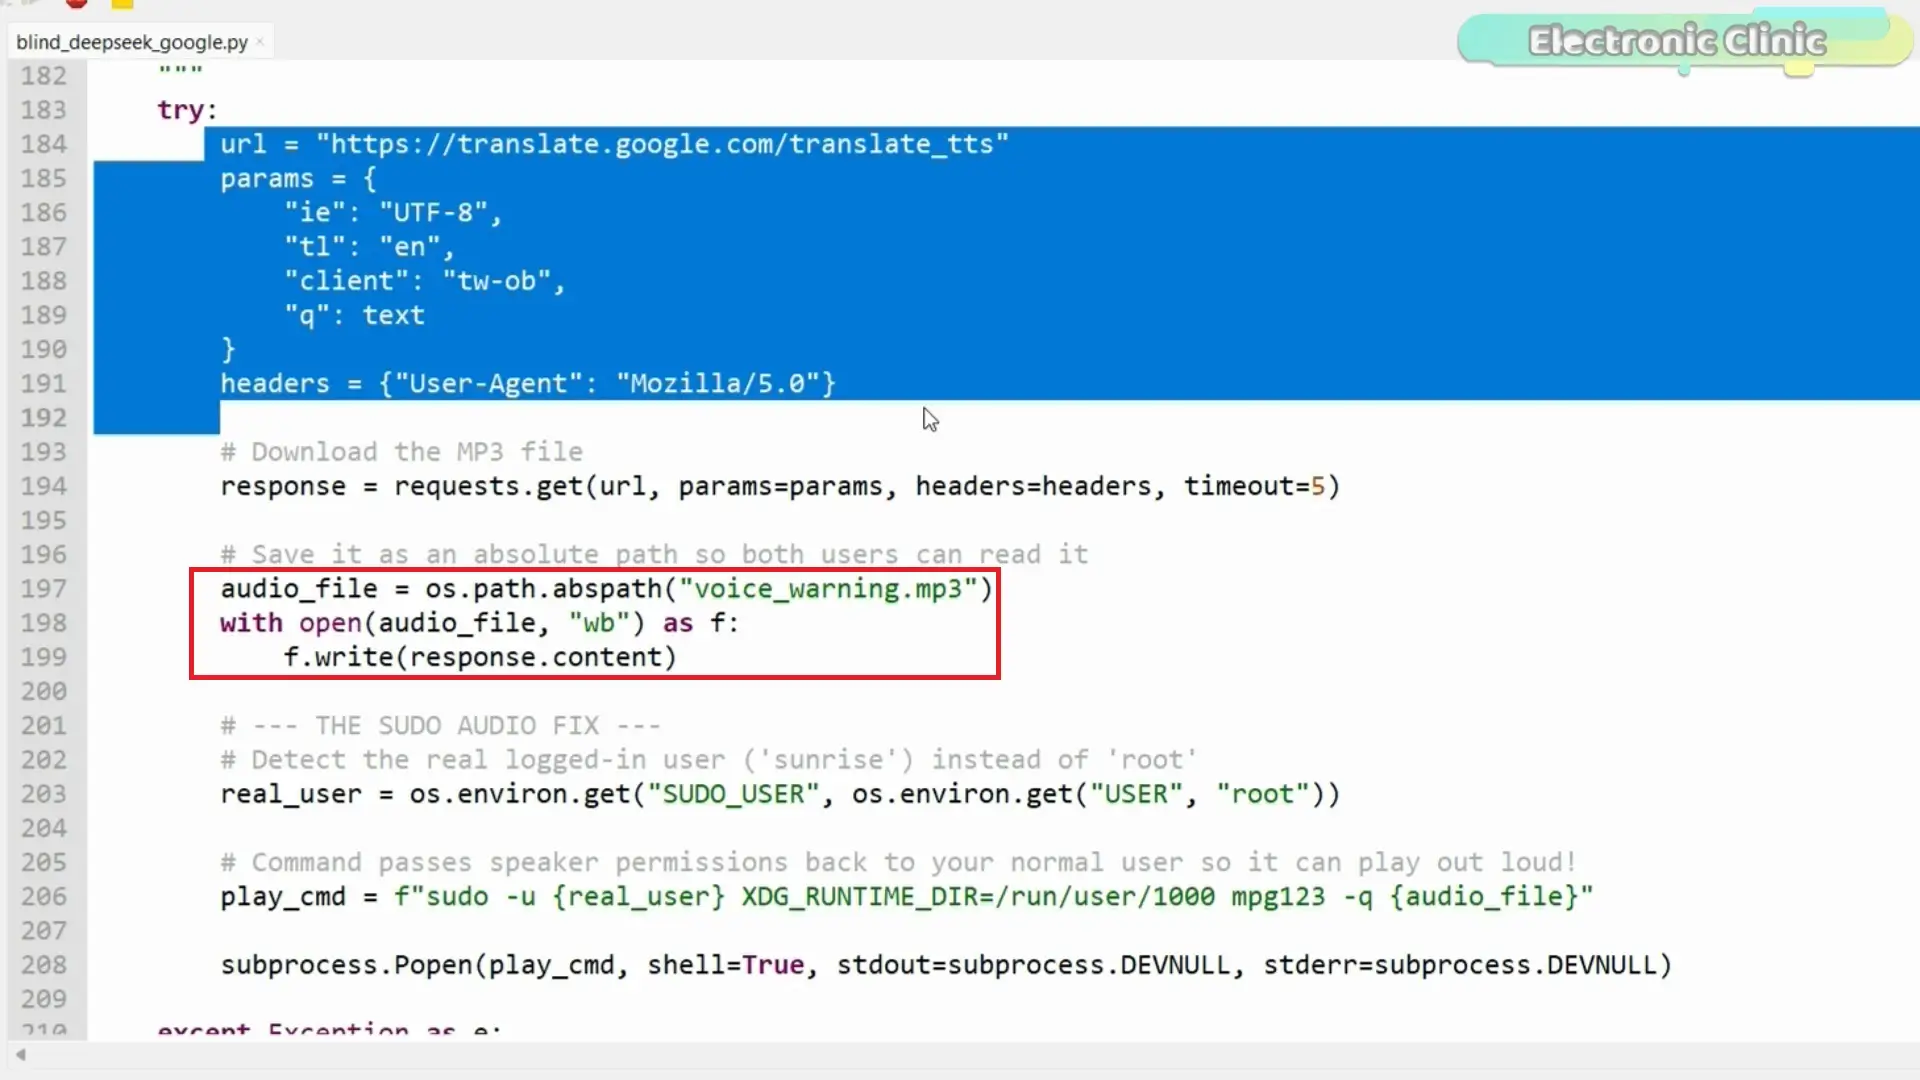
It returns an MP3 audio file
We save it locally
Then play it using mpg123
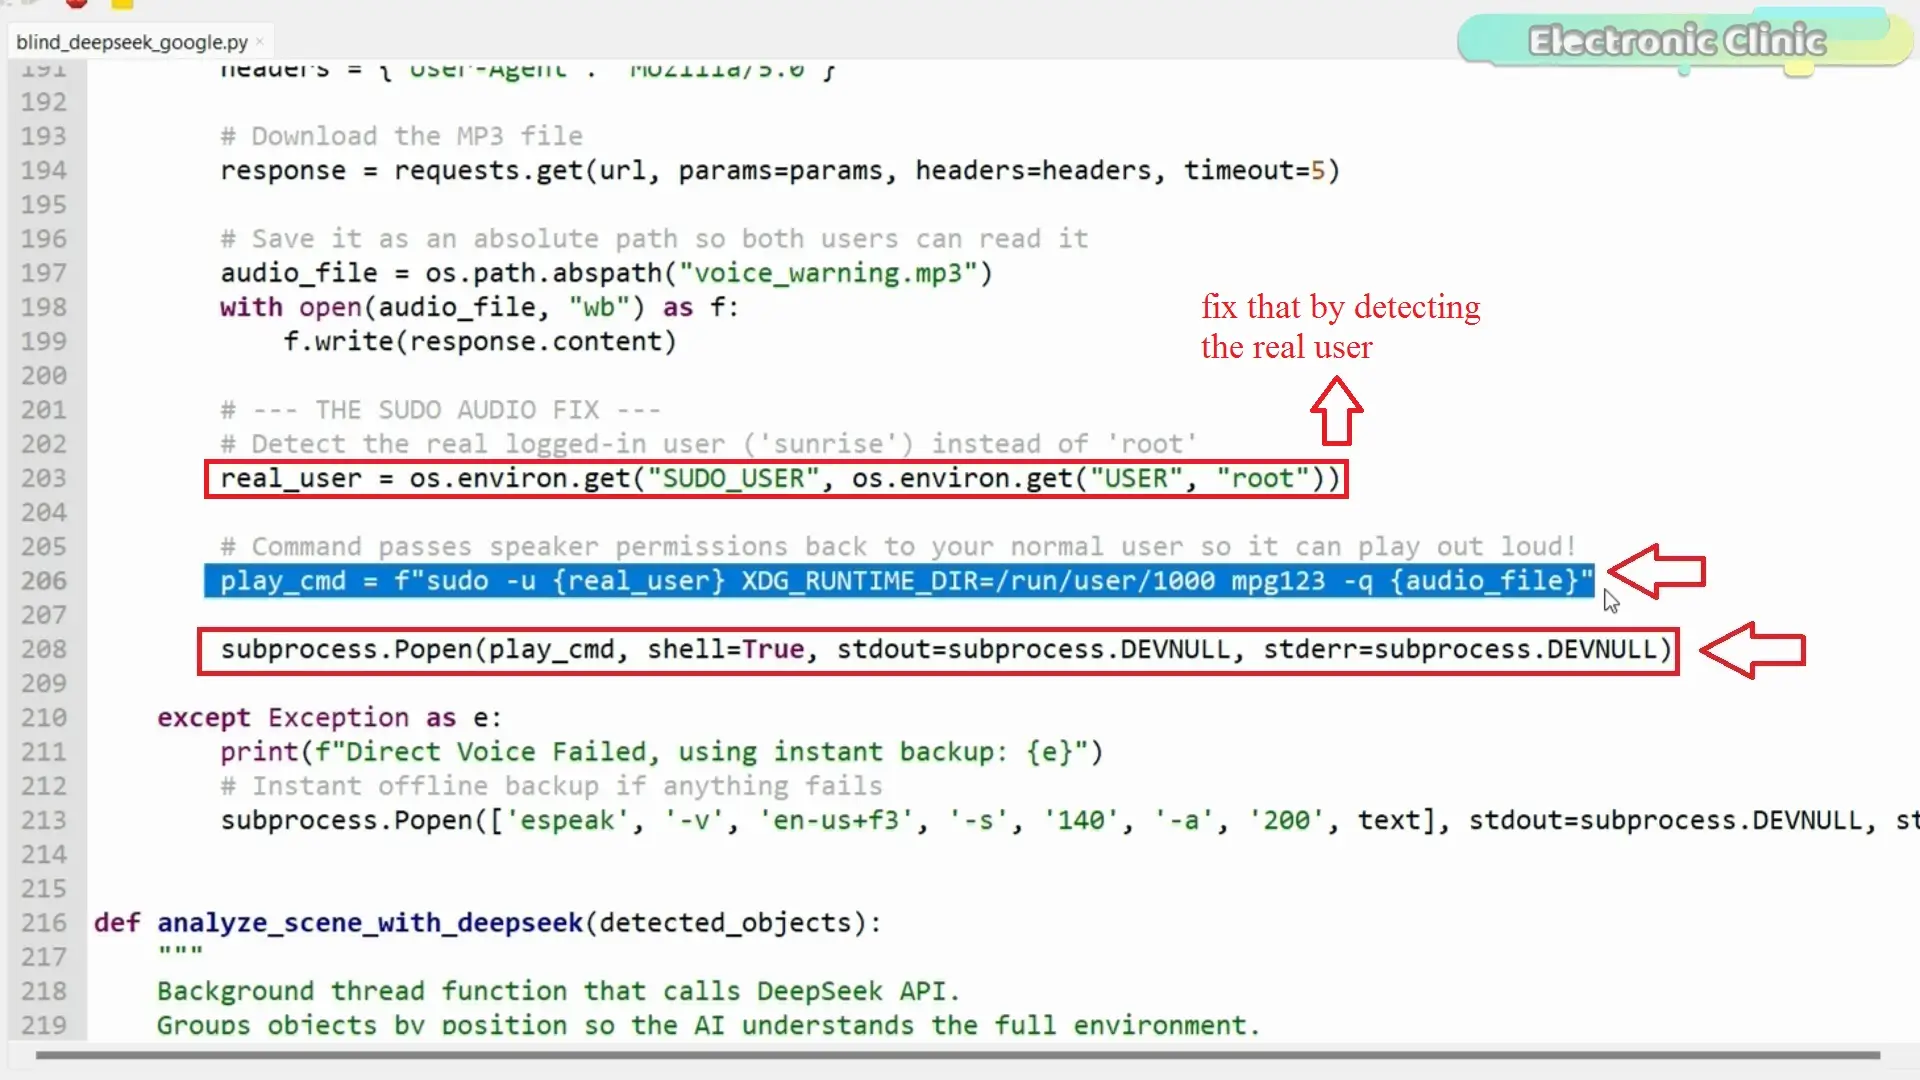
audio_file = os.path.abspath(“voice_warning.mp3”)
But there’s a small catch.
When you run the script using sudo,
audio won’t play through your normal user.
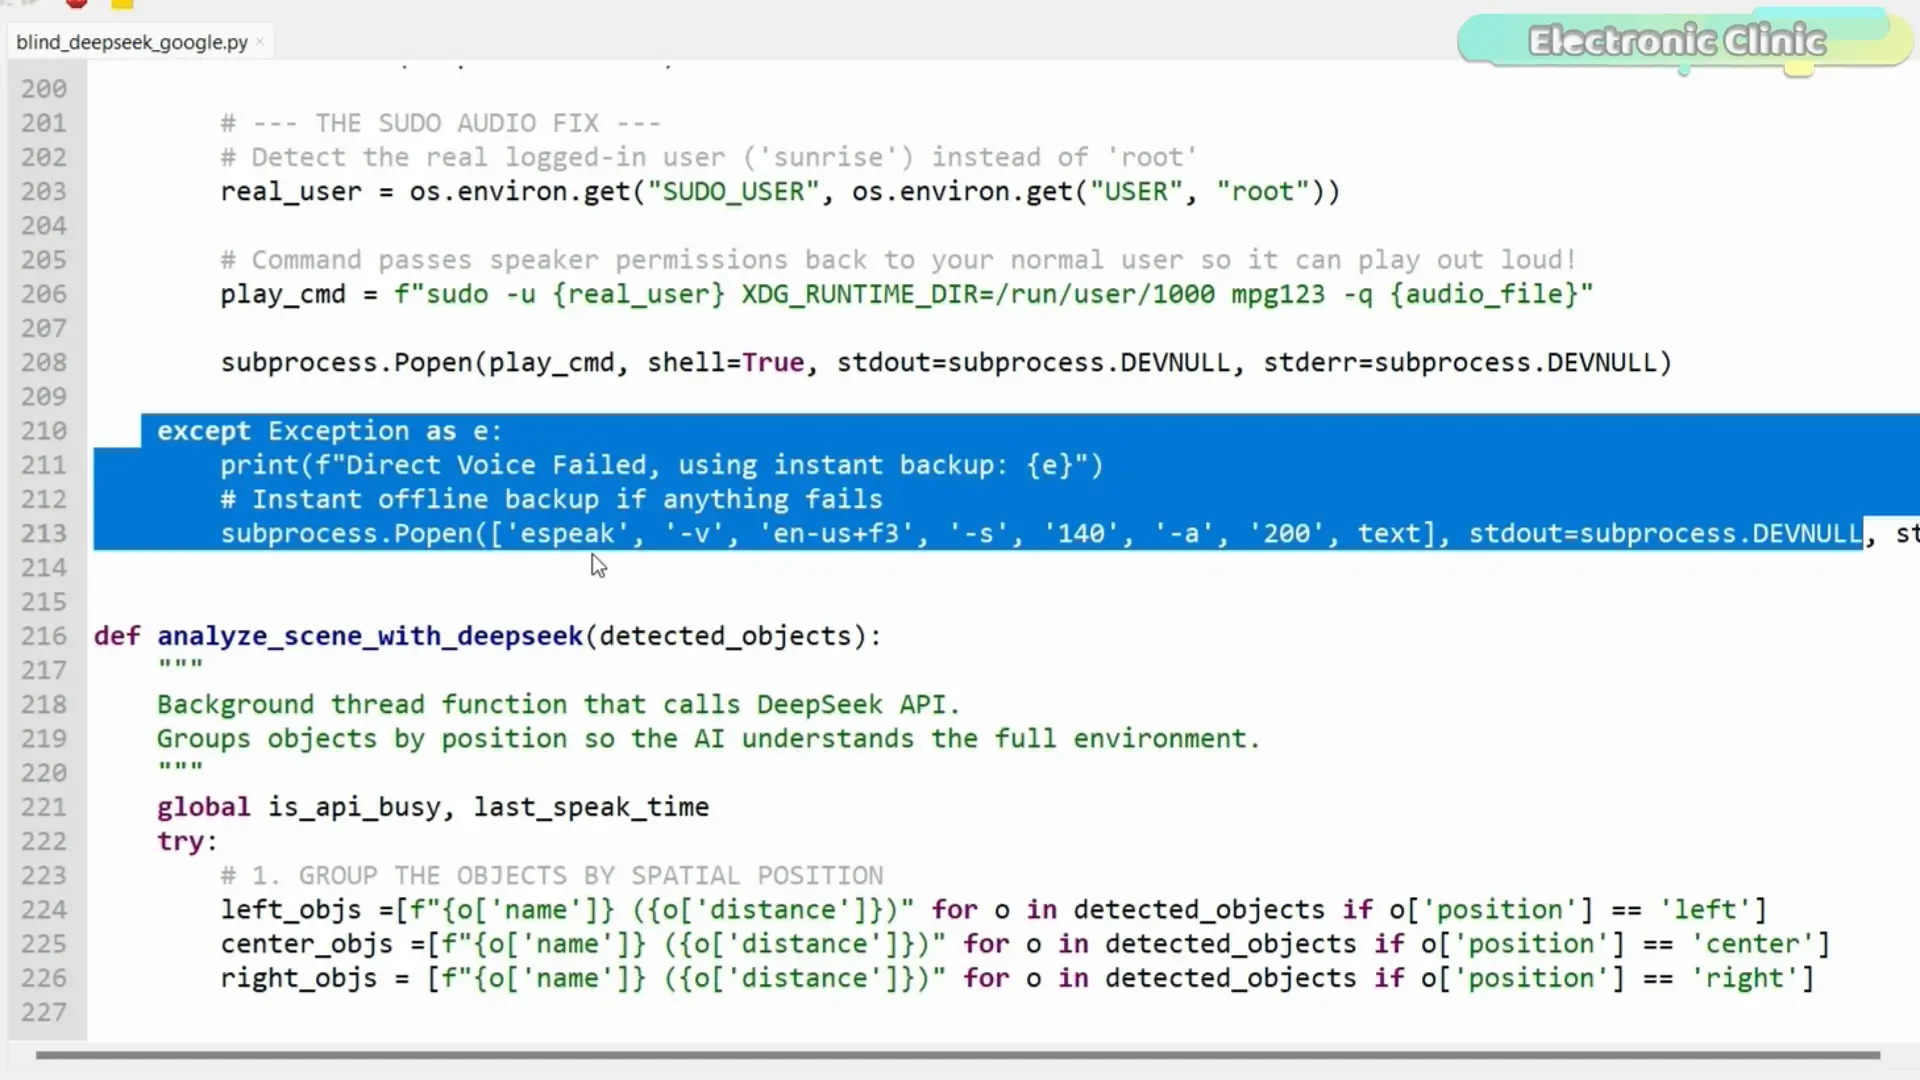
So we fix that by detecting the real user:
real_user = os.environ.get(“SUDO_USER”, os.environ.get(“USER”, “root”))
And then we play the audio as that user:
sudo -u {real_user} mpg123 voice_warning.mp3
And just like that…
You get a natural, human-like voice output.
And if anything fails,
it instantly falls back to eSpeak
so the system never stops speaking.
Now Version 2 doesn’t just see…
doesn’t just think…
it finally sounds human too.
Now let’s go ahead and test the final version…
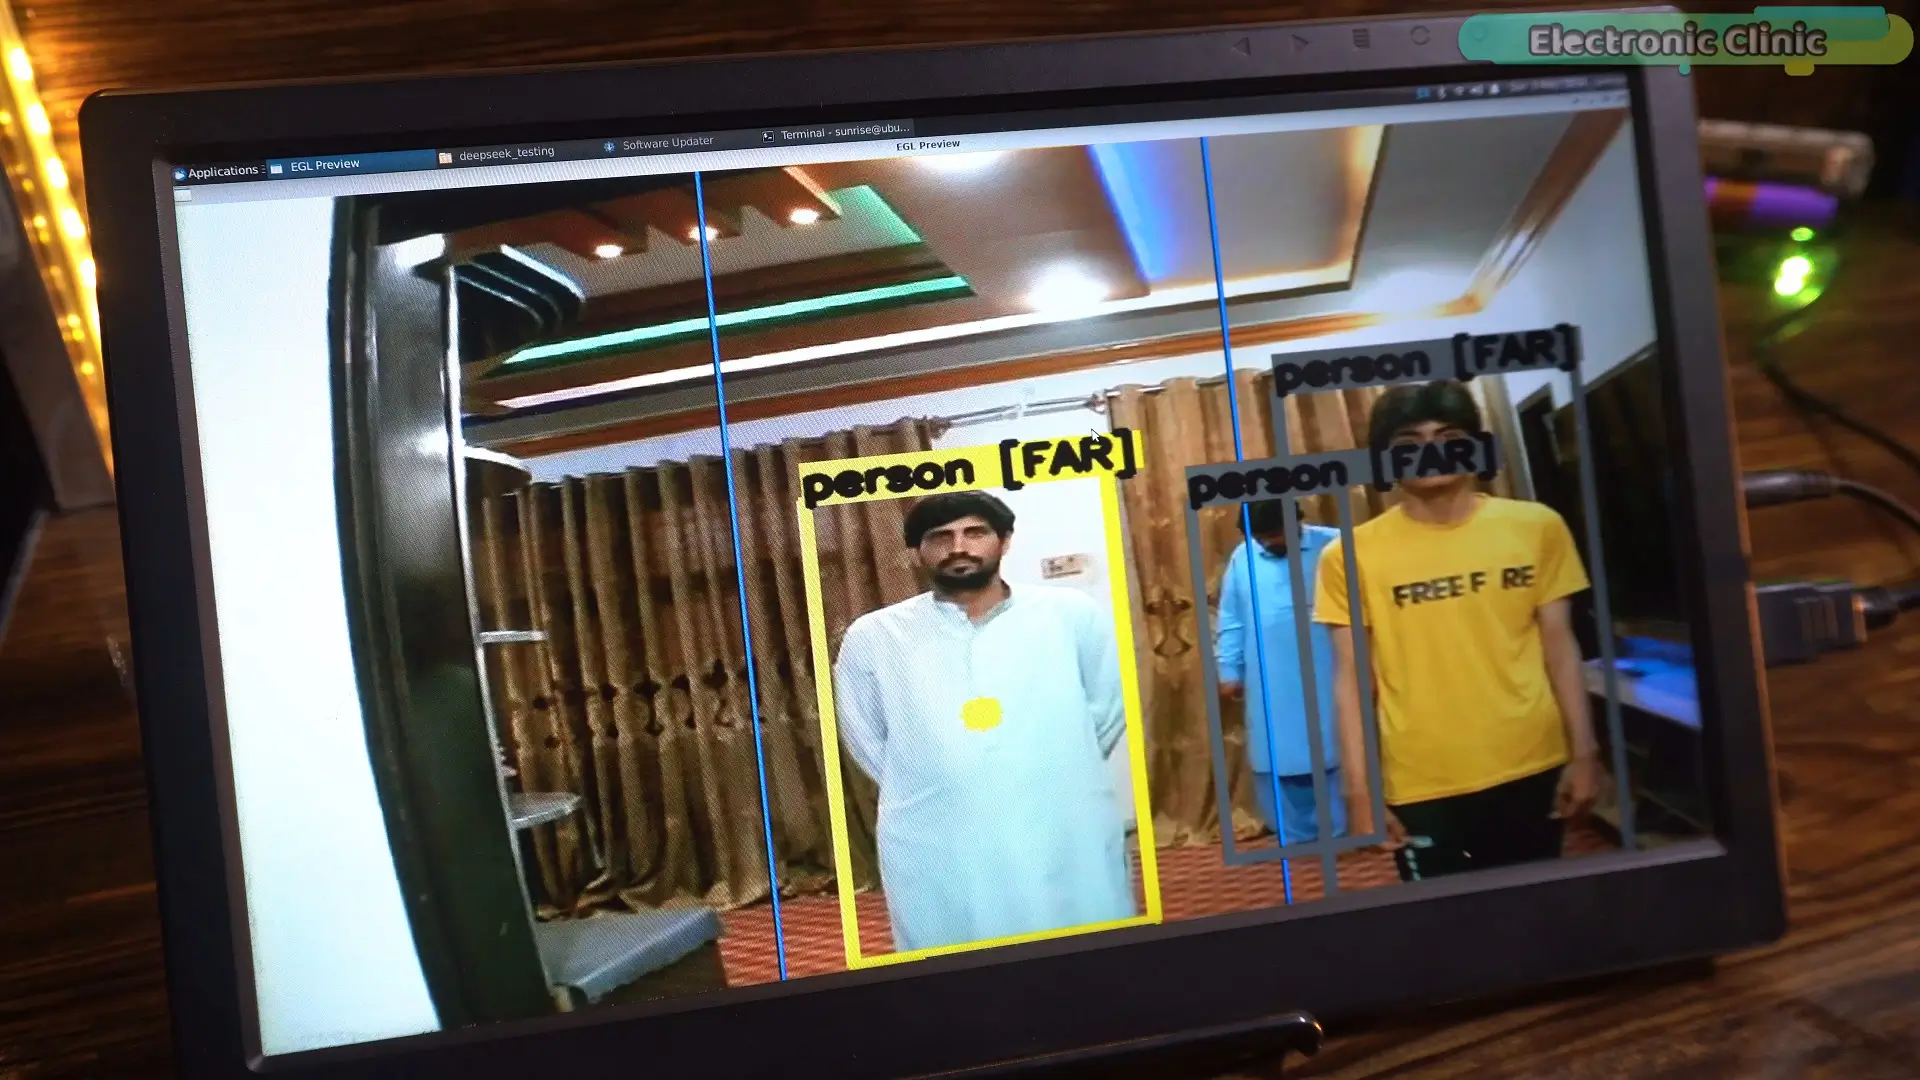
…and wow… this is actually insane.
You can hear it thinking in real time… analyzing the scene…
And then giving a clear, human-like instruction instead of just random object names.
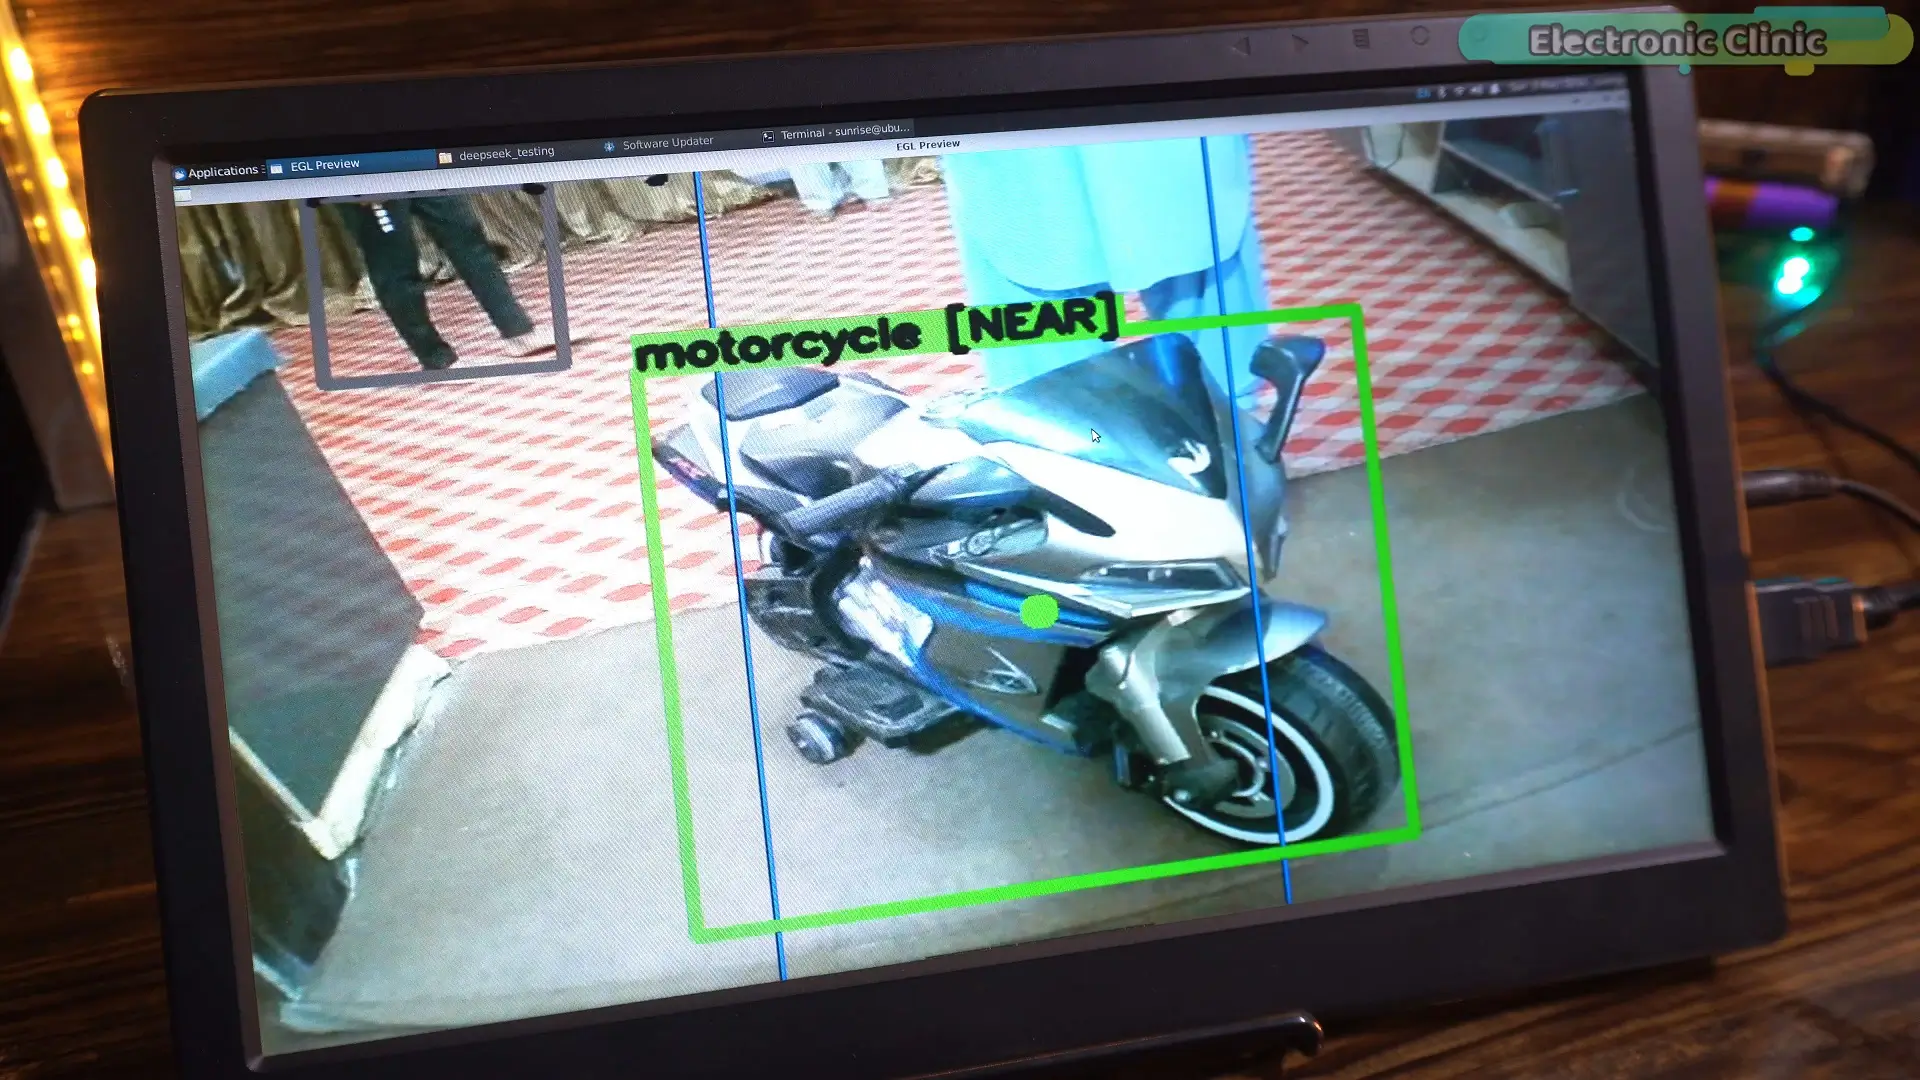
Sometimes it tells me to slow down…
sometimes it tells me to move left or right…
And sometimes it just says stop immediately…
And that’s the crazy part…
It’s not fixed.
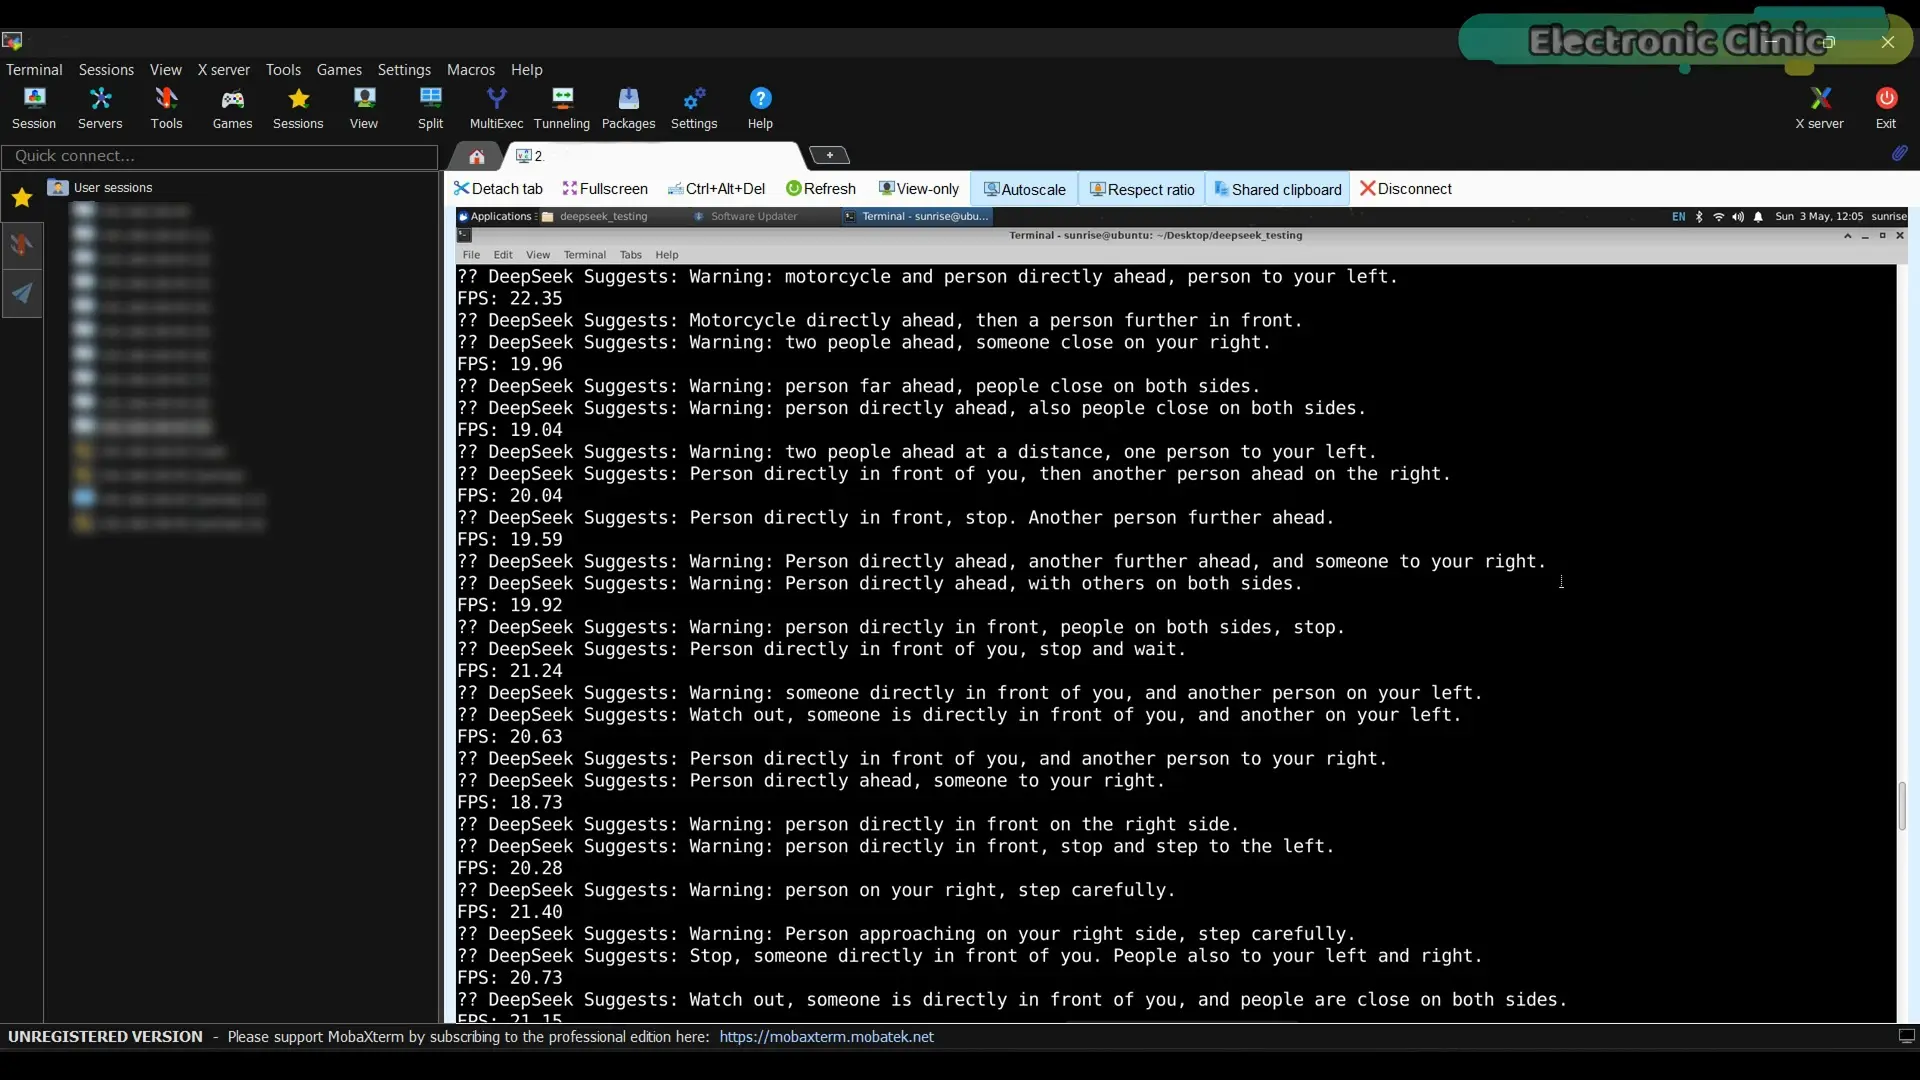
It’s not pre-programmed.
It’s reacting to the real world… differently every single time.
That’s when you realize… this is no longer just a “project”…
This actually feels like a real AI assistant guiding you.
And one more thing that made a HUGE difference…
The voice.
In Version 1, and even earlier in Version 2… we were using eSpeak.
And honestly… it sounded way too robotic.
It felt like a machine talking.
But now… with Google Text-to-Speech…
Everything changes.
The voice sounds natural… smooth… and much easier to understand.
When you are building something for visually impaired people…
this is not just a small upgrade…
This is critical.
Because clarity and comfort matter just as much as intelligence.
Now it doesn’t just think like a human…
…it actually sounds like one too.
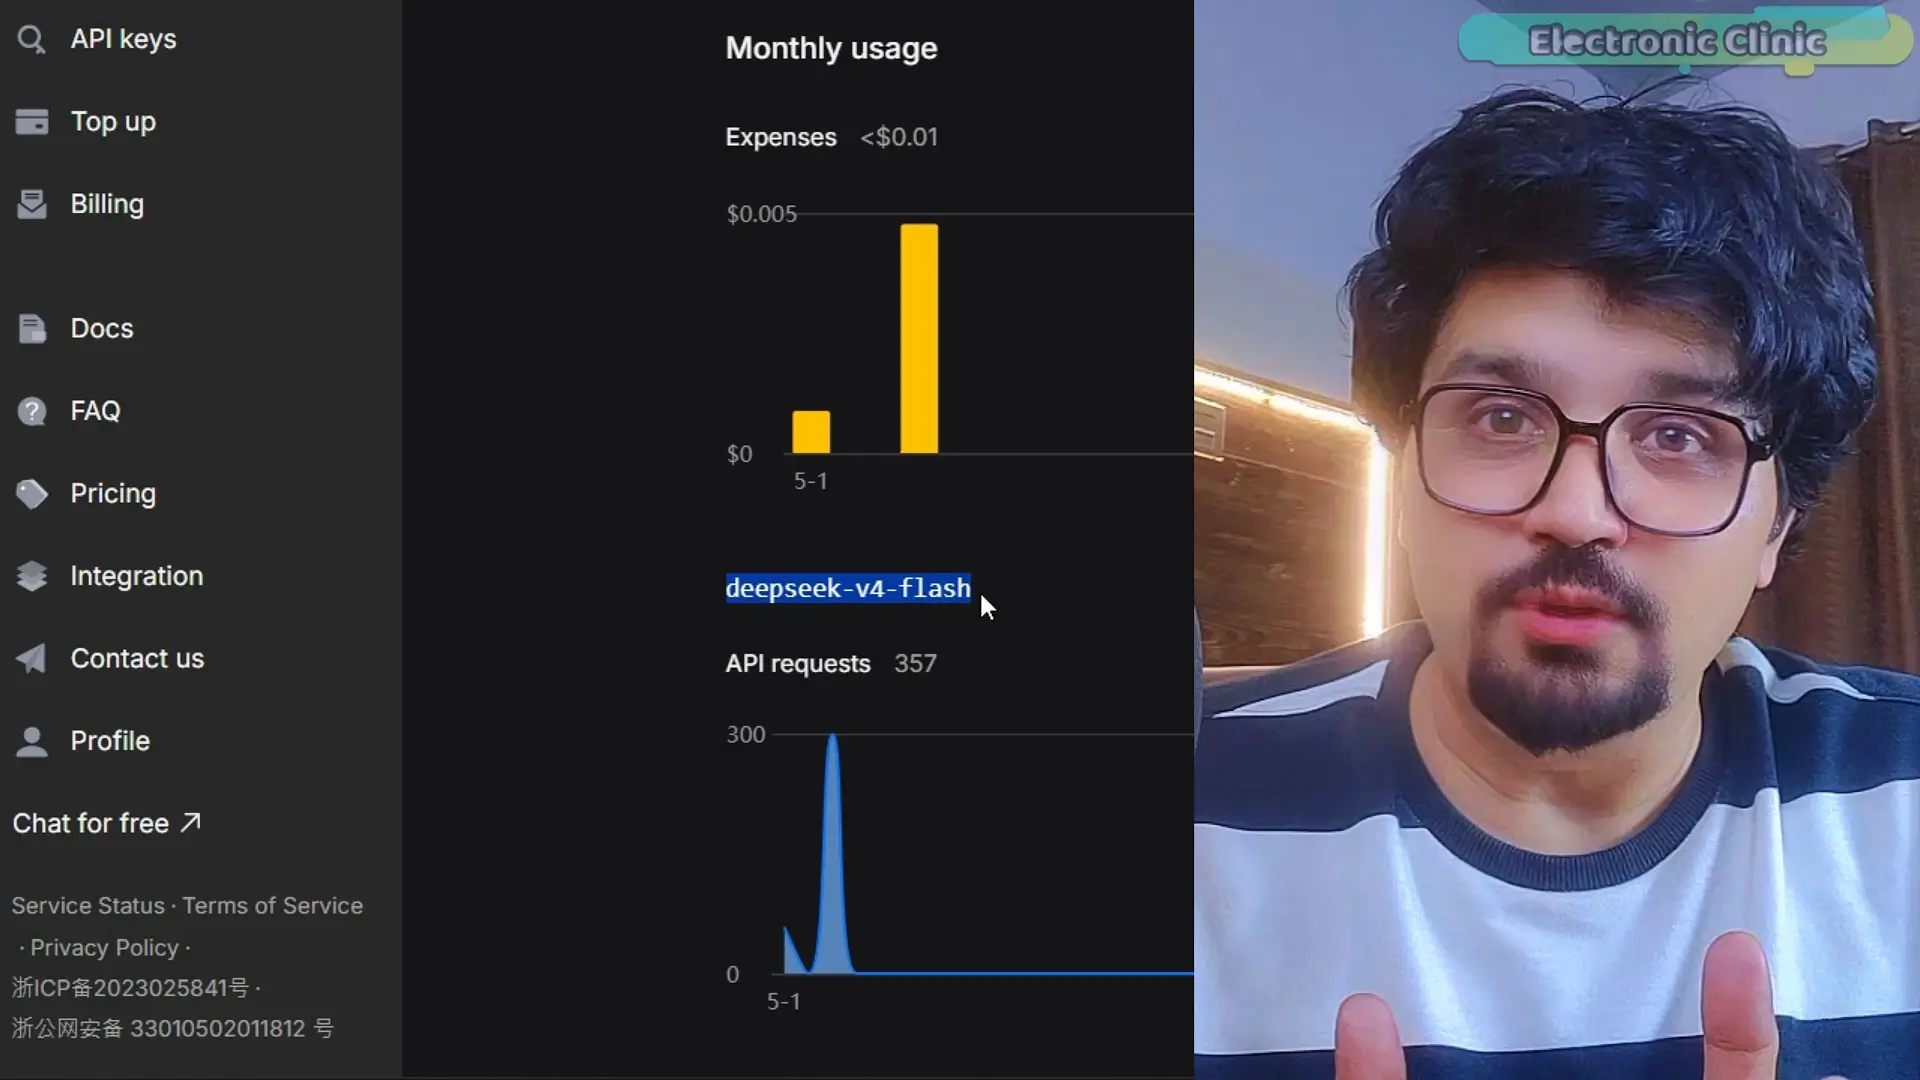
And if we talk about cost…
I did a lot of testing…
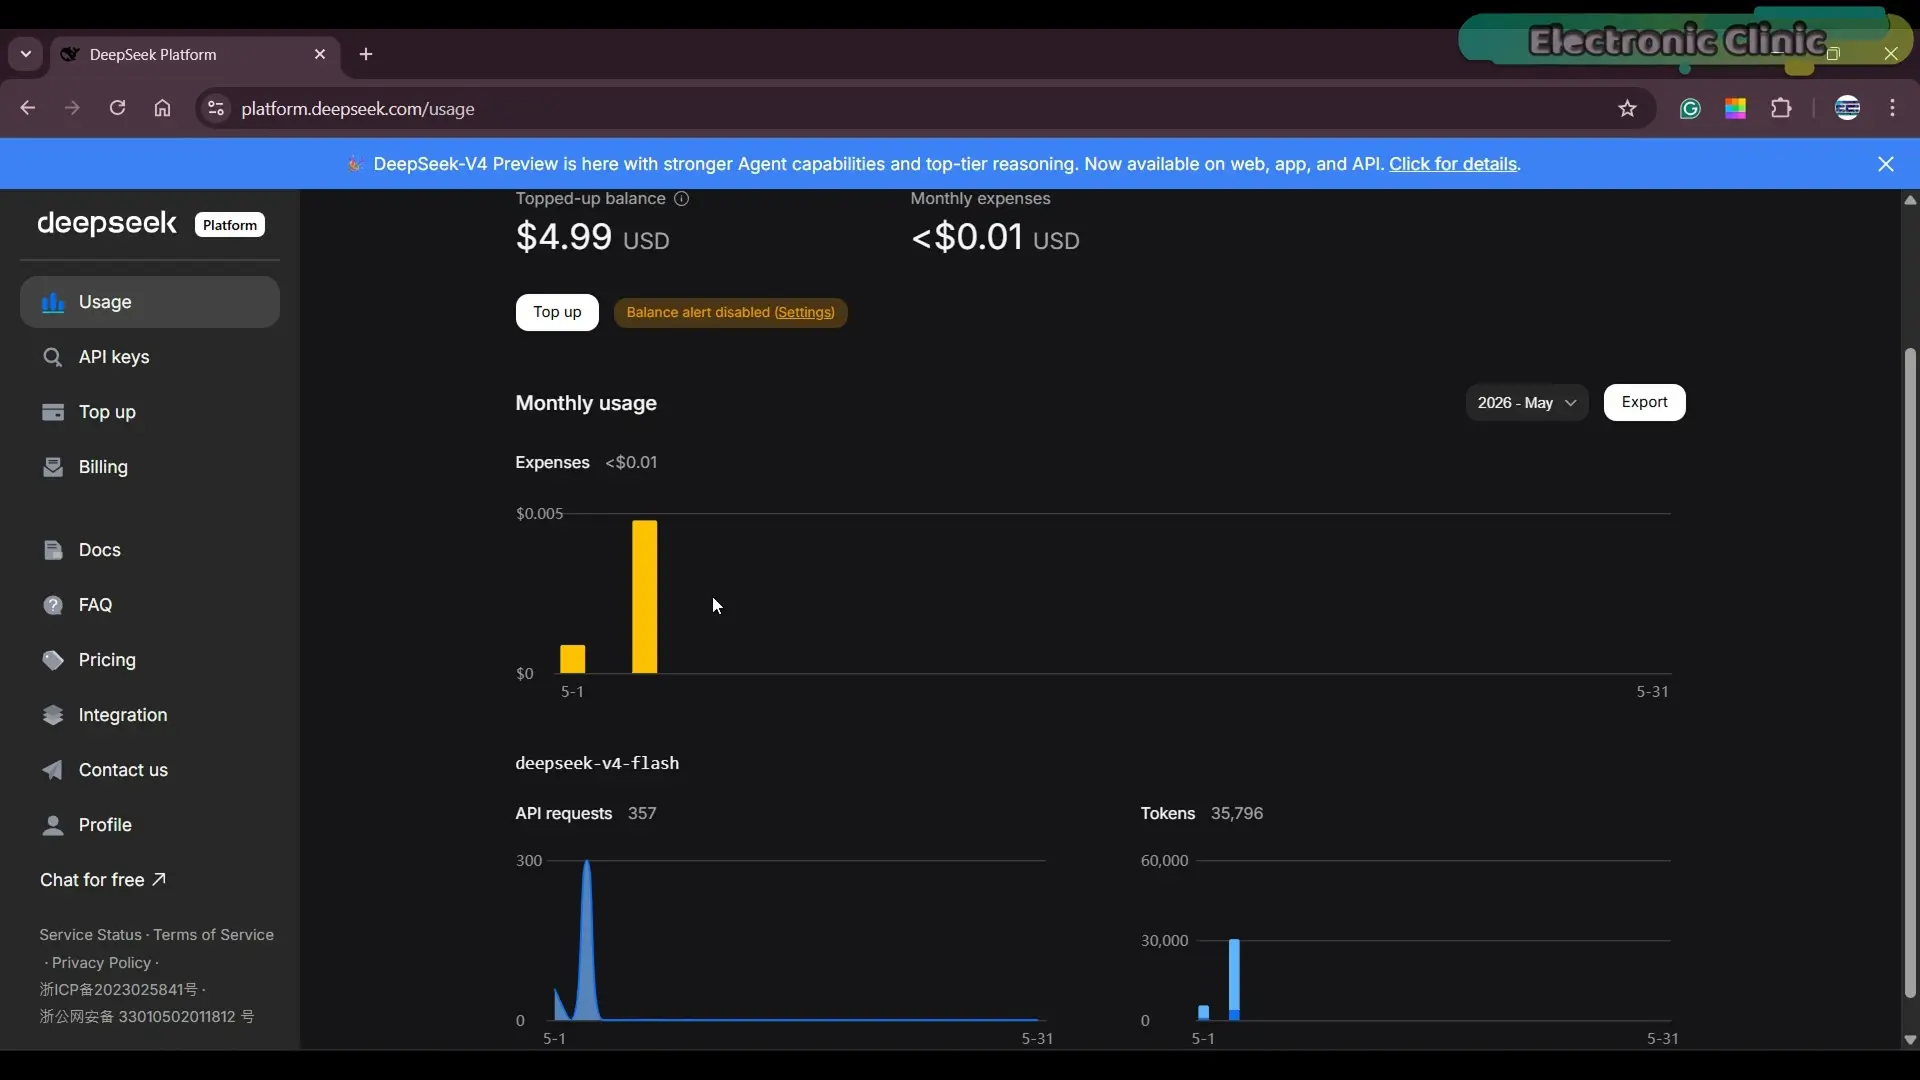
And as you can see, it’s actually very low.
Which means…
I can keep building more projects like this without worrying too much about budget.
And that opens up a lot of possibilities.
So now I am thinking…
What should I build next using DeepSeek V4 and the RDK X5?
Maybe something even more advanced…
maybe something even more useful in real life…
What do you want to see next?
Drop your ideas in the comments
After all these tests…
I am honestly impressed.
The way DeepSeek V4 works with the RDK X5
turns a simple detection system into something much smarter.
It feels more natural.
More helpful.
More human.
And that’s exactly what we were aiming for.
I have been using the RDK X5 in a lot of my recent projects…
and every time, it proves how powerful and flexible it really is.
If you are into AI, computer vision, or real-world smart systems…
you should definitely try it out.
So, that’s all for now.
Support me on Patreon:
If you enjoy my work and find these projects helpful, please consider supporting me on Patreon. With just $1, you can get access to all project source codes, schematics, and extra resources that I share with my supporters. Your support helps me continue creating new electronics tutorials, experiments, and open projects for the community. Thank you so much for being part of this journey and for supporting my work!
Watch Video Tutorial:
Discover more from Electronic Clinic
Subscribe to get the latest posts sent to your email.