How to make a Quadcopter Drone using CC3D Flight controller
Last Updated on February 25, 2024 by Engr. Shahzada Fahad
Table of Contents
Quadcopter Drone using CC3D Flight Controller:
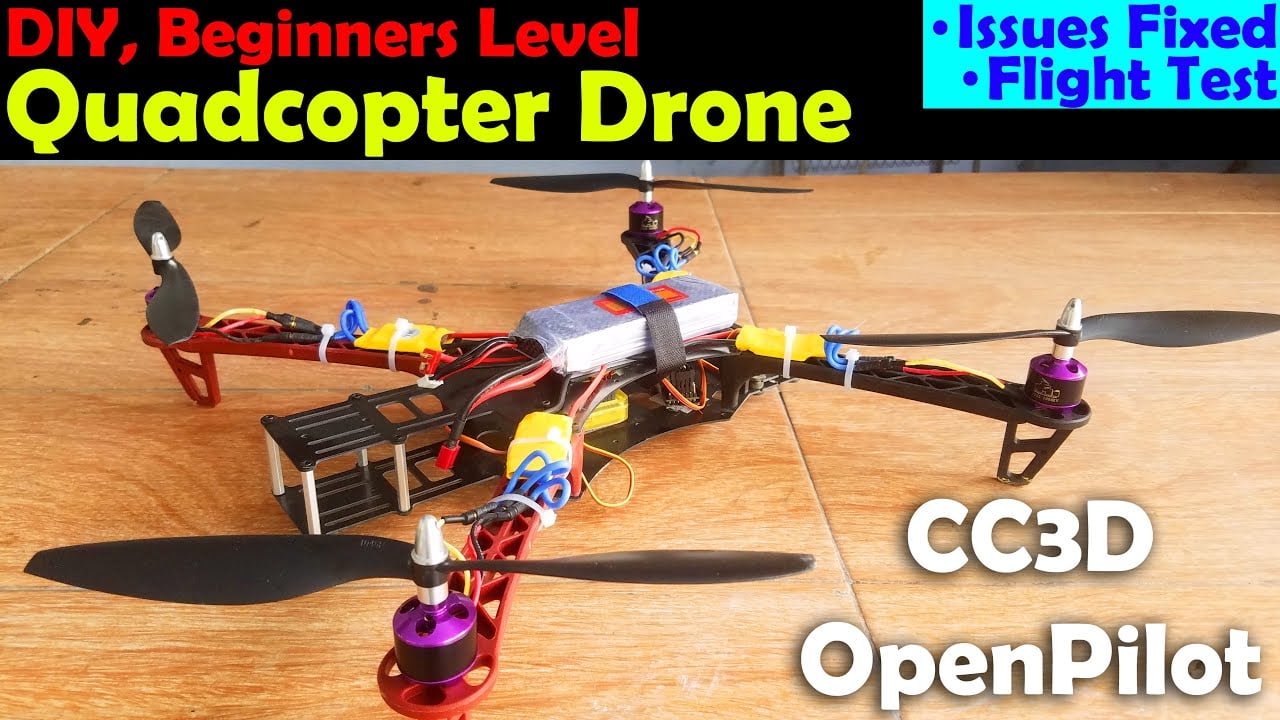
How to make a Quadcopter Drone using CC3D Flight controller– In this tutorial, you will learn how to build your very first beginner’s level Quadcopter Drone using 1000Kv Brushless Motors, 10×4.5 inches Propellers, 30A ESCs “Electronic Speed Controllers”, Power Distribution board, Openpilot CC3D Flight Controller, 3300 mAh 3S Lipo Battery, the Quadcopter frame, the one I am using is the X500 Alien V2 which is specially designed for FPV Multicopter, it is the clone version of the popular TBS Discovery DJI Spider frame; it doesn’t matter if your frame is different from mine; I will explain how to select your model during the CC3D Flight controller setup using the Openpilot GCS software, and finally the Flysky Fs-i6 Transmitter & Receiver which I am going to use to wirelessly control my Quadcopter Drone.
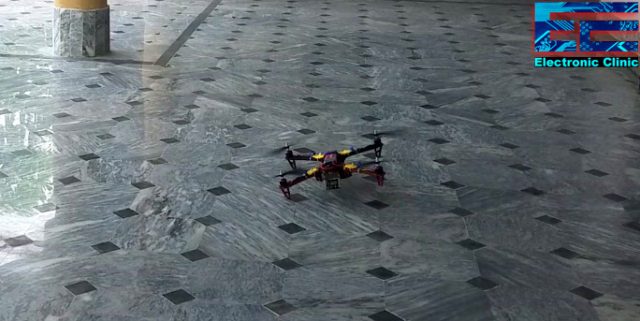
Before, I am going to explain the making and how to setup the CC3D Flight Controller, first I am going to share with you the flight results and then we will talk about everything else. For the demonstration, watch video given at the end of this article. The stability which you can see is after fixing some issues which I will explain later in this article.
Without any further delay, let’s get started!!!
Amazon Purchase Links:
X500 Alien and other top Quadcopter Frame
1000KV Brushless Motor, 30A Speed controller, and Propellers
Flysky FS i6 Transmitter and Receiver
Other Tools and Components:
Super Starter kit for Beginners
PCB small portable drill machines
*Please Note: These are affiliate links. I may make a commission if you buy the components through these links. I would appreciate your support in this way!
Power Distribution Board for ESCs:

We are going to need 4 ESCs for controlling 4 Brushless Motors. To Power up all the 4 ESCs I am going to use this small size Power Distribution board…Over here I will solder this XT60 connecter for connecting my Lipo Battery. One more thing, if you can see I have removed the red wires which are the 5v wires from the 3 ESCs, because only 1 ESC is enough to supply 5v to the CC3D flight controller, so that’s why only one ESC has this 5v wire while it is removed from the other 3 ESCs.
The Power Distribution board is very easy to use, it has these + and – signs. The Lipo battery is going to be connected with holes marked with + and – signs and there is also written XT60. So make sure the Battery +ve wire is connected with the + and GND wire is connected with the -. Use the XT60 Male connector so that you can easily connect and remove your Lipo Battery and this also eliminates the risk of attaching your battery in the wrong way.

All the holes with the + signs are connected together and this is where we connect the positive wires of the ESCs. The holes without the signs are also connected together and this is where we connect the GND wires of our ESCs. I have soldered the positive and ground wires of all the ESCs with the Power Distribution board.

I have already assembled the frame and mounted all the 4 brushless motors, as this is the easiest part and I know you can do it.

If you still find it hard how to assemble the frame then watch my video tutorial.
Openpilot CC3D Flight Controller:
CC3D Flight Controller Description:
CC3D Openpilot Open Source Flight Controller 32 Bits Processor Flight Controller for Multirotor Quadcopter drones.
CC3D Flight Controller Features
Powerful STM32 32-bit microcontroller running at 90MIPs with 128KB Flash and 20KB RAM
3-axis high-performance MEMs gyros and 3-axis high-performance MEMs accelerometer
Tiny 36mmx36mm 4 layer PCB for superior electrical noise reduction and flight performance.
Software support for Windows, Mac and Linux
Direct high speed USB support with no drivers required, a truly plug and play device.
Spektrum satellite receiver support
Futaba S-BUS hardware support
Innovative Flexi-port technology for superior port flexibility
4Mbits on-board EEPROM for configuration storage
Flexiport
CopterControl also offers the innovative Flexi-port which provides either I2C connectivity or a second serial port. Flexi-port gives CopterControl the flexibility to use either I2C and a single serial port or dual serial ports, according to your connectivity needs.
Superior user experience
OpenPilot has tried to make your experience with the CC3D as easy and trouble-free as possible. Naturally for a high-end product, the hardware is complete. there is nothing to solder. The included RC harness allows you to connect any standard PWM receiver. All CopterControl boards are tested before shipping and come with bootloader already flashed. A standard mini-USB cable (not included) is used to load the latest firmware and configure everything for your unique airframe.
The OpenPilot project, whist still young, it trying to make Open Source much more user friendly. OpenPilot software is designed to be used by everybody! All major operating systems are supported and install packages are provided. The software is all Free software under the GPLv3 license and not only are you welcome to hack it, but we encourage it!

This is the OpenPilot CC3D Flight Controller provided with these female jumper wires on one end and a connector on the other side. On the left side you can see we have these two ports, this is the main port and the other one is the flex port. The input port is used to connect the RF receiver.
You can see these numbers written next to these male headers, these numbers are the channel numbers and we connect our ESCs with these channels. This dot represents the signal, the + is the 5v, and the – is the ground.
This arrow sign on the Openpilot CC3D Flight Controller represent the direction; it must be pointing in the same direction as the Quadcopter front, so this sign and the Quadcopter front direction must be in parallel.
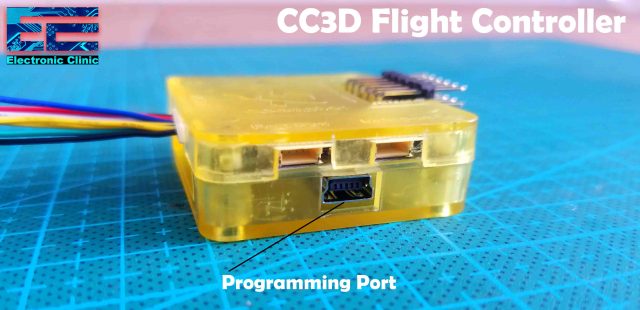
Finally, we have this port which is used to program the CC3D flight controller.

I fixed the flight controller using a double tap and as you can see the arrow head is pointing towards the front of the Quadcopter frame.

You can see I connected this input port of the flight controller with the Flysky receiver. The first one is the ground, the second one is the 5v, and the 3rd wire is the channel 1, 2, 3, 4, 5, and 6. All these inputs are connected with the 6 channels of the receiver.

Connect the middle wire from the ESC with the yellow wire of the brushless motor and then connect the other two wires with the Red and Black wires. If the motor is spinning in the wrong direction then simply switch these Red and Black wires.
CC3D Flight Controller Connection Diagram:

Next we have this simple connection diagram, which clear shows how the RF receiver is connected with the Openpilot CC3D flight controller, and which channels are used to control all the 4 Brushless motors.
The 4 ESCs are connected with the 4 channels of the flight controller. The first irst ESC is connected with channel 1, 2nd ESC is connected with channel 2, 3rd one is connected with channel 3, and the 4th ESC is connected with the channel 4.
The first motor should spin in the clockwise direction, the second motor should spin in counter-clockwise direction, the 3rd motor in clockwise, and the 4th motor should spin in the counter clockwise direction.
Basic Quadcopter Issues and how to fix them:
I made some mistakes while programming the CC3D flight controller for the first time. here is my first flight test, which is very bad, because I didn’t properly setup the flight controller, and this is the reason I didn’t record anything, because first I wanted to perform the tests and when I am satisfied then I will share with you the final setup. I am also a beginner, I have never built a Quadcopter before, this is my first DIY Quadcopter Drone and if I get successful in flying this Quadcopter then I am sure by following my setup you will also be able to make your Quadcopter fly.
Let’s talk about some very common issues that I faced while making my first Quadcopter and then I will explain; how to properly setup your OpenPilot CC3D Flight Controller using the OpenPilot GCS software.
Problem Number1:
If you are facing this type of problem when you are not able to lift your Quadcopter up in the air, and the Quadcopter behaves in an abnormal way then it means the Brushless motors are not correctly calibrated. So, what I did? I reprogrammed the OpenPilot CC3D Flight Controller, and the Quadcopter Drone started to accept my commands. Now the drone is kind of normal but it still has this issue which is the problem number 2.
Problem number2:
If you watch my video, you will clearly see without even touching the control stick the Quadcopter is moving in the forward direction and sometimes it drifts to the Left or Right side. I fixed this issue to some extent using the trim keys on my Flysky Fs-i6 transmitter. After using the trim keys then my Quadcopter Drone could go up straight with a very little drift. Seriously I tried my best but I couldn’t make it stay at one position, it drifts, but I can control it using the control stick on my Flysky Transmitter.
Problem number3:
The problem number 3 which I faced during my flight tests was my Drone started to twitch during the flight, this thing started to happen after my drone had some crashes, when I closely observed the props, I found one prop was slight damaged and this was causing the drone twitch, the Quadcopter frame was vibrating a lot, and because of this twitching problem I badly crashed my Drone, but thanks to Allah nothing happened to the frame and flight controller. Anyways I replaced all the four props, and I also fully charged my battery and all the issues were gone and finally I was able to fly this Quadcopter.

I am flying it for the first time and I am very nervous, seriously I find it very hard to move it in different directions, although I have changed the channel 1 and channel 2 end points, still the control stick is very responsive. I don’t want to damage my props and I am also afraid I am going to hurt someone. So, I decided to go some open place where I can practice and improve my skills.

I am really happy with my first Quadcopter Drone; I know it’s not perfect as it has no GPS, no telemetry device, and no FPV camera. But, in my upcoming videos and articles I will add all these devices when I am done with my research work, as I am studying different flight controllers and brushless motors. In my next project I will use the KK 2.1.5 flight controller.
I think, now it’s time to go ahead and take a look at the OpenPilot CC3D Flight Controller setup.
OpenPilot CC3D Flight Controller Setup:
Before you start with the CC3D Flight Controller Setup, first you will need the OpenPilot GCS software.
Download: OpenPilot version 15.02.02
You can see the CC3D Flight Controller is not connected with the Laptop. We are going to use the OpenPilot GCS version 15.02.02 for the CC3D flight controller setup. The GCS stands for “Ground Control Station”. The software download link is already given above. After you have downloaded and installed the OpenPilot GCS software then go ahead and double click the icon to open the OpenPilot software and click on the Vehicle Setup Wizard.

First of all you will see this warning message “You must remove all propellers from the vehicle before proceeding!” and as you can see I have already removed all the propellers. This wizard will guide you through the basic steps required to setup your OpenPilot controller for the first time. As a beginner you should read all the instructions carefully. So, anyways when you have removed your Drone Propellers then go ahead and click on the next button.

The very first thing that we are going to do is to update the firmware. Right now you can see the flight controller is not connected, first click on the Upgrade button and then connect the flight controller and wait for a while. When you have updated the firmware then go ahead and click on the next button which will take you to the OpenPilot Board Identification. You don’t have to do anything on the page. Simply click on the Next button.
On the OpenPilot Input Signal Configuration select PWM and then click on the next button.
Select Multirotor on the Vehicle Type Selection.
On the OpenPilot Multirotor Configuration I selected Quadcopter X, as my Quadcopter Drone resembles the letter X. We have other models available which you can select.
On the OpenPilot Output Signal Configuration we have different ESCs. Select the Rapid ESC.
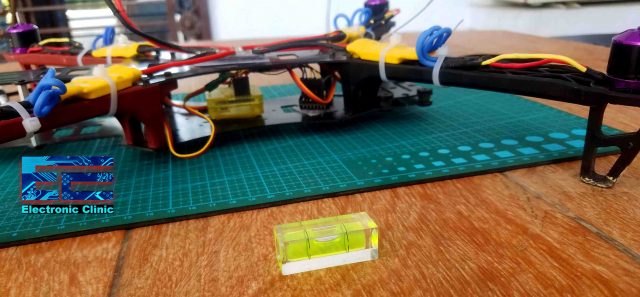
OpenPilot Sensor Calibration Procedure, this is really an important step make sure your Drone is on a flat surface before you click on the Calculate button, otherwise this will affect the Drone stability during the flight, when everything is fine then you can click on the Calculate button and wait for a while. When you see done, this means you are ready for the next step, so simply click on the Next button.
The OpenPilot ESC Calibration Procedure is the 2nd most important step, all the instructions are given on the screen, confirm all the safety questions, Check all the three boxes and then click on the start button and then you can go ahead and connect your battery, wait for around 1 minute, the motors will make different sounds, so just wait for the confirmation beeps. When the calibration process is completed then you can click on the stop button and wait for the confirmation beeps before you disconnect the battery. When everything is completed, disconnect the battery and press the next button.
Again connect the battery.

Now on the Output Calibration each motor is going to be individually calibrated. Click on the start button and move the slider until the motor starts spinning; it’s just that simple, now you will have to repeat this for all the four motors. Go back and confirm these values once again, if any of the motors is not spinning then simply change the value. Finally, click on the next button.
Next you will see list of the famous Quadcopter models, select the one which resembles your Drone frame.

This model is pretty close to the model I am using, so I will continue with this one. When you have selected your model then click on the next button.
Finally click on the save Button and wait for a while. Congrats!!! The hard work is done.
Transmitter Setup Wizard:
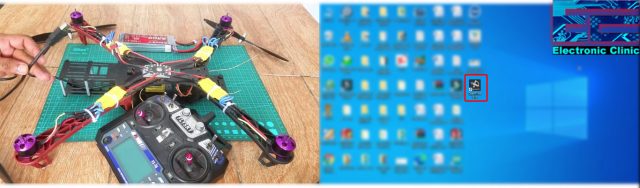
Click on the Transmitter Setup Wizard and follow the same exact steps as I explained in the video give below.
Next time, I will use the same Quadcopter frame with some branded Brushless motors. I will also test it with the KK 2.1.5 Flight Controller; I will make a fair comparison so that you can decide which Flight controller you need to get started with. That’s all for now. If you have any questions let me know in a comment.
Related Projects:
Twins Motor RC Plane Design Calculation:
https://www.electroniclinic.com/rc-plane-designing-calculations-making-and-flight-test/
Single Motor RC Plane Design calculation:
https://www.electroniclinic.com/diy-rc-plane-for-beginners-with-amazing-stability-and-design-calculations/
SU-27 RC Jet plane:
https://www.electroniclinic.com/rc-jet-plane-su27-with-2600kv-brushless-motor-making-and-flight-test/
RC Paper Airplane:
https://www.electroniclinic.com/rc-paper-airplane-made-of-foam-board-using-2600kv-brushless/
Watch Video Tutorial:
Discover more from Electronic Clinic
Subscribe to get the latest posts sent to your email.


Hi Eng Shahzada, I saw your activities on the page , that was a real eng. my best wishes to you and hope more good things in your life.
I am electronic eng. ” between me and you “old engineer ” graduated from university of Baghdad also good skill in Russian and polish even English language , my interest in design electronic devices and modules .
Thanks .
I think you did a wonderful job making you first drone, and the instructions and particularly the video were very understandable (my native language is English.. My second I’m just beginning to learn is Russian). My second language choice is difficult for me but your instructions, and English, are excellent and simple enough for a clever child.
Thanks for this instruction… I have a new Frsky Taranis Q X7S radio, not yet used, and a Frsky controller/receiver still in the packages, so I will finally be trying to make my first drone similar to yours… Just a different system and software.
Despite that small difference, I’m encouraged and motivated by your tutorial.
Thanks