Arduino Nano USB C, Review and Testing
Table of Contents
Arduino Nano USB C:
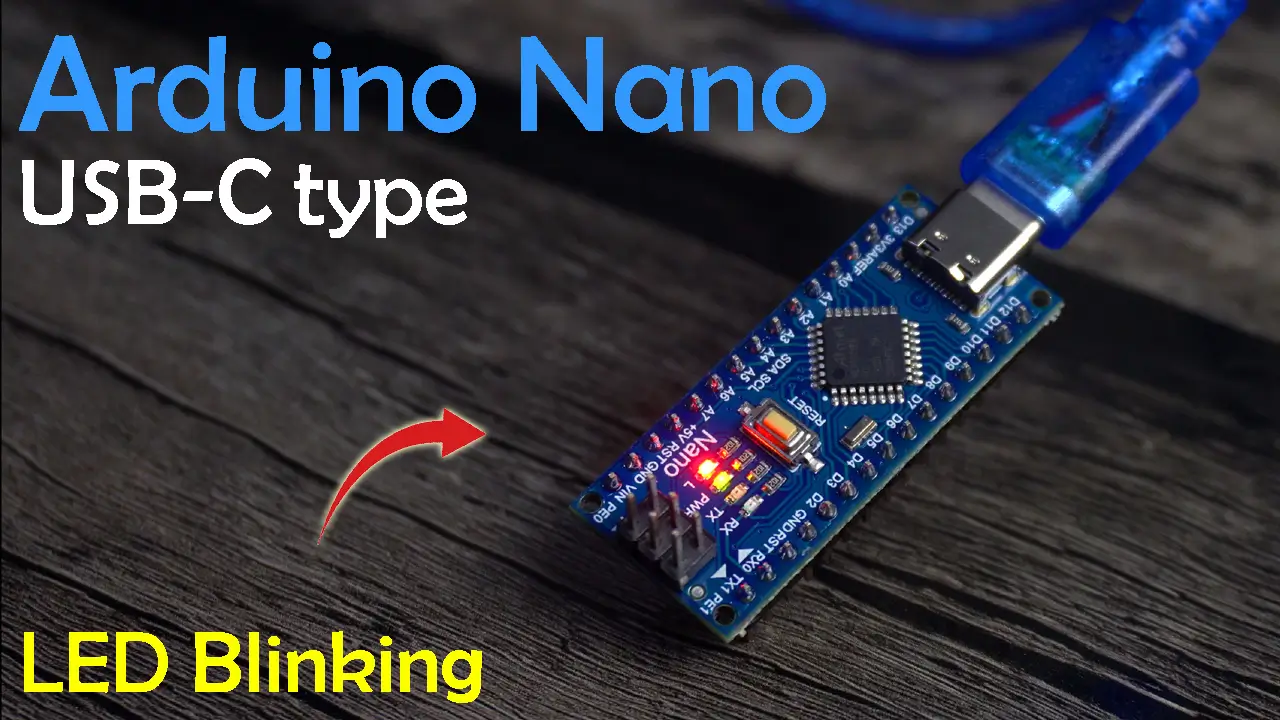
Arduino Nano USB C, Review and Testing- Just for you guys, I have launched my USB-C type Arduino Nano on Amazon with the brand name Electronic Clinic. So, when you buy the Arduino Nano, be sure to check for the brand name Electronic Clinic.
I have made its packaging quite premium.
Inside this box, you will find one Arduino Nano in an anti-static plastic bag and one original USB-C type cable.
Just check out the quality, the USB-C type port has added a touch of elegance to the Arduino Nano. For your convenience, I have already soldered the male headers, so you will get it ready to use. All you need to do is connect it to your computer and start programming.
If you buy this kind of Arduino Nano board, which does not come with a cable, USB-C type port, or soldered male headers. You will not be able to use any cable with it, and moreover its cable is not available everywhere. So, you will have to buy a separate cable for it, which means extra payment. And if the cable gets misplaced or lost, you will have to buy another one.
So, I must say, it is time to upgrade. Instead of purchasing this kind of Arduino Nano, buy a USB-C type Arduino Nano. Because USB-C type cables are readily available in every house nowadays, and you can easily get them from any mobile shop.
Amazon Links:
Arduino Nano USB-C (Recommended)
Other Tools and Components:
ESP32 WiFi + Bluetooth (Recommended)
Super Starter kit for Beginners
PCB small portable drill machines
*Please Note: These are affiliate links. I may make a commission if you buy the components through these links. I would appreciate your support in this way!
Why Choose the Electronic Clinic Nano 3.0?
Pre-Soldered Pins for Your Convenience: Say goodbye to tedious soldering tasks! On this board, the pins are already expertly soldered, saving you valuable time and ensuring hassle-free setup for your projects.
Seamless USB-C Connectivity: Experience lightning-fast data transfer and reliable connectivity with the USB-C port. The USB-C interface not only provides faster data transfer speeds but also offers convenient reversible plug orientation, making it easier to connect your board to modern devices.
Comprehensive Compatibility: Whether you are a hobbyist, student, or professional, this versatile board is your gateway to endless possibilities in the world of DIY electronics. With its compatibility with Arduino Nano CH340 Controller and Arduino IDE, it’s perfect for enthusiasts of all skill levels.
Includes USB-C Cable: To further enhance your convenience, each board comes with a high quality USB-C cable, ensuring you have everything you need to get started right away.
Seamless Compatibility: Compatible with a wide range of sensors, shields, and accessories, this board seamlessly integrates into your existing projects.
Enhanced Features: From its advanced microcontroller to its intuitive programming environment, every feature is designed to enhance your experience.
Global Support: Backed by a community of enthusiasts and experts, you’ll never be alone on your journey with the Electronic Clinic Nano 3.0.
Technical Specifications and Pinout:
8 Analog Input Ports: Explore the nuances of your analog signals with precision using the A0 to A7 ports.
14 Digital Input/Output Ports: From communication with other devices to controlling external components, utilize the TX, RX, and D2 to D13 ports for versatile digital operations.
6 PWM Ports: Achieve finer control over your connected devices with PWM capability on D3, D5, D6, D9, D10, and D11 ports.
TTL Level Serial Transceiver Ports: Seamlessly exchange data with other devices using the RX/TX port pair.
Bootloader Installed: Get started quickly with a pre-installed bootloader, ensuring hassle-free programming and experimentation.
Operating Voltage: With a stable 5V operating voltage, your projects will run smoothly and reliably.
Flash Memory: Enjoy ample storage space with 32KB of flash memory, accommodating your code and data requirements.
Clock Speed: Harness the processing power of a 16MHz clock speed, enabling swift execution of instructions.
Simulated I/O Pins: Expand your project capabilities with the ability to simulate 8 additional I/O pins.
DC Current: Each I/O pin can handle a maximum DC current of 40mA, ensuring safe operation of your components.
Input Voltage Range: Supply power conveniently within a range of 7 to 12V, adapting to various power sources.
Number of I/O Pins: Benefit from a total of 22 I/O pins, providing ample connectivity options for your projects.
6 PWM Output Pins: Fine-tune your output signals with 6 dedicated PWM output pins.
Low Power Consumption: Despite its robust capabilities, the Electronic Clinic Nano 3.0 maintains efficient power usage, minimizing energy consumption for sustainable operation.
Its pinout is just like the other Arduino Nano boards, so if you want to use this new Arduino Nano in any existing project, simply remove the old Arduino Nano and replace it with this new one, and that’s it.
For your convenience, I have properly labeled the I2C pins; A4 is the SDA, and A5 is the SCL. I have labeled the reset button, and added arrows to the TXD and RXD pins.
Now, let’s connect it to the laptop.
While the Arduino IDE is open. Go to the File Menu, then to Examples, then to Digital, and click on the BlinkWithoutDelay.
USB-C Type Arduino Nano LED Blinking Code:
|
1 2 3 4 5 6 7 8 9 10 11 12 13 14 15 16 17 18 19 20 21 22 23 24 25 26 27 28 29 30 31 32 33 34 35 36 37 38 39 40 41 42 43 44 45 46 |
/* USB-C type Arduino Nano by Electronic Clinic https://amzn.to/4ahGLdk */ // constants won't change. Used here to set a pin number: const int ledPin = LED_BUILTIN;// the number of the LED pin // Variables will change: int ledState = LOW; // ledState used to set the LED // Generally, you should use "unsigned long" for variables that hold time // The value will quickly become too large for an int to store unsigned long previousMillis = 0; // will store last time LED was updated // constants won't change: const long interval = 1000; // interval at which to blink (milliseconds) void setup() { // set the digital pin as output: pinMode(ledPin, OUTPUT); } void loop() { // here is where you'd put code that needs to be running all the time. // check to see if it's time to blink the LED; that is, if the difference // between the current time and last time you blinked the LED is bigger than // the interval at which you want to blink the LED. unsigned long currentMillis = millis(); if (currentMillis - previousMillis >= interval) { // save the last time you blinked the LED previousMillis = currentMillis; // if the LED is off turn it on and vice-versa: if (ledState == LOW) { ledState = HIGH; } else { ledState = LOW; } // set the LED with the ledState of the variable: digitalWrite(ledPin, ledState); } } |
This is the example code which I am going to use to blink the onboard LED. To upload this program, first, you will need to select the Arduino Nano board.
Again go to the Tools menu, then to Processor, and select ATmega328P (Old Bootloader).
Again go to the Tools menu, then to Port, and select the communication port.
Finally, you can click on the Upload button.
I can already see the onboard LED is blinking. Let me show it to you.
You can support me and my channel by purchasing my Arduino Nano. Its quite affordable. If you purchase my Arduino Nano and add a product review and comment, you will have my full support. If you encounter any issues with any of my projects, I am here to help you. So, that’s all for now. Stay safe, and I will see you next time.


