13.3” FHD 1920 x 1080 Portable IPS Monitor for Raspberry Pi, Xbox 360, PS3, PS4
Portable IPS Monitor for Raspberry Pi
Last Updated on September 21, 2024 by Engr. Shahzada Fahad
Table of Contents
13.3” FHD 1920 x 1080 Portable IPS Monitor:
13.3” FHD 1920 x 1080 Portable IPS Monitor for Raspberry Pi, Xbox 360, PS3, PS4– If you guys are searching for an amazing All in one type Full HD HDMI supported 1920 x 1080 Portable Monitor that can be used with Raspberry Pi, DSLR Cameras, Dish Antenna Receivers, Laptops, CPUs, Xbox 360, PS3, PS4, Windows, FPV Drones, Cars, and robots as it supports OSD, and so on. Then you need this 13.3” Full HD IPS monitor from the SunFounder. I will also test this monitor with my 3S Lipo Battery and 4S Lithium Ion battery packs. Let’s go ahead and start the unboxing.
Raspberry Pi System Monitor for PC: Enhancing Performance and Remote Monitoring
Amazon Links:
SunFounder Raspberry Pi Display
Other Tools and Components:
Super Starter kit for Beginners
PCB small portable drill machines
*Please Note: These are affiliate links. I may make a commission if you buy the components through these links. I would appreciate your support in this way!
Inside this box, we have a paper.
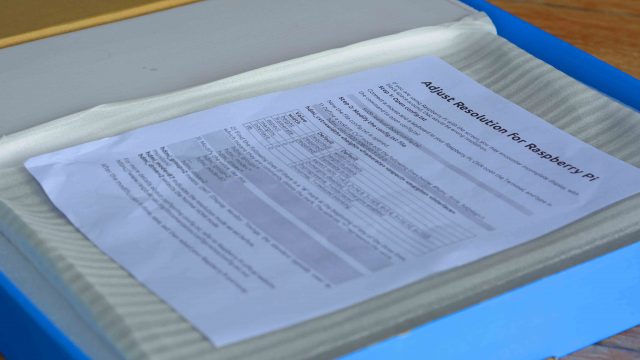
If you want to use this monitor with Raspberry Pi, first you will need to adjust the resolution, otherwise, you may encounter an incomplete display, with black spaces around. So, it’s like a guide explaining how to make changes in the Config.txt file.
Adjust Resolution for Raspberry pi:
If you are using Raspberry pi with the screen, you may encounter an incomplete display, with black space around. That would be the wrong resolution.
Step1: Open config.txt
Connect a mouse and keyboard to your Raspberry pi. Click open the Terminal, and type in the command to open config.txt
sudo leafpad/boot/config.txt
Step2: Modify the config.txt file
Now the file config.txt is opened.
1) Define a custom CVT mode add the following lines below #hdmi_force_hotplug=1.Hdmi_cvt=1920 1080 60 3000
hdmi_cvt=<width> <height> <framerate><aspect><margins><interlace>
| Value | Default | Default |
| width | Required | Width in pixels |
| height | Required | Height in pixels |
| framerate | Required | Framerate in Hz |
| aspect | 3 | Aspect ratio 1=4:3,2=14:9, 3=16:9, 4=5:4, 5=16:10, 6=15:9 |
| margins | 0 | 0=margins disable, 1=margins enabled |
| interlace | 0 | 0=progressive,1=interlaced |
| rb | 0 | 0=normal, 1=reduced blanking |
2) Find the following lines (if there is a “#” mark at the beginning of any of the three lines, which means they are comments, delete the mark. The asterisk “*” represents the value
hdmi_group=*
hdmi_mode=*
hdmi_drive=*
3) Modify the value, like this:
hdmi_group=2
hdmi_mode=87
…
hdmi_drive=2
hdmi_group=2 means DMT (display monitor Timings; the standard typically used by monitors)
hdmi_mode=87 indicates the resolution mode we set before.
Hdmi_drive=2 selects the normal HDMI mode.
For more details about configuring config.txt refer to the Raspberry Pi official website:
https://www.raspberrypi.org/documentation/configuration/config-txt.md.
After the modification is done, save, exit then reboot your Raspberry Pi and enjoy.
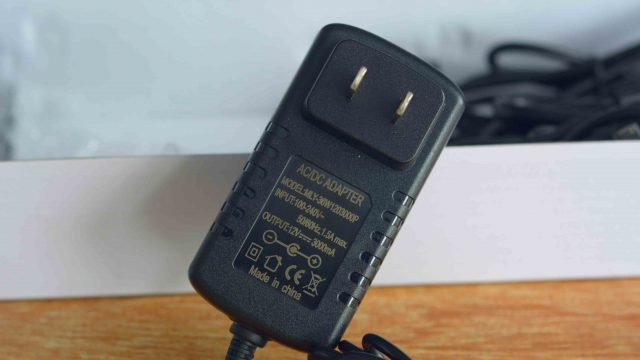
Inside, this box we have this AC/DC adaptor with all the specs clearly printed. This Adapter outputs 12Vdc and can supply 3000mA. Instead of using this adaptor you can also use a power bank, a 12V battery, and you can also use a Lipo battery or lithium-Ion battery pack; I will practically demonstrate this in a minute.

We have also got this foldable stand which I think is made of steel and is coated with a non-slip rubber-type material. It also protects it from rusting. This is extremely easy to use, simply loosen the screws, unfold the stand, set the desired angle, and tight the screws.
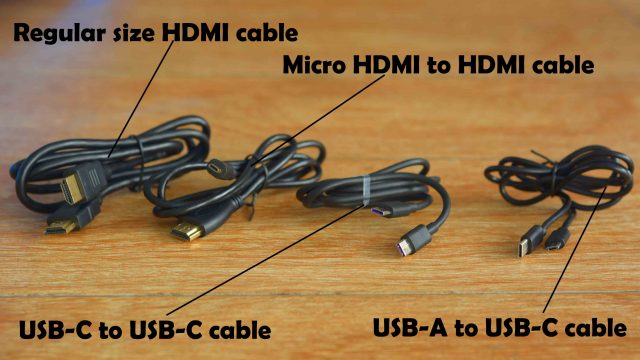
Inside this box, we have also got these 4 different types of cables.
Regular size HDMI cable.
Micro HDMI to HDMI cable.
USB-A to USB-C cable. and
USB-C to USB-C cable.
Ladies and gentlemen presenting to you the lightweight 550 Grams, 13.3” Full HD HDMI 1920 x 1080P Portable IPS Monitor Display compatible with Raspberry Pi, PS3, PS4, Xbox 360 Windows, and all other HDMI supported devices.
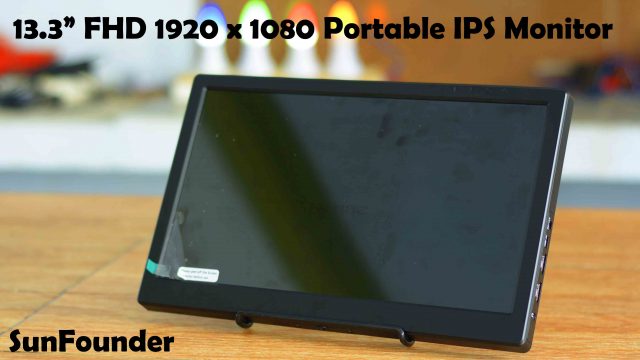
This SunFounder 13.3 inch monitor which is so lightweight that you can carry it or move it outside easily, it also allows being powered with a portable battery when you are outside. As a professional IPS monitor, it is made with a mature technology that is capable of outstanding performance in showing the HD picture. That would be the best choice to use it as a gaming monitor. In addition, it’s perfect for a portable Raspberry Pi System, a power bank can drive this monitor.
The key features are; it’s a 13.3” Full HD IPS Monitor with 1920 x 1080 resolution, supports key operation, has a wide visual angle, fast response speed, and accurate color rendition.
It can also be used with other models of raspberry pi including (4 model B, 3 Model B/B+, 2 Model B, and Model B+). It’s only 15mm thin, this can be a best portable gaming monitor for travel and business occasion.

On the right side, we got this DC-12V power jack, USB-5V in or 5V output, HDMI-1, HDMI-2, and Earphone jack. When it comes to the power consumption it’s only 10W. It has got two speakers on the backside. The Display color is 262K. The interface type is Digital. Response time is only 5 milliseconds. The working temperature is from -200 Celsius to +800 Celsius. Working voltage is from 5 volts to 12 volts DC.
It supports 50Hz and 60Hz. If you need 120Hz and 144Hz professional gaming monitors, it cannot meet the requirements. It supports Multi-function OSD operations and multiple OSD languages. The viewing angle is 178 degrees which is pretty amazing.

On the top, we have got buttons for the Power, Source, Menu, VOL+, and VOL-.

On the bottom side, it also has an ¼” 20 female tripod mount for those who want to use it with a tripod or any male ¼” 20 screw mount.
If you want to know more about this Monitor you can visit the SunFounder official product page.
Now, I am going to use this monitor as a 2nd display with my laptop; but first, I am going to peel off the screen protector. I Connected monitor to the laptop using HDMI cable. Then I connected the power supply. And finally, I pressed the Power button to turn ON the monitor. Works right out of the box. I didn’t have to do any settings. I am going to play a video.

We can increase and decrease the volume using VOL+ and VOL- buttons. Click on the Menu button and to scroll through the menu items click on the VOL+ and VOL-. Once you select the desired menu item then click on the Menu button which also works as the enter key.
Again you can use the Volume buttons to scroll through the items, let’s say I want to control the brightness, so I will simply select the brightness and then using the volume buttons I can increase or decrease the brightness.

Once the desired brightness is selected then you can click on the source button to deselect the item. You can also do settings for the OSD, I will explain this in one of my future articles when I will be using this monitor with my FPV Drone. So, I am sure, now you know about these different buttons and how to use them.
Next, I am going to check if, I can power up this 13.3” Full HD 1920 x 1080 IPS monitor using my 3S Lipo battery pack and 4S lithium-Ion battery pack. So, let’s first start with the 3S Lipo battery.
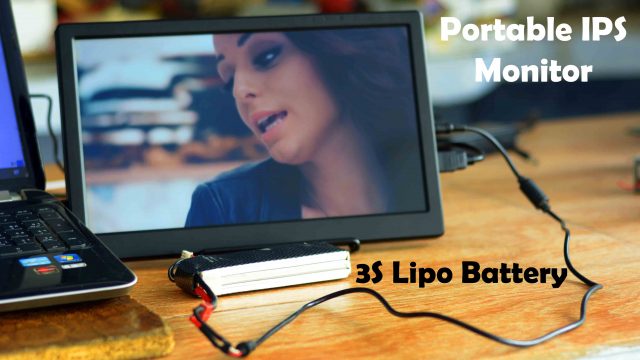
This is simply amazing.
Now, let’s go ahead and test it with my 4S lithium Ion Battery pack.
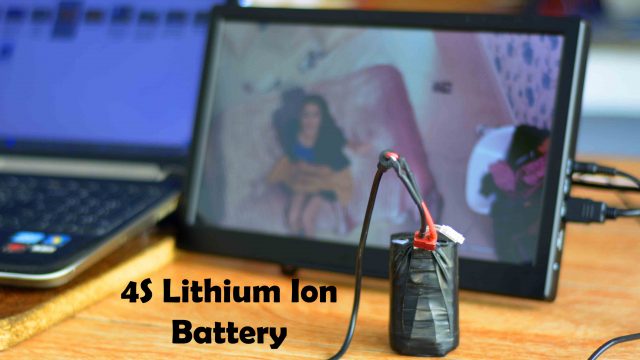
This is outstanding, I am Lithium Ion Batteries lover, I can use my lithium Ion battery pack to power up the monitor and then using 5 volts output from the monitor I can power up my Raspberry Pi 4 and this way I can build myself a completely portable computer and gaming PC.
You can read my article on how to make 4S lithium Ion battery. If you want to make the same 4S lithium Ion Battery.
The SunFounder claims that this 13.3” Full HD IPS monitor is a gaming screen; to verify this, next, I am going to play a game.
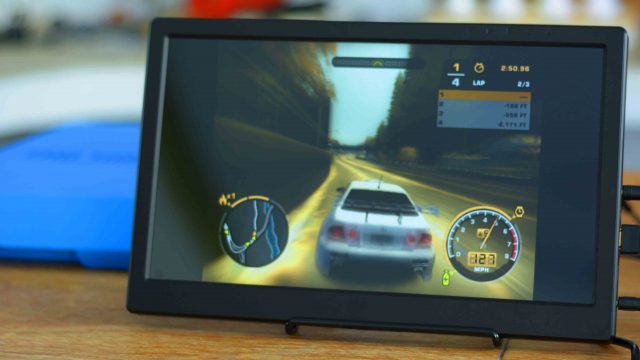
The overall gaming experience on this Monitor is simply amazing. Very soon I will test it with Xbox360 and PS4 as well.

Next, I used this Monitor with my Dish Antenna receiver and I was able to play video songs and movies from my USB Flash drive.
I am also planning to use this monitor with my Nikon DSLR Camera, right now I don’t have the correct size HDMI adaptor, and once I get the HDMI adaptor then I will share with you the test results.
Personally, I really liked this monitor, as I can use it for watching videos, I can use it with Raspberry Pi, I can use it with my DSLR camera, I can use it with my FPV Drones and cars, and so on. What you think about this 13.3” Portable Full HD HDMI 1920 x 1080 IPS monitor? Let me know in a comment. So, that’s all for now.
Watch Video Tutorial:

Discover more from Electronic Clinic
Subscribe to get the latest posts sent to your email.