Creating Your Own Widget class with simple example
Create your own widget class:
In my previous article “signals and slots” which was about adding your own signals and slots to a class guided how to do this by deriving a class. The demonstrated process is actually a common way of Qt programming. You usually lead from someone a little higher in the hierarchy class (e.g. mostly QWidget or QDialog) and placed therein the widgets required for the partial object. In practice, the Applications are then composed of several such sub-objects. There are many advantages to this route. For example, if you want to improve or change the sub-object or extend it, it is usually sufficient to just change the code of this class. The main function remains unchanged. Overall, this corresponds to Advantages that you also have with C ++ and the corresponding classes.
Basically, you usually create your own widget in the following steps (where here “extended” rather applies):
- Derive widget from the desired class
- Create GUI elements to be displayed in the widget
- Arrange displayed GUI elements (layout)
- Set up signal and slot connections
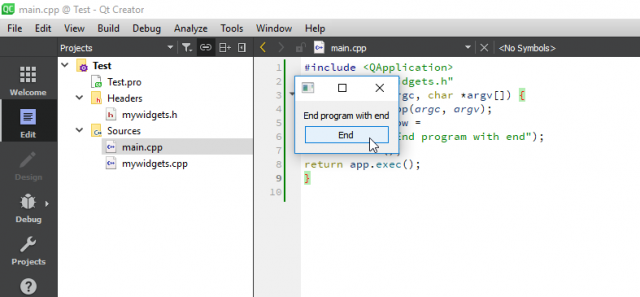
We are going to make a very basic project which is easy to follow. The purpose of this small project is to make a message box with a button and when the button is pressed the window form is closed. Isn’t it simple, yes of course it is. So, let go ahead and make this small project.
First, we create the framework for the class. For this, everything is used as a basic framework summarized in a header file, what kind of message box is needed. In this example, the following scaffolding was created:
First, create mywidgets.h file and paste the below code
|
1 2 3 4 5 6 7 8 9 10 11 12 13 14 15 16 17 |
#ifndef MYWIDGET_H #define MYWIDGET_H #include <QWidget> #include <QPushButton> #include <QVBoxLayout> #include <QLabel> class MyWidget : public QWidget { public: MyWidget(const char* qstr = "Please press Button", const char* but = "End", QWidget *parent = 0 ); private: QPushButton *button0; QLabel* label; QVBoxLayout* layout; }; #endif |
In this example no methods or own signals or slots are implemented. The first parameter in the constructor (line 9) is used for the text label (QLabel). If the user does not specify otherwise, the default Text in the message box is shown (here »Please press the button«). Same for the second argument of the constructor related to the button (QPushButton). As additional widgets in the MyWidget class, QPushButton, QLabel and QVBoxLayout (lines 11 to 13) implemented. Now to the actual definition of the MyWidget.cpp class:
|
1 2 3 4 5 6 7 8 9 10 11 12 13 14 15 16 17 |
#include "mywidgets.h" #include <QApplication> // Derive new widget class from the actual widget MyWidget::MyWidget( const char* lab, const char* but, QWidget *parent): QWidget(parent) { // Create elements of the widget button0 = new QPushButton (but); layout = new QVBoxLayout(this); label = new QLabel(lab); // Arrange / adapt elements of the widget layout->addWidget(label); layout->addWidget(button0); // Set up signals of the widget connect( button0, SIGNAL( clicked() ), qApp, SLOT( quit() ) ); } |
First we create the GUI elements of the new widget (lines 6 to 8), they can then be arranged according to a layout (lines 10 to 11). At the end we set up a signal slot connection (line 13). There the question that should arise right away is what qApp is doing here. qApp is a Pointer to a global variable in <QApplication>. This refers to the unambiguous Instance of the application. We need this global pointer to close the application or, in this case, the message box.
Now create the main.cpp file and paste the code:
|
1 2 3 4 5 6 7 8 9 |
#include <QApplication> #include "mywidgets.h" int main(int argc, char *argv[]) { QApplication app(argc, argv); MyWidget* window = new MyWidget("End program with end"); window->show(); return app.exec(); } |
Output:
By pressing the end button, the program will close. This was just a getting started tutorial, I am sure you can use the same concept in some top level projects.

