How to repair LED Bulb in 2 minutes, LED Bulb Repair, LED Bulb Repairing
Last Updated on August 23, 2024 by Engr. Shahzada Fahad
Table of Contents
Repair LED bulb, Description:
How to repair LED Bulb- LED Bulbs are everywhere because these are cheap and available in different shapes and sizes. In my previous article, I explained; how to run 12V DC MCPCB “Metal Core Printed Circuit Board” LED light bulbs on 220Vac. In this article, I explained how to perform the calculations and how to protect the LEDs from high voltage spikes.
In today’s article I am going to explain how to repair LED Bulb in just 2 minutes. You don’t need to be expert in soldering. For the LED Bulb repairing all you need is a soldering iron and solder wire. The technique I am going to explain in this article only works for 110/220Vac LED bulbs.
Precaution: Don’t touch the circuit when the LED bulb is turned ON. Because 110/220Vac can be really dangerous. Wear protective gloves.
Amazon Links:
Disclosure: These are affiliate links. As an Amazon Associate I earn from qualifying purchases.
LED Bulb repairing:

In Pakistan and India we are using 220Vac in our homes for running electric appliances. In some countries 110Vac is used. So it doesn’t matter whether you are using 110Vac or 220Vac. So, anyways I have this 220Vac Led bulb which just stopped working, the same issue I faced so many times as I have been using LED bulbs throughout my house. Let’s go ahead and open this Led Bulb.
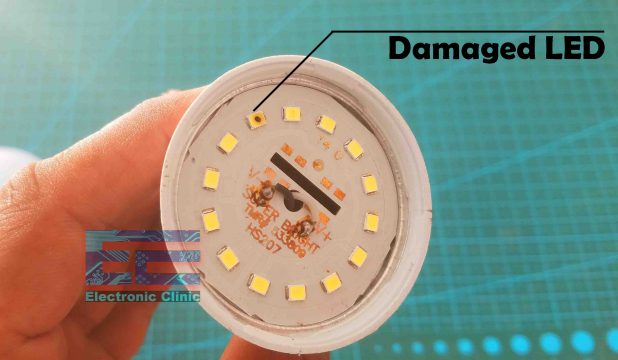
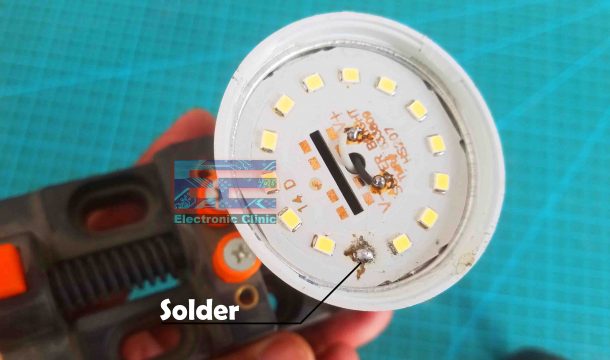
You can clearly see this one LED is damaged and this is the reason my LED bulb wasn’t lighting up. This type of issue I faced so many times and this is the reason, today I am writing this article to share this knowledge with you guys as well. All the other Leds are in good condition. So, what we can do to fix it. Just remove this LED and then short the two points.
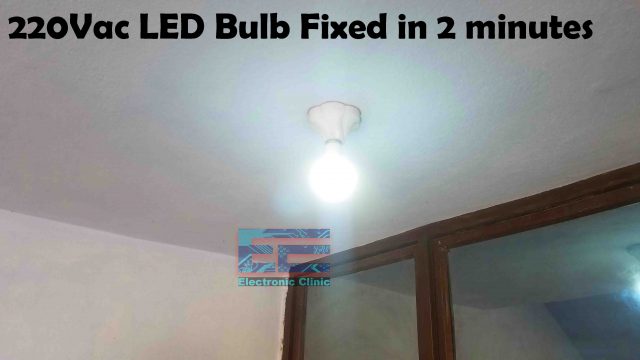
That’s all the LED Bulb is fixed.
For me it was just a 1 minute job, but you are a beginner then It may take 2 minutes.
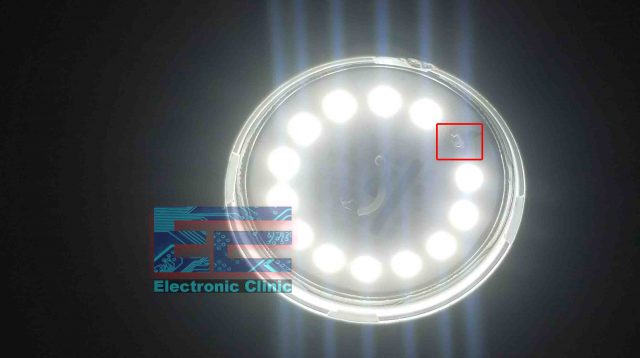
Now, we have only this one Led removed. This was a quick LED Bulb repair if incase you don’t have the LED. All you need is to remove the damaged Led and solder the two points and that’s it. After you have tested your LED Bulb then you can attach the head part and you can continue to use the same LED bulb for years.
With the casing it’s impossible to find if there is any Led which is damaged. I hope you like this quick LED Bulb repair. Let me know in a comment if you have also faced the same issue.
Watch Video Tutorial:
Discover more from Electronic Clinic
Subscribe to get the latest posts sent to your email.

Yap, it is quick fix for quick dead of that led lamp, that is all…
Someone have to tell You about ohms law, and others ,,one man must now formulas”!
Rename this site to ElectronicPatology….
Sorry for my hard opinion, judgment.
Andy from Slovakia,
58 year old electrician and hobbyist from young age as 7 years old boy.
Wrong repair, will burn again in few minutes