Naze32 Rev6 Quadcopter, Betaflight Setup and Firmware Update
Table of Contents
Naze32 Rev6 Quadcopter, Description:
Naze32 Rev6 Quadcopter, Betaflight Setup and Firmware Update- In my previous two articles, I explained how to make a Quadcopter using the CC3D flight Controller and KK2.1.5 Flight Controller. I made a very fair comparison between the OpenPilot CC3D flight Controller and the KK 2.1.5 Flight Controller. While working on the CC3D flight controller I faced many issues and seriously I wasn’t really happy with the CC3D flight controller overall performance because it was very unpredictable, sometimes the flight was so smooth and then at the next moment the Quadcopter would start twitching or falling out of sky. At this point I realized that the CC3D flight controller is not good for the beginners at all and since I am making this series on different flight controllers just to help you guys which flight controller as a beginner you need to start with.
So, I decided to start with the KK2.1.5 flight controller which is even cheaper than the CC3D flight controller. You don’t need a computer software to setup this flight controller, you can change the PID settings at any time, you have the buttons and a display, read the instructions and make changes as per your skills. With KK 2.1.5 flight controller I was very comfortable and this is the reason I still recommend KK 2.1.5 flight controller for the absolute beginners because it’s cheap and easy to setup. You can fly it in the Acro mode or in the self level mode. You can train yourself with this flight controller and once you feel confident then you can try some expensive flight controllers. Anyways with the KK 2.1.5 flight I solved the twitching issue. To further improve the performance I replaced the ordinary motors and propellers with the branded DJI motors and propellers and this greatly improved the stability, but it still had some issues it slightly drifts to the left, right, forward, or backward, you will need to adjust it using the control sticks.
Anyways, the KK 2.1.5 flight controller really helped me in improving my piloting skills and now I feel confident and I am ready to try another flight controller. So, today we will find out if we can beat the KK 2.1.5 flight controller with the Naze32 Rev6 Flight Controller. Before, I am going to explain anything first let’s watch the Naze32 based Quadcopter Drone in action.
Altium Designer:
Altium Designer is the world’s most trusted PCB design system. Altium Designer enables engineers to effortlessly connect with every facet of the electronics design process. Over 35 years of innovation and development focused on a truly unified design environment makes it the most widely used PCB design solution. With Altium Designer you can create PCB designs with an intuitive and powerful interface that connects you to every aspect of the electronics design process. Route it your way through any angle, tune for delay, Push, Slide, and Walkaround faster than ever. Interact and collaborate with mechanical designers like never before in a photo-realistic, 3D design environment. If you want to get started with the Altium designer, you can click on the get started.
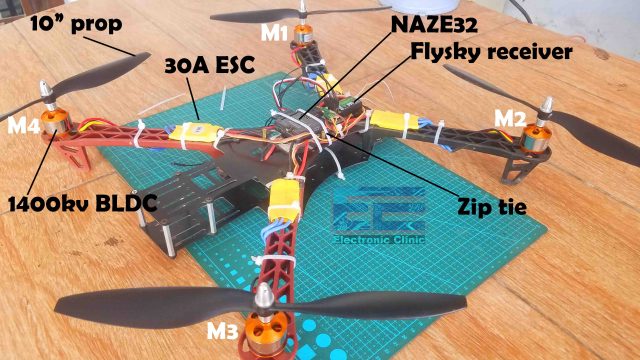
For the flight test results watch video given at the end of this article. I was simply amazed with the stability of this Quadcopter in the Acro mode, seriously I wasn’t expecting this level of smoothness. The control sticks were quite responsive so I adjusted the RC rate values and now I feel like I can fly this Quadcopter. This is my first test and of course I will further tune the PID values. As this Quadcopter is for the beginners so that’s why I am not using any branded stuff. I am using simple 1400KV brushless motors, Flysky Transmitter and Receiver, low-cost 10 inch propellers, the same X500 Alien V2 Frame, and the same 3S 3300mAh Lipo battery.
I really liked the Naze32 Rev6 and I am definitely going to make a racing FPV Drone with it, so consider subscribing if you don’t want to miss any of my upcoming videos. As this is my first video on the Naze32 Rev6; so, in this article, I will only cover the extreme basics including how to Flash the firmware and how to setup the Naze32 Rev6 using Betaflight. Without any further delay, let’s get started!!!
Amazon Purchase Links:
X500 Alien and other top Quadcopter Frame
1000KV Brushless Motor, 30A Speed controller, and Propellers
Flysky FS i6 Transmitter and Receiver
Other Tools and Components:
Super Starter kit for Beginners
PCB small portable drill machines
*Please Note: These are affiliate links. I may make a commission if you buy the components through these links. I would appreciate your support in this way!
Naze32 Rev6 Flight Controller:
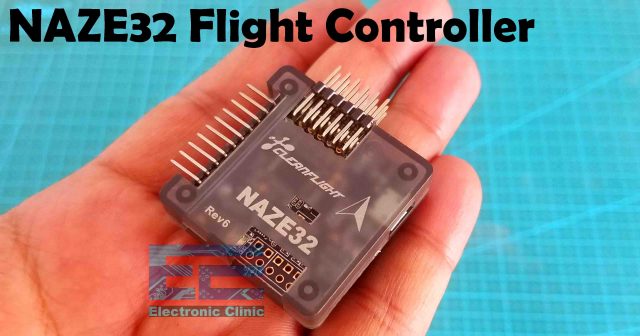
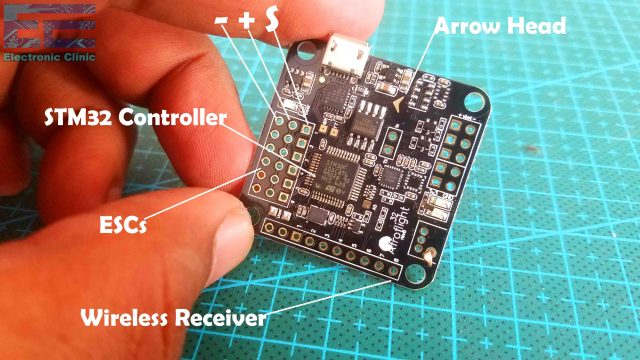
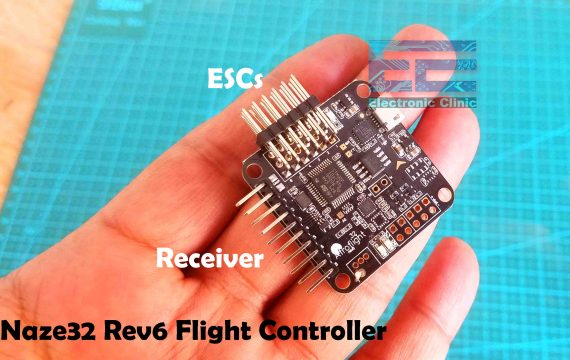
This is the Naze32 Rev6 Flight controller which is based on the STM32 microcontroller. On the board you can see this arrow sign which should be towards the front of the Quadcopter drone. With these headers we connect our wireless receiver which in my case is the Flysky FS-i6. On the backside, all the headers are clearly labeled, so you will be having no problem in connecting the wireless receiver and the ESCs.
Next you can see we have these 3 rows of headers on the left side “labeled as ESCs” and this is where we can connect our brushless motors using ESCs “Electronic Speed Controllers”. You can connect maximum of 6 motors. As I am making a Quadcopter so I will only connect 4 motors. On the backside all the headers are clearly labeled, the PWM, positive, and ground. On the top row we will connect the signal wires of all the ESCs, second row is for the 5v, and 3rd row is for the GND wires. The Naze32 Rev6 flight controller is also provided with these male and female headers. I will solder these male headers on the Naze32 board and this will help me in easily connecting the wireless receiver and the 30A ESCs.
You can see I just soldered these male header for the 30A ESCs and for connecting the wireless receiver.
Naze32 Rev6 Firmware update:
Once you have soldered all the male headers then the next step is to update the firmware on the Naz32 flight controller. Now at this point, like all other guys you might have thought about using the Cleanflight configurator software. To be very frank I also started with the Cleanflight and I was able to flash the firmware but then it wasn’t connecting. I spent hours on this but it really didn’t work for me and there were so many other guys searching about the same thing. So at this point I decided to use the Betaflight configurator and it worked for me in the first try and this is what I am going to explain right now.
Next, you will need the Flashloader Demonstrator software and the betaflight_3.2.5_NAZE hex file.
Download: Flashloader Demonstrator Software
Download: Betaflight_3.2.5_NAZE
To flash the betaflight_3.2.5_Naze hex file;
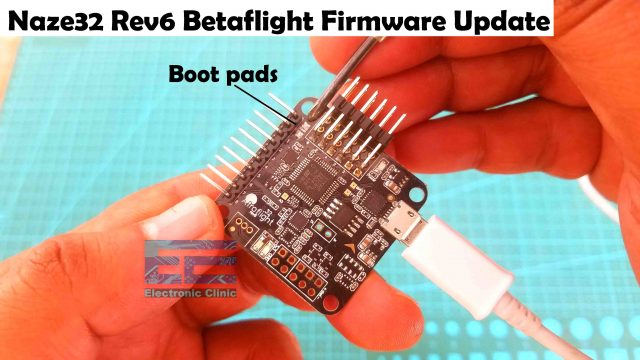
First you will need to short these two boot pads then plug-in the USB cable and open the Flashloader Demonstrator Software.
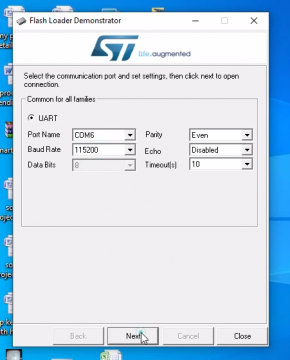
Select the comport and then click on the next button.
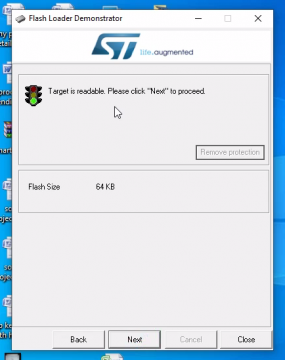
if you can see the Flash size it means everything is fine and click on the next button.
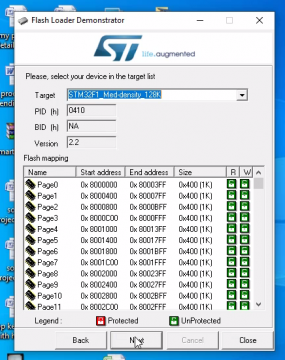
select device from the target list and click on the next button.
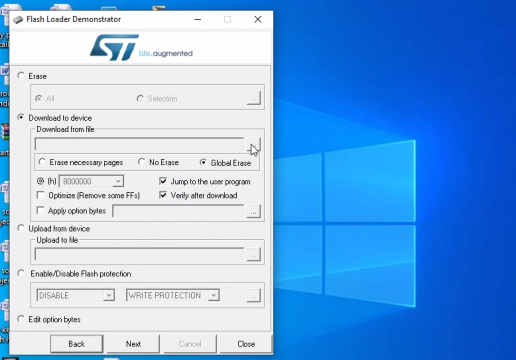
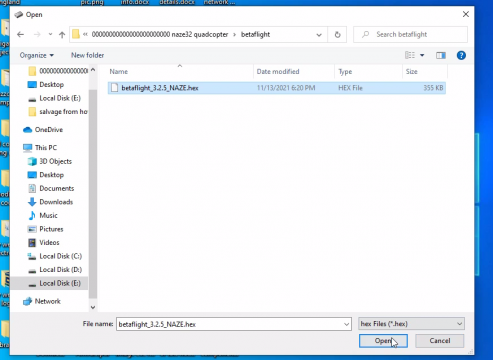
Select Download to device, select the Global erase, and check the jump to the user program and verify after download boxes. Finally, you can select the hex file, for this click on the browse button.
Click on the Open button and then click on the Next button. Wait for a few seconds.
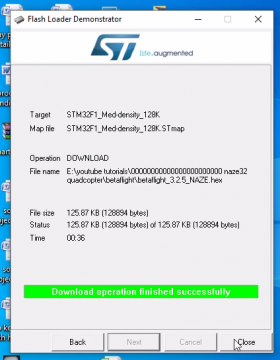
You can see the download operation finished successfully, you will also see some leds flashing on the NAZE32 when the firmware is updated. Now, you can close this software.
Note: First remove the USB cable and then disconnect the boot pads, otherwise you will lose all the settings and you will have to repeat all the steps again.
Final step:
After flashing the firmware, when you connect the USB cable and if you see a solid blue color then it means the flight controller needs to be restarted. So, to restart the flight controller simply disconnect the USB cable and one more time short the boot pads and connect it with the laptop to run the flight controller; once you see the green lights start flashing then you can disconnect the USB cable and you are all set.
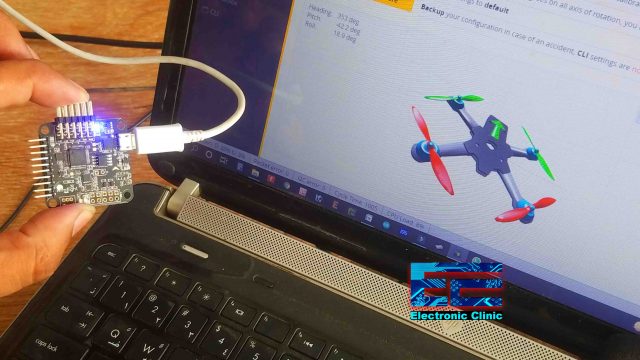
To further ensure if everything is done correctly, at this point you can open the Betaflight configurator and connect the Naze32 Rev6 Flight controller with the laptop. The Betaflight software will automatically detect and select the correct communication port. click on the connect button and now if you can control this 3d model with the flight controller then you are all set.
If you are able to control this 3d model as you move the Naze32 Rev Flight Controller then you have successfully updated the firmware and there is no issue. Now you can enclose the Naze32 Rev6 flight controller in its plastic enclosure.
Receiver connection with the Naze32 Rev6:
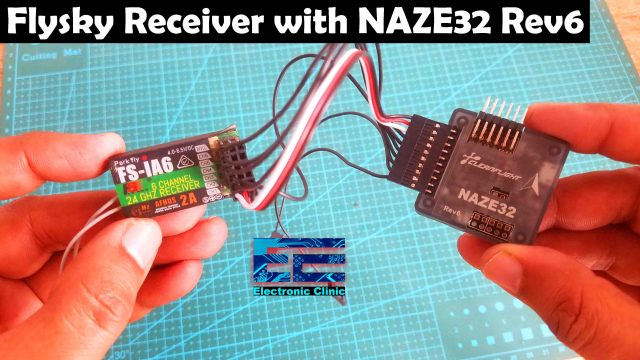
Now, the next step is to connect the Flysky Fs-i6 Receiver with the Naze32 Rev6 Flight controller. The Flysky receiver pins are clearly labeled, this receiver has a total of 6 channels which we are going to connect with the 6 channels of the Naze32 flight controller. Be very careful while connecting the wires. Connect channel number1 of the Naze32 with the channel number1 of the Flysky receiver, similarly channel 2 of the naze32 with the channel 2 of the receiver and so on up to channel number 6. Our Flysky Fs-i6 receiver connection with the Naze32 flight controller is done.
Next, I am going to replace this kk 2.1.5 flight controller with the Naze32 Rev6 flight controller and then next I will connect all the 4 ESCs with the 4 channels. Next, I will secure the flight controller using the zip ties, I am doing it temporarily.
I will go with the same motors configuration. This is motor number1, this is motor number2, this is motor number3, and this is motor number4. The motor number1 should be rotating in the clockwise direction, motor number2 in the counter clockwise direction, motor number 3 in the clockwise direction, and finally motor number4 in the counter clockwise direction. Before, you start setting up the NAZE32 using Betaflight Configurator, first, remove all the 4 propellers.
Naze32 Rev6 Setup in Betaflight:
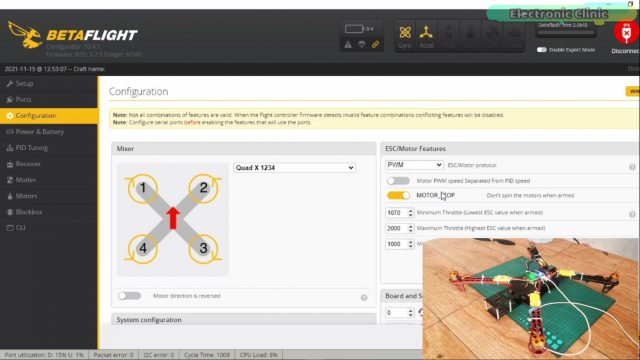
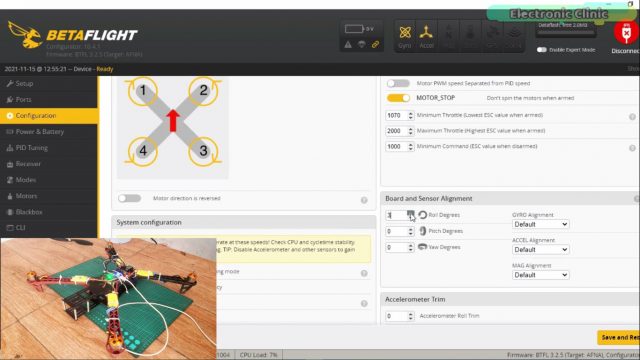
Connect the USB cable and then open the Betaflight configurator. Click on the Configuration and select the Quad X 1234, then Select the PWM, and turn ON the MOTOR_STOP button.
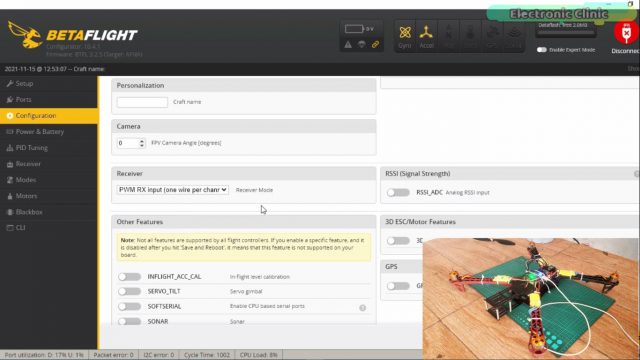
Scroll down and on the Receiver Mode select PWM RX input(one wire per channel).
Everything else on this page looks good, and now I can click on the Save and Reboot button.
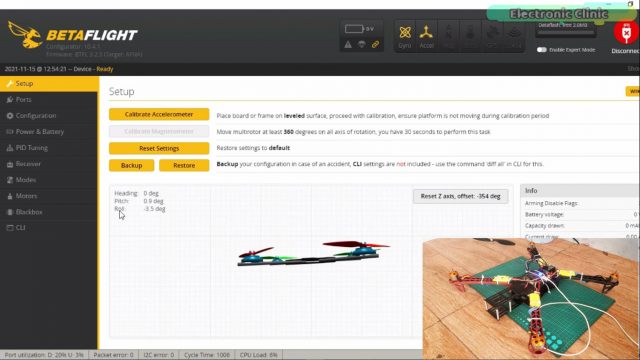
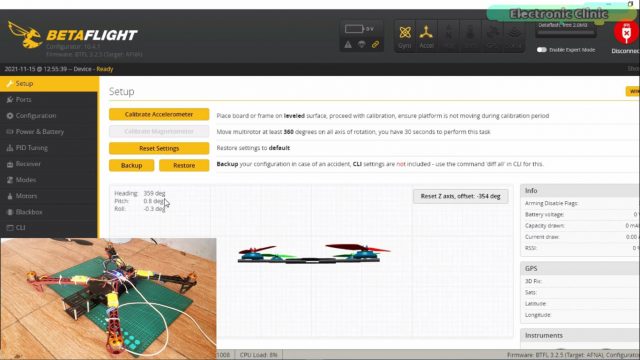
Now, go to the Setup.
You can see the Roll value is a bit off, we will need to adjust this value for this we will go back to the Configuration.
We can change this value “Roll Degrees”, I selected a value of 3 for the Roll Degrees.
Now you can see the Roll value is -0.3. It’s just acceptable.
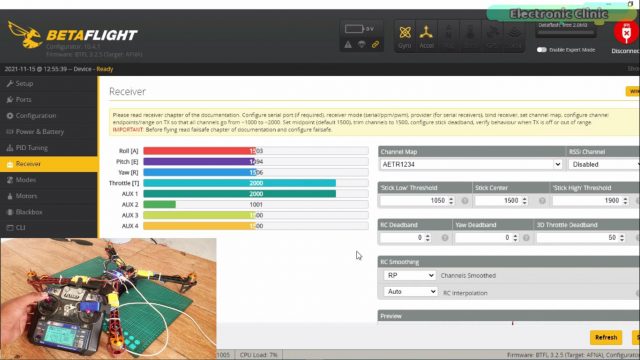
Next go to the Receiver. Turn ON the transmitter.
Now you can start moving the control sticks. If any of the channel is opposite then on transmitter simply reverse that channel. I have already explained this in my previous articles. So the transmitter is all set.
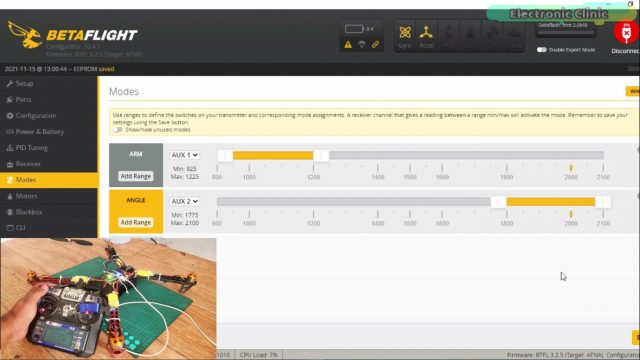
Next, go to the Modes. We will add the ARM switch. When we press the button it automatically selected the AUX1. Next, I am going to add the ANGLE, I will use AUX 2. Finally, click on the save and reboot button.
Motors Setup in Betaflight:
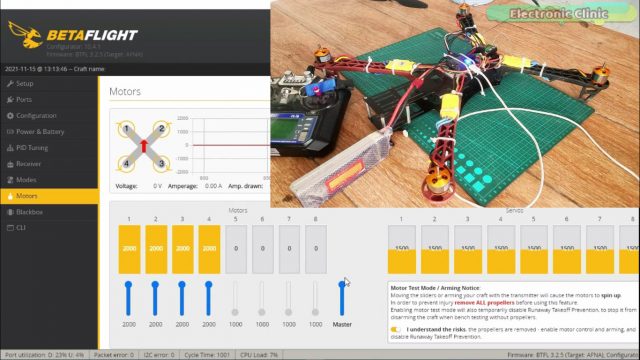
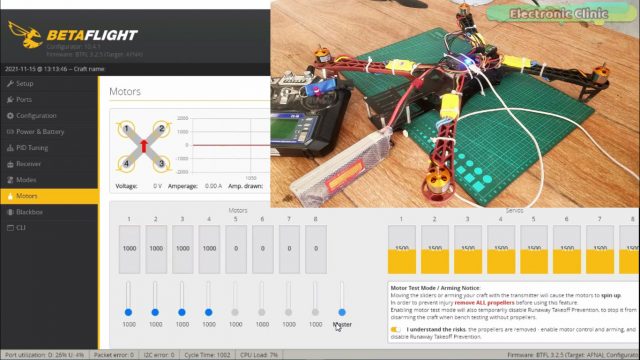
Next go to the motors and as all the propellers are already removed, so I am going to click on the button “I understand the risks”.
Slide the master button to its maximum value and then connect the battery.
After you hear some beeps then slide the master button all the way down and wait for the final beeps.
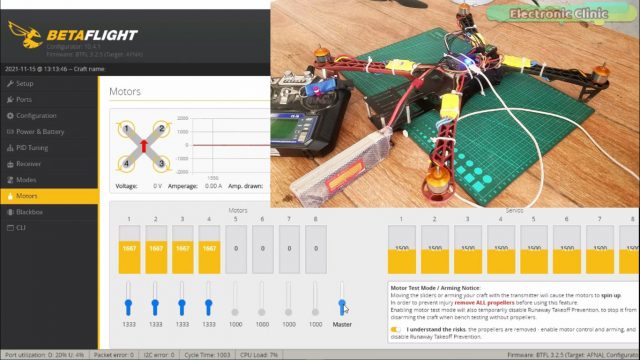
Now when you move the Master button all the 4 motors should start spinning.
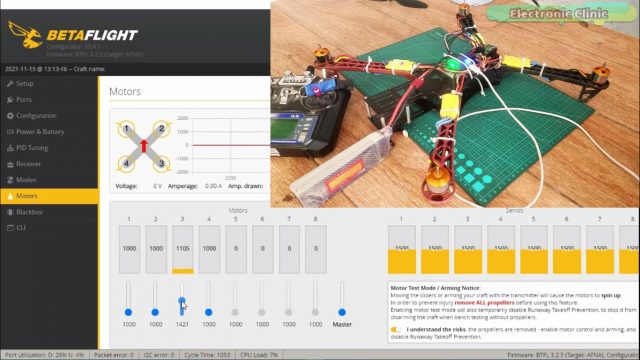
You can also check each motor individually to confirm the direction of rotation
If any motor is rotating in the wrong direction then you can simply switch the Red and Black wires of that motor.
Naze32 Rev6 PID Tuning:
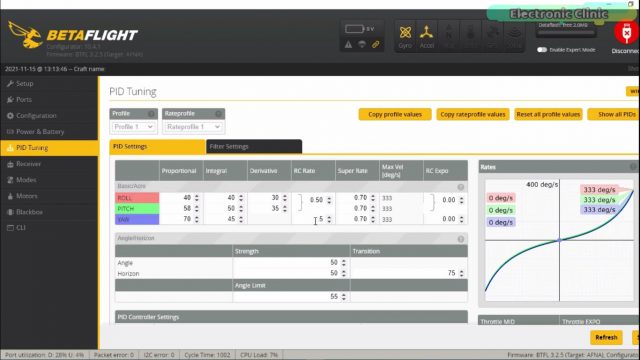
Now, go to the PID Tuning. For now I will go with the default values but I will change the RC Rate values, I am doing this to make my control sticks less responsive. So, I set my RC Rate values at 0.5 for the ROLL and 0.5 for the YAW. You can simply play with these values and you will understand how this effects the control sticks.
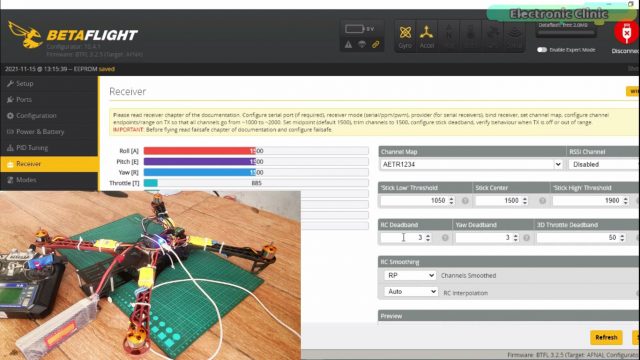
Next, on the receiver, set the RC Deadband and Yaw Deadband values, I set it to 3 for both the RC Deadband and for the Yaw Deadband. Don’t forget to click the save button after you have made any changes. Everything looks good, my setup is completed and now I can click on the disconnect button.
Final Testing:
Once the setup is completed you can remove the USB cable and start mounting the propellers. Next fix the battery in place. Turn On the Transmitter. Connect the battery. You can ARM and dis-ARM the Drone using the switch. When not armed the motors won’t spin, this is for the safety. The motors will only spin when the Naze32 is armed, you will see a green light, now if you move the throttle stick the motors will start spinning. So, that’s all for now.
Note: If you are a beginner then I highly recommend you should go to some open place, I am sure you will never want to hurt anyone. Show some patience the default mode on the NAZE32 is the Acro mode and you know in Acro mode there is no self leveling, you will have to constantly adjust the control sticks to maintain a certain angle. For the flight test results watch video given below.
Watch Video Tutorial:
