Qt Creator C++, simple HelloWorld Gui in Qt Creator
Table of Contents
Qt Creator C++, Description:
How to create a simple HelloWorld Gui in Qt Creator– in this article you will learn how to create a new project and how to add a simple Qpushbutton in your GUI application. As this is a getting tutorial, so I will try to cover the maximum basic things to help you easily get started with Qt Creator and then how to program in C++. Before, I am going to explain how to add a button in Qt Creator, first let’s read a bit about the Qt Creator and how to install the Qt Creator.
Amazon Purchase Links:
*Please Note: These are affiliate links. I may make a commission if you buy the components through these links. I would appreciate your support in this way!
About the Qt Creator:
You are sure to ask yourself why Qt Creator or why I chose Qt? Why not Microsoft’s MFC? Making a comparison with other GUI frameworks does not usually make much sense. I chose Qt Creator because this framework is in the software scene meanwhile takes on the role of a top dog. Top software such as Google Earth, the Opera browser, or Skype was created with Qt Creator. The list of companies using Qt Creator is long and impressive. Naturally does it not mean the ultimate when companies like Synopsys, Motorola, Skype, Volvo, Adobe, Google, Samsung, Walt Disney Feature Animation, NASA etc. use this framework – but “it’s got something.” Most of the way, you never get to see software created with Qt, because it is most programs that have been specially created for companies. But Qt also has a lot to offer on the technical side. The framework is very flexible and can be used in many common systems. In addition to the “big ones” like MS-Windows, Linux, Unix, BSD or Mac OS X Qt can also be used on “small” systems such as cell phones or PDAs. In addition to the portable source code, the wealth of Functionality is a big reason to use Qt. With the huge variety that Qt Creator offers, it was nevertheless taken into account that the Framework is also easy to use. Documentation is also the first Cream. Qt is very fair when it comes to licensing. As long as your applications are in If you want to use the open-source area, you will not incur any expenses.
Requirements for Qt Creator
Except for in-depth and good C++ knowledge with all its facets is actually not assuming too much to get into the Qt library. As far as the technical side is concerned, a computer with any operating system is sufficient (Linux, Unix, Windows, Mac OS X etc.). Of course are for one Self-study appropriate discipline and self-motivation necessary. The learner is responsible for his own progress, nobody will make this progress monitor.
What is Qt:
Qt is an increasingly popular class library that is used for platform-independent Programming of graphical user interfaces (short and English also: GUI = Graphical User Interface) is used under C++. Responsible for Qt is the Norwegian company Trolltech (formerly Quasar Technologies). The Qt library is now available for a wide variety of operating systems and graphics platforms like X11 (Linux / Unix derivatives), Mac OS X, Windows, or also available as PDA version. At the beginning of 2008, the company Trolltech was taken over by Nokia bought out. Since then the development has been under the name Qt Development Frameworks continued. However, Qt is not just a library that is used to develop graphical User interfaces can be used. This library is rather it is a powerful framework that can handle things like XML, databases, Internationalization, networks, file input/output, interprocess communication, Offers multithreading and a lot more. So you can say that you can do anything with Qt, and you can’t do any more Libraries also required. An all-around carefree package.
While Qt Creator uses an extension of the C++ programming language, there is also implementations for C, C #, Java, Perl, Python and Ruby. However, will these extensions are not maintained by Nokia.
Qt Creator Installation:
Linux
In practice, it is advisable to always use the precompiled packages to use the respective distributions, which are often supplied and subsequently can be installed via the corresponding package manager. It makes sense to get the latest packages of the corresponding distribution online Respectively.
To create a complete Qt environment using a package manager, you definitely need the packages libqt4-core, libqt4-dev and qt-dev-tools. With this Qt environment, you could already have applications on the command line translate. You can then use the Qt Creator development environment, to be more precise, install the qt-creator package from the sources. Alternatively, you can use the SDK or download it from the web. Make sure that you complete the installation still have to make executable (chmod u + x). The advantage of the finished SDK is a typical installer with a graphical user interface such as one from Windows operating systems.
Mac OS X
The installation of the SDK on the Mac is also quite easy. You are downloading the latest version from the web. Then need All you have to do is follow the instructions on the screen. Usually, the complete SDK is placed in the root directory Developer / Applications /Qt installed.
MS-Windows (XP / Vista / Windows 7)
As usual, for Windows you will find a complete installer, everything will be installed automatically. Fortunately, you have to look at the Installation of the SDK no longer involves the compiler and its system-wide configuration to take care of. Qt Creator uses the MinGW compiler under Windows for the SDK. At the end of the installation, you should find a new folder named in the start menu Qt SDK by Nokia v2010.01 (Open Source), in which the command line to translate the applications, the Qt development environment Creator, the demos (examples), Qt Assistant (documentation, reference) and Qt Linguist.
Hello world with Qt Creator
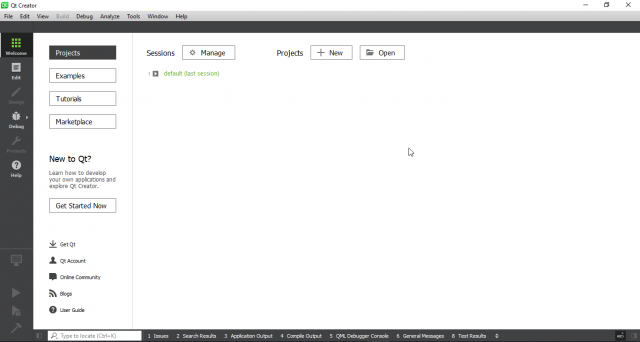
First, start Qt Creator.
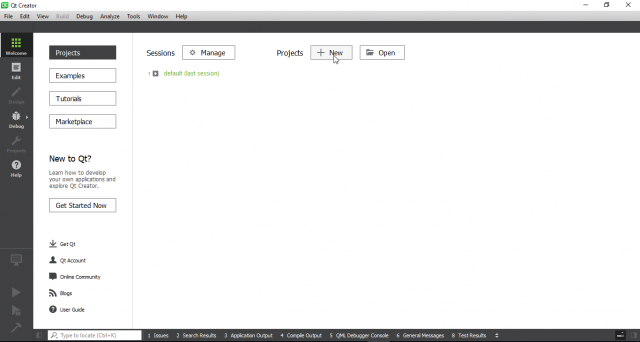
Now select the Create New Project button.
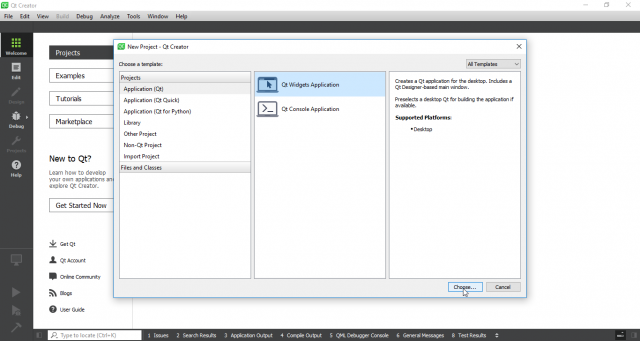
In the next dialog, you have to select the type of the new project. In my case, I selected the Application(Qt) from the left side of the dialog and Qt Widgets Application from the right side. You can continue by clicking on choose button.
In the next dialog, you will be asked for the name and location of the new Project. The name is also the directory name of the project. It continues with the Next button.
Now select the qmake compiler and click on the Next button.
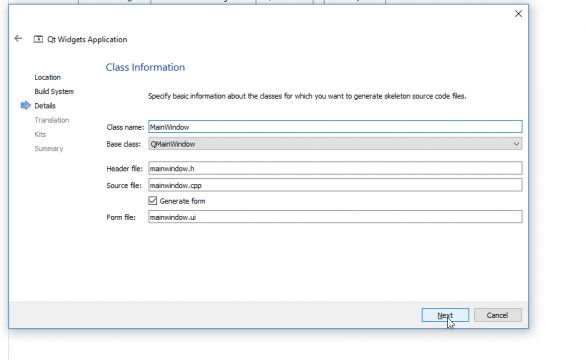
Then enter the class information in my case I entered MainWindow and clicked on the next button.
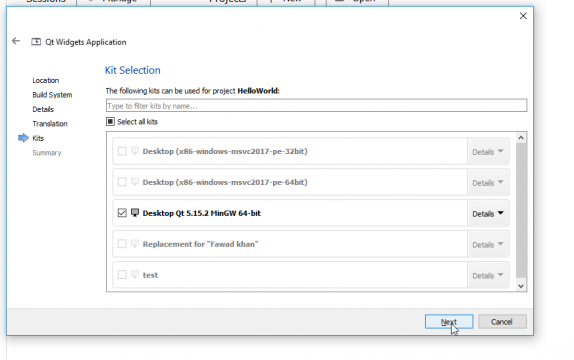
Then select the kits for your application.
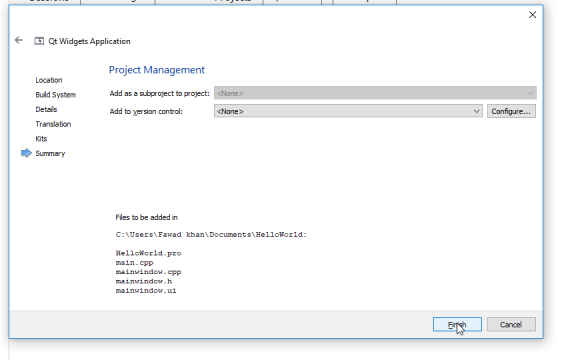
Finally, click on the finish button
After clicking the finish button the main program will be opened. As you can see in the below image.
Creating a simple HelloWorld Button gui In Qt Creator using c++:
|
1 2 3 4 5 6 7 8 9 10 11 12 13 14 15 16 17 18 19 |
#include <QApplication> #include<QPushButton> int main(int argc, char *argv[]) { QApplication a(argc, argv); QPushButton HelloWorld("Hello World"); HelloWorld.resize(300,60); HelloWorld.show(); return a.exec(); } |
Output:
Program Explanation:
#include <QApplication>
This header file is used for windows application designing in the header file all the constructors and objects are saved.
#include<QPushButton>
This is the button header file. In this file, the constructor and object of the button are saved.
QApplication a(argc, argv);
The QApplication class manages the Gui application’s controls flow and main setting.Qpplication is the class and a is the name of the class “argc, argv” are the arguments.
QPushButton HelloWorld(“Hello World”);
QPushButton is a class and HelloWorld is the name of the class and in the function bracket, I passed a string value. This is the caption of the button as you can see in the above image.
HelloWorld.resize(300,60);
HelloWorld is the name of the button and resize is the attribute or property of the button class 300 is the width and 60 is the height.
HelloWorld.show();
This line is used for showing the windows application. the show is the attribute of the button class.
return a.exec();
This line is used to enter into the main event loop and waits until exit() is called, then returns the value that was set to exit().
