Raspberry Pi Putty SSH, Access raspberry Pi over wifi wirelessly
Table of Contents
Description:
Raspberry Pi Putty SSH– In this tutorial, you will learn how to setup your SSH network using Putty software. The major advantage of using the SSH network is that, you can access your raspberry pi over a wifi network using your laptop. It doesn’t matter which operating system is installed on your laptop, currently on my laptop I am using windows 10. With the help of the SSH network you can program your raspberry pi wirelessly, you can run programs, you can create folders you can delete files and so on.
Using the Putty software you can logged into your raspberry pi using a login name and a password. The SSH network makes it easier for you to get access to your raspberry wirelessly, this way you don’t need to connect a keyword or mouse with the raspberry Pi. You can use your computer or Laptop keyboard and mouse to control Raspberry Pi.
This Tutorial is really very important and I believe that every raspberry beginner should know about the SSH network. In this Tutorial, I will also explain how to fix the connection refused error.
Amazon Links:
Wireless Keyboard and Mouse for raspberry pi:
Night vision Camera for Raspberry Pi:
Oled HDMI touch display for raspberry pi:
Other Tools and Components:
Super Starter kit for Beginners
PCB small portable drill machines
DISCLAIMER:
Please Note: these are affiliate links. I may make a commission if you buy the components through these links. I would appreciate your support in this way!
How to enable SSH on Raspberry Pi?
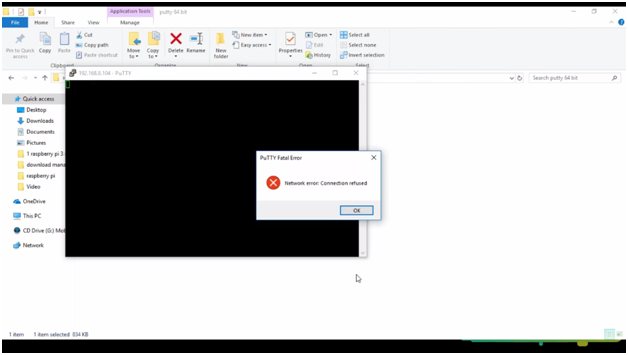
By default the SSH connection on the Raspberry pi 3 is disabled, so that’s why when you try to connect with your Raspberry Pi using the Putty software you get a network connection refused error.
Now to fix this error “Network error: Connection refused”. You need to follow the following steps or you can watch video tutorial given at the end of this article.
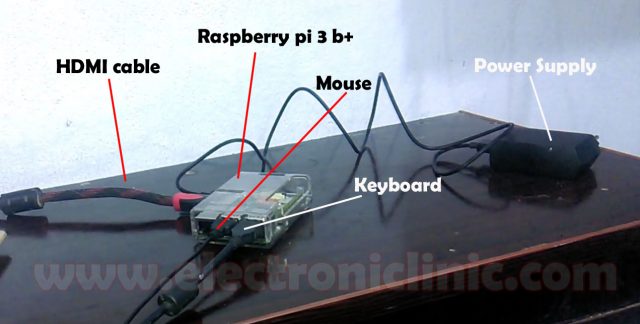
First of all, make sure that your Raspberry Pi is connected with an LCD through an HDMI cable, and also make sure keyboard and mouse are also connected.
Now turn on your Raspberry Pi and LCD and wait for a while… After the Raspberry loads up all the files and you see the Raspberry desktop on your LCD. Then the next step is
Click on the wifi and select your wifi router and enter your Password to connect.
I am already connected.
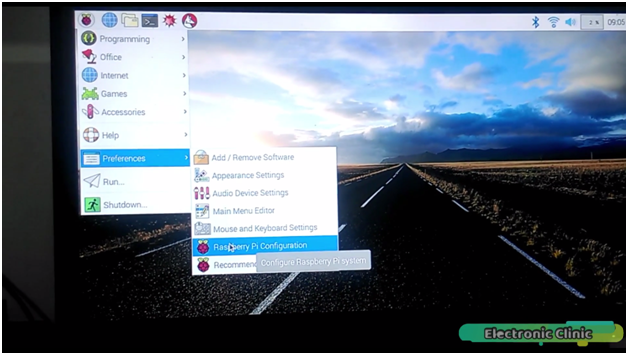
Now to enable the SSH connection simply click on the applications menu then preferences and then click on the raspberry pi configuration.
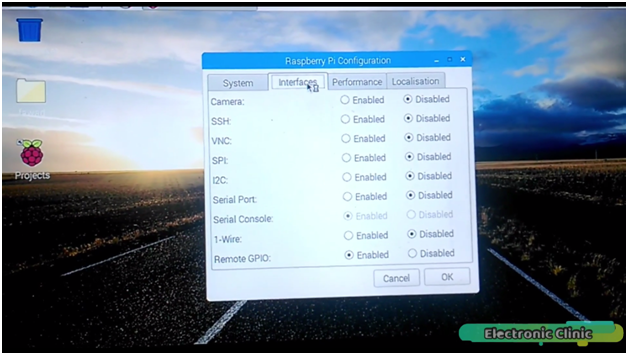
In the raspberry pi configuration click on the interfaces.
As you can see the SSH is disabled. Simply enable the SSH and click ok and that’s it. Now that the SSH is enabled now let’s move forward to the next step.
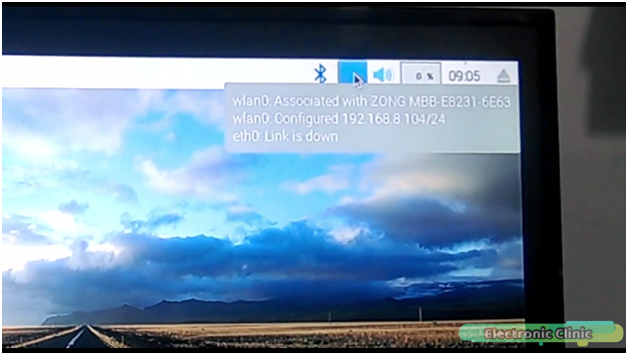
Now let’s find the IP address of the raspberry pi… we have different methods for this, the first one is by simply floating the mouse cursor over the wifi, as you can see, the IP address is 192.168.8.104.
The 2nd method is by opening the terminal widow. type ifconfig and enter, and you will see the same IP address.
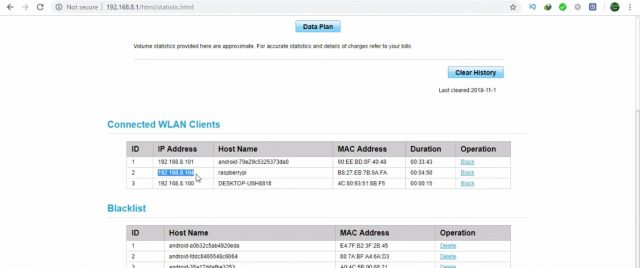
The 3rd method is by opening your router settings page on your laptop, you can check the IP address.
So now that we know about the ip address and also we have enabled the SSH connection. Now it’s time to download the putty software. Open your internet browser and type www.putty.org you can download the putty software, I have already download this software.
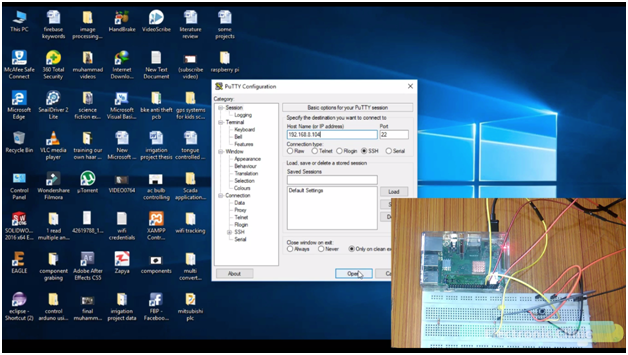
Open the putty software.
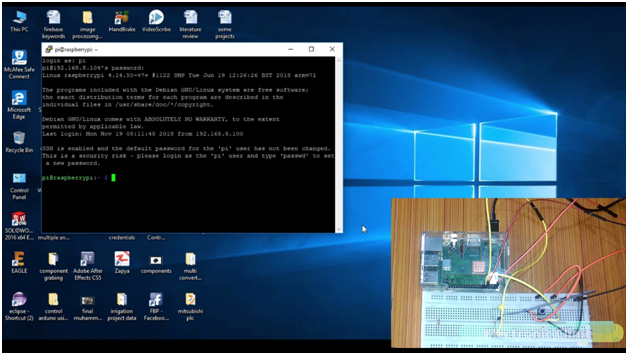
Enter the IP address of your raspberry pi and then click open.
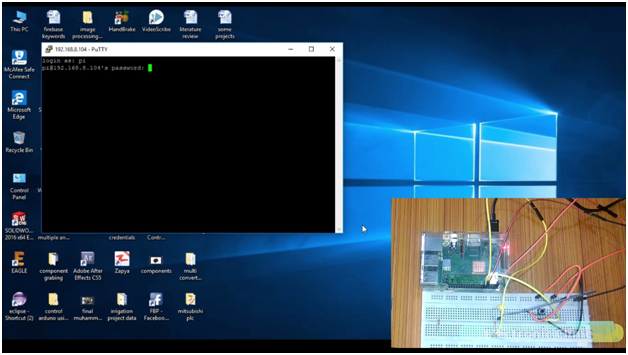
user name is pi and password is raspberry. Make sure you write the correct spelling.
As you can see we are logged in. Now we can wirelessly control raspberry pi.
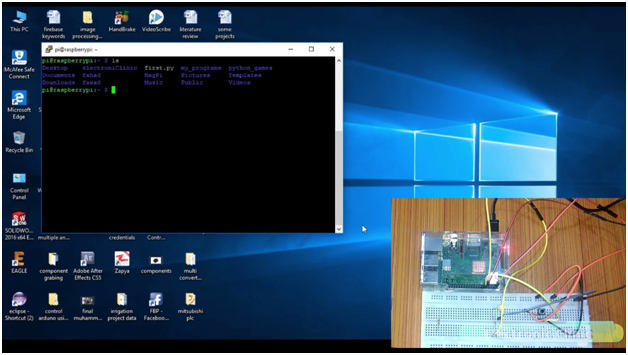
Write clear and press enter to clear the screen. Use the ls command to list all the files and folders. Simply write ls and press enter on your keyboard.
As you can see we already have a folder with the name electroniClinic, which I have already created.
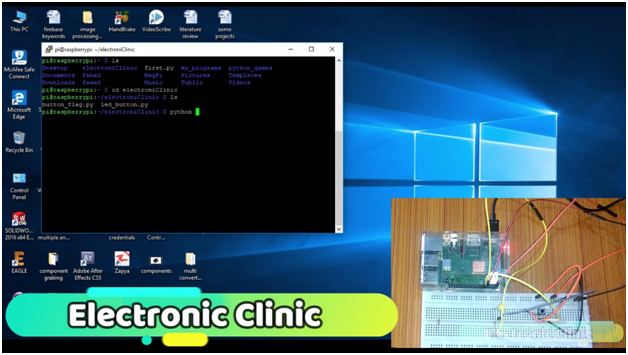
Let’s open this folder electroniClinic.
Simply write
cd electroniClinic and press enter. Then writing the ls command we can see what files and folder we have inside the electroniClinic folder.
As you can inside the folder electroniClinic we have to python programs button_flag.py and led_button.py. For now, let’s run these two programs
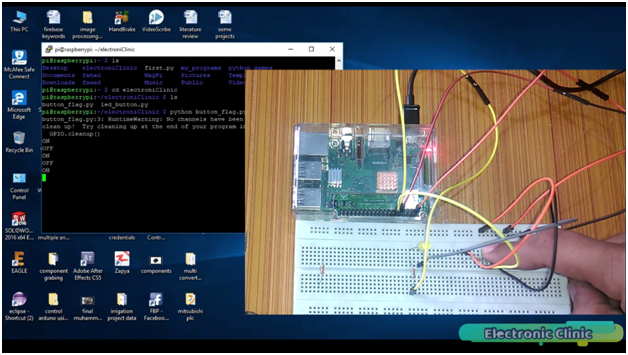
Let’s run the button_flag.py program for this simply write
Python button_flag.py and press enter
Now by pressing the Pushbutton you can see ON and OFF message on the screen. And similarly you run the other program. The purpose of running these programs was only to practically demonstrate that our connection is working and now we can control our Raspberry Pi wirelessly over SSH network using WIFI.
Checkout my other tutorials on Raspberry Pi.
For the detailed step by step explanation watch my video tutorial given below. Don’t forget to like and share this video. If you have any question let me know in a comment.
