Arduino Ultrasonic Sensor Obstacle detection using Arduino & ”HC SR04
Table of Contents
Arduino Ultrasonic Sensor, Description:
Arduino Ultrasonic Sensor Project Obstacle detection using Arduino– In this tutorial, you will learn how to use the HC-SR04 ultrasonic sensor with Arduino for Obstacle detection and distance measurement. For the demonstration purposes, I will use an Led which will be controlled depending on the distance of the object from the HC-SR04 Sensor. This LED will be controlled as per the pre-defined value. The Obstacle detection range can be adjusted in the programming.
The same programming can also be used in the Robot for detecting any Obstacle, or it can be used in a security project, or the same idea can also be used in making the touch-less doorbell system. For the Step by Step explanation, you can watch a video tutorial given at the end of this Article.
This tutorial covers the extreme basics
- Ultrasonic sensor Pinout
- Circuit Diagram
- Ultrasonic Sensor interfacing with Arduino
- Ultrasonic Sensor Arduino Programming and finally
- Testing
Amazon Purchase Links:
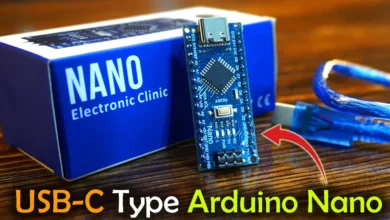
Arduino Nano USB-C Type (Recommended)
Other Tools and Components:
ESP32 WiFi + Bluetooth Module (Recommended)
Super Starter kit for Beginners
PCB small portable drill machines
DISCLAIMER:
Please Note: these are affiliate links. I may make a commission if you buy the components through these links. I would appreciate your support in this way!
Features of the Ultrasonic Sensor:
Power Supply: +5V DC
Quiescent Current : <2mA
Working Current: 15mA
Effectual Angle: <15°
Ranging Distance : 2cm – 400 cm/1″ – 13ft
Resolution : 0.3 cm
Measuring Angle: 30 degree
Trigger Input Pulse width: 10uS
Dimension: 45mm x 20mm x 15mm
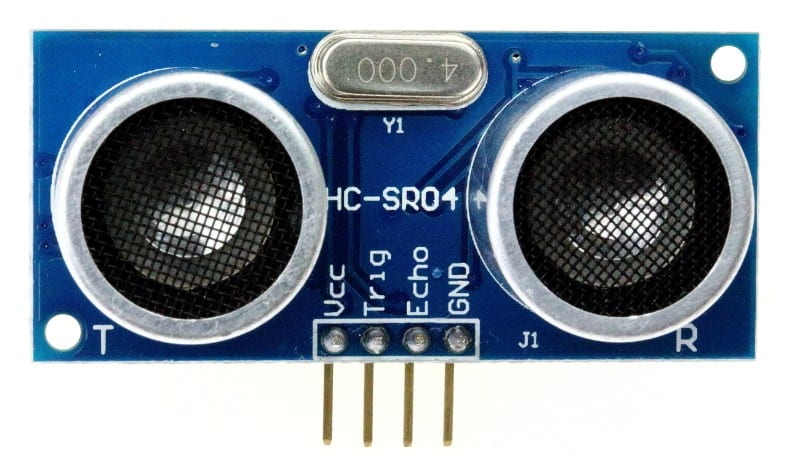
Ultrasonic Sensor HC SR04 Pinout:
As you can see in the Picture above, the HC-SR04 has a total of 4 male headers which are clearly labeled with Vcc, Trig, Echo and GND. As the HC-SR04 needs 5v so this Ultrasonic Sensor can be powered using the Arduino’s 5v.
Arduino Ultrasonic Sensor Circuit Diagram:
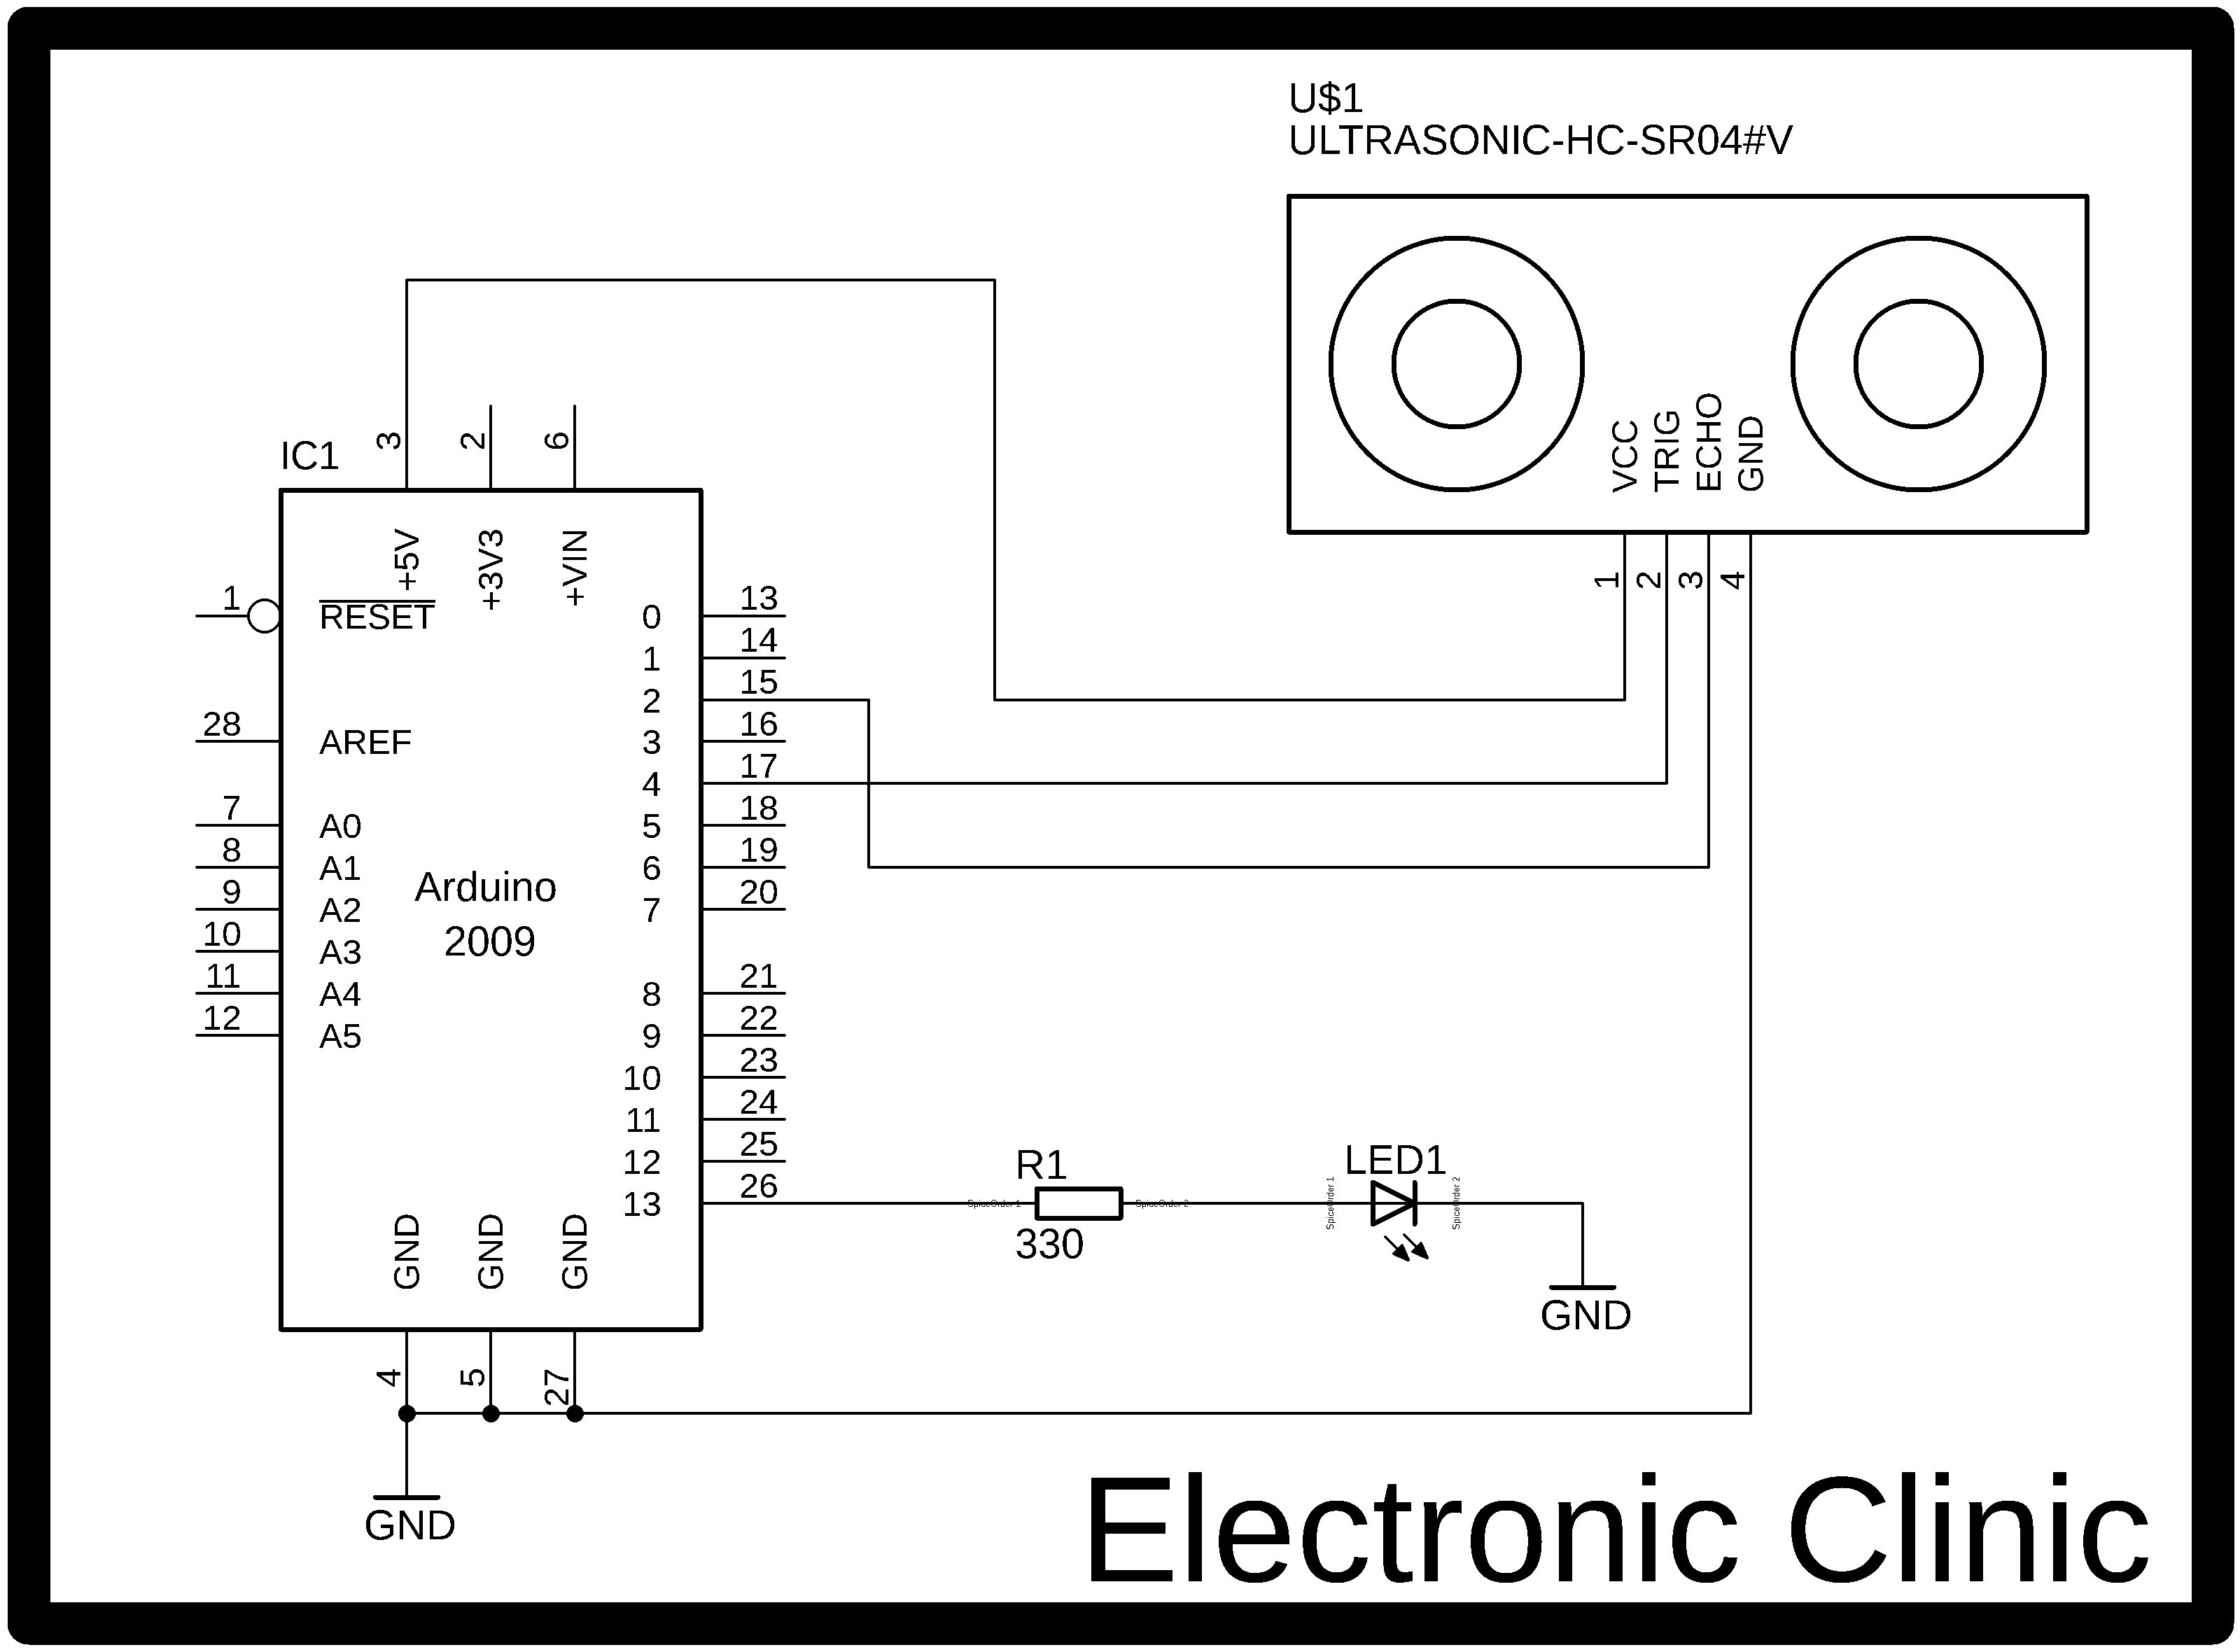
This schematic is designed in Cadsoft eagle 9.1.0 version, if you want to learn how to make a schematic and PCB then watch my tutorial.
As you can see in the circuit diagram above the HC-SR04 Vcc pin is connected with the Arduino’s 5v, the trigger pin is connected with pin number 4.Tthe echo pin is connected with pin number 2, and the ground pin is connected with the Arduino’s ground. A 330 ohm resistor is connected in series with a 2.5v LED. This is a current limiting resistor. I have a very detailed tutorial on led and how to calculate the current limiting resistor value; you can watch the video tutorial.
The resistor is connected with pin number 13, while the cathode side of the LED is connected with the ground.
Ultrasonic Sensor HC-SR04 Interfacing with Arduino:
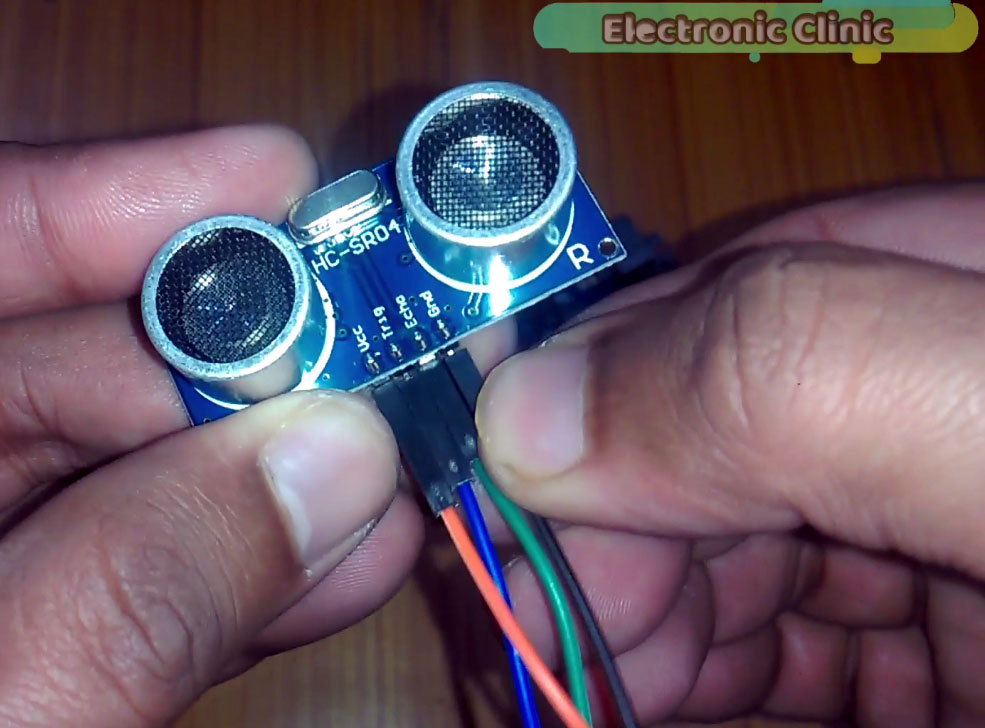
- Connect the orange wire with the Vcc.
- Connect a blue wire with the trigger pin.
- Connect a green wire with the echo pin.
- Connect a black wire with the ground pin.
After I was done with connecting the male to female type jumper wires with the HC-SR04 then I started connecting these wires with the Arduino Uno.
I simply connected the Orange wire with the Vcc.
I connected the black wire with the ground.
I connected the blue wire with pin number 4.
I connected the green wire with pin number 2. I also connected an LED with pin number 13 through a 330 resistor.
Arduino Ultrasonic Sensor Programming:
|
1 2 3 4 5 6 7 8 9 10 11 12 13 14 15 16 17 18 19 20 21 22 23 24 25 26 27 28 29 30 31 32 33 34 35 36 37 38 39 40 |
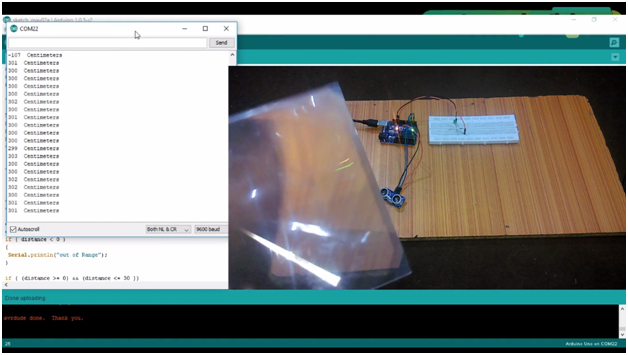
#define trigpin 4 // digital pin 4 #define echopin 2 // digital pin 2 #define buzzer 13 void setup() { Serial.begin(9600); pinMode(trigpin, OUTPUT); pinMode(echopin, INPUT); pinMode(buzzer, OUTPUT); digitalWrite(buzzer, LOW); } void loop() { int duration, distance; digitalWrite(trigpin, HIGH); delayMicroseconds(1000); digitalWrite(trigpin, LOW); duration = pulseIn(echopin,HIGH); distance = ( duration / 2) / 29.1; if ( distance < 0 ) { Serial.println("out of Range"); } if ( (distance >= 0) && (distance <= 30 )) { digitalWrite(buzzer, HIGH); } if (distance > 30 ) { digitalWrite(buzzer, LOW); } Serial.print(distance); Serial.print(" Centimeters\n"); } |
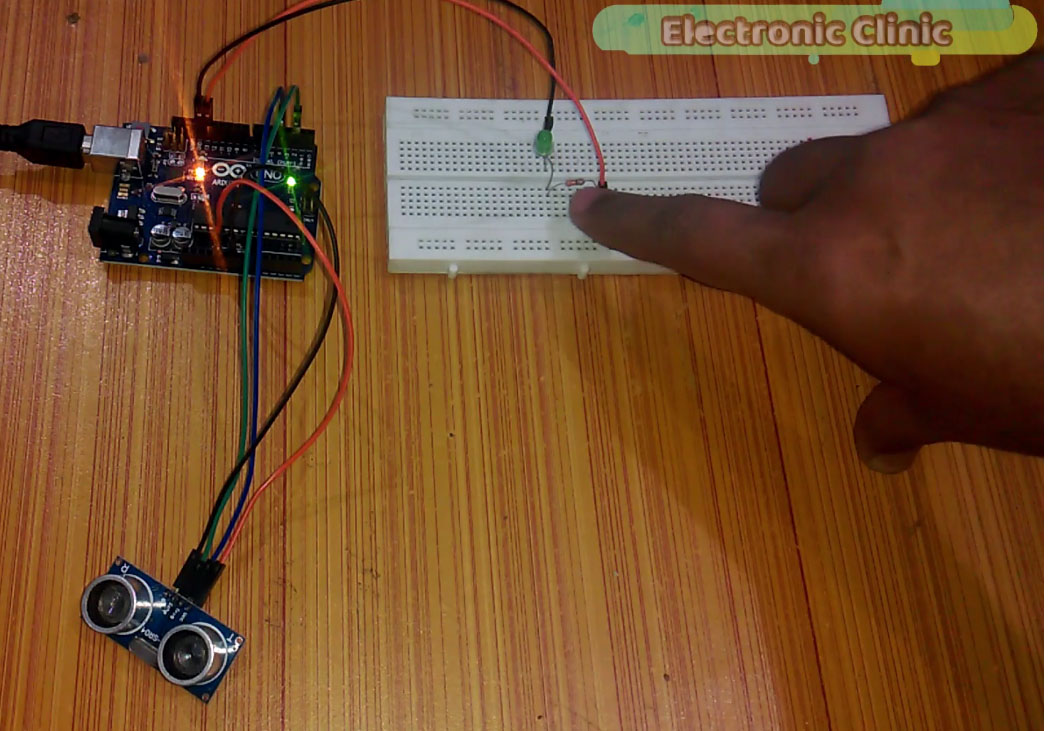
After I uploaded this program into the Arduino Uno, I was able to detect objects and was also able to measure the distance.
For the practical Demonstration watch the following video Tutorial.
Watch Video Tutorial:
Other HC-SR04 Sensor Projects:
Safe distance maintaining Car to Avoid accident using Ultrasonic Sensor
Water level monitoring using Ultrasonic Sensor
IOT Water level monitoring using Ultrasonic Sensor