Hard Disk Motor Speed Controller using Arduino, DIY Sander
Last Updated on August 17, 2024 by Engr. Shahzada Fahad
Table of Contents
Hard Disk Motor Speed Controller, Project Description:
Hard Disk Motor Speed Controller using Arduino, Diy Sander– In this tutorial, you will learn how to turn your old Hard Disk Drive Brushless DC motor into an amazing Electric Sander. The HDD “Hard Disk Drive” Brushless DC motor speed will be controlled using a Potentiometer.
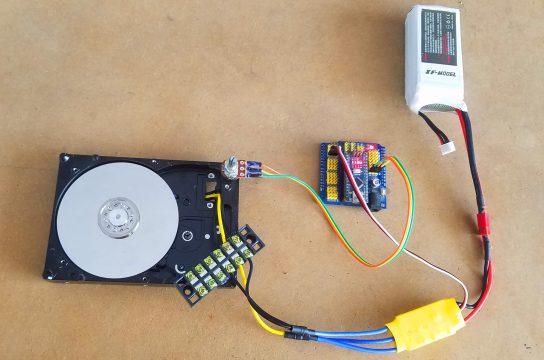
The Hard Disk Motor Speed controller is based on the Arduino Nano, ESC, and 11.1V 2800mAh Lipo Battery Pack. Instead of using the Lip Battery Pack you can also use a normal 12V DC power supply.
You might have watched some videos on YouTube explaining how to make a Sander from an old Hard Drive. In almost all those videos, the Servo Testers are used to control the speed of the Hard Disk Motor.
In this tutorial, we will do it in a different way, instead of using a Servo Tester, we will be using Arduino Nano and will write our own code to control the speed of Hard Disk Motor using a Potentiometer.
The reason I made a video tutorial was just to confirm if this Sander actually works in real. As I had all the components from the previous RC plane Wireless control system. I only had to purchase the Old Hard Disk Drive.
I used the Lip Battery Pack as the Power source, this battery pack provided the need power. I don’t what could be the result if I had used a normal 12V adaptor. But seriously for me, it worked. So, after a successful test, then I decided to write an article about this and share all the details with you guys.
Without any further delay, let’s get started!!!
Note: For the step by step making watch video tutorial available at the end of this article.
Amazon Purchase Links:
Arduino Nano USB-C Type (Recommended)
1000KV Brushless Motor, 30A Speed controller, and Propellers
*Disclosure: These are affiliate links. As an Amazon Associate I earn from qualifying purchases.
About the Hard Disk Drive:
A typical HDD has two electric motors: a spindle motor that spins the disks and an actuator (motor) that positions the read/write head assembly across the spinning disks. The disk motor has an external rotor attached to the disks; the stator windings are fixed in place.
For this tutorial, we only need the Hard Disk Motor and the housing. The other parts can be used in some other projects. First let’s start with the Circuit Diagram.
Hard Disk Motor Interfacing with Arduino, Circuit Diagram:
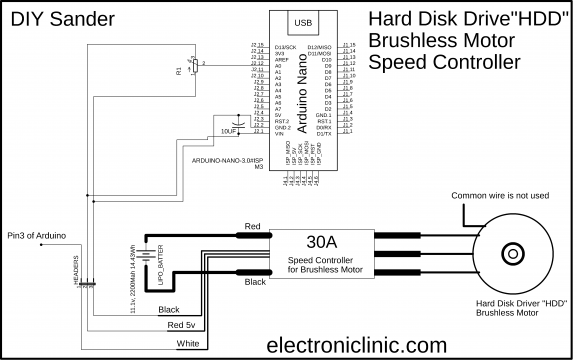
The Hard Disk Motor 3 wires are connected with the 30A Speed Controller. The common wire of the Hard Disk Brushless DC motor is not connected. The Red and Black wires of the 30A speed controller are connected with the Lipo Battery Pack.
The three wires Black, Red, and White from the ESC can be clearly seen. The White wire is connected with the Arduino’s pin number 3, which is used to control the speed of the Hard Disk Motor. The other two wires Red and Black are connected with the Arduino’s Vin and ground pins.
A Potentiometer is connected with the Analog pin A0 of the Arduino. By rotating the Knob of the Potentiometer, the speed of the Hard Disk Brushless DC motor can be controlled. The other two legs of the Potentiometer are connected with the Arduino’s 5V and GND.
Hard Disk Motor Speed Controller Arduino Programming:
|
1 2 3 4 5 6 7 8 9 10 11 12 13 14 15 16 17 18 19 20 21 22 23 |
// Hard Disk Motor Speed Controller, Diy Sander // https://www.electroniclinic.com/ // Download Servo Library: // https://www.electroniclinic.com/arduino-libraries-download-and-projects-they-are-used-in-project-codes/ #include <Servo.h> Servo BMotor; int B_Motor = 3; int Pot = A0; // Potentiometer is connected with A0 of Arduino int speed_data; // brushless motor speed data void setup() { // put your setup code here, to run once: BMotor.attach(B_Motor); pinMode(Pot, INPUT); BMotor.write(0); } void loop() { // put your main code here, to run repeatedly: int PotData = analogRead(Pot); speed_data = map(PotData,0, 1023, 1000, 2000); BMotor.writeMicroseconds(speed_data); } |
Hard Disk Motor Speed Controller Code Explanation:
I started by adding a library Servo.h. We need this library to control the speed of the Hard Disk Brushless DC motor.
#include <Servo.h>
Servo BMotor;
The ESC Signal wire is connected with the Arduino’s pin number 3.
int B_Motor = 3;
Potentiometer is connected with the Arduino’s Analog pin A0.
int Pot = A0; // Potentiometer is connected with A0 of Arduino
int speed_data; // brushless motor speed data
void setup() {
// put your setup code here, to run once:
BMotor.attach(B_Motor);
pinMode(Pot, INPUT);
BMotor.write(0);
}
Inside the loop() function, we simply read the Potentiometer and store the value in variable PotData. Next this value is mapped and is stored in the variable speed_data, this value is used to control the speed.
void loop() {
int PotData = analogRead(Pot);
speed_data = map(PotData,0, 1023, 1000, 2000);
BMotor.writeMicroseconds(speed_data);
}
Sander Making from the Hard Disk Drive “HDD”:
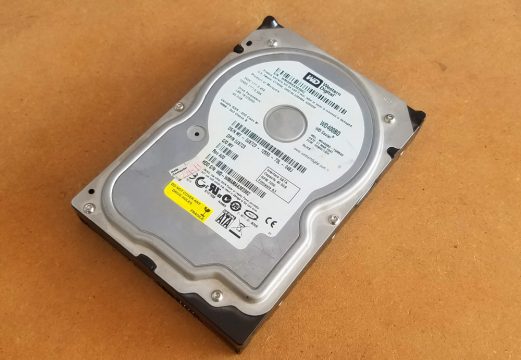
For this tutorial, I purchased an old Hard Disk Drive for around 1 dollar.
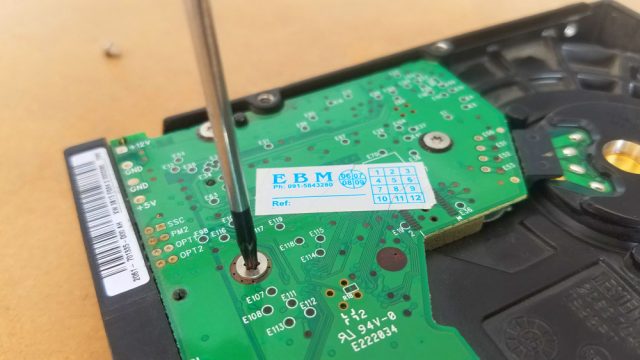
I removed the circuit, and the upper plate, and in no time I was inside the HHD.
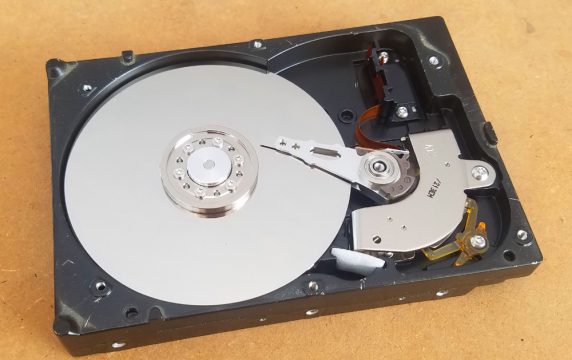
Now, we will remove the read/write head assembly across the disks.
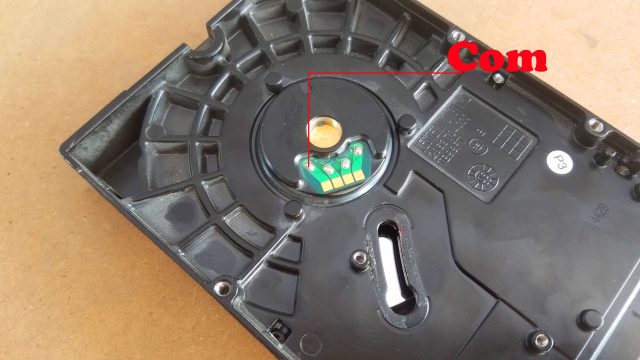
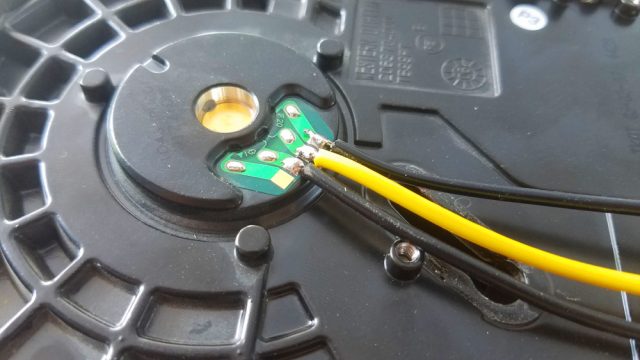
After removing the circuit, on the bottom side, you can see the 4 wires coming out of the Hard Disk Motor. The Left-most wire is the Common wire and will not be used in this project. Next, I soldered three wires. Later, these three wires will be connected with the 3 wires of the ESC. Make sure you connect the Middle wire of the Hard Disk Motor with the Middle wire of the ESC.
The right and left wires can be interchanged, if you want to change the direction of rotation of the Hard Disk Brushless DC Motor.
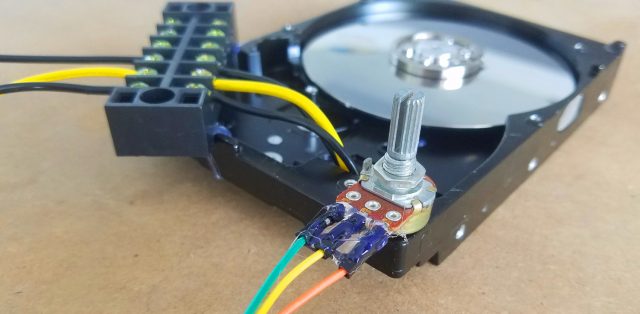
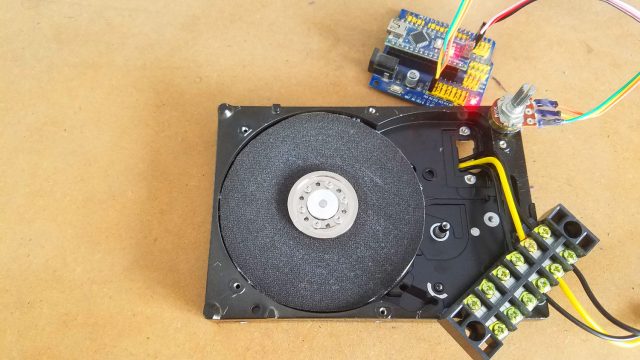
Fixed the potentiometer. Orange wire will be connected with the 5V, Yellow wire will be connected with the A0 pin, and finally, the green wire will be connected with the ground.
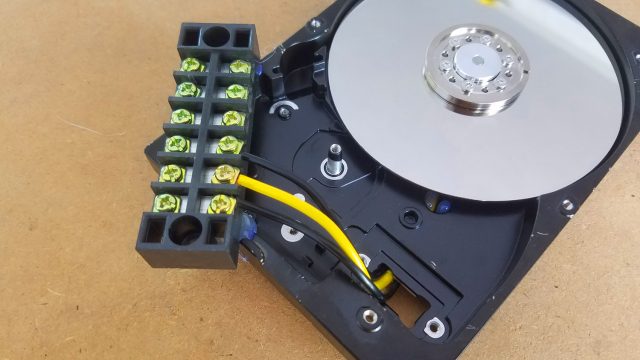
I connected everything as per the circuit diagram. Before, fixing the sandpaper I decided to check my connections and Arduino programming. I successfully controlled the speed of the Hard Disk Motor using the Potentiometer.
After performing my first test, I disconnected the Lipo Batter and the ESC. I unscrewed the plate.

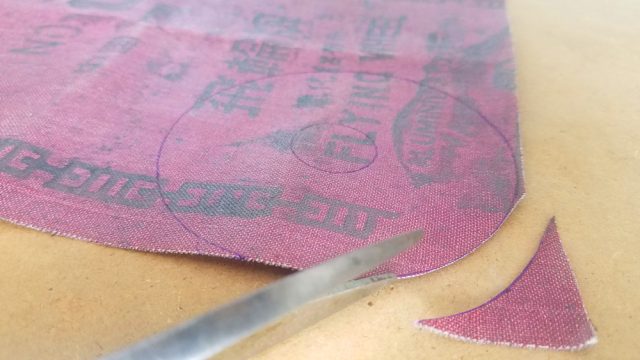
Next, I cut the Sand Paper as per the Plate.
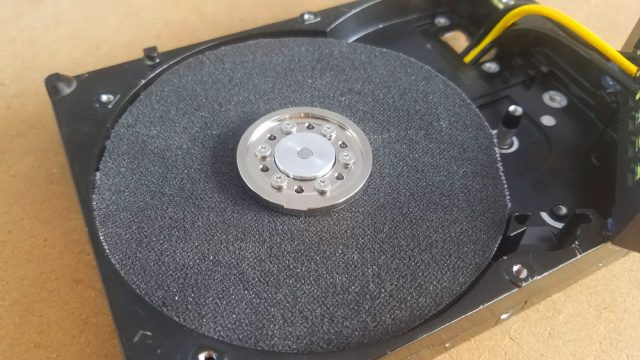
Finally, my Electric Sander was ready for the final test.
Again I connected the ESC and Lipo Battery to power up my electronics.
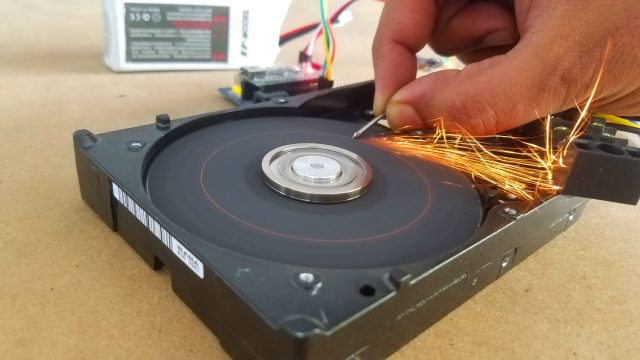
This is an amazing DIY Sander project based on the Hard Disk Motor, ESC Speed controller, and Arduino Nano. This is an ideal project for beginners with less programming, easy interfacing, and can be easily built at home.
Watch Video Tutorial:
Discover more from Electronic Clinic
Subscribe to get the latest posts sent to your email.


Hi Mr. Fahad
I’m just starting with the world “Arduino” and I’m verry happy to follow your video.
After reading your tuto, I still have a question about which controller to use to control the motor speed. Could you give me more details?
Thank you