How to make Lithium Ion Battery using 3S BMS and 4S BMS
Table of Contents
Lithium Ion Battery, Description:
How to make Lithium Ion Battery using 3S BMS and 4S BMS- In this article, I am going to explain how to use different BMS modules for making different size battery packs. This article is going to be a little longer but after reading this article, you will become an expert and then you will be able to make any size battery using Lithium-Ion Batteries. You can also read my article on how to make a Lead Acid Battery at Home.
Using Lithium-Ion Battery cells you can make any size battery pack of your choice, as you have full control over the voltage and current selection. You can simply connect the lithium-Ion batteries in series to increase the voltage or connect them in parallel to increase the current Or you can connect them in series and parallel at the same time to increase the voltage and current. So you can make a small 3.7v battery pack for powering up your Arduino, ESP32, STM32, ESP8266, etc or you can make a Heavy-duty 14 volts battery pack to power up your entire house, or a heavy-duty 72 volts battery pack to power up your electric Car.
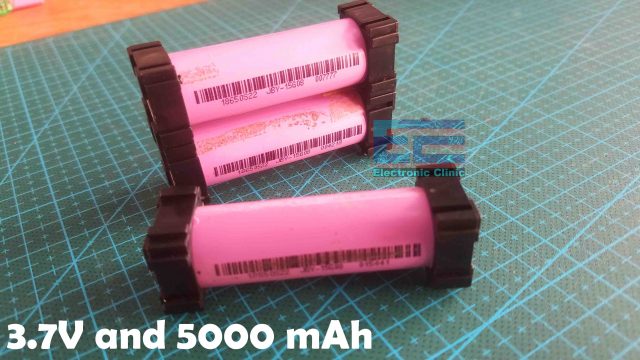
Since each Lithium-Ion Battery cell is only 3.7 volts but comes with different mAh capacities from a few hundred mAh to let’s say 10000 mAh. The Lithium-Ion Batteries I am going to use for making 3S and 4S battery packs are 3.7V and 5000mAh. In most applications, this voltage and current are not enough to power up your devices and then you start thinking about connecting these Lithium-Ion battery cells in series and parallel. At this point, you can use the soldering or spot welding technology for making these series and parallel connections.
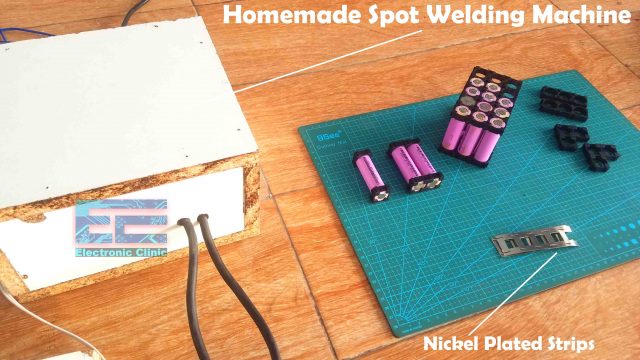
Personally, I don’t recommend the soldering technique for this job. What I recommend is Spot welding technology. In my previous article, I made a semi-automatic Spot welding machine and I explained each and every detail including, wiring explanation with the help of a simulation designed in Proteus, Spot welding electrodes selection, and how to weld lithium Ion Battery cells using this Diy Homemade Spot welding machine. Now, with this Automatic spot welding machine, I can start making battery packs for my upcoming electric Bikes, Scooters, Go-Karts, and so on.
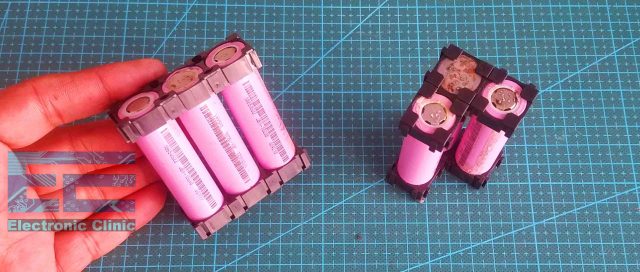
So, I have these Lithium Ion Batteries which I salvaged from my dead Hoverboard; Nickel-plated Strips, and this Automatic Spot welding machine. So, what else I need is the BMS module, BMS stands for Battery Management System.
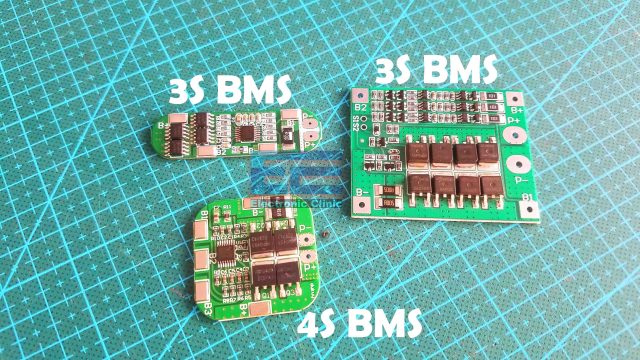
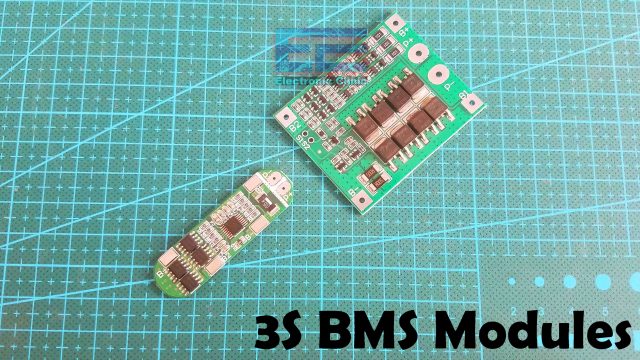
Here, I have these different BMS modules; you can see the sizes are different. Don’t get confused if you see smaller or bigger BMS modules, their use is 100% the same. These smaller and bigger BMS modules are the 3S BMS modules, the only difference is that the smaller one is for low current applications and this bigger BMS module can deal with high currents. While this other BMS module is 4S.
3S means, 3 batteries in series, and 4S mean 4 batteries in series, and if you are making a battery pack for your electric bike or electric scooter then you will need 13S BMS, which means you will need to connect 13 lithium-ion batteries in series to get 48 volts. So, before purchasing a BMS module first make sure how much voltage and current you need. So, I am sure, you have fully understood why 3S is written on these two BMS modules and why 4S is written on this other BMS module. These are printed on the backside of the module.
Before, I am going to share with you some other useful information and the test results, first a few words about the sponsor of this article for helping me purchase the required components and tools.
Altium Sponsor:
Altium Designer is the world’s most trusted PCB design system. Altium Designer enables engineers to effortlessly connect with every facet of the electronics design process. Over 35 years of innovation and development focused on a truly unified design environment makes it the most widely used PCB design solution. With Altium Designer you can create PCB designs with an intuitive and powerful interface that connects you to every aspect of the electronics design process. Route it your way through any angle, tune for the delay, Push, Slide, and Walkaround faster than ever. Interact and collaborate with mechanical designers like never before in a photo-realistic, 3D design environment. If you want to get started with the Altium designer, you can click on the get started.
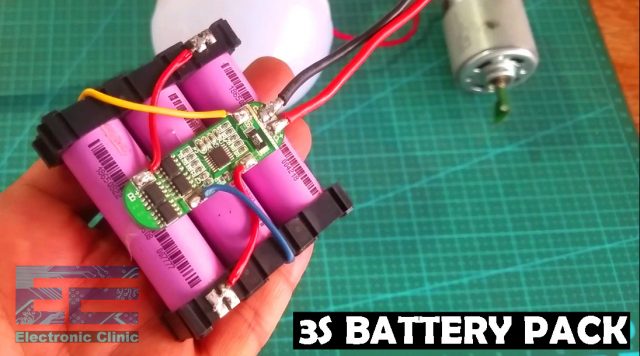
Here is my 3S Lithium Ion Battery pack made of three Lithium-Ion Battery cells connected in series, each cell has 5000mAH capacity. For this battery pack, I used a 3S BMS module. Since I am using only 3 lithium-ion cells in series and there are no batteries connected in parallel so the mAh will remain the same which is 5000mAh. As you know in series the current remains the same. If you want to increase the current capacity up to 10000 mAh then you will have to connect 3 more batteries but this time in parallel. So the battery pack will become 3S and 2P. You can make 3S and 3P, 3S and 4P, and so on. This will increase the current capacity.
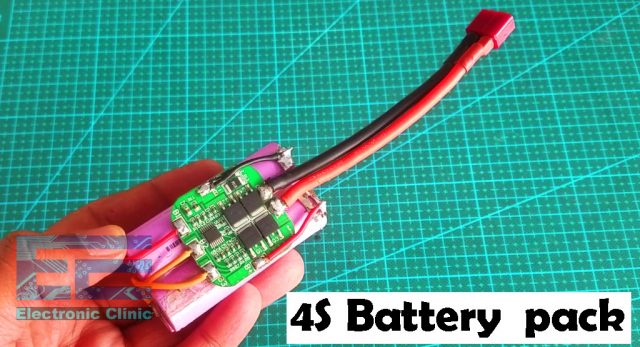
This one is 4S battery pack as you can see I have connected 4 lithium-ion battery cells in series. As I am using 4 cells, that’s why I used a 4S BMS module. This battery pack gives me more voltage than the 3S battery pack, but the current capacity is still 5000mAH as I am not using any cells in parallel.
After, sharing with you, some basic information; now it’s time to explain the BMS modules Pinouts and wiring. Without any further delay let’s get started!!!
Amazon Links:
5000 mAh Lithium Ion Batteries
Lithium Ion Batteries Accessories
Other Tools and Components:
Super Starter kit for Beginners
PCB small portable drill machines
*Please Note: These are affiliate links. I may make a commission if you buy the components through these links. I would appreciate your support in this way!
3S BMS Module Wiring:
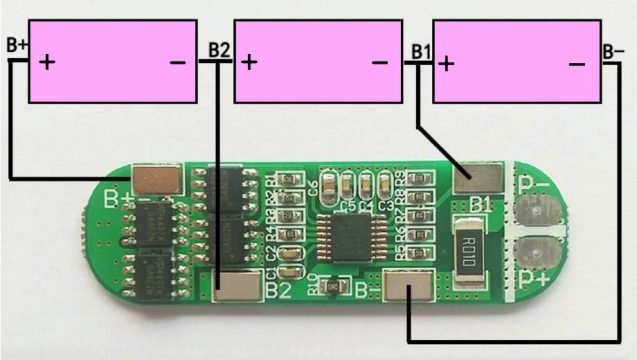
Let’s first start with these 3S BMS modules. Both the modules are designed for the same job that is to protect the Lithium-Ion Batteries from Overcharge and Over-discharge. Both the modules got the same contacts. The same P+ and P- contacts, the same B+ and B- contacts, and the same B1 and B2 contacts. The only difference between the two BMS modules is that the smaller BMS module is designed for 10A applications while the bigger BMS module is designed for 25A applications. So, let’s start with this smaller 10A BMS module.
The P+ and P- contacts are used for the input and output. Through these contacts, you will charge your batteries and to these contacts, you will also connect your output loads, but one at a time. You can either connect the load or you can charge the batteries. When a charger is connected then you cannot connect the loads. So, first, charge the batteries using these P+ and P- contacts, then remove the charger and connect the load which you want to power up.
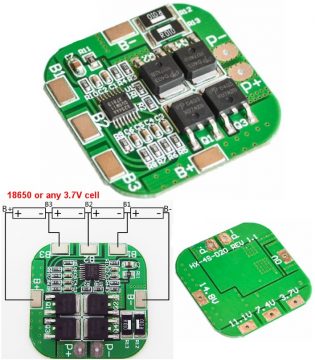
The B+ and B- contacts will be connected with the Battery pack main positive and main ground terminals. The B1 contact will be connected with the 3.7Volts, and B2 contact will be connected with 7.4 volts. Don’t get confused, I know what exactly you are thinking. Let me explain this in a more easy way.
Since we are making a 3S battery pack, which means we need to connect 3 lithium-ion cells in series. Connect the positive side of the first battery with the negative side of the 2nd battery, now connect the positive side of the 2nd battery with the negative side of the 3rd battery. The positive side of the third battery is the main positive of the battery pack and it should be connected with the B+ contact on the BMS and the negative side of the first battery is the main negative of the battery pack and it should be connected with the B- contact on the BMS. The B1 should be connected with the first cell and B2 should be connected with the 2nd cell.
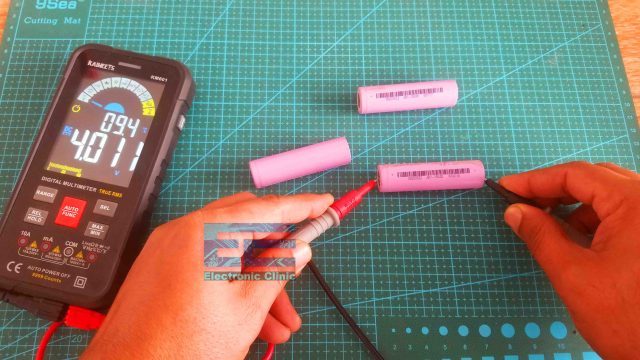
No matter if you have got the new or old Lithium-Ion Battery cells, first check the voltages. Select batteries which gives you approximately the same voltages.
All these batteries are in useable condition.
I just love building a battery pack using these Lithium-Ion Battery cells, I can connect them in different styles. For the sake of this article, I am going to go with this configuration, so that you can easily understand the connections.
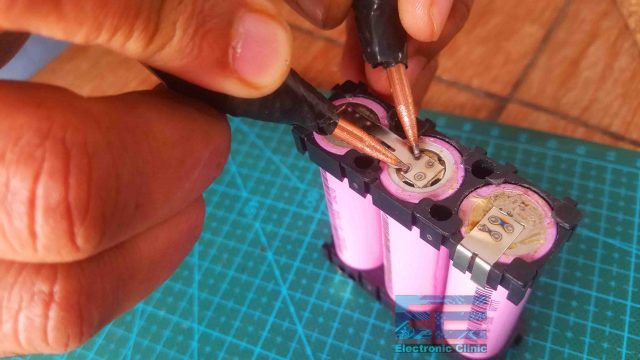
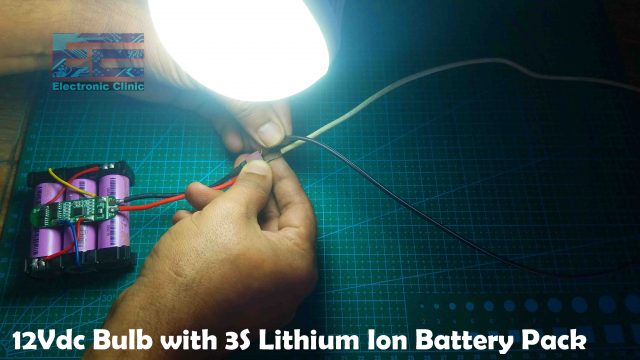
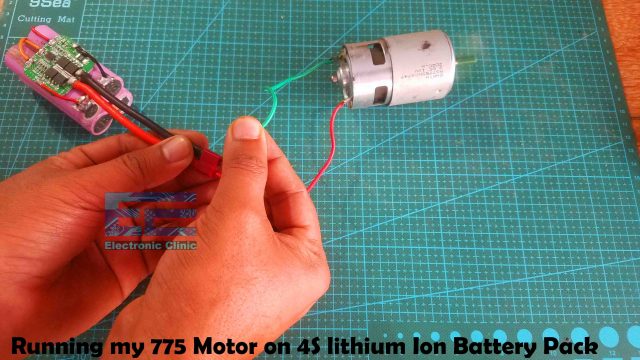
First I connected all three batteries in series using my homemade spot welding machine. The connection diagram I have already shared above. Anyways, It took me a few minutes to complete the welding. After that, I fixed the 3S BMS module on the battery pack, and completed the wiring as per the connection diagram. I first soldered the Battery pack main voltage and Ground wires which you can confirm using the digital multimeter. Then I looked for the first cell and confirmed the voltage which was around 3.7 volts and I connected it to the B1 contact on the BMS module. Then I looked for the 2nd battery and again I confirmed the voltage which was around 7.4 volts and I connected it to the B2 contact on the BMS. Finally, I connected the XT-60 connector with the P+ and P- contacts of the BMS module. After, I was done with the wiring then I checked the short circuit and continuity, and I also checked all the voltages. You can watch video tutorial for the practical demonstration which is given at the end of this article. So, after doing all the testing, then I charged the battery pack for a few minutes and then I used it to power up 775 Motor and 12V dc Light bulb.
4S BMS Module Wiring:
Now, look at this 10A, 4S BMS Module, it has got the same contacts as the 3S BMS module. This module also has these voltages printed which makes it easier to use. The only difference between the 3S and 4S BMS modules is that, the 4S BMS module has this one more contact which is labeled as B3. The connection diagram is pretty much the same.
I have already made this 4S battery pack. The P+ and P- contacts are connected to the XT-60 connector. The B+ and B- contacts are connected with the battery pack main positive voltage and Gnd. B1 is connected with the positive of Battery1, B2 is connected with the positive of Battery2, and finally the B3 contact is connected with the positive of Battery3. Before charging this battery pack, first I confirmed all the voltages using my digital multimeter. I checked it with different loads and it worked flawlessly.
Watch Video Tutorial:


Thanks for your excellent article. However one bit of info seems to be missing. Taking a 3S module as an example… what do I connect to the battery pack to charge the batteries? Can it be a variable PSU, must ut be current limited or does the module take care of this ? What voltage should they be charged at..and again does the module control the voltage across each cell.
Thanks
Malcolm
I love your analysis and arrangements of each subtopics…Thank You.
How can I connect 21 lithium Ions battery to get 12volts out,the arrangement and what kind of BMS would I used?