How to remove surface mount IC, SMD IC replacement, Desoldering tutorial
SMD Components Desoldering tutorial
Table of Contents
SMD IC replacement:
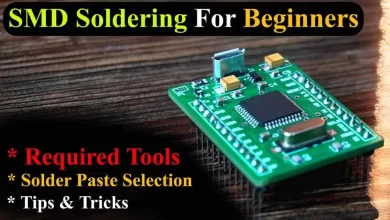
How to remove surface mount IC | SMD IC replacement | SMD Soldering & Desoldering- Desoldering and resoldering an SMD IC or controller refers to the process of removing and then reattaching a surface mount device (SMD) to a printed circuit board (PCB). This is a common task in electronics repair and prototyping. By watching the video, you will learn how to desolder and resolder SMD components, which will enable you to replace any SMD IC.
To perform SMD IC soldering and desoldering, one must have a good understanding of the techniques involved. SMD components are much smaller than traditional through-hole components, which can make them more challenging to work with. Desoldering involves using a soldering iron, desoldering braid, or suction tool to remove the solder holding the SMD component in place. Resoldering involves placing the component back onto the PCB and reflowing the solder to make a secure connection.
Amazon Links:
Desoldering wire or desoldering braid or wick
Other Tools and Components:
Super Starter kit for Beginners
PCB small portable drill machines
*Please Note: These are affiliate links. I may make a commission if you buy the components through these links. I would appreciate your support in this way!
Nowadays, many electronic devices use SMD components, including surface mount ICs, SMD resistors, SMD capacitors, and many other SMD components. Therefore, understanding how to work with SMD components is essential for creating new circuits or repairing SMD circuits.
To perform SMD soldering and desoldering, you should have good quality tools and basic knowledge, such as knowing how to set the temperature, how to use flux, how to hold the heat gun, and how to apply solder paste with or without an SMT stencil on the PCB.
Watch Video Tutorial English:
Watch Video Tutorial Hindi/Urdu:
Here are some things to take care of while doing SMD IC desoldering:
Proper tools: Ensure that you have the correct tools for the job, such as a good quality soldering iron, desoldering braid, soldering flux, and a heat gun. Having the right tools will make the process easier and less likely to damage the PCB or components.
Heat management: SMD components are sensitive to heat, and excessive heat can damage them or the PCB. Use a temperature-controlled soldering iron and heat gun to avoid overheating. Heat only the component that needs to be desoldered, not the entire PCB.
Solder removal: Use desoldering braid or a soldering vacuum to remove the old solder from the pads. Avoid pulling or twisting the component, as this can damage the pads or the component itself.
Cleaning: Once the old solder is removed, clean the pads with a soldering flux remover or isopropyl alcohol to ensure that the new component attaches securely.
Component placement: When placing the new component, ensure that it is oriented correctly, and align the pads with the PCB. Apply solder paste to the pads using an SMT stencil if available, and then use a heat gun to reflow the solder.
Testing: After completing the soldering process, test the component to ensure that it is functioning correctly.
For demonstration purposes, I will be replacing my Arduino Pro Micro microcontroller, which has many legs. So, I am sure you will understand what I want to explain.
What could happen if you set a high temperature?
If you set a high temperature while desoldering or soldering SMD components, it can cause several problems:
Component damage: High temperatures can damage the SMD components, including the IC, resistors, capacitors, or other components, which may cause them to fail or malfunction.
PCB damage: High temperatures can also damage the PCB, especially the pads or the traces, which can affect the integrity of the entire circuit.
Excessive solder flow: High temperatures can cause excessive solder flow, which can result in short circuits, solder bridges, or cold joints, all of which can cause the circuit to malfunction.
Toxic fumes: High temperatures can also produce toxic fumes from the solder and flux, which can be harmful to your health. It’s essential to work in a well-ventilated area and wear appropriate safety gear.
Therefore, it’s crucial to use the right temperature settings while desoldering or soldering SMD components to avoid any damage to the components or the PCB. Always refer to the manufacturer’s specifications or guidelines for the appropriate temperature range to use.
Read my article on how I built my self a 5V and 3A power supply.


