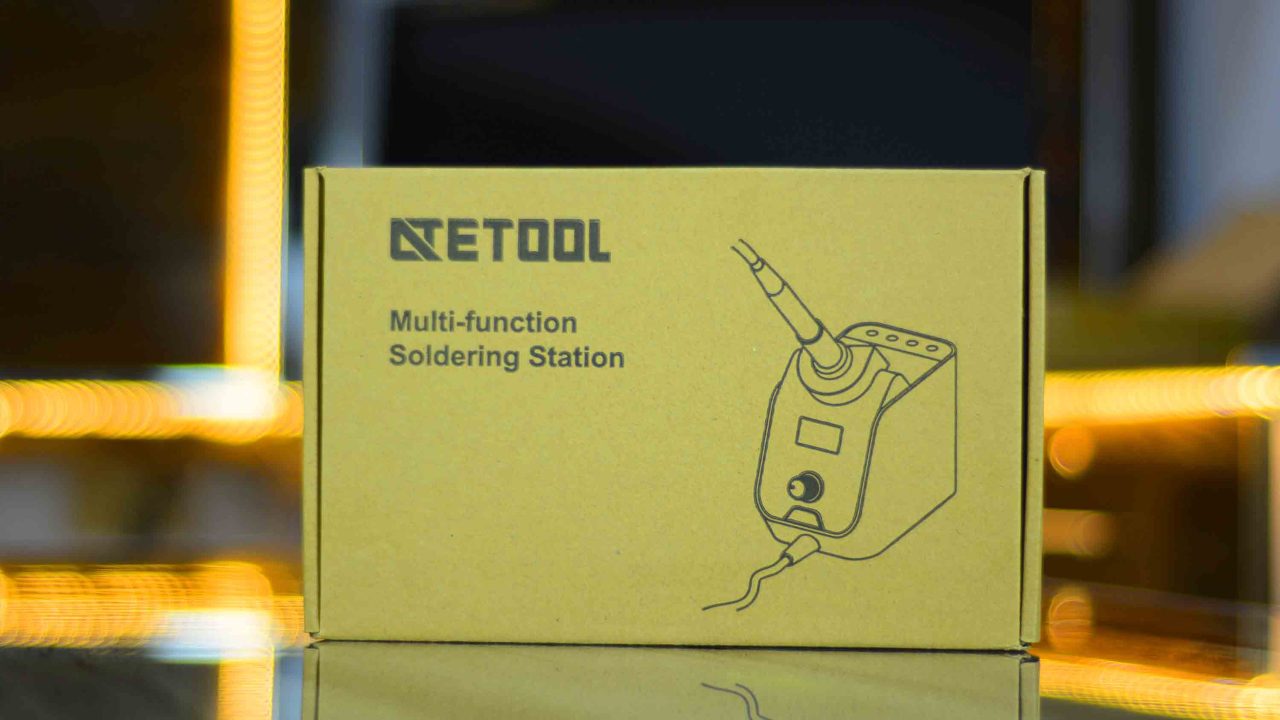
Soldering Station AE689A from ATETOOL Review and Soldering Test
Last Updated on September 21, 2024 by Engr. Shahzada Fahad
Table of Contents
Soldering Station AE689A:
Soldering Station AE689A from ATETOOL Review and Soldering Test-I got two soldering irons from ATETool. The soldering Pen AE560W and a Multi-function Soldering Station. I have already reviewed and tested the AE560W soldering iron while using different types of soldering tips and I used the Andonstar digital microscope for recording the soldering so that you guys could clearly see the finishing results.
Anyway, in today’s article, I am going to review and test the ATETool Multi-function Soldering station. This soldering station has got multiple functions like temperature setting, temperature locking function, temperature unit conversion, standby and sleep mode, and the temperature calibration. I will go through all these functions, and I will explain in detail how to use these different functions.
I will be using the same soldering iron tips, the ones I used with the AE560W soldering Iron, and I will also use my Andonstar digital microscope for recording the soldering. By the way, you can also watch my video on Andonstar digital microscope available on my YouTube channel Electronic Clinic.
Amazon Links:
ATETOOL AE689A Soldering Station
Disclosure: These are affiliate links. As an Amazon Associate I earn from qualifying purchases.
Anyway, let’s go ahead and start the Unboxing.
Inside this box you will find the ATETOOL AE689A Soldering Station User Manual.
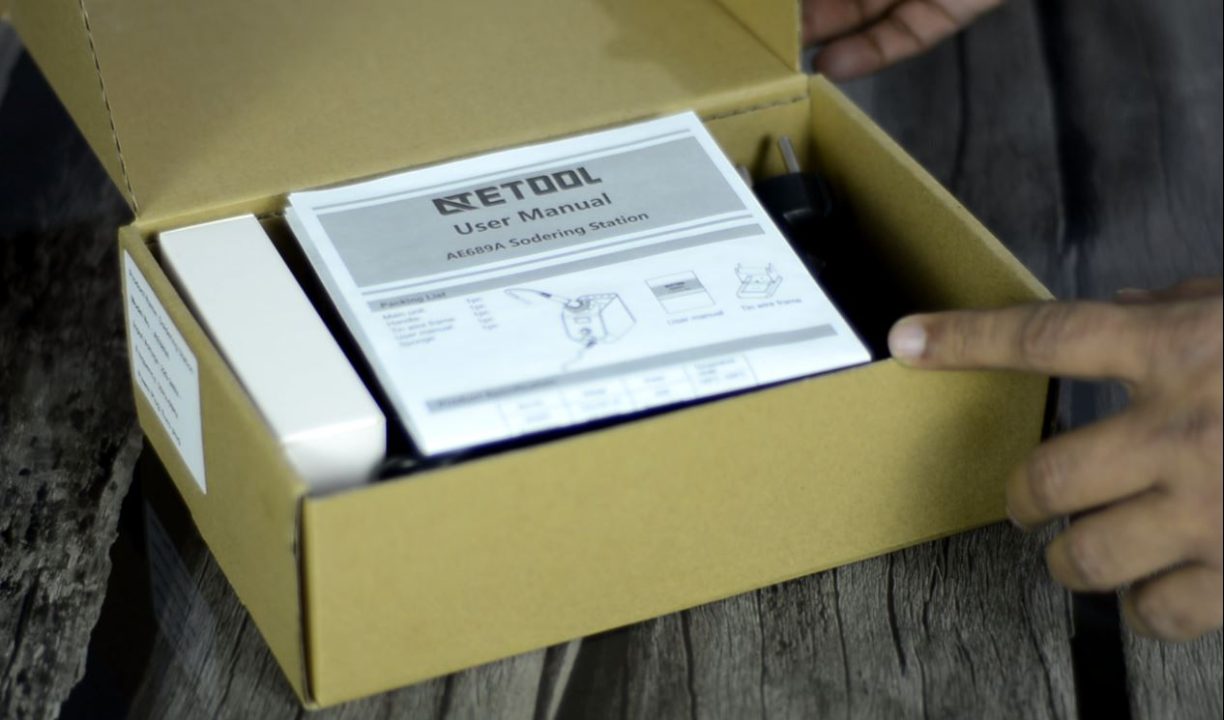
And in this User Manual you will find every bit of information including the Packing List, Product Specification, Safety and Precautions, Using Method, and information about the 900M-T series soldering Tips.
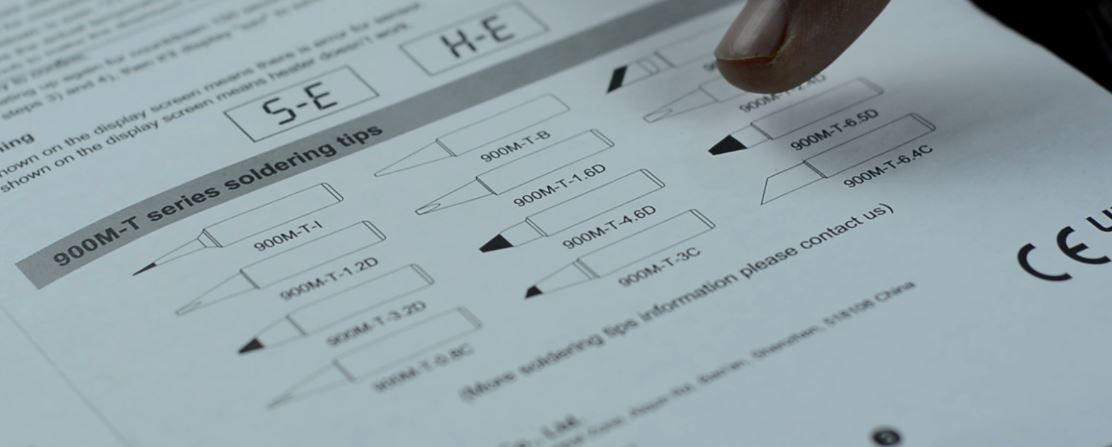
I personally, don’t have all these soldering tips, but I have got some of the most commonly used soldering tips, which I am going to use with the soldering station. Anyway, I highly recommend you guys should go through this user manual before you power up this soldering station. You can also visit the ATETOOL official website if you want to know more about the AE689A Soldering Station.
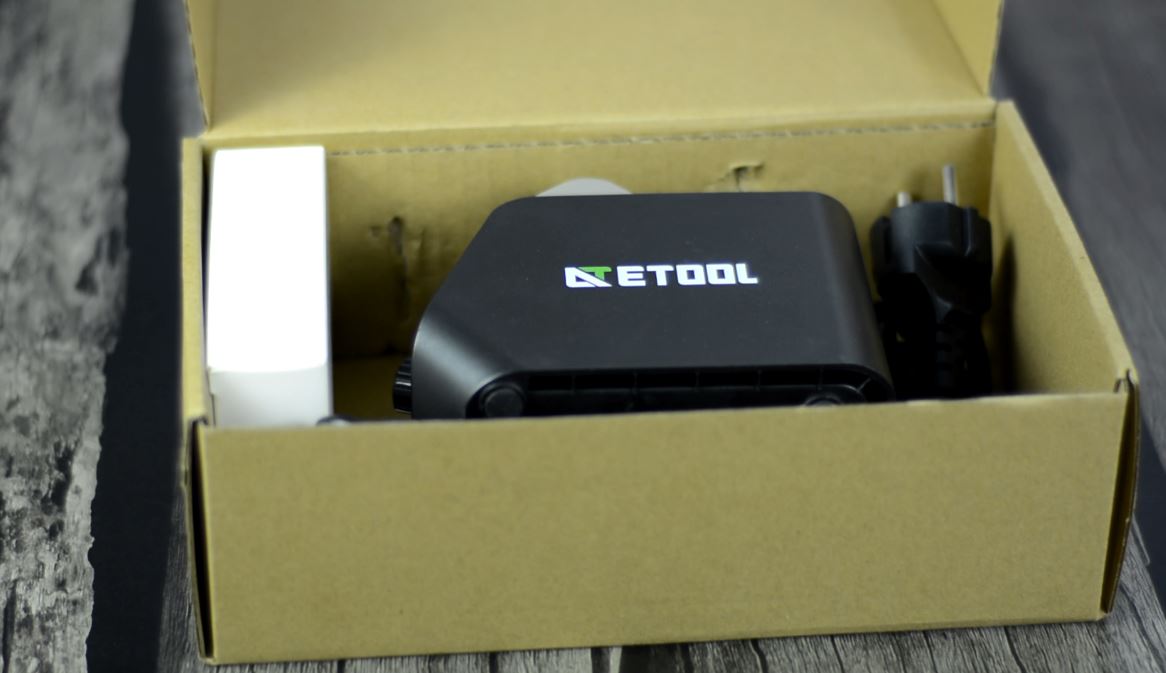
We have also got this white box, and I guess inside this box is the Tin Wire Frame and Sponge. Actually, I read this in the User Manual. Anyway, you will have to manually assemble the Tin Wire Frame, I did it for you in the video.

This is how the Tin wire frame look after assembling all the parts. And finally, here comes the Main Unit and the Soldering Iron.
Now, this is the ATETool 60W AE689A Soldering Station, the input voltage is 220 to 240Vac, ATETOOL has also 110VAC version of the same soldering station, so make sure you order the correct soldering station.Its Model number is AE689A.
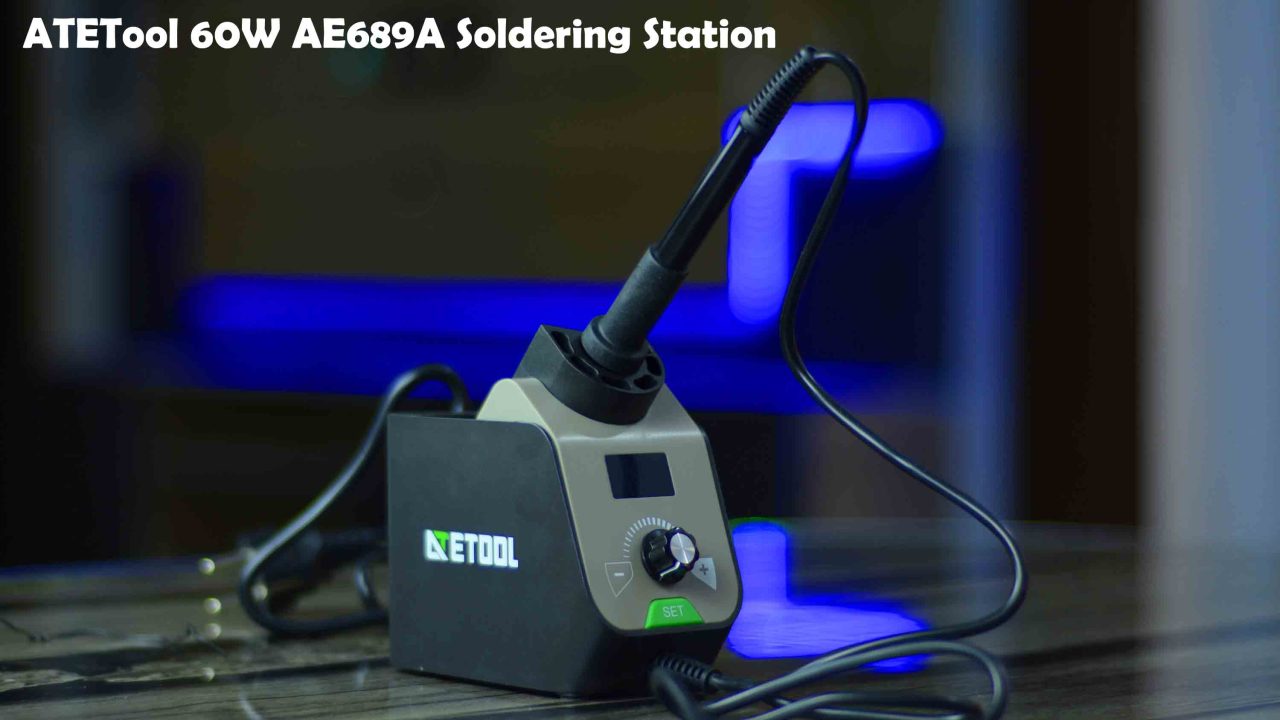
Appearance and Control Panel:

The Power button is on the back side of the soldering station.
LED segment display
There is also an indicator light
Temperature adjustment Knob
Temperature Unit Switch
Soldering Handle
Soldering Stand
And the soldering tip slots
It has this 900M-T series tip which is switchable. Simply unscrew the Nut, remove the casing,and replace the current tip with a new one as per your soldering job.

This is a ceramic ATETOOL PTC two-core heating element. For now I will continue with the same soldering iron tip which is designed with an electroplating protective layer that can greatly prolong its service life.
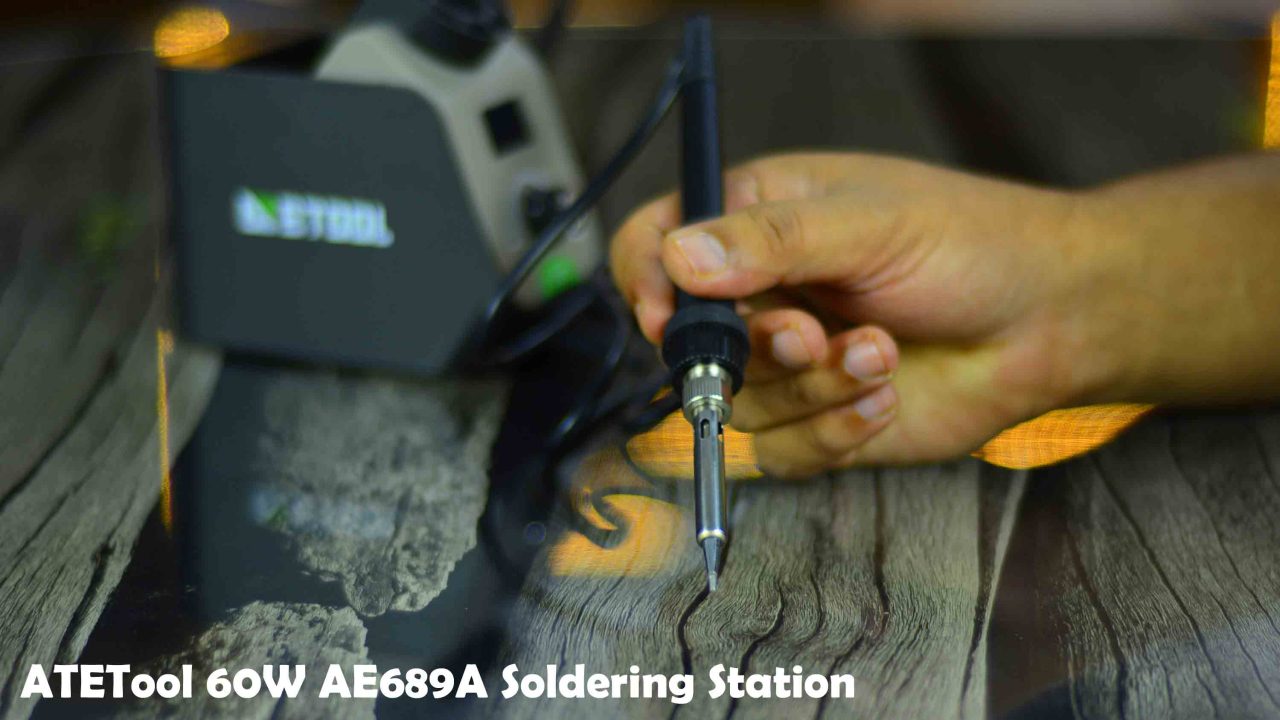
It’s so slim and lightweight that you can hold it like a pen. And it’s suitable for all kinds of the soldering process.
Using the Knob you can set different temperatures between 100 and 500 degrees Celsius; with temperature stability up to ±2 Degrees Celsius.
Soldering Station AE689A, technical parameters
| Manufacturer | ATETOOL |
| Model number | AE689A |
| Power | 60W |
| Input voltage | 110VAC / 230VAC |
| Temperature range | 100-500℃ (212-932℉) |
| Heating element | two-core PTC heating element |
| Soldering tip | 900M-T series tip |
| Power cord length | 1.2m |
| Handle cable length | 1.2m |
| Net weight | 560g |
| Temperature stability | ±2℃/±4℉ (when temperature >200℃/400℉) |
| Tip to ground resistance | <2Ω |
| Tip to ground voltage | <2mV |
| Warranty | 12 months |
| Packing list | 1 x Main unit 1 x Handle 1 x Tin wire frame 1 x User manual 1 x Sponge OR 1 x brass wool |
Different Functions:
Note: for the step by step explanation watch video tutorial available on my YouTube channel Electronic Clinic. I have also added a link to the video at the end of this article. So, let’s go ahead and power up the soldering station.
After turning ON the power, LED segment lights up and displays “888”for 1 second, then it displays the temperature unit “Co” or “Fo” for 1 second. If the standby function is enabled, “SLP” will be displayed for another 1 second. As, I am using this soldering station for the first time that’s why “SLP” is not displayed.
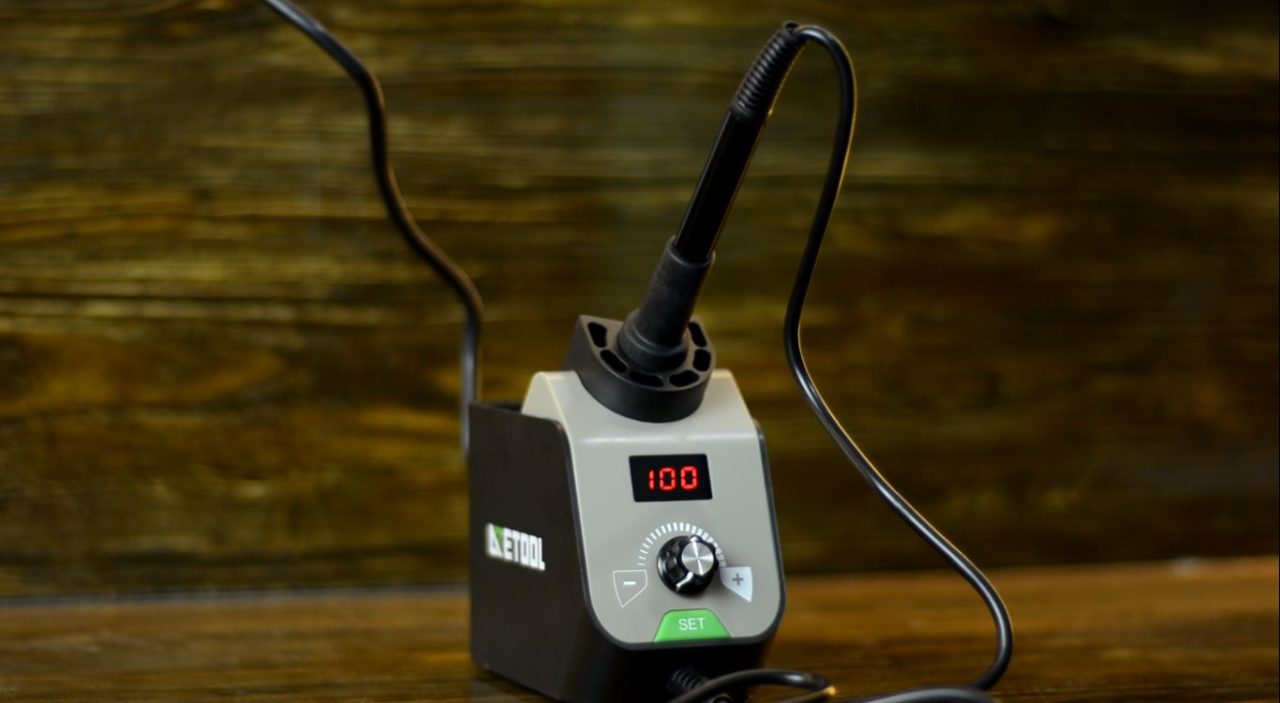
Anyway, then it displays the set temperature for 1.5 seconds, and finally displays the actual temperature. Right now you can see the knob is at the lowest temperature value which is 100 degree Celsius, so the set temperature and actual temperature are the same. I am going to increase the temperature.
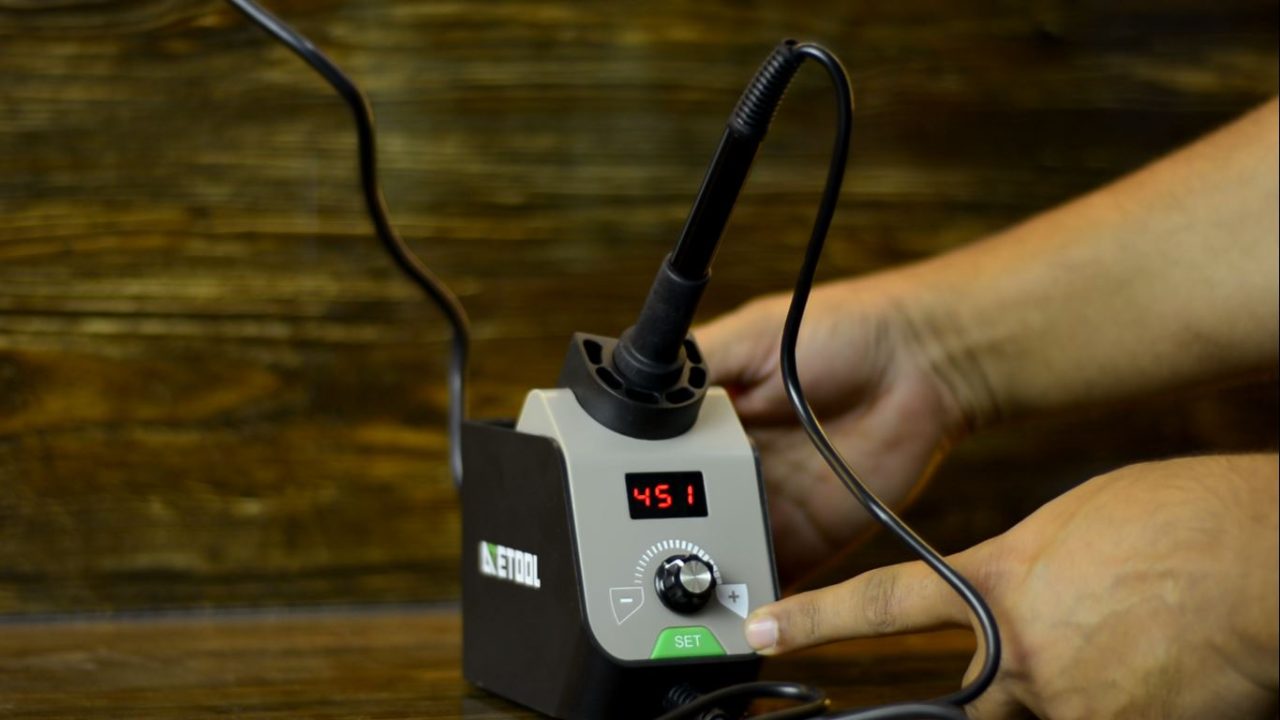
When the temperature is stable the LED flashes. Did you notice? Of course not, you can’t get the idea from these images, for this you will have to watch my video. Anyway,when I changed the temperature, the set temperature was displayed for around 1 second and then for the next few seconds it displayed the rising temperature and when it reached the set temperature value it stopped there and the LED started to flash, which means the temperature is stable
Temperature Locking Function:
Next, I am going to explain how to use temperature locking function, first I am going to set the desired temperature, required for the soldering job.
Now, long press the function key and when the “LOC” is displayed, release the function key to enter the temperature locking function setting.
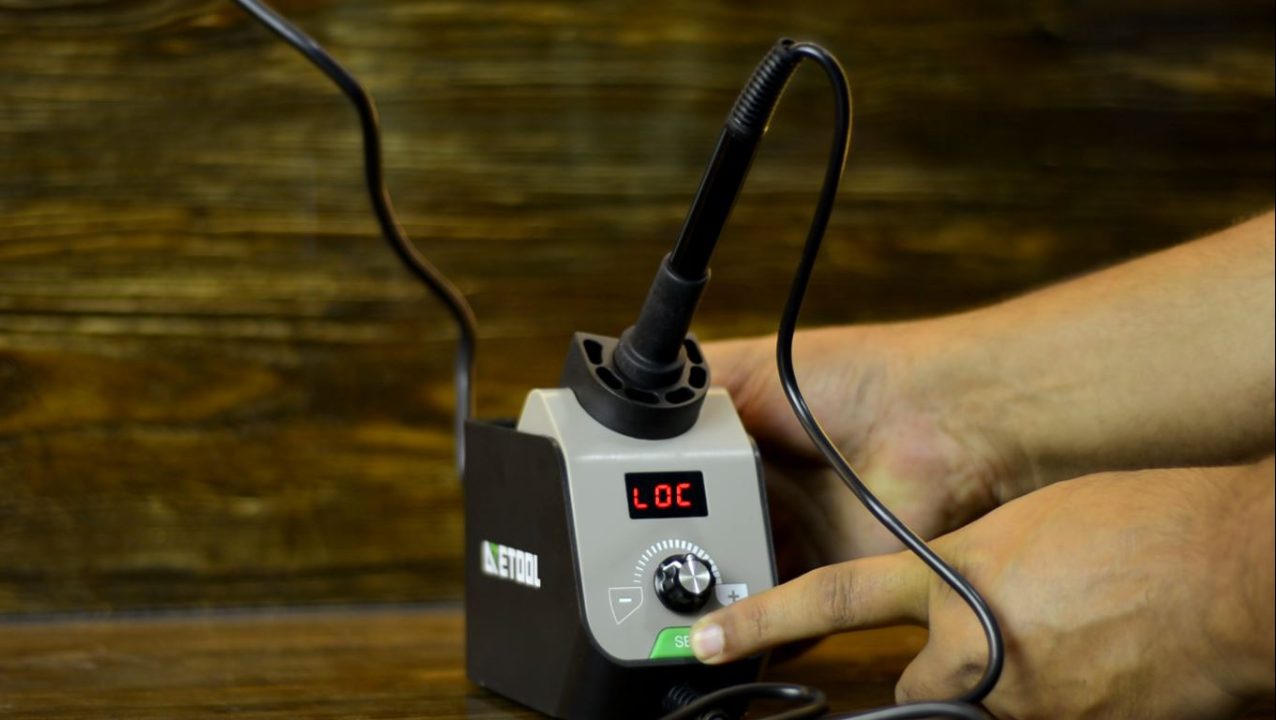
Just release the function key as soon as you see the LOC on the display. You need to be a little bit quick.

Use the knob to turn it ON or OFF, for now, I will continue with ON. So, simply rotate the knob and when you see ON, press the function key or wait for 10 seconds to automatically save the setting.
This temperature locking function can be quite handy in situations when you are going to soldering temperature-sensitive components and you don’t want the temperature to change even if you rotate the knob.
Now, to turn OFF the locking function, repeat the same steps but this time select OFF and press the set button if you don’t want to wait for 10 seconds. Now, you can change the temperature.
Temperature Unit Conversion Function:
Next, I am going to explain how to change the temperature Unit. Let’s say you want to display the temperature in Fahrenheit. For this first you will need to turn OFF the soldering stations. Next, press and hold the function key and then turn ON the power at the same time. After the “888” is displayed, release the function key to complete the temperature unit switching.
Now, you can see the temperature is in Fahrenheit. Now, let’s say I want to change this back to Celsius, I will repeat the same steps. Now, the soldering station will display the temperature in Celsius.
Sleep Function:
Now, I am going to explain how to use sleep function. While your soldering station is ON, Just long press the function key and when the “SLP is displayed release the switch and then use the Knob to Turn ON or OFF the sleep function just like the locking function. Use the know to turn ON the Sleep function. Now you can press the function key to save the setting or wait for 10 seconds.
In the standby or sleep mode, when the soldering station is not used for 10 minutes; it will automatically enter into standby or sleep mode. “STB” will be displayed”I will be back after 10 minutes.
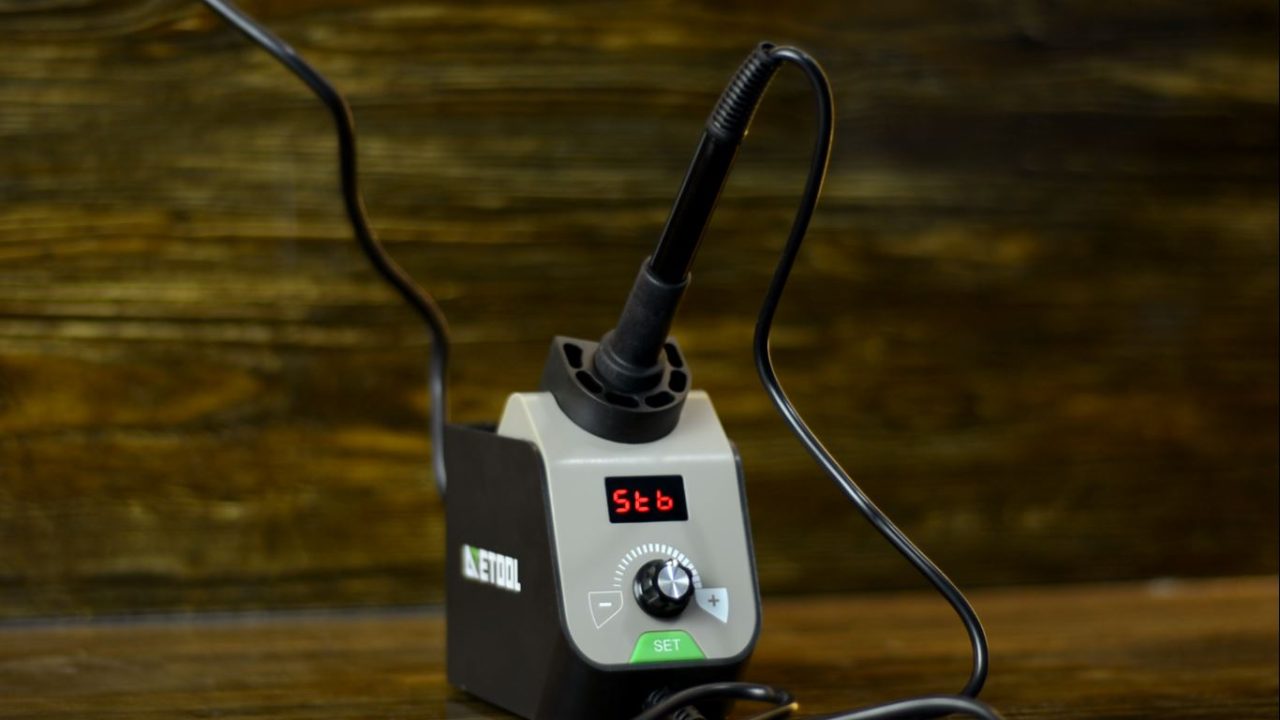
hey guys, I am back after 10 minutes. You can see Stb is written on the display, and the soldering station temperature is dropped to 250o Celsius. When any operation is detected, such as using the handle, adjusting the knob, or pressing the function key, it will return to the normal heating mode.
Temperature Calibration:
You can also do temperature calibration, if you want the most accurate temperature for a specific soldering job. For the temperature calibration, long press the function key and when the “CAL” is displayed, release the button.
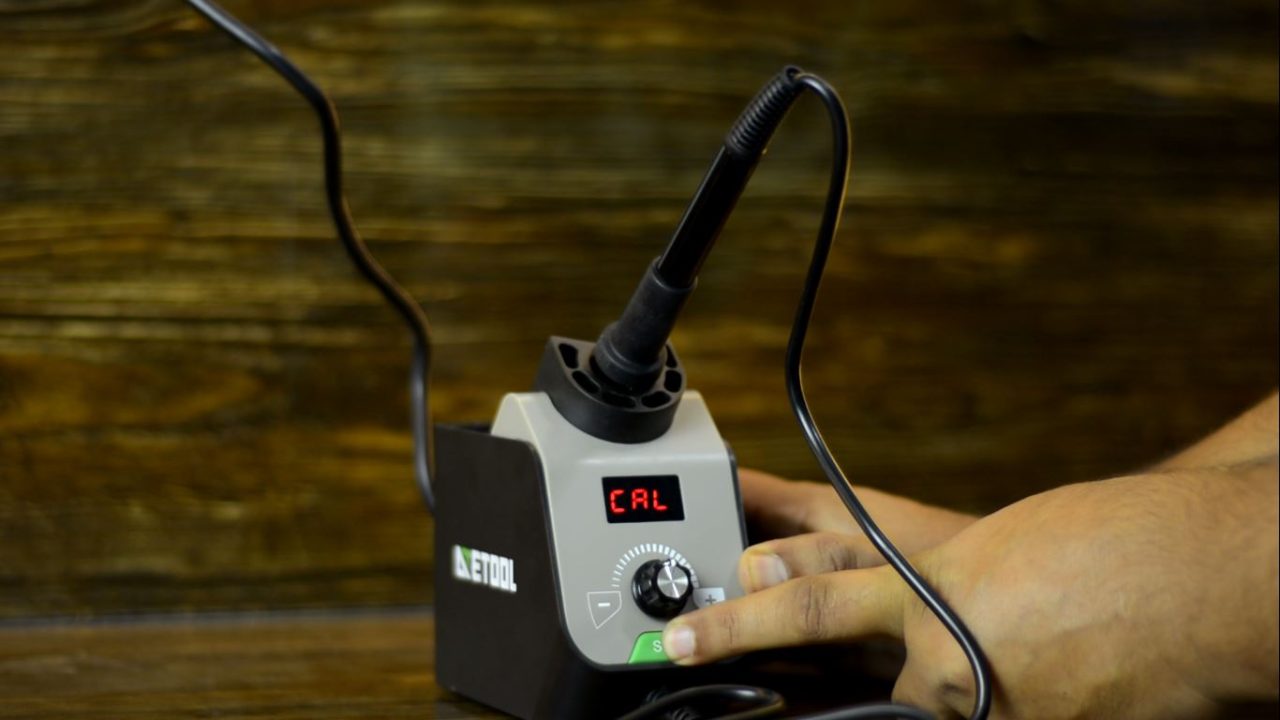
In the User Manual, it is explained step by step, right now, I don’t have a precise temperature monitor; so I can’t calibrate this, and to be very frank, I don’t need to calibrate this soldering station, since I will be using this for soldering random electronics components. Anyway, let’s go ahead and start the soldering.
First, I am going to start with its default soldering tip and then I will test it with my other soldering iron tips. I am going to turn ON my Andonstar digital microscope for recording the soldering. And I am also going to turn ON my soldering station and I am going to wait for a few seconds till the temperature gets stable.
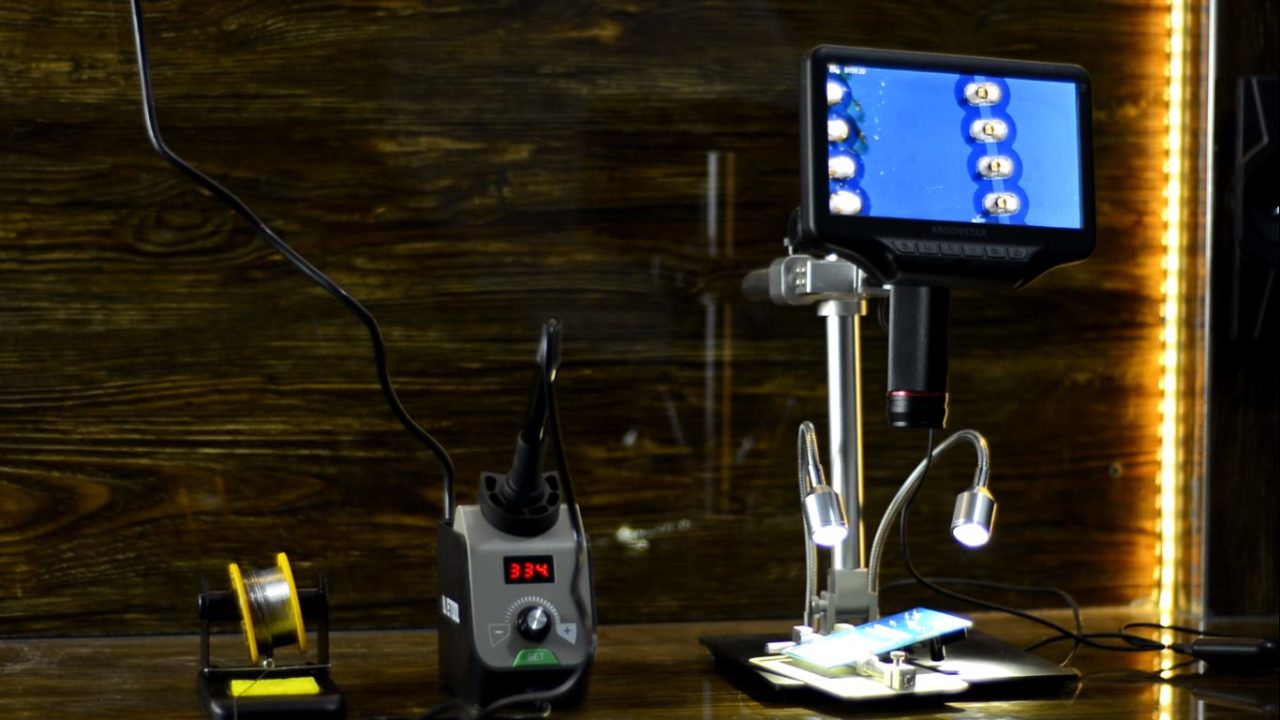
Now, let’s go ahead and start the soldering.

This is the first time I have used the soldering station, and now I regret why I didn’t get it in the beginning. The ATETool soldering iron and soldering station both are simply amazing; you can watch both the soldering devices in action on my YouTube channel. Anyway, I also used this soldering station with different types of soldering tips; knife tip, chisel tip, bevel tip, etc. The Built-in PID system ensures high stability, excellent performance, and precise accuracy. It also increases the Soldering tip life.
Watch Video Tutorial

Discover more from Electronic Clinic
Subscribe to get the latest posts sent to your email.