STM32 and DHT11 Temperature & Humidity Sensor Interfacing Using Arduino IDE
Last Updated on May 11, 2026 by Engr. Shahzada Fahad
Table of Contents
STM32 and DHT11, Description:
STM32 and DHT11 Library, Circuit Diagram, and programming using Arduino IDE-
While working on the STM32 and DHT11 based temperature and humidity monitoring system I faced an issue that was my DHT11 sensor was giving me 255 values for both the Temperature and Humidity. While searching I found out that maximum of the guys were facing the same issue. The previous DHT library that I was using with the Arduino didn’t work with the STM32. I fixed this issue by replacing the DHT11 library, seriously I searched for hours and finally, I found the correct version of the DHT11 Library which works perfectly with the STM32 microcontroller board. The library download link is given in the programming section.
It’s just a beginners level project and the purpose of this tutorial is to help you guys how to program the STM32 microcontroller board using the Arduino IDE. So, basically, in this tutorial you are going to learn two things, the first one is how to use the DHT11 temperature and Humidity Sensor with the STM32 and the 2nd one is how to use an I2C supported Oled display module with the STM32 controller board. The type of the Oled display I am using is the SSD1306 which I have been using with the Arduino, ESP8266, and ESP32 controller boards.
Without any further delay let’s get started!!!
Amazon Links:
STM32F103C8T6 Controller Board
DHT11 Temperature and Humidity Module
Other Tools and Components:
Super Starter kit for Beginners
PCB small portable drill machines
*Please Note: These are affiliate links. I may make a commission if you buy the components through these links. I would appreciate your support in this way!
DHT11 Interfacing with STM32:
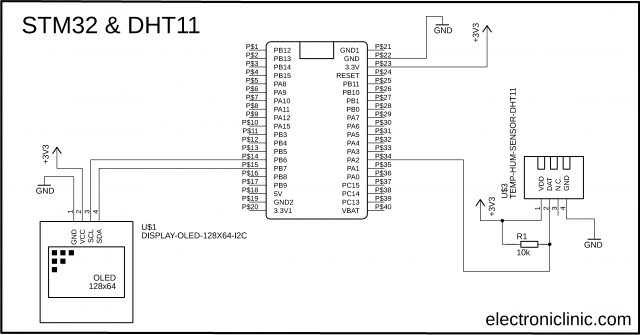
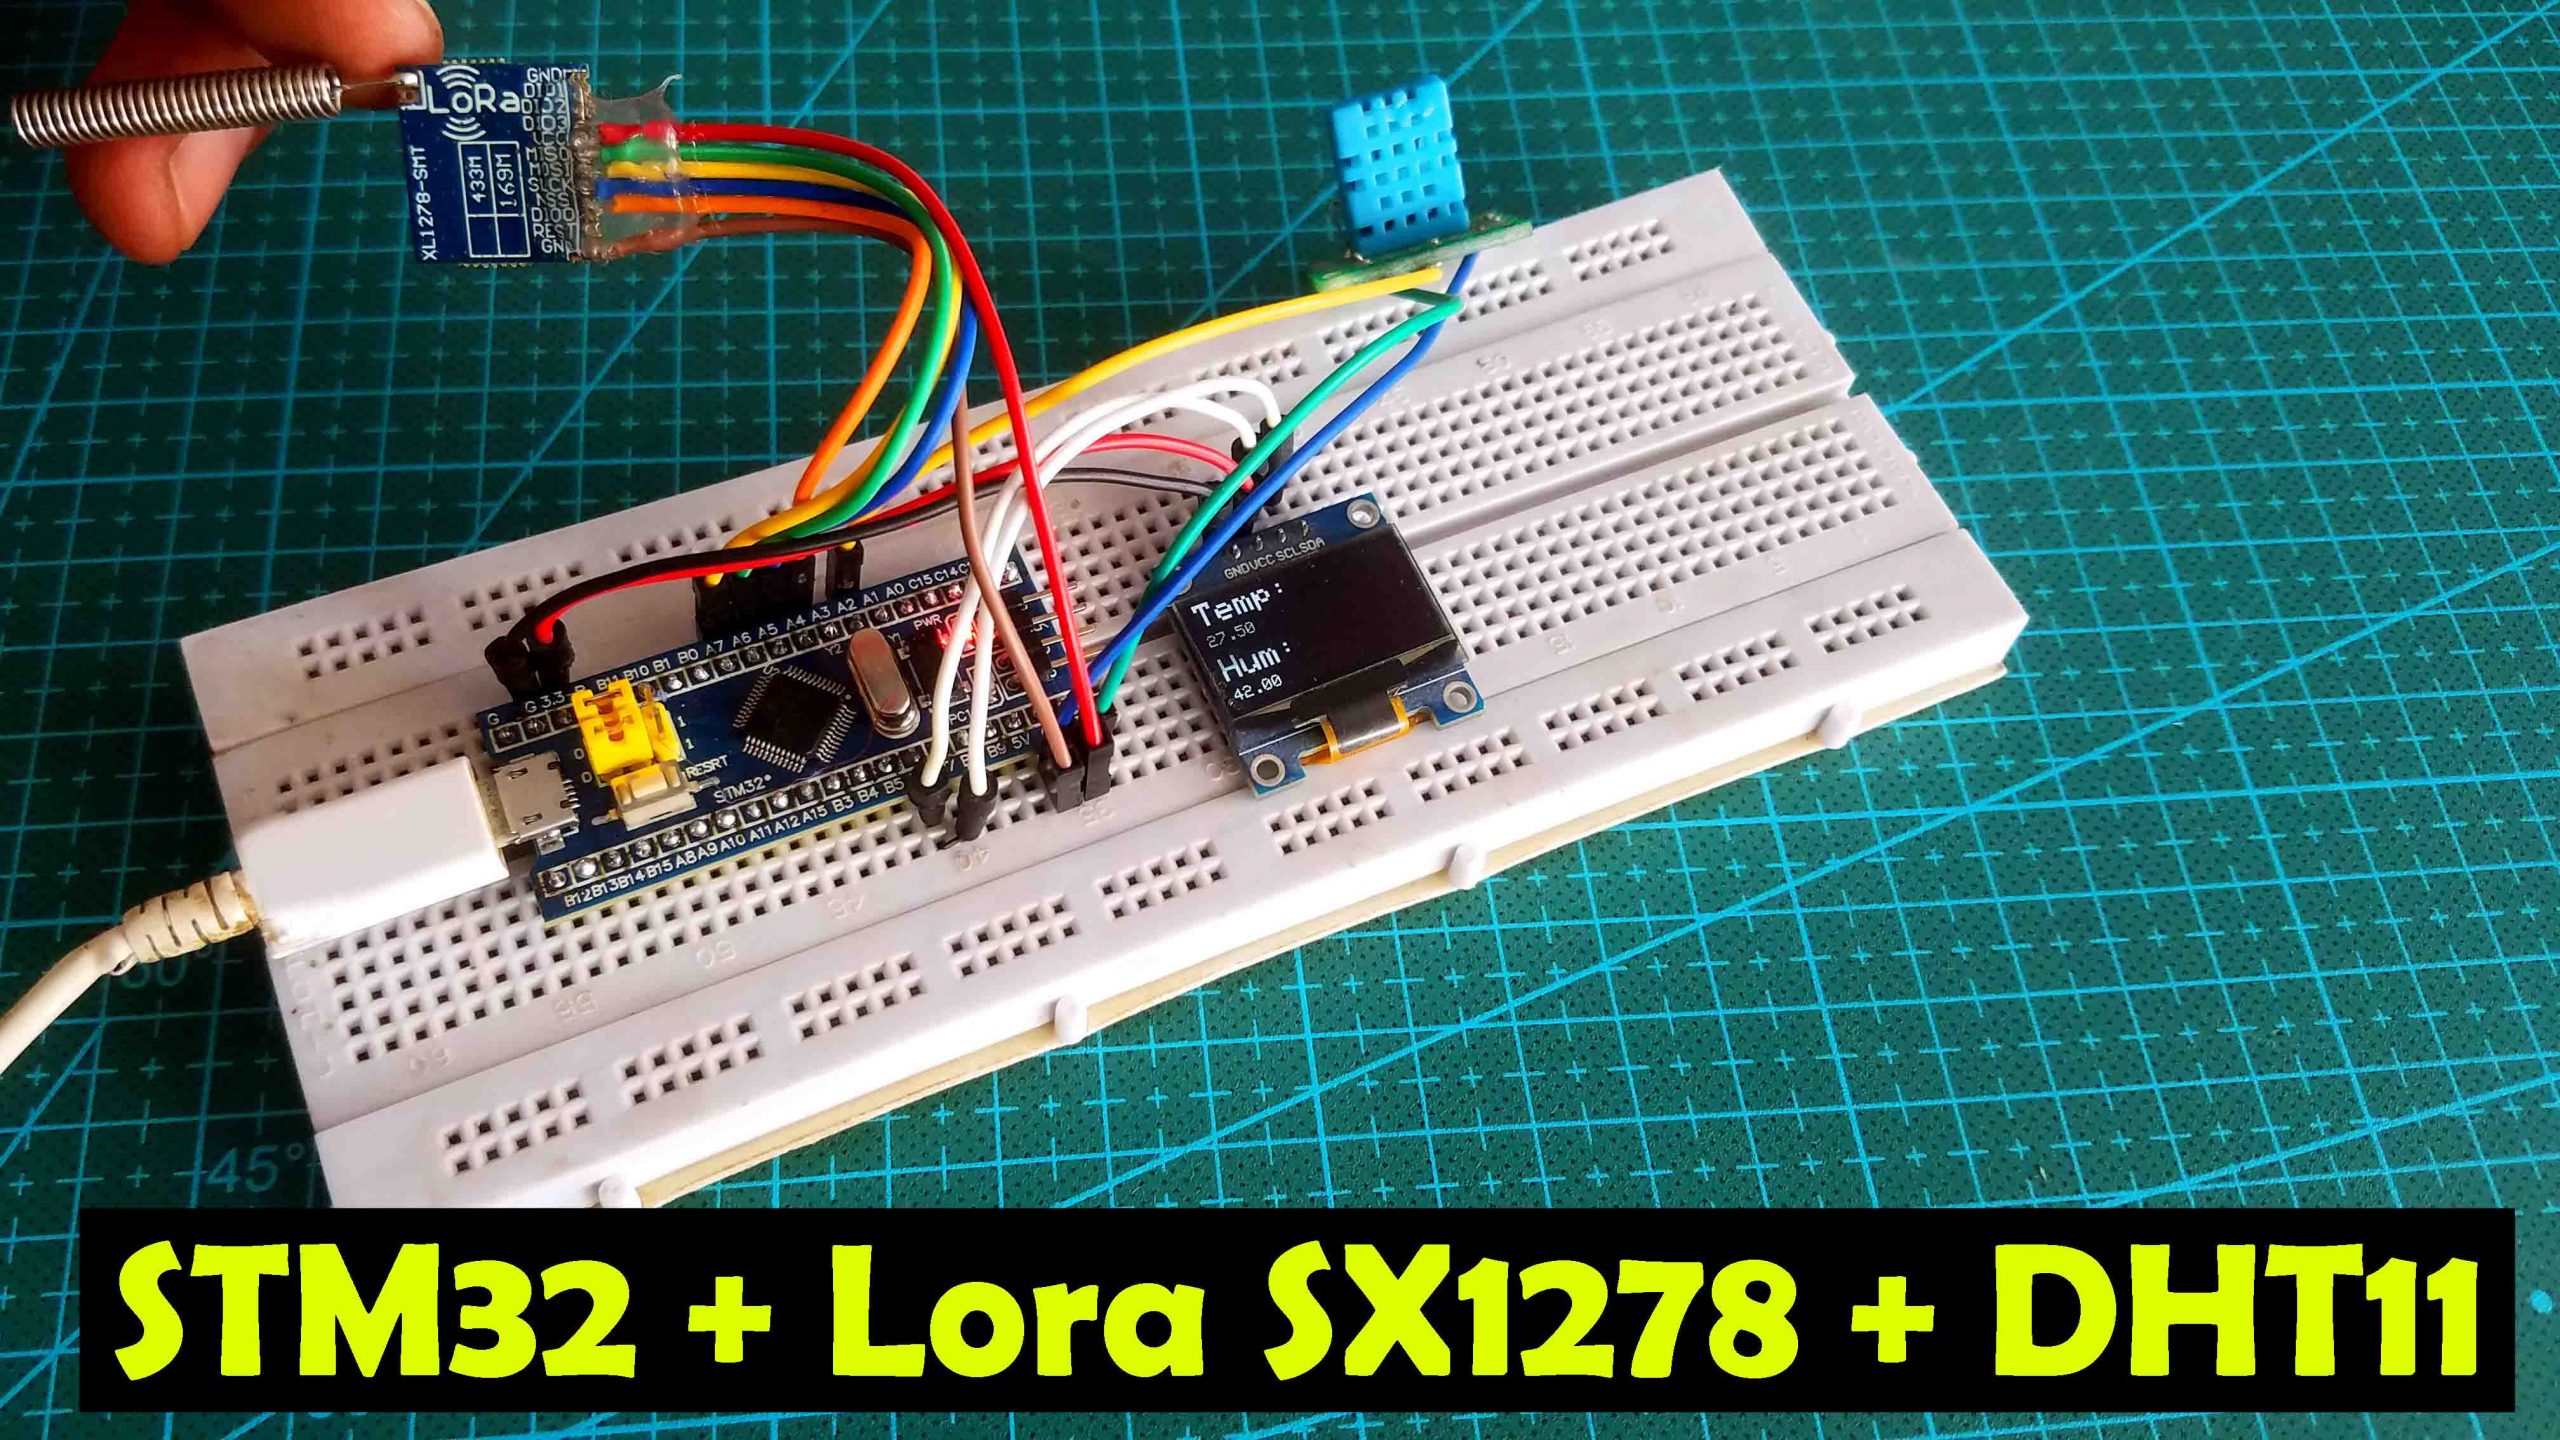
A 10K ohm resistor is connected between the VDD and DATA pin of the DHT11 Temperature and Humidity Module. The VDD pin is connected to 3.3V pin of the STM32 Microcontroller board, the Data pin of the DHT11 Sensor is connected to PA2 Analog pin of the STM32 controller board, and the GND pin of the DHT11 sensor is connected to the GND pin of the STM32 Microcontroller board.
The SSD1306 Oled display module Power supply pins are connected with the 3.3V and GND pins of the STM32 microcontroller board. The SCL and SDA pins of the Oled display module are connected with the B6 and B7 pins of the STM32. B6 is the SCL and B7 is the SDA.
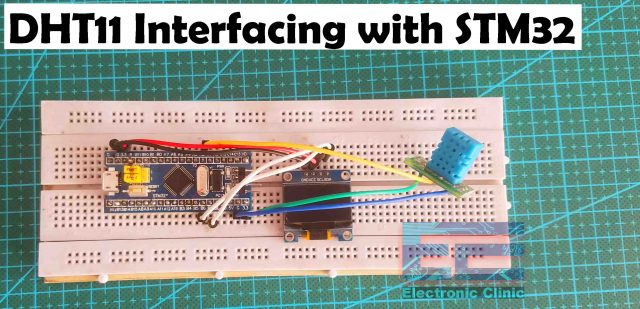
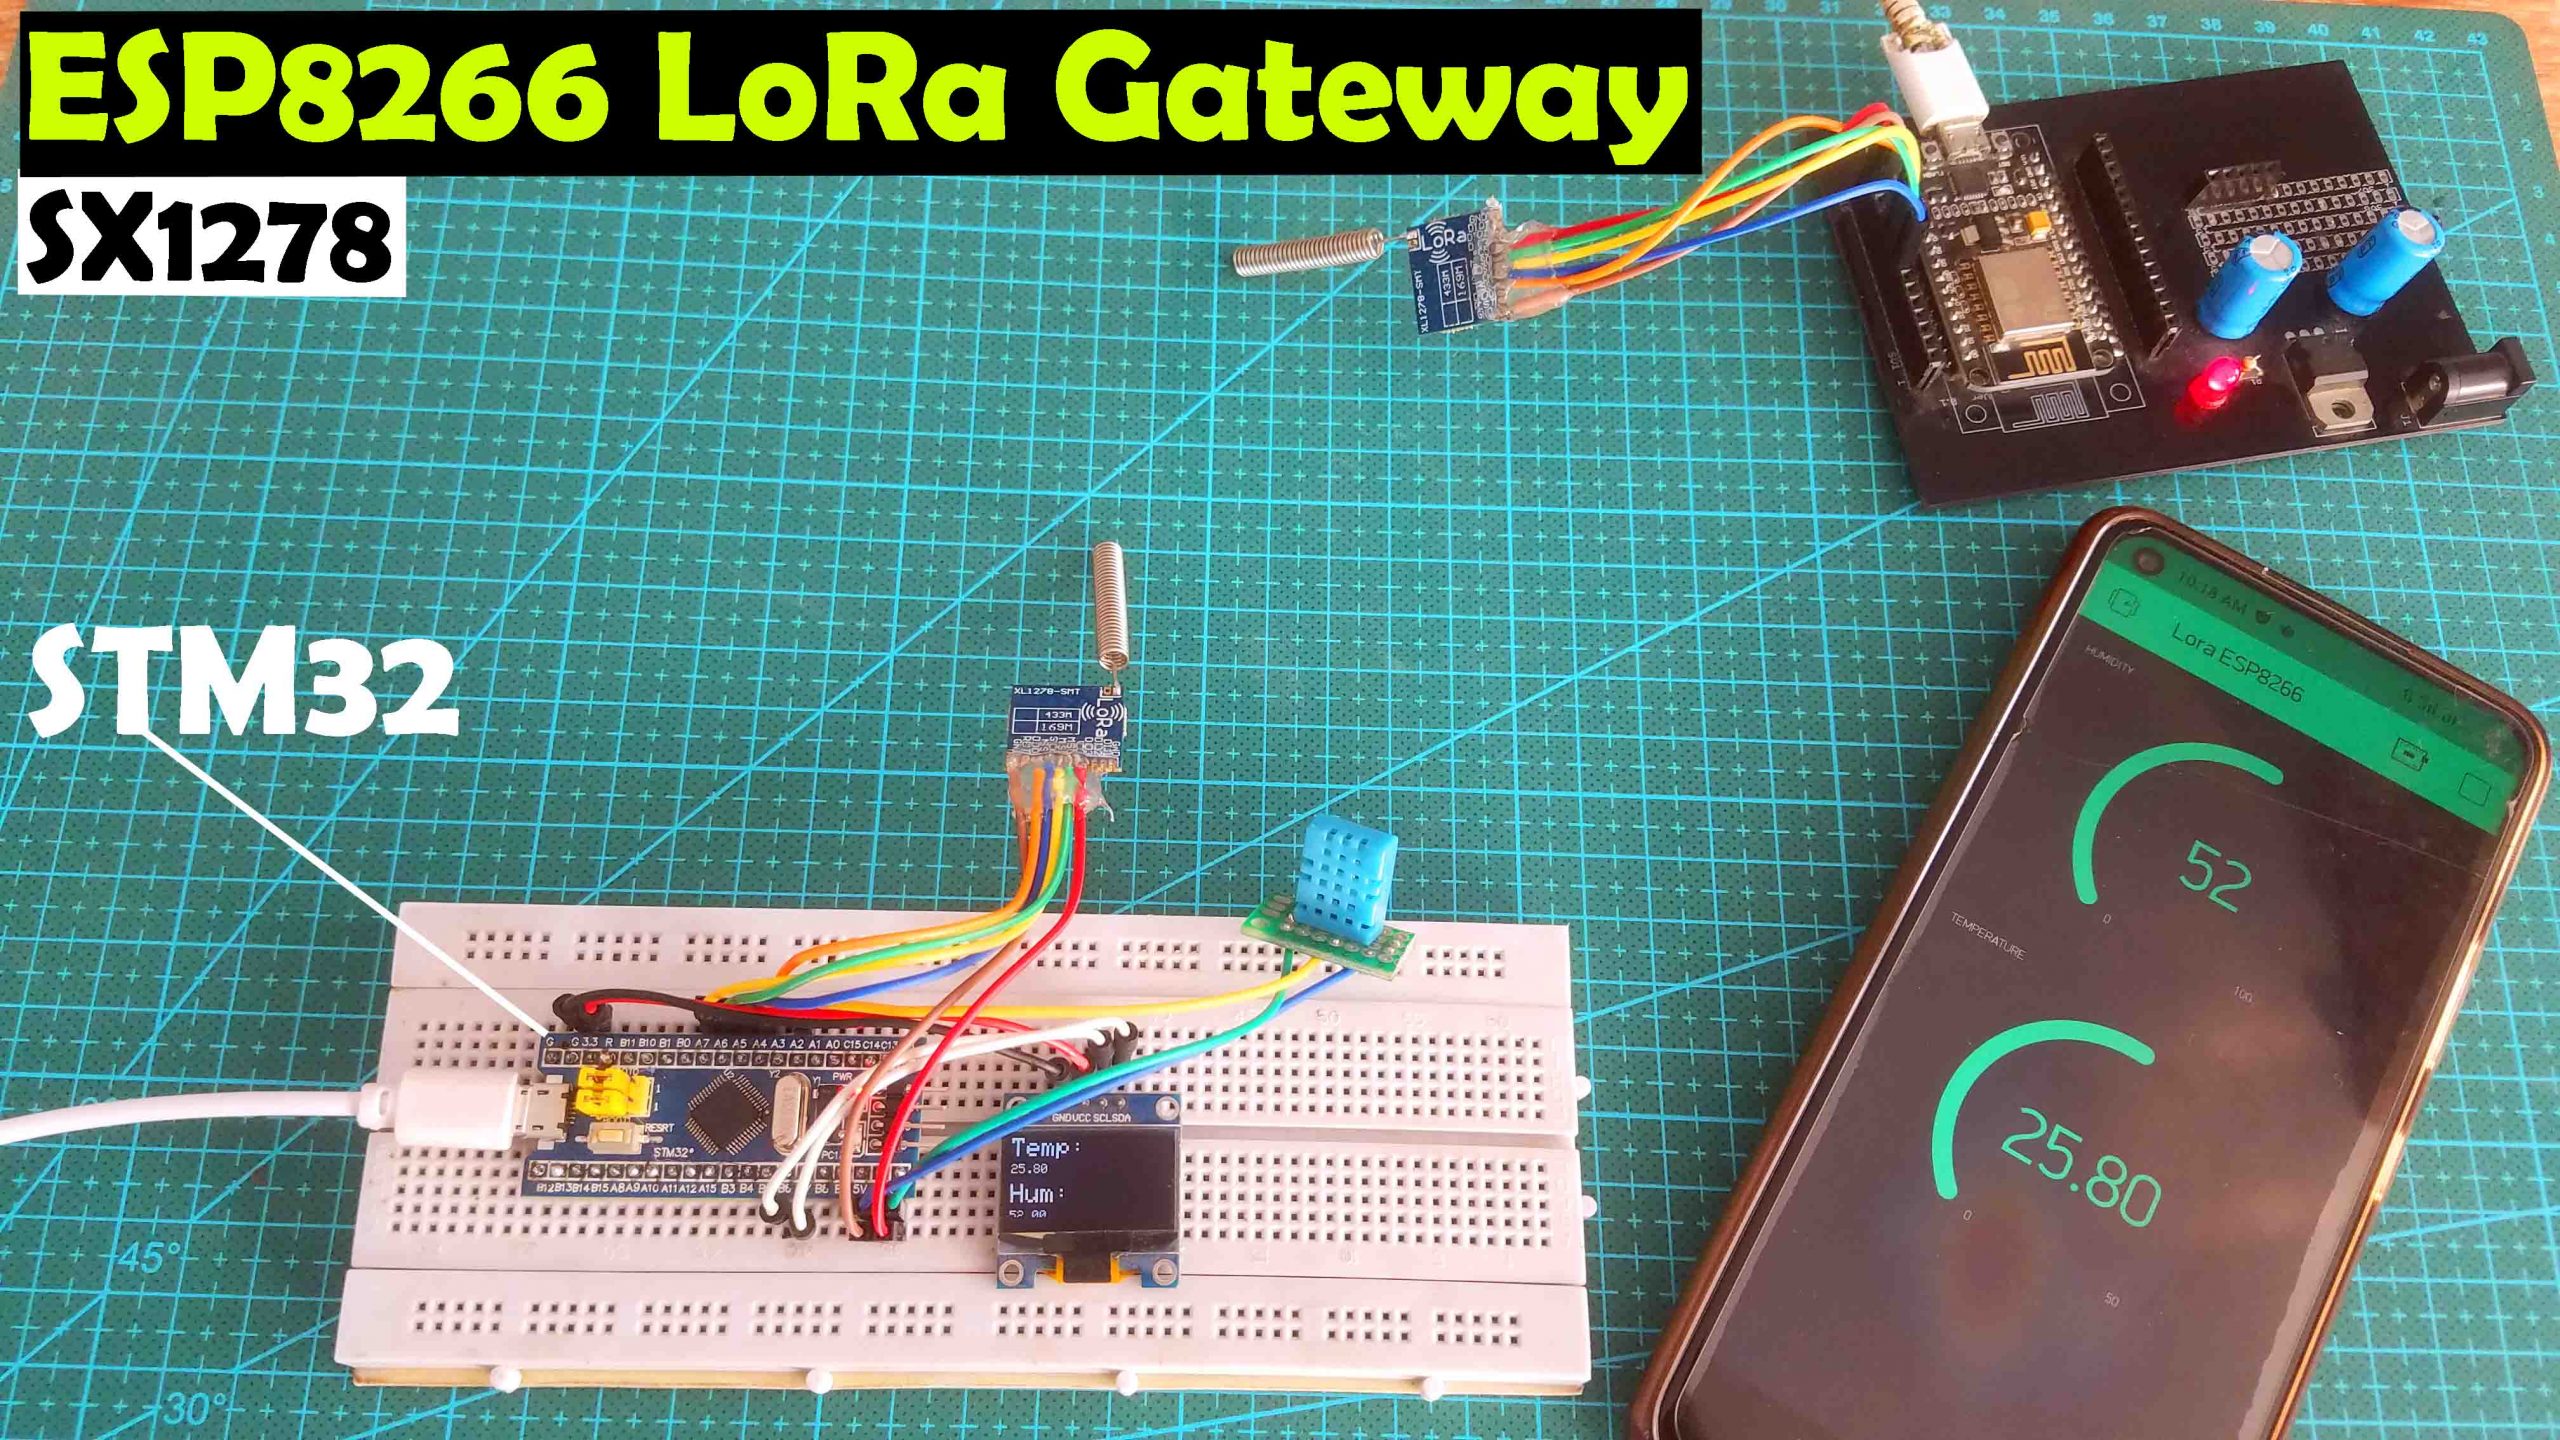
I connected the Oled display module and the DHT11 temperature and humidity sensor as per the circuit diagram.
In order to program the STM32 microcontroller board using the Arduino IDE, first you will need to flash the STM32 bootloader using USB cable, and you will also need to install the STM32 board, and some drivers. I have a very detailed tutorial on this and I highly recommend you should read this complete STM32 bootloader setup guide. Now, let’s take a look at the programming.
DHT11 STM32 Programming using Arduino IDE:
|
1 2 3 4 5 6 7 8 9 10 11 12 13 14 15 16 17 18 19 20 21 22 23 24 25 26 27 28 29 30 31 32 33 34 35 36 37 38 39 40 41 42 43 44 45 46 47 48 49 50 51 52 53 54 55 56 57 58 59 60 61 62 63 64 65 66 |
/* * STM32 and DHT11 Temperature and Humidity sensor * DHT11 connected to PA2 * * Oled connection * B6 to SCL of Oled * B7 to SDA of Oled * * https://www.electroniclinic.com/ */ #include <Wire.h> //Library for using I2C #include <Adafruit_SSD1306_STM32.h> #include <DHT.h> //Library for using DHT sensor #define DHTPIN PA2 #define DHTTYPE DHT11 DHT dht(DHTPIN, DHTTYPE); //initilize object dht for class DHT with DHT pin with STM32 and DHT type as DHT11 float h; float t; // for Oled display ssd1306 #define OLED_RESET -1 Adafruit_SSD1306 display(OLED_RESET); void setup() { Serial.begin(9600); display.begin(SSD1306_SWITCHCAPVCC, 0x3C); // initialize with the pinMode(DHTPIN, OUTPUT); dht.begin(); //Begins to receive Temperature and humidity values. //Clear the buffer. display.clearDisplay(); } void loop() { h = dht.readHumidity(); //Gets Humidity value t = dht.readTemperature(); //Gets Temperature value Serial.println(h); Serial.println(t); DisplayData(); } void DisplayData() { display.clearDisplay(); display.setTextSize(2); display.setTextColor(WHITE); display.setCursor(0,0); display.println("Temp:"); display.setTextSize(1); display.setCursor(0,20); // column , row display.println(t); display.setTextSize(2); display.setCursor(0,35); display.println("Hum:"); display.setTextSize(1); display.setCursor(0,55); // column , row display.println(h); display.display(); delay(100); } |
This program I wrote for the Arduino which also works with the STM32 Microcontroller board. I made a few changes. I added the stm32 version of the SSD1306 library, and I also changed this DHT library.
Finally, I change the pin number to which the DHT11 temperature and humidity sensor is connected and rest of the programming is exactly the same. So, that’s all for now.
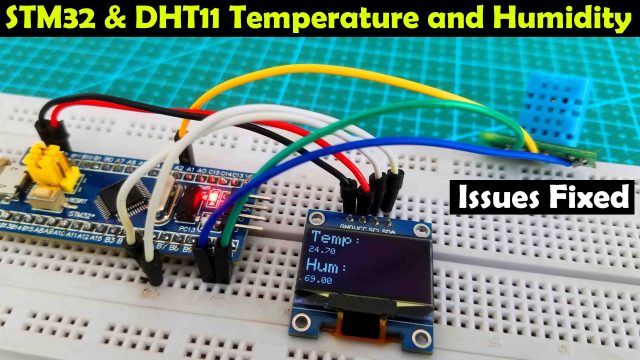
I successfully displayed the Temperature and Humidity values on the Oled display Module using the STM32F103C8T6. In my upcoming tutorial, I will send the temperature and humidity values using the SX1278 Lora Transceiver Module. You can subscribe to my website and YouTube channel if you don’t want to miss any of my upcoming tutorial.
Watch Video Tutorial:

Discover more from Electronic Clinic
Subscribe to get the latest posts sent to your email.