TDS Sensor and ESP32 IoT based Water Quality Monitoring system
Table of Contents
TDS Sensor and ESP32:
TDS Sensor and ESP32 IoT based Water Quality Monitoring system– In this tutorial, you will learn how to make IoT based Water Quality Monitoring System using TDS Sensor, DS18B20, and ESP32 Wifi + Bluetooth Module by the ESPRESSIF systems. As this project is based on the IoT “Internet of Things” based technology, so, the EC “Electrical Conductivity” and Temperature can be monitored from anywhere around the world using the Blynk application.
EC or Electrical Conductivity of water is its ability to conduct an electric current. Salts or other chemicals that dissolve in water can break down into positively and negatively charged ions. These free ions in the water conduct electricity, so the water electrical conductivity depends on the concentration of ions. Salinity and total dissolved solids (TDS) are used to calculate the EC of water, which helps to indicate the water’s purity. The pure the water, the lower the conductivity. To give a real-life example, distilled water is almost an insulator, but saltwater is a very efficient electrical conductor.
The old Blynk is no more functional, you will have to migrate your project on the new Blynk v2.0. Read my latest article on the TDS sensor and the new Blynk v2.0 more…
You can also ready my article on IoT based Water level monitoring and automatic water pump control system using the ESP32 WiFi + Bluetooth Module, Waterproof Ultrasonic Sensor, and the New Blynk V2.0 more…
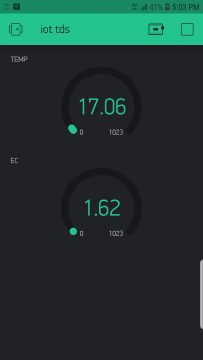
Currently, the EC value which you can see on the Gauge is the EC value of the fresh water. Let’s see what happens when we start adding the salt.
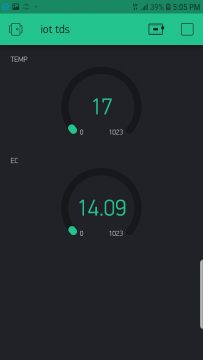
I started adding the salt and the value increased, you can see the EC value has increased. This is version 2 of the water quality monitoring system, which is more stable, cost effective, and easy to build.
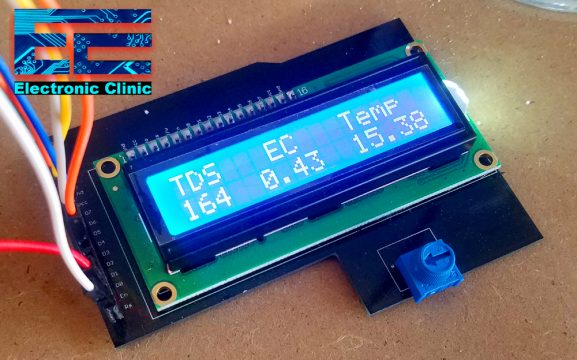
While, version 1 of the water quality monitoring system was based on the Arduino, 16×2 LCD, DS18B20, and TDS Sensor. In version 1 of the water quality monitoring system, I have explained the extreme basics, including the TDS Sensor Pinout, basic working principle, Arduino programming, Circuit diagram. If you want to learn the basic things about the TDS Sensor and also want to learn how to use the TDS Sensor and DS18b20 with the Arduino Uno then you should definitely read this article.
TDS meter Arduino, water Quality monitoring Project, TDS in Water
Other related Water Quality Monitoring projects based on the pH sensor:
Arduino and pH Sensor getting started tutorial.
Nodemcu ESP8266 Wifi Module and pH Sensor based Water quality monitoring.
In this tutorial we will cover,
- TDS Sensor and ESP32 complete circuit diagram explanation.
- TDS Sensor and ESP32 Programming and finally
- Testing
Without any further delay let’s get started!!!
Amazon Links:
ESP32 WiFi + Bluetooth Module(Recommended)
DS18B20 one-wire digital temperature sensor:
Other Tools and Components:
Super Starter kit for Beginners
PCB small portable drill machines
*Please Note: These are affiliate links. I may make a commission if you buy the components through these links. I would appreciate your support in this way!
About the Gravity TDS Sensor V1.0:
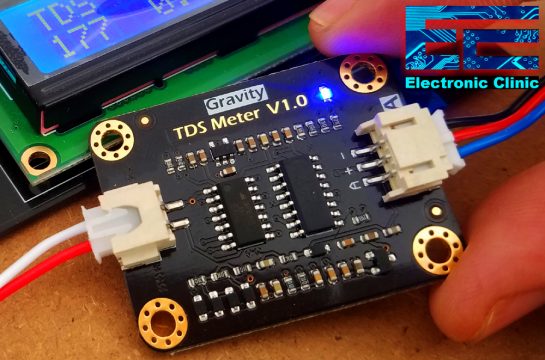
This is the Gravity TDS Meter V1.0 Analog Sensor kit by the DFrobot which is completely compatible with Arduino. One thing that I really like about this TDS Meter is that it supports 3.3 to 5.5 Volts wide voltage input, and 0 to 2.3 Volts analog voltage output, which makes this TDS meter compatible with 5V and 3.3V control systems or boards. This comes with the plug and play type TDS probe which is waterproof and can be immersed in water for long time measurement. This board has the working current of 3 to 6mA. The TDS measurement Range is from 0 to 1000 ppm. While the measurement accuracy is ±10% at 25 degrees centigrade.
While using this TDS meter you have to be careful, the probe cannot be used in water above 55 degrees centigrade.
The probe cannot be left too close to the edge of the container; otherwise it will affect the reading.
The head and the cable of the probe are waterproof, but the connector and the signal transmitter board are not waterproof, so be careful while using this TDS meter Analog Sensor kit.
TDS Meter Pin Description/Pinout:
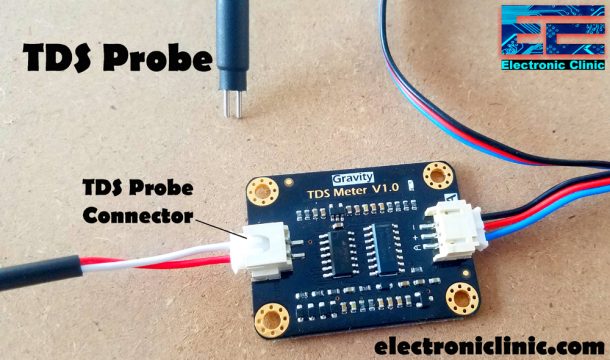
As you can see this Signal Transmitter Board has two connectors. The left one is the TDS Probe Connector and the right side connector is used to interface this module with the Arduino or any other compatible controller board. The connector pins are labeled with A which is the analog output pin and should be connected with the analog pin of the Arduino, in my case I will connect this with the ESP32 Analog pin which I will explain in the circuit diagram, + which can be connected with 3.3 or 5 volts, and – which is the ground pin.
Before I am going to explain the circuit diagram and programming, first I am going to explain some basic things, which I believe you should know.
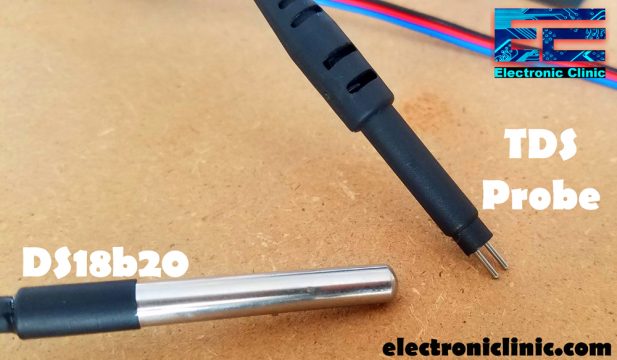
This TDS probe has no temperature sensor, So that’s the reason I am using DS18B20 waterproof one-wire digital temperature sensor for the temperature compensation, this is important for the accurate values. Although the temperature compensation algorithm is reserved in the sample code the default value is 25 degrees centigrade. But I highly recommend use a temperature sensor if you want accurate values.
0 ppm is considered the most ideal result. TDS meters cannot detect non-ionic particles like sugar and will not contribute to the reading. This can be practically seen in my previous video.
This TDS meter is based on the EC “electrical conductivity and 1 EC equal approximately 900 ppm. The EC of most other metals, minerals and salts will carry a charge. A TDS meter measures that EC level and then converts it to a TDS measurement.
You might be thinking what TDS value is good for drinking water?
Water is considered excellent if its less than 300 mg/liter,
water is considered good if it’s between 300 and 600 mg/litre.
Water is considered fair if it’s between 900 and 1200 mg/litre.
Water is considered unacceptable if the value is greater than 1200mg/litre.
As per the TDS regulation, the U.S. EPA sets the maximum contaminant level for TDS at 500 ppm. The World Health Organization (WHO) sets the maximum contaminant for TDS at 1000 ppm.
TDS Sensor and ESP32 Circuit Diagram:
The circuit diagram is very simple, let’s start with the gravity TDS Sensor V1.0, the minus pin which is the ground pin of the TDS sensor is connected with the ground pin of the ESP32 module. The plus pin is the input supply voltage pin, is connected with the 3.3v pin of the ESP32 module. The output analog pin of the TDS sensor is connected with the A0 pin of the ESP32 module. A0 pin is basically the GPIO pin 36.
The VCC wire of the DS18B20 is connected with the 3.3volts pin of the ESP32 module. The data wire of the DS18B20 is connected with the GPIO pin 13 of the ESP32 module and the ground wire is connected with the ground pin of the ESP32. A 330 ohm resistor is connected between the VCC and data wire of the DS18B20 waterproof one wire digital temperature sensor.
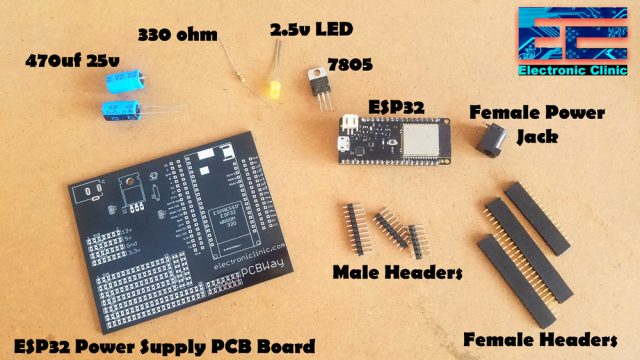
The power supply is based on the famous LM7805 voltage regulator. This regulated power supply is used to power up the ESP32 module. J1 is the female dc power jack and this is where we connect a 12V adaptor, battery, or a solar panel. Two 470uf electrolyte capacitors are connected at the input and output sides of the voltage regulator. At the output of the voltage regulator a 330-ohm resistor is connected in series with a 2.5V LED. This is a current limiting resistor. This is the power ON led, with the help of this LED we know if the circuit is power up. A wire from the output of the voltage regulator is connected with the 5V pin of the ESP32 module. Make sure you connect the ground of the 5V regulated power supply with the ground of the ESP32 module. So, that’s all about the circuit diagram. Now let’s make the Blynk application. Follow the same exact steps.
About the ESP32 Power Supply PCB Board Designing:
I have already explained the PCB designing.
Watch my video on PCB designing:
12 volts from the female power jack J1 are connected with the input leg of the voltage regulator, 470uf capacitor, and SV9. A ground wire from the Female Power Jack is connected with the ground legs of the capacitors, Middle leg of the voltage regulator, with the headers, cathode pin of the LED, and ground pin of the ESP32 module. The output leg of the 7805 voltage regulator is connected with the headers, 330-ohm resistor, and also with the 5v pin of the ESP32. While 3.3 volts from the ESP32 are connected with the headers. The Red and Blue traces represent the top and bottom sides of the PCB.
In the bottom left side area you can solder male or female headers, or you can directly solder different sensors. This is totally up to you for what purpose you are going to use this area.
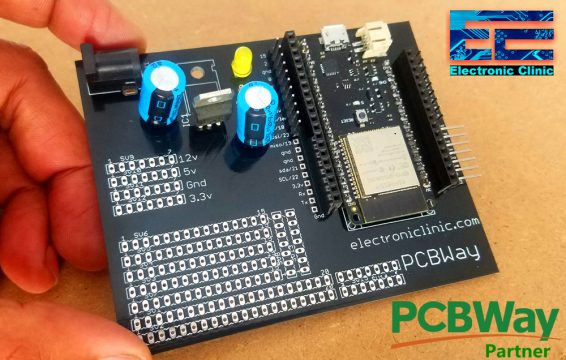
About the ESP32 Power Supply PCB Manufactured by PCBWay:
The PCB Board used in this tutorial, is sponsored by the PCBWay Company. The Gerber files of the ESP32 Power Supply PCB board can be downloaded from the PCBWay official website by clicking on the download link given below.
High quality & Only 24 Hours Build time:
The PCB quality is really great. The silkscreen is quite clear and the Black Solder mask looks amazing, I am 100% satisfied with their work. The Gerber files of this PCB board can be downloaded from the PCBWay official website.
Download ESP32 Power Supply PCB board Gerber files.
Finally, I soldered all the components, for more details watch video given below.
TDS Sensor and DS18B20 interfacing with ESP32:
Finally, I connected everything as per the circuit diagram explained above.
Note: this old version of the Blynk app is no more functional. For the blynk mobile App setup and Blynk.cloud dashboard setup ready my article on the New Blynk V2.0. In this article I have explained how to migrate your projects from Blynk 1.0 to the new Blynk V2.0. You can also watch the video.
Blynk Application designing for the Water Quality monitoring based on the TDS Sensor and ESP32:
I always first start with the Blynk application designing, this way I know which virtual pins I have to use in the programming. Moreover this also helps me in checking my code, as I keep testing my project. So, first let’s start with the Blynk application designing.
- First of all open the blynk application.
- Click on the new project and enter the project name as “IoT TDS”.
- Click on the choose device and select ESP32 Dev Board from the list.
- Make sure the connection type is set to WIFI.
- Finally, click on the create button, an authentication token will be sent on your email id, which later will be used in the ESP32 programming.
- Click anywhere on the screen and search for the Gauge widget and add it.
- Click on the gauge, enter the name as TEMP and select the virtual pin V2, select the reading rate as 1 Sec.
- Click again on the screen and add another gauge.
- Click on the gauge, enter the name as EC and select the virtual pin V3, select the reading rate as 1 Sec.
That’s it, our Blynk app is ready.
TDS Sensor and ESP32 BASED Water Quality Monitoring Programming:
|
1 2 3 4 5 6 7 8 9 10 11 12 13 14 15 16 17 18 19 20 21 22 23 24 25 26 27 28 29 30 31 32 33 34 35 36 37 38 39 40 41 42 43 44 45 46 47 48 49 50 51 52 53 54 55 56 57 58 59 60 61 62 63 64 65 66 67 68 69 70 71 72 73 74 75 76 77 78 79 80 81 82 83 84 85 86 87 88 89 90 91 92 93 94 |
//TDS Sensor and ESP32 // Download Libraries #include <Arduino.h> #include <OneWire.h> #include <DFRobot_ESP_PH_WITH_ADC.h> #include <Adafruit_ADS1015.h> #include <DFRobot_ESP_EC.h> #include <DallasTemperature.h> #include <EEPROM.h> #include <BlynkSimpleEsp32.h> #include <SimpleTimer.h> #define ONE_WIRE_BUS 13 // this is the gpio pin 13 on esp32. OneWire oneWire(ONE_WIRE_BUS); DallasTemperature sensors(&oneWire); DFRobot_ESP_EC ec; DFRobot_ESP_PH_WITH_ADC ph; Adafruit_ADS1115 ads; float phvoltage, phValue, phtemperature = 25; float voltage, ecValue, temperature = 25; // You should get Auth Token in the Blynk App. char auth[] = "I_r9XZkkR4bKYnfPptszNQy2zvcjPm4O"; // Your WiFi credentials. // Set password to "" for open networks. char ssid[] = "AndroidAP7DF8"; char pass[] = "electroniclinic"; SimpleTimer timer; float readTemperature() { //add your code here to get the temperature from your temperature sensor sensors.requestTemperatures(); return sensors.getTempCByIndex(0); } void setup() { Serial.begin(115200); Blynk.begin(auth, ssid, pass); EEPROM.begin(32);//needed EEPROM.begin to store calibration k in eeprom ph.begin(); ec.begin(); sensors.begin(); timer.setInterval(1000L,MainFunction); } void loop() { Blynk.run(); timer.run(); // Initiates BlynkTimer } void MainFunction() { voltage = analogRead(A0); // A0 is the gpio 36 //Serial.print("voltage:"); //Serial.println(voltage, 4); temperature = readTemperature(); // read your temperature sensor to execute temperature compensation Serial.print("temperature:"); Serial.print(temperature, 1); Serial.println("^C"); ecValue = ec.readEC(voltage, temperature); // convert voltage to EC with temperature compensation Serial.print("EC:"); //Serial.print(ecValue, 4); //Serial.println("ms/cm"); Serial.println(ecValue); // Sensor Values to Blynk application Blynk.virtualWrite(V2, temperature); Blynk.virtualWrite(V3, ecValue); ec.calibration(voltage, temperature); // calibration process by Serail CMD } |
TDS Sensor and ESP32 Code Explanation:
Before you start the programming, first of all, make sure that you download all the necessary libraries by clicking on the Download link given below.
Learn how to install the ESP32 board
As you can see I have added so many libraries, as in the future I am planning to make an IoT based Hydroponic system, for which I will need all of these libraries. Currently, I am not using some of these libraries.
#include <Arduino.h>
#include <OneWire.h>
#include <DFRobot_ESP_PH_WITH_ADC.h>
#include <Adafruit_ADS1015.h>
#include <DFRobot_ESP_EC.h>
#include <DallasTemperature.h>
#include <EEPROM.h>
#include <BlynkSimpleEsp32.h>
#include <SimpleTimer.h>
The data wire of the DS18B20 is connected with the ESP32 GPIO pin 13. If you want you can use any other GPIO pin.
#define ONE_WIRE_BUS 13 // this is the gpio pin 13 on esp32.
OneWire oneWire(ONE_WIRE_BUS);
DallasTemperature sensors(&oneWire);
DFRobot_ESP_EC ec;
DFRobot_ESP_PH_WITH_ADC ph;
Adafruit_ADS1115 ads;
float phvoltage, phValue, phtemperature = 25;
float voltage, ecValue, temperature = 25;
This is the authentication code which was sent via email, I simply copied and paste it over here.
// You should get Auth Token in the Blynk App.
char auth[] = “I_r9XZkkR4bKYnfPptszNQy2zvcjPm4O”;
// Your WiFi credentials.
// Set password to “” for open networks.
//this is the name of the Wifi router
char ssid[] = “AndroidAP7DF8”;
this is the password
char pass[] = “electroniclinic”;
next, I defined a timer.
SimpleTimer timer;
float readTemperature()
{
//add your code here to get the temperature from your temperature sensor
sensors.requestTemperatures();
return sensors.getTempCByIndex(0);
}
In the void setup() function, I activated the serial communication for debugging purposes.115200 is the baud rate. void setup()
{
Serial.begin(115200); // for debugging purposes
Blynk.begin(auth, ssid, pass);
If you are not using the EEPROM and the pH sensor you can delete these two lines.
EEPROM.begin(32);//needed EEPROM.begin to store calibration k in eeprom
ph.begin();
ec.begin();
sensors.begin();
MainFunction is a user defined function which is executed after every 1 second. The project entire code is placed inside this function.
timer.setInterval(1000L,MainFunction);
}
In the void loop() function, I have added only two functions which are the Blynk.run() and timer.run() functions.
void loop()
{
Blynk.run();
timer.run(); // Initiates BlynkTimer
}
As I said earlier MainFunction() is a user defined function, it has no return type and does not take any arguments as the input.
void MainFunction()
{
The analog output pin of the TDS sensor is connected with the ESP32 Analog pin A0 which is the GPIO pin 36.
voltage = analogRead(A0); // A0 is the gpio 36
//Serial.print(“voltage:”);
//Serial.println(voltage, 4);
Next, we read the temperature and store the value in variable temperature.
temperature = readTemperature(); // read your temperature sensor to execute temperature compensation.
The following instructions are used to send the temperature value to the serial monitor for debugging purposes.
Serial.print(“temperature:”);
Serial.print(temperature, 1);
Serial.println(“^C”);
Next, we convert the voltage to EC with temperature compensation and send values to the serial monitoring to make sure, we get the correct values
ecValue = ec.readEC(voltage, temperature); // convert voltage to EC with temperature compensation
Serial.print(“EC:”);
//Serial.print(ecValue, 4);
//Serial.println(“ms/cm”);
Serial.println(ecValue);
Finally, we send the temperature and EC values to the Blynk application through virtual pins V2, and V3.
// Sensor Values to Blynk application
Blynk.virtualWrite(V2, temperature);
Blynk.virtualWrite(V3, ecValue);
ec.calibration(voltage, temperature); // calibration process by Serial CMD
}
So that’s all about the programming.
In the end, I successfully read the EC value of the freshwater and salty water. For the practical demonstration, watch the video given below.
Don’t forget to subscribe to my website and YouTube channel “Electronic Clinic”, if you want to be notified each time I add a new article or upload a new video on my channel.
TDS Sensor and ESP32 Video Tutorial:





You are very kind and have the same goal as me to make an automatic hydroponics system, if you are willing, can I get your cellphone number, thank you.
I want to read it on ppm value how to convert it? Can u kindly help?
exit status 1
Error compiling for board DOIT ESP32 DEVKIT V1.
This is the error the code is displaying, and I’ve tried different fixes, none has work for me