Arduino RFID Servo Motor Control system for Car Parking “MFRC522”
Table of Contents
Arduino RFID Servo Motor, Description:
Arduino RFID Servo Motor Control system for Car Parking- In this Tutorial, you will learn how to make an RFID based Car Parking gate Opening system using a Servo Motor, Arduino Uno, MFRC522 RFID module and RFID Tags. To reduce the overall cost of this project, I decided to design my own PCB board for the ATmega328 microcontroller. The same connections can be done using the Arduino Board.
In this tutorial, we will also cover some basics and we will also make a power supply for the Servo Motor. For the best understanding, you can watch a video Tutorial given at the end of this Article. This Tutorial covers
- What is the Servo Motor?
- Servo Motor Advantages
- Servo Motor Applications
- How to make an external power supply for a Servo Motor
- Servo Motor Interfacing with Arduino
- MFR522 RFID module interfacing with Arduino
- Programming and finally
- Testing
Without any further delay let’s get started.
Amazon Links:
Arduino Nano USB-C Type (Recommended)
MFRC522 RFID module with tags:
Other Tools and Components:
ESP32 WiFi + Bluetooth Module (Recommended)
Super Starter kit for Beginners
PCB small portable drill machines
DISCLAIMER:
Please Note: these are affiliate links. I may make a commission if you buy the components through these links. I would appreciate your support in this way!
Servo Motor:
A Servo Motor is a Rotary actuator or linear actuator that allows for precise control of angular or linear position, velocity, and acceleration. It consists of a suitable motor coupled to a sensor for position feedback. Servo Motors comes in different sizes and shapes, but the basic working principle of all Servo Motors is exactly the same.
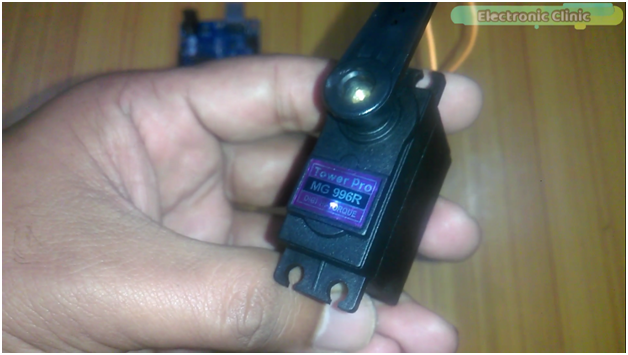
This is High-Torque MG996R Servo Motor that I have used in this Tutorial. MG996R is an upgraded version of MG995 Servo Motor, and features upgraded shock-proofing and a redesigned PCB and IC control system that makes it much more accurate than its predecessor. The gearing and motor have also been upgraded to improve dead bandwidth and centering.
Servo Motor MG996R Specifications:
- Weight: 55 g
- Dimension: 40.7 x 19.7 x 42.9 mm approx.
- Stall torque: 9.4 kgf·cm (4.8 V ), 11 kgf·cm (6 V)
- Operating speed: 0.17 s/60º (4.8 V), 0.14 s/60º (6 V)
- Operating voltage: 4.8 V a 7.2 V
- Running Current 500 mA –
- Stall Current 2.5 A (6V)
- Dead band width: 5 µs
- Stable and shock proof double ball bearing design
- Temperature range: 0 ºC –
- 4.8 V a 7.2 V
- – 900 mA (6V)
- Double ball bearing design
- 55 ºC
Servo Motor Pinout:
Advantages of Servo Motor:
- Low Cost
- The smooth rotation at low speeds
- No Power is used at a standstill
- With no static loads on the motor, no current is required to hold the position.
- Wide variety of types available.
Servo motor applications:
- Servo motors are most commonly used in robots for precise positioning, these are used in Grippers, Pick and place a mechanism, robotic Arms joints, etc. S
- Servo motors are also used in industries for labeling and packaging etc.
- Camera Auto Focus.
- Solar Tracking Systems.
- Antenna positioning.
- CNC machines.
- Automatic door openers and so on.
Servo Motor Rotation Problem and how to solve this?
Your servo may behave erratically, and you may find that this only happens when the Arduino is plugged into certain USB ports. This is because the servo draws quite a lot of power, especially as the motor is starting up, and this sudden high demand can be enough to drop the voltage on the Arduino board, so that it resets itself. The same thing happened to me, my Arduino was resetting and I wasn’t able to achieve the smooth movement and accurate positioning. I solved this problem by making an external power supply for my servo motor. Let’s have a look at the circuit diagram.
Servo Motor Power Supply Circuit Diagram:
This schematic is designed in cadsoft eagle 9.1.0 version. If you want to learn how to make a schematic and PCB then watch my tutorial.
J1 is the dc female power jack; this is where you connect your 12v adaptor or a battery. This voltage should be greater than 6 volts and less than the max input voltage of 7805 voltage regulator; the recommended voltages are 9 to 18 volts. In my case, I will be using 12 volts. A 25v 470 UF capacitor is connected between the output and ground pins. The output of the voltage regulator is connected with the supply wire of the servo motor. The ground wire of the servo motor is connected with the regulator ground and also with the Arduino’s ground. While the signal wire is connected with the Arduino’s pin number 3.
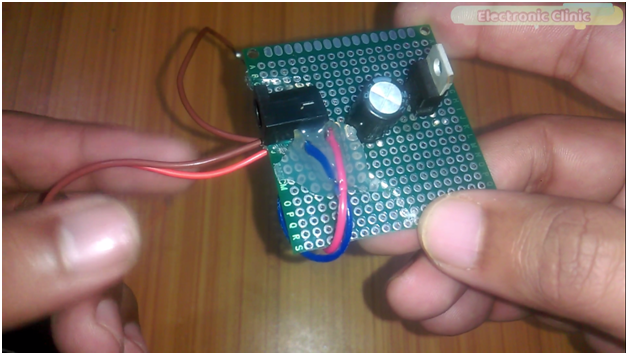
This is the final circuit; the components are soldered as per the circuit diagram. The supply wire of the servo motor, which is the red wire, is connected with the output leg of the 7805 voltage regulator, and the brown wire which is the ground wire is connected with the middle leg of the 7805 voltage regulator and a 470UF capacitor is connected between the output and ground.
This is the ground wire and should be connected with the Arduino’s ground. The yellow wire is the signal wire and it can be connected with any PWM pin of the Arduino, in my case I will connect this with pin number 3 of the Arduino. Now this servo motor is ready and can be used with Arduino, Mega or any other controller board.
Now let’s have a look at the circuit diagram of the MFR522 RFID module and learn how this module is connected with the Arduino. I am using the term Arduino because the board I have designed is just like the Arduino.
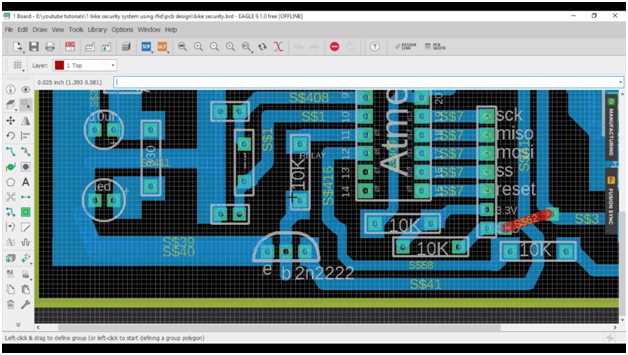
After I designed my PCB, using cadsoft eagle 9.1.0 version.
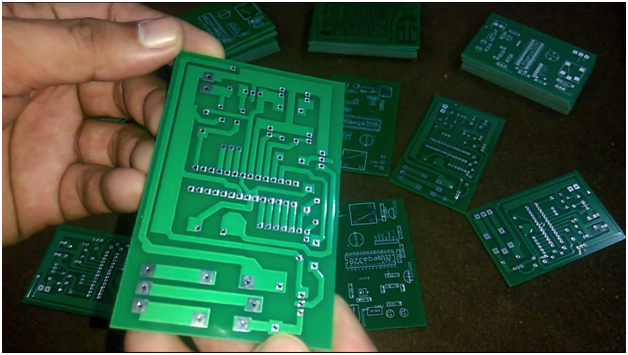
Then I sent my PCB Gerber files to Wellpcb company, and made an order of 50 PCBs. these are the PCBs.
Properly documented containing all the information about the PCBs. As you can see the quality is really great. I am 100% satisfied with their work.
Download this PCB board: RFID SERVO MOTOR
If you want to learn how to make a PCB then you can watch my tutorial “Click here”
PCB connections explanation:
The same PCB board I have already used in the Bike Anti-theft system. So for more details and connections watch this Tutorial.
Let’s start with the power supply; this is the terminal block where we connect the 12v and GND. wires. The 1n4007 diode is connected which protect the circuit if in case you connect the wires in a wrong way. The cathode side of the diode is connected with the input pin of the 7805 voltage regulator. The middle pin of the 7805 voltage regulator is connected with ground.
A 330-ohm resistor is connected with the output of the regulator, this resistor is connected in series with the led anode side, this is a current limiting resistor, the other leg of the led is connected with the ground. A 10uf capacitor is also connected at the output of the voltage regulator.
A 10k resistor is connected with pin number1 of the atmega328 controller and the other side of the 10k resistor is connected with the 5v. a 5v wire is also connected with pin number 7 of the controller. Pin number 8 of the controller is connected with the ground. A 16Mhz crystal is connected with pin9 and pin10 of the controller. 22pf capacitors are connected with the 16Mhz crystal.
Pin number11 which is the digital pin5 is connected with the 10k resistor, and the other side of the 10k resistor is connected with the base of 2n2222 NPN transistor, the emitter is connected with ground, while the collector is connected with the ground pin of the buzzer. This transistor will be used to control this buzzer.
While the buzzer positive pin is connected with the 5v. pin number12 which is the digital pin6 will be used to control a relay. The emitter is connected with ground, while the collector is connected with one side of the relay coil while the other side of the relay coil is connected with 12v. This transistor is selected after the calculations, if you want to learn how to perform the relay driver circuit design calculation then you should watch my tutorial on relay driver circuit design calculations, this tutorial covers the relay Pinouts, finding the relay coil resistance and calculations. A diode is used across the relay coil for back EMF protection. A terminal block is connected at the output of the relay. Digital pins 9 to 13 are connected with the RFID module. So that’s.
Soldering:
For the step-by-step explanation watch the video Tutorial.
MFRC522 RFID Module:
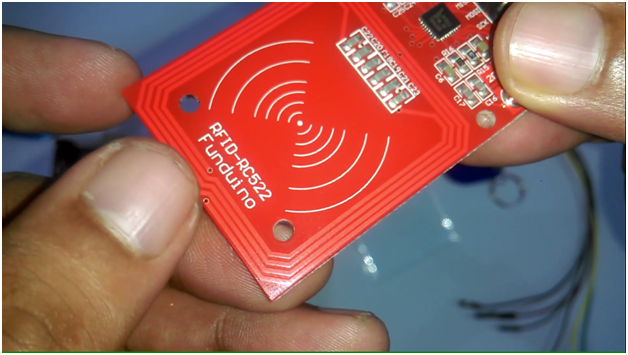
A few days back I posted a tutorial on ” Arduino MFRC522 RFID module Pinouts, Interfacing, how to read RFID tags identity number and use”
In this tutorial I covered all the basics, like interfacing, finding the identity numbers of the tags, I am using the same RFID tag. So if you don’t know how to find the RFID tag identity number then you should watch this tutorial.
RFID Servo Motor Programming:
|
1 2 3 4 5 6 7 8 9 10 11 12 13 14 15 16 17 18 19 20 21 22 23 24 25 26 27 28 29 30 31 32 33 34 35 36 37 38 39 40 41 42 43 44 45 46 47 48 49 50 51 52 53 54 55 56 57 58 59 60 61 62 63 64 65 66 67 68 69 70 71 72 73 74 75 76 77 78 79 80 81 82 83 84 85 86 87 88 89 90 91 92 93 94 95 96 97 98 99 100 101 102 103 104 105 106 107 108 109 110 111 112 113 114 115 116 117 118 119 120 121 122 123 124 125 126 127 |
/* ----------------------------------------------------------------------------- * Pin layout should be as follows: * Signal Pin Pin Pin * Arduino Uno Arduino Mega MFRC522 board * ------------------------------------------------------------ * Reset 9 5 RST * SPI SS 10 53 SDA * SPI MOSI 11 51 MOSI * SPI MISO 12 50 MISO * SPI SCK 13 52 SCK * voltage 3.3v * The reader can be found on eBay for around 5 dollars. Search for "mf-rc522" on ebay.com. */ #include <SPI.h> #include <MFRC522.h> #include<Servo.h> Servo myservo; #define SS_PIN 10 #define RST_PIN 9 MFRC522 mfrc522(SS_PIN, RST_PIN); // Create MFRC522 instance. int relay = 6; int flag = 0; int buzzer = 5; int relaystate = 0; void setup() { Serial.begin(9600); // Initialize serial communications with the PC myservo.attach(3); // servo motor connected here pinMode(7,OUTPUT); pinMode(relay, OUTPUT); digitalWrite(relay, HIGH); pinMode(buzzer, OUTPUT); digitalWrite(buzzer, LOW); digitalWrite(7,LOW); SPI.begin(); // Init SPI bus mfrc522.PCD_Init(); // Init MFRC522 card //Serial.println("Scan a MIFARE Classic PICC to demonstrate Value Blocks."); } void loop() { relaystate = digitalRead(relay); // Prepare key - all keys are set to FFFFFFFFFFFFh at chip delivery from the factory. MFRC522::MIFARE_Key key; for (byte i = 0; i < 6; i++) { key.keyByte[i] = 0xFF; } // Look for new cards if ( ! mfrc522.PICC_IsNewCardPresent()) { return; } // Select one of the cards if ( ! mfrc522.PICC_ReadCardSerial()) { return; } // Now a card is selected. The UID and SAK is in mfrc522.uid. // Dump UID Serial.print("Card UID:"); for (byte i = 0; i < mfrc522.uid.size; i++) { // Serial.print(mfrc522.uid.uidByte[i] < 0x10 ? " 0" : " "); // Serial.print(mfrc522.uid.uidByte[i], DEC); } Serial.println(); // Dump PICC type byte piccType = mfrc522.PICC_GetType(mfrc522.uid.sak); // Serial.print("PICC type: "); //Serial.println(mfrc522.PICC_GetTypeName(piccType)); if ( piccType != MFRC522::PICC_TYPE_MIFARE_MINI && piccType != MFRC522::PICC_TYPE_MIFARE_1K && piccType != MFRC522::PICC_TYPE_MIFARE_4K) { //Serial.println("This sample only works with MIFARE Classic cards."); return; } // defining Cards here if( ((mfrc522.uid.uidByte[0] == 192) && (mfrc522.uid.uidByte[1] == 47) && (mfrc522.uid.uidByte[2] == 254) && (mfrc522.uid.uidByte[3] == 121))) { digitalWrite(relay, !relaystate); // Serial.println(relaystate); myservo.write(90); delay(5000); myservo.write(0); delay(2000); } if((relaystate == 0)&& (flag == 0) ) { // Serial.println("led on"); digitalWrite(buzzer, HIGH); delay(500); digitalWrite(buzzer, LOW); delay(500); digitalWrite(buzzer, HIGH); delay(500); digitalWrite(buzzer, LOW); delay(500); digitalWrite(buzzer, HIGH); delay(500); digitalWrite(buzzer, LOW); delay(500); flag = 1; } if((relaystate == 1)&& (flag == 1) ) { // Serial.println("led off"); digitalWrite(buzzer, HIGH); delay(500); digitalWrite(buzzer, LOW); delay(500); flag = 0; } else Serial.println("unregistered user"); } |
RFID Servo Motor Video Tutorial:
Related Projects:
Servo Motor Arduino code and its Power Supply, Advantages & Application
RFID & GSM-based student Attendance Alert message to parents
