Raspberry Pi Pico MicroPython Installation and Thonny IDE Setup
Table of Contents
Raspberry Pi Pico RP2040 MicroPython:
Raspberry Pi Pico MicroPython Installation and Thonny IDE Setup– read my articles on Raspberry Pi Pico Vs Arduino and Raspberry Pi Pico Pinout & Specs. Anyway, before you can use your Raspberry Pi Pico controller board, first, you will need to install the MicroPython and you will also need to install an IDE “Thonny IDE”.
Previous Articles:
Raspberry Pi Pico Pinout & Specs
Raspberry Pi Pico Led examples.
Raspberry Pi Pico Digital Input.
Raspberry Pi Pico Oled Display Module SSD1306
Raspberry Pi Pico ADC Analog Sensor
Raspberry Pi Pico Temperature Sensor.
Raspberry Pi Pico Ultrasonic Sensor.
Raspberry Pi Pico PIR Motion Sensor.
Raspberry Pi Pico LDR Sensor, Day & Night Detection.
Amazon Links:
Other Tools and Components:
Super Starter kit for Beginners
PCB small portable drill machines
*Please Note: These are affiliate links. I may make a commission if you buy the components through these links. I would appreciate your support in this way!
Setting up Raspberry Pi Pico:
MicroPython Installation on Raspberry Pi Pico
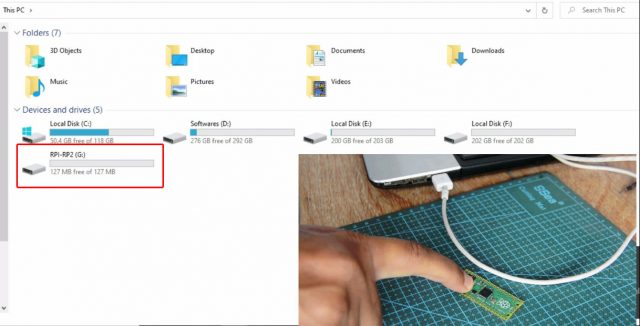
Push and hold the Boot Selection button and plug your Raspberry Pi Pico into the USB port of your Laptop or computer.
It will mount as a Mass Storage Device called RPI-RP2. Release the BOOT Selection button after your Pico is connected. Copy the MicroPython UF2 file.
Once you have downloaded the MicroPython UF2 file, then simply open the RP1-RP2 device, and paste the file.
Raspberry Pi Pico Driver Installation
Next, check the driver if it’s installed; in windows 10 the driver is automatically installed, but if you are using a lower version of windows then you will have to manually install the driver. Download the atmel_devices_cdc driver
Anyway, the driver is installed and also the MicroPython has been installed on the Raspberry Pi Pico. Now you can disconnect the Raspberry Pi Pico board.
Thonny IDE installation:
Now, the final step is to install the Thonny IDE.
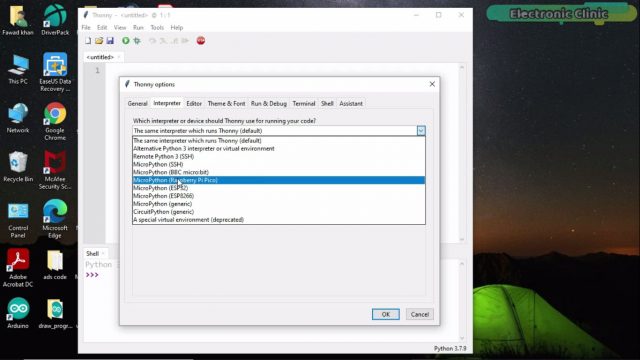
There is nothing complicated, simply follow the onscreen instructions. Once the installation is completed; open the Thonny IDE, go to the Run Menu and click on the Select interpreter.
Select MicroPython(Raspberry Pi Pico) and click on the OK button.
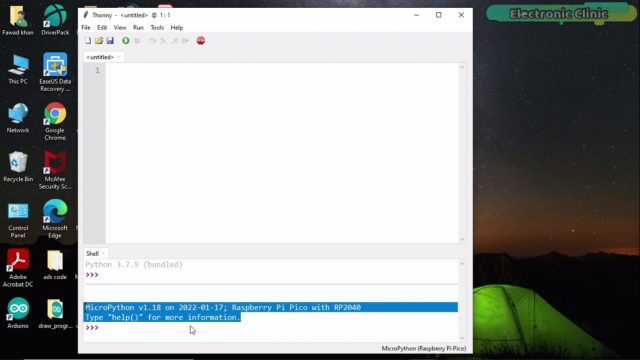
Now the IDE is ready for the programming.
Next Article, Raspberry Pi Pico LED Blinking Example.
