Home Security System using Arduino, GSM, & Microwave Sensor
Last Updated on August 16, 2024 by Engr. Shahzada Fahad
Table of Contents
Home Security System using Arduino:
Home Security System using Arduino, GSM, & Microwave Sensor- In today’s article, I am going to build a Home Security System using Arduino, GSM SIM900A module, and a Microwave Sensor. This project combines technology and innovation to create a robust and invisible security solution for your home or any valuable property. You can also read my article on Arduino and GSM-based home automation system.
To detect any movement or human presence, I will be using the DFrobot Gravity Microwave Sensor v2.0. This incredible sensor is specifically designed to detect moving objects, Humans, and animals. It’s Microwave signals are powerful enough to penetrate through walls, doors, and similar objects, allowing it to detect any intruders or moving objects even when hidden from view.
To send security alerts and notifications, I will be integrating this GSM SIM900a module into my Home Security system. This module allows us to send messages directly to our smartphones when the microwave sensor detects any suspicious activity. It ensures that we stay informed and can take immediate action if needed.
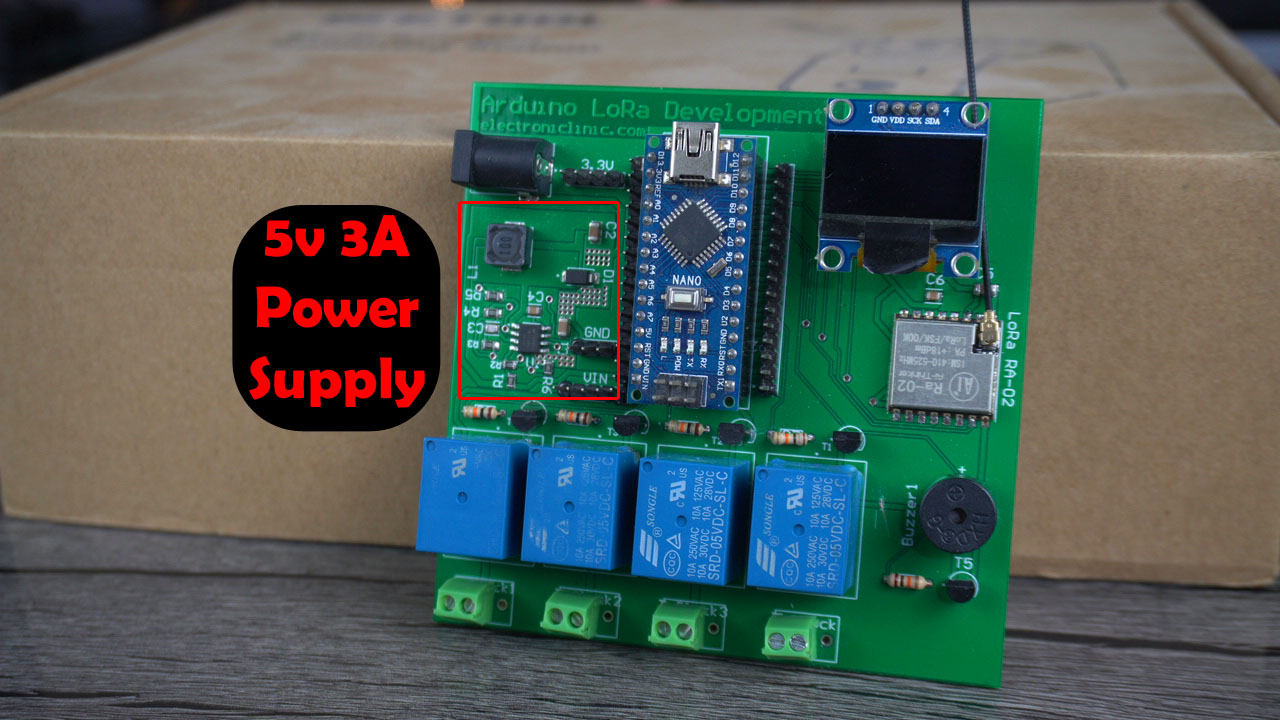
And as usual, I am going to use my designed Arduino Nano and LoRa based development board. But you can also use Arduino Uno or even Arduino Mega. My designed Arduino development board has the advantage of having this 5V and 3A power supply, so I don’t need to use a separate 5V regulated power supply for the GSM Sim900a module. This 5V and 3A power supply is more than enough to power up all the electronics. So, without any further delay, let’s get started!!!
Amazon Links:
Arduino Nano USB-C Type (Recommended)
DFrobot Gravity Microwave sensor v2.0
*Disclosure: These are affiliate links. As an Amazon Associate I earn from qualifying purchases.
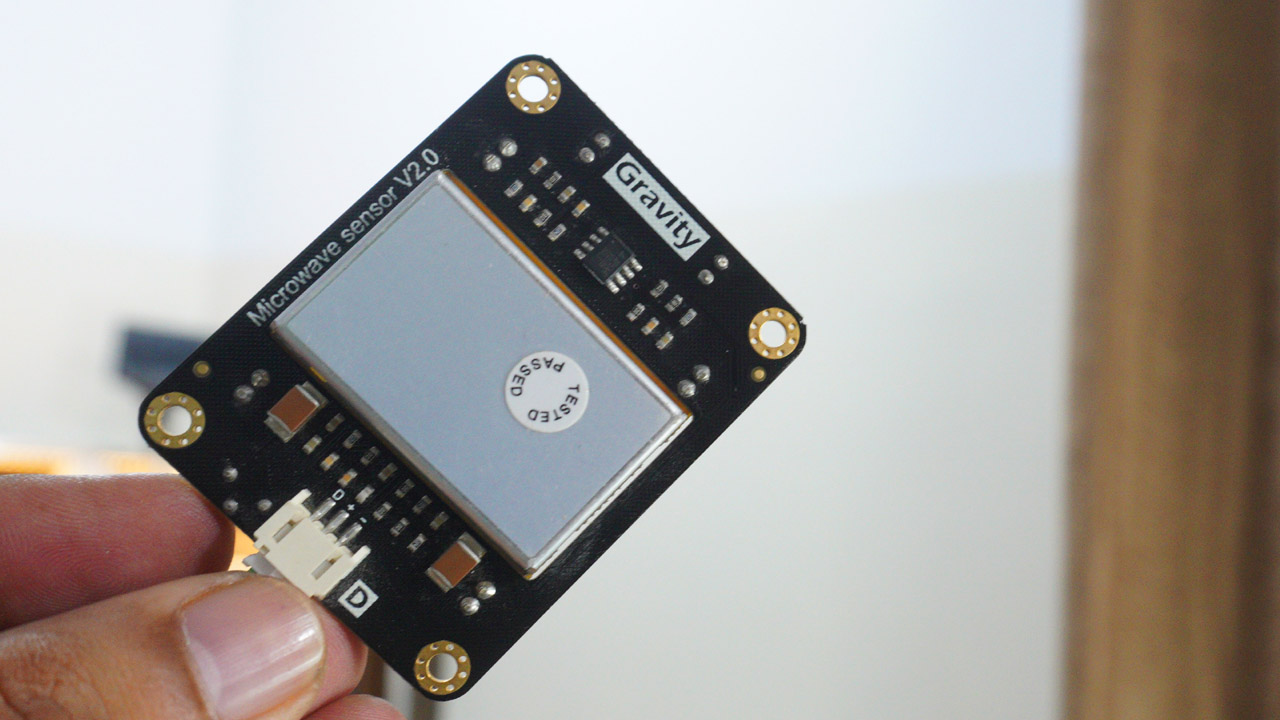
DFrobot Gravity Microwave Sensor V2.0:

This is the Gravity Digital Microwave Sensor V2.0 from the DFrobot. This microwave sensor is able to detect objects without physical contact. Its readings are not affected by temperature, humidity, noise, air, dust, or light which makes it suitable for harsh environments. This sensor also has strong resistance to radio frequency interference. Due to it’s low output, it’s not harmful to the human body. Since this sensor uses microwaves and you know microwaves have a wide detection range and velocity equal to the speed of light. This digital microwave sensor also supports non-life-class object detection.
It’s working voltage is 5 volts.
Working current is 60mA maximum and 37mA typical.
The detection range is from 2 meters to 16 meters which is adjustable. You can use the blue color potentiometer available on the other side of the microwave sensor to set the detection range.
If you want to study more about this sensor then you should read my Getting Started article on the Gravity digital Microwave sensor v2.0.

The red wire is the 5V, Black wire is the GND, and Green wire is the output wire.
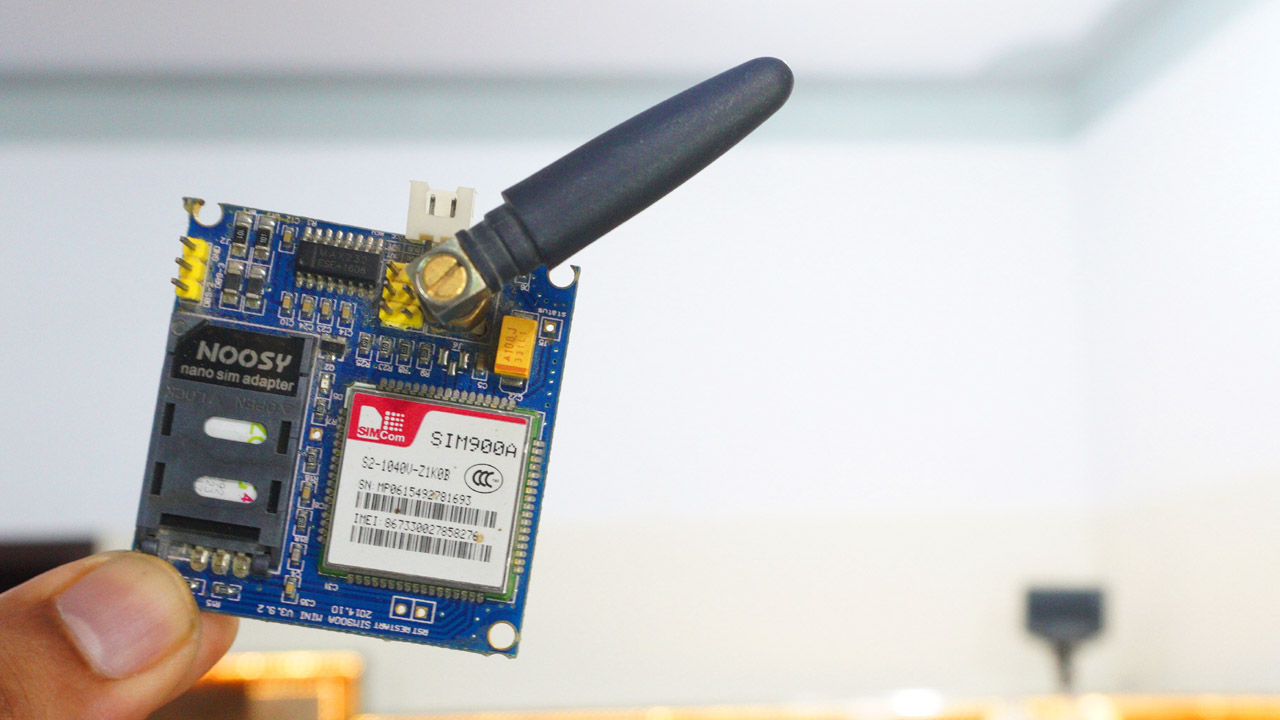
GSM Sim900a Module:
This is the GSM Sim900A mini Module. The first thing that you will notice about this GSM module is that, it has no onboard voltage regulator, so be very careful while applying the voltage; Because voltages greater than 5 volts can easily damage this module. Ideal voltage for this GSM module is 4.7v but you can easily power up this GSM Sim900A module using a 5v and 2A adaptor. if you don’t have a 5v adaptor then you can make yourself power 5V and 3A power supply. I have a detailed article on how to build yourself a 5V and 3A power supply.
There are a few things that I really like about this GSM sim900A module which are
This is the cheapest GSM module available on the Market.
Another cool thing is, that it can be easily interfaced with 5V supported controller boards like Arduino Uno, Arduino Mega, Arduino Nano, etc., and also with 3.3v controller boards like Nodemcu ESP8266 Wifi Module and ESP32 etc. The GSM Sim900A module interfacing with Nodemcu ESP8266 and ESP32, as I have already explained in my previous videos.
Anyway, I have also a detailed article on the GSM Sim900a module explaining its
Key features
Functional diagram
Pins description
Its applications
How to use it
Its pinout and AT commands.
Now, let’s go ahead and take a look at the connections.
Home Security System Circuit Diagram:
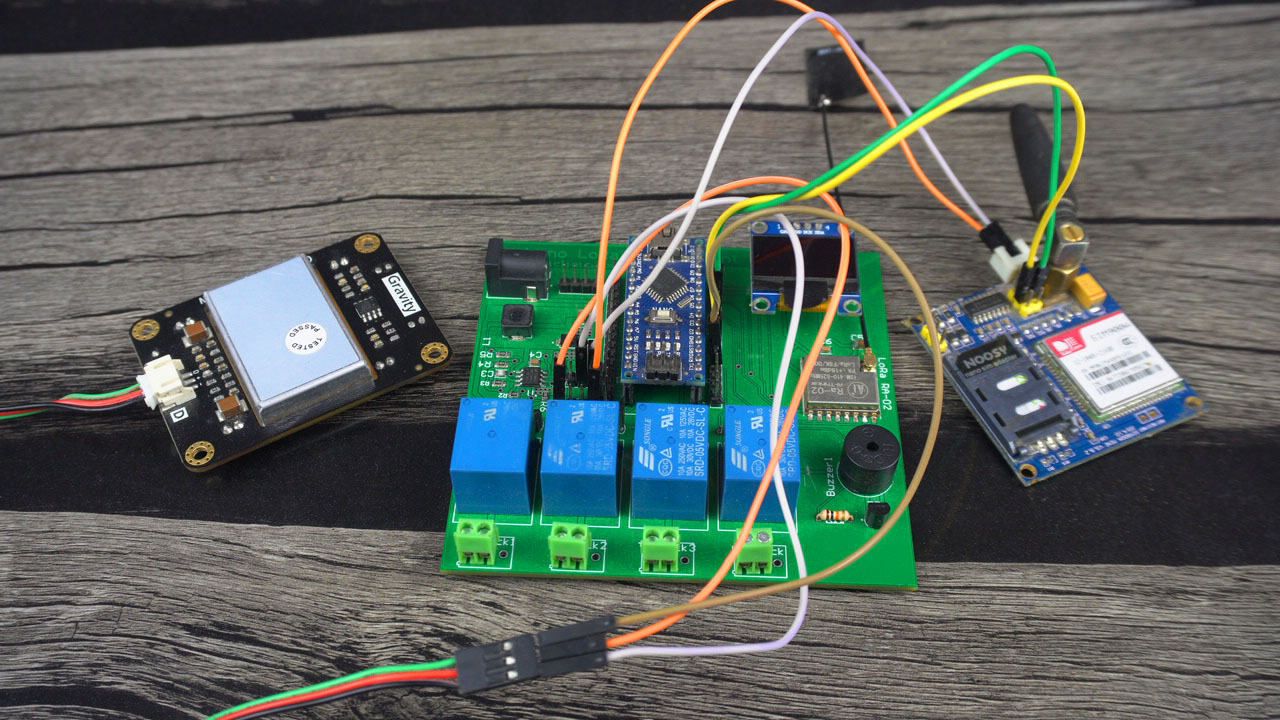
I have connected the Microwave sensor and GSM Sim900a module to the Arduino Nano. Just don’t get confused with these other components. Just concentrate on the connections I am about to explain.

Connect the VCC and GND wires of the digital microwave sensor to the Arduino Vin and Gnd pins. Let me also tell you. On this development board the Arduino Vin and Gnd Pins are connected to the regulated 5V and 3A Power supply.

This power supply is more than enough to power up the Arduino, microwave sensor, and the GSM module. If you want you can connect other components too. This power supply is fully tested and I have been using it to power up even high torque servo motors. Anyway, connect the signal wire to the Arduino digital pin D2.
Connect the power supply pins of the GSM Sim900a module to the regulated 5v and 3A power supply.
Connect the TXD 5V to the Arduino digital pin D3 and connect the RXD 5V pin to the Arduino digital pin D9. So, that’s all about the connections. Now, let’s go ahead and take a look at the Home Security System programming.
Altium Designer, Altium 365, & Octopart:

Altium Designer is the world’s most trusted PCB design system. Altium Designer enables engineers to effortlessly connect with every facet of the electronics design process. Over 35 years of innovation and development focused on a truly unified design environment makes it the most widely used PCB design solution. With Altium Designer you can create PCB designs with an intuitive and powerful interface that connects you to every aspect of the electronics design process. Route it your way through any angle, tune for the delay, Push, Slide, and Walkaround faster than ever.
Easily work together with your mechanical team and forget about the days of swapping design files. Every design change stays in sync between Altium Designer and SOLIDWORKS, PTC Creo, Autodesk Inventor, Autodesk Fusion 360, or Siemens NX*.
Interact and collaborate with mechanical designers like never before in a photo-realistic, 3D design environment.
One of the best things about Altium Designer is that you can share your designs with your team members using Altium 365. They can check your design, leave comments, and if there are any issues, they can fix them from anywhere in the world. Altium Designer also uses the world’s fastest components search engine, Octopart, so you won’t have any difficulty in searching for components.
Altium Designer, Altium 365, and Octopart—unleashes the full potential of electronics design by seamlessly integrating design tools, collaboration platforms, and component databases. Together, they offer engineers a comprehensive and synchronized experience, leading to improved productivity, reduced errors, and accelerated innovation in the world of electronics design.
Required Library:
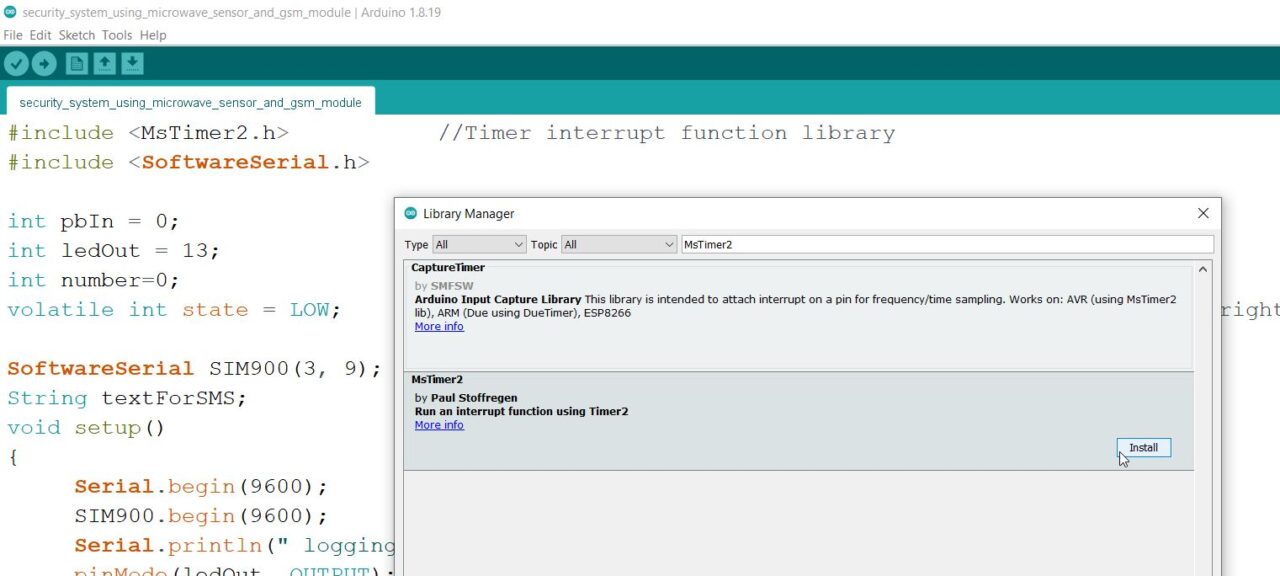
Before you start the programming, first of all make sure you install the MsTimer2 library. For this simply go to the Sketch Menu> then to Include Library > and click on the Manage Libraries.

And search for the MsTimer2 library and install it.
Home Security System Programming:
|
1 2 3 4 5 6 7 8 9 10 11 12 13 14 15 16 17 18 19 20 21 22 23 24 25 26 27 28 29 30 31 32 33 34 35 36 37 38 39 40 41 42 43 44 45 46 47 48 49 50 51 52 53 54 55 56 57 58 59 60 61 62 63 64 65 66 67 68 69 70 71 72 73 74 75 76 77 78 79 |
#include <MsTimer2.h> //Timer interrupt function library #include <SoftwareSerial.h> int pbIn = 0; // Define interrupt 0 that is digital pin 2 int ledOut = 13; // Define the indicator LED pin digital pin 13 int number=0; //Interrupt times volatile int state = LOW; // Defines the indicator LED state, the default is not bright SoftwareSerial SIM900(3, 9); // gsm module connected here TX pin=3 and RX pin=9 String textForSMS; void setup() { Serial.begin(9600); SIM900.begin(9600); Serial.println(" logging time completed!"); pinMode(ledOut, OUTPUT);// attachInterrupt(pbIn, stateChange, FALLING); // Set the interrupt function, interrupt pin is digital pin D2, //interrupt service function is stateChange (), when the D2 power //change from high to low , the trigger interrupt. MsTimer2::set(1000, Handle); // Set the timer interrupt function, running once Handle() function per 1000ms MsTimer2::start();//Start timer interrupt function } void loop() { Serial.println(number); // Printing the number of times of interruption, which is convenient for debugging. delay(1); if(state == HIGH) //When a moving object is detected, the ledout is automatically closed after the light 2S, //the next trigger can be carried out, and No need to reset. Convenient debugging. { textForSMS = "\nMotion detected"; sendSMS(textForSMS); Serial.println(textForSMS); Serial.println("message sent."); state = LOW; digitalWrite(ledOut, state); //turn off led delay(5000); } } void stateChange() //Interrupt service function { number++; //Interrupted once, the number + 1 } void Handle() //Timer service function { if(number>2) //If in the set of the interrupt time the number more than 2 times, then means have detect moving objects, //This value can be adjusted according to the actual situation, which is equivalent to adjust the threshold //of detection speed of moving objects. { state = HIGH; digitalWrite(ledOut, state); //light led number=0; //Cleare the number, so that it does not affect the next trigger } else number=0; //If in the setting of the interrupt time, the number of the interrupt is not //reached the threshold value, //it is not detected the moving objects, Clear the number. } void sendSMS(String message) { SIM900.print("AT+CMGF=1\r"); // AT command to send SMS message delay(1000); SIM900.println("AT + CMGS = \"+923348912230\""); // recipient's mobile number, in international format delay(1000); SIM900.println(message); // message to send delay(1000); SIM900.println((char)26); // End AT command with a ^Z, ASCII code 26 delay(1000); SIM900.println(); delay(100); // give module time to send SMS } |
This is the Home Security system programming and more than 80% of this code is from my previous “Invisible Security system project”. This time round, I also added code for the GSM Module.
I have also added the SoftwareSerial.h header file. With the help of this library I can defined multiple serial ports. As you can see using the SoftwareSerial I have defined another serial port using the Arduino pins 3 and 9. I could also connect the GSM module to the Arduino default Serial port, but I used it for the debugging purposes.
Anyway, as I said earlier, majority of this code, I have already explained in my previous invisible security system project. So, let’s go to the loop() function.
When the movement is detected, the Arduino sends the “Motion detected” alert message to the specified cell phone number which is added in the sendSMS function. Make sure you change this number before you upload the program. And I would like to remind you one more time. If you want to study in detail about these AT commands then I highly recommend to read my article on the GSM Sim900a module. Anyway, I have already uploaded this program and now let’s watch the Arduino and microwave sensor-based Home Security System in action.
PCBs Sponsor:
PCBs used in this Project are sponsored by NextPCB – the Reliable Multilayer PCB Manufacturer. Order high-quality, reliable PCB manufacturing starting at $1.9:
Enjoy free PCB assembly for 5 boards:
Home Security System, Practical Demonstration:
I have already inserted a valid SIM card. And I can power up this project using 9V to 28 volts power supply. First, I am going to start with this 12V and then I will also test it using my created 4S lithium Ion Battery.

Initially, when we power up the GSM module, this Led blinks at a faster rate which means the GSM module is not connected to the GSM network. Normally, it takes a few seconds. But if on your side it takes longer then you can do a little bit of troubleshooting, like for example, you can remove and re-insert the sim card. And make sure your power supply is at least 2A for the smooth operation. And also make sure your GSM module IMEI number is not blocked by the GSM network. Anyway, if this LED is blinking at a slower rate as you can see. Then it means its connected to the GSM network.

You can see, as soon as the Microwave sensor detects any movement an alert message is sent on the specified number.
To make it a portable security system; you can use a battery. In my case I am going to use a 4S lithium Ion Battery.
Let’s say, I want to detect any movement in my room, and I also don’t want this security system to be visible to anyone. So, I am going to place it over here.
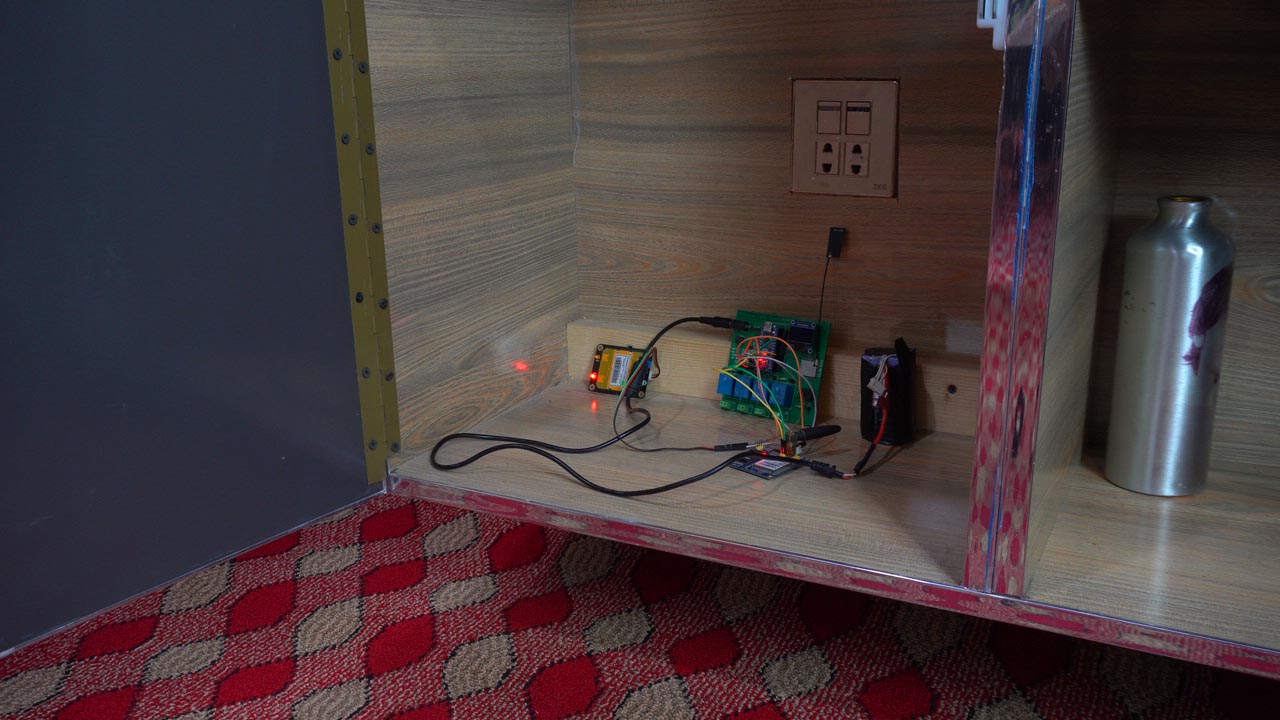
I closed the door. As I didn’t want anyone to see this security system. Its going to be invisible/hidden. The Gravity Microwave sensor, signals are powerful enough to penetrate through wood sheets and walls. So, it will have no issue in detecting movements inside the room.
I asked my cousin to go inside and as expected, my Home security system successfully detected my cousin and sent me an alert message.

This is mind blowing. Now, with this smart security system I can secure any place. So, that’s all for now.
Watch Video Tutorial:

Discover more from Electronic Clinic
Subscribe to get the latest posts sent to your email.


