Best Arduino Projects 2020 advanced & intermediate level “Top 10”
Last Updated on February 24, 2024 by Engr. Shahzada Fahad
Table of Contents
Best Arduino Projects 2020, Description:
Best Arduino Projects 2020 advanced and intermediate level- In this article, I am going to share with you 10 best Arduino Projects which can be used as your degree projects in 2020. These projects can be easily modified. Every project which I am going to share below is provided with a detailed video tutorial and also provided with links to the articles from where you can download the circuit diagrams and programming.
Note: Watch the video at the end of this article.
Best Arduino Projects 2020
Electric Bike Automatic Speed Controller using Arduino 
In this tutorial, which is part3 of the hybrid Electric Bike, we are going to control the speed of electric bikes automatically using the GY-521 MPU6050 six degrees of freedom 3-Axis Gyroscope and Accelerometer Module. The MPU6050 Module can be fixed on the Helmet or on the jacket and then depending on the angle the speed can be increased or decreased automatically.
In this project, a variable resistor is used to activate and deactivate the automatic speed control system. When the value is less than 100 the automatic speed control system is deactivated. When the value is greater than 100 then the automatic speed control system is activated and the MPU6050 Module can be used to control the speed.
This is an amazing project and can be further improved by adding some ultrasonic sensors and automatic indicators etc. Following is the detailed video tutorial. Don’t forget to subscribe and check links in the description.
Fingerprint Biometric Student Attendance System
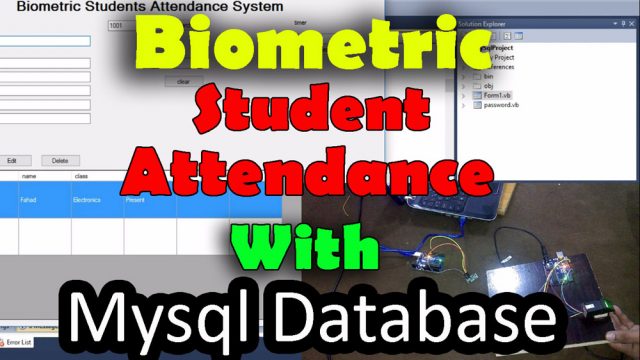 In this tutorial, you will learn how to make a Biometric Student Attendance system and save the records in a database whether a particular student is Present, Late, or absent. This is a completely wireless system the transmitter and receiver have no physical connection. The computer application is designed in visual basic 2010 express edition. In this project two Arduino’s are used, one as the Transmitter which is connected with the Fingerprint module and the other one as the receiver which is connected with the Laptop.
In part1 of the biometric student attendance system, I explained how to make a very basic GUI application; in this episode, I explained how to add text boxes, labels, and timers, etc.
In this episode, I will not explain the things which I have already explained in my previous tutorials. I highly recommend first watch my previous tutorials based on the fingerprint module and then you can resume from here.
In this project, I have explained
- Complete circuit diagram explanation.
- GUI attendance application
- How to install a Xampp Server.
- How to create a database.
How to connect a database with the GUI Attendance application
IoT Based Patient Monitoring System using ESP8266
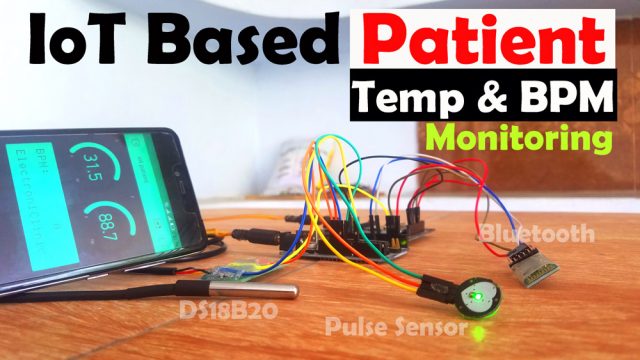 In this tutorial, you will learn how to make an IoT based Patient monitoring system using the Nodemcu ESP8266 Wifi module, Arduino, HC-05 Bluetooth Module and Cell phone Applications. This is an advanced level project and is entirely different from all the existing Patient monitoring systems available.

In this project, two different cell phone applications are used for monitoring the patient temperature and BPM “Beats Per Minute”. One application is designed in Blynk while the other Cell Phone application is designed in Android Studio.
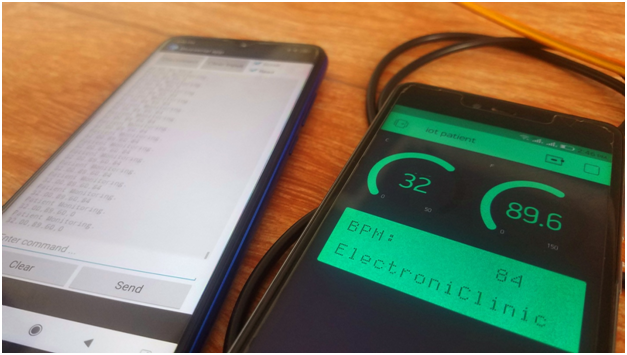
With the help of this application the patient BPM, temperature in centigrade and Fahrenheit with two decimal points precision can be monitored from anywhere around the world. With the help of this application, the Doctor can monitor the patient in real-time from anywhere so far the internet connection is available.

While this application can be used by the family members to wirelessly monitor the patient temperature and BPM. I have a separate video on the android cell phone application designing for the Bluetooth. You can find a link in the video description.
This project is designed in a way that it can be easily modified by anyone and more sensors can be interfaced. To accommodate more sensors I am using Arduino and Nodemcu esp8266 Wifi module together.
Water Flow Rate & Volume Measurement
 In this tutorial, you will learn how to accurately measure the Water Flow Rate and Water volume using the Water Flow Sensor YF-S401, Arduino UNO, and a 12v DC Water Pump.
Working on the Water Flow Sensor is a bit tricky whether you are using YF-S401 or YF-S201 Hall Effect Water Flow Sensor, and that’s the reason, most of the people complain about the wrong values. There are things that we need to take care of while using the Water Flow Sensor. As per the datasheet, when water flows through the rotor, rotor rolls. Its speed changes with different rates of flow. If we can keep the pressure and flow constant we can make an accurate water volume measurement system. I solved this problem by using a 12v Water Pump.
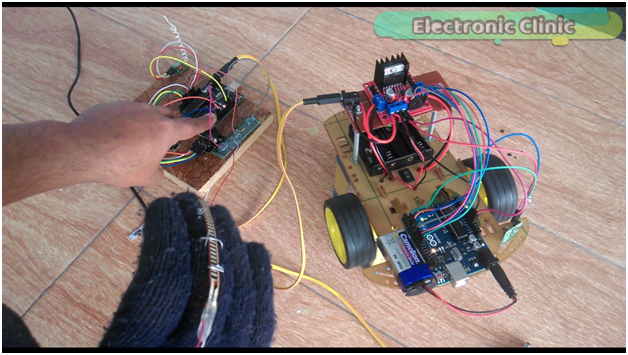
Arduino Project: Wireless Hand gesture
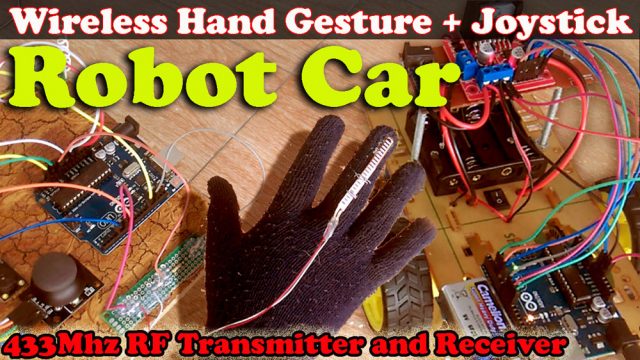 In this tutorial, you will learn how to make a wireless Hand gesture controlled Robot using Arduino, L298N Motor Driver, Flex Sensor, 2 Axis Joystick and 433Mhz RF transmitter and Receiver.
In this project, the Flex sensor will be used as the accelerator while the joystick will be used for controlling the forward, reverse, left and right movements. The Motors speed can be controlled in real-time as we close and open the hand. The robot control system can be activated and de-activated using the Built-in Joystick push Button. The use of Flex Sensor makes this project Hand gesture controlled Robot.
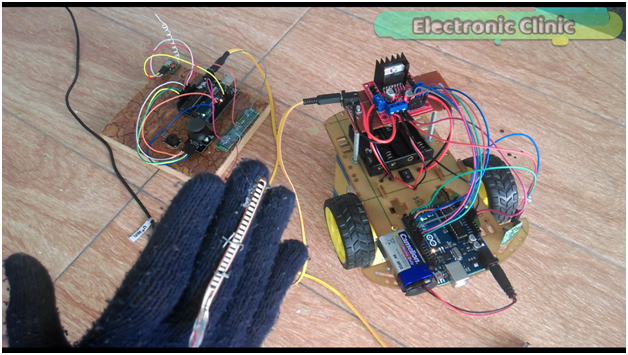
Once the control system is activated, then the flex sensor and joystick together can be used to control the Robot car. Straight fingers mean zero acceleration, so even if you move the joystick the Motors won’t rotate, but as you start bending the flex sensor the motors start rotating, then depending on the amount of the bend the motors speed can be controlled in Real-time.
This is the 3rd version of the Robot Car which I named as the Wireless Hand Gesture Controlled Robot.
While in the 2nd version
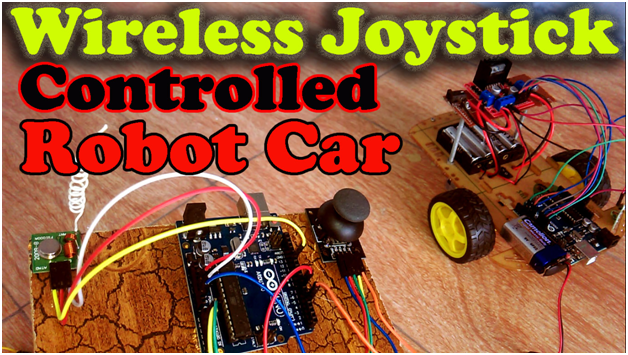
Wireless Joystick controlled Robot Car using Arduino, 433Mhz RF, and L298N Motor Driver
In this project which is based on the Wireless hand gesture controlled robot, I used only the joystick to control the speed and movement of the robot Car. The program used in this project was a little bit complex, so that’s why I decided to make another version of this robot and use a separate sensor for the speed controlling. So that’s why I created version 3.
While in the 1st version
Arduino Project: Bluetooth controlled Robot Car | Phone controlled car + L298N Motor Driver
I used an Android cell phone to control the Robot Car using the HC-05 Bluetooth module.
Let’s get back to our project which is Version 3.
This Tutorial “Version 3”, is based on my previous two tutorials,
in this tutorial, I explained, how to assemble the robot parts and how to use the L298N motor driver to control the forward, left, right and reverse movement. In this tutorial, I also explained how to control the speed of a dc motor using pulse width modulation.
While in this tutorial I explained the joystick Pinout, its basic working principle, it’s interfacing with Arduino and basic programming to control some LEDs depending on the movement of the joystick. If you are a beginner and you have never used the Joystick module and L298N motor driver then I highly recommend you should first watch these tutorials and then you can resume from here.
I am sharing a lot of links, and you may find it annoying but trust me, all these videos explain the basics, which will help you in understanding the Connections, Pinout, Interfacing, Programming, checking and so on.
Image Processing based Forest Fire Detection
 This project is based on image processing based forest fire detection along with email notification. It concentrates in particular on systems that use image and video processing for converting visual data into a form that can be understood by the computer program.
In this project, the image processing is done using visual basic dot net “VB.NET” 2010 express edition using emgucv. Emgu CV is a cross-platform .Net wrapper to the OpenCV image processing library. Allowing OpenCV functions to be called from .NET compatible languages such as C#, VB, VC++, IronPython, etc. The wrapper can be compiled in Mono and run on Windows, Linux, Mac OS X, iPhone, iPad, and Android devices.
In this project, a special computer application is designed in Visual Basic “VB.NET”. This designed application is capable of detecting the fire and displaying the temperature in Centigrade in real-time. There is a certain threshold value set for the temperature Sensor defined in the Arduino programming. This threshold value can be adjusted as per the requirement. The K-type thermocouple is used to monitoring the temperature. This temperature sensor is capable of measuring the temperature greater than 1000C which is perfect for this project.
As you know using the image processing there is a high chance of the false detection, to overcome the problem of false detection, I used a temperature sensor with the Arduino which monitors the temperature in that particular area. As you know temperature rises due to the fire. So, this temperature monitoring system will work as the feedback for the fire detection application.
So, a notification email will only be sent if the fire is detected and the temperature has crossed a predefined value. For the email notification both the conditions should satisfy. If any of the two is missing, it will be taken as the false data.
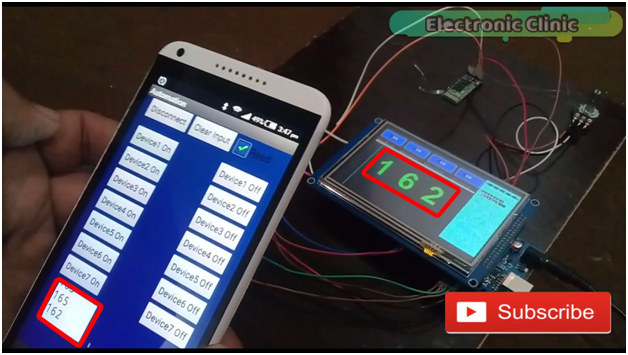
Arduino Mega Project: Control HMI Touch Screen
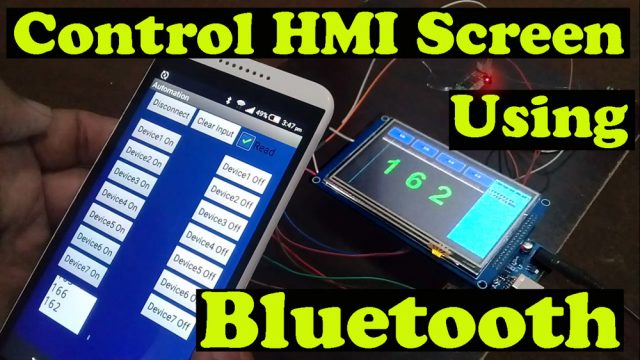 In this tutorial, you will learn how to control a 5 inch TFT HMI touch screen wirelessly using the Hc-05 or Hc-06 Bluetooth module and an android cell phone. This is a dual control system, the relays can be controlled using the HMI touch screen and can also be controlled using your android cell phone.
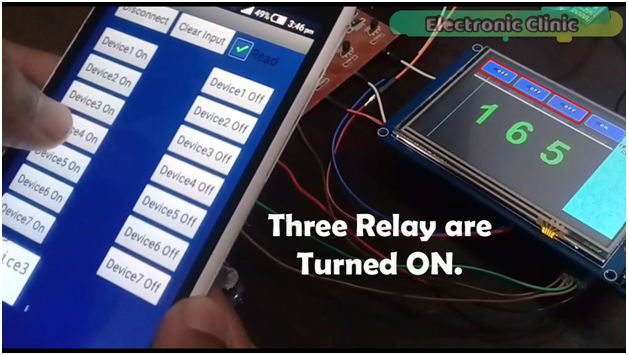
Any load which is turned on using the HMI touch screen can be turned off using the cell phone application, and any load which is turned on using the android cell phone application can also be turned off using the HMI TFT touch screen.

With the help of this project “Android HMI development” you can also monitor the sensor values on the screen and also in the application.
Android HMI development project is entirely based on my previous three tutorials. In the first tutorial, I created one button to control an led and display the on-time of a controller in seconds. In this tutorial, I covered all the basic functions.
In the second tutorial, I converted two images and then displayed those images on the LCD. This tutorial is really important and explains how Pictures can be displayed on the HMI TFT touch screen.
While in the third tutorial I combined the techniques used in the first two tutorials, the sensor values as you can see on the screen are actually the images which I converted; in the second tutorial, I explained the image conversion in very detail.
So I highly recommend before you start working on the Android HMI development project you should watch my previous three tutorials otherwise you won’t be able to make this project.
Hand Protection Electronic Gloves
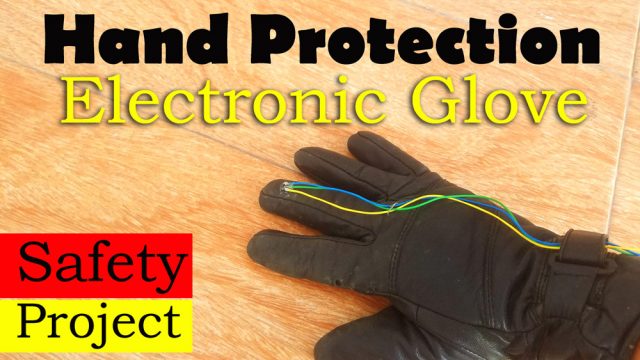 You know my friends, in industries usually the hand’s accidents happen, when the hands come in contact with the moving parts, which results in heavy injuries, amputations, and deaths. These accidents can be minimized by designing special type of electronic gloves which can turn off the machine when a hand comes in contact with the moving part.

In today’s episode you will learn how to make an electronic glove based on the magnetic Hall Effect sensor, Arduino, and 433 MHz Radio Frequency Modules; to protect workers from coming into contact with the moving parts or getting caught in the machinery. For the demonstration purposes, I am using two indicator lamps. When the worker gets too close to the moving part the machine turns off and an alarm is activated which is represented by the yellow indicator lamp.
This is just a prototype model which can be further improved by designing some very small size Hall Effect sensors, we can also include some pressure sensors and the wires can be made hidden inside the gloves. Using such gloves we can perform ordinary tasks without any problem as these gloves are completely Wireless.
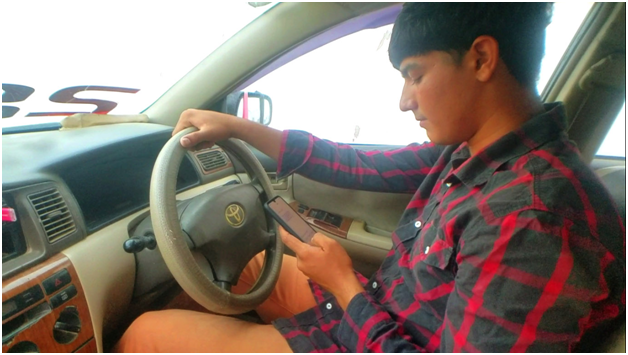
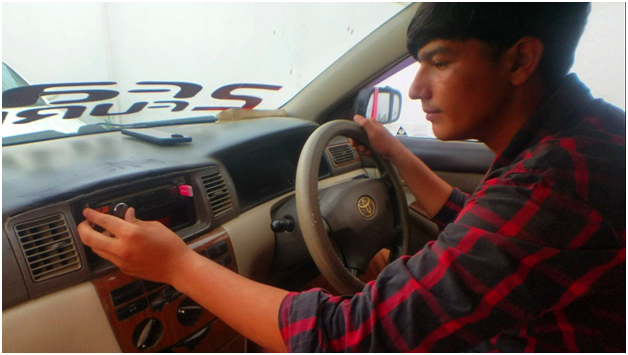
How to Reduce Distracted Driving Accidents
 Nearly 1,250,000 people die in road crashes each year, on average 3,287 deaths a day. An additional 20-50 million are injured or disabled.
Among other causes of road accidents, distracted driving is the most common cause of road accidents around the world, resulting in more crashes every year than speeding, drunk driving, and other major accidents causes. Drivers can become distracted behind the wheel for a variety of reasons. Some of the leading causes of distracted driving accidents include using a cell phone, particularly texting while driving, is the most dangerous form of distracted driving.
Drinking water from a mug or bottle. Adjusting the Radio is one of the most common forms of distracted driving. At any given time, more than 600,000 drivers are manipulating electronic devices, like radios, while driving.
Driving distractions are divided into three categories:
- Visual, which takes your eyes off the road?
- Cognitive, which takes your mind off the road, and
- Manual, which takes your hands off the steering wheel?
Listening to the radio or adjusting the station covers all three categories of distractions.
The National Highway Traffic Safety Administration estimates that drowsy driving was responsible for 72000 crashes, 44000 injuries, and 800 deaths in 2013 as reported in the United States of America. However, these numbers are underestimated and up to 6,000 fatal crashes each year may be caused by drowsy drivers.
In this tutorial, you will learn how to reduce distracted driving accidents using only Arduino, MPU6050 and a buzzer. If a driver writes a message and looks down for more than 2 seconds the buzzer is activated. So, if the driver looks down or looks up for more than 2 seconds a buzzer is activated which alerts the driver. This project can also be used as the driver drowsiness detection system. This is just a prototype model that can be further improved by designing a PCB. For the practical demonstration watch video tutorial given at the end.
If you don’t know about the MPU6050 module then watch the following video which explains the extreme basics.
IoT based Water Quality monitoring using Arduino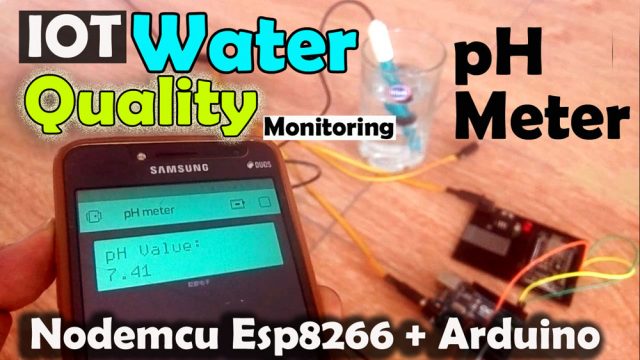
In this tutorial, you will learn how to make an IoT based water quality monitoring system using Arduino, pH Sensor, Nodemcu esp8266 wifi module and Blynk Application. As this is an IoT “Internet of Things” based project, the water quality can be monitored from anywhere around the world. In this episode, I will practically explain how to measure the pH value of the Well water, and I will also explain whether the water under test is good or bad for health. In this tutorial, you will also learn how to use the 16×2 LCD widget in the blynk application. This is Version2 of the pH sensor Water Quality Monitoring System.
While in Version1
I covered the extreme basics like for example
- What is pH?
- How a pH sensor works?
- How to measure the pH value of different liquids?
In version1 I also explained how to calibrate the pH sensor. So if you are using a pH sensor for the First time then I highly recommend first you should watch Version1 and then you can resume from here.
In this tutorial, I have explained,
- Complete Circuit Diagram
- pH sensor Unboxing
- pH Sensor Pinout
- pH sensor and Nodemcu ESP8266 wifi module interfacing with Arduino.
- Arduino and Nodemcu Programming and finally
- Testing
Watch Video Tutorial:
Discover more from Electronic Clinic
Subscribe to get the latest posts sent to your email.


